Group assignment
- characterize your lasercutter’s focus, power, speed, rate, kerf, and joint clearance
Process involves in using the laser cutter
laser can be used in different process like laser cutting, Raster engraving, vector engraving, 3D laser engraving,metal laser marking and photo-engraving let see the breif explanation of laser processes
laser can be used in different process like laser cutting, Raster engraving, vector engraving, 3D laser engraving,metal laser marking and photo-engraving let see the breif explanation of laser processes
LASER CUTTING
laser cutting is a precise method of cutting a design from any material using Computer Aid Design to guide it, you can found the three main type of laser commonly used in industry CO2 lasers Nd and NdYAG but in most fablabs even our fablab Rwanda have CO2 lasers.
RASTER ENGRAVING
laser engraving or laser ecthing is a process of marking where the laser head engraves or remove a partion layers from material by moving left to right slow down the material. which is known raster engraving.
VECTOR ENGRAVING
Vector engraving is a method of marking or scoring a material surface. Like the laser cutting process the laser beam will follow the path of vector strokes without cutting all the way through. The width of the stroke is made at the kerf of the laser i.e approx 0.2mm. To engrave thicker strokes, we would need to use the raster engraving method or de-focus the laser slightly.
3D LASER ENGRAVING
3D Laser engraving is a fantastic process that really pushes the boundaries of laser technology. It works in the same way as laser engraving , but when using the 3D setting, the laser will also adjust the power it applies to the material based on the tonal quality of the drawing (lights and darks). Black areas receive maximum power while the white areas do not get engraved. All the shades in between get a varying amount of power giving it a true 3D appearance. The laser adds sloped edges to the engraving at varying depths. It’s a stunning process.
METAL LASER MARKING
Metal laser marking is another method that involves the basic laser engraving process. During this process a special chemical marking compound is used. Surface depths cannot be achieved, the surface of the material is marked with permanent black marks. This process is mostly used for metal engraving but it also works well on other hard materials such as ceramic, marbles and stones.
PHOTO LASER ENGRAVING
Photo laser engraving is essentially laser engraving but with a lot more detail. The laser reads the the tonal qualities of an image much like a printer. Black areas receive maximum laser power, white areas do not get engraved, the shades between the two get a varying amount of power. You can achieve some stunning results where we can engrave photographic quality up to 1200 DPI on many different material.
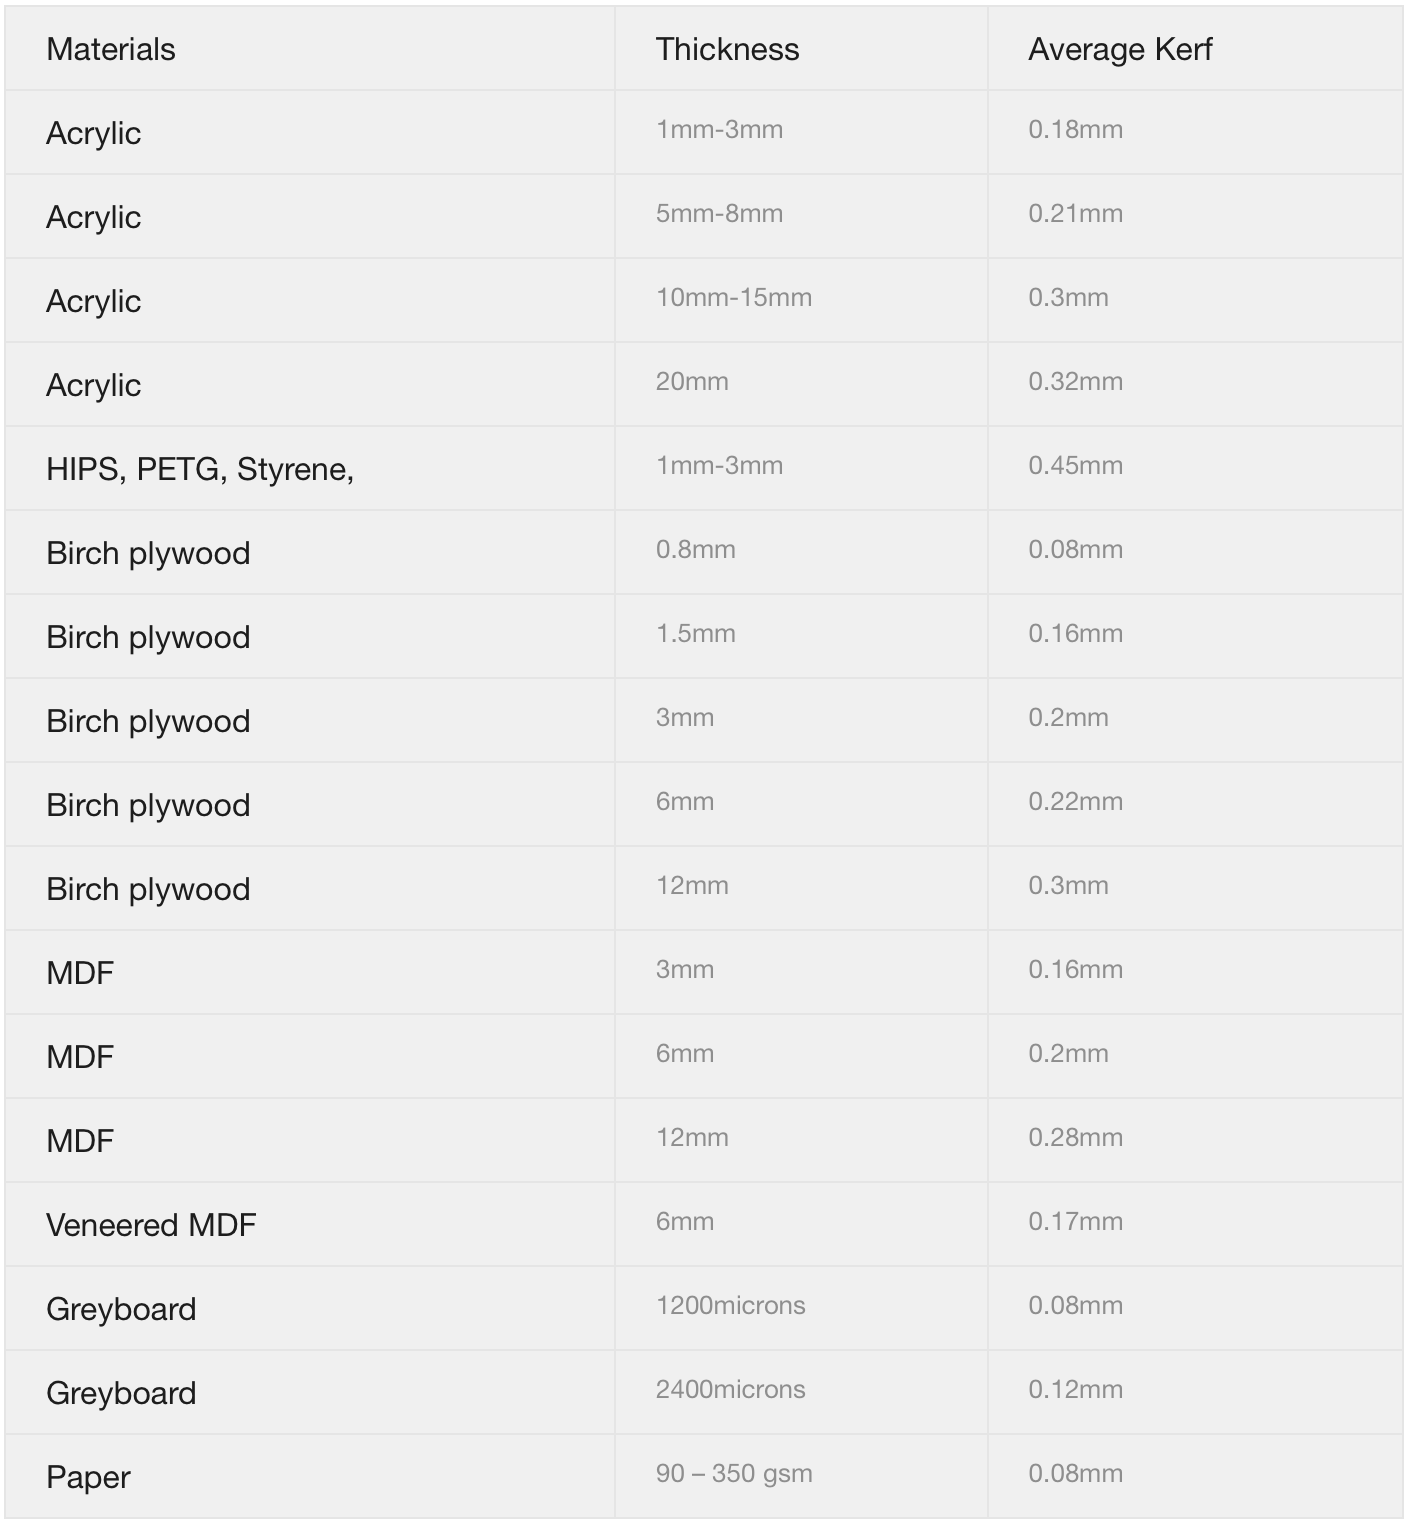
LASER CUTTER KERF
Kerf = Width
Kerf is defined as the width of material that is removed by a cutting process. It was originally used to describe how much wood was removed by a saw, because the teeth on a saw are bent to the side, so that they remove more material than the width of the saw blade itself, preventing the blade from getting stuck in the wood. Kerf width is a measure of how much material is removed.When talking about CNC shape cutting with typical cutting processes, kerf is the width of material that the process removes as it cuts through the plate. Understanding the "kerf" of the laser
I found some resources about how to determine kerf of laser cut and i followed this process to calculate this kerf of epilog laser mini 40W
In cutting the my parametric parts i used Epilog mini laser which is first one in top 10 best laser engravers for laser cutting and laser engraving due to its feature: they have a long life span, The main difference between most Epilog machines is the size, although the higher end models have a significant amount of extra power and use newer technology. For most businesses the Epilog mini at 18″ x 12″ or 24″ x 12″ is large enough for almost any job. The Helix is the most popular and quite a bit larger than the mini at 24″ x 18″ which is really plenty for the vast majority of projects. At Laser Cutting Lab we use the mini 24" x 12" at 40 watts as it is simply our favorite machine. Although we rarely have projects that require use the full 24" x 12" engraving area, it is great to have that ability. at this stage i used laser cutting process to cut my parametric object from cardboard material
Individual assignment
- Design, lasercut, and document a parametric press-fit construction kit, which can be assembled in multiple ways. Account for the lasercutter kerf.
- For extra credit include elements that aren’t flat.
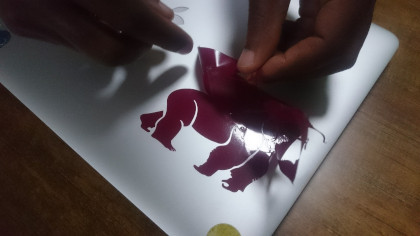
Task: Vinyl Cutting
There is no specific project that is focussed on this very useful tool. There are a range of ways you might utilise it throughout the programme, or your local instructor may set a specific project. You might make:
- Stickers
- Flexible circuit boards
- A textured surface/relief pattern
- Screenprint resists/stencils
VINYL CUTTING
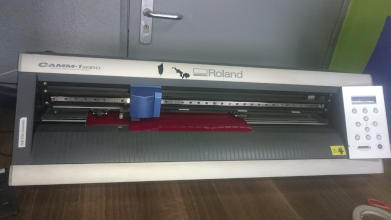
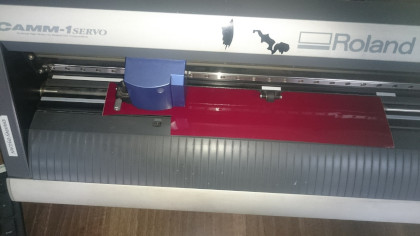
A vinyl cutter is a computer-controlled machine that “reads” your design and translates it to an outline, then uses a sharp blade to cut that shape from a sheet of vinyl.To create my first vinyl cutter, I used CAMM-1 vinyl cutter which is considered as the the fastest, precise Roland desktop vinyl cutter.
SETTING UP THE VINYL CUTTER
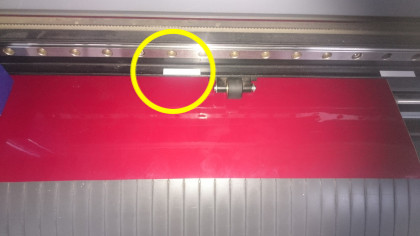
The first step is to adjust or reposition the cutting carriage (printing head) depending on the size of the cutting surface or printing image. The next step you have to fire/start the machine by pressing the power button. The white areas of the rails serve as a guide for positioning the grit rollers. Using the stickers on the rails as a guide, adjust the positioning of the left and right pinch rollers above the grit rollers.
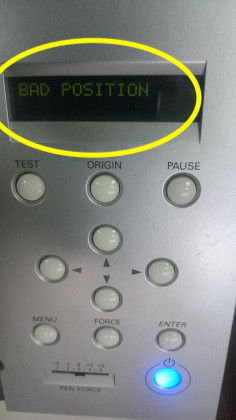
BAD POSITION
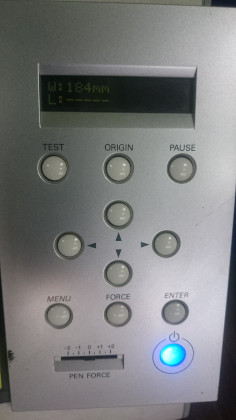
When the Pinch roller is not well positioned under the white tape you will get a bad position message from the LCD screen, means you have to reposition your right roller.
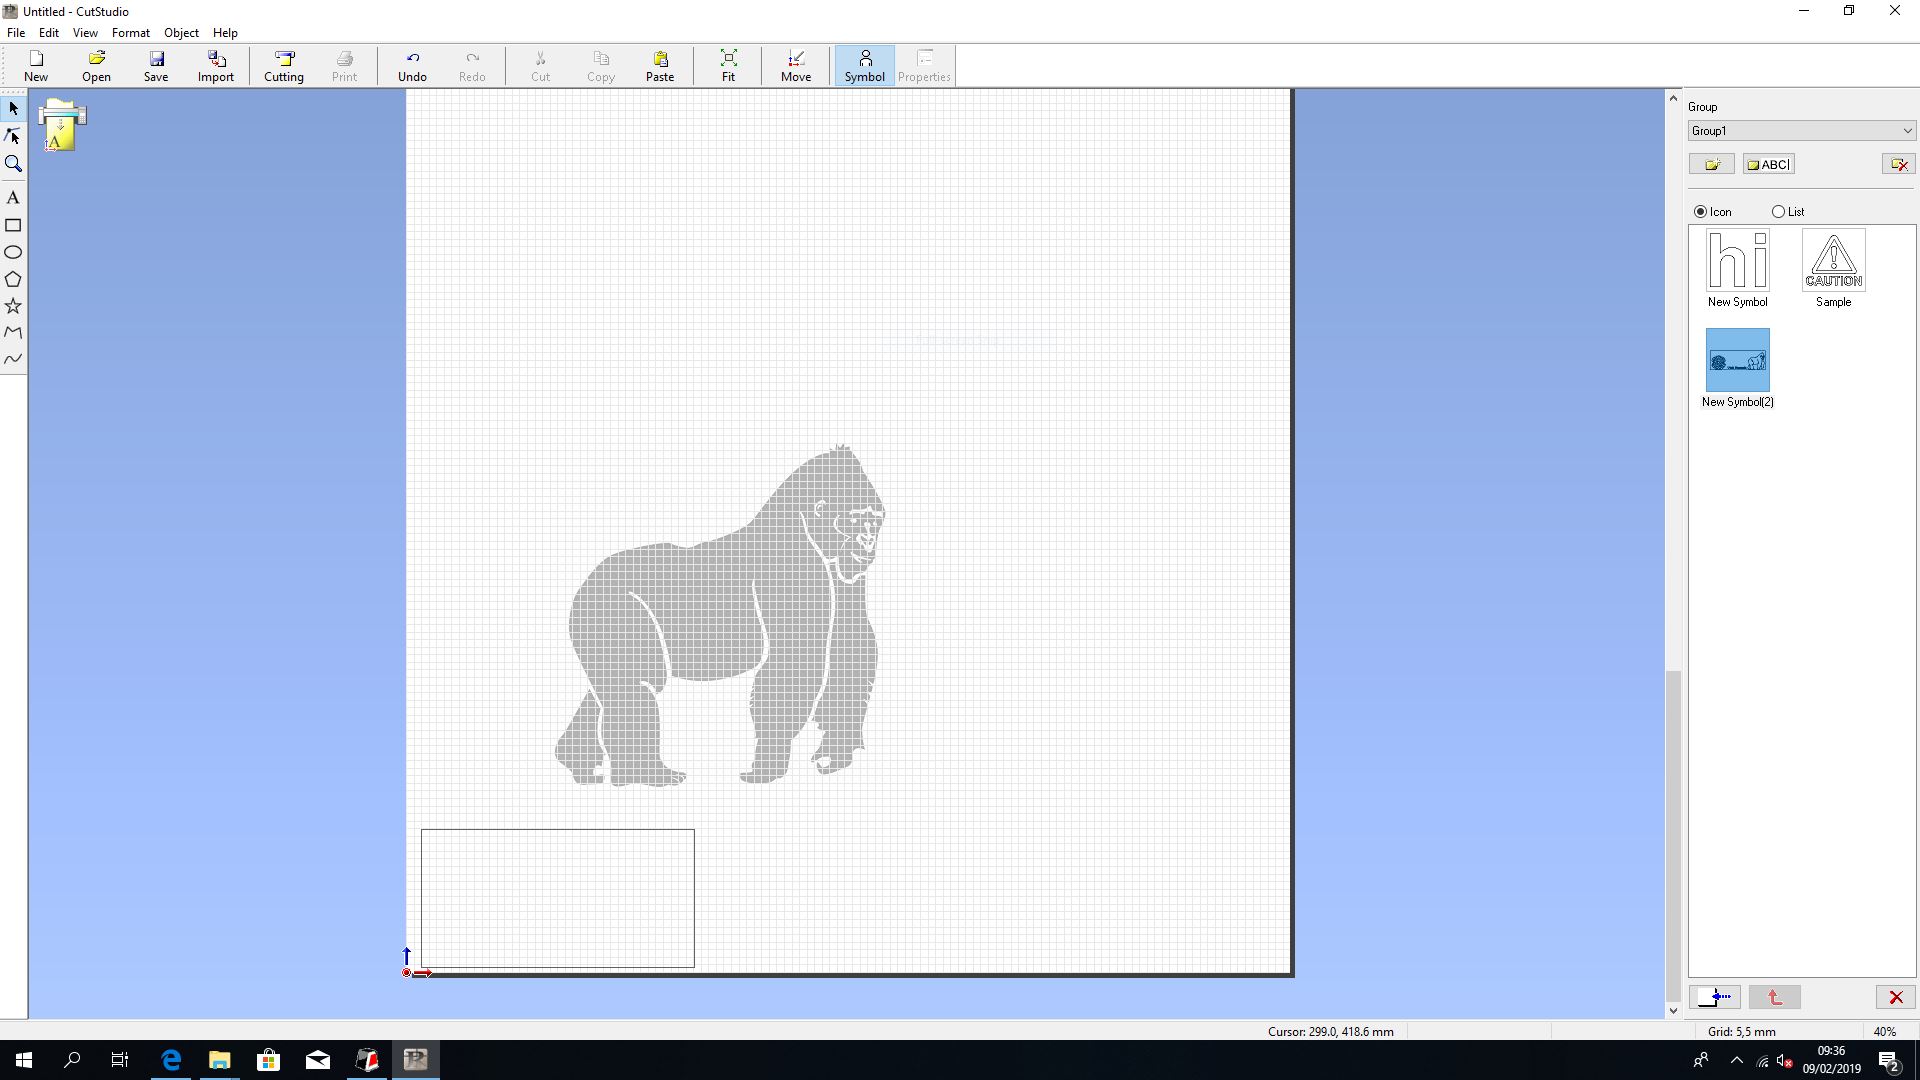
CUTSTUDIO
To design and print my artwork, I used the software called CutStudio. CutStudio lets users enlarge, reduce, re-position, rotate and mirror images. It also cuts enlarged images as crisp as original size and cuts TrueType fonts without outlining. CutStudio supports BMP, JPG, STX, AI, and EPS file formats. Once you have created your artwork, you’ll import it to your vinyl cutting program which will allow you to format, frame, size, scale, rotate, and manipulate the image many ways before you send it to the vinyl cutter. Similarly, Adobe Illustrator or Photoshop are Good programs for creating vectored objects , Adobe Illustrator or Photoshop.
MY WORK
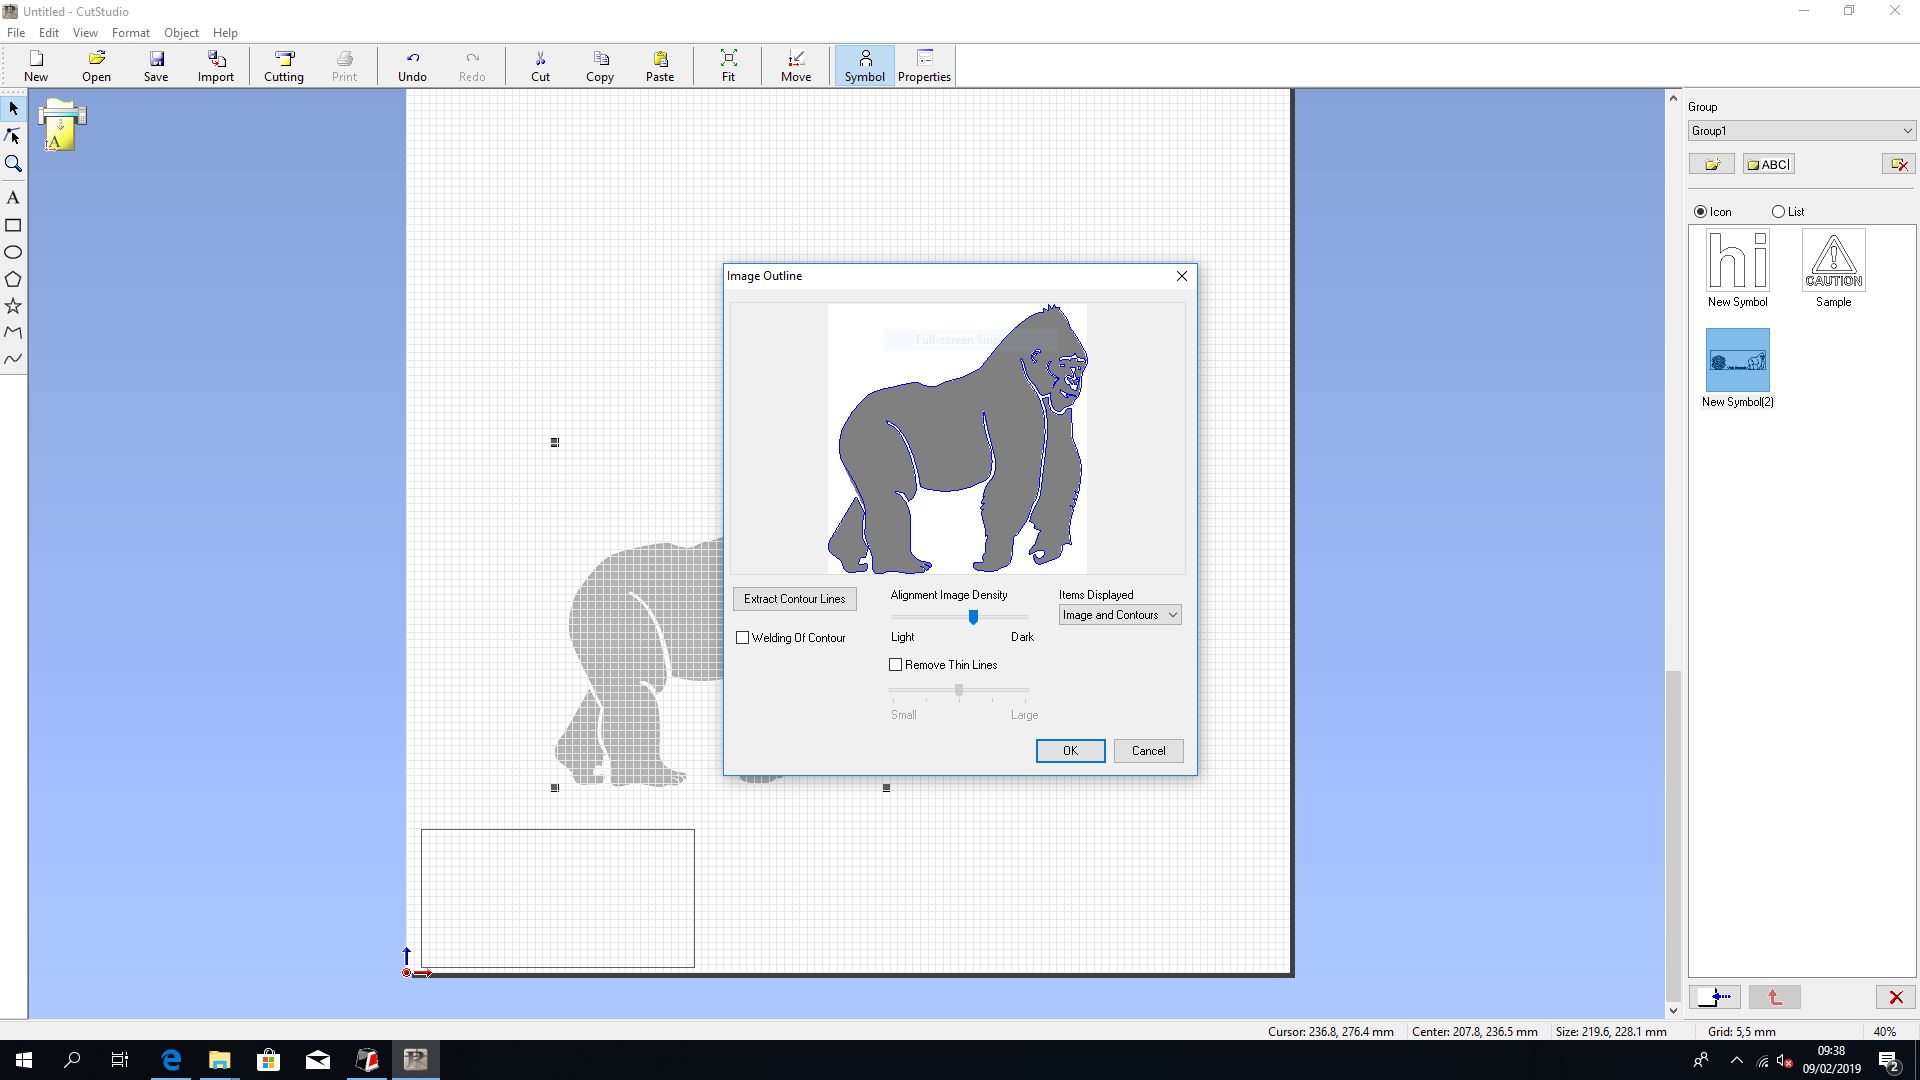
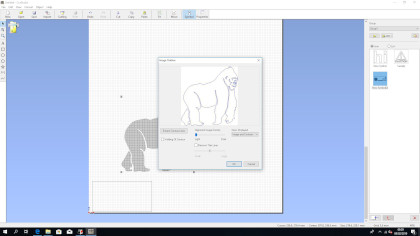
I downloaded a vector image from internet with the distinguishable lines and solid color. Realistic pictures are not a good source for a cut object.

After downloading a JPG image, I transformed my image by extracting the contour lines and adjusting the image density with CutSudio software and the final stage was to send it to the vinyl cutter which cuts the image. Make sure that your design is saved in one of the following formats: JPG,PNG, BMP, GIF.
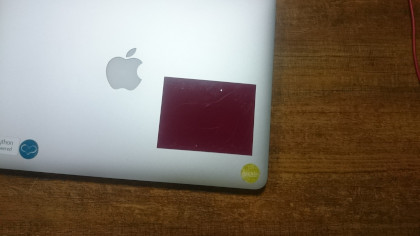
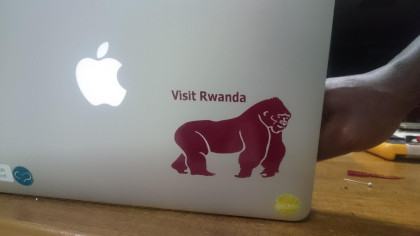
APPLY TRANSFER TAPE
The last step is to put the stick on your sticker. You’ll want to choose a tape that stays flat or else the edges of the decal will begin to curl up and attract dirt. Transfer tape is like masking tape but has a different tack for adhering to your vinyl but releasing it on the target surface.
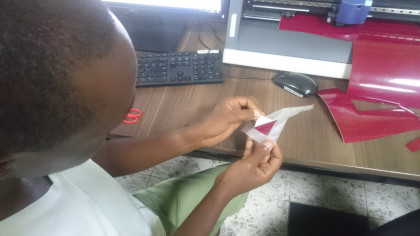
Depending on how complex your design is, cutting may take seconds or hours, but most simple decals are done in a few minutes, mine took only one minute. When it’s done cutting, I used scissor to remove the cut section from the roll.
I used tweezers to peel off unneeded portions of the created material.
To transfer the created material to the application tape. I Sticked the tape over the completed work. After that I pressed down firmly on the application tape to remove air bubbles. If you do not press firmly enough the cut area will not stick to the surface.
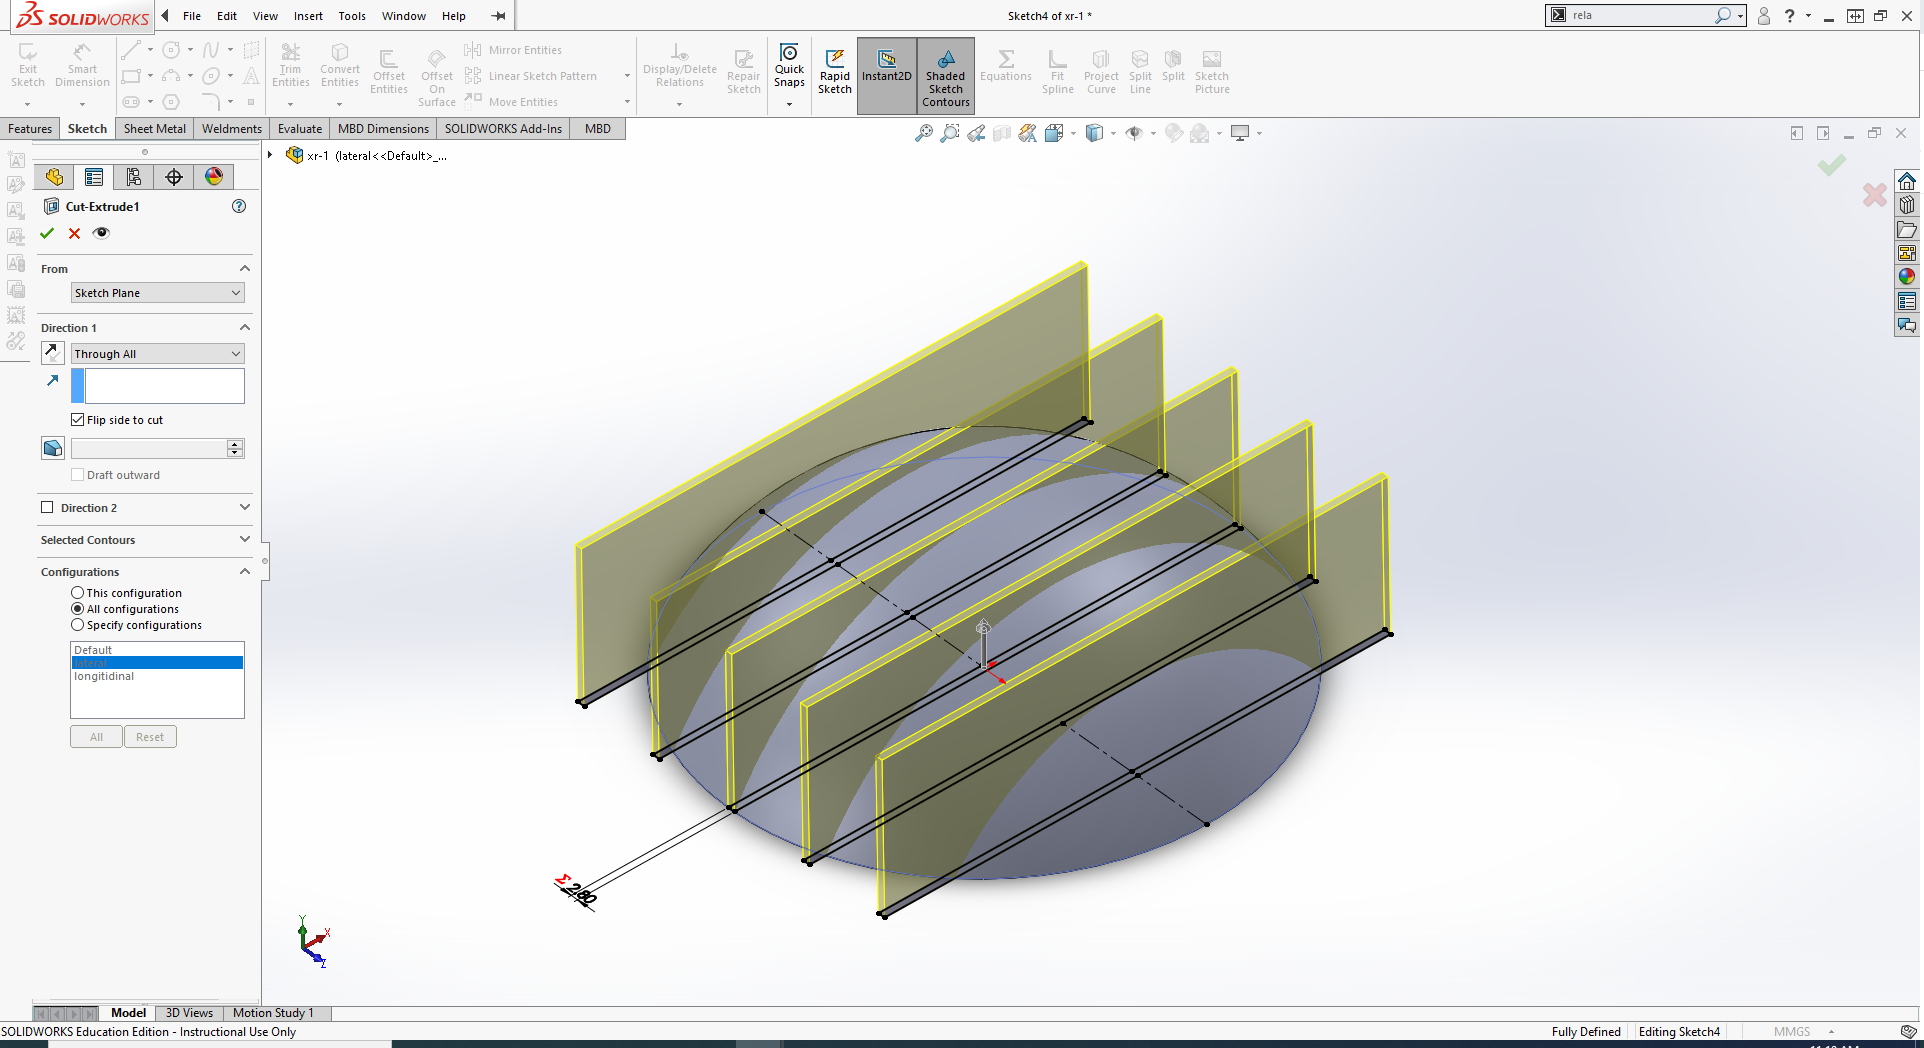
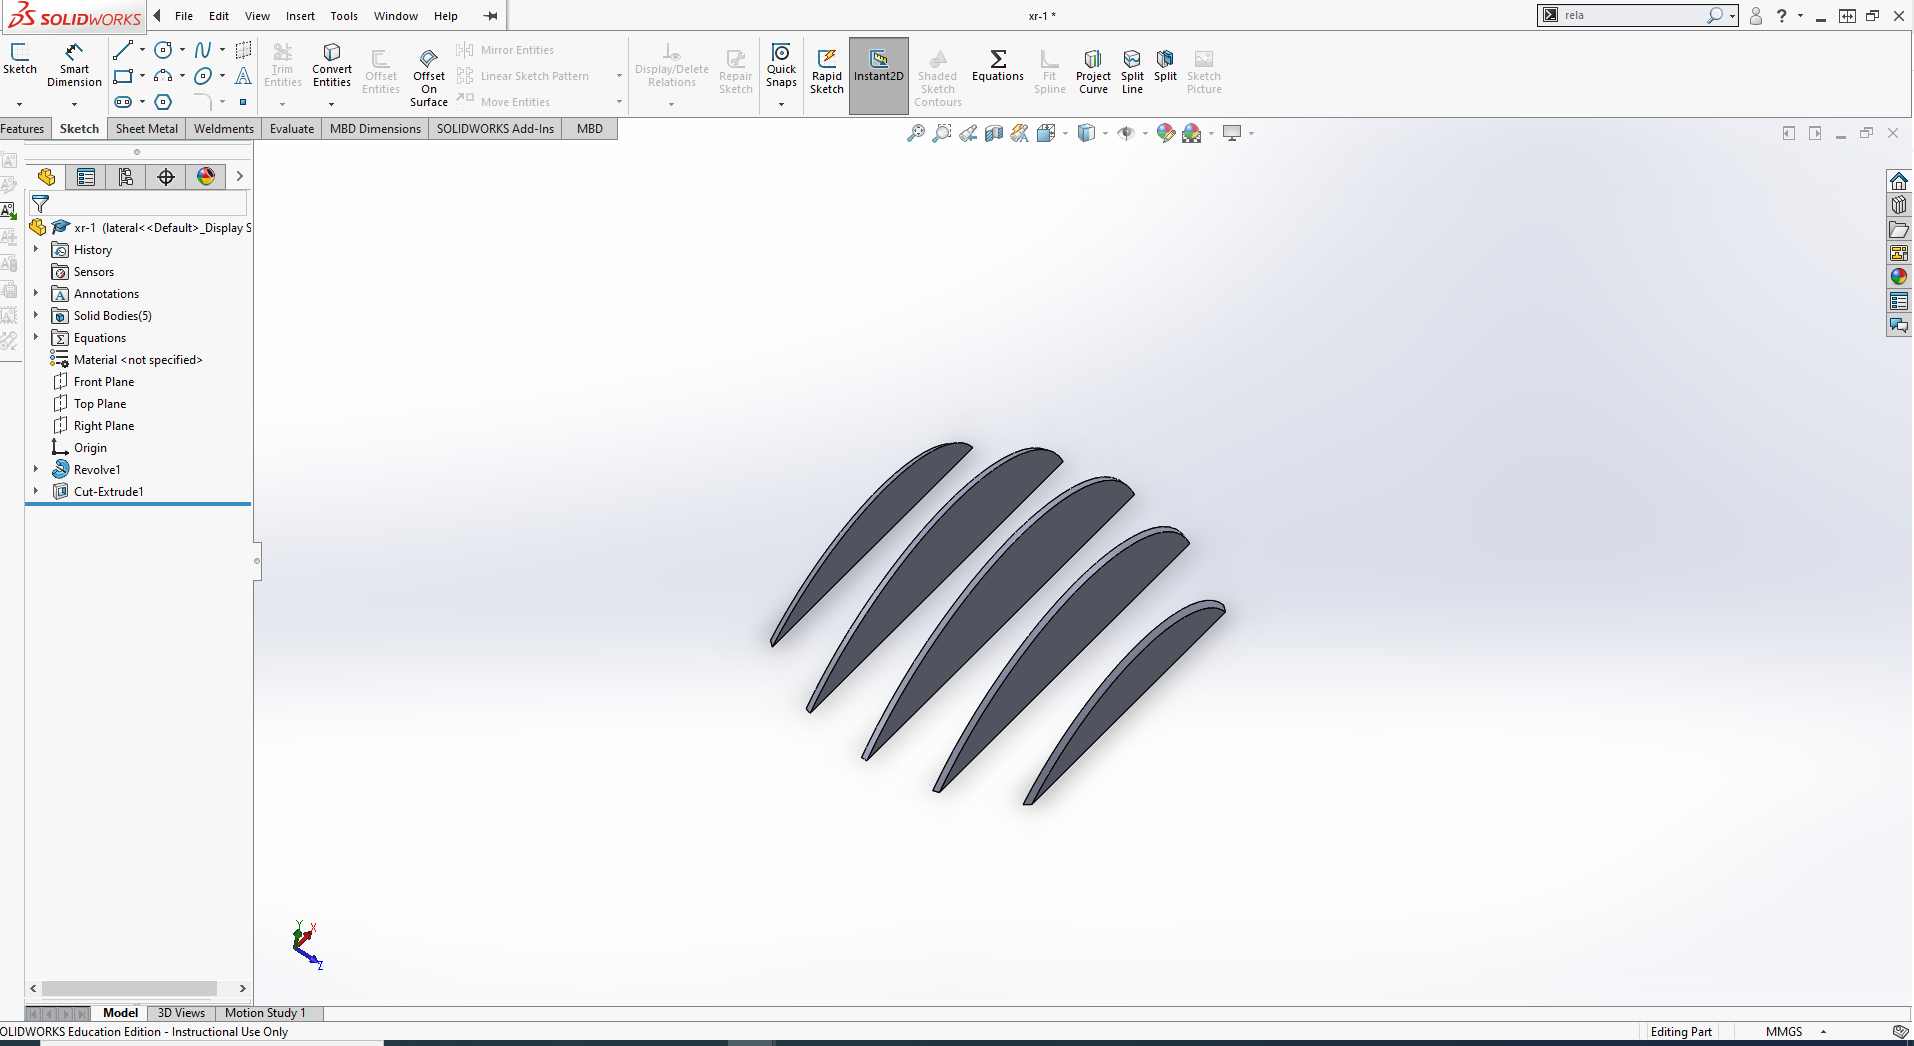
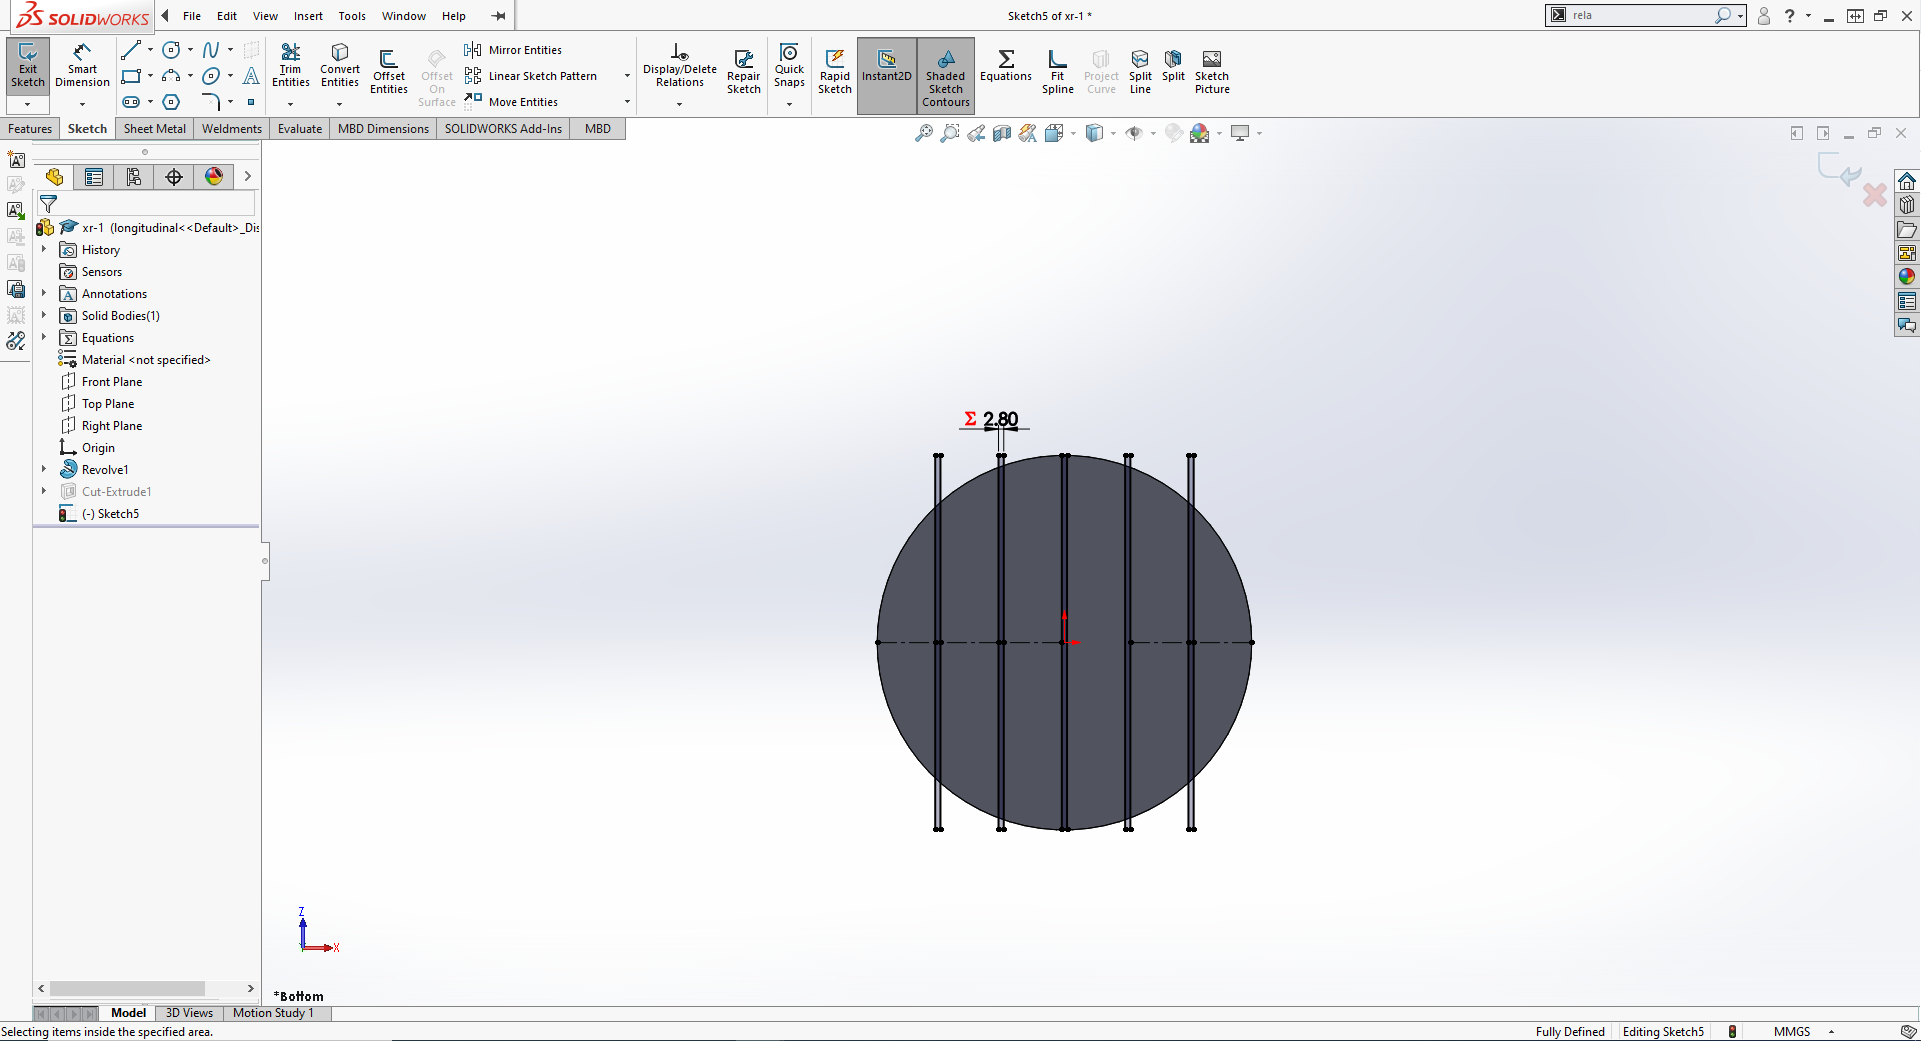
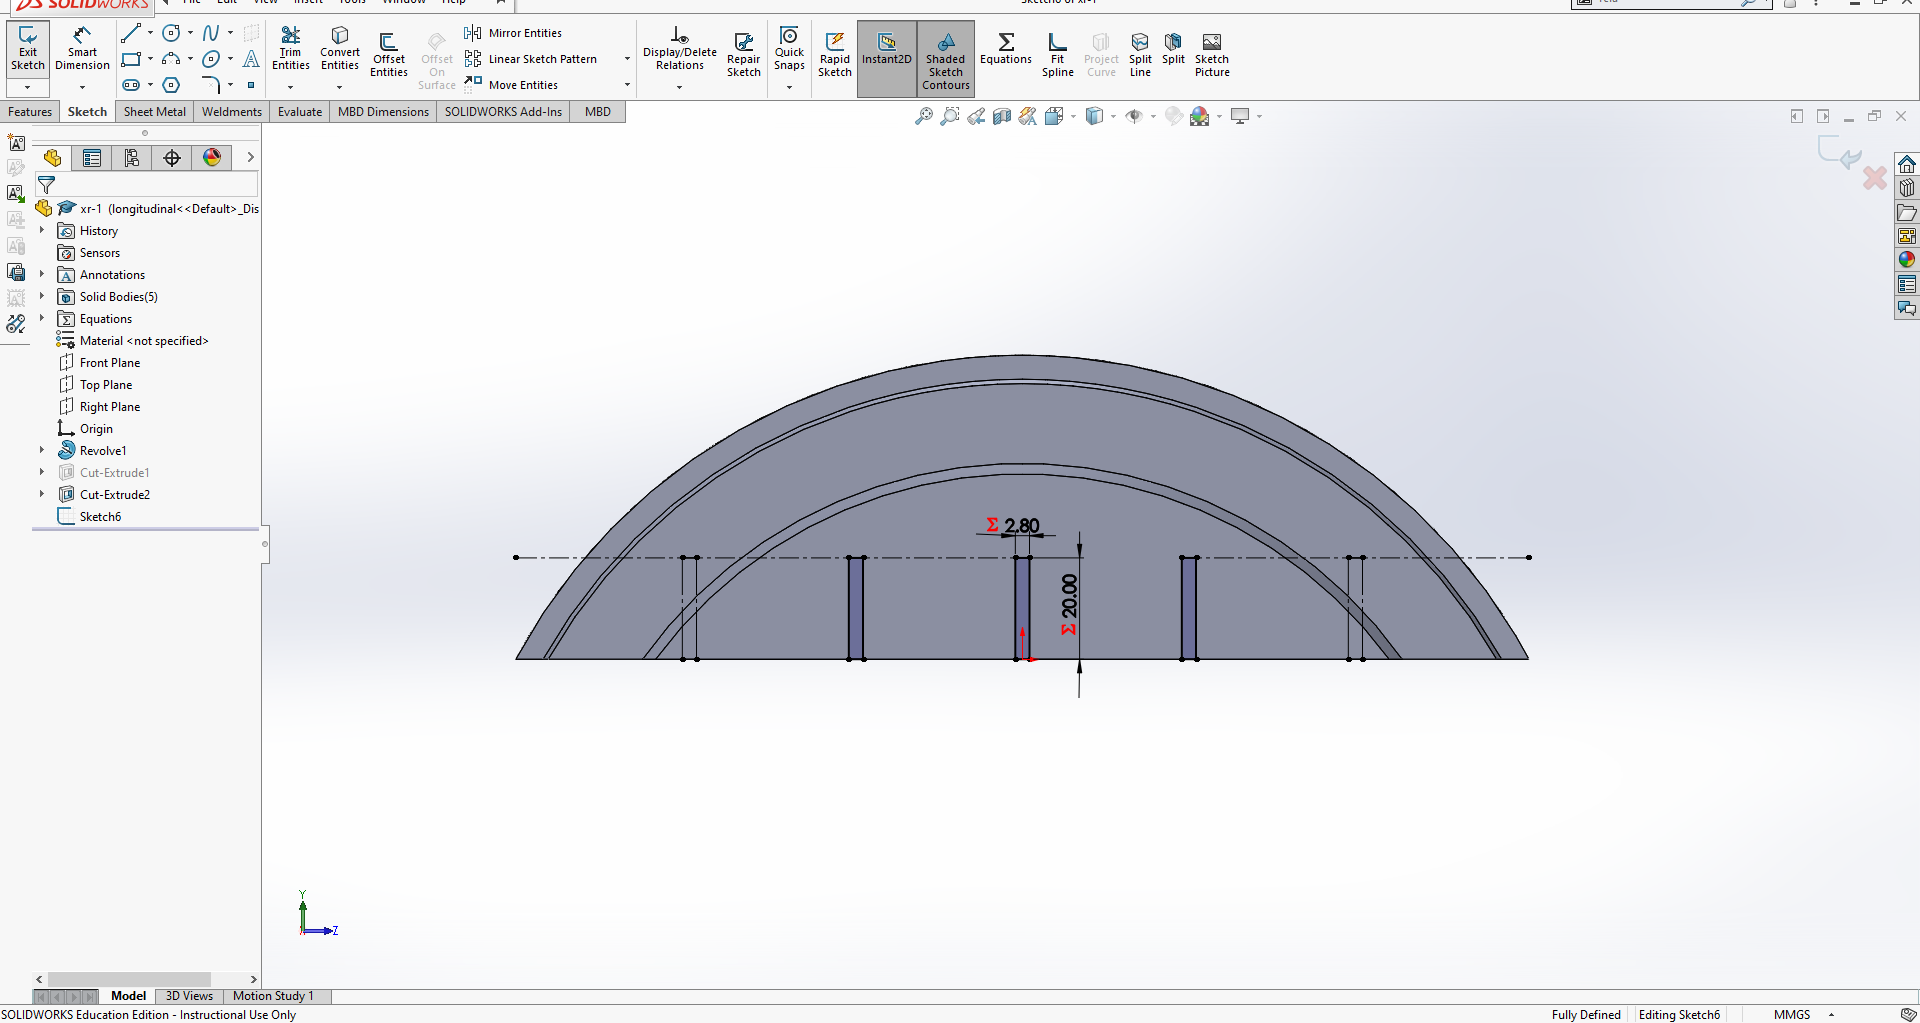
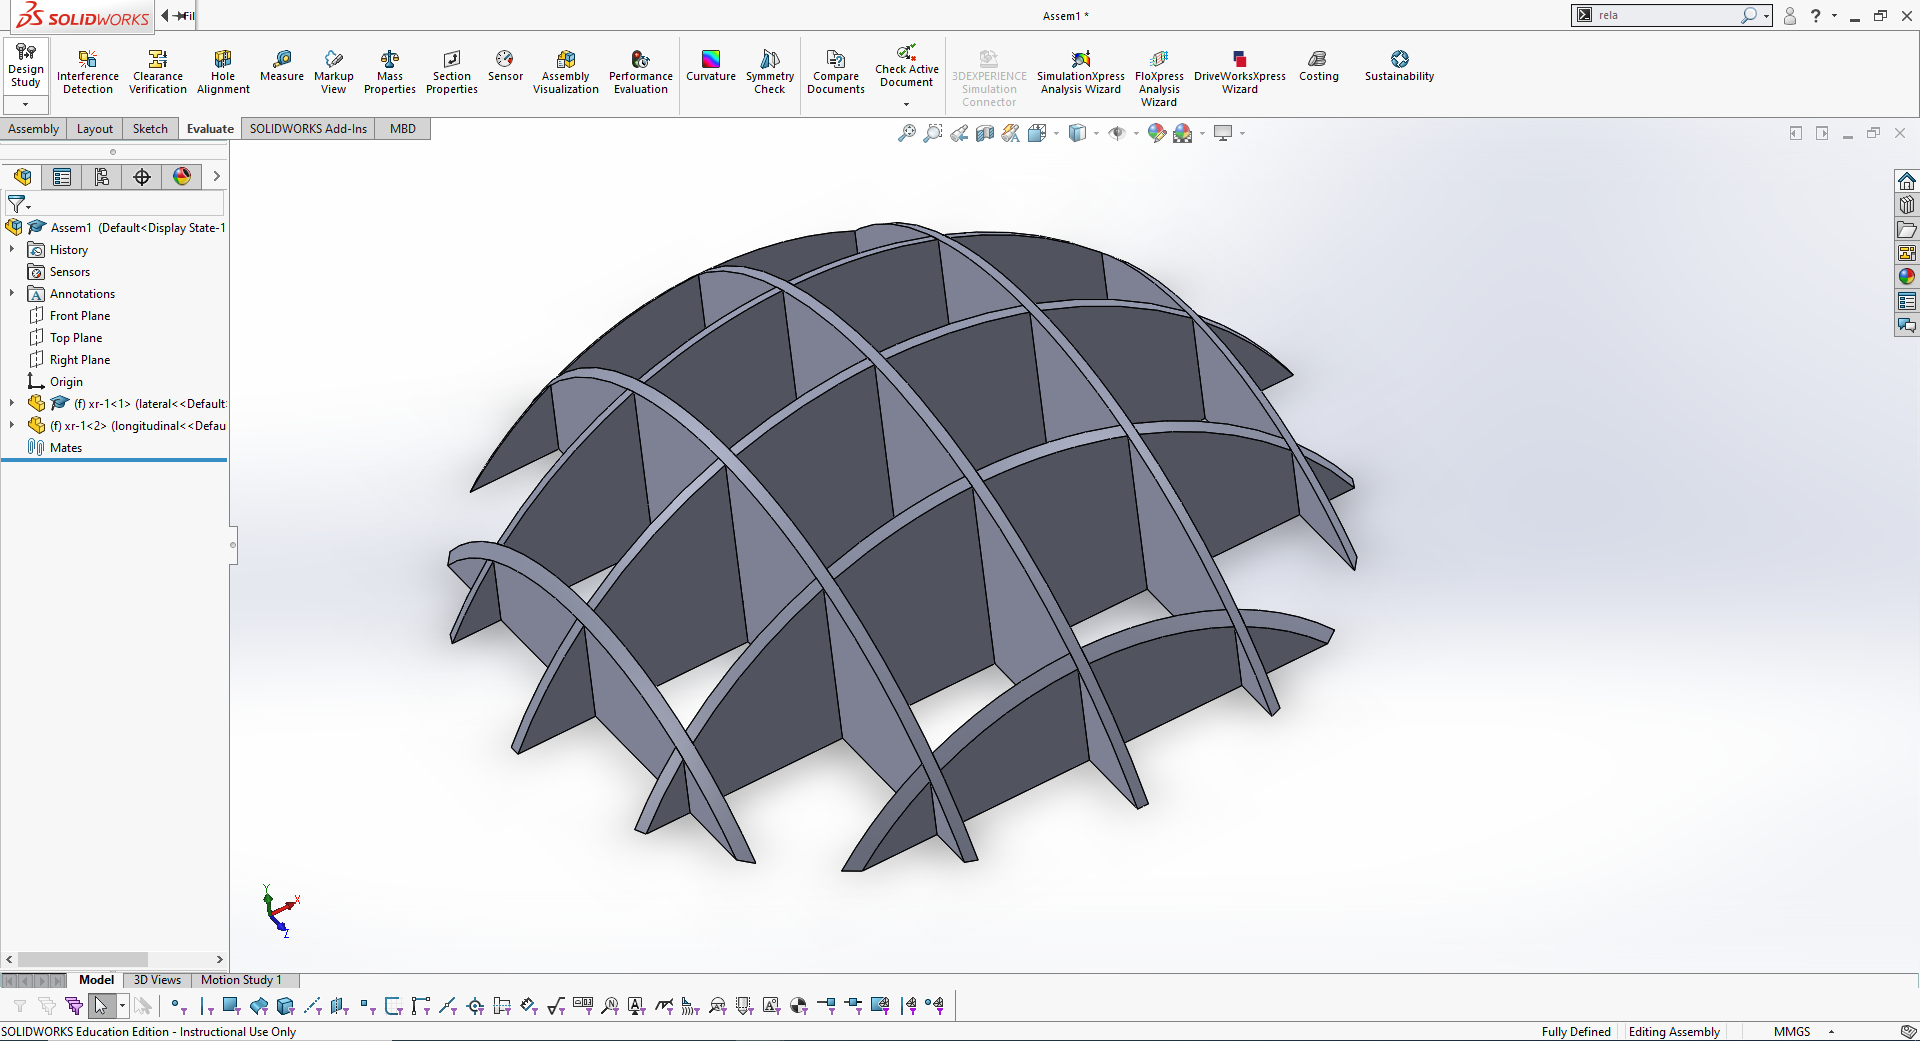
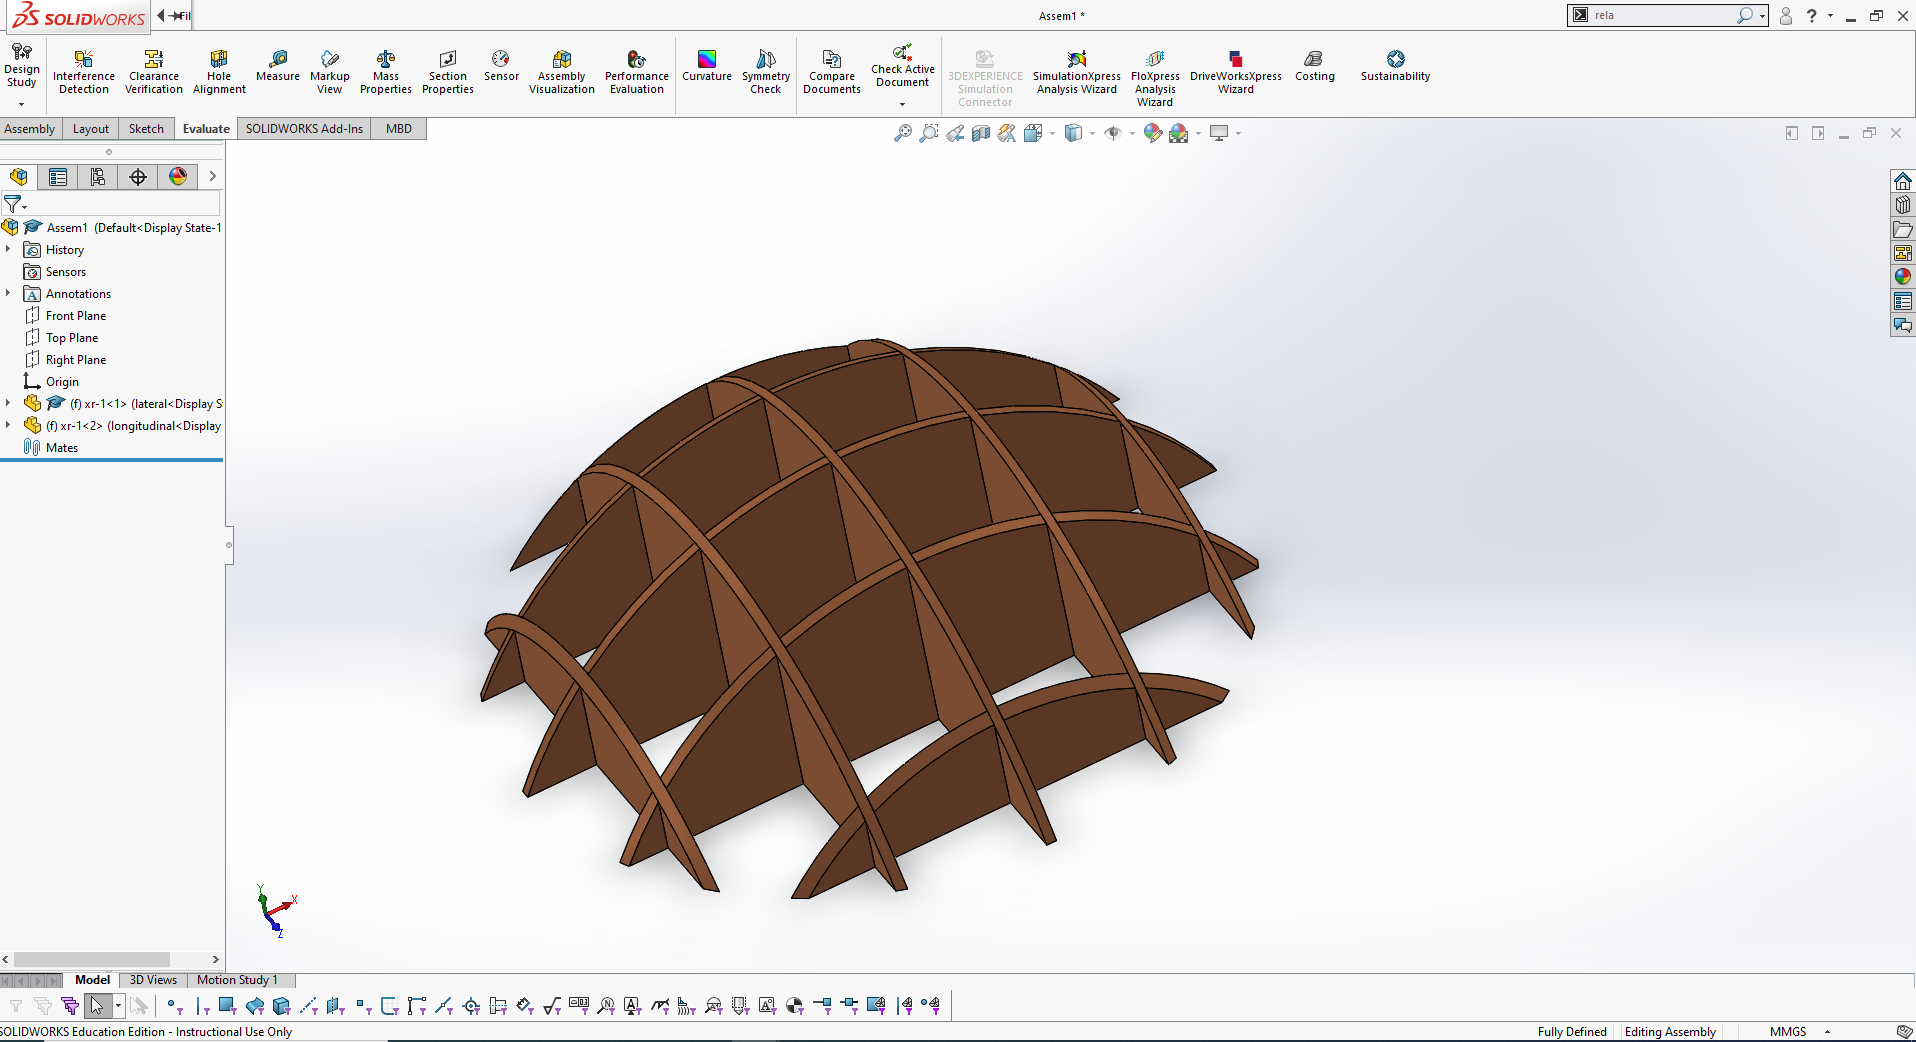
PRESS FIT KIT
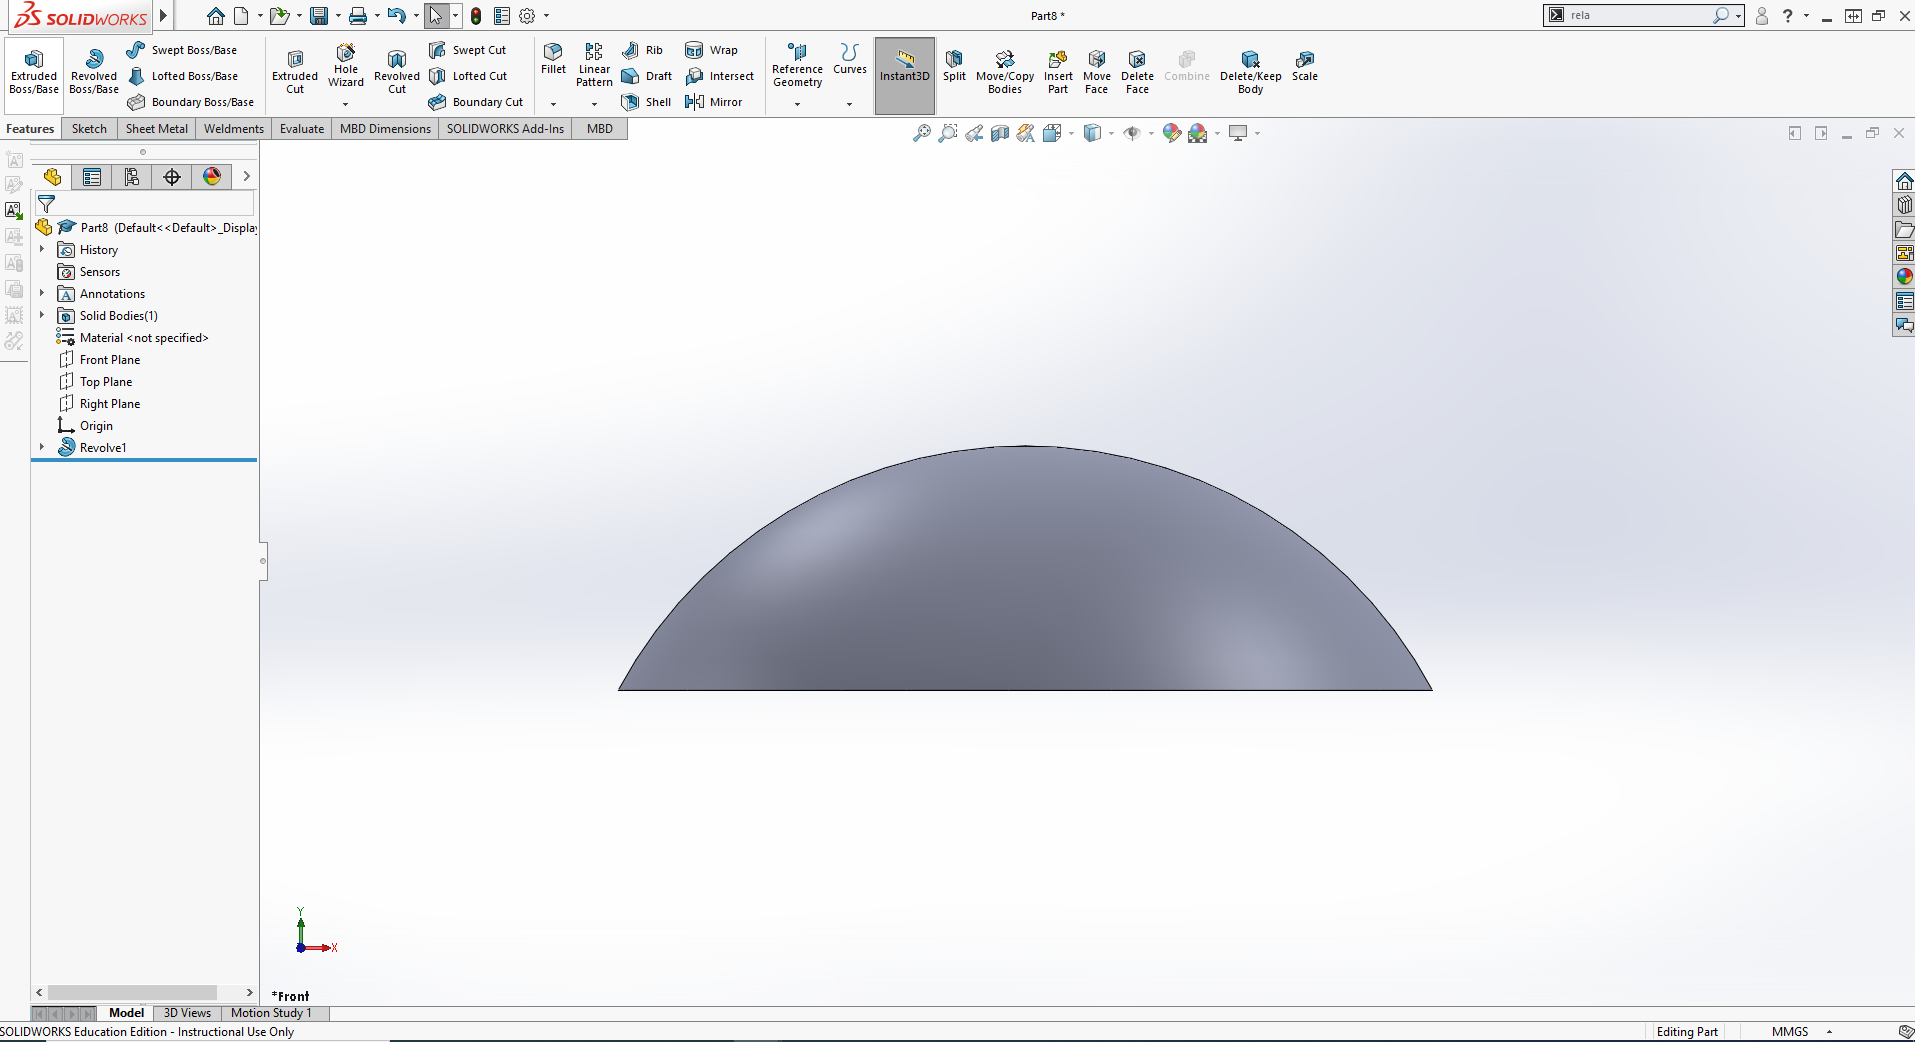
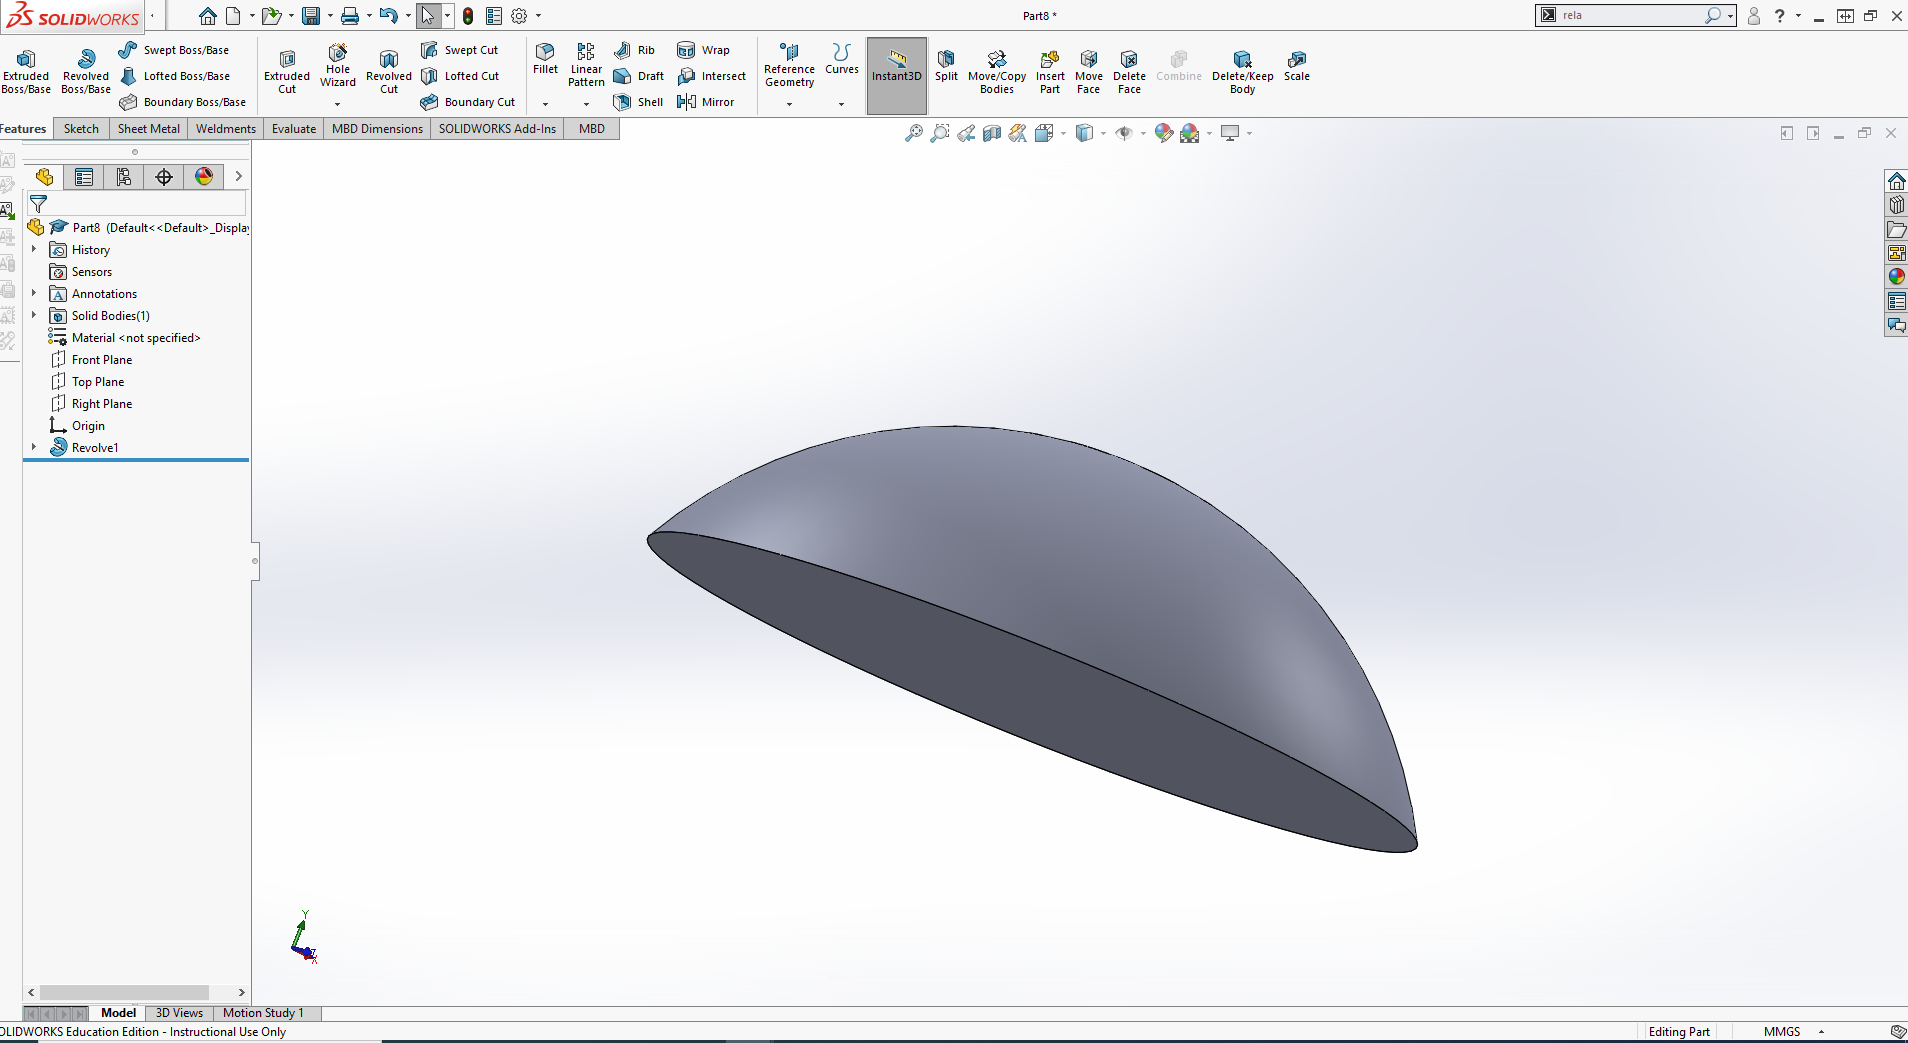
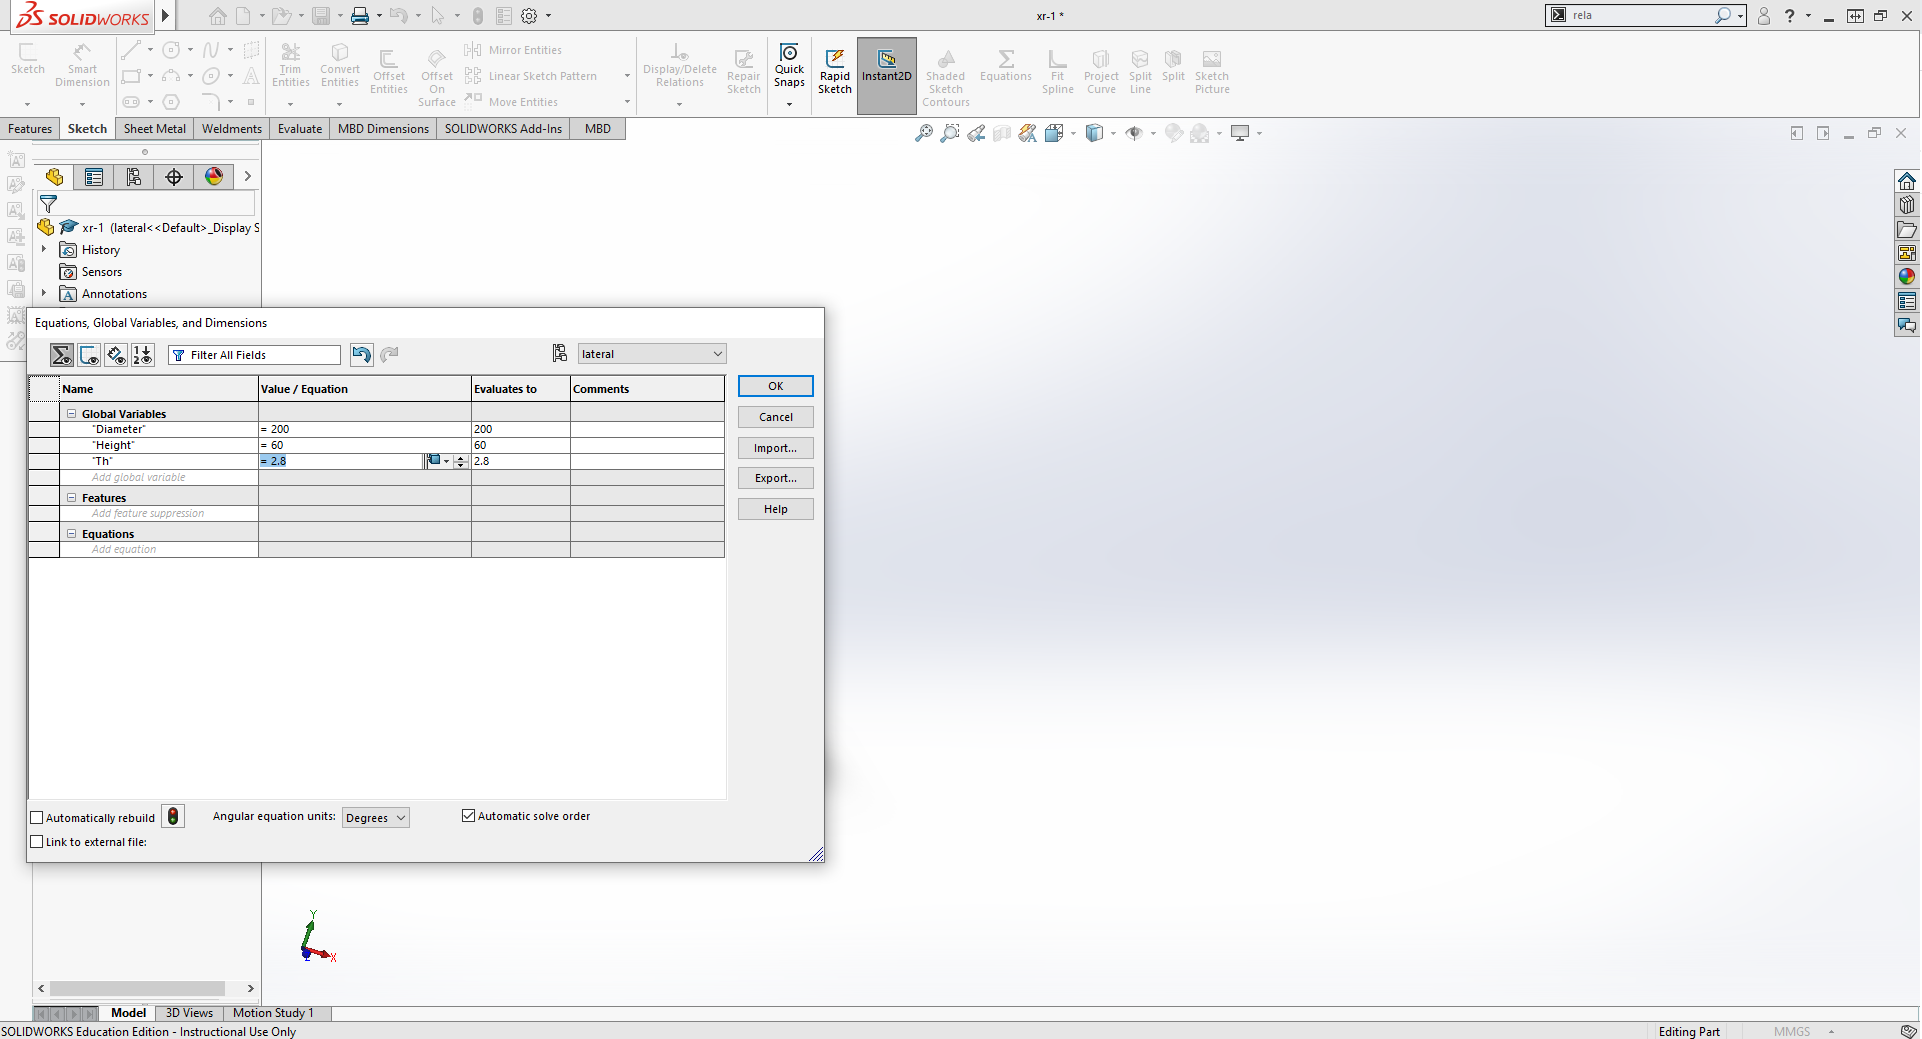
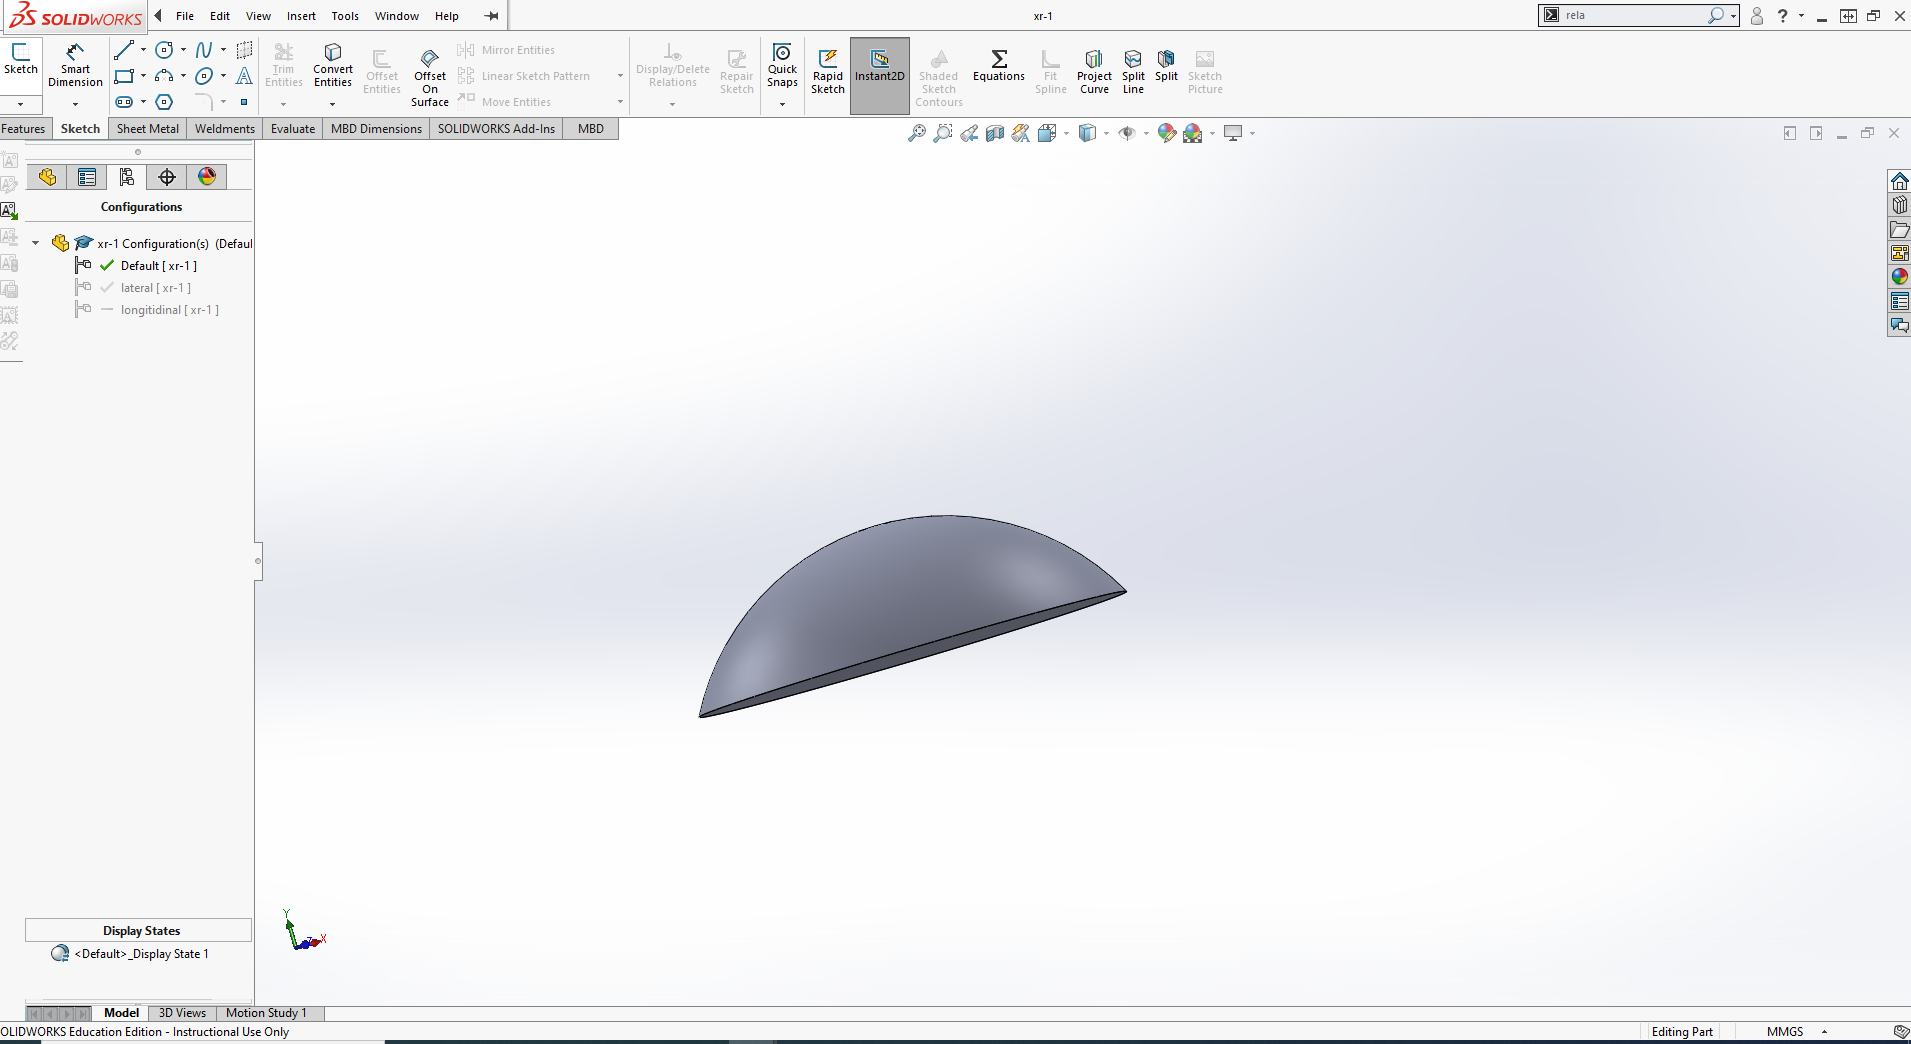
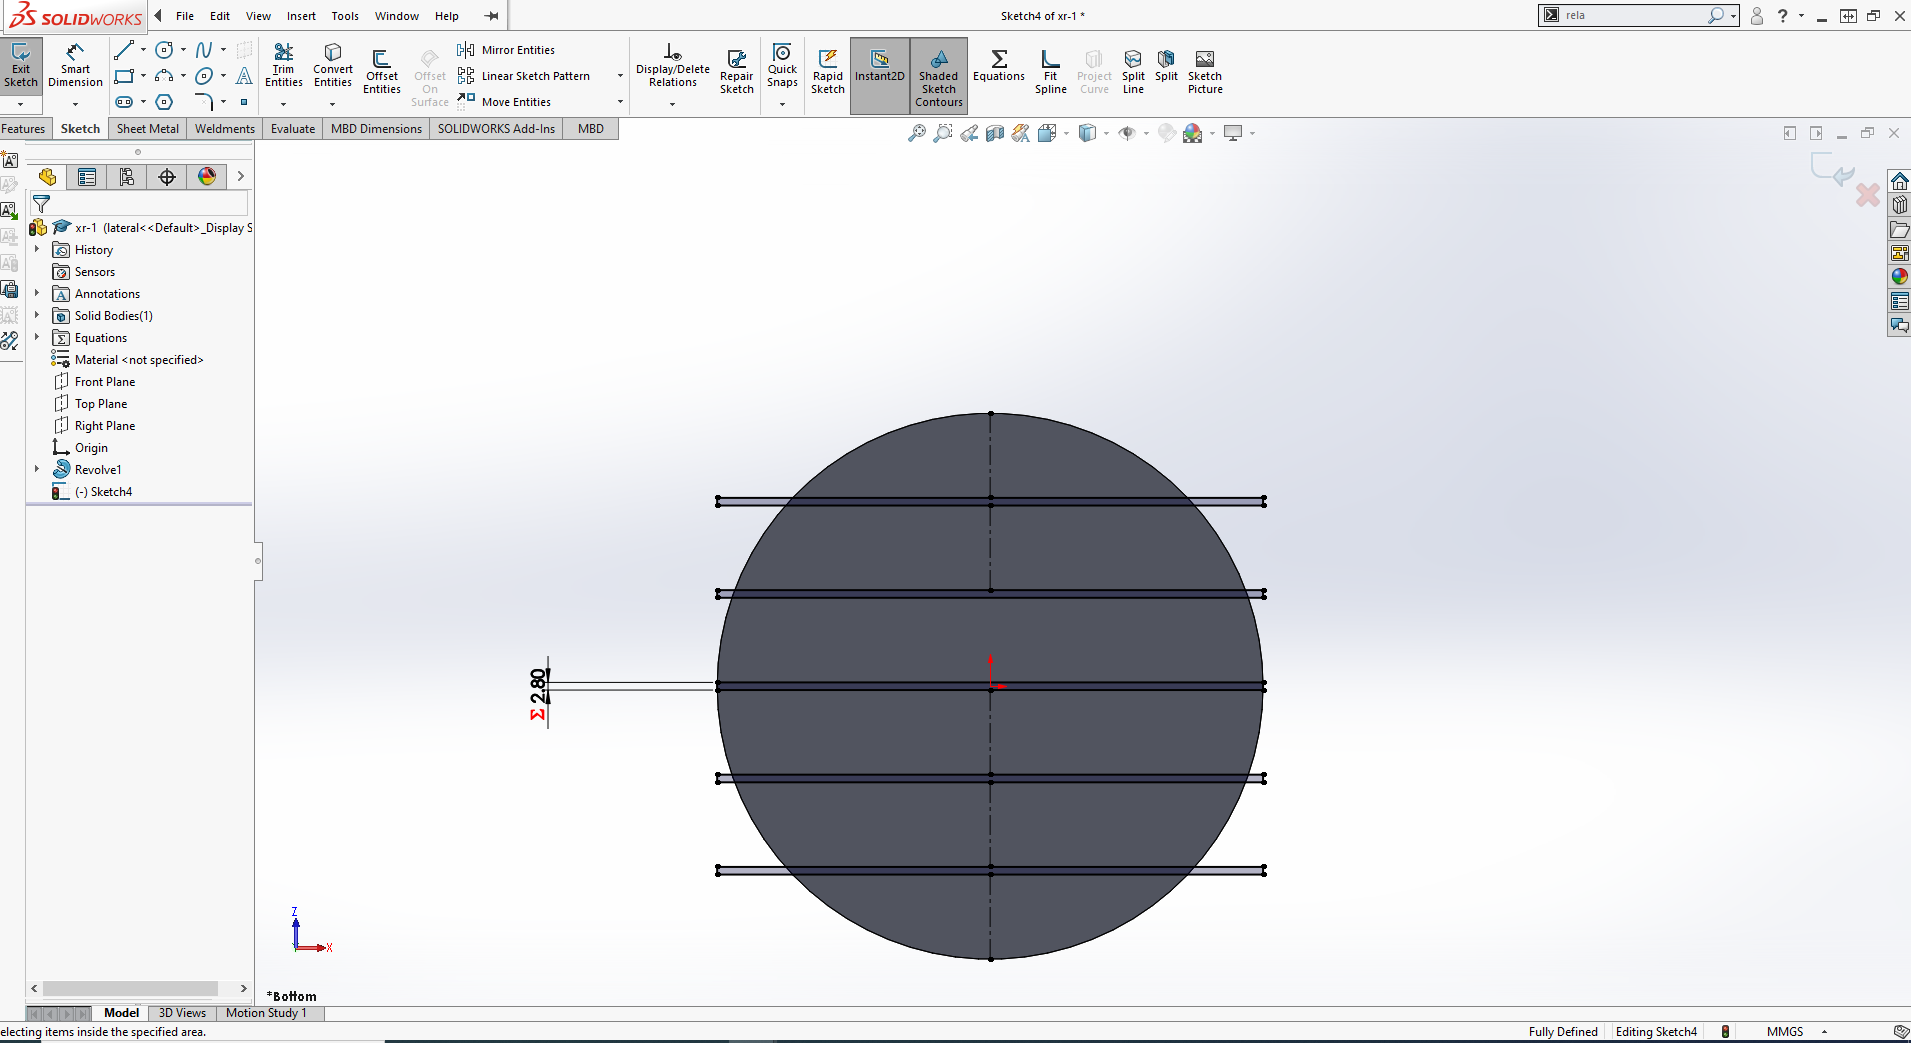
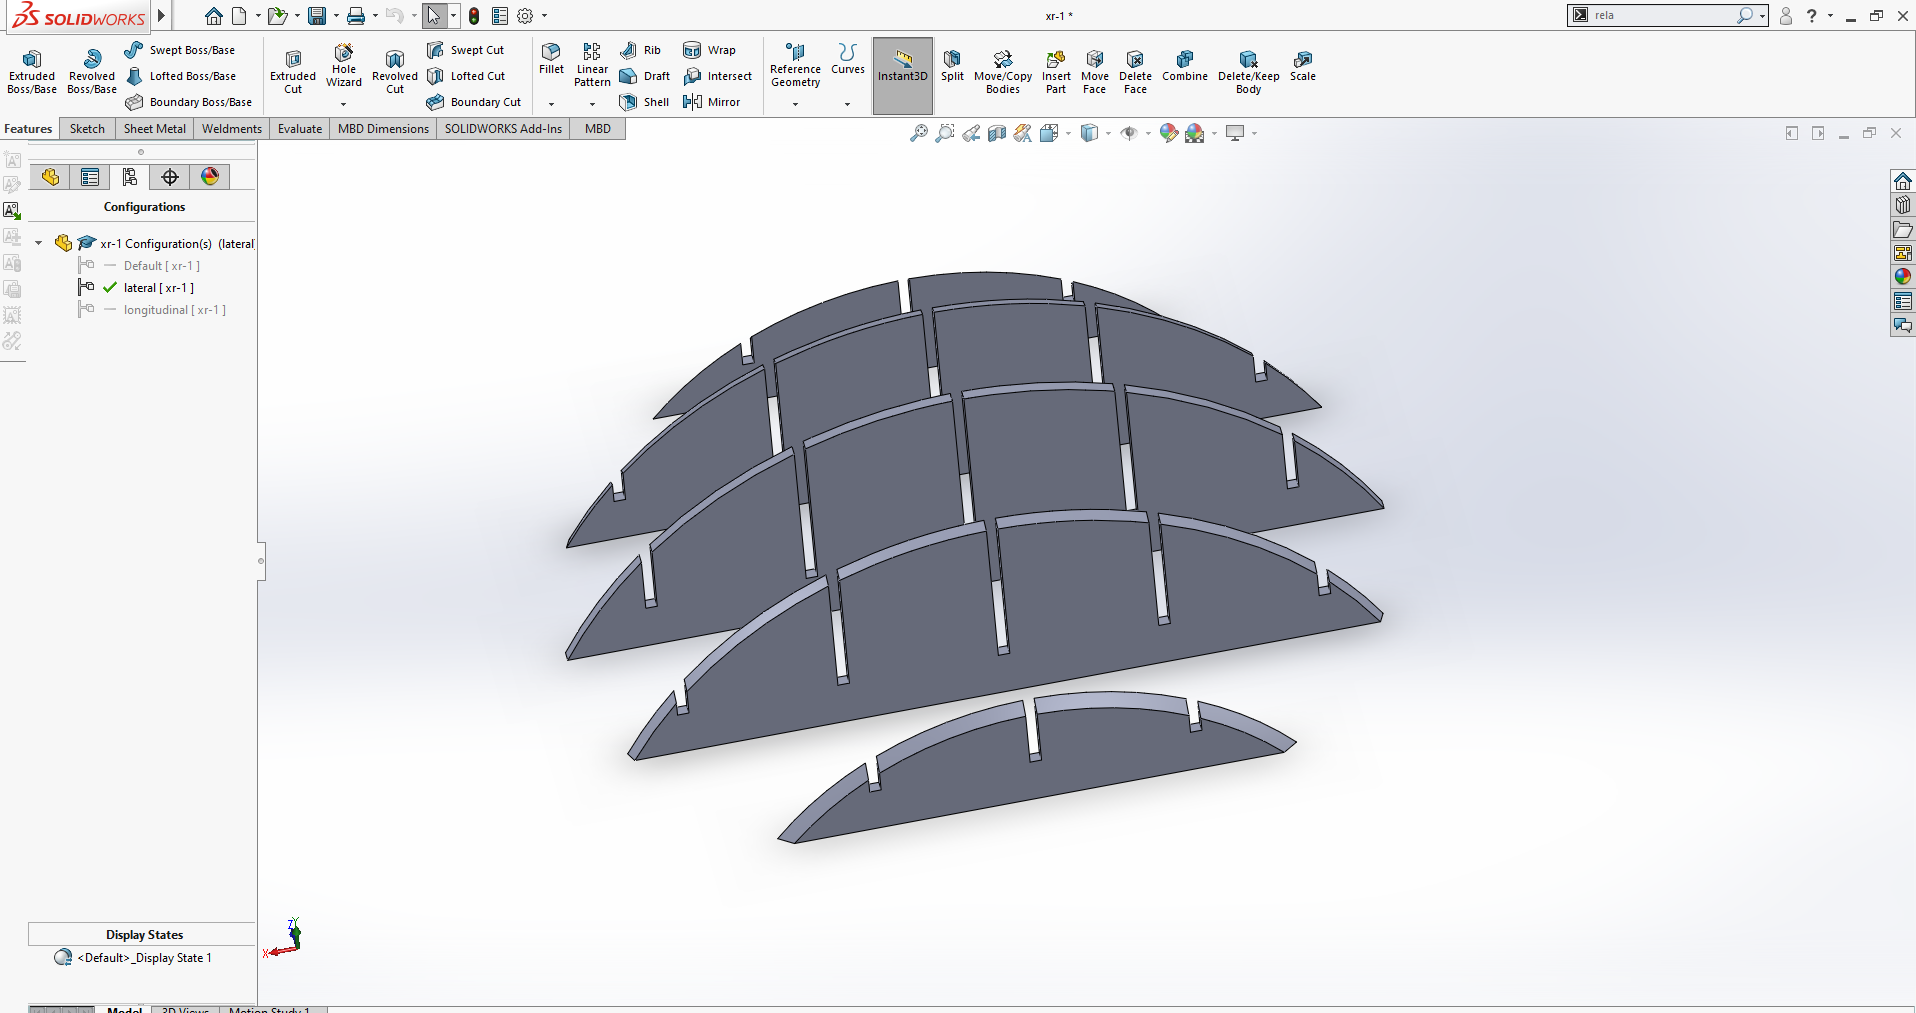
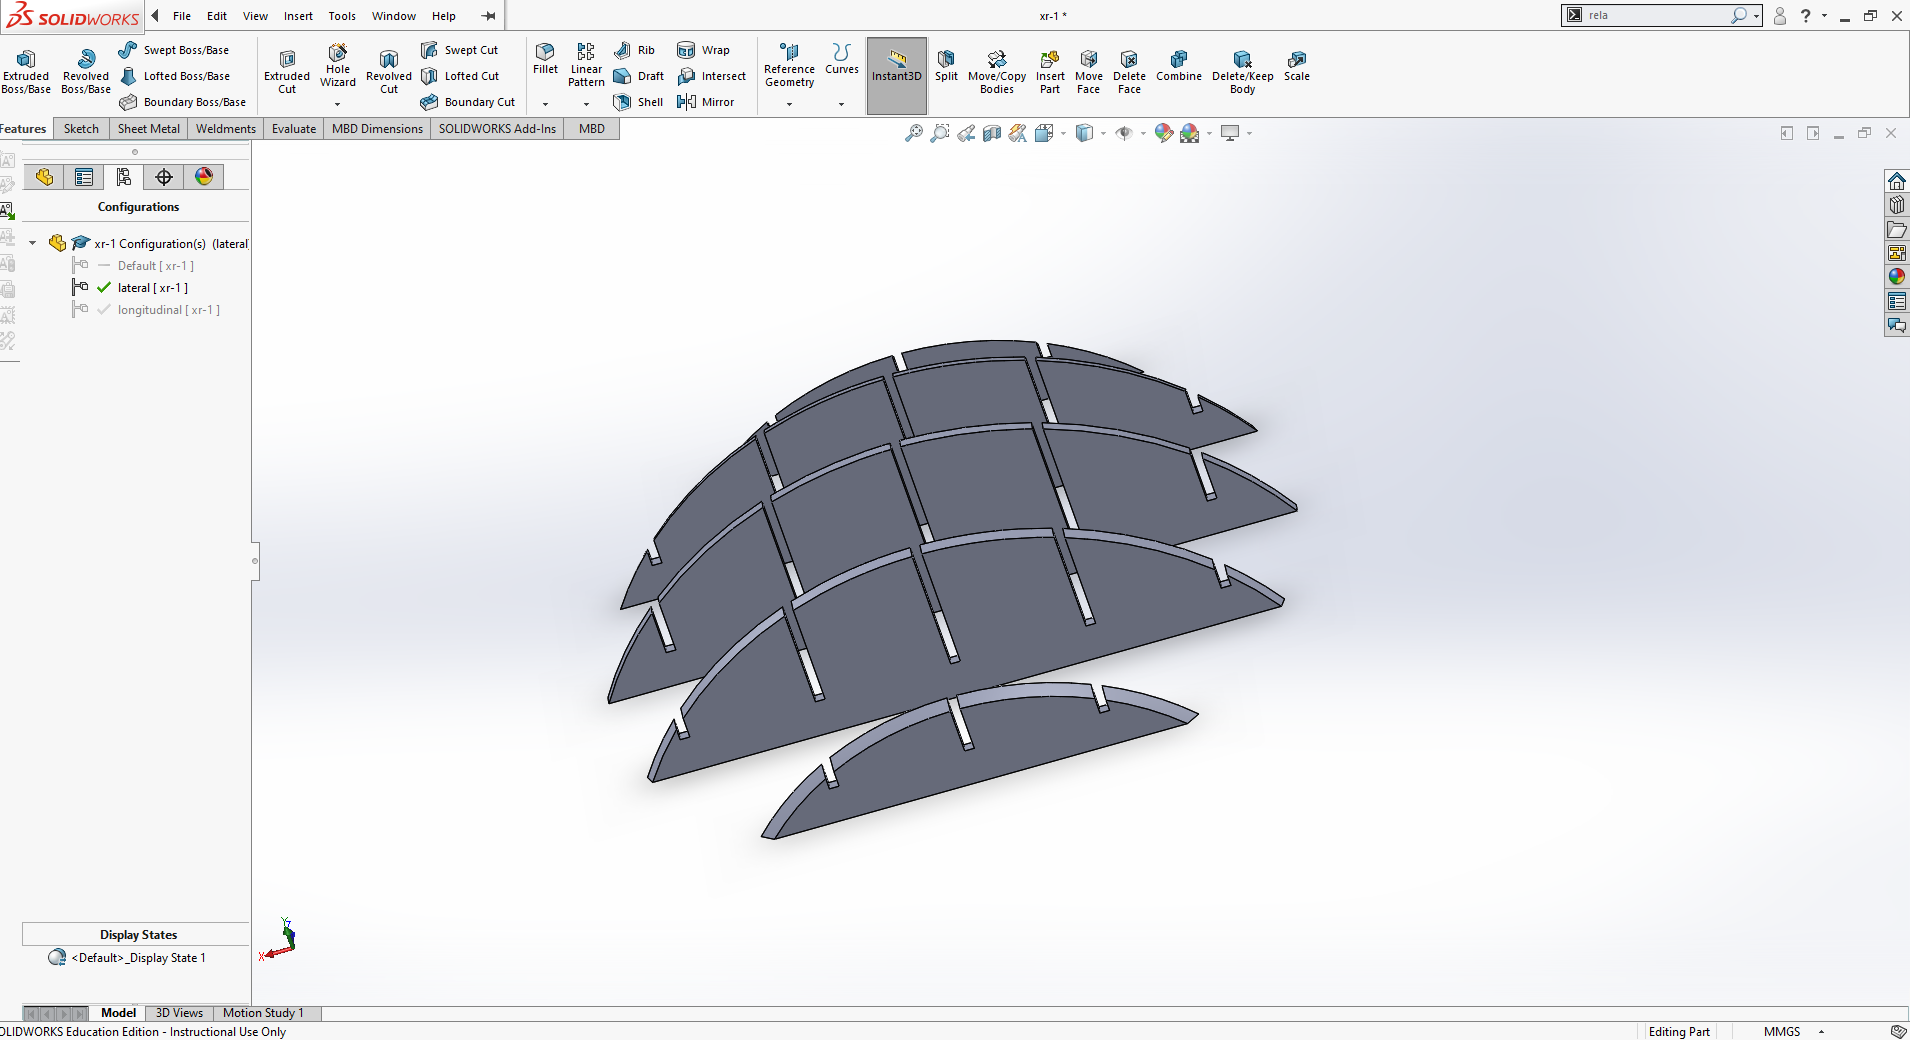
- 1. I designed my Parametric shape in solidworks 2018.
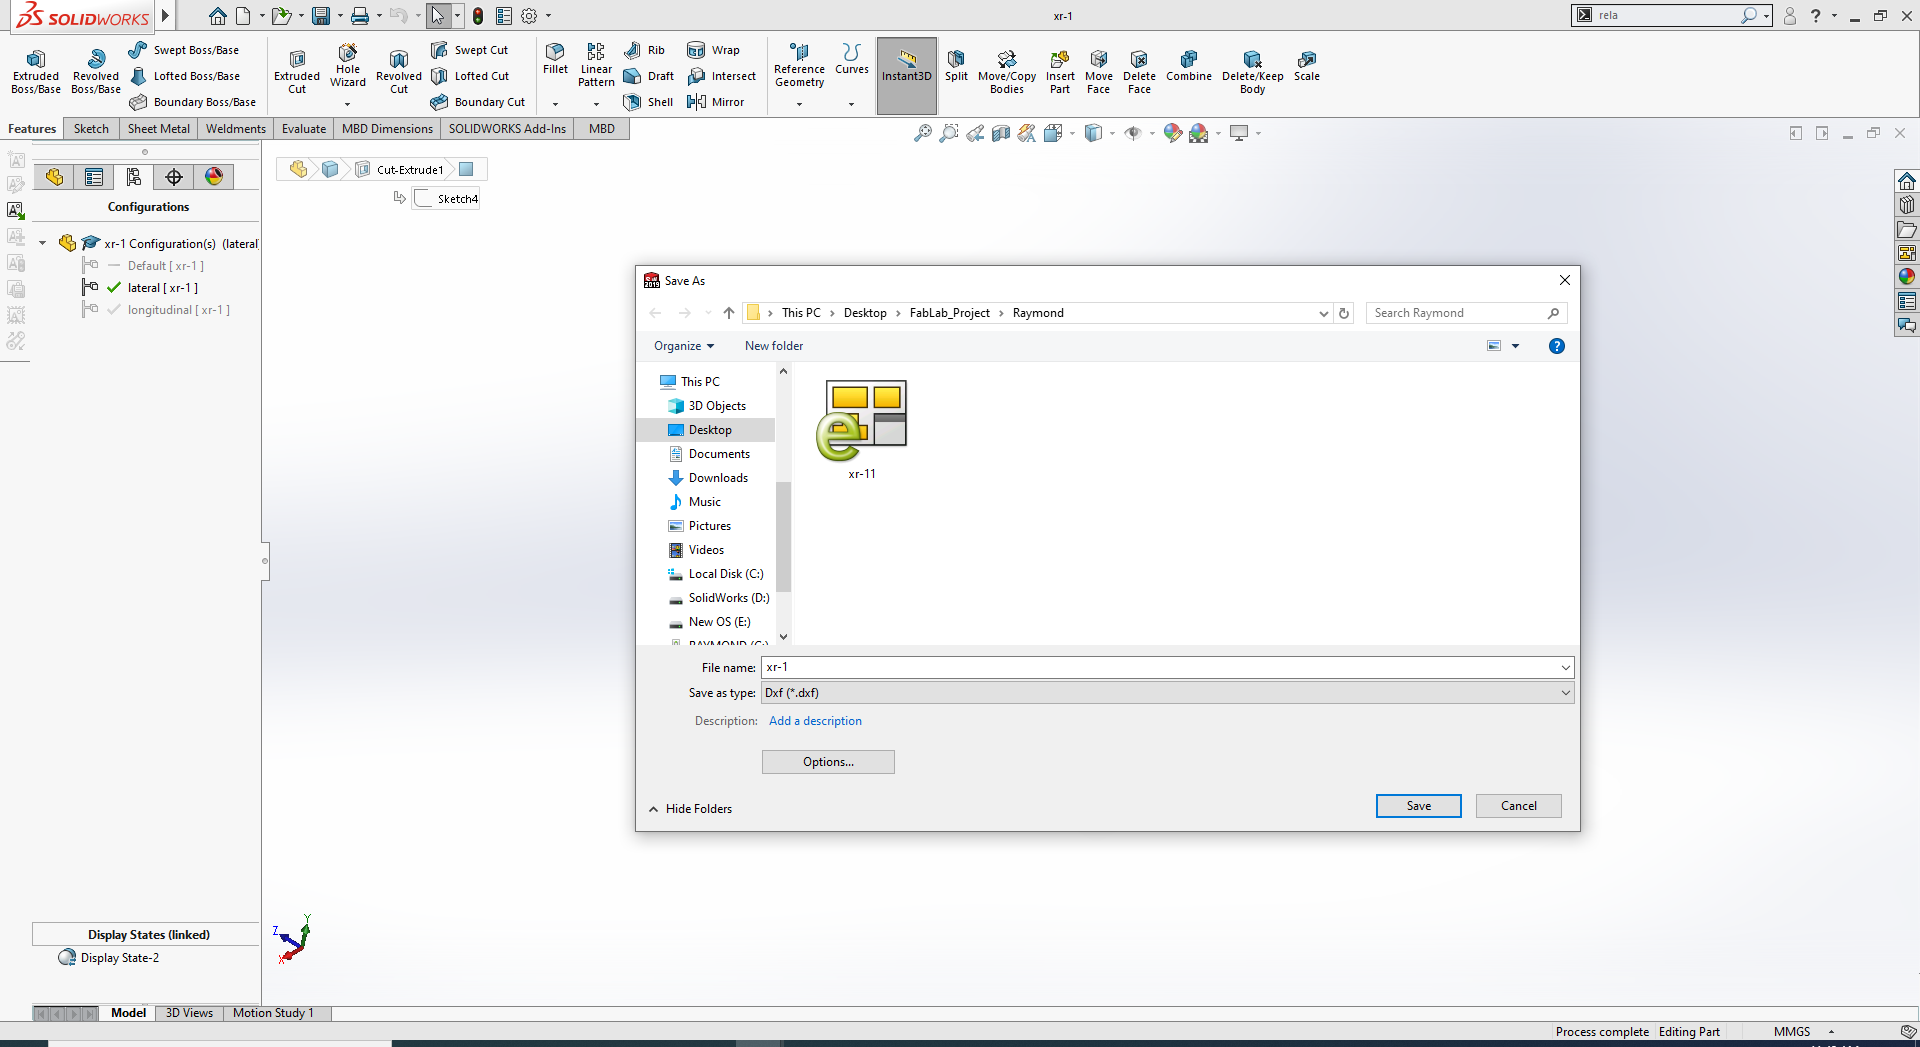
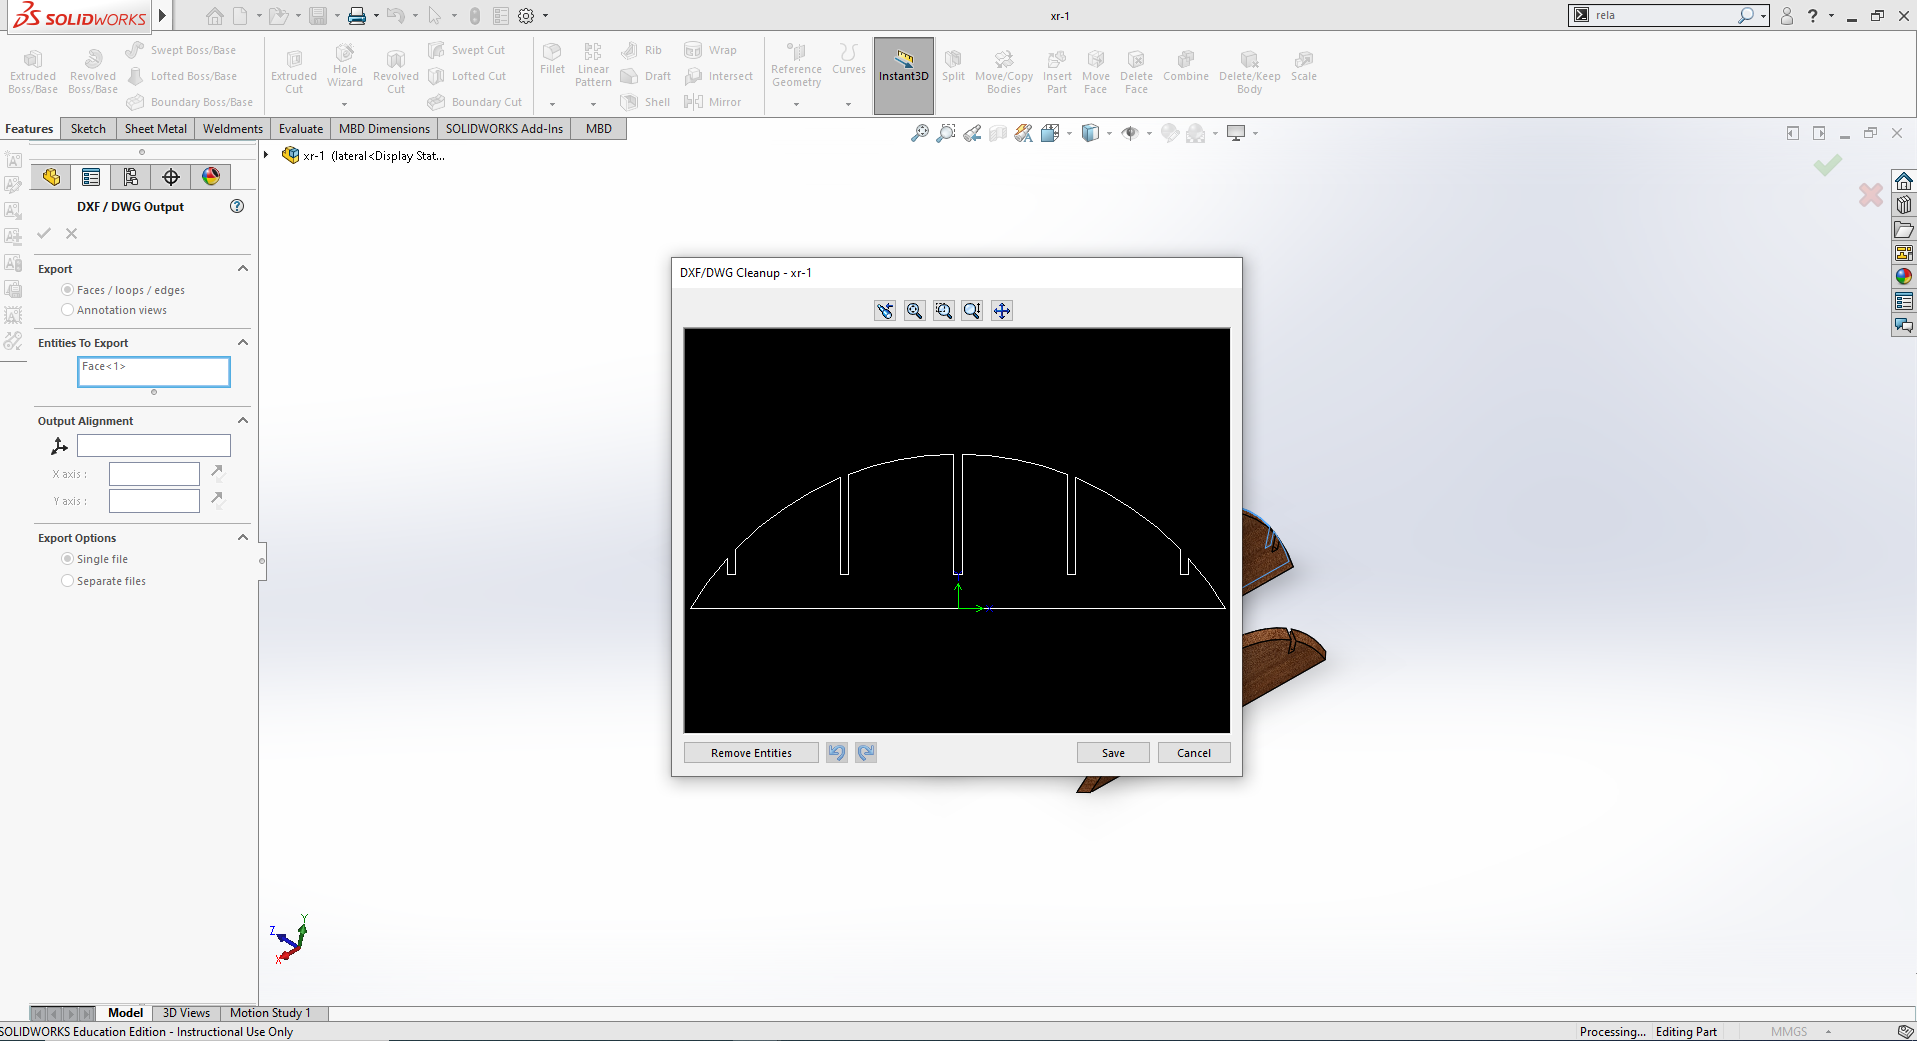
- 2. Saving my 3D Design in DXF for lasercutting
- 3. import saved DXF and multiply the models into cowelDraw for cutting them
- 4.I assembled the parts cut by lasercutter following the bird shape that was in my mind.
Here are photos showing how I made every step
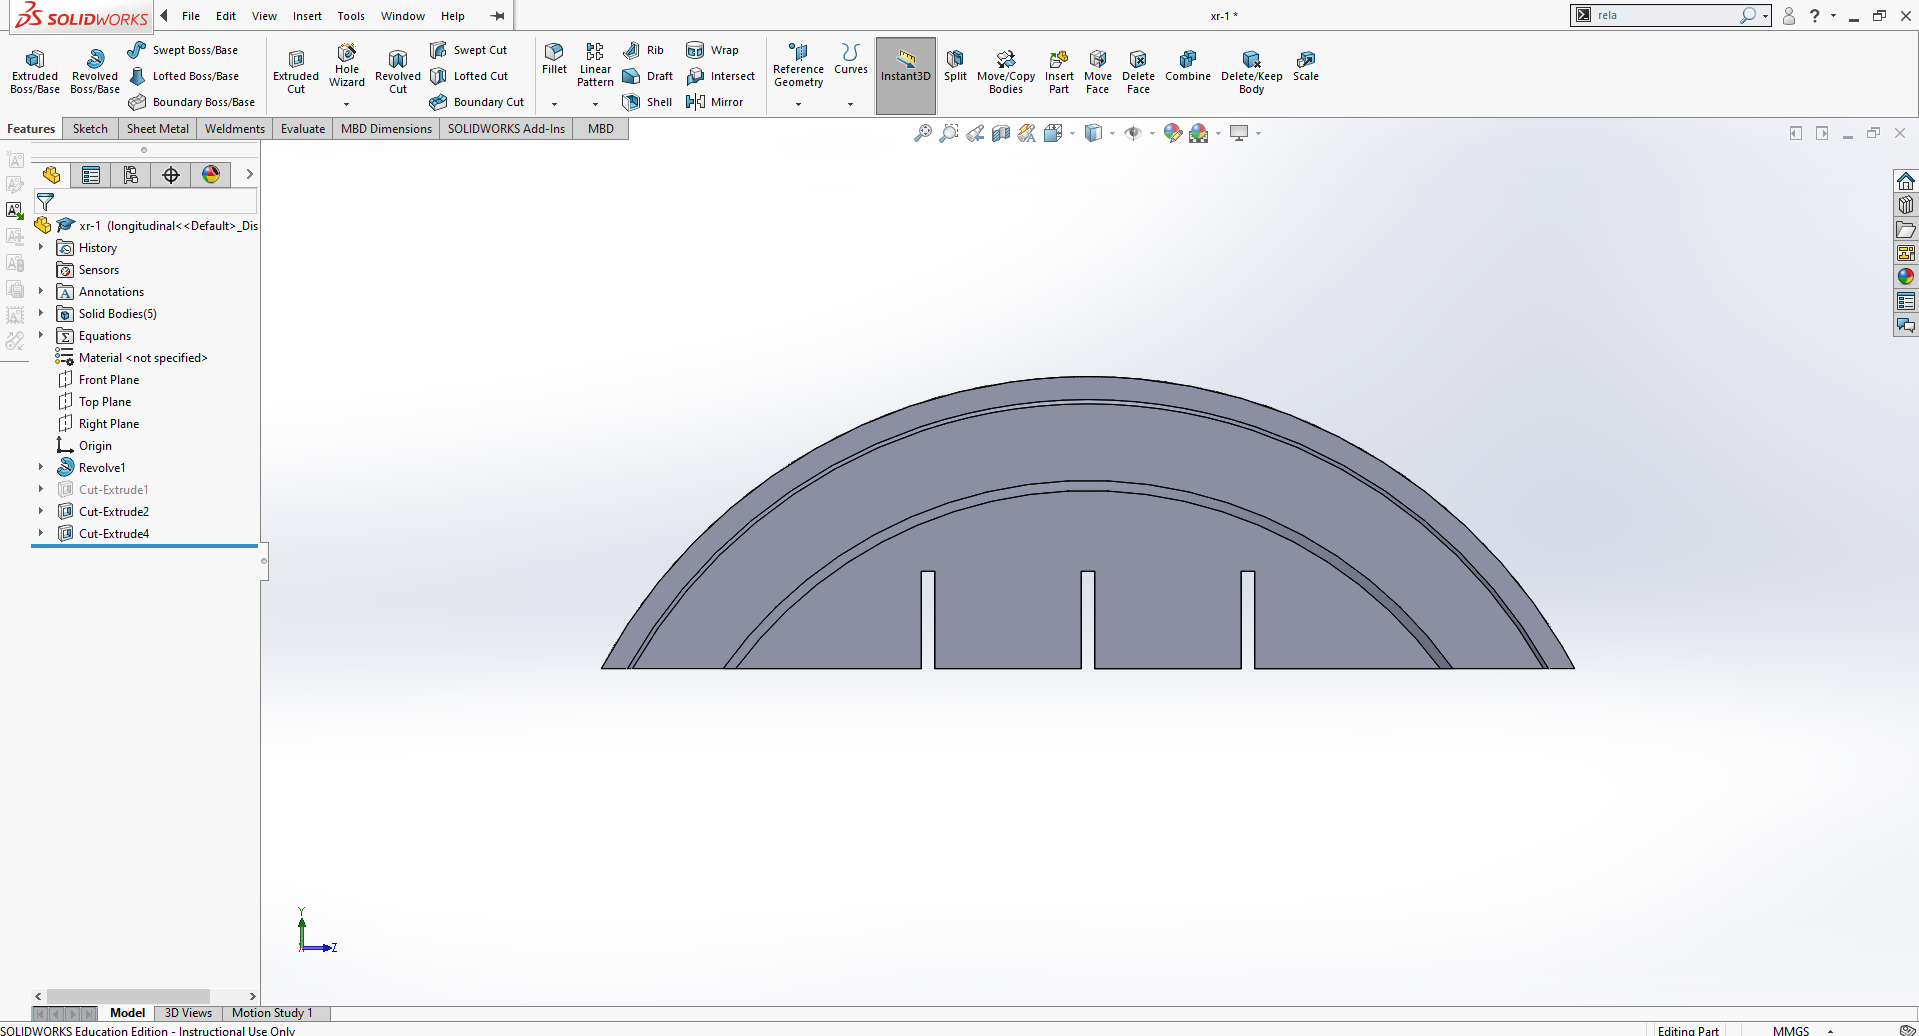
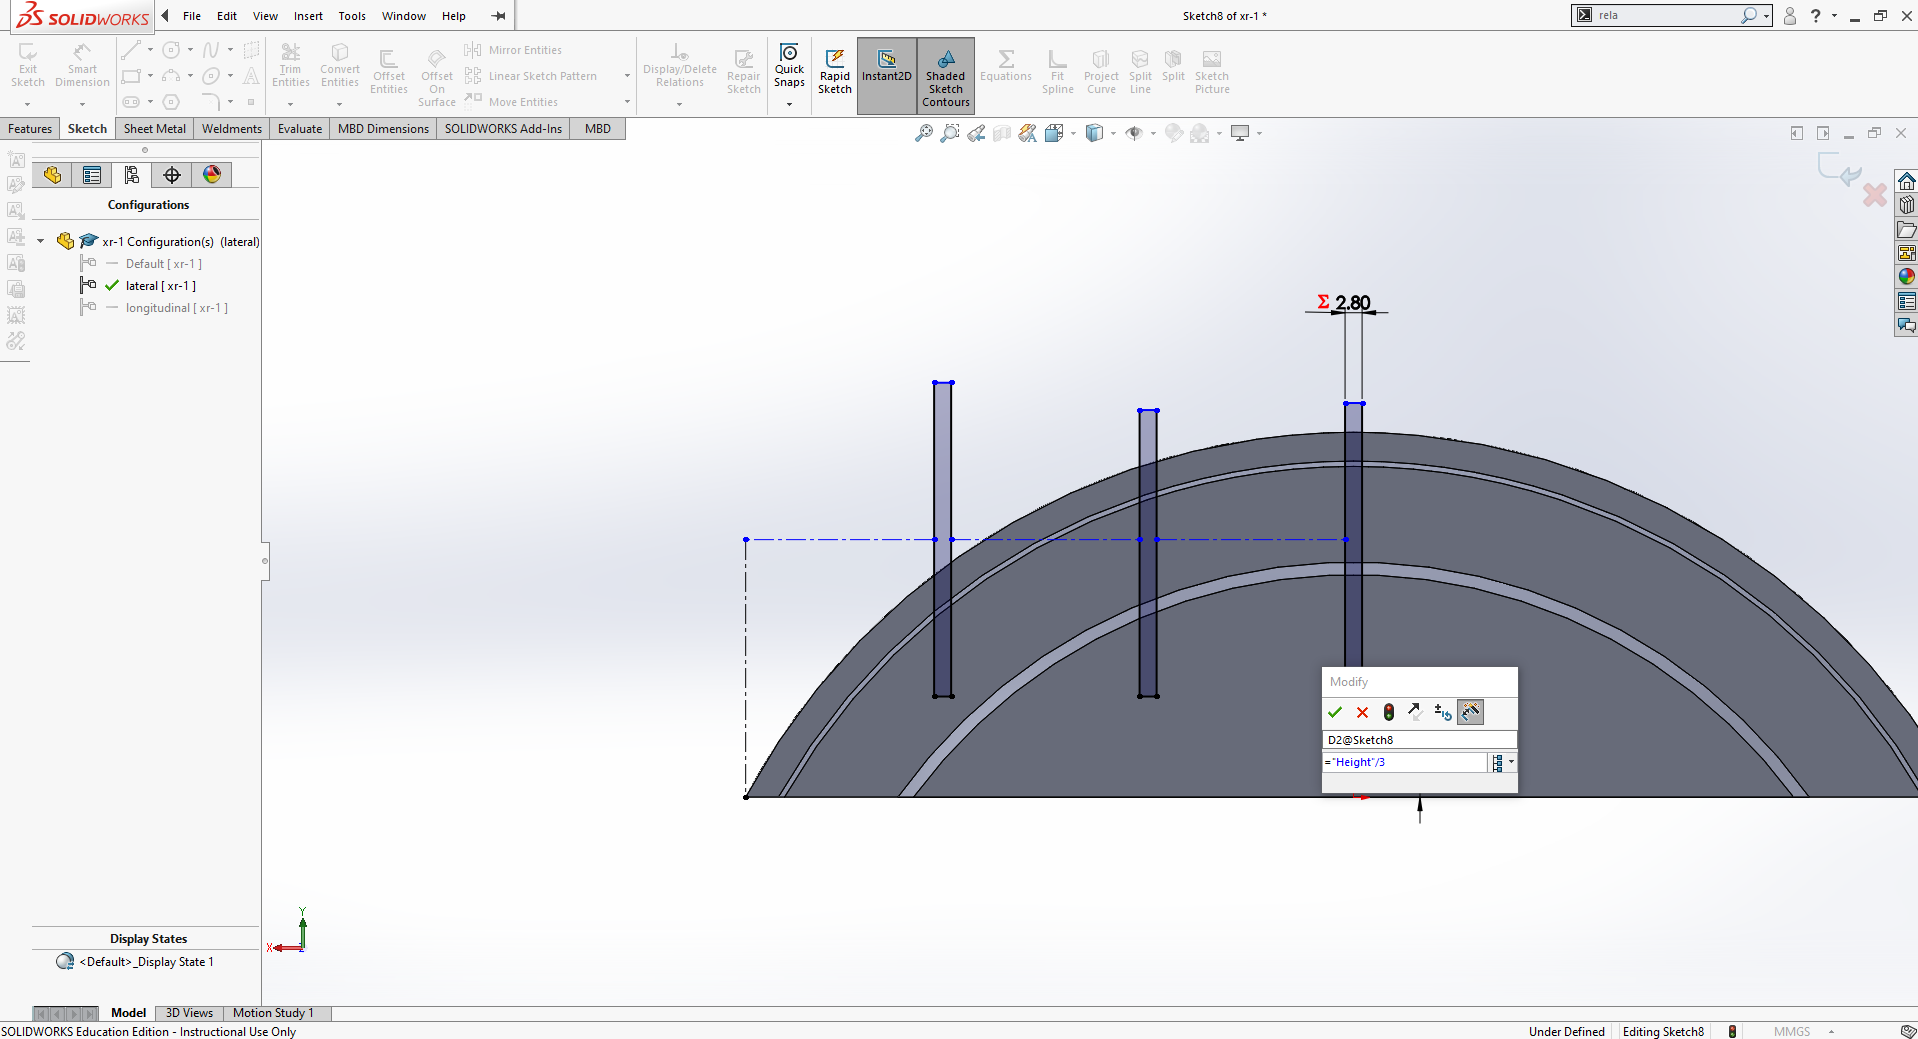
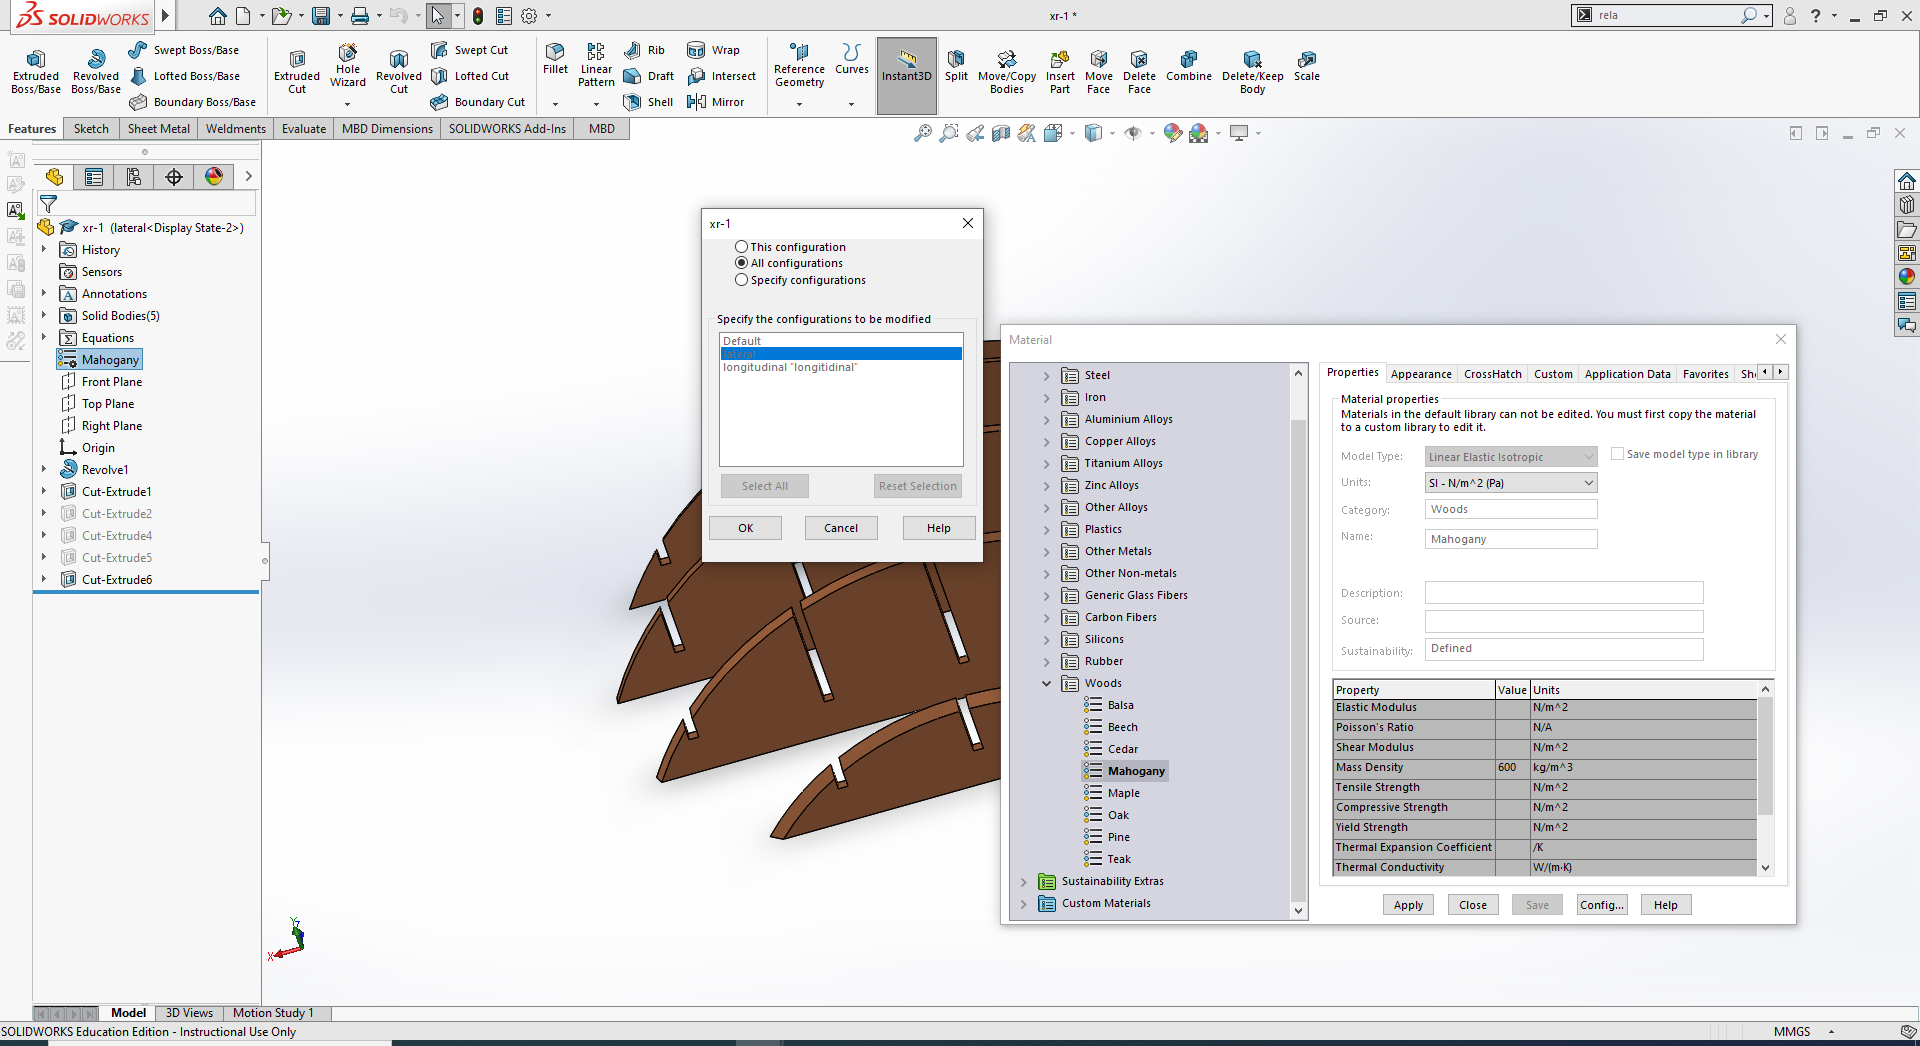
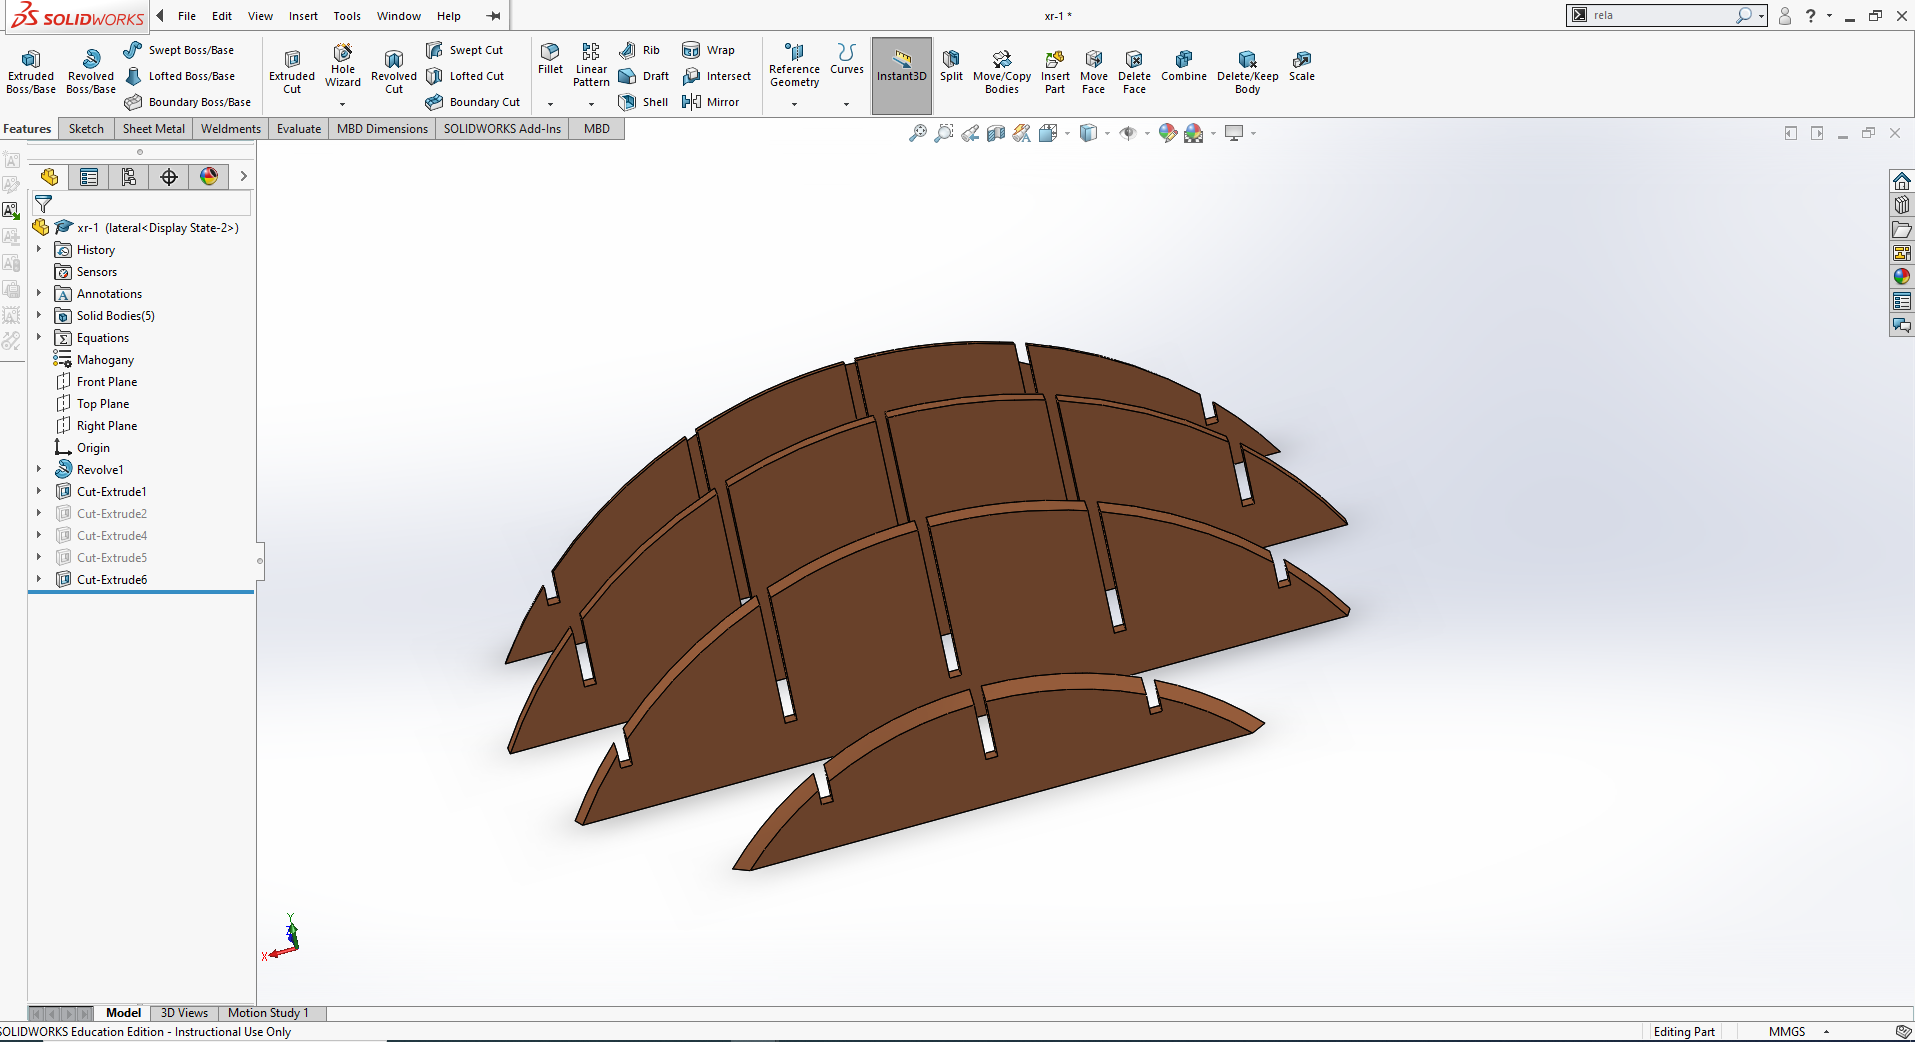
My design was in SOLIDWORKS, with parametrically designed slots, "Equations and global variables" in order to make the design parametric.
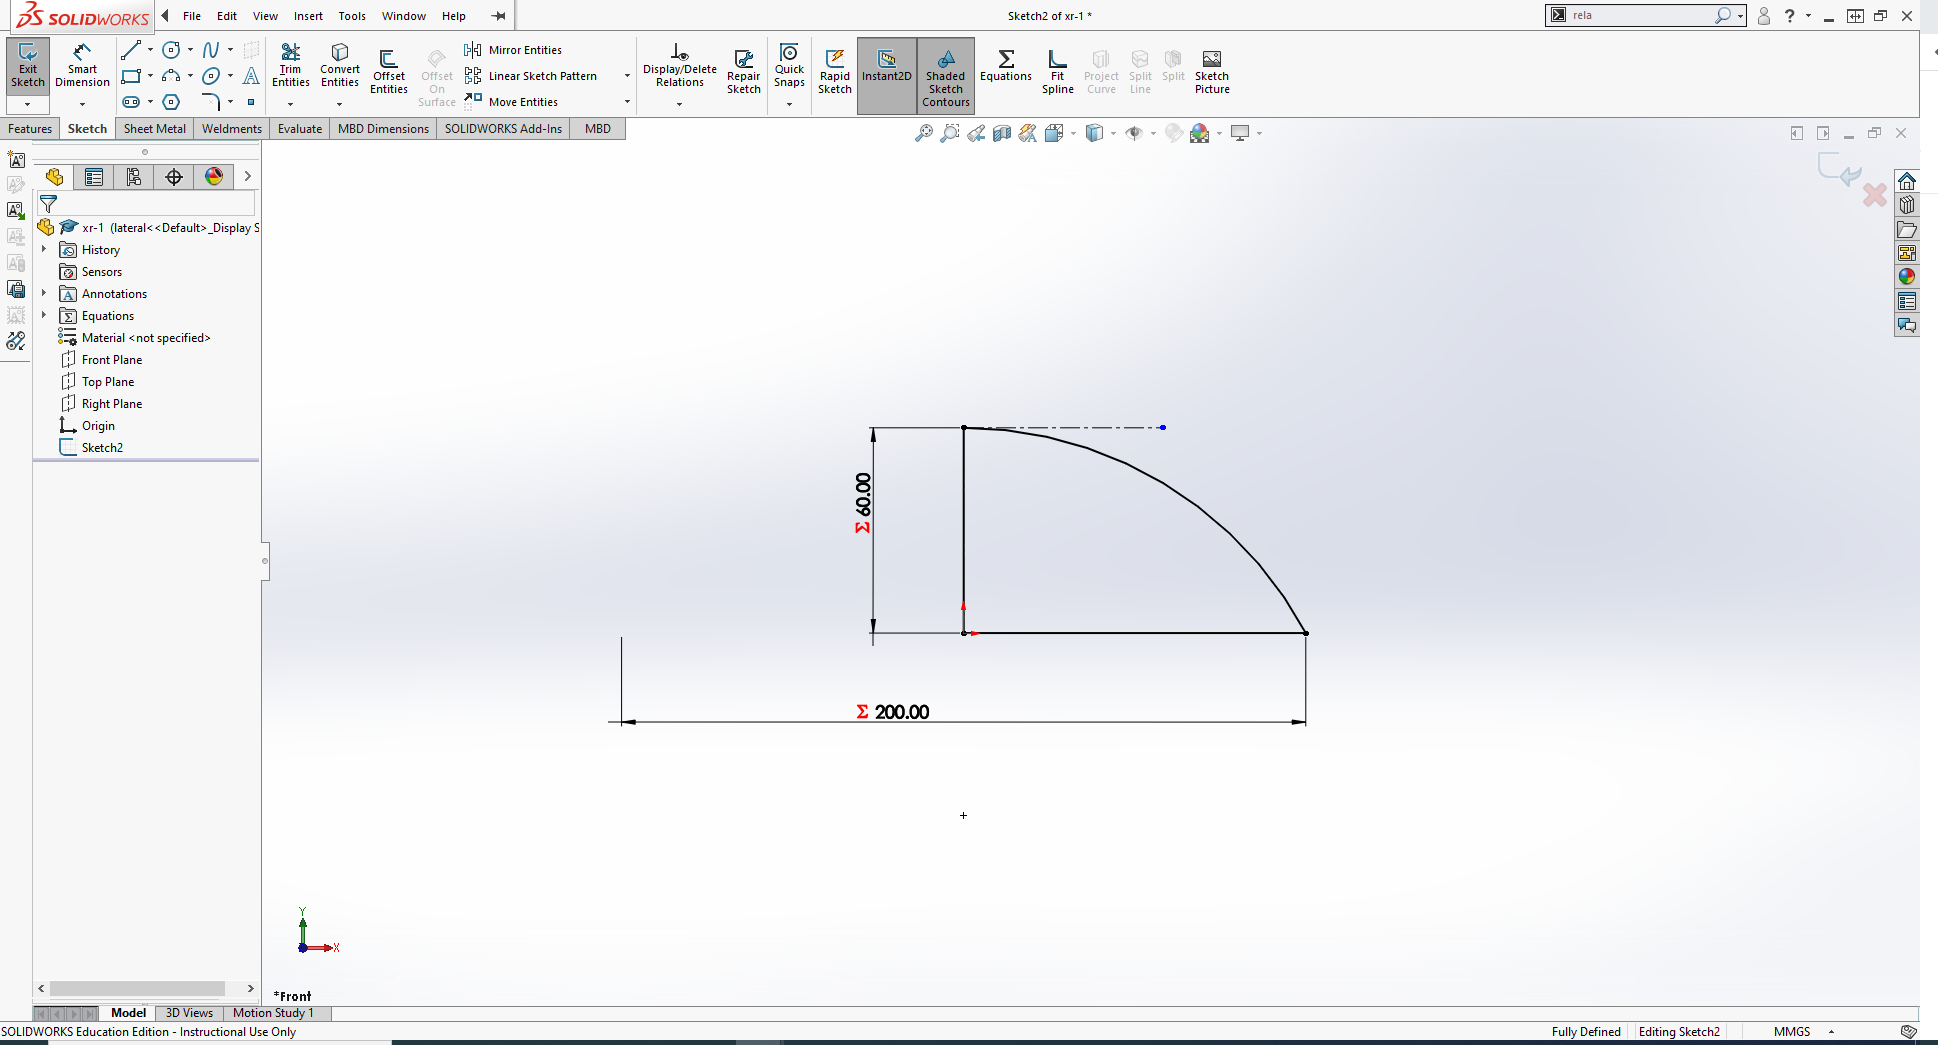
The design is parametric and all the dimensions can be changed later to fit various materials of different thickness. I then exported the file as a .dxf file and opened it in Inkscape, I aligned the design and changed the color to match the cut line and cut out two test pieces.
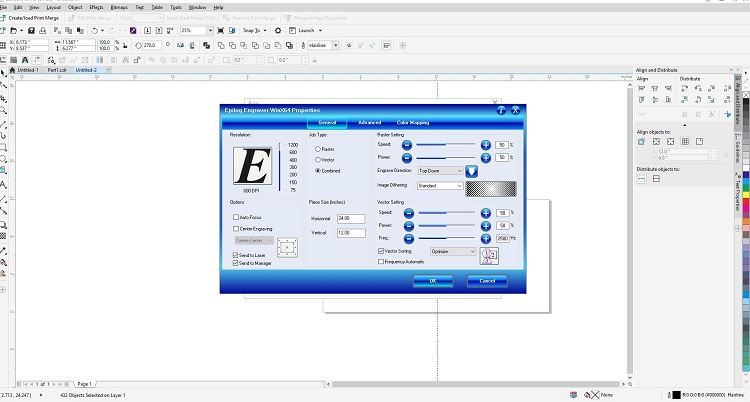

- 1. job type: vector
- 2. Raster setting:
speed=50%
power=50%
- 3. Raster setting:
Horizontal: 24
Vertical: 12
- 4. Vector setting:
speed: 20%
Power:100%
Frequency: 2500Hz
EPILOG CUTTING
The Epilog laser cutter uses a high powered laser to make precision cuts in a variety of materials, from paper and wood to acrylic and glass. The laser is accurate to 1/100 of an inch (.01 inches), which allows it to cut very complex, intricate designs. The laser can be programmed to either engrave (raster cut) the surface of the material or cut through the material (vector cut).
EPILOG LASER CUTTER SETTING
Once you send a design to the laser cutter to be cut, the machine creates a graphic map where each point (.02 mm) of the image is given a coordinate that tells the laser exactly where to go and how deep to cut. The CO2 laser is attached to a mechanical arm that allows it to move left and right on the x-axis, much like your printer. The mechanical arm also moves on the y-axis, so the laser can reach the entire 24”w x 12” h surface of the cutting bed. The depth of the cut in the z-axis is determined by the setting for the laser’s power, speed, and frequency. There is a specific power, speed, and frequency that is appropriate for each material that can be used in the laser cutter.
These settings take into account the thickness of the material and its density. Thinner materials that are easier to cut through, like paper, require less power to cut and must use a slower speed and frequency to ensure the heat of the laser does not cause the material to burn. Thicker, denser materials, like wood, require higher power, speed, and frequency settings and are able to absorb more heat from the laser before burning.


HERE IS THE FINAL RESULTS ASSEMBLED

USED FILES