Presentation Files
Poster, VideoOriginal Files
Mold, 3d printing 1, 3d printing 2,OUT-Board, OUT-Schematic, OUT-Code
IN-Board, IN-Schematic, IN-Code
Go to


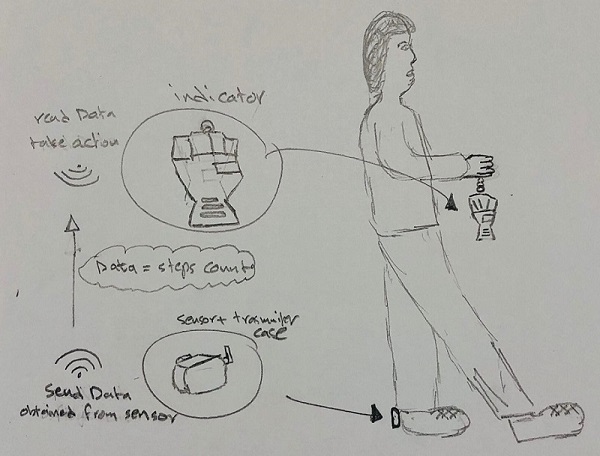
Is a device that can be attached to shoes or footwear to keep track of your daily steps count without being very obvious. the device will have two parts one containing the sensor and communication device and the other part will have LEDs to indicate the amount of steps achived. so if you walked a 100 steps it light up only one led and for each 1000 another led will light up. untill all of them are led.
Although there are multiple options available but non of them is not eye catchy or easily accessible. That is why TrackWalk is good for people who dont like to wear watches or forget to use thier phones or just dont like to be countinously asked about thier progress.

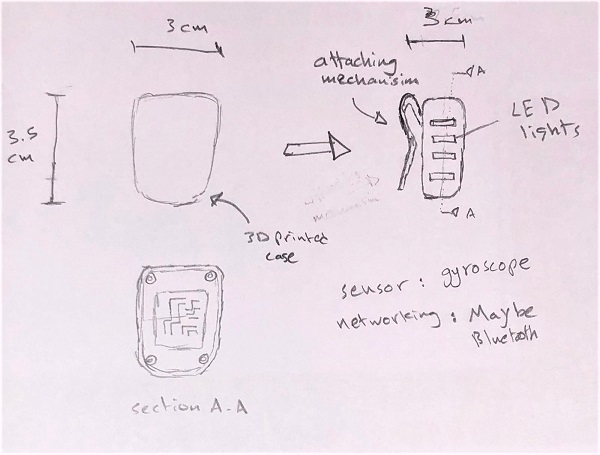
this is a simple sketch of the idea. the device is small and can be attached to easily.

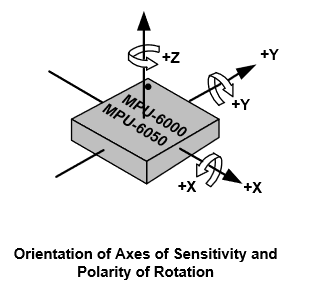
mpu/itg module (accelerometer) will be used to measure the step count.
For now to power the device i will use batteries but in future i want to implement a previous fab academy project made by Aline Becq to harvest the energy from walking. togther i beleive it will make for a great package.

for this term the scope of work will be to make the sensor holder and the indicator case each with a pcb that communicat with one another and would look something like this.

bill of material needed for this project are listed below:

i decided to make this part by molding and casting method. because i think it will be much fun if a person after finishing thier daily goal of walking can get a reward and that reward would be the indicator case itself. so everydady you get to eat the indicator once youfinish the daily gaol and then cast another one to use it for the next day.
so i started the design of the mold i chose this fist design because it indicates that "yes you can do it" so that every time you look at it you will feel someone is motivating you.
the i exported stl file and took it to srp player the cam software used for milling. i used a block of wax to make the mold.
then before gaving it order to start i set the origin at the center of the block and did the z leveling using the z prob and made sure that the tools that i want to use are in thier propar place.
once everything was ready i started the milling process i had some problem like the shapes was breaking during the milling and i had to repeat it again.
after several triels i managed to get to the desired molds. then i started preparing the silicone mold i used mold max 10 because we did not have the food safe material. for mixing the componants you must weigh Part A and B using a gram scale
i left it overnight to cure and the next day it was ready for casting.
he i want a simple compact design for the case all it had to be is small and invesible and attachable so idesigned the case in solidwork the used cura to get the gcode and then 3d printed it.
i had to print it severel times first becasue the filet was making the corners realy thin and it would breack easily so i fixed that by increasing the thikness of the material and reducing the filet size. second thing was that the oriantation of the printing parts was making them weaker and it was breaking upon snaping them together.
i need to communicate between two boards wirelessly. so i started by exploring the different options available to me in the lab.
the ir transmitter and reciver was the first option its ideal because of its capabilities to transfare small data. but the shortcomings of ir communication is that it requires line of sigt and they have to face each other which is not possible in my project. i had to opt for other option.
the bluetooth module hc 5 seemd another good wireless option but in my research i found that most people complained about the troubles to reconnect once the connection is lost and you would need to troublshoot alot and again this seems like a hastle to me specially if everytime i need to do this i would have to get it out of its place and troubleshoot it but never the less i gave it a try an i wasnt sucessfull. one issue i would like to point is that be carefull which modue you are using. because the HC 06 is only a slave so you cant use pair of the same yould need to have one of them HC 05 or pair of the later.
then i used the NRF transmmiter and reciever i liked this one the most since it can send the data without much problem you dont have the reconnection problem nor the clear sigt issue the only condintion is to stay within the same area which is the application of my project. so i started by testing it with arduino.
the first board needed the accelerometer sensor with the nrf and the other boaard will use led. to connect the MPU i just needed 4 pins voltage, ground , SDA and SCL to transform the data. with this i stated building the circuit on arduino. i tried different modules of the MPU with the same code until i found the MPU/ITG this one i could verify that its working.
the code is simple in the input board it gives order read date from the MPU, then the data from the MPU is manepulated to count the steps. then a parameter called count is sent via nrf to the input board where it have a condition if the step count is certin number then it lights up the led and so on. i needed to include some libraries for the nrf and the mpu.
i started designing the board using eagle in addition to the componant mintioned before i will need an atmega to make this board i first got my hand on atmega 16u and build my design around it
i used the same file from eagle but removed the sensor pins and added led pins.
after that i exported 3 files from eagle one for the traces one for the holes and one for the cut.
i did the same for the other part as well and then took the files to rolland machine to fabricat the boards.
the results are good and ready to be soldered.
after putting everthing together and in its place this how the device looks. my board and the design were not very much compatible with each other this will be fixed after fab academy. for now its doing what it suppose to do.
