Week 17. Machine Design
![]()
My contribution to the common cause
This week was interesting for me.
The core of our machine is Arduino UNO. We have a button as an input and a stepper motor, which moves a cart with a plastic cup, and a servo, which rotates and drops a tablet of effervescent vitamin C, as output. To operate the stepper motor we used a stepper motor driver which we've found in FabLab (it took some time to find it) Pololu DRV8834. Lucas was in charge of coding and I was doing the assembling and soldering. In the meantime, he used me as a yellow duck to walk through the logic of the code. I like to think, that my precious comments helped him to make the final code nice and neat as it is now.
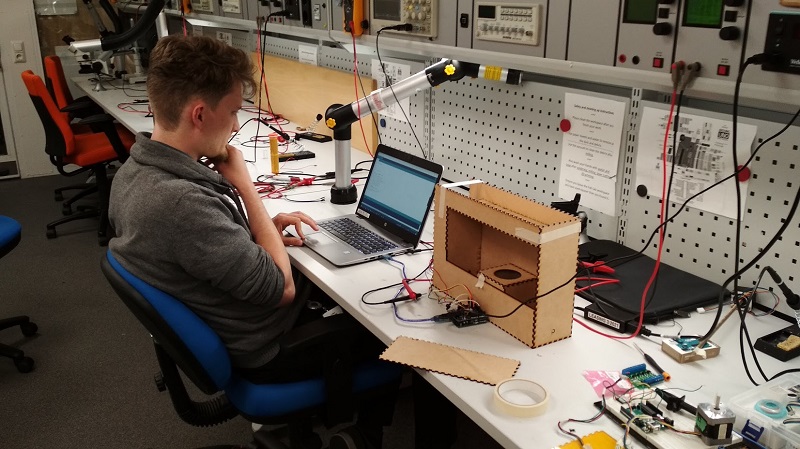
First, I put the body of our machine together using PVA glue (it works just great with MDF). I left left, front and top faces holding only by pressfit joint for better access to the moving parts and electronics. Servo is attached to the top face with two 30mm long M3 screws. Button I attached to the top face with a hot glue gun. Stepper motor is attached with 4 mounting screws to the spacer inside the box. Arduino is placed on the other side of the same spacer and attached with 3 mounting screws. Later we added another button to the spacer. The idea is that when the machine turns on it must check the position of the cart. In our design when the machine turns on it move the cart back until is press the button on the spacer. In that way it will never hit the right wall ever again.
To make our life easier we used a prototyping shield from my Arduino UNO kit. It was very handy.
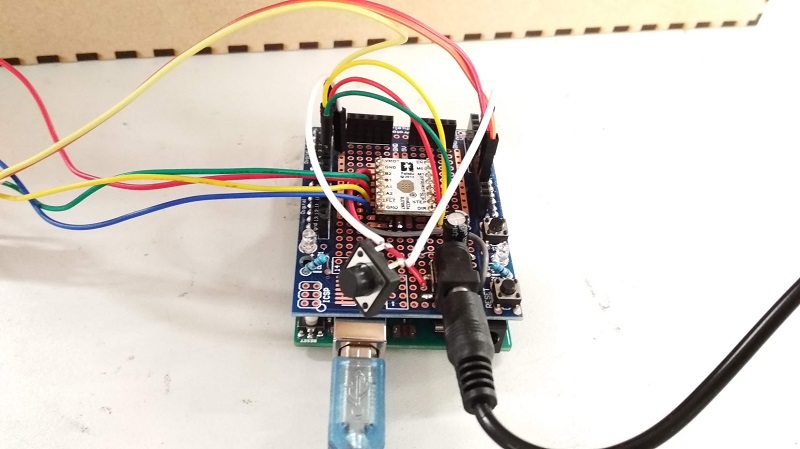
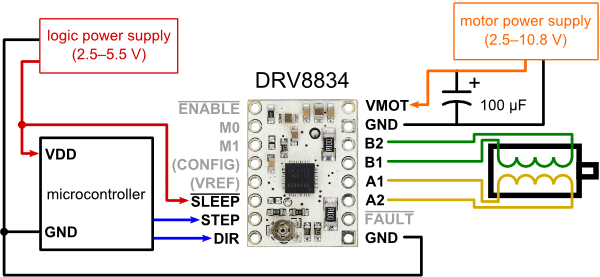
To run the stepper motor I added an additional power In from 9V adapter.
After the machine was finally put together, I shot some videos and shared them with Perttu so he made our final video.
4. The Results of the week
- VitaFab is alive and brings us some vitamins
- We successfully used a stepper motor, servo motor and several buttons.
- I tried 50mm Helios 44-m lens in videography and I liked it.