Week 14. Networking and Communication
Go to:
1. Group work
Task: send a message between two projects
We worked all together on this week group assignment. We randomly choose some board to make separate nodes. We tried to communicate with Bluetooth module [HC-06] to a different project developed in the previous week. We program each board selected as Jobin_Node1, Sahan_Node2, Mikel_ Node3 and Yasir_Node4. All the board we programmed and connected serially and control through Bluetooth applications. By pressing buttons in an app on the phone we can light up LEDs on the specific board.
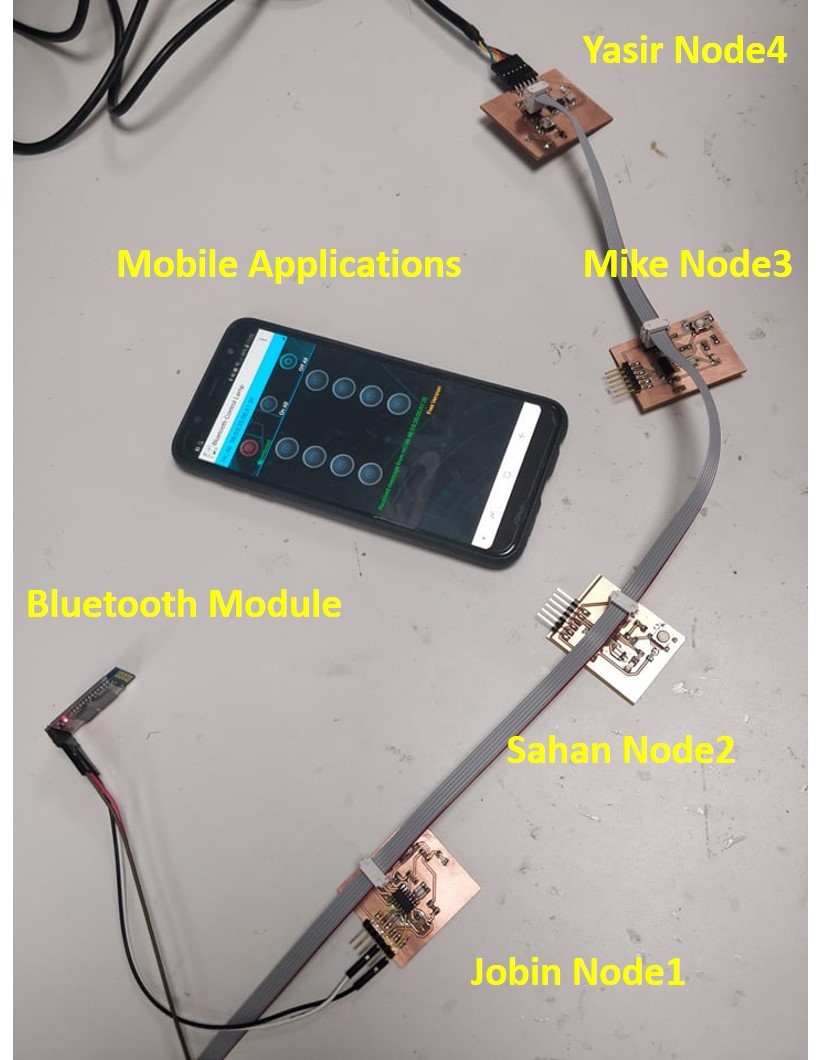
Bluetooth to serial communication
All code we used can be found on Jobin's page
2. ATtiny and serial
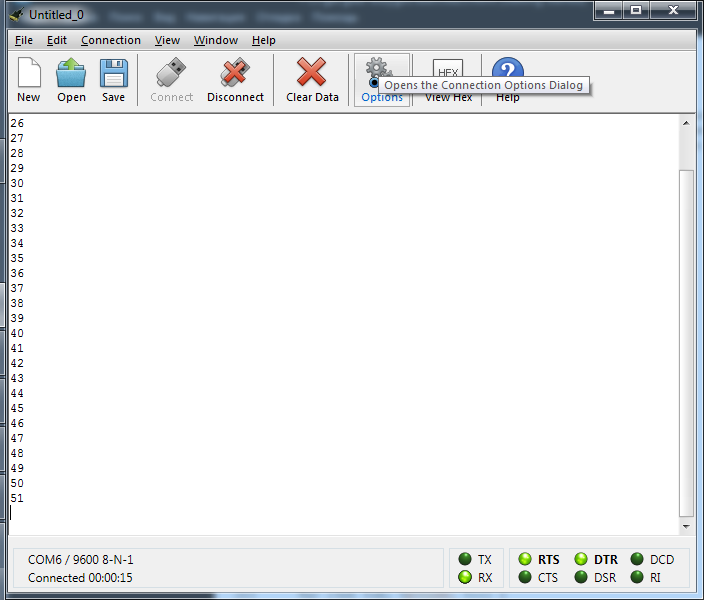
I had some troubles making my ATtiny communicating via serial. With some help from our local instructor Ivan I made it work. Below I leave a simple code example which sends numbers from 0 to 99 to the serial port so you can test yours. If it doesn't work on your board check:
- Clock on your board
- Clock selected in Arduino IDE Tools
- Tx/Rx pins
- Try to burn the bootloader again
#include <SoftwareSerial.h>

SoftwareSerial mySerial(0, 1); // RX, TX

void setup() {
  mySerial.begin(9600);
}


void loop() {
  for (int i=0; i<100; i++) {
    mySerial.println(i);
    delay(500);
  }
}
Burn the code to your board and open the terminal (com6 [check the port number from Device manager]: 9600/8/N/1).
3. Individual assignment
Task: design, build, and connect wired or wireless node(s) with network or bus addresses
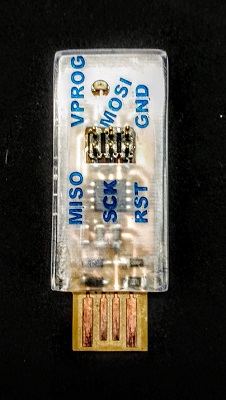
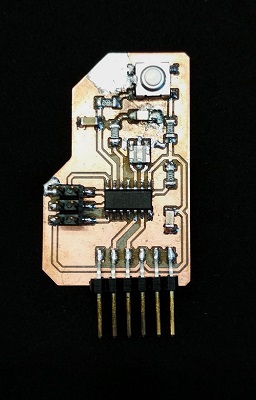
Hardware for this week:
 |
 |
 |
 |
 |
 |
 |
More information about the board you can find on Electronics Design and Input Devices pages.
I found Jari's assignment very helpful.
What he does is: every board has it's own id stored in node const (1,2,3 etc..).
const char node = '1'; // network address
If board reads it's id from serial it does something
if (incomingByte == node) // node check
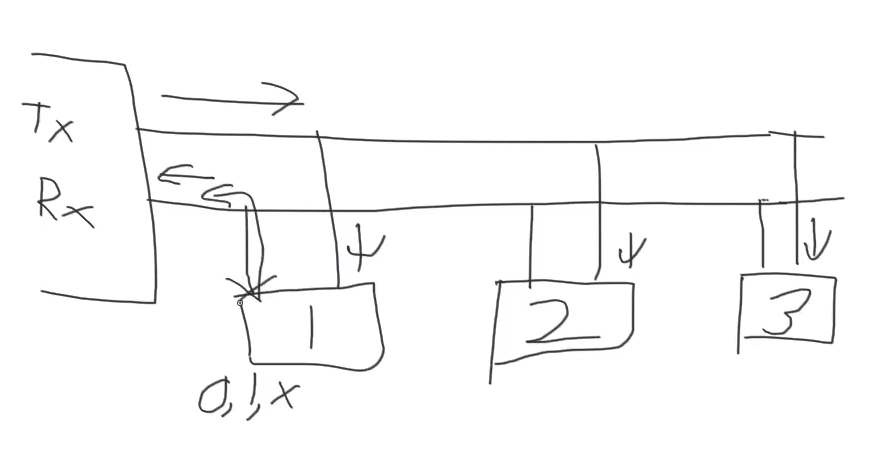
From Neil's hitech drawing we understand that, by default all boards have Rx to be input.
pinMode(Rx, INPUT);
And when writing response, we make it output for a while.
pinMode(Rx, OUTPUT);
mySerial.print("node ");
mySerial.println(node);
pinMode(Rx, INPUT);
Based on Jari's code I made mine. It turns on LED if board reads it's name from serial and sends LED status back.
#include <SoftwareSerial.h>
SoftwareSerial mySerial(0, 1); // RX, TX

const char node = '1'; // network addres
const char node2 = '2';
const int ledPin =  8; // the number of the LED pin ( = ATTiny pin 5)

int incomingByte;

void setup() {
  mySerial.begin(9600);  //open serial
  pinMode(ledPin, OUTPUT); //LED pin as output
  pinMode(1, INPUT);  //Rx pin as input by default
}

void loop() {
  if (mySerial.available() > 0) {  //blink the LED when serial available
    digitalWrite(ledPin, HIGH);
    delay(200);
    digitalWrite(ledPin, LOW);
    delay(200);
    incomingByte = mySerial.read();  //read inByte
    if (incomingByte == node) {  //if inByte = node thurn LED on
      digitalWrite(ledPin, HIGH);
      pinMode(1, OUTPUT); // open line to write
      mySerial.print("node1: ");
      mySerial.println("LED ON");  //and send LED status back
      pinMode(1, INPUT);  // RX back to input
    }
    else {
      digitalWrite(ledPin, LOW); // else Turn LED off and send "node1: LED OFF" back
      pinMode(1, OUTPUT); // open line to write
      mySerial.print("node1:  ");
      mySerial.println("LED OFF");
      pinMode(1, INPUT); // RX back to input
    }
  }
}
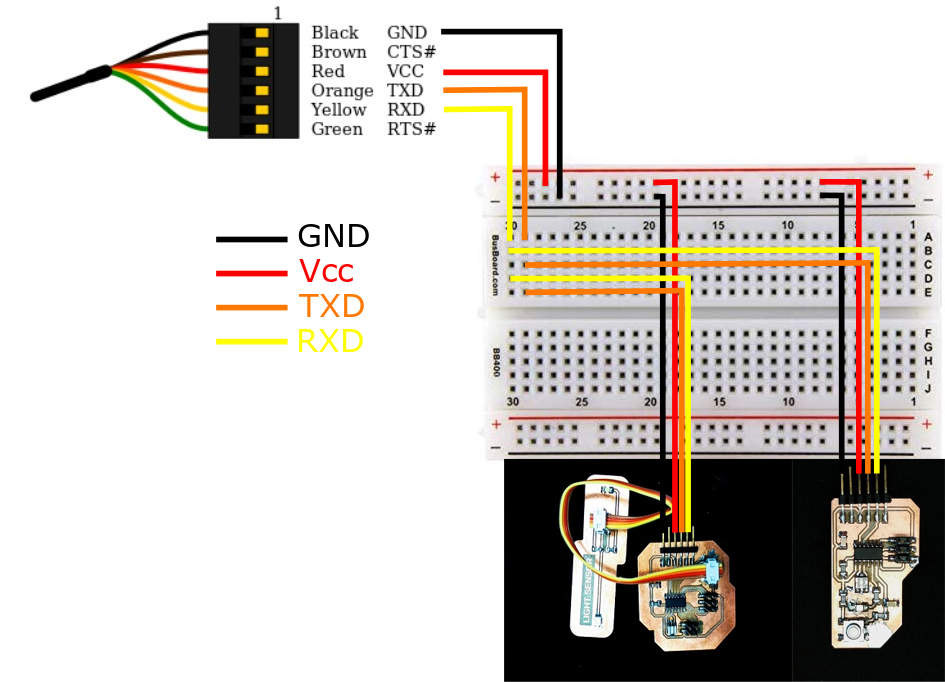
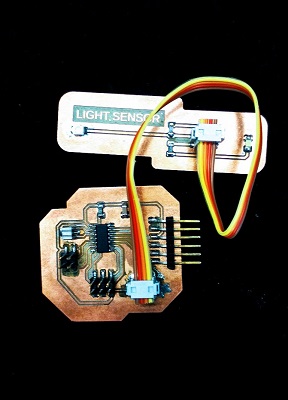
It worked fine, so I edited the code for the second board. I changed the LED pin number and added a delay(50) so the LED status message won't interfere with each other. To connect both boards to the serial I connected 5V and GND from FTDI cable to long bus on the breadboard and Tx/Rx pins to rows 29 and 30. Then I connected Vcc and GND pins from FTDI headers on my boars to the bus and Tx/Rx pins to the same rows. On the video below you can see how it works. When I send to the serial port:
- 1 — both LEDs blink when boards receive data, red LED on Hello Word board turns on, Boards send "node1: LED ON", [delay(50)] "node2: LED OFF"
- 3 — both LEDs blink when boards receive data, white LED on Light sensor board turns on, Boards send "node1: LED OFF", [delay(50)] "node2: LED ON"
- 3 (or any other symbol) — both LEDs blink when boards receive data, LEDs on both turn off, Boards send "node1: LED OFF", [delay(50)] "node2: LED OFF"
4. The Results of the week
- I made my boards work with the serial port.
- I learned how to operate my boards and get feedback from them via serial port.
- During the group work we tested the bluetooth connection. I will use that experience on my final project.
- Programming the boars became a routine process.