Week 1-2. Project Management
Go to:
1. Personal Web Page
Before the lecture dedicated to the basic WEB development by our local instructor, I knew only the basic HTML syntax. After the lecture my knowlege was multiplied significantly. I was inspired and self assured. I was certain that in a few hours I'll feast my eyes on a site of my dreams. Needless to say that I was wrong. After reading the HTML Basics tutorial and watching the YouTube lecture by Massimo Menichinelli I downloaded Brackets on my Win7 computer and started my test page. After a few hours of procrastination on it, I downloaded the template by Massimo Menichinelli and started modifying it for my needs.
The template has a all the required pages:
- Main page - Short introduction and links to othe pagers
- About - page to introduce myself
- Final project - you can add not one, but a few of thouse to document the progress
- Assignments pages - a separate page for every week assignment
- Contact - contact information
Every page has a Static navbar for easy access for every page. Exercises and Final project sections have a drop-list with links to different pages. The list of the elements can be edited from exercises-menu.html and project-menu.html files.
HTML
Some HTML and CSS tags I used (instead of using style="" I added parameters to fabacademy.css file):
        <div></div style="margin-left: auto; style="margin-right: auto">            - centered container.

        <p style="text-indent: 20px"></p>  - a paragraph with 20px indent

        <h1><h1>, <h2><h2>, <h3><h3>...  - different level headlines

        <span></span>                            - used to apply different style inside other tags

        <img src="link_to_the_imge"> - image

        <pre></pre> - text as it is, used in this block to show HTML tags

        <b style="color: red"></b> - bold and red text

        <a href="https://www.google.com/">www.google.com</a> - link to google
        <a href="#">Go to top</a> - link to the top of the page
        <a id="mid"></a> - anchor can be placed anywhere on the body of the page.
        Use <a href="mid">Go to mid<a> to create a link to the anchor

        <ol>                                     - ordered list
            <li>element of the list №1<li>
            <li>element of the list №2<li>
        </ol>

         <ul>                                     - unordered list
            <li>element of the list<li>
            <li>element of the list<li>
        </ul>

        <table width="100%" cellspacing="0" cellpadding="0"> - 1x2 table with zero space between cells
            <tr>                                             - line
                <td>1</td>                                 - cell 1
                <td>2</td>                                 - cell 2
            </tr>
        </table>

        <video style="width: 100%"; controls>                -video with controls
            <source src="link">
        </video
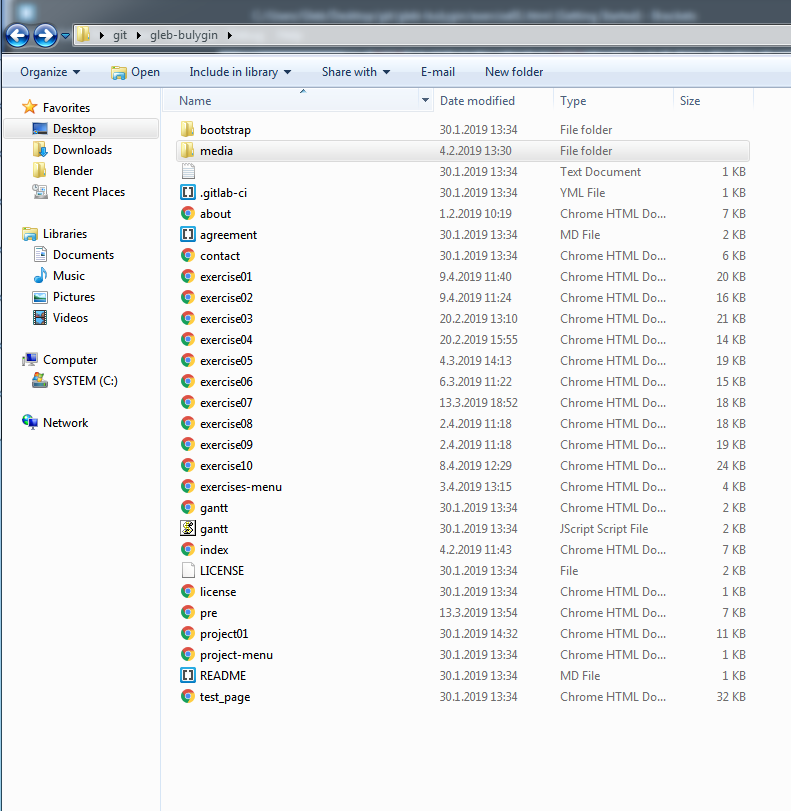
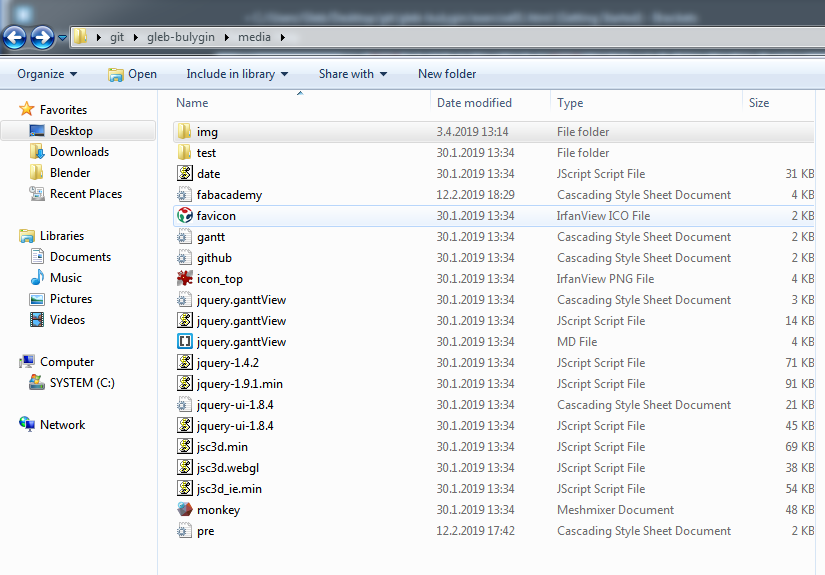
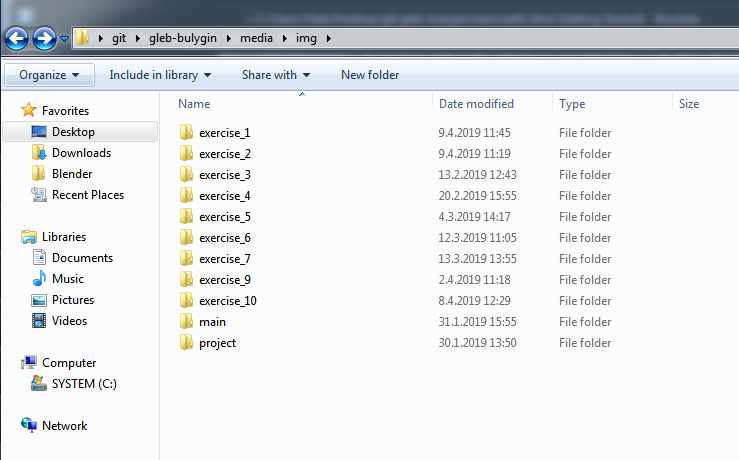
The website file structure
Scroll Up button
Using the power of Google I added a very nice scroll-up button to my page. The source here is in Russian but I leave the same instructions below:
You'll need a button image. I used that one:icon_top.png
![]()
Add this code below to your .css file. Here you can set the opacity of the button and its position on the page. For exemple on this page go_to_top button is located in 150px from the bottom and 30px from the right side of the page.
        .scrollup{
        width:40px;
        height:40px;
        opacity:0.3;
        position:fixed;
        bottom:50px;
        right:50px;
        display:none;
        text-indent:-9999px;
        background: url('icon_top.png')
        }
And then add this code to the head of your page. The first line connects a jQuery library to your page. The second script shows the button when you scroll the page down and smoothly returns you to the top when you click on it.
        <head>
            ...
            <script src="http://ajax.googleapis.com/ajax/libs/jquery/3.3.1/jquery.min.js"> </script>

            <script type="text/javascript">
            $(document).ready(function(){

            $(window).scroll(function(){
            if ($(this).scrollTop() > 100) {
                $('.scrollup').fadeIn();
                } else {
                $('.scrollup').fadeOut();
                }
            });

            $('.scrollup').click(function(){
                $("html, body").animate({ scrollTop: 0 }, 600);
                return false;
            });
            });
            </script>
        </head>
All that left is to enable the button by adding this line of code to the end of the body of your project:
        <body>
            ...
            ...
            ...
            < href="#" class="scrollup">Up</a>
        </body>
One more useful thing I've found is this web page where you can find nice combinations of google fonts. I used ALMENDRA DISPLAY and CARDO combination on my Test Page. Probably, I'll change fonts on this site, but for now I like it how it is.
2. Git and publishing
All FabAcademy files are stored in one project on https://gitlab.fabcloud.org/. Fabacademy IT gave us permissions so we can access the repository.
I downloaded Git Bash for Windows on my Win7 computer. I opened a Git tutorial and following it I did this week assignment.
I set my user name and email address by opening Gitbash and typing:
        git config –-global user.name “MY_USERNAME”
        git config -–global user.email “my.email@oulu.fi”
Then I generated public/private key pairs in order to connect securely with remote repository using SSH protocol.
ssh-keygen -t rsa -C "$your_email"
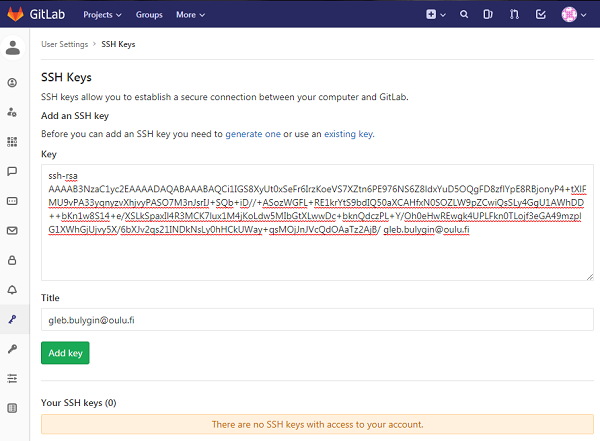
Then I copied the public key by typing the command below and added it to my GitLab account (profile settings/ssh keys).
clip<~/.ssh/id_rsa.pub
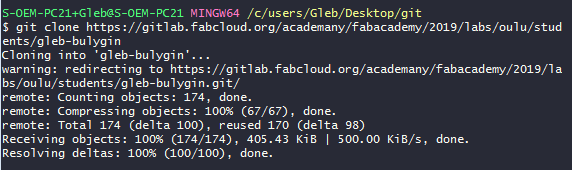
Then I created a local copy of my Fabcloud repo om my local machine using git clone command (to paste into Gitbash use "shift+Ins" combination). Important! Before cloning your repo change the directory by using cd folder_name command (change the path to your git-folder). To move one level up use cd ../
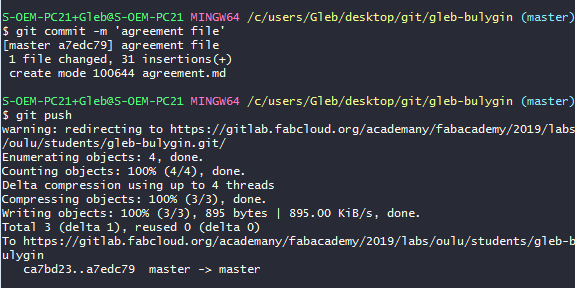
Then I pushed my agreement file to my repo to check if it works.

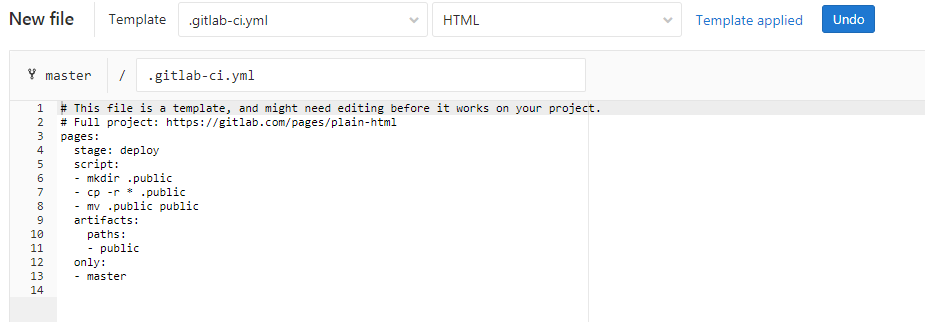
After that I created a local backup of my repo and deleted everything from my repo using git rm * -rf command (* -all files, -r - recursive -f - force). Then I uploaded my files to my repo. I had them there, but nothing worked. The thing was I hadn't created .gitlab-ci.yml file which is needed for for publishing the static html site. You can read more about .yml file extension . I've tried to solve it by reading tutorials, but I managed to do that only after my local tutor helped me. The solution is very simple: go to Repository/files, add a New File. Name it .gitlab-ci.yml and choose HTML from the templates. Voila, now it works!
3. Project management
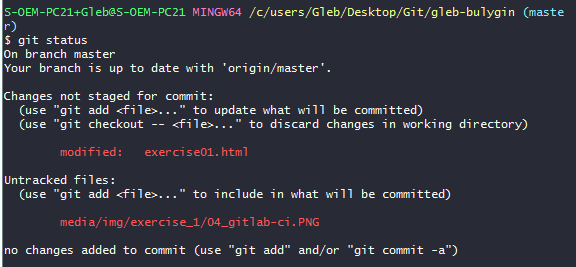
Now I have a local copy of my repo. I can change any file and add a new one. List of changes you've made can be checked by typing git status in the Gitbash window (you still need to be in the right directory). It's important to do git pull and git status before you start changing something locally to keep your local repo up to date with your remote repo.
Here are Git commands I use
        Routine git workflow cycle:

        cd c:/git/gleb-bulygin                            - go to local git folder
        git pull                                          - pull files from the remote repo
        git status                                        - check what files are changed
        git add -A                                        - add all changed files
        git commit -m 'comment'                           - commit changes
        git push                                          - push commited files to the remote repo
        ________________________________

        To set up:

        git clone "link_to_remote_repo"                   - creates local copy of the remote repo
        git config –-global user.name “MY_USERNAME”       - set username
        git config -–global user.email “my.email@oulu.fi” - set email
        ssh-keygen -t rsa -C "$your_email"                - creates ssh key pair

        keygen command creates id_rsa.pub file in your user root folder (c:/users/user/.ssh).
4. The Results of the week
- I created my own web page using a template and posted it online with almost zero knowledge about HTML and CSS at the beginning. I took slightly more time than was planned, mostly because of my procrastination on a test page. Definitely, if was wiser to start Git and publishing part a few days earlier.
- I modified the template by editing fabacademy.css file.
- It's slightly faster to make a small change (like correcting spelling) from the web interface, but to make any significant change it's better to use Brackets and Git Bash (or whatever you use there).
- Tracing the history of files changed is cool, even for a small and simple page like mine. No doubt here.
- The final project idea is formed and posted on the project page.