Wildcard week: vacuum thermoforming
Week 19
Like every week I started the week planning the assignment.

Vacuum thermoforming
For this wildcard week, I have decided to use the vacuum thermoforming machine that we have in our lab. The vacuum thermoforming is a technique where a sheet of plastic is heated to a forming temperature, stretched onto a single-surface mold, and forced against the mold by a vacuum, taking the shape of that mold.
My goal with this assignment was to produce the packaging for my final project. My final project is thought of as a "kit" that you can get and then assemble your own lamp, so it is important to consider and think about how the packaging is going to be.

The vacuum thermoforming machine that we have is a CR Clarke 750FLB. It has a maximum work volume of 480x430x150(h)mm. It can be used with any thermoformable plastic (the one that works better is the PVC) between 0,3mm. and 3mm. The bed, where we place our mold, is perforated to make easier for the vacuum to absorb the air. The mold has to be made in a material that lets the air pass through it, such as wood. You can also use foam but you need to protect the mold with some sealant or paint, otherwise, the heat will melt the mold, the sheet of plastic will stick to it and it will be impossible to remove the mold. From my experience, I don't recommend to use 3d printed pieces as a mold, the heat melts the mold very easily. I have also tried with a plaster mold and it doesn't work very well as the plaster doesn't let the air to pass through.
Design + 3D CNC milling
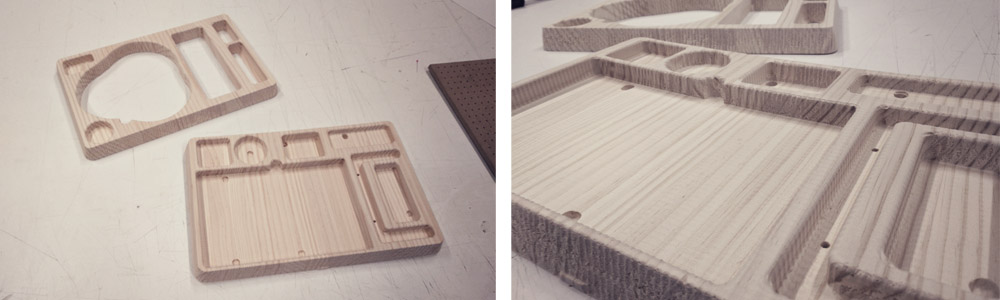
I started designing the mold in Rhinoceros 3D. Keeping in mind the maximum size of the vacuum thermoforming machine, I decided to organized all components and pieces in two trays that fit together one above to the other one.
I made all the corners rounded, as in this way is much easier to remove the plastic from the mold once done. I also did the spaces a bit bigger than the real size of the components (5mm.) so it should be easy to take off the different pieces. I also added four tabs, one in each side, so we don't take the risk that the piece moves while machining.
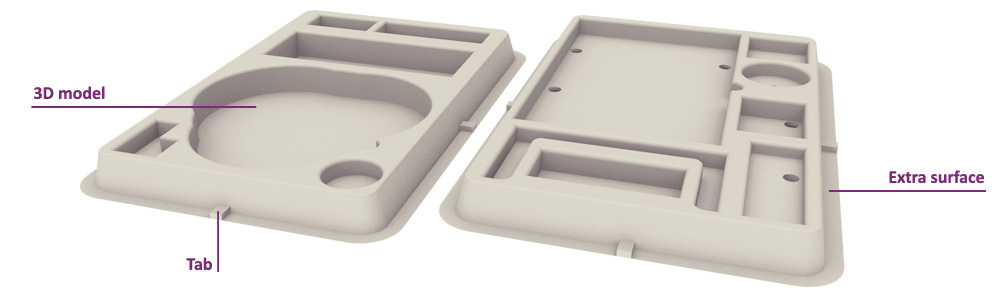
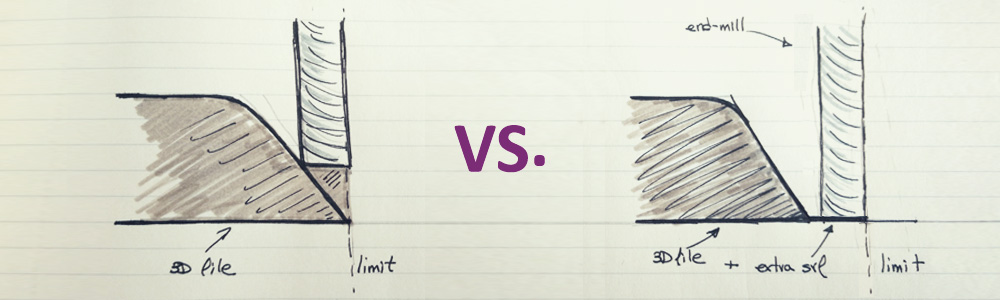
I also added a surface on the bottom of each piece to let the CNC reach the base of the mold. I used Aspire to prepare the files for the CNC, and I don't know in other software, but Aspire only work over the top of the 3d file that you import into the software, no matter how big in the material. That means that if the edge of your object is inclined, if you have an angle smaller than 90º, the tool never will go further than the limit of your object, it will stop in the last possible point, and the finish will not be good. That why you need to add a surface on the bottom in those cases, a bit bigger than the diameter of the end-mill that you are using, to "trick" the software.
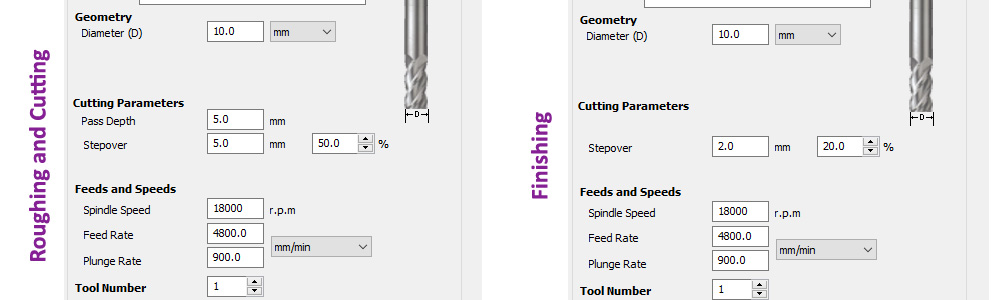
For the mold, I used a striped wood board of fir/pine of 30mm. and I decided to use an end-mill of 10mm.
In Rhino I exported my 3d files as a mesh into .dxf and I imported them in Aspire. Here I set the dimension of the material and the different footpaths: the roughing to remove most of the material that I don't need as fast as possible; two finishing, one in each direction, to get the final shape, and then the cutting to finally cut the tabs.
Here you can see the settings that I used:
Once all toolpaths are calculated, Aspire gives you an estimation of time (around 1:30h. each mold in my case) and also a preview of the job that let you identify possible errors:
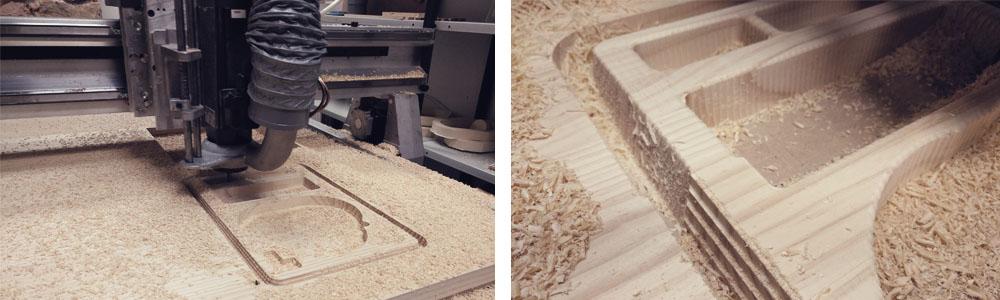
After checking that everything was ok, I saved the file, I put the 10mm. end-mill, I chose the xy0 and I set the z0 with the sensor. Then I started the job (I cut each mold separately). Bellow, you can see some photos of the process and the final result:
Vacuum thermoforming
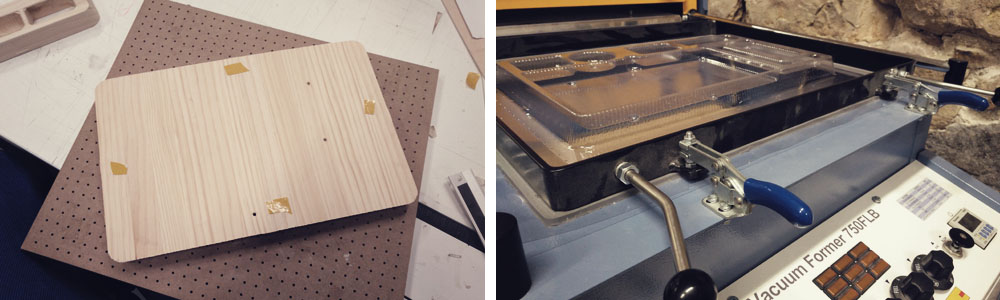
After sanding and cleaning out the dust of the mold, I made the copy in plastic (PVC 0,5mm).
I turned on the machine. The machine needs around 15 minutes to warm up, in order to get a homogeneous heat in the whole surface. Then I placed the mold to the perforated base and I fitted with double-sided tape. With the mold inside, I clamped the plastic. The plastic needs to be a bit bigger than the hole, otherwise, the clamps will not be able to take it well and the vacuum will not work properly.
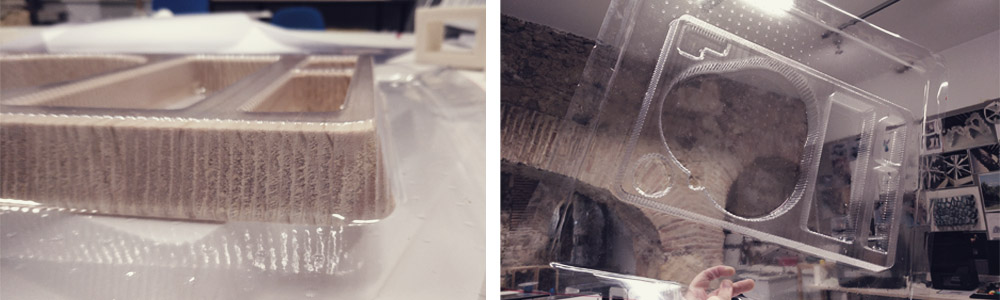
Once everything was ready, I moved the heater over the plastic. I heated it up during 2 minutes (this depends on the type and thickness of the plastic), then I removed the heater, I turned on the vacuum bomb and I move up the base with the mold. Then the machine makes the magic!!! The vacuum absorbs the air and the flexible plastic take the shape of the mold. You need to keep it there a bit, so the plastic can cool down a bit and keep the shape. Then I turned off the vacuum bomb and I moved down the base. Finally, I unclamped the plastic and voilá! Done!
The process is very fast, it only takes a few minutes and the plastic copy the shape perfectly, even the grain of the wood! Apart from that, if something goes wrong you can reuse the sheet of plastic: the heater will "melt" the shape and you can make a new copy.
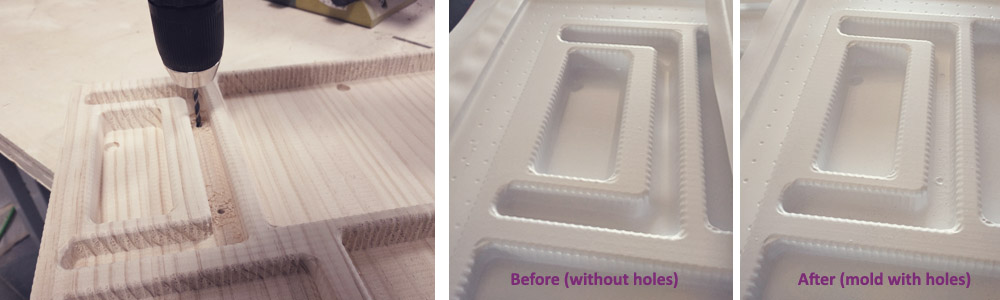
When you have small spaces sometimes is hard for the plastic to take the shape, above all if that space doesn't cross through all the thickness of the material. I have this problem with one of the spaces in the second mold. In those cases, it helps a lot if you make a couple of holes which make easier to absorb the air. Here you can see the difference:
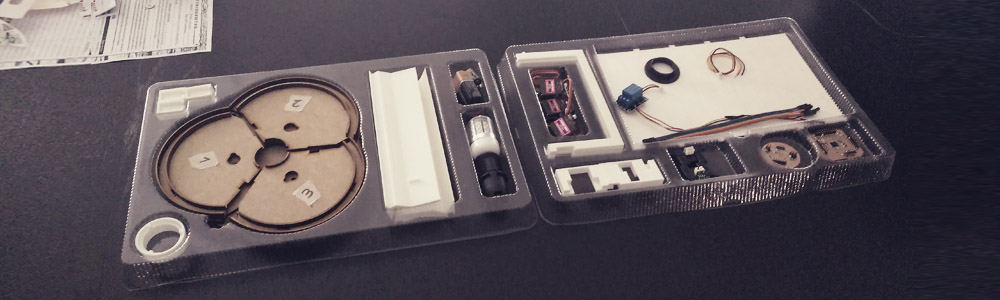
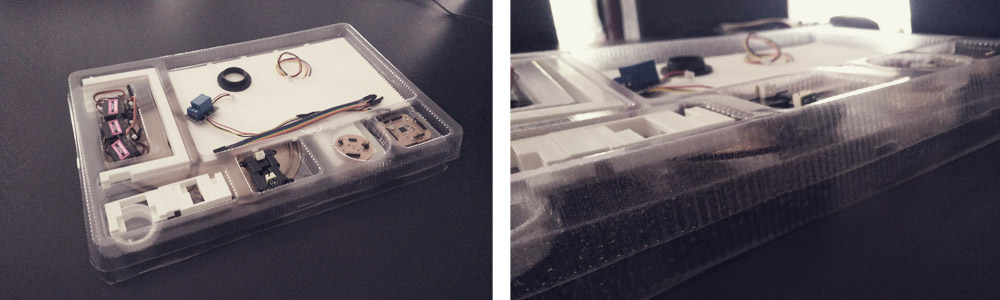
I did one copy in transparent plastic and another one in white plastic. I think I will finally use the transparent one, first of all, because when you have the two trays together you can see the layer below, and secondly because the white one looks like a hospital food tray... XD.
With both parts fabricated, I cut the excess of plastic and I put all the components and pieces of the machine inside. They fit perfectly!! I think it looks very nice :D
To complete the packaging, for the final, I will also create a corrugated cardboard box where to save these two trays and the instructions to assemble the lamp.
Extra: 3D Printing + textiles
For this week I also wanted to try to use the 3DPrinting over textiles. I thought it would be interesting to apply this technique to my final project, in order to fabricate the "folding exterior layer" of the lamp.
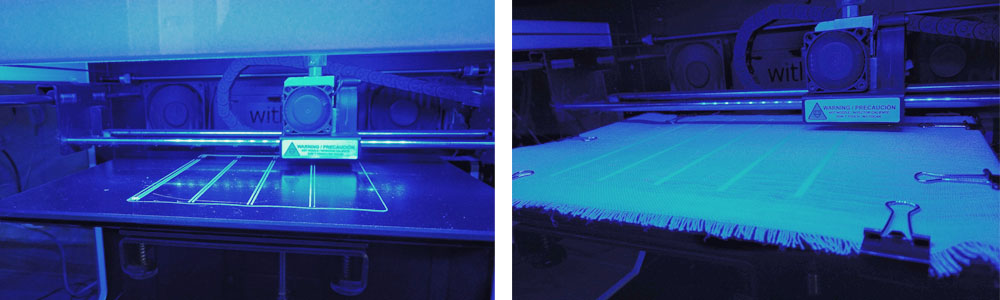
I started designing in Rhino what I wanted to 3D print, in this case, the "structure" of the folding layer, the part that will hold the textile to the above and below rails. Keeping in mind the length of the rails I made five circular sticks of 3mm. I prepared the file in Cura and I sent it to the 3D printer. When the file was 40-50% done, I paused the machine and I put a piece of linen on the base and I held it with small claps in the edges. Then I resumed the job: the printer continues printing pushing the plastic through the holes of the textile and joining both sides of the plastic sticks keeping the textile in the middle.
When the printing process was done, I took it off from the base and I cut the excess of textile. It was a bit difficult to cut it, above all because I didn't have any reference (for future printings I will prepare a template for the outline).
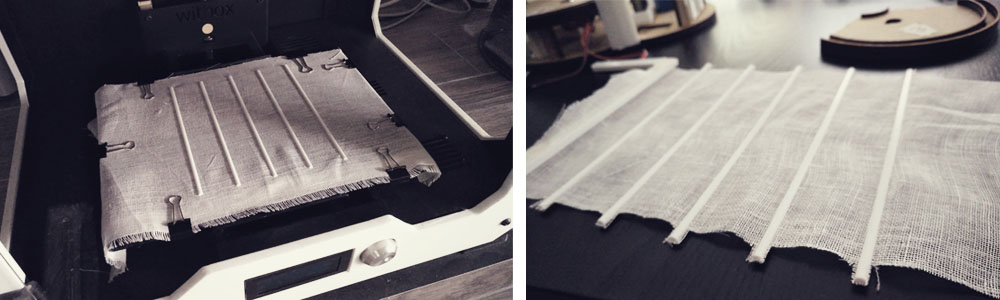
I was a little scared because I didn't know if the printer would be stuck when it drew the first layer on the textile ... But it worked very well, zero problems, the machine didn't realize the textile was there. And I'm also very impressed with the result because the two sides of the plastic sticks are really just one single piece so the final object is super strong!.
Here you can see a video with the final piece placed in the lamp. It worked very well. The only bad thing is that I cannot control in which direction the textile is going to fold, and that is something that I can do if I used paper instead. But this is not a big problem. And I think that it more interesting and it looks nicer if I used this technique.
I really love this technique, when I finish the Fab Academy I am going to get crazy with this. (When did you say that is the Frabricademy? XD)
Files
Find below the files that I made for this assignment. Please do not hesitate to download it!! I hope you enjoy it!!
Mold 01 - .stl
Mold 02 - .stl