3D Scanning and printing
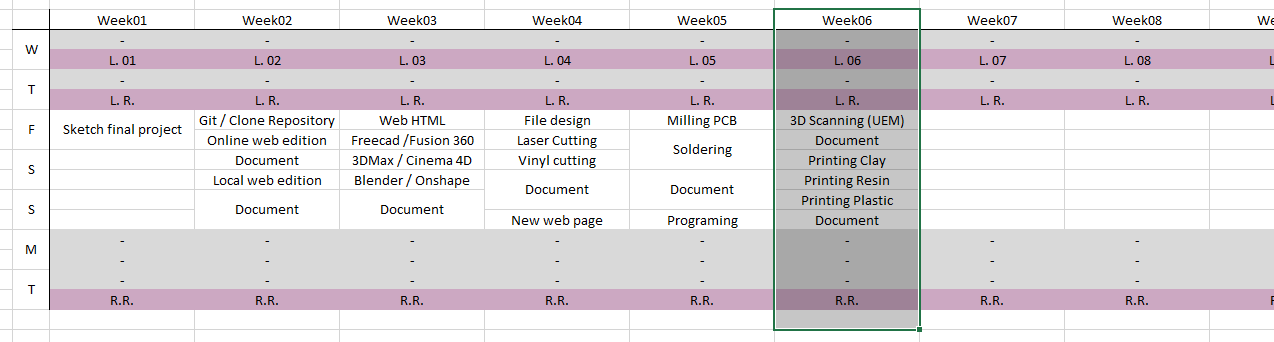
Week 06
Like every week I started the week planning the assignment.
Group assignment. Characterizing the machines
I am a remote student and none of my colleagues are in the fab academy, so I did this part of the assigment individualy.
For this assignment I used three different types of 3D Printer:
FDM - Plastic PLA: BQ Witbox 2
- Max. volume: 300x200x200(h.) mm.
- Nozzle: 0,4 mm.
- Layer height: 0,3 mm.
- Wall thickness: 1,2 mm.
- Top/Bottom thickness: 0,9 mm.
- Infill density: 15%
- Speed: 60mm/s
- Supports: no
FDM - Clay/Porcelain: Delta Wasp 20x40 Clay Kit
- Max. volume: Ø200x400(h.) mm.
- Nozzle: 1,2 mm.
- Layer height: 0,5 mm.
- Wall thickness: 2,4 mm.
- Top/Bottom thickness: 2,4 mm.
- Infill density: 0%
- Speed: 20mm/s
- Supports: no
SLA - Curable Resin: Liquid Crystal Hi-Res
- Max. volume: 200x150x200(h.) mm.
- Pixel density: 97 μm.
- Layer height: 0,1 mm.
- Exposure time: 60.000 ms.
- Bottom Exposure: 240.000 ms.
- Bottom Layers: 15
- Infill density: 100% - solid
- Supports: no
File Design
I decided to use Rhinoceros 3D to design an object for 3D printing that could not be made subtractively. The size of the object is: 60x60x120mm. with a thickness of 1,3mm.
3D Printing
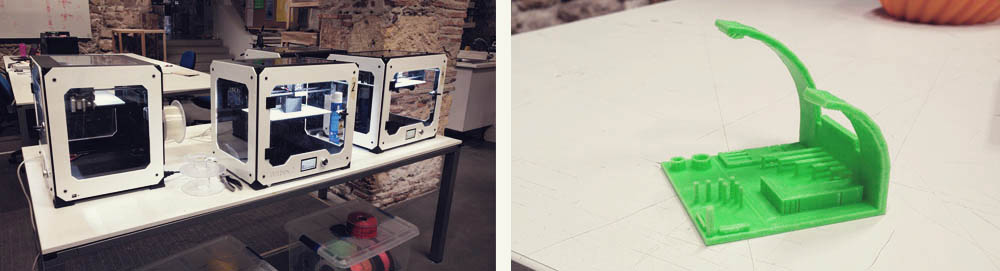
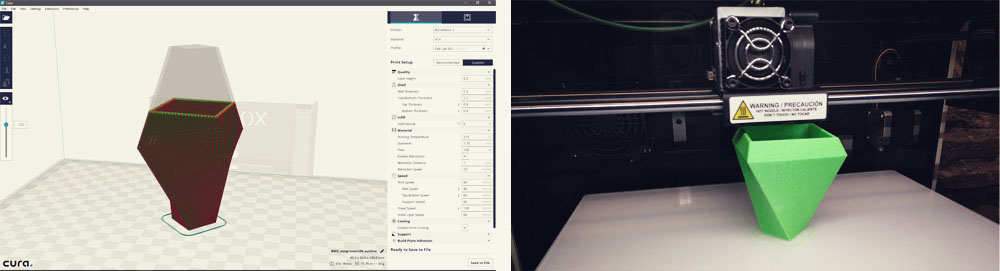
MFD - Plastic PLA - BQ Witbox 2
How does the machine work? In the head of the printer there are a couple of wheels that take the wire of filament and push it into a hot-end that melts and extrudes the plastic.
To create the gcode I used the slicing software CURA, version 2.3.1. I used the settings described before and I printed it. I did not have problems with that and the quality was very good. The printing process took 1,5 hours.
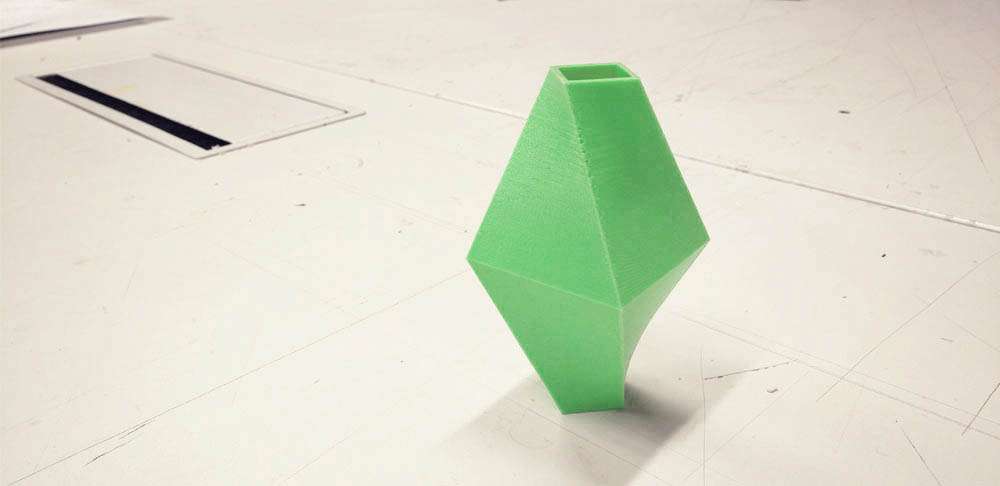
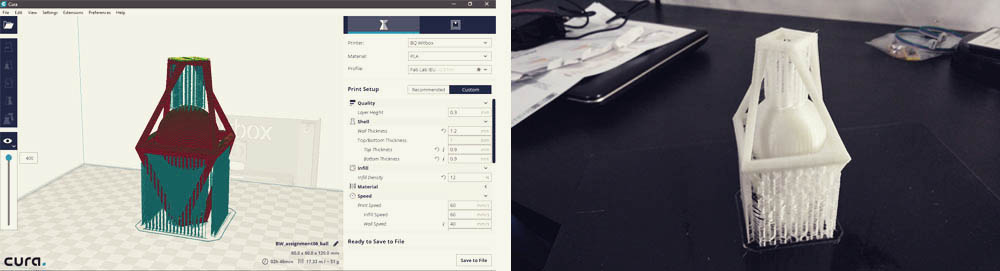
Then, I wanted also to try with a bit more complex design, and I remodeled my initial object by using the same shape but taking only the edges and including a ball inside. I used the same printing settings than before but including supports. This time the process took 3 hours.
I also tried with Filaflex, that is a flexible PLA and the result was very nice. In this case It was necesary to print it a bit slower (40 mm/s.) and with a thinner layer height (0,2 mm.).
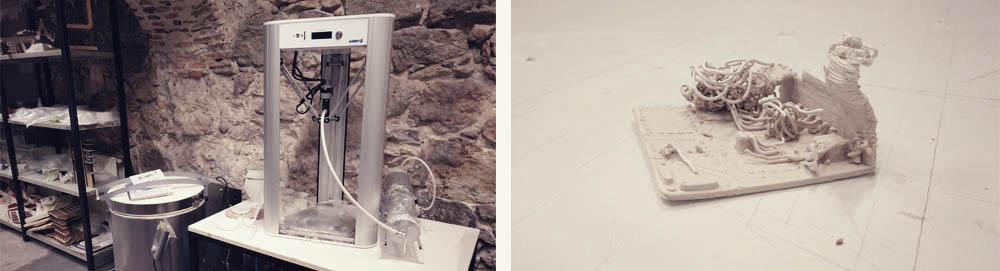
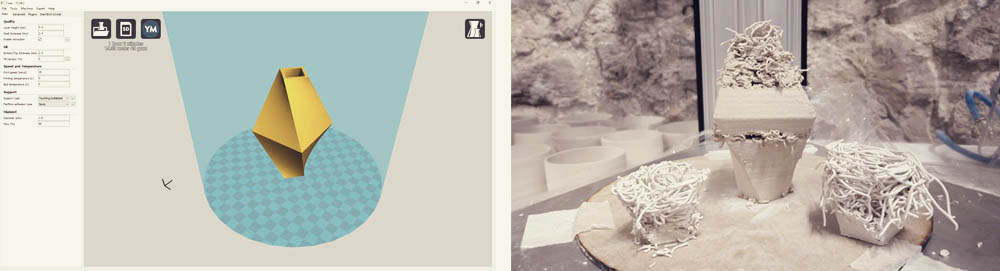
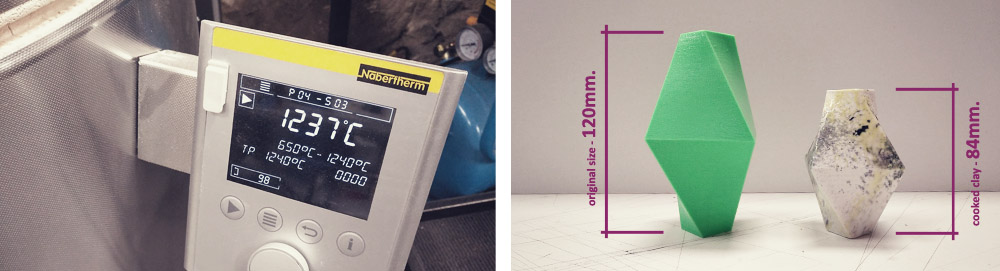
FDM - Clay/Porcelain – Delta Wasp 20x40 Clay Kit
How does the machine work? In this case we have a compressor that pressurizes a cylinder full of clay. That pressure pushes the clay to the head of the machine where there is a screw that pushes again the clay to the nozzle.
To create the gcode I used again the slicing software CURA, but this time a used the version 15.04.2, which is the last one that has the option to set a circular base. I used the settings described before and I printed it.
I sent the file four times until it worked. Due to the mouth of the nozzle (1,2mm); the material (clay, porcelain) which is “semiliquid”, and that it takes time to dry once extruded, I had to increases the thickness of the object until 3,7mm. so the piece could be stable by itself even when it was still wet. The process took almost 2,5 hours.

Once the object was completely dry, I cooked it in the kiln by 12 hours, then I let it cold down other 12 hours and then a put a layer of glaze and I cooked it again. With this machine is not possible to create very accurate models as shape and size of the model changes during the printing process and during the cooking process it can shrink up to 25% of the size.
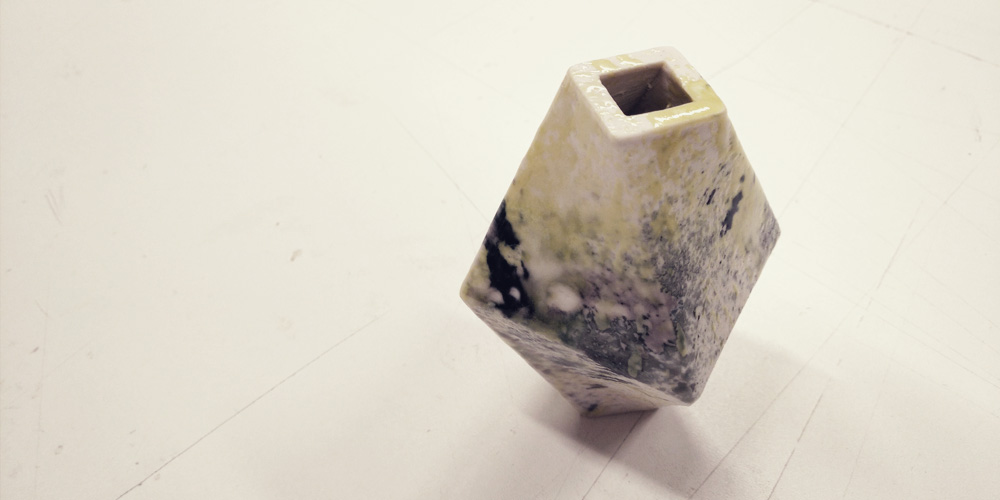
It is very tricky to work with this type of 3d printers due to the material. There is a lot of things that cannot work well, like the material is too liquid or too fat; if you have air bubbles inside of the mixture that cut the continuous fluid of material, etc. Also, to fix the problem, whatever it is, you always have to ensemble the whole printer, remove the clay, clean everything and built it again, and that consume a lot of time. Begging honest, it is a pain to 3d print in clay, but, on the other hand, most of the times the results are very cool, even those “bad” printed.
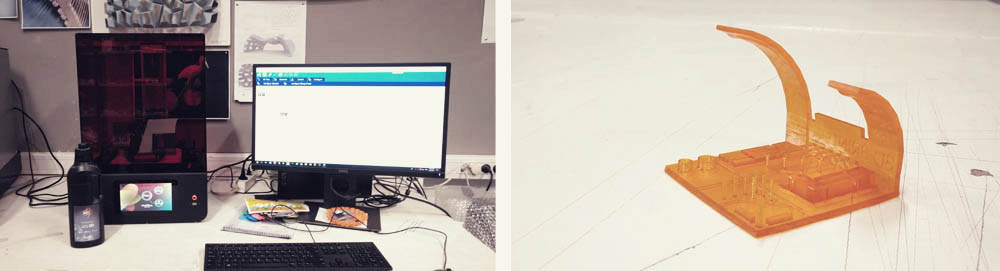
SLA - Curable resin - Liquid Crystal Hi-Res
How does the machine work? In this case we have a tank full of curable resin and under this tank there is a screen. The screen projects the different layers using a white&black code and then the resin reacts to that light and gets solid.
To create the gcode I used the slicing software Creation Workshop. I sent the file three times until it worked. I used more or less the same settings each time but the problems of the two first time was that for some reason the first layer of the object didn’t stick to the base of the machine, so I included a big base to avoid that issue. This time the process took more than 16 hours!!! O.o
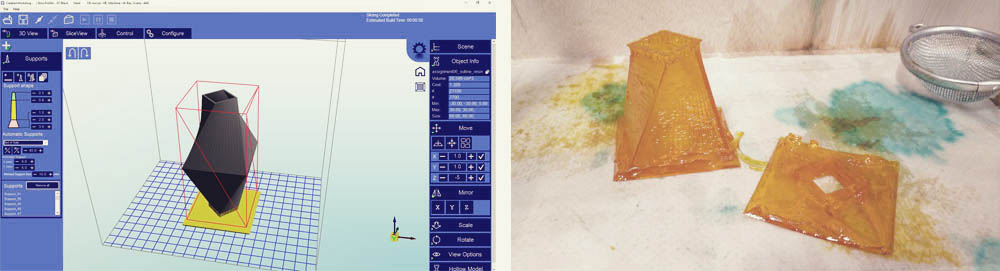
This is a very annoying machine. The process itself is very dirty and it takes so long!!! More than 16 hours for a piece of 60x60x120cm!!! Unless you have a very small and very detailed object, I think it is not worthy to use this time of technology. But for sure the level of detail and the finish are unbeatable!
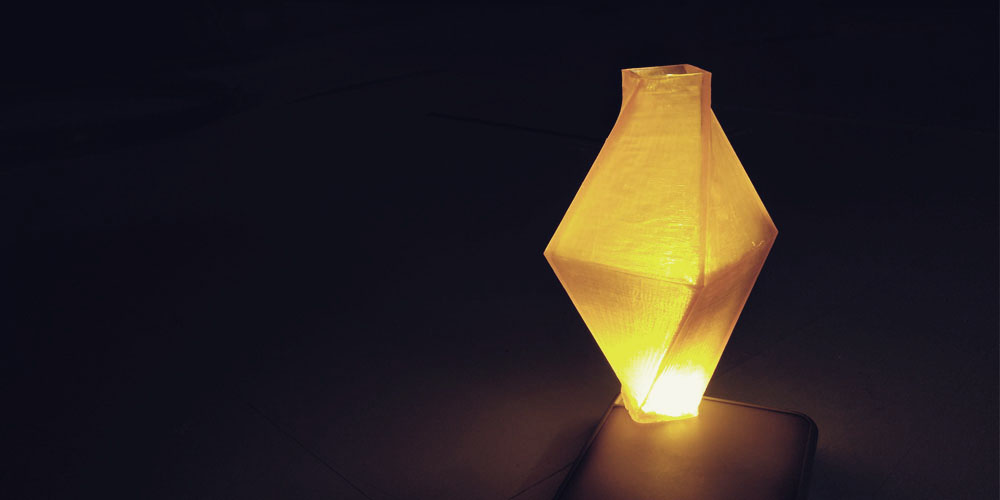
Final results
At the end I got a really nice collection of 3d printed objects :)
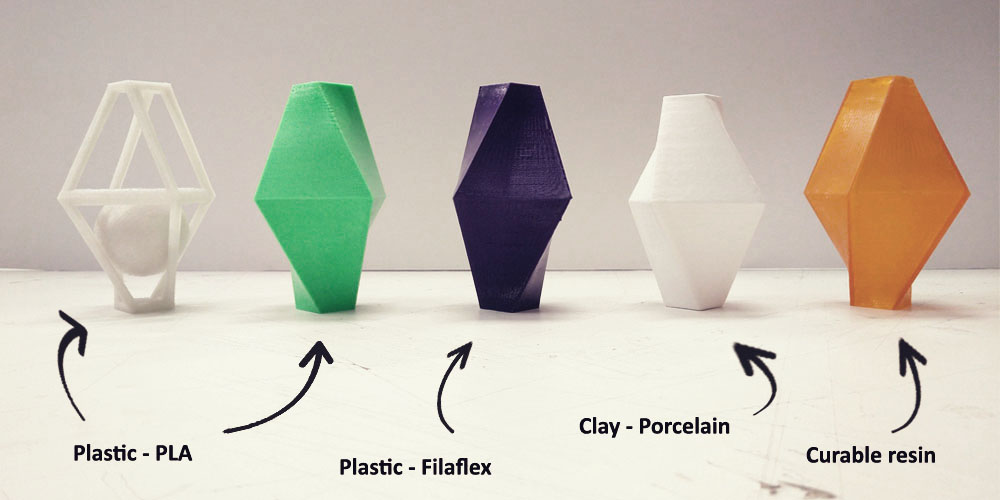
It is amazing how the appearance, even the proportions, changes depending on which type of technology and material you use to fabricate an object, even if you use the same base file. That let me realized that if you want to do an object which needs to have a very specific dimensions, maybe because it needs to fit with other one, you need to test the machine and find out its limits and characteristics.
3D Scanning
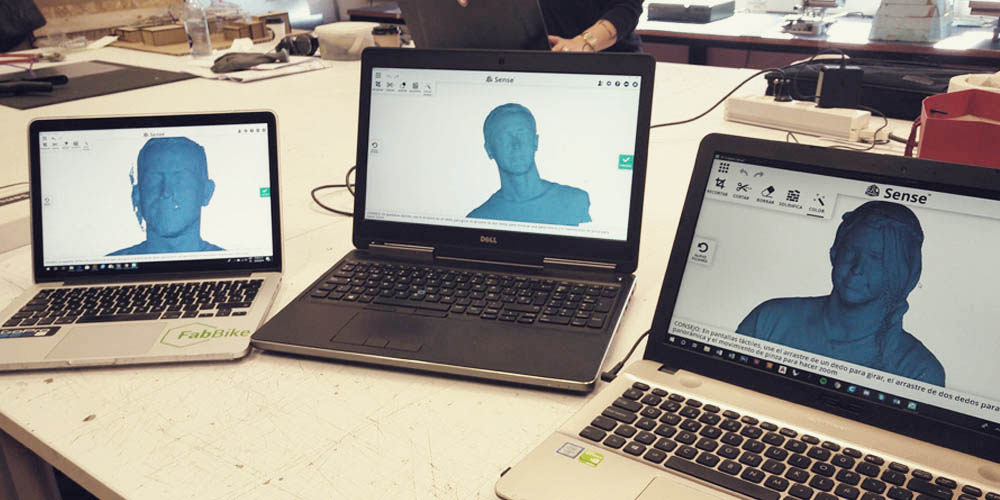
For this part of the assignment we used the Sense 3D Scanner by 3D Systems.
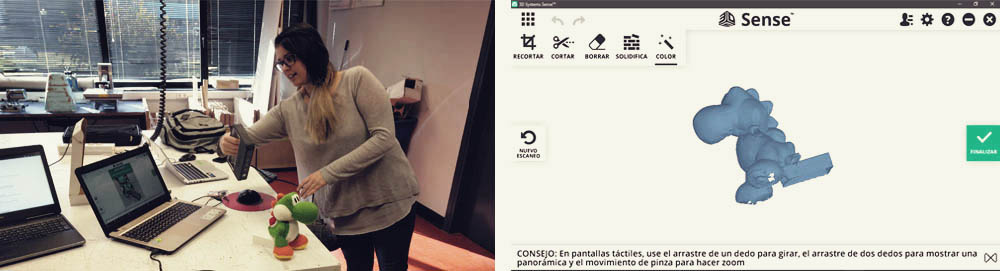
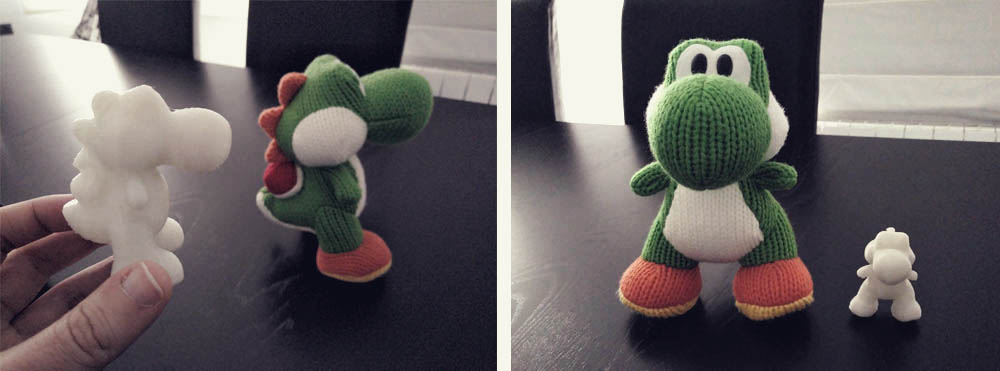
I am very impressed. The quality of the scanned is pretty good and the device is very easy to use. Also the software has a really good tools with ones it is very easy to fix the file and prepare it to 3d print. I am in love with the eraser tool!!
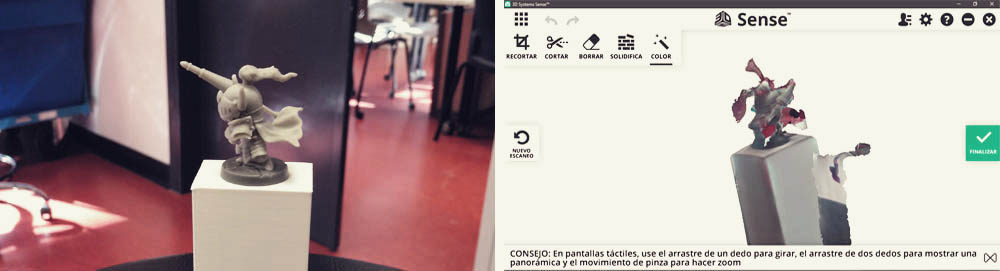
I also wanted to know the limits of the machine and I tried to scan a very small object (aprox. 40x40x40mm.), but although I configured the software with the better possible resolution, it seems that the object was too small, while scanning it was all the time lossing the reference and the result wasn’t good.
From here on, we just had fun ;D
3D Models
Files
Find below the files that I made for this assignment. Please do not hesitate to download it!! I hope you enjoy it!!
Plastic + resin - .stl
Plastic (ball) - .stl
Clay - .stl
Yoshi (3D scanning) - .stl