Week 16: Interface and Application Programming
Group Assignment
Individual Assignment
In this week's group assignment I had to compare as many tools as possible so we first read about different tools and compared them one by one. Some of them are explained below
Cloud: In cloud there are various option available like AWS, Azure, Google. AWS is the market leader on Cloud and have wide varities of services available.
AR/VR: In AR/VR there are Various games engine, Unity, Cloud Options like AWS Sumerian. Basically its Need programming background like C# for Unity, good for creating immersive experineces.
Programming Languages:
Ther are some famous and mostly used programming languages are Python, Java, Scala, Node.JS. Python is most widely used programming language, Scala is quite difficult for a beginner level. Java is more object oriented and procedural language where Python is functional language. But now Node.js is widely framework for creating full stack applications.
Blynk
Blynk supports hardware platforms such as Arduino, Raspberry Pi, and similar microcontroller boards to build hardware for your projects. Blynk supports the following connection types to connect your microcontroller board (hardware) with the Blynk Cloud and Blynk personal server:
1) Ethernet
2) Wi-Fi
3) Bluetooth
4) Cellular
5) Serial
PyQt5
Qt is a set of cross-platform C++ libraries that implement high-level APIs for accessing many aspects of modern desktop and mobile systems. These include location and positioning services, multimedia, NFC and Bluetooth connectivity, a Chromium-based web browser, as well as traditional UI development. PyQt5 is a comprehensive set of Python bindings for Qt v5. It is implemented as more than 35 extension modules and enables Python to be used as an alternative application development language to C++ on all supported platforms including iOS and Android.
Processing
Processing is a flexible software sketchbook and a language for learning how to code within the context of the visual arts. Since 2001, Processing has promoted software literacy within the visual arts and visual literacy within technology. There are tens of thousands of students, artists, designers, researchers, and hobbyists who use Processing for learning and prototyping. Download website: is under this link.
LabView
A bit difficult to learn but widely used in industrial applications.LabView does not interfaces directly with any other party hardwares such as Arduino, Raspberry Pi etc but since its a modular programming language it is able to program and read data from external party hardwares through VISA Modules.
MIT App Inventor
App Inventor has been very easy to use, just pick and place components and your done, and with the help of this App Inventor I have completed this week's individual assignment.
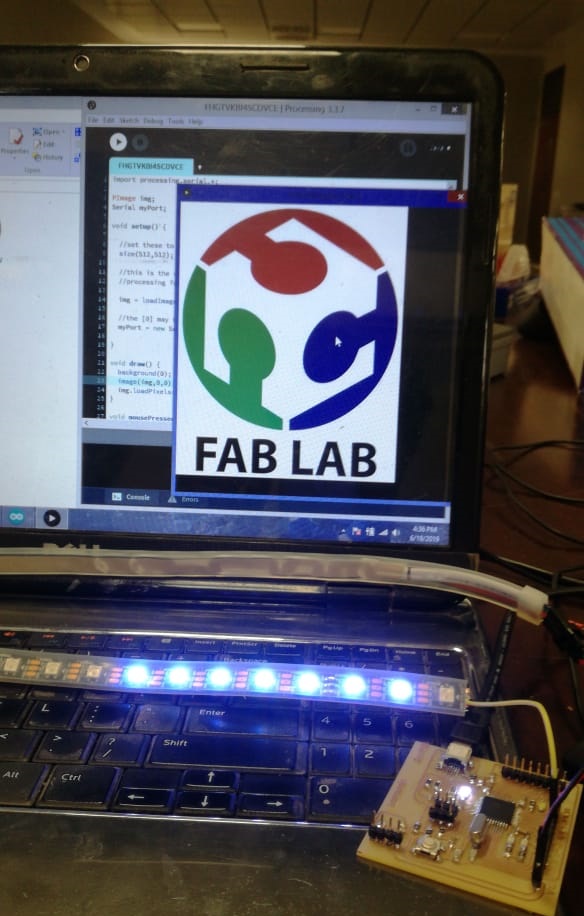
For this week's assignment I tried to make an Interface on the computer that will allow me to control rgb leds. I am using processing software where I can create interface and control leds color from computer. I read more about this software basically processing is a flexible software sketchbook and a language for learning how to code within the context of the visual arts. Since 2001, Processing is promoting software literacy within the visual arts and visual literacy within technology. There are tens of thousands of students, artists, designers, researchers, and hobbyists who use Processing for learning and prototyping.
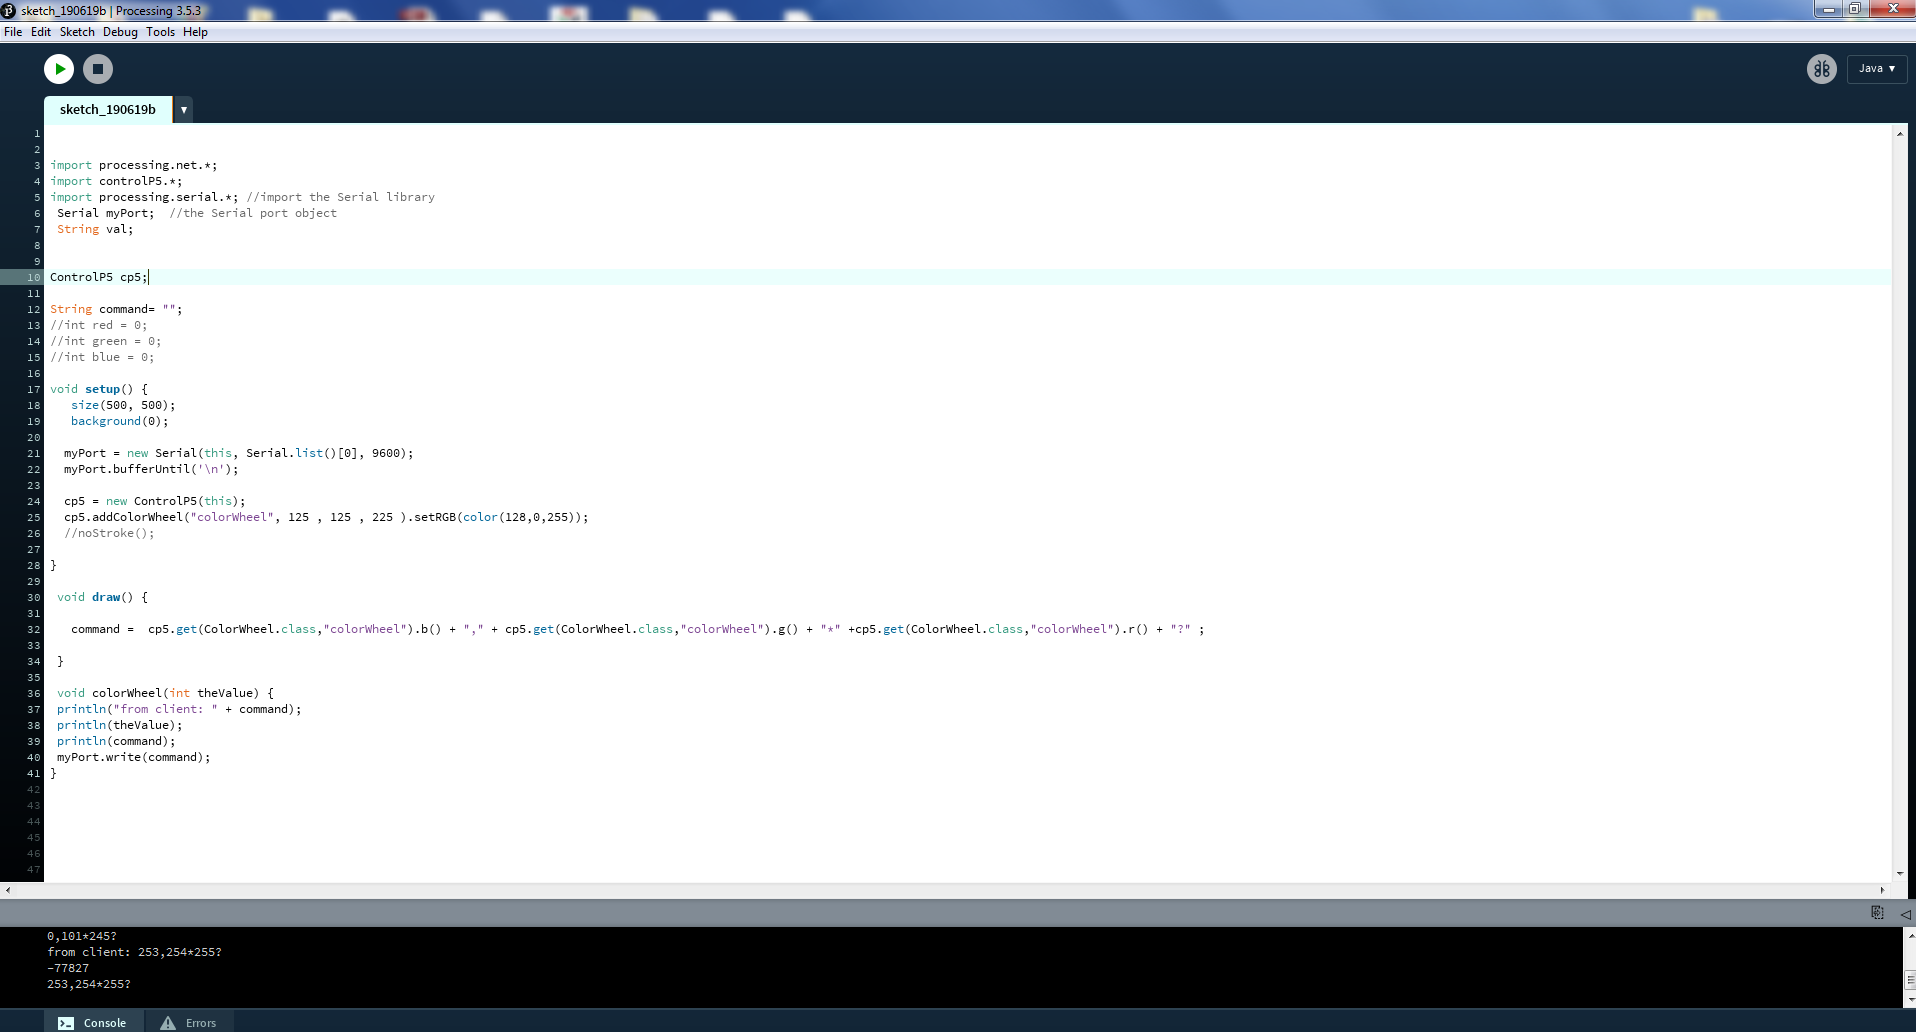
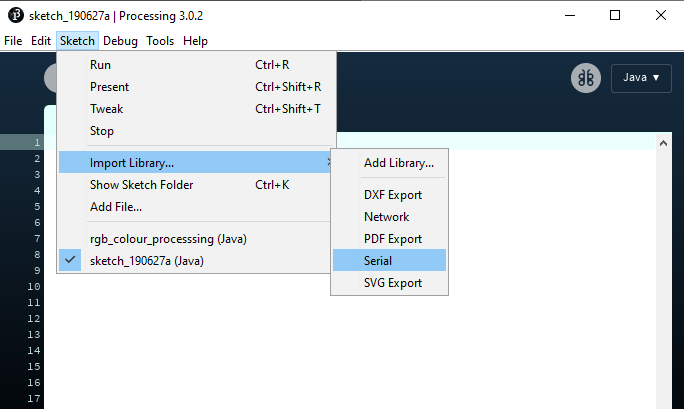
I first watched this tutorial for software and rgb leds where I learnt how to control rgb leds using processing software. Next I proceeded with the arduino code and processing code shown below in programming section and ended with some amazing results. In order to create interface and talk to arduino leonardo over serial port there is library called import processing.serial.*; which can be imported in processing as given sketch => import library => Serial which can also be seen below in figure. Next I have declared the myport variable which shall be used to communicate between processing and arduino.
Next I used PImage variable which is datatype for storing images like gif, jpg, and .png images. Images can be displayed in 2D and 3D space. Before an image is used, it must be loaded with the loadImage() function. The PImage object contains fields for the width and height of the image, as well as an array called pixels[] which contains the values for every pixel in the image. I loaded the color image for interfacing purpose which can be seen below in figure. After that I proceeded to further for arduino programming and interfaced the leonardo and Processing IDE.
.png)
#include FastLED.h
#define NUM_LEDS 35
#define DATA_PIN_1 9
CRGB leds_1[NUM_LEDS];
int red = 0;
int green = 0;
int blue = blue;
long int inByte;
int wait = 10; //10ms
void setup()
{ FastLED.addLeds
Serial.begin(9600);
}
void outputColour(int red, int green, int blue) {
leds_1[1] = CRGB(red,green,blue);
leds_1[2] = CRGB(red,green,blue);
leds_1[3] = CRGB(red,green,blue);
leds_1[4] = CRGB(red,green,blue);
leds_1[5] = CRGB(red,green,blue);
leds_1[6] = CRGB(red,green,blue);
leds_1[7] = CRGB(red,green,blue);
}
int* getColour() {
int* colour;
int i;
i = 0;
//for some reason it only works if we put a dud value between the C and
// the R value
while (i < 4)
{
if (Serial.available() > 0) {
colour[i] = Serial.read();
i++;
}
}
return colour;
}
// Main program
void loop()
{
if (Serial.available() > 0) {
inByte = Serial.read();
if (inByte == 'C') {
int* one;
one = getColour();
//1 2 3 not 0 1 2 due to the dud value
outputColour(one[1],one[2],one[3]);
FastLED.show();
delay(30);
}
}
//delay(wait);
}
import processing.serial.*;
PImage img;
Serial myPort;
void setup() {
//set these to the size of the image
size(512,512);
//this is the name of your image file saved in the data folder in your
//processing folder see processing.org for help
img = loadImage("fablogo.jpg");
//the [0] may be [another number] on your computer
myPort = new Serial(this, Serial.list()[0], 9600);
}
void draw() {
background(0);
image(img,0,0);
img.loadPixels();
}
void mousePressed()
{
myPort.write("CL");
myPort.write(int(red(img.pixels[mouseX+mouseY*img.width])));
myPort.write(int(green(img.pixels[mouseX+mouseY*img.width])));
myPort.write(int(blue(img.pixels[mouseX+mouseY*img.width])));
}
Initially I tried to include the rgb image where I controlled the leds which can be seen below in video. Basically I am selecting the different pixels of imported image now whenever I select the particular pixel that specific color is lighten up at leds. After that I chose fab logo where I did same experiment like selecting the red, blue or black color that can be seen below in figure and video.