Cloud.
In cloud there are various option available like AWS, Azure, Google. AWS is the market leader on Cloud and have wide varities of services available. AR/VR.
In AR/VR there are Various games engine, Unity, Cloud Options like AWS Sumerian. Basically its Need programming background like C# for Unity, good for creating immersive experineces. Programming Languages.
Ther are some famous and mostly used programming languages are Python, Java, Scala, Node.JS. Python is most widely used programming language, Scala is quite difficult for a beginner level. Java is more object
oriented and procedural language where Python is functional language. But now Node.js is widely framework for creating full stack applications. Blynk.
Blynk supports hardware platforms such as Arduino, Raspberry Pi, and similar microcontroller boards to build hardware for your projects.
Blynk supports the following connection types to connect your microcontroller board (hardware) with the Blynk Cloud and Blynk’s personal server:
Ethernet
Wi-Fi
Bluetooth
Cellular
Serial
PyQt5.
Qt is a set of cross-platform C++ libraries that implement high-level APIs for accessing many aspects of modern desktop and mobile systems. These include location and positioning services, multimedia, NFC and
Bluetooth connectivity, a Chromium-based web browser, as well as traditional UI development. PyQt5 is a comprehensive set of Python bindings for Qt v5. It is implemented as more than 35 extension modules and enables Python
to be used as an alternative application development language to C++ on all supported platforms including iOS and Android. Processing.
Processing is a flexible software sketchbook and a language for learning how to code within the context of the visual arts. Since 2001, Processing has promoted software literacy within the visual arts and visual
literacy within technology. There are tens of thousands of students, artists, designers, researchers, and hobbyists who use Processing for learning and prototyping. Download website: is under this link. LabView.
A bit difficult to learn but widely used in industrial applications.LabView does not interfaces directly with any other party hardwares such as Arduino, Raspberry Pi etc but since its a modular programming language it
is able to program and read data from external party hardwares through VISA Modules. MIT App Inventor.
App Inventor has been very easy to use, just pick and place components and your done, and with the help of this App Inventor I have completed this week's individual assignment.
Individual task
Write an application that interfaces with an input &/or output device that you made.
Thus far in this course we have been writing snippets of code which are typically embedded in control doing different operations and/or communicating with PC or other micro-controllers.
In this assignment our objective was to design application and/or interface which allows us to interact with the micro-controller boards thus sending in control instructions and receive status.
For this assignment I had plenty of options such as Python, Javascript, Processing, MIT APP Inventor just to name a few. I took this as an opportunity to dip my toes into mobile app development.
I don't have any prior experience in app development so I followed some tuturial and tried to learn how to make an application and communicate it in MIT app inventor.
As my project has a bluetooth module attached, I thought of making an application for that,
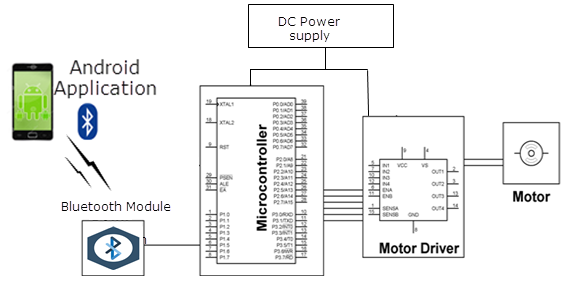
The idea: is to design a small mobile app which can communicate with a micro-controller over blue-tooth interface and move the motor with the signals received.
The tuturials that I followed on youtube.
[1] [2] [3]
Block diagram
Working with MIT APP Inventor 2
This was quite a unusual experience for me. Since this is unconventional platform to work with.
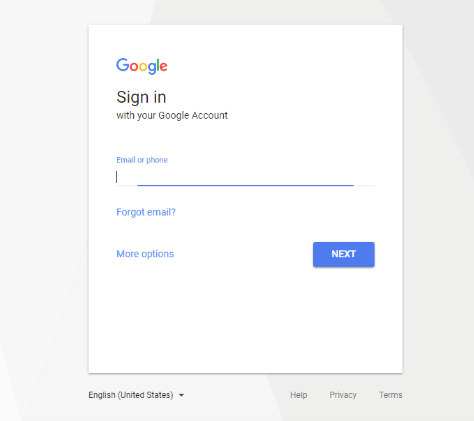
The platform is available online and one just needs to use a google account to start working.
MIT app inventor
To start working on MIT App Inventor 2, we had to first register ourselves using google account. Sign In
Once I was registered, I was sent to MIT App Inventor 2's main page where I created a new project and started working.
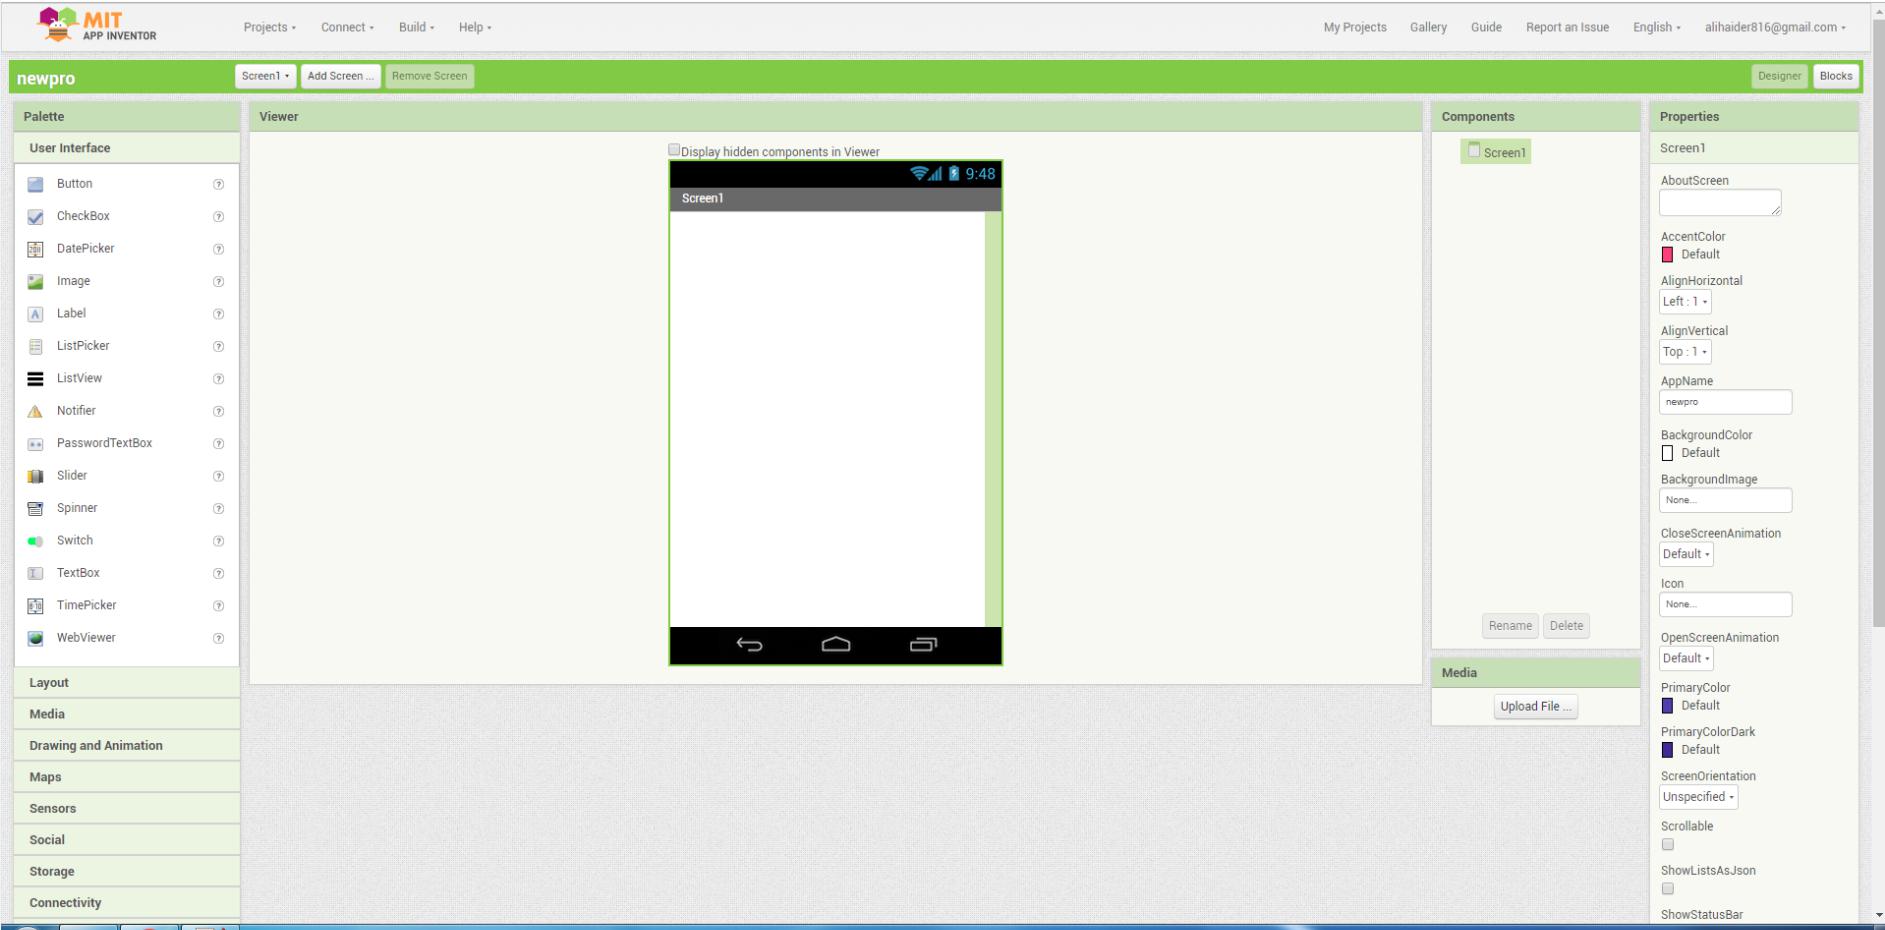
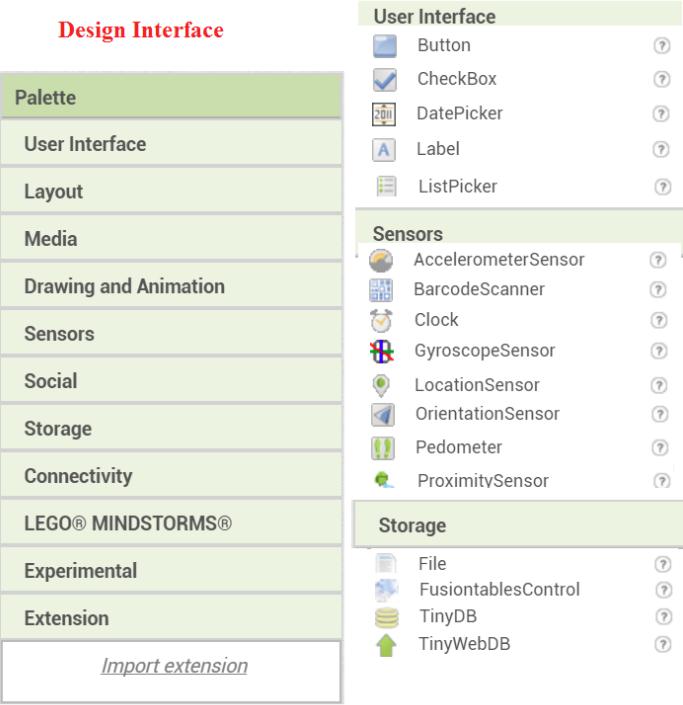
Interface of MIT app Inventor
The variety of tools such as user interface ,connectivity, sensors ,audion and many others feature can be incorporated as simply as a drag and drop. Palette
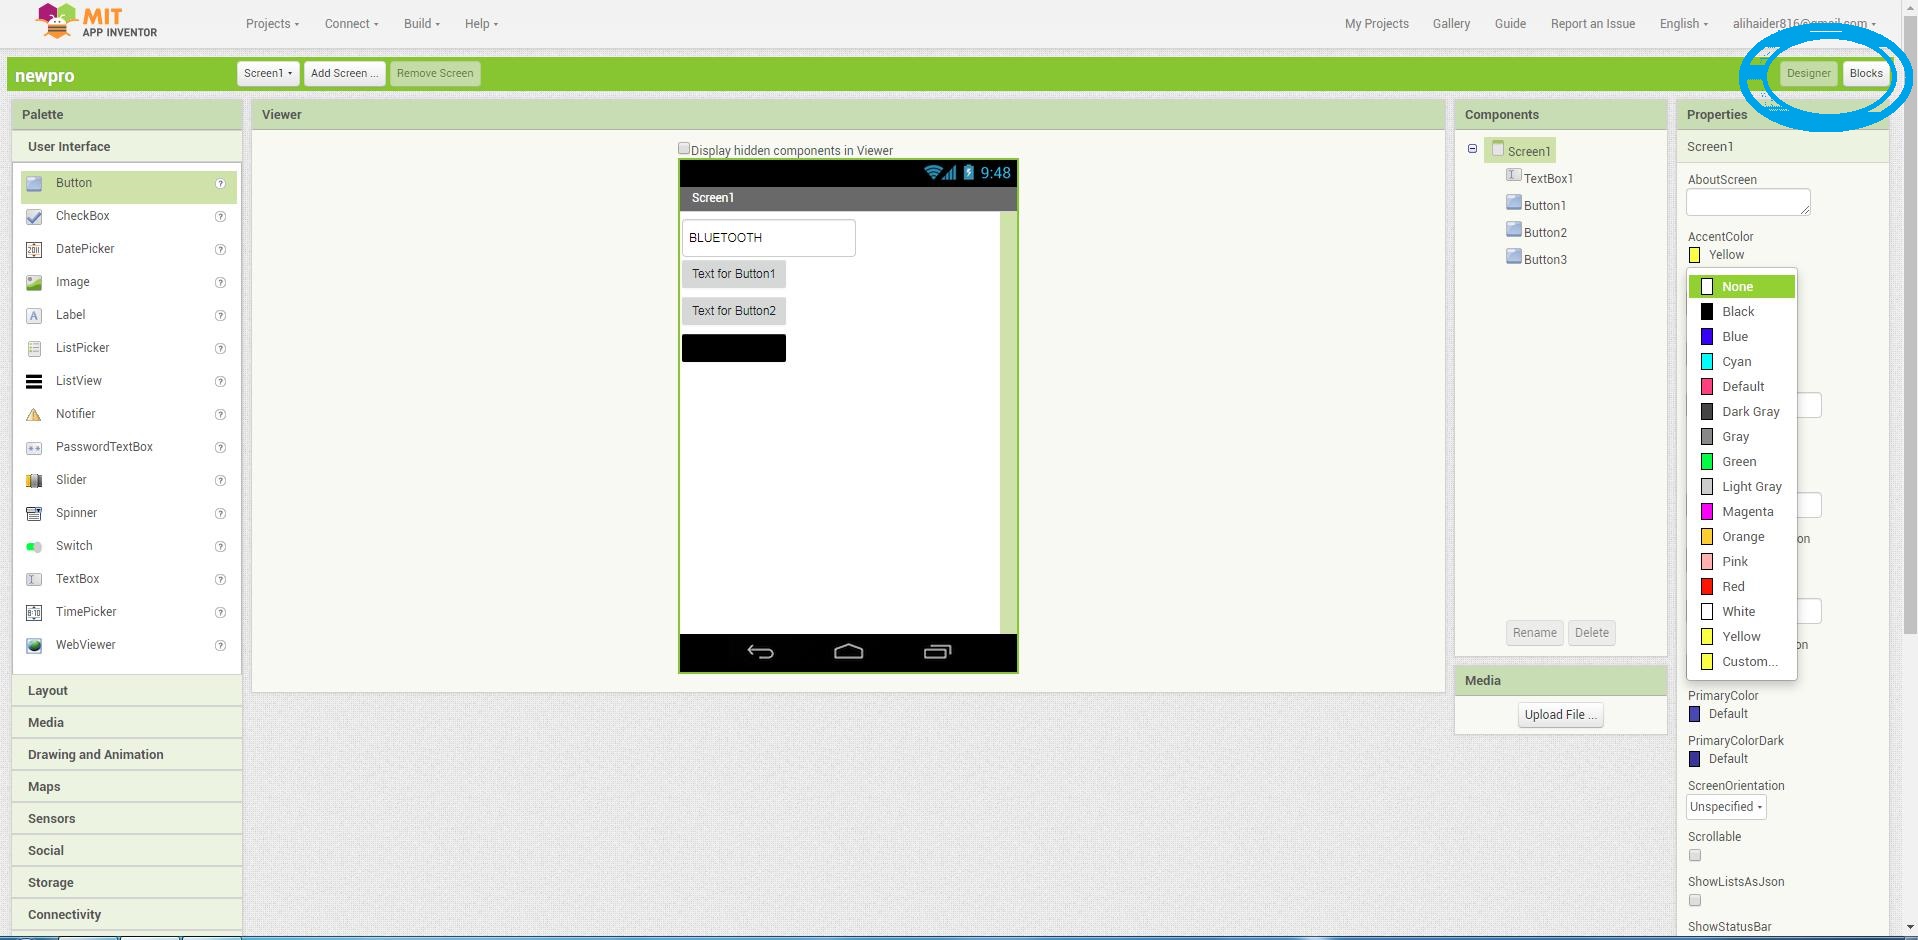
After that I started my main work and dragged and dropped some text, color, button and some other thing on the main screen and made a proper app preview. making an app
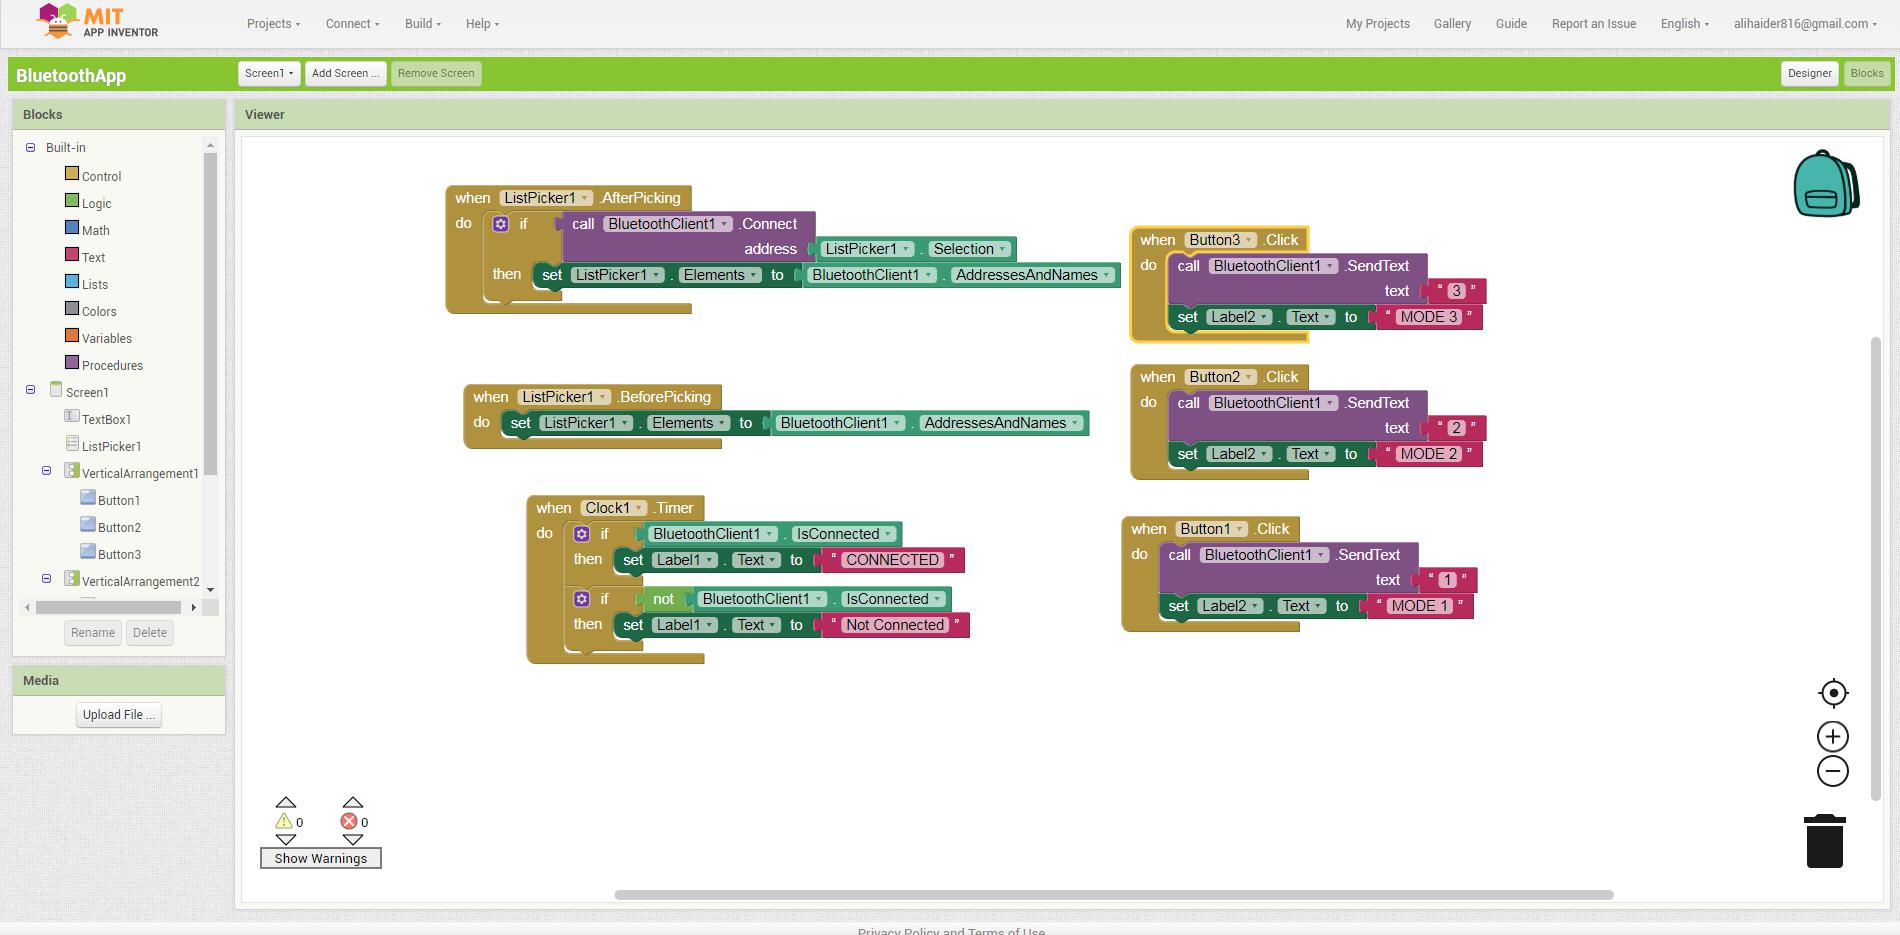
Once all the require button, labels, dials, systems features like timer, connectivity modules are setup we are ready to switch to the blocks mode and start designing workflow of your app.
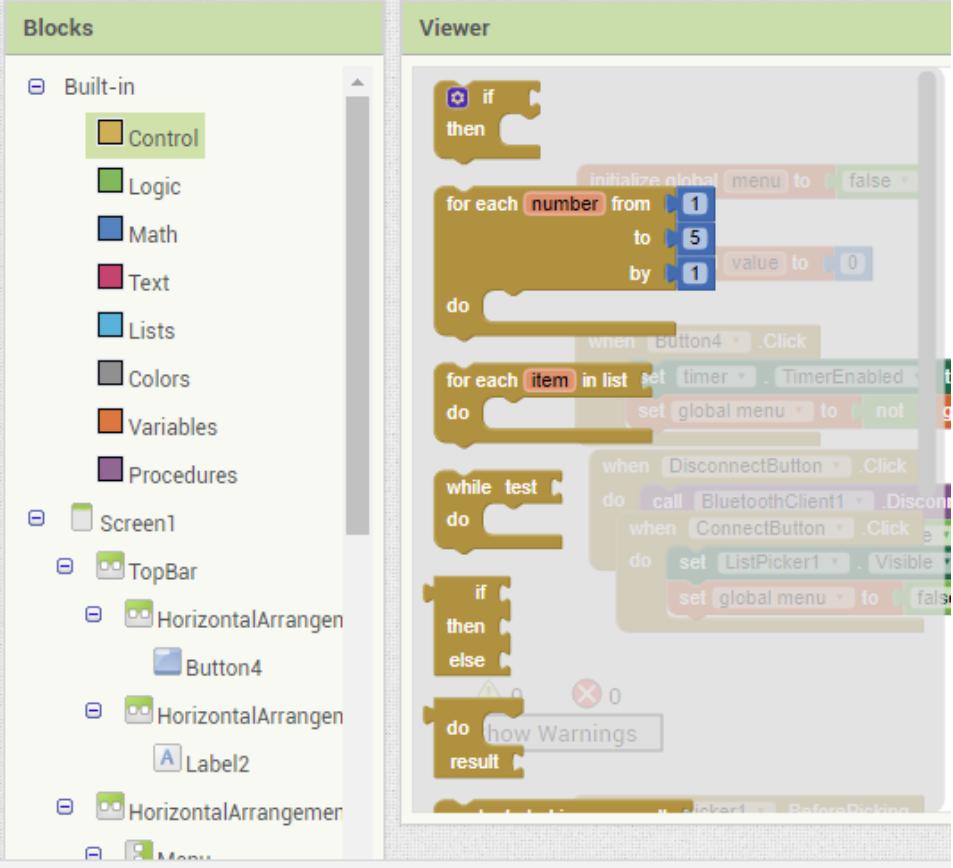
When you click any option from the blocks menu, its subsequent draggaple and droppable functionalities will be available. You can just select according to your choice and need
It also contains the components which are inserted in the Components hierarchy and their related functions. For example a button is inserted in hierarchy, the blocks menu will contain the button
and its subsequent functionality like onClick, OnHover etc
Blocks Menu
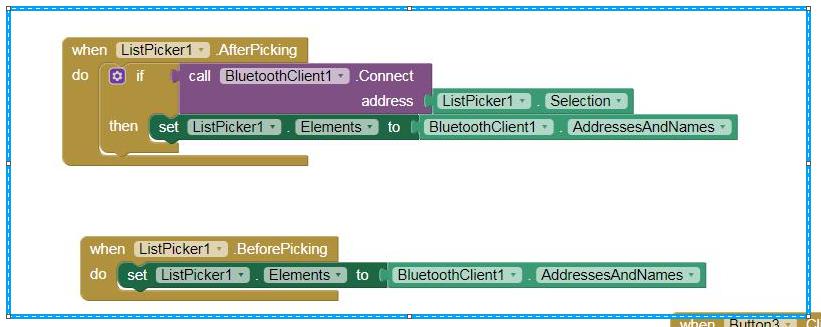
After that, there are only 2 important functions which are must to be remembered when using listpicker:
BeforePicking: Means before selecting the components, what should the list do. Here we select all the available devices and show them in list. AfterPicking: Once you have selected a device then what should we do.
Blocks
I added a few buttons to move the clock-wise and anticlcok-wise rotation of motors. Blocks
Bluetooth connectivity and all the Butoons are programmed accuratly.
To test the application if it is working on Mobile or not, there are two ways. One, you can directly build it for the mobile, 2nd you can directly run it using the AICompanion app.
It is easily available on PlayStore and GooglePlay.
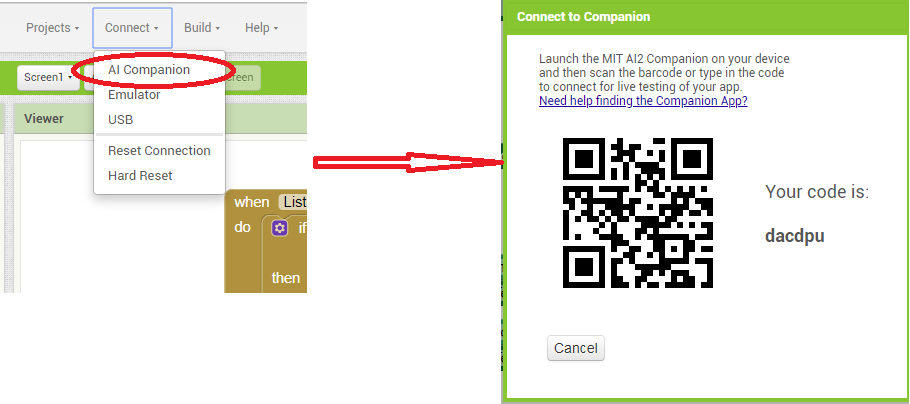
I used the AICompanion app, so for that we have to start it from connect menu, and then click on AI Companion.
Once the AI Companion is clicked it will launch the barcode screen.
Blocks
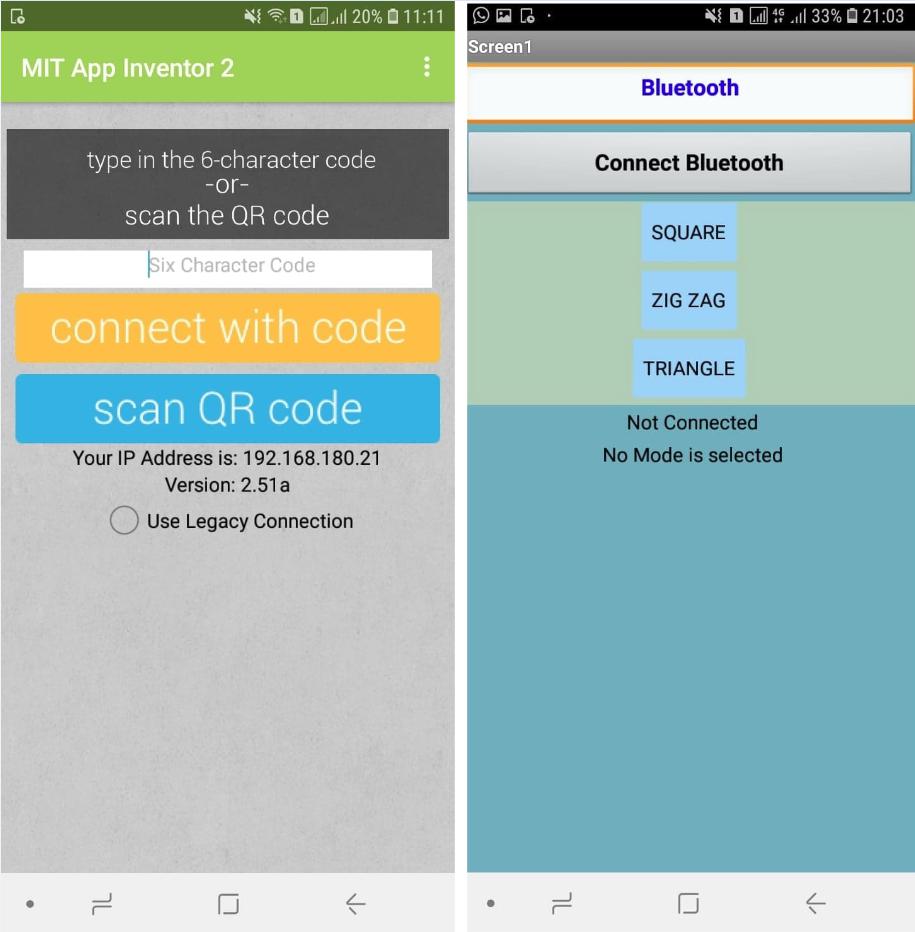
After this, you have to launch the AI Companion app on mobile and scan the QR code and then connect with code, and your application will be launched. But there is one condition, your mobile as well
as the computer must be on same network otherwise this function wont work.
Mobile screen
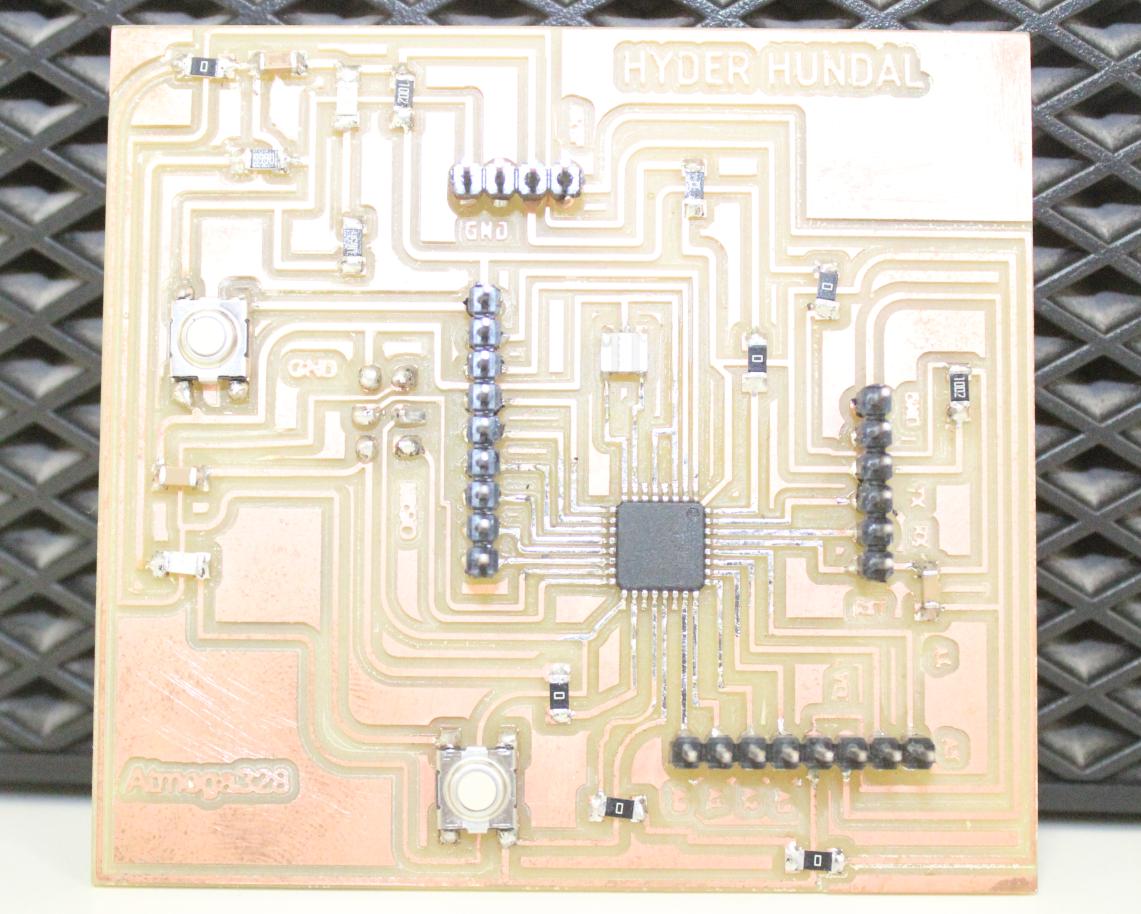
atmega328p
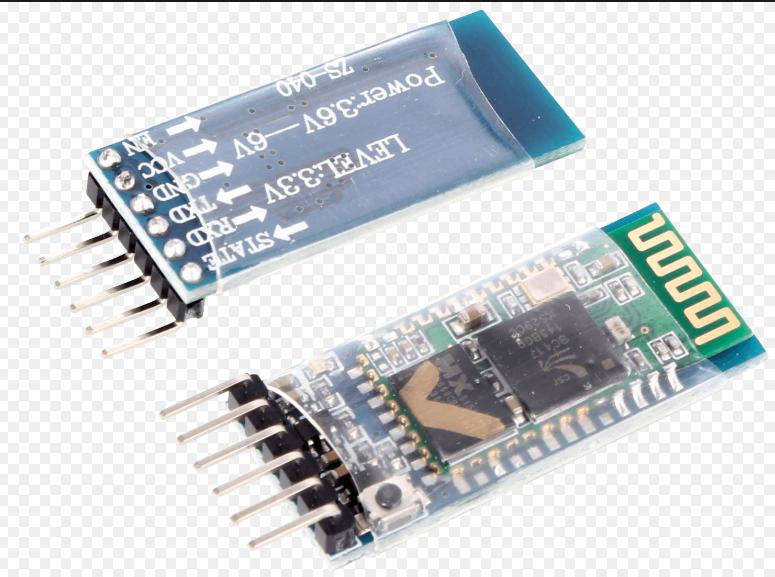
HC-05 module is an easy to use Bluetooth SPP (Serial Port Protocol) module, designed for transparent wireless serial connection setup. The HC-05 is a very cool module which can add two-way (full-duplex) wireless
functionality to your projects. You can use this module to communicate between two microcontrollers like Arduino or communicate with any device with Bluetooth functionality like a Phone or Laptop. The module communicates
with the help of USART at 9600 baud rate hence it is easy to interface with any microcontroller that supports USART.
HC-05
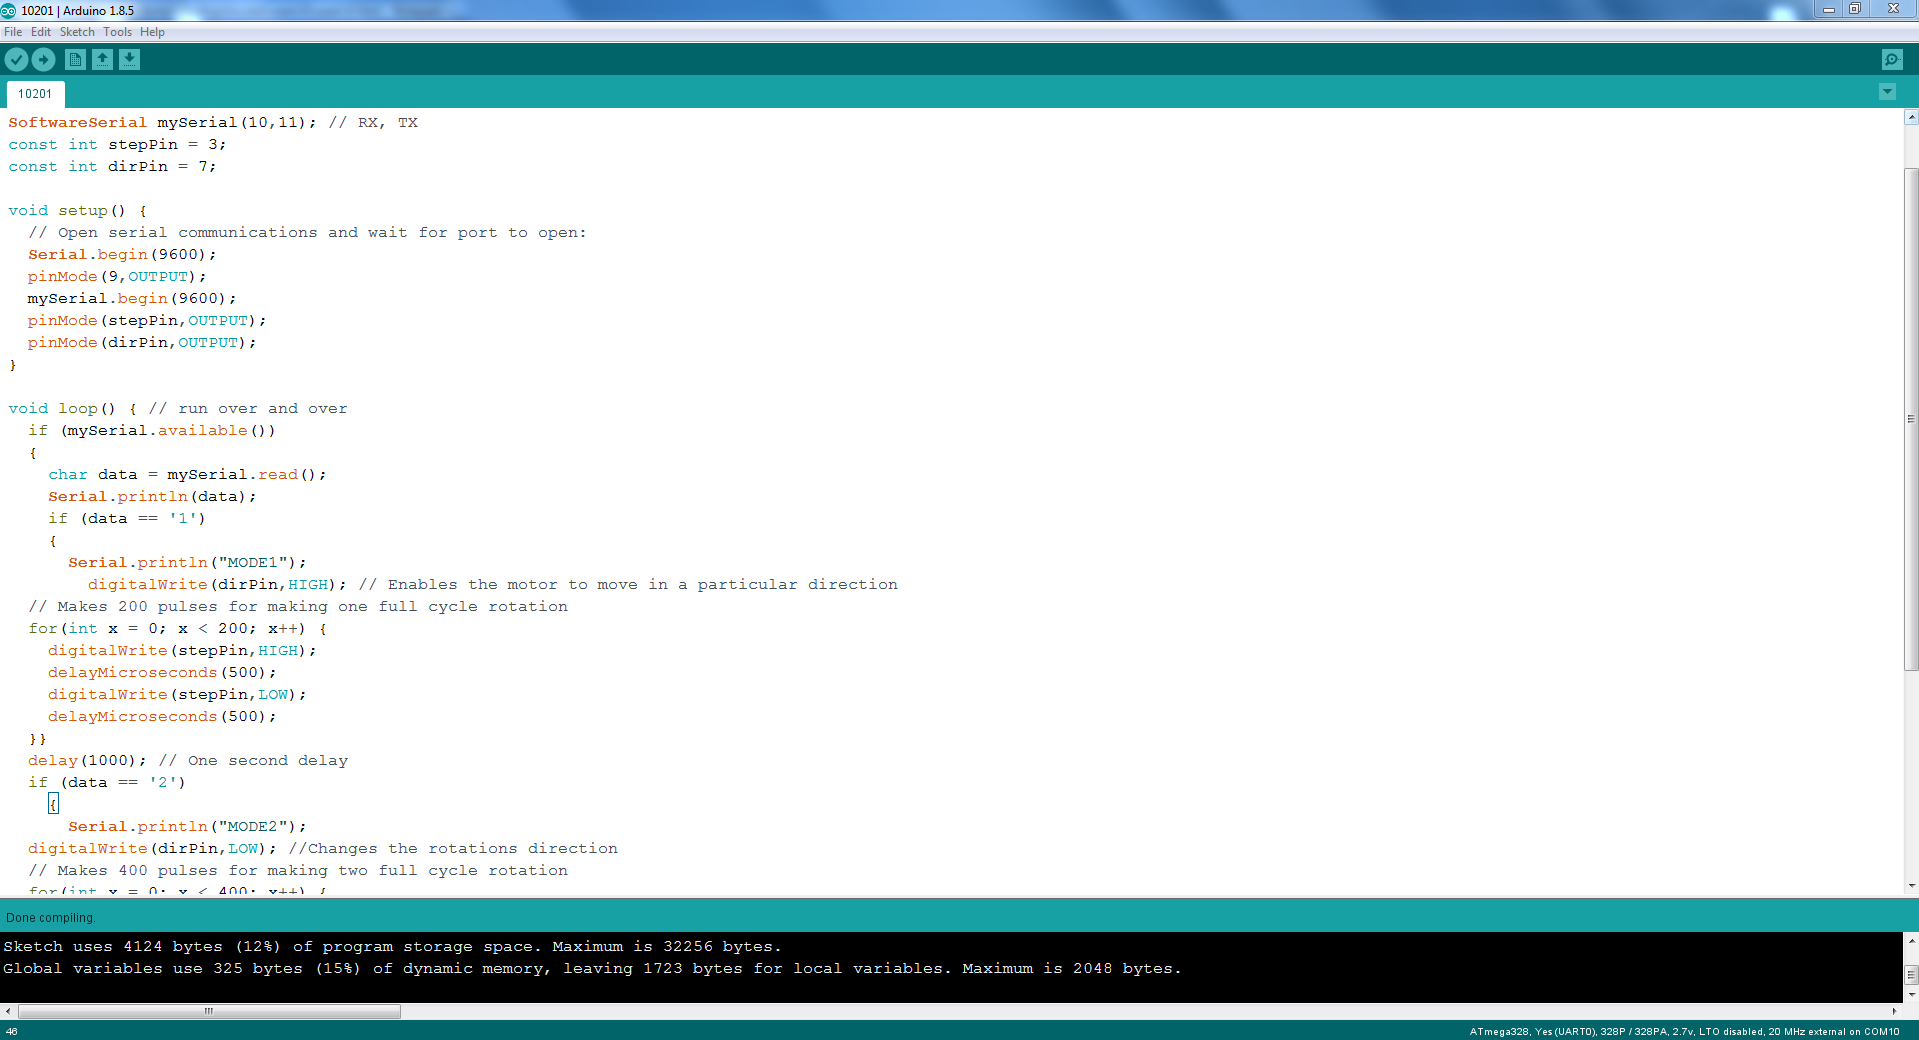
Micro-Controller Coding
For this assignment I used my main circuit board, I have milled and soldered the board that is the atmega328p circuit board which I already explained in final project and one motor driving circuit which is
also explained in final project.