Molding and casting
This week's assignment was to mold and then cast something. As I am a 3d-Artist, I decided to make something very intricate design, which would usually take a 4-axis cnc mill to produce.
Since I made the model with the software "Zbrush" which is quite expensive and not suited for people who don't do what I do on a regular basis, I just provide a timelapse video of me making the model.
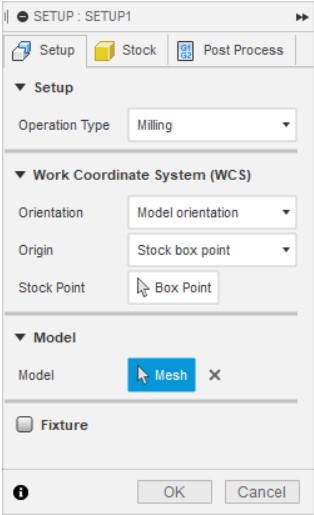
First things first, to generate the toolpath in Fusion360 you need to go to the "manufacture" workarea. Here you can then create what is called a "setup" which let's you decide which model you want to use, what kind of operation you are setting up for and the work coordinate system. The coordinate sytem is actually the most important part, as the Z-axis has to point upwards.
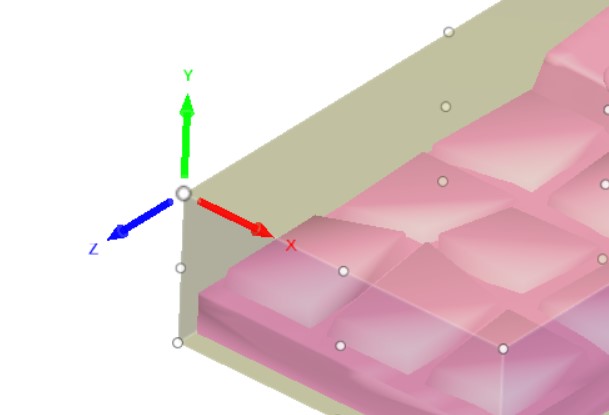
So this would be wrong, since you would want to mill the top of the material and not the side. The blue axis has to point up (unless it's intentional).
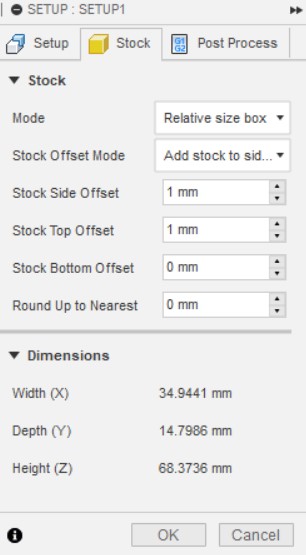
Then you can edit the settings for the stock size, for this example I left everything as is and usually that's all it takes. But there are circumstances where these settings come in handy.
After that is all done, you can cornfi´rm the setup by clicking the "ok" button. Then you can go ahead and configure the generation of the g-code. For that I made an adaptive 3d-toolpath.

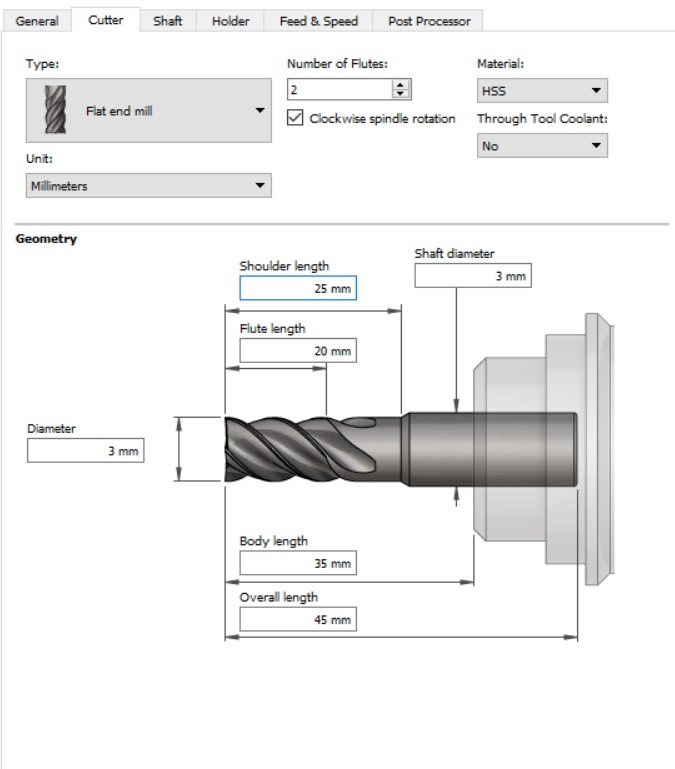
First thing to do here is add the tool we want to mill with. So basically this is done by using a caliper, measuring the dimensions of the tool and putting the result into this interface.
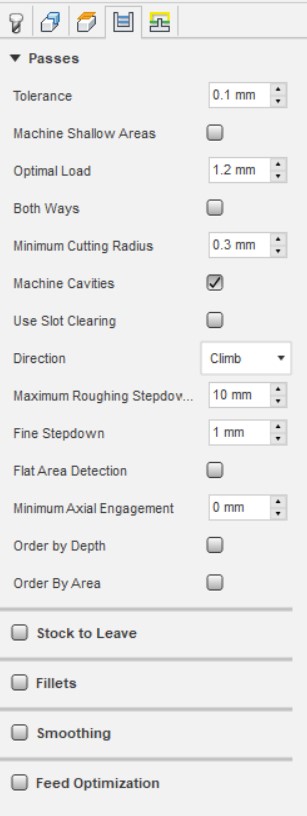
Now let's talk about the feeds and speeds. Usually these setings are fine as they are, but since I wanted to cut wax, which is really soft and easy to machine they matter even less.
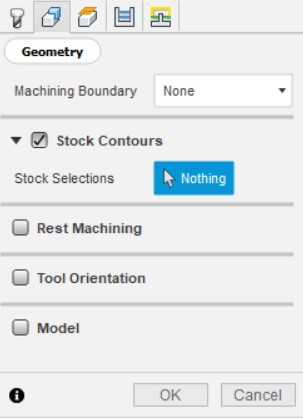
For the Geometry I usually turn everything off exept "stock contours".
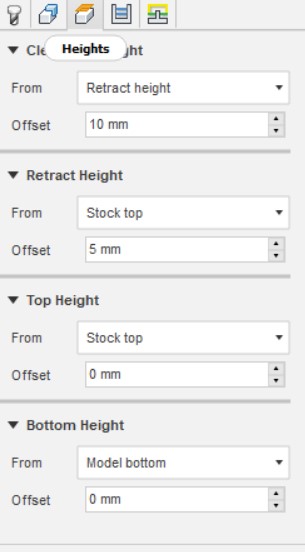
The heights are also usually fine from the get go. You can however use them to save some time milling, if you for example lower the safe z, so the machine doesn't have to move as much whenever it changes positions.
Once you click "ok" the toolpath will be calculated automatically and you can chaack for collisions by selecting "actions - simulate".
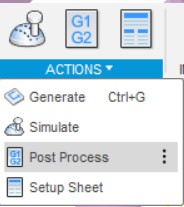
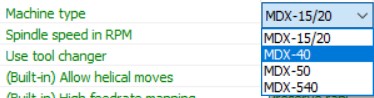
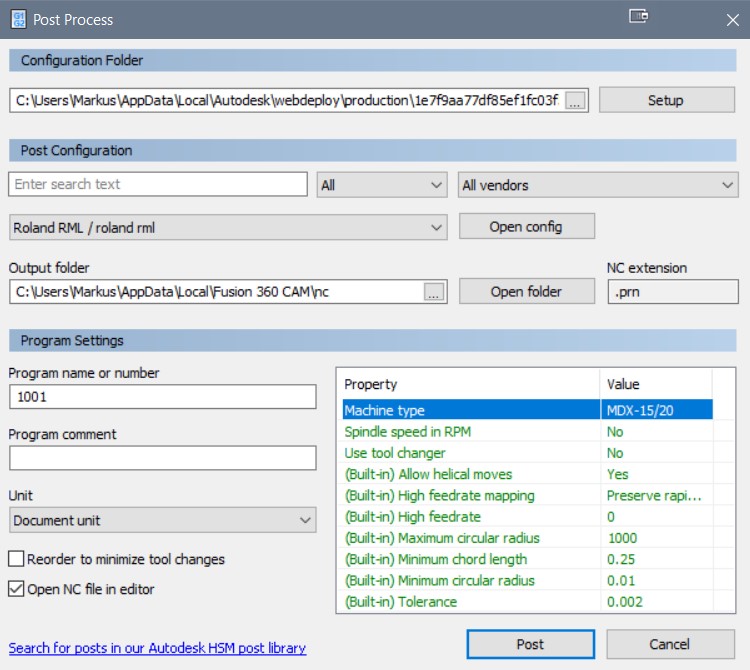
To export the toolpath for any given machine, go to actions - post process and select your machine and the correct model. In my case that was "Roland / RML" and "MDX-40". After all of those settings are dialed in, you can go on to click on "ok" and the gcode will be generated.
 And this is basically what I did with all of the jobs I generated for this assignment. The changes inbetween are usually pretty minor and depend on the different tools and generation algorithms you use.
So after the design was processed and the necessary g-code generated, it was time to actually mill the part.
As said, the model will be milled in two parts. Therefore we started with the easier of the two, which is the base since it doesn't have any overhangs.
By the way, I used two different materials because we ran out of wax before the assignment, therefore I hat to use foam as my second material. It was milled in wax (which we remelted from collected wax chips by previous milling jobs). The wax block was fixed to a mdf board with double sided tape and then clamped into the machine.
.jpg)
Milling was very straight forward and worked on the first try without any problems.
.jpg)
This is the result:
But now for the actual interesting part of this assignment. Since the design is impossible to mill with our machine, we had to create a jig to be able to keep the reference point and not shift the stock, while rotating it after each job.
In total we did four jobs, one for each side of the quboid stock.
The jig consisted of two lasercut pieces of mdf, that were the exact same size. They had rectangular holes that were perfectly centered and the size of the stocks dimensions.
.jpg)
These were just glued ontop of each other, while beeing careful to keep them alligned perfectly.
.jpg)
Now we put the stock in the rig and the clamped the rig into the machine. And started the first job.
.jpg)
Here are a few pictures of how the first job turned out:
.jpg)
.jpg)
After it was done, we flipped the stock around and started doing all the other jobs one by one.
.jpg)
.jpg)
.jpg)
At some point we noticed that there was a slight shift, even though we really tried to make sure to keep everything alligned.
Allthough that was a bummer, I knew we wouldn't have enought time to start from scratch again. So I just went with it and did the rest of the jobs. Therefore I decided to just try and sand the notches off the model by hand. Around the same time I also decided that the rougth-cut would have to be sufficient, since there wasn't enougth time left and I was blocking the machine for the other sudents. So smoothing the model was also done by hand in the end.
.jpg)
.jpg)
.jpg)
At this point all of the jobs were done and this is the final result.
.jpg)
.jpg)
After finishing smoothing the model, I then started removing the support structure from it.
.jpg)
Which is also when I decided not to include the models arms, sice they would have been way too flimsy and small to be able to successfully cast them in the end.
.jpg)
.jpg)
.jpg)
.jpg)
Now the two parts of the model had to be connected somehow. As it turns out, that was quite the challange because of the legs being very small and therefore not having enough surface area to be glued.
The fix for that was a nail, that I sharpened on both ends of. I just heated it up and stuck it into the base and then I stuck the model it.
.jpg)
.jpg)
As you can see, the model now stands freely and sturdily and is ready to be cast in silicone.
.jpg)
.jpg)
For that it needed to have and outer shell, which I quickly cut out of mdf on the bandsaw and glued together with hotglue.
.jpg)
I then placed the model inside the shell and sealed everything with more hotglue.
.jpg)
.jpg)
So now it was time to mix up a batch of silicone to cast the negative of the model with. There are a few things to take into concideration before blindly mixing the silicone and it's hardener. First is the amount you will need which is roughly calculated by multiplying the width, height and length of the mold. Also, the mixing ratio of hardener and silicone is very important, this is usually stated in the silicone's datasheet. In my case the ratio was 100 units of silicone to 10 units of hardener. in my case that means I will need roughly 480 g of silicone and 48 g of hardener.
.jpg)
The Silicone is stored in a big barrel and it is crucial to keep it away from the rim of the barrel, because it might glue it shut otherwise.
.jpg)
Then I got myself a plastic container to mix my silicone in and put it on the scale to tare it.
.jpg)
I then measured and mixed my silicone and the hardener, but since that introduces a lot of air into the mixture regardless of using a shearing motion to stirring it, it has to go in the vacuum chamber to get all of that eccess air out.
.jpg)
The vacuum chamber has a dedicated holder for the container to sit in and a "remote" mixing tool can be attached optionally.
.jpg)
So now let me explain the vacuum chamber a little bit. It has a valve on it's side, which is used to let air back into the chamber. First picture shows the valve being in the open state and the second one shows it being in the closed state. Of course, when pulling the air out of the chamber, this valve has to be closed.
.jpg)
.jpg)
Also make sure that the main's power switch is turned on.
.jpg)
This is the machines interface, on top there is the pressure display: around 1000 is atmospheric pressure and 0 is a full vacuum. Then there is a black knob with the lable "rührgeschwindigkeit", which is "stirring speed" in german and it controls the speed of the remote stirring tool. And then last but not least, there is another black knob, which turns the pump on and off when set to 1 or 0.
.jpg)
I then closed the door of the chamber, checked if the valve is closed and started pulling the air out with moderate stirring. At some point the mixture started bubbling up vigorously, whenever that happened I stopped the pump and opened the valve a bit to let a bit of air back into the chamber.
.jpg)
I repeated that process until the display read 0, at that point I stopped the pump and waited for 5 more minutes until I opened the valve to fill the chamber with air again.
.jpg)
Now the mixture was ready to be poured into the mold. Important to note is that the silicone should be poured very slowly to avoid introducing any air into it.
To make the curing process faster, I then put the mold into the oven at 80°C which cut the curing time in half, from 24 to 12 hours.
.jpg)
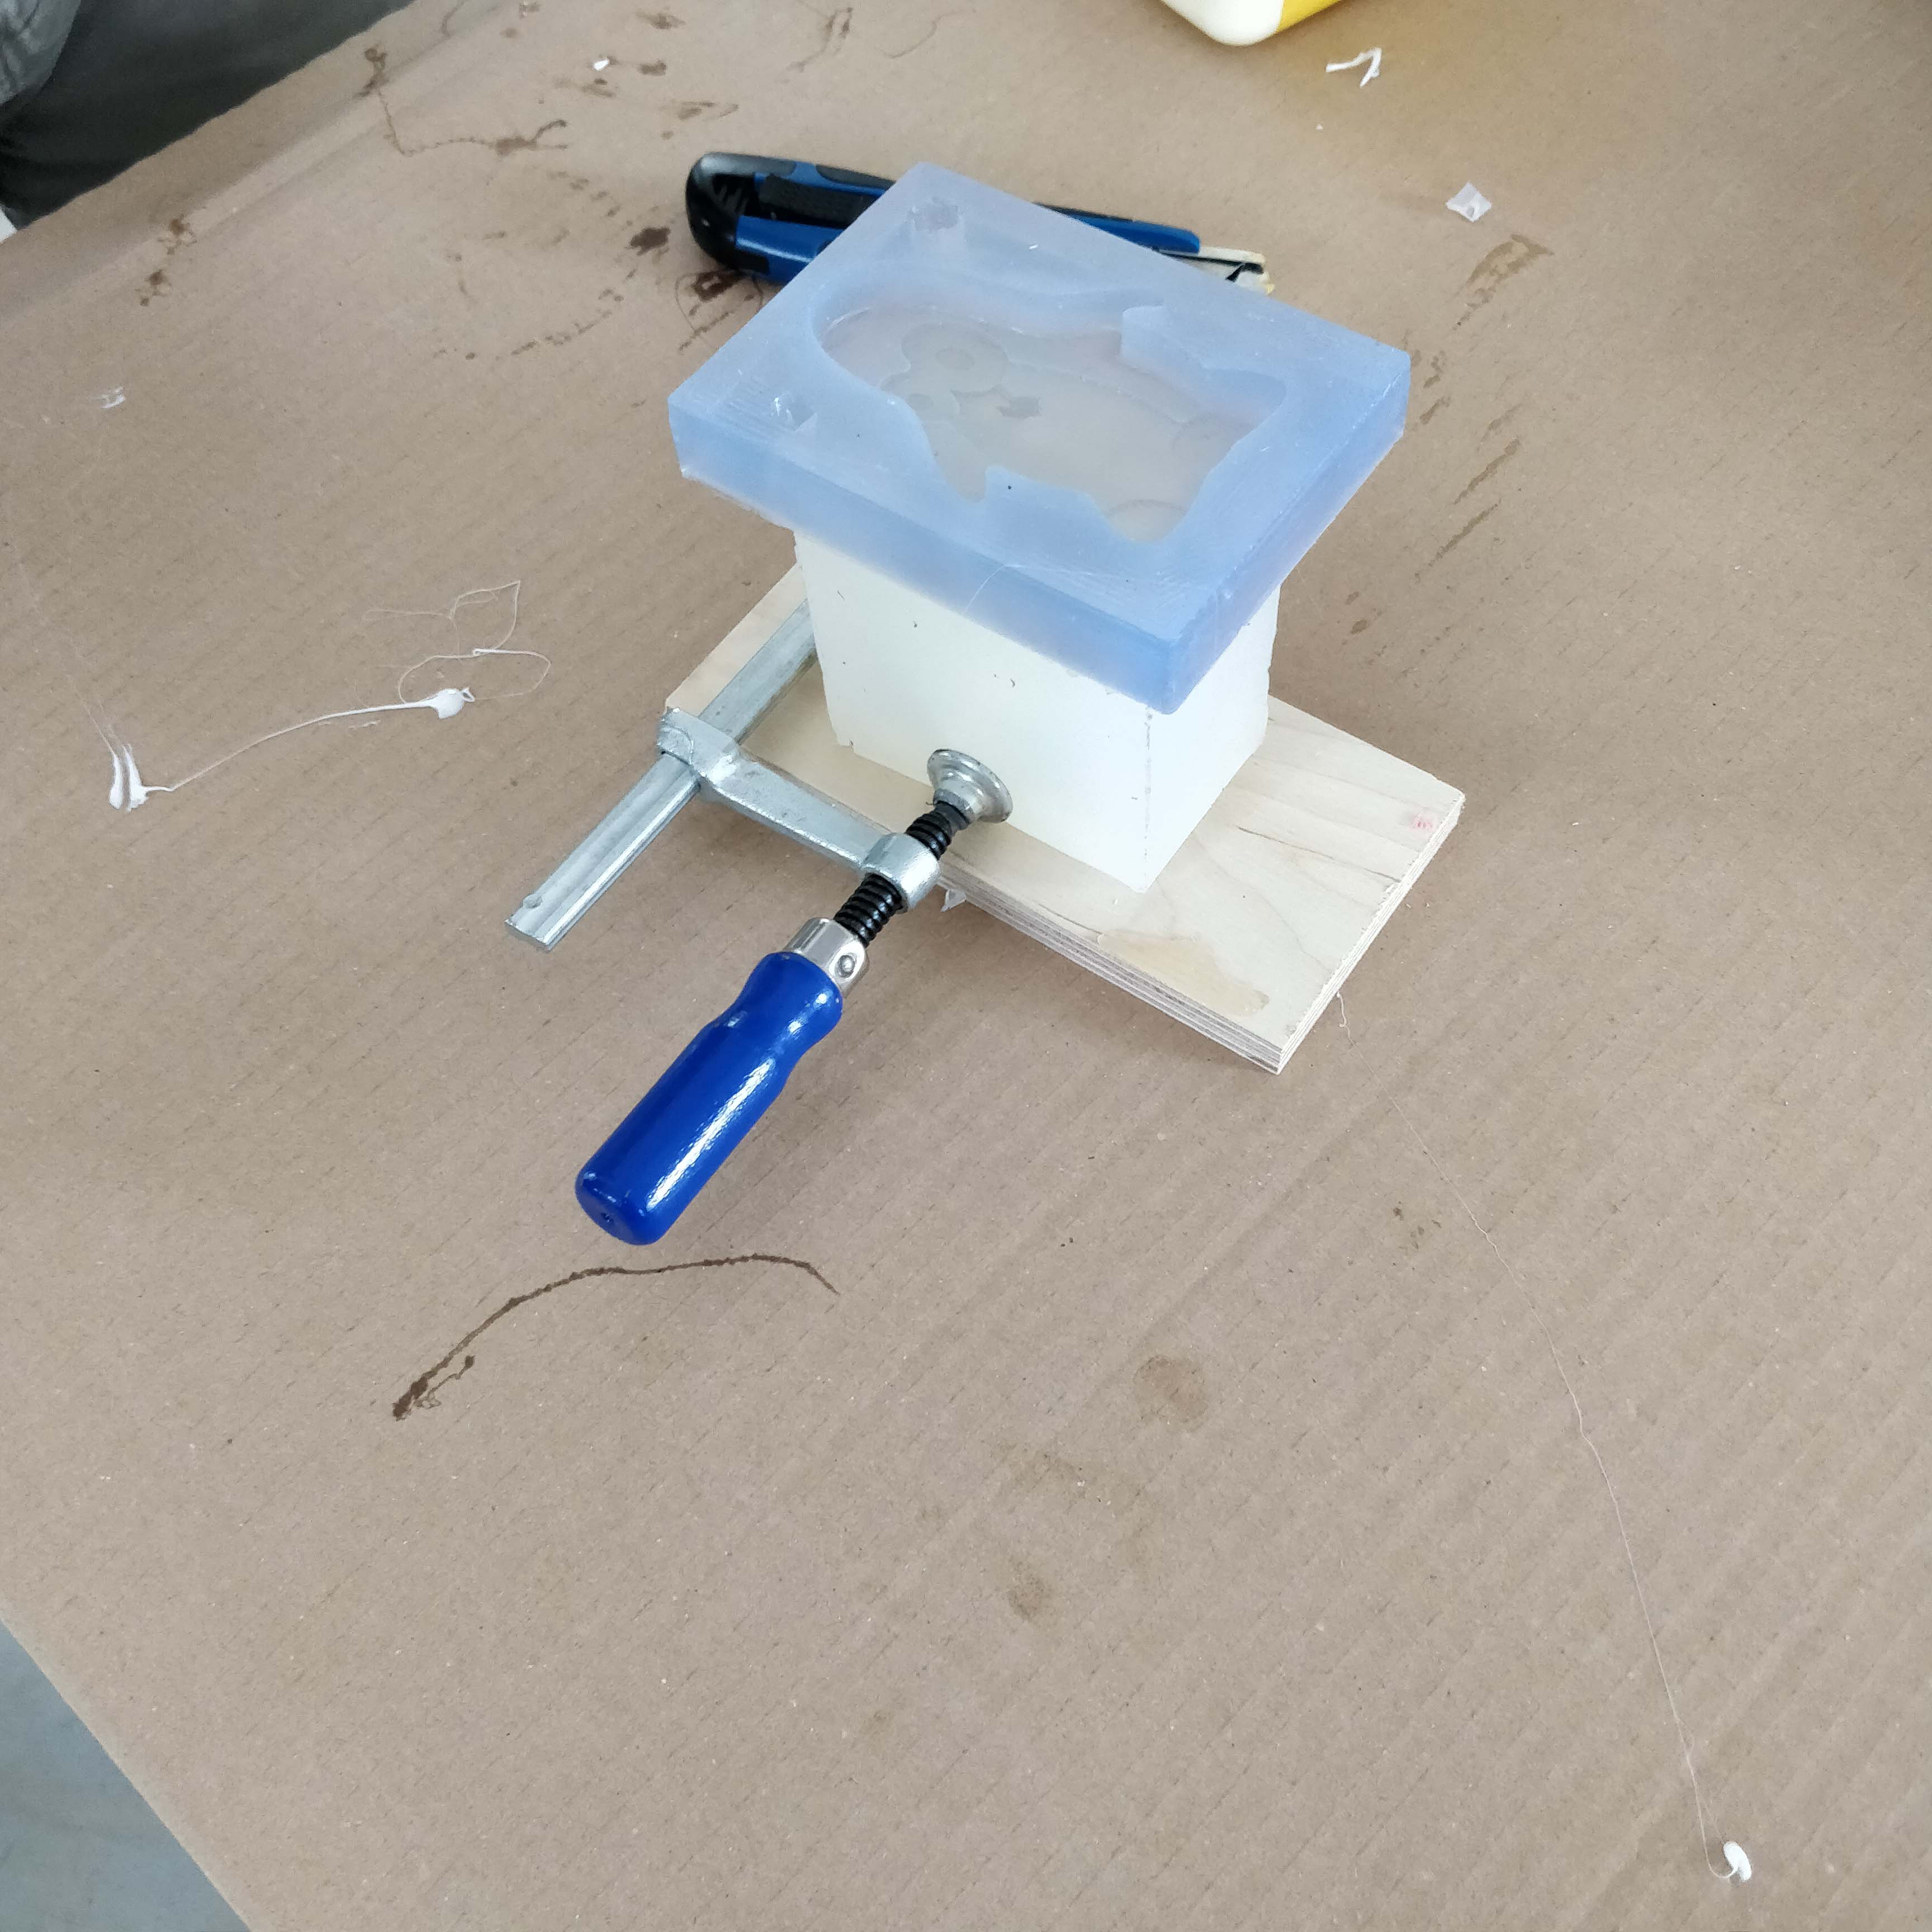
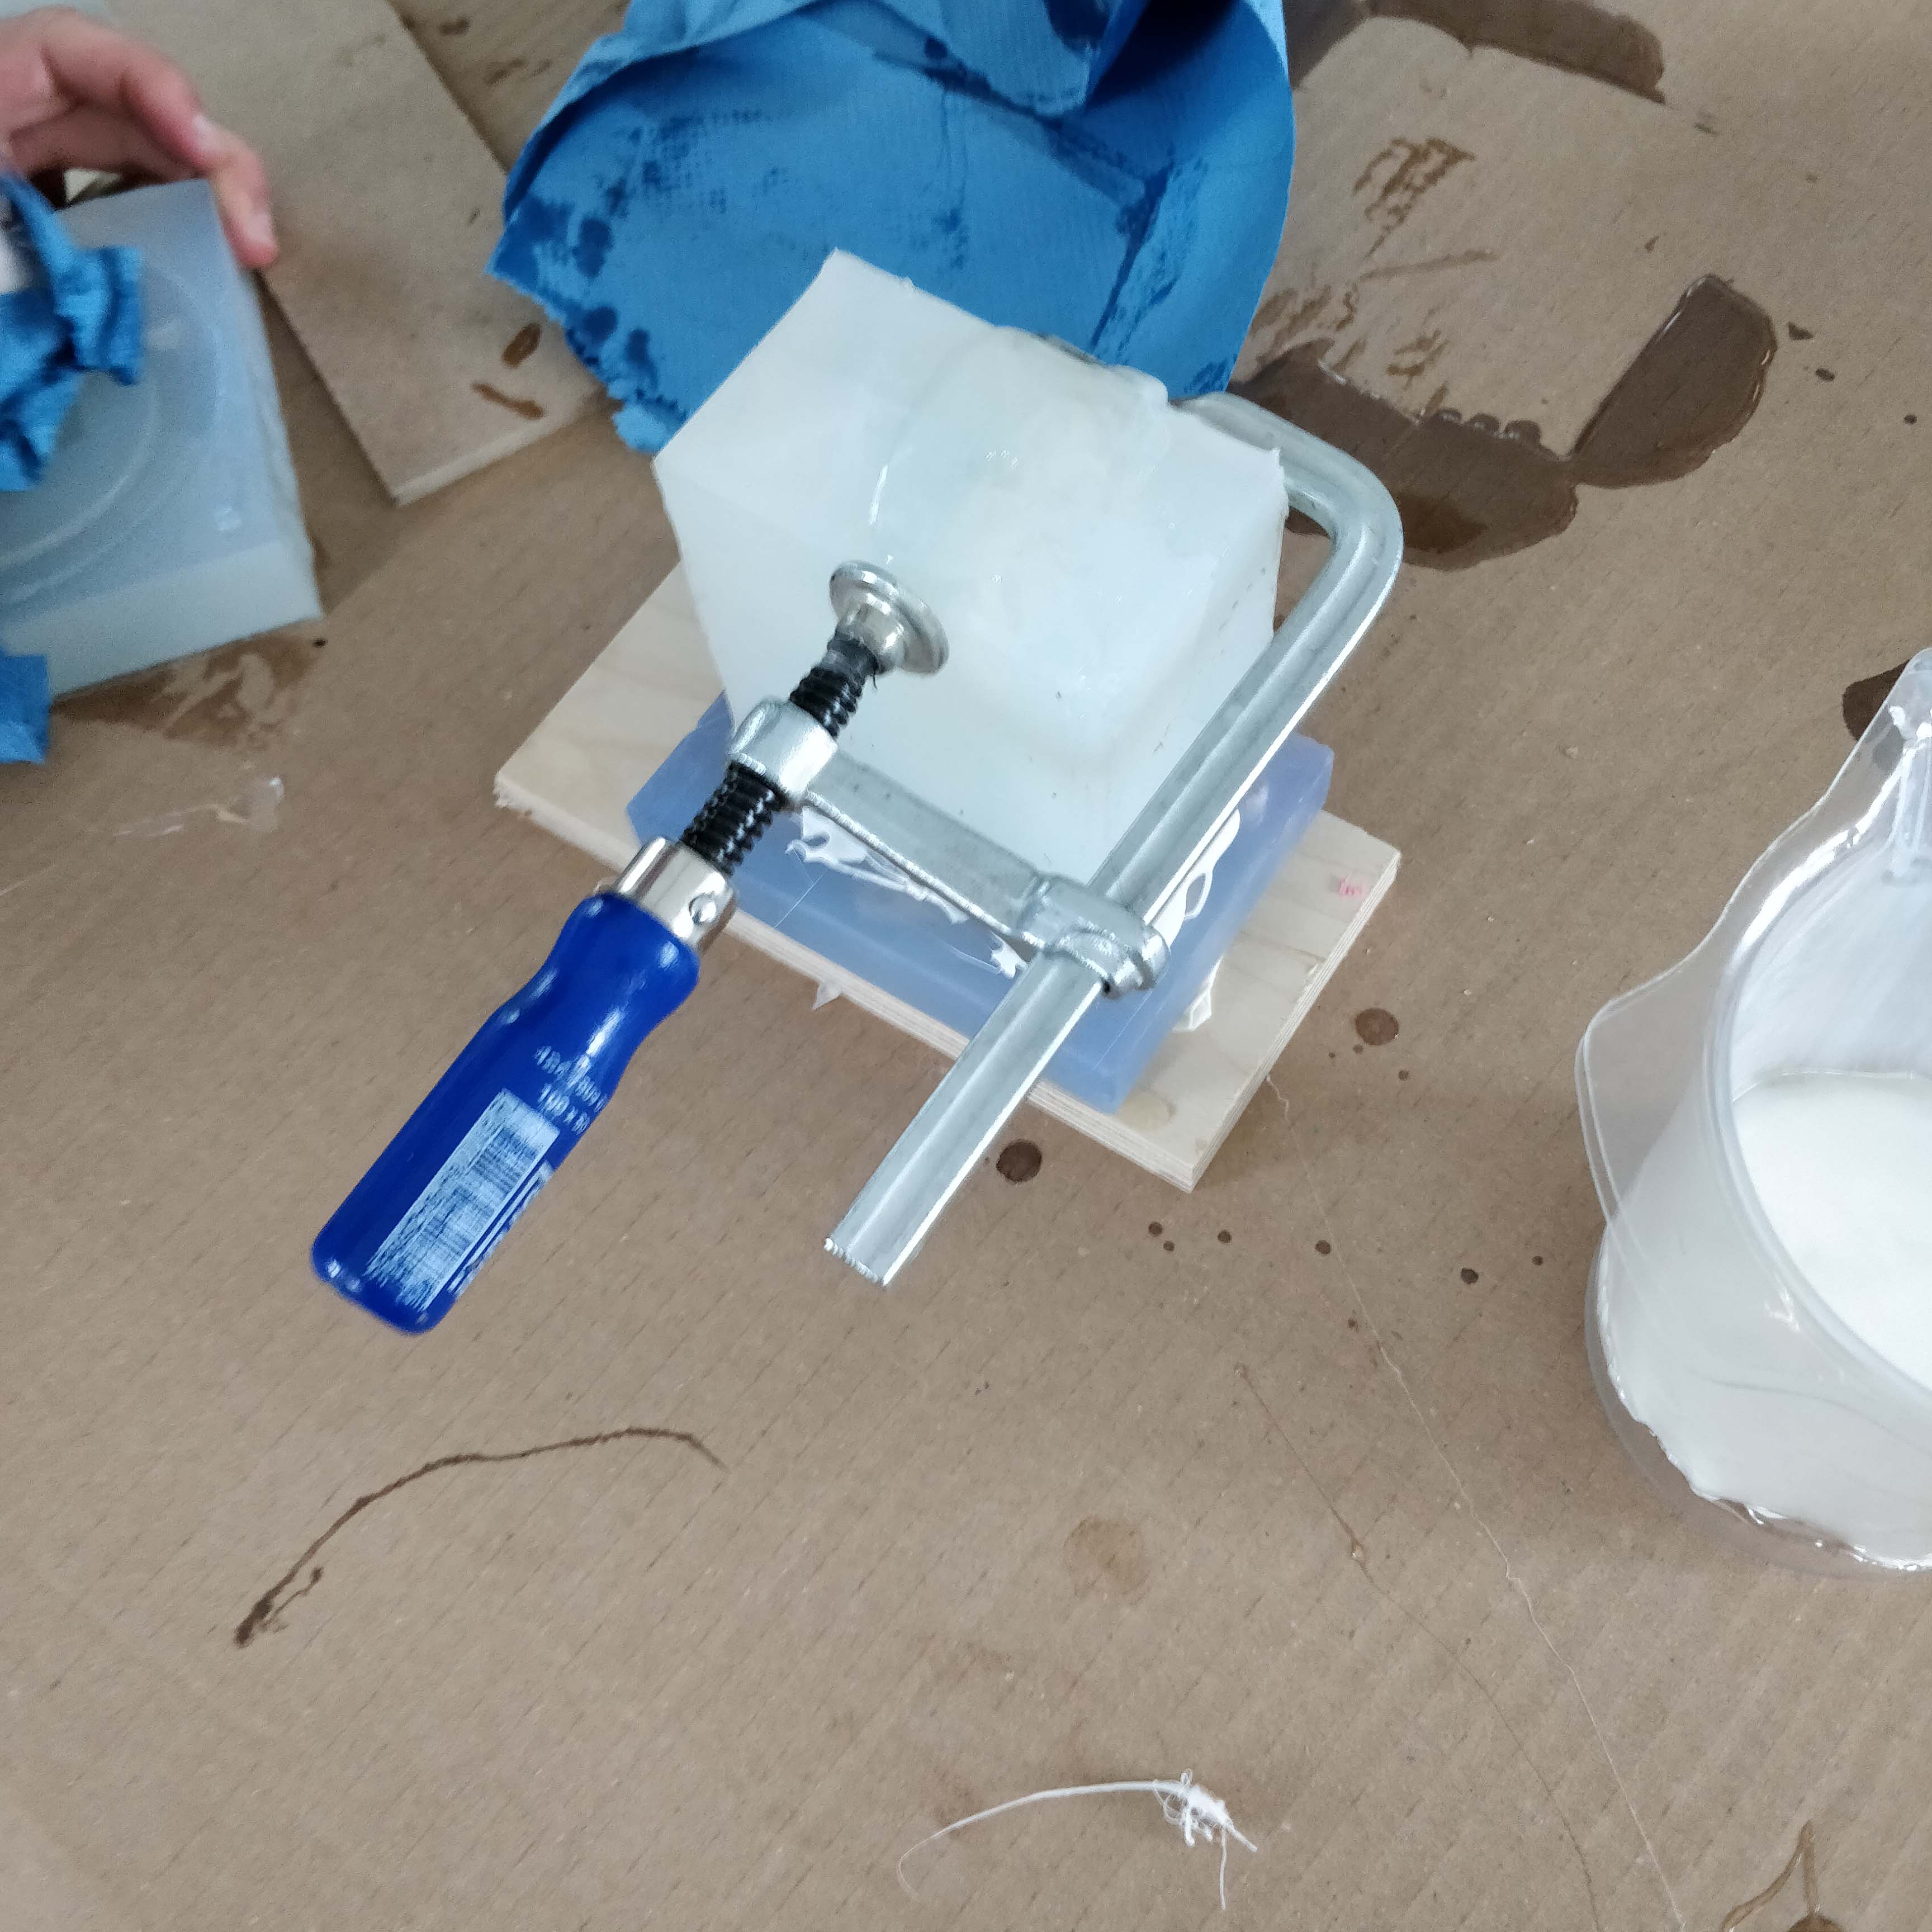
After It was cured, I took the casing off of the mold and carefully removed the bottom part.
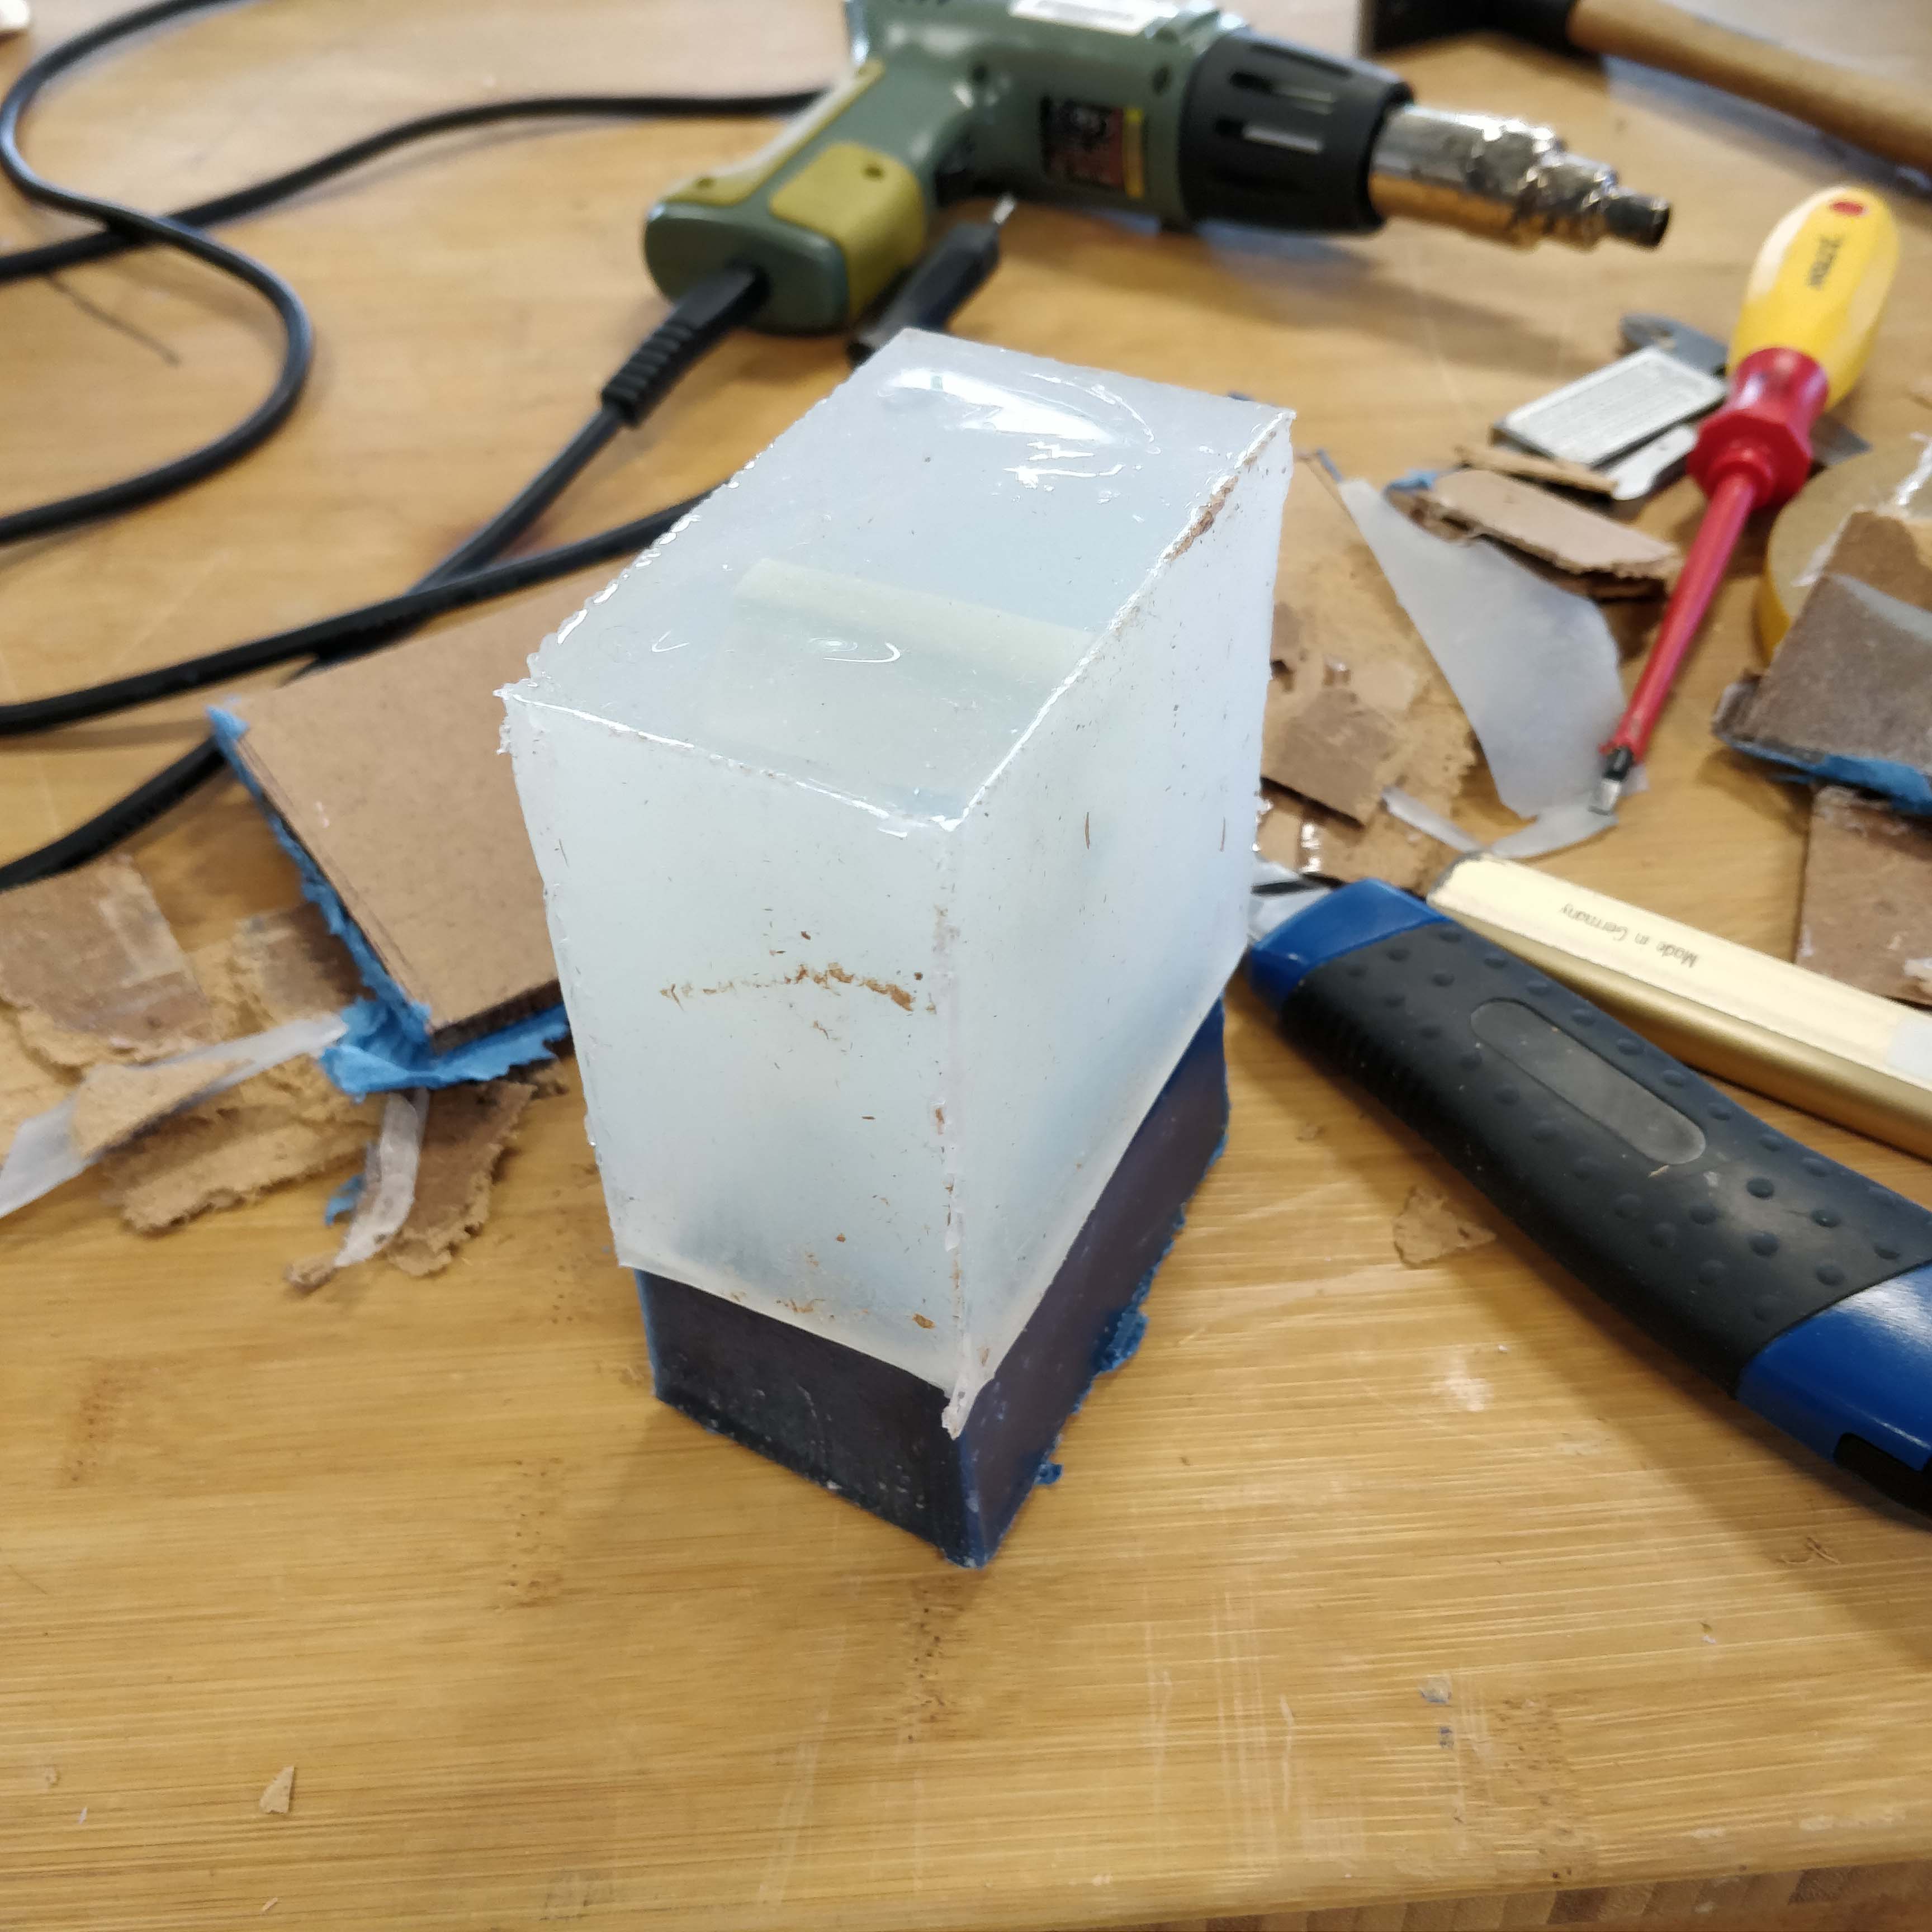

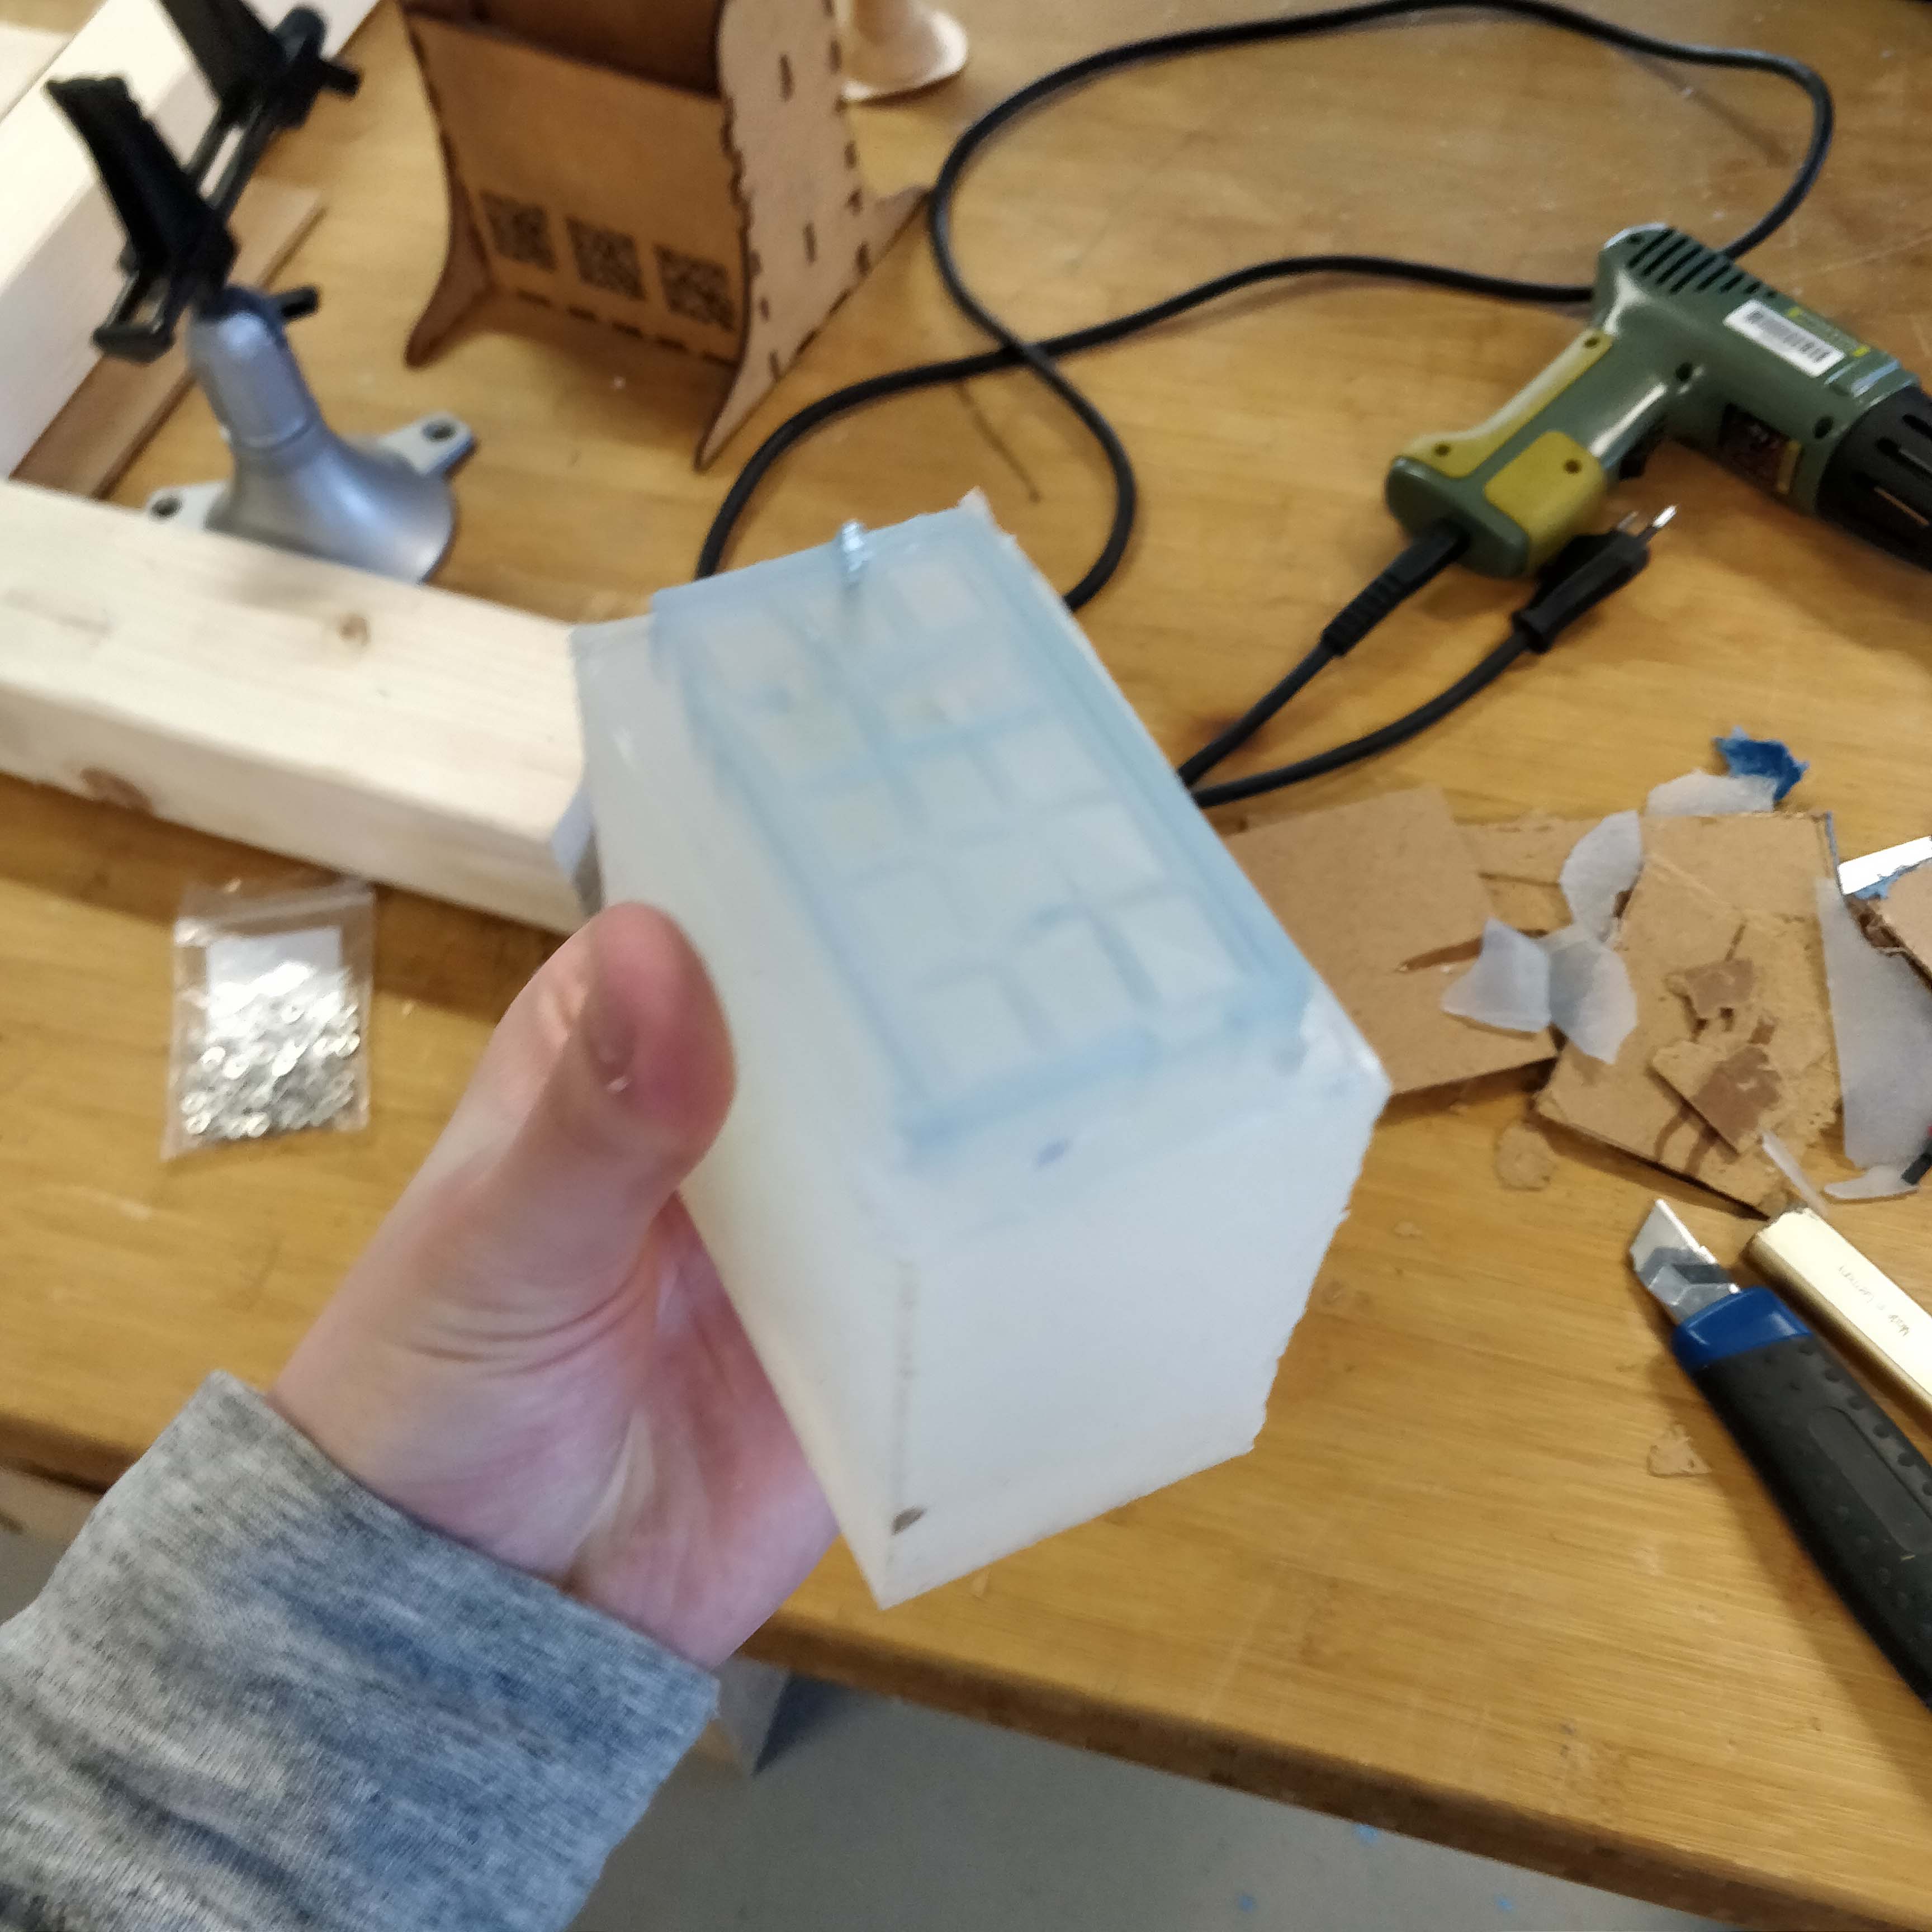
I then cut the silicone in half with a exacto blade and in a zigzag pattern. I cut it in that pattern to have registration when putting it back together.
This also revealed the biggest mistake we made when doing ths assignment. We didn't seal the foam, so the silicone and the foam basically became a composite and were really hard to seperate. This was a very frustrating, time consuming and unfortunately undocumented experiance.
After that I cut a venting hole and a pouring hole into the top of the mold.
Then I clamped the mold back together and added a piece of scrap Silicone as a bottom. This was fixed onto the actual mold with simple white hot glue.
I then went ahead and mixed up a batch of resin using the same techniques as with the silicone.
The resin I used was NEUKADUR ProtoCast105 from the company altropol. It consists of two components. According to the datasheet the mixing ratio of the resin is 70:100, so for example on 100 grams of component b I have to take 70 grams of component a. It cures way faster than the Silicone and is therefore way harder to work with.
And after some time in the oven, the cast was done! To be honest it doesn't look as good as it could have, because mistakes were made and decisions were not as thought through as they should have been. But still, for someone who knows the game, this is definately a "mimic from dark souls".
get all the files
Since I made the model with the software "Zbrush" which is quite expensive and not suited for people who don't do what I do on a regular basis, I just provide a timelapse video of me making the model.
First things first, to generate the toolpath in Fusion360 you need to go to the "manufacture" workarea. Here you can then create what is called a "setup" which let's you decide which model you want to use, what kind of operation you are setting up for and the work coordinate system. The coordinate sytem is actually the most important part, as the Z-axis has to point upwards.
So this would be wrong, since you would want to mill the top of the material and not the side. The blue axis has to point up (unless it's intentional).
Then you can edit the settings for the stock size, for this example I left everything as is and usually that's all it takes. But there are circumstances where these settings come in handy.
After that is all done, you can cornfi´rm the setup by clicking the "ok" button. Then you can go ahead and configure the generation of the g-code. For that I made an adaptive 3d-toolpath.
First thing to do here is add the tool we want to mill with. So basically this is done by using a caliper, measuring the dimensions of the tool and putting the result into this interface.
Now let's talk about the feeds and speeds. Usually these setings are fine as they are, but since I wanted to cut wax, which is really soft and easy to machine they matter even less.
For the Geometry I usually turn everything off exept "stock contours".
The heights are also usually fine from the get go. You can however use them to save some time milling, if you for example lower the safe z, so the machine doesn't have to move as much whenever it changes positions.
Once you click "ok" the toolpath will be calculated automatically and you can chaack for collisions by selecting "actions - simulate".
To export the toolpath for any given machine, go to actions - post process and select your machine and the correct model. In my case that was "Roland / RML" and "MDX-40". After all of those settings are dialed in, you can go on to click on "ok" and the gcode will be generated.
And this is basically what I did with all of the jobs I generated for this assignment. The changes inbetween are usually pretty minor and depend on the different tools and generation algorithms you use.
So after the design was processed and the necessary g-code generated, it was time to actually mill the part.
As said, the model will be milled in two parts. Therefore we started with the easier of the two, which is the base since it doesn't have any overhangs.
By the way, I used two different materials because we ran out of wax before the assignment, therefore I hat to use foam as my second material. It was milled in wax (which we remelted from collected wax chips by previous milling jobs). The wax block was fixed to a mdf board with double sided tape and then clamped into the machine.
Milling was very straight forward and worked on the first try without any problems.
This is the result:
But now for the actual interesting part of this assignment. Since the design is impossible to mill with our machine, we had to create a jig to be able to keep the reference point and not shift the stock, while rotating it after each job.
In total we did four jobs, one for each side of the quboid stock.
The jig consisted of two lasercut pieces of mdf, that were the exact same size. They had rectangular holes that were perfectly centered and the size of the stocks dimensions.
These were just glued ontop of each other, while beeing careful to keep them alligned perfectly.
Now we put the stock in the rig and the clamped the rig into the machine. And started the first job.
Here are a few pictures of how the first job turned out:
After it was done, we flipped the stock around and started doing all the other jobs one by one.
At some point we noticed that there was a slight shift, even though we really tried to make sure to keep everything alligned.
Allthough that was a bummer, I knew we wouldn't have enought time to start from scratch again. So I just went with it and did the rest of the jobs. Therefore I decided to just try and sand the notches off the model by hand. Around the same time I also decided that the rougth-cut would have to be sufficient, since there wasn't enougth time left and I was blocking the machine for the other sudents. So smoothing the model was also done by hand in the end.
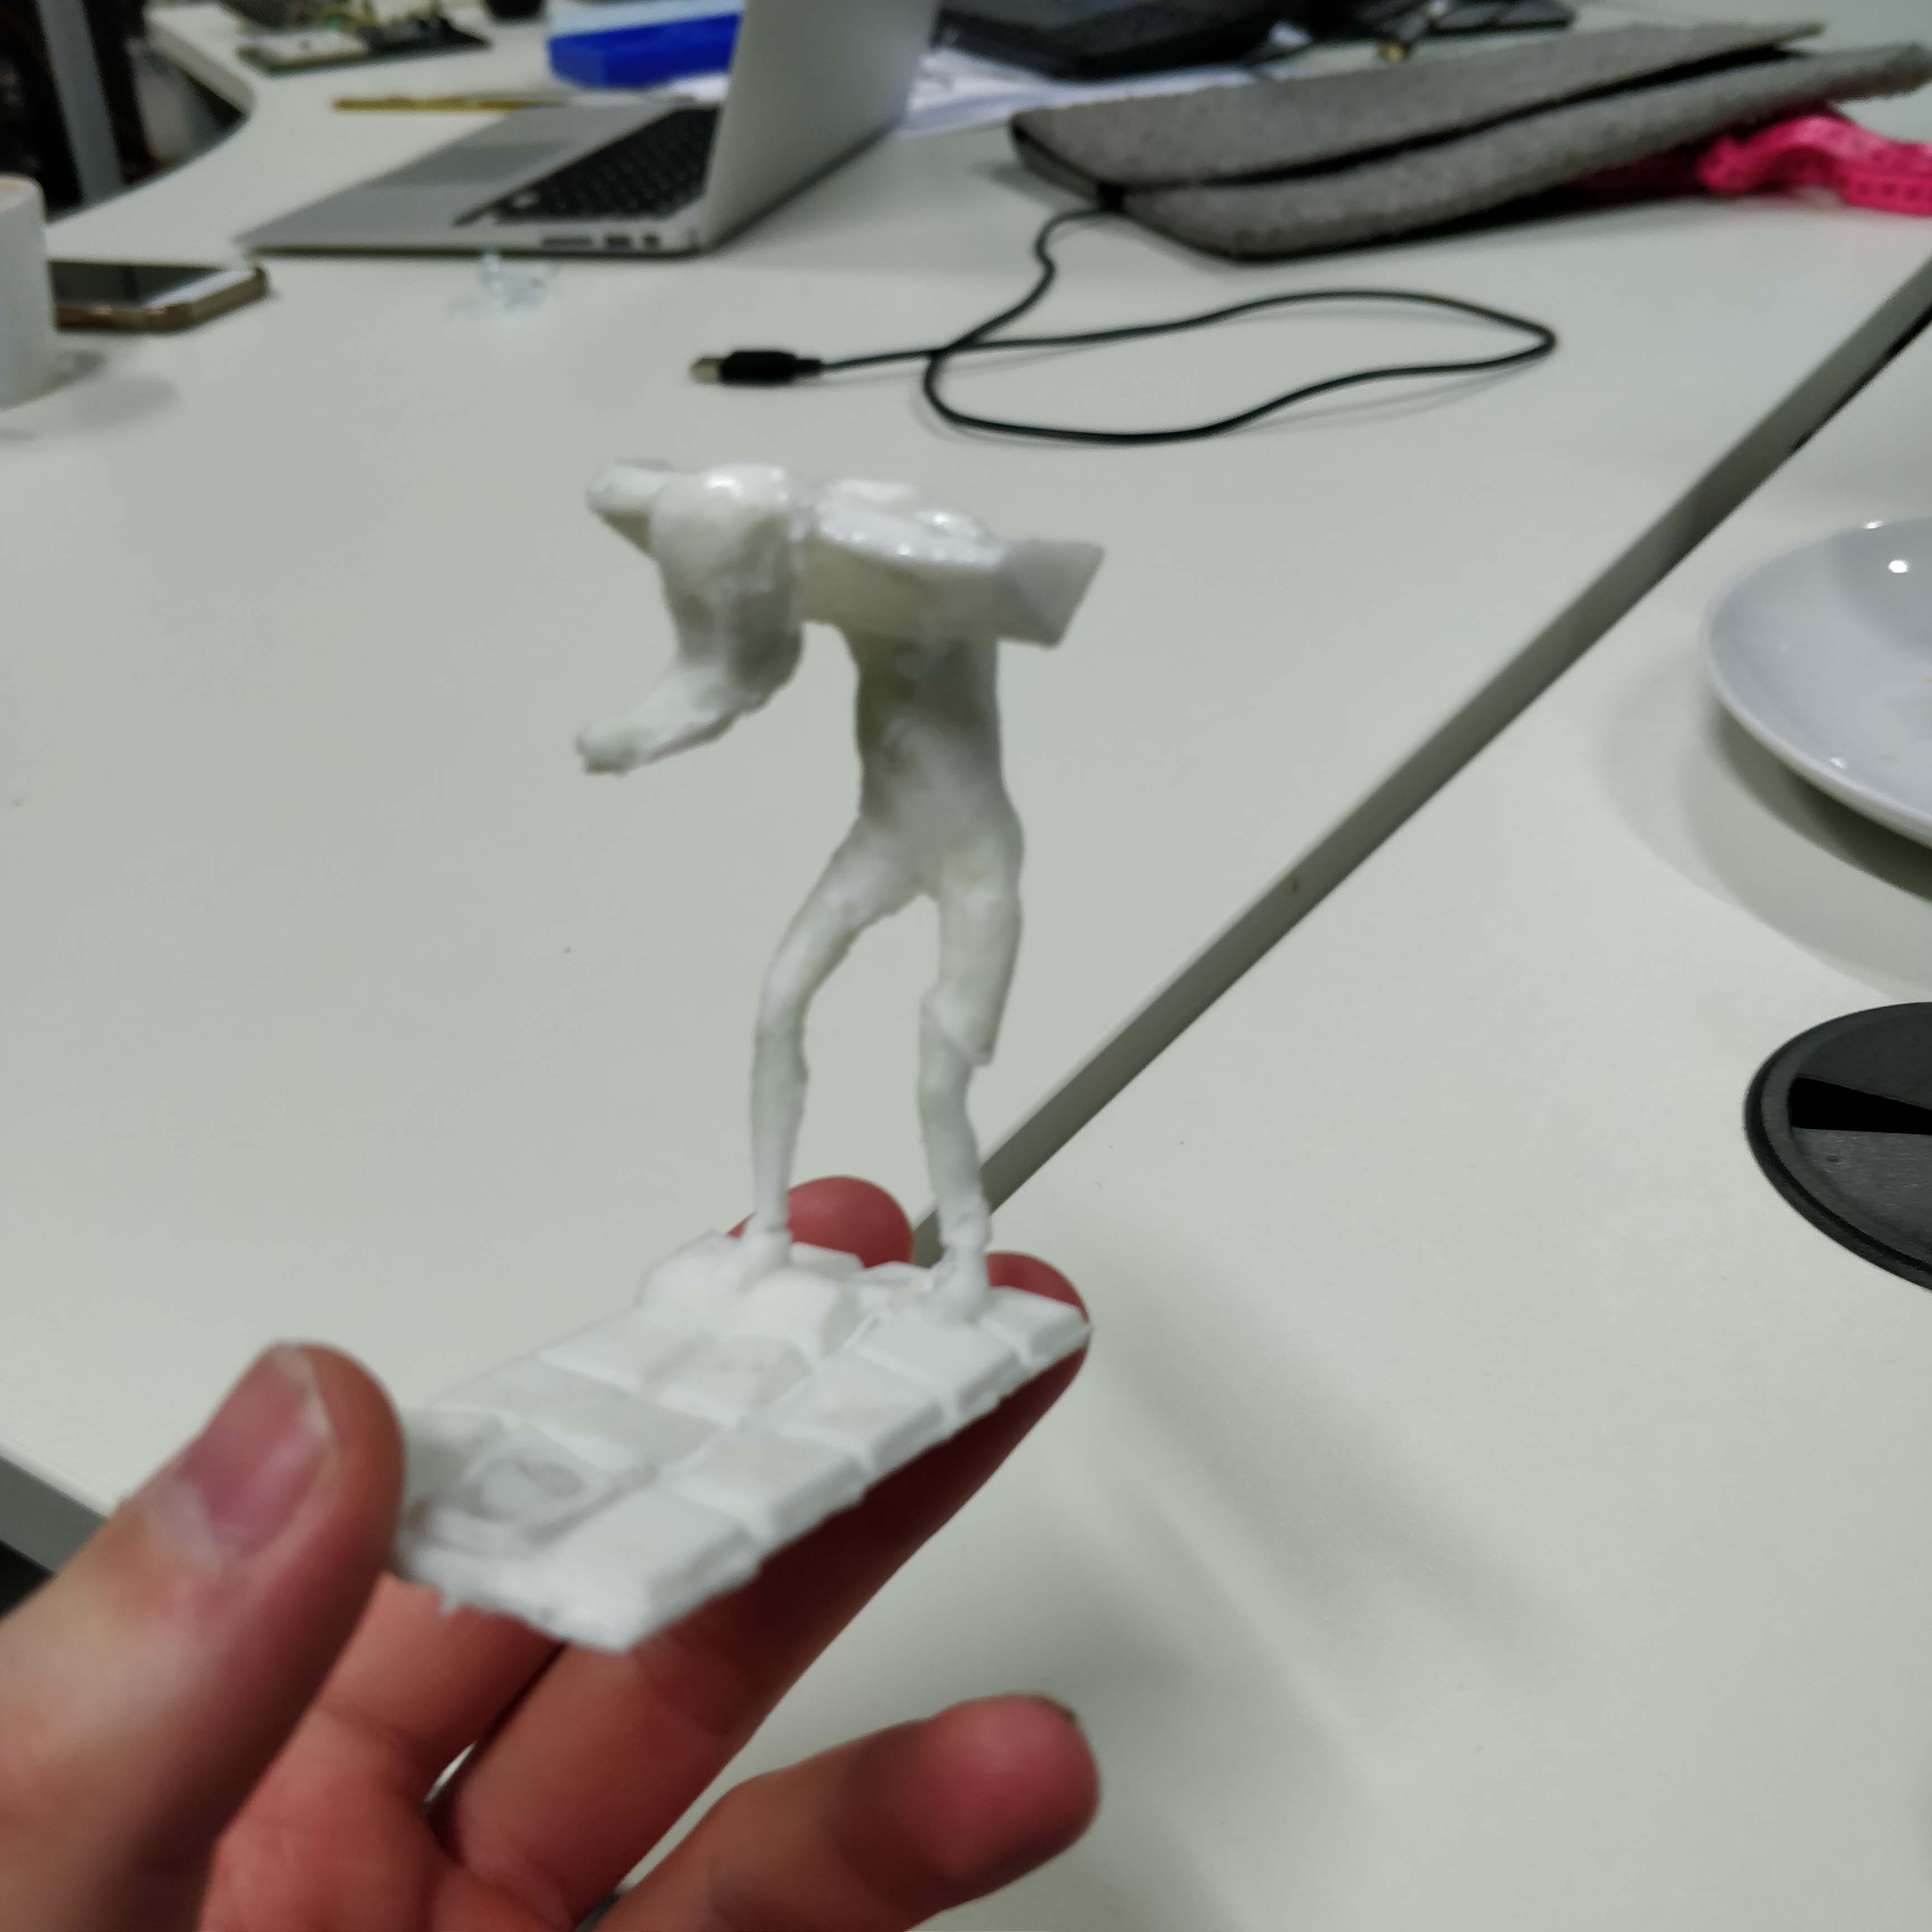
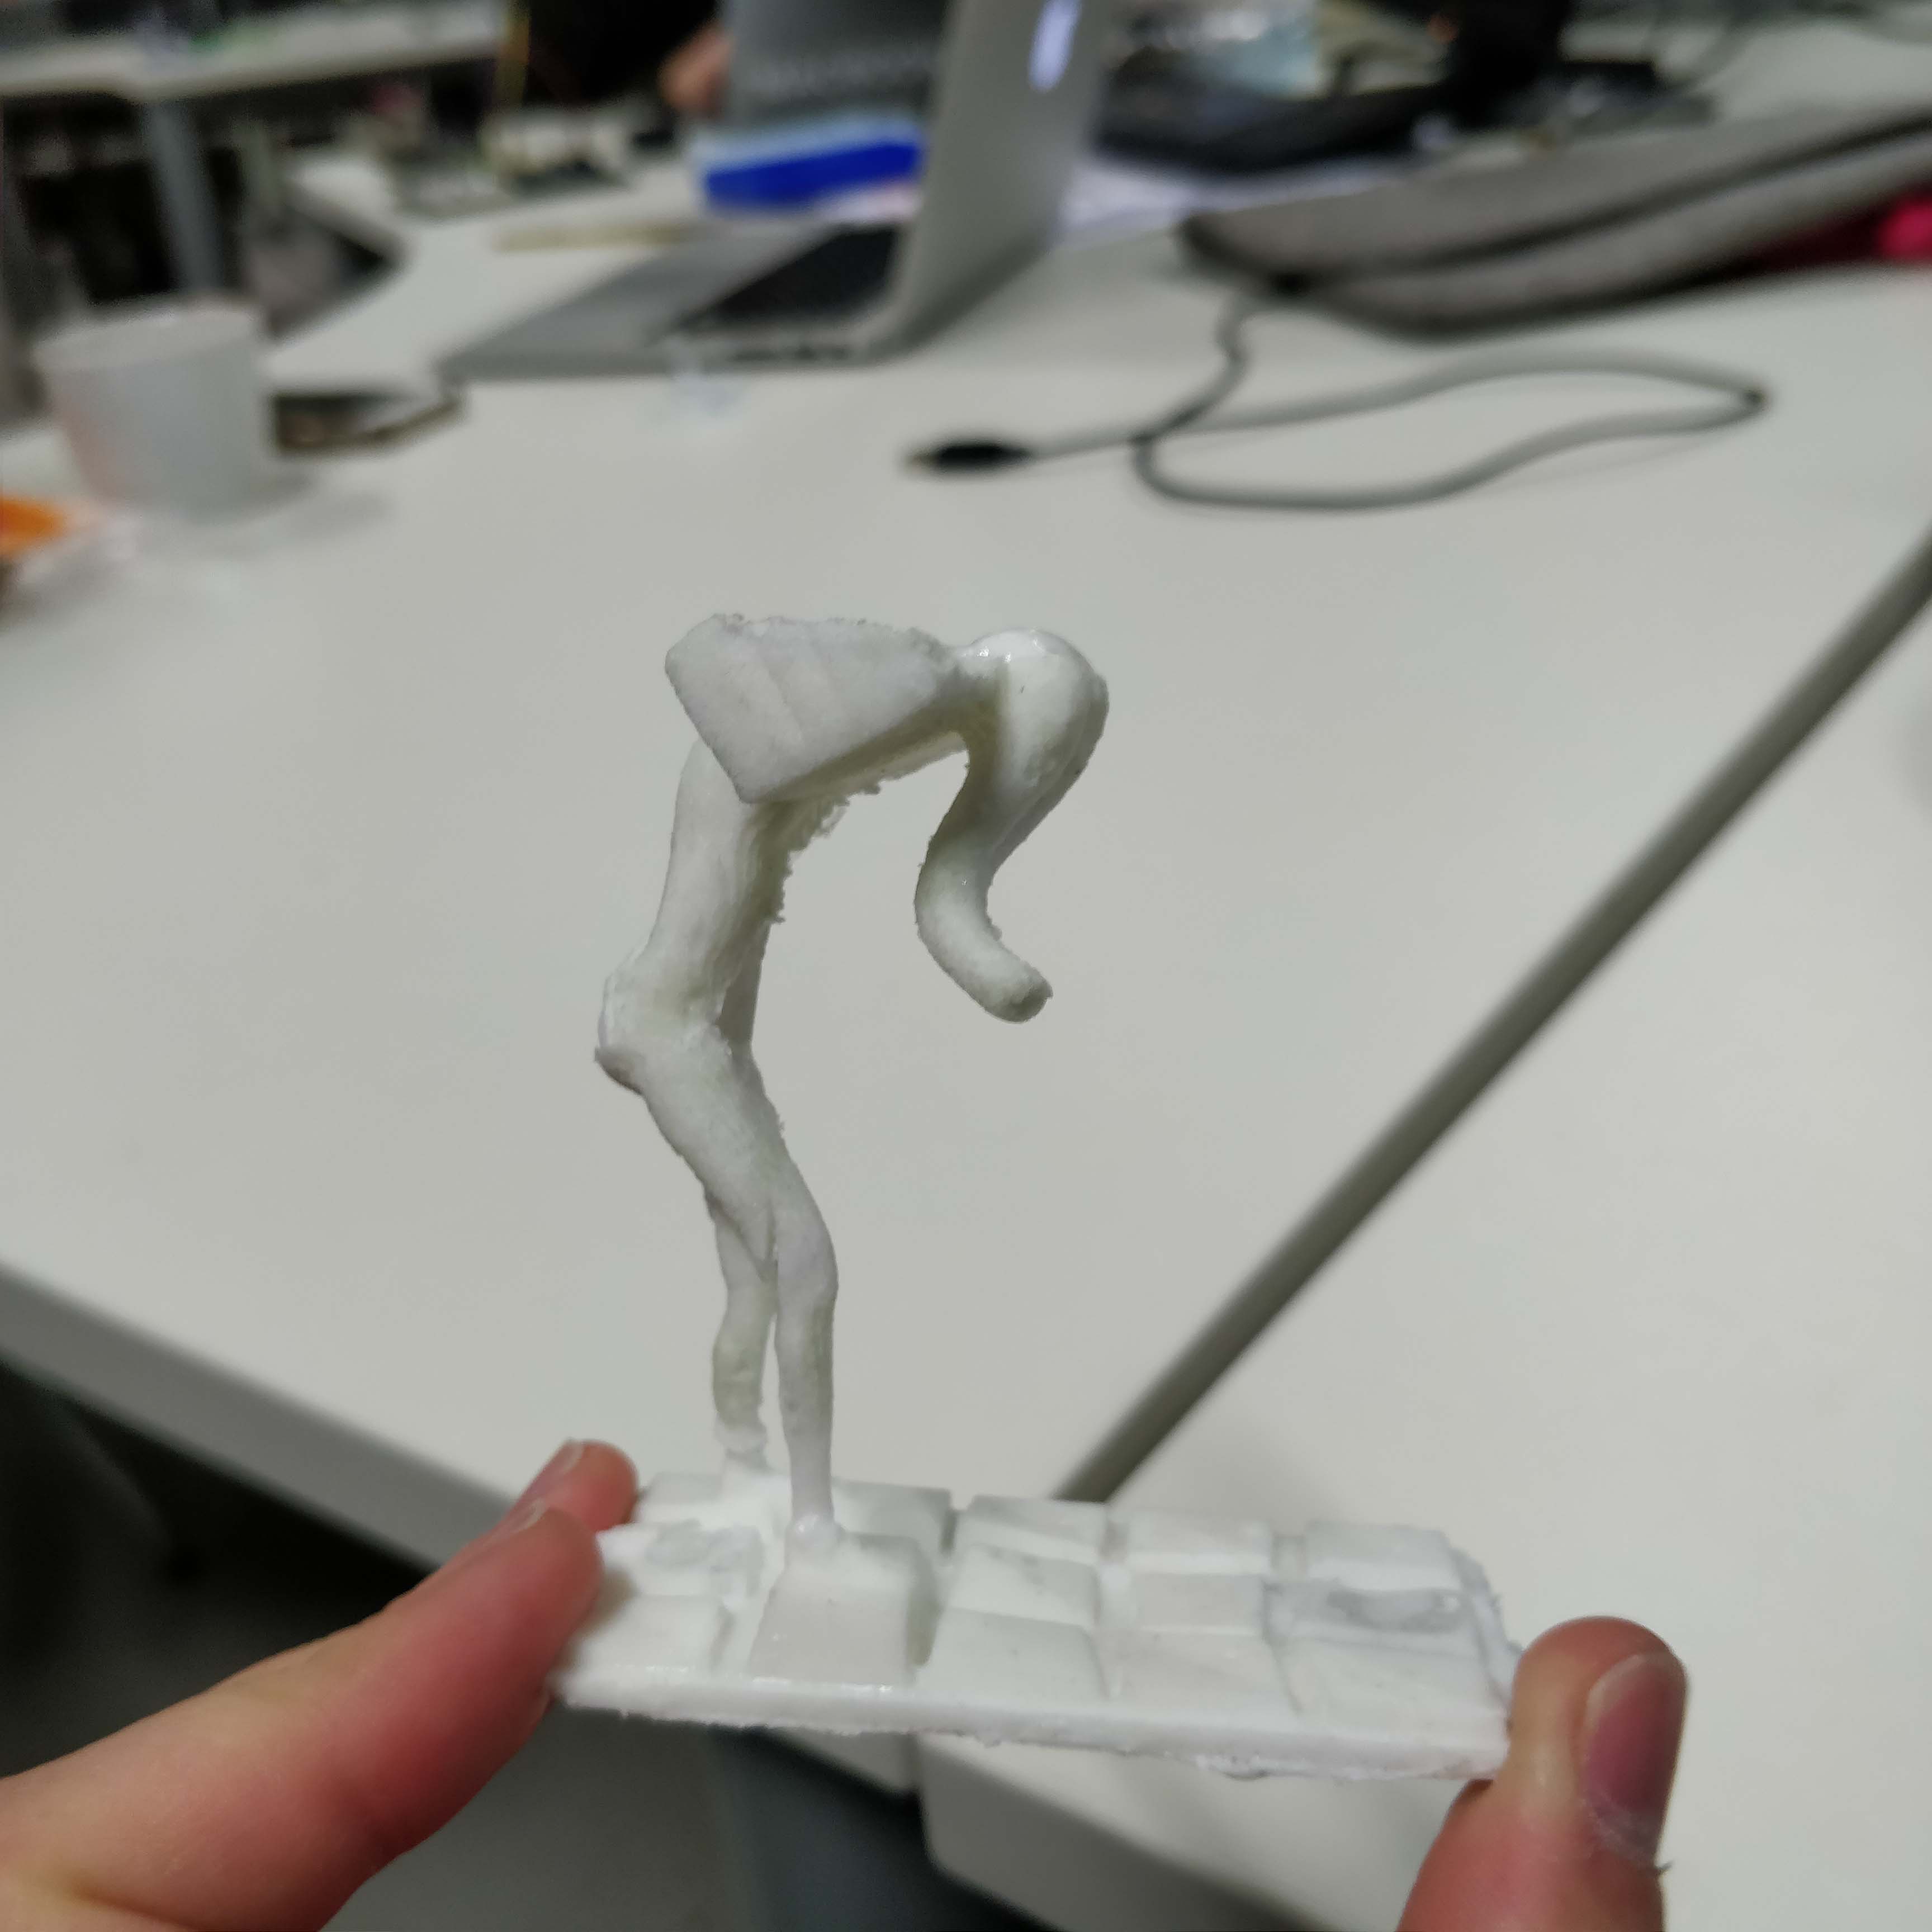
At this point all of the jobs were done and this is the final result.
After finishing smoothing the model, I then started removing the support structure from it.
Which is also when I decided not to include the models arms, sice they would have been way too flimsy and small to be able to successfully cast them in the end.
Now the two parts of the model had to be connected somehow. As it turns out, that was quite the challange because of the legs being very small and therefore not having enough surface area to be glued.
The fix for that was a nail, that I sharpened on both ends of. I just heated it up and stuck it into the base and then I stuck the model it.
As you can see, the model now stands freely and sturdily and is ready to be cast in silicone.
For that it needed to have and outer shell, which I quickly cut out of mdf on the bandsaw and glued together with hotglue.
I then placed the model inside the shell and sealed everything with more hotglue.
So now it was time to mix up a batch of silicone to cast the negative of the model with. There are a few things to take into concideration before blindly mixing the silicone and it's hardener. First is the amount you will need which is roughly calculated by multiplying the width, height and length of the mold. Also, the mixing ratio of hardener and silicone is very important, this is usually stated in the silicone's datasheet. In my case the ratio was 100 units of silicone to 10 units of hardener. in my case that means I will need roughly 480 g of silicone and 48 g of hardener.
The Silicone is stored in a big barrel and it is crucial to keep it away from the rim of the barrel, because it might glue it shut otherwise.
Then I got myself a plastic container to mix my silicone in and put it on the scale to tare it.
I then measured and mixed my silicone and the hardener, but since that introduces a lot of air into the mixture regardless of using a shearing motion to stirring it, it has to go in the vacuum chamber to get all of that eccess air out.
The vacuum chamber has a dedicated holder for the container to sit in and a "remote" mixing tool can be attached optionally.
So now let me explain the vacuum chamber a little bit. It has a valve on it's side, which is used to let air back into the chamber. First picture shows the valve being in the open state and the second one shows it being in the closed state. Of course, when pulling the air out of the chamber, this valve has to be closed.
Also make sure that the main's power switch is turned on.
This is the machines interface, on top there is the pressure display: around 1000 is atmospheric pressure and 0 is a full vacuum. Then there is a black knob with the lable "rührgeschwindigkeit", which is "stirring speed" in german and it controls the speed of the remote stirring tool. And then last but not least, there is another black knob, which turns the pump on and off when set to 1 or 0.
I then closed the door of the chamber, checked if the valve is closed and started pulling the air out with moderate stirring. At some point the mixture started bubbling up vigorously, whenever that happened I stopped the pump and opened the valve a bit to let a bit of air back into the chamber.
I repeated that process until the display read 0, at that point I stopped the pump and waited for 5 more minutes until I opened the valve to fill the chamber with air again.
Now the mixture was ready to be poured into the mold. Important to note is that the silicone should be poured very slowly to avoid introducing any air into it.
To make the curing process faster, I then put the mold into the oven at 80°C which cut the curing time in half, from 24 to 12 hours.
After It was cured, I took the casing off of the mold and carefully removed the bottom part.
I then cut the silicone in half with a exacto blade and in a zigzag pattern. I cut it in that pattern to have registration when putting it back together.
This also revealed the biggest mistake we made when doing ths assignment. We didn't seal the foam, so the silicone and the foam basically became a composite and were really hard to seperate. This was a very frustrating, time consuming and unfortunately undocumented experiance.
After that I cut a venting hole and a pouring hole into the top of the mold.
Then I clamped the mold back together and added a piece of scrap Silicone as a bottom. This was fixed onto the actual mold with simple white hot glue.
I then went ahead and mixed up a batch of resin using the same techniques as with the silicone.
The resin I used was NEUKADUR ProtoCast105 from the company altropol. It consists of two components. According to the datasheet the mixing ratio of the resin is 70:100, so for example on 100 grams of component b I have to take 70 grams of component a. It cures way faster than the Silicone and is therefore way harder to work with.
And after some time in the oven, the cast was done! To be honest it doesn't look as good as it could have, because mistakes were made and decisions were not as thought through as they should have been. But still, for someone who knows the game, this is definately a "mimic from dark souls".
Group Assignment
Here you can find this week's group assignment.get all the files