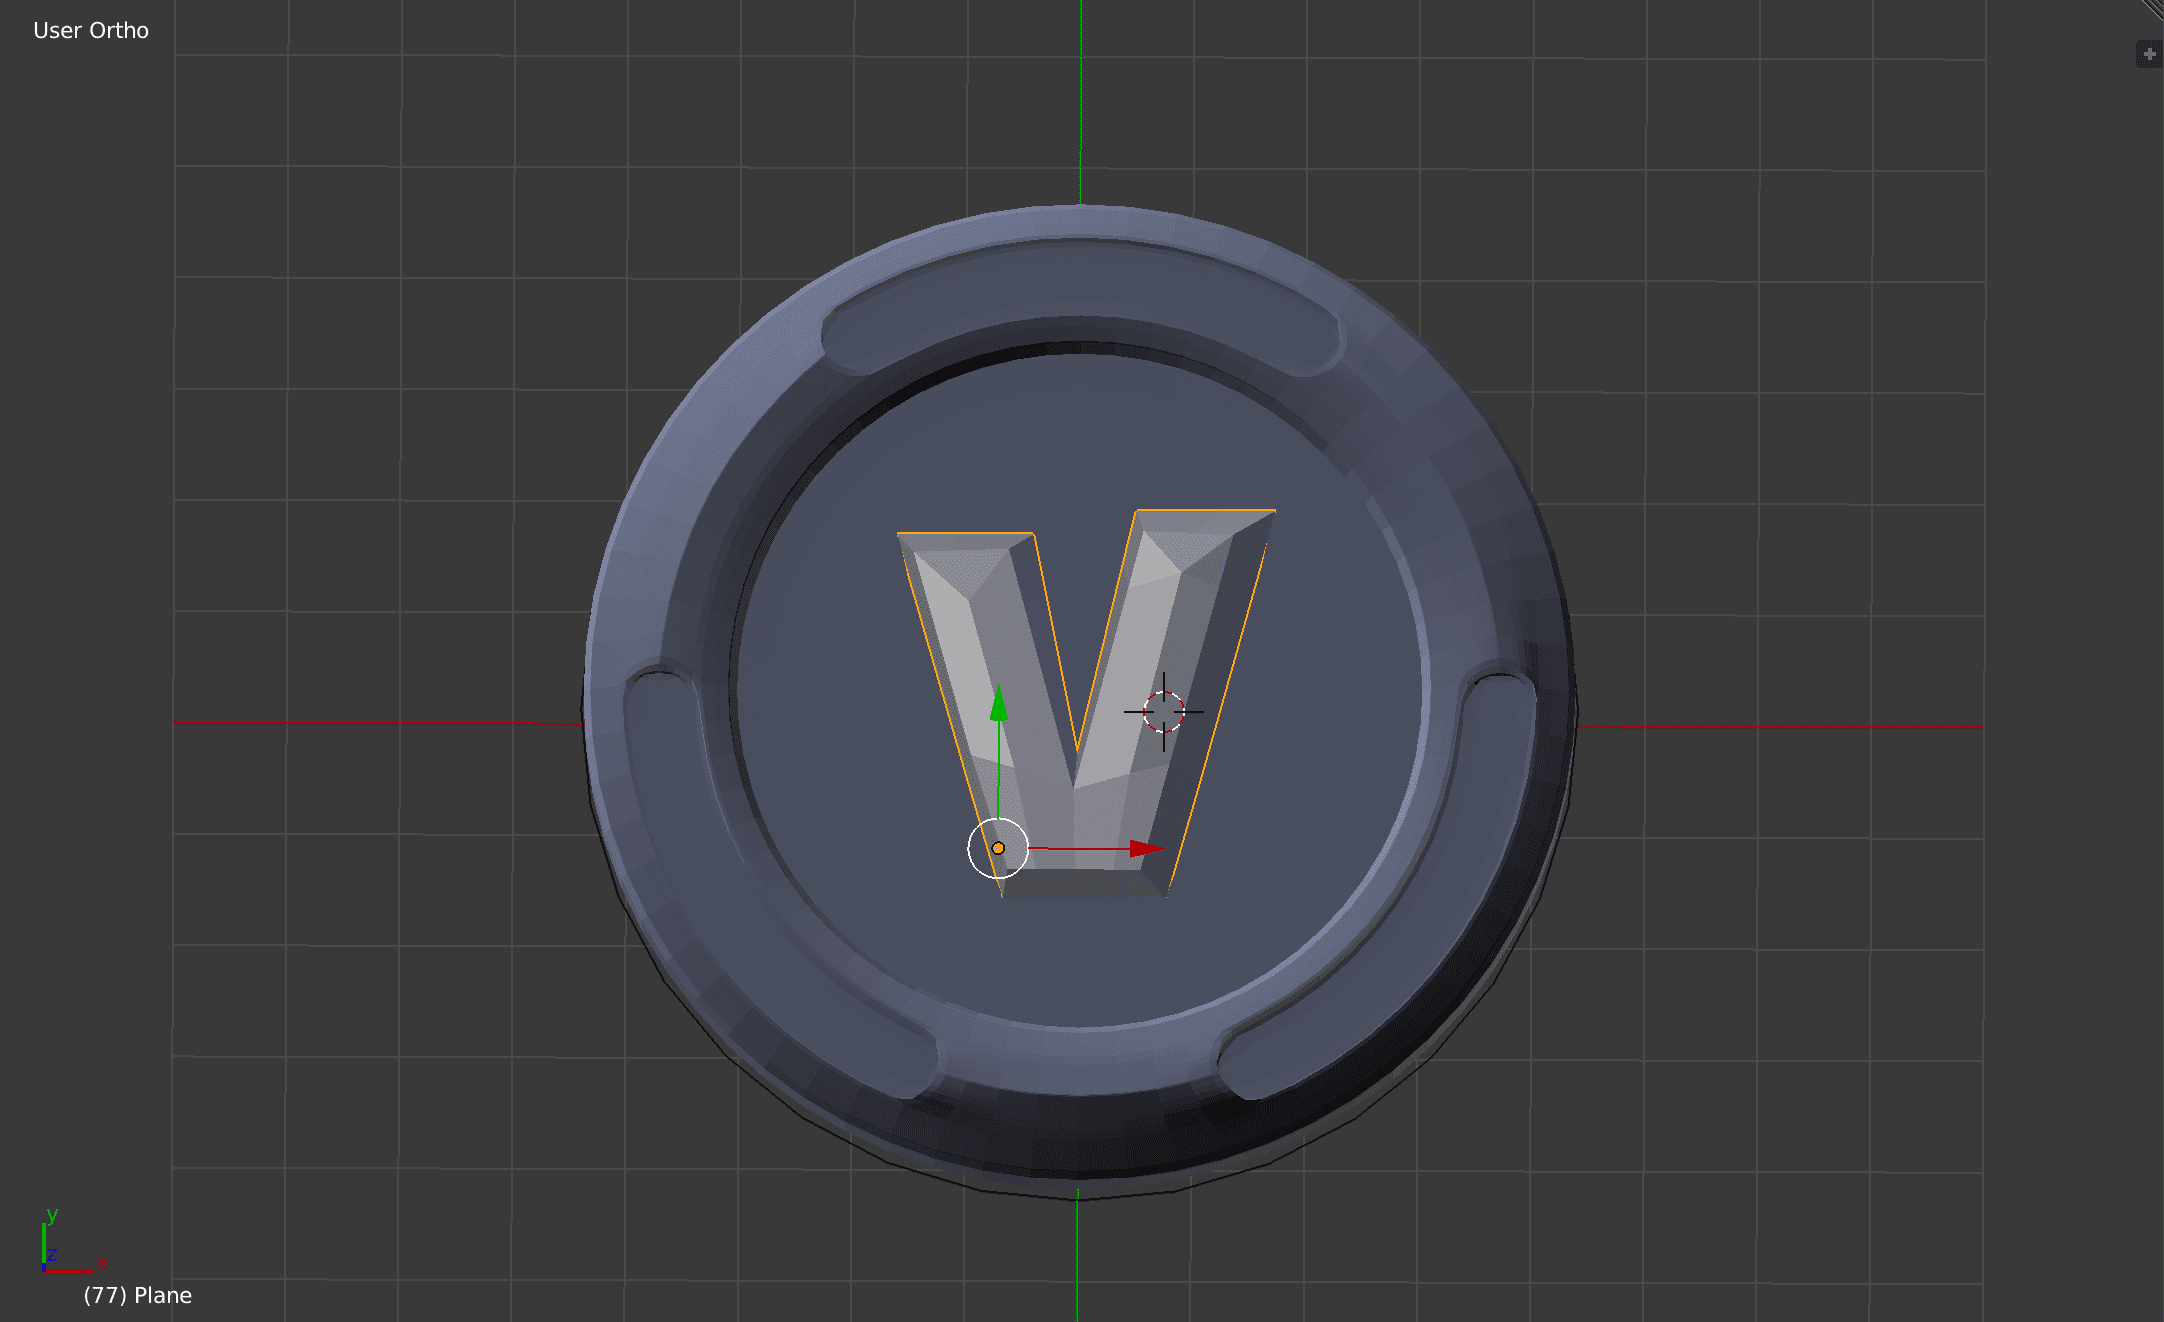
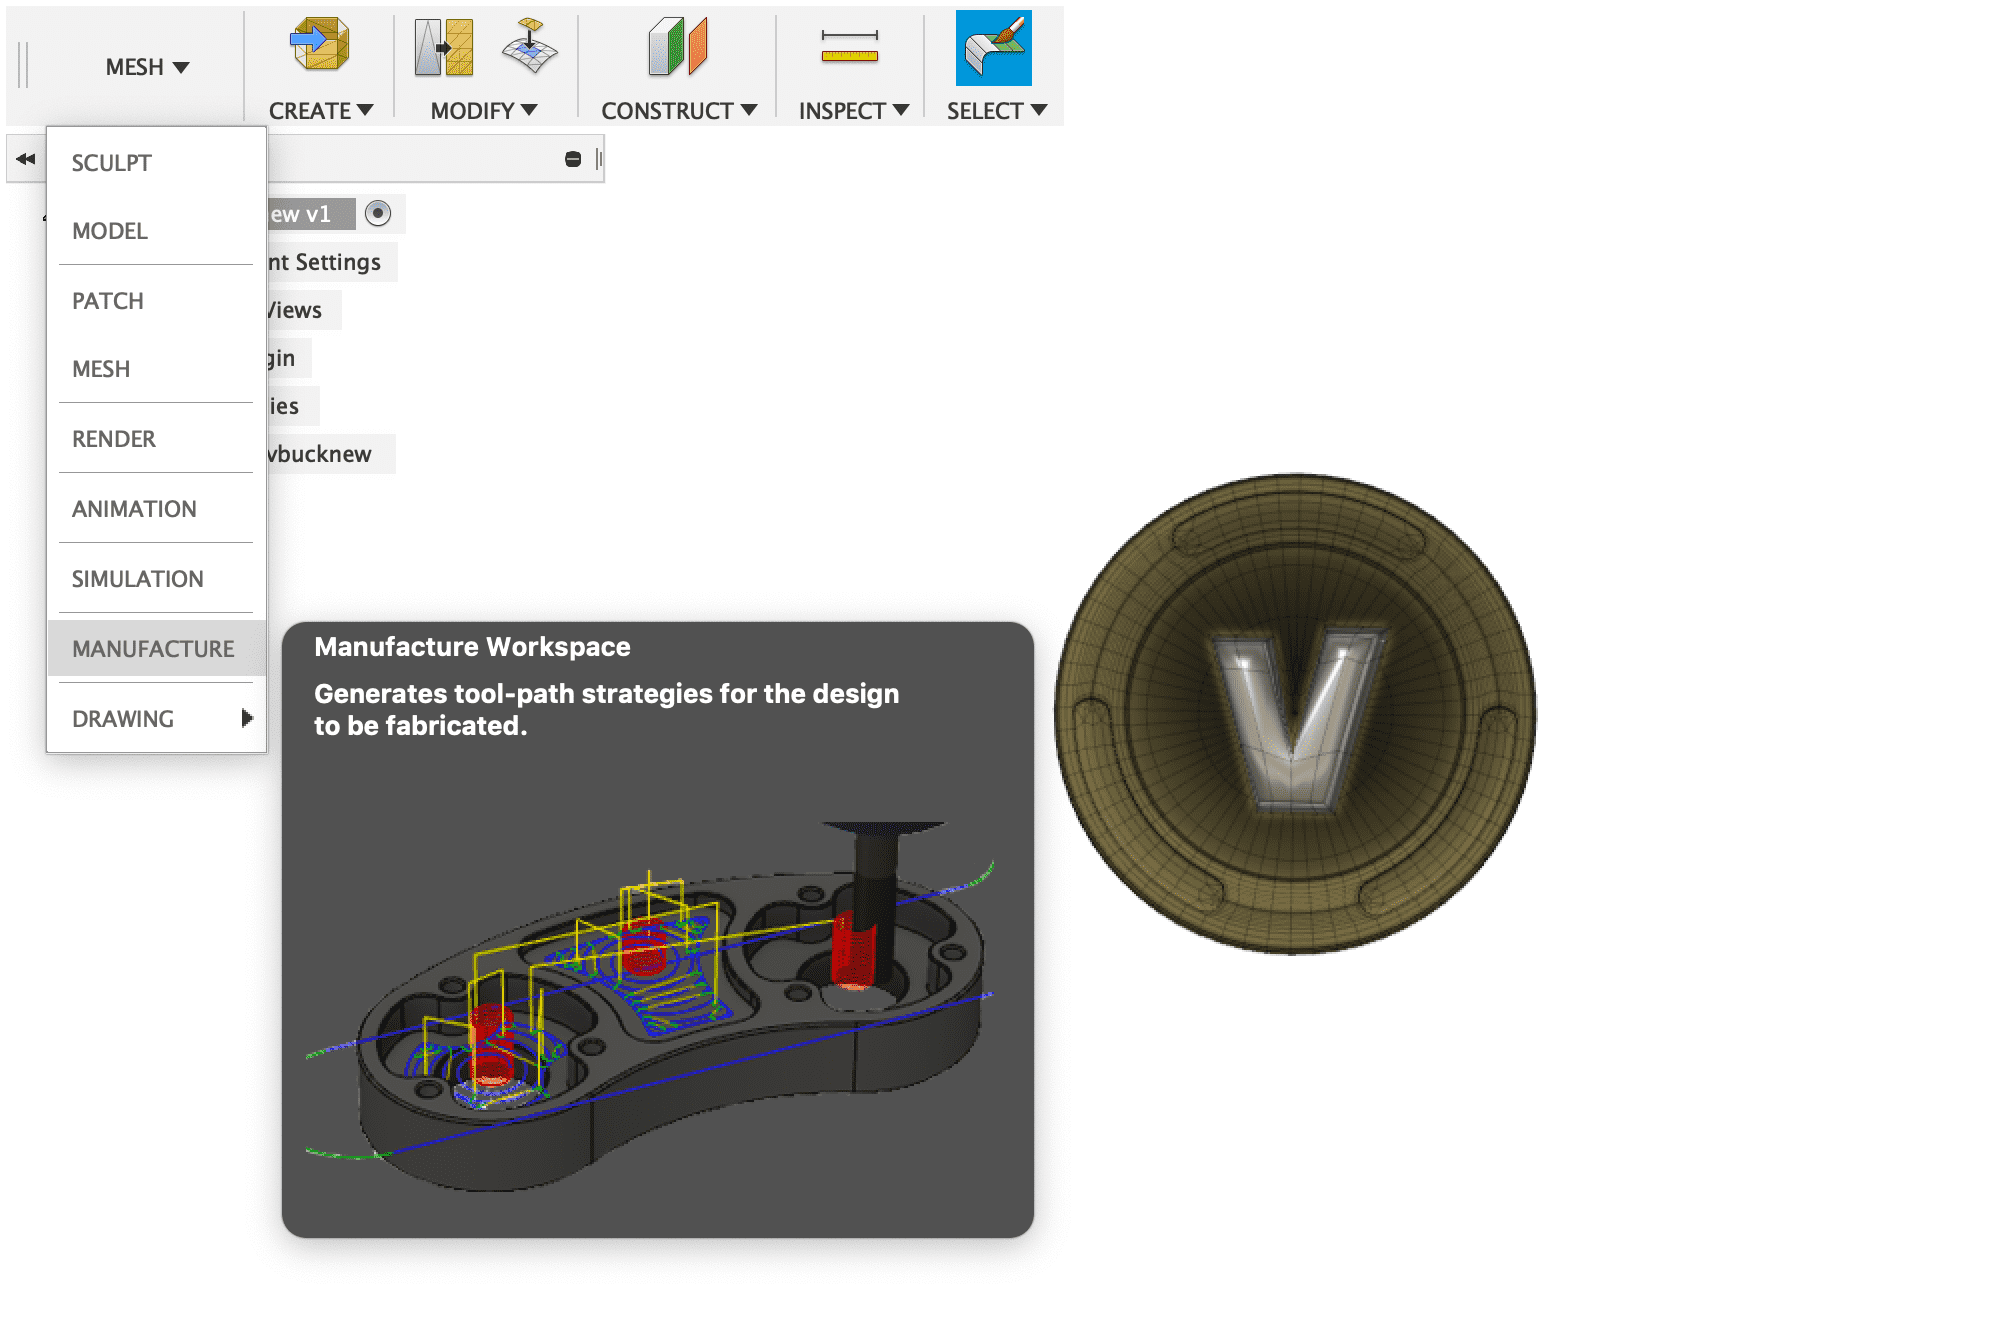
I have created a model using Blender. Blender is a free 3d-model software to create very creative and unique 3d-models. For further information check this link.


SETUP SETTINGS
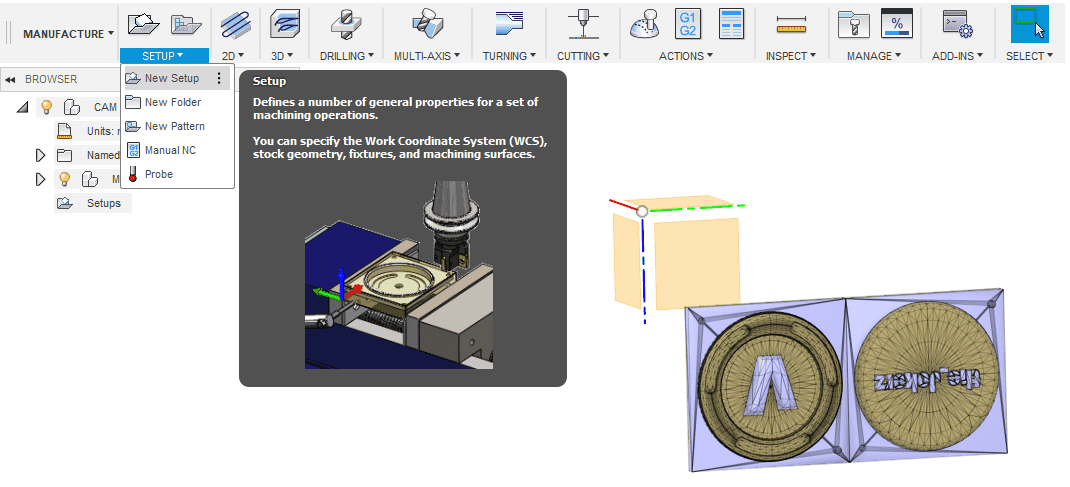
I will use milling as the operation type, I just navigate to Manufacture in the top left
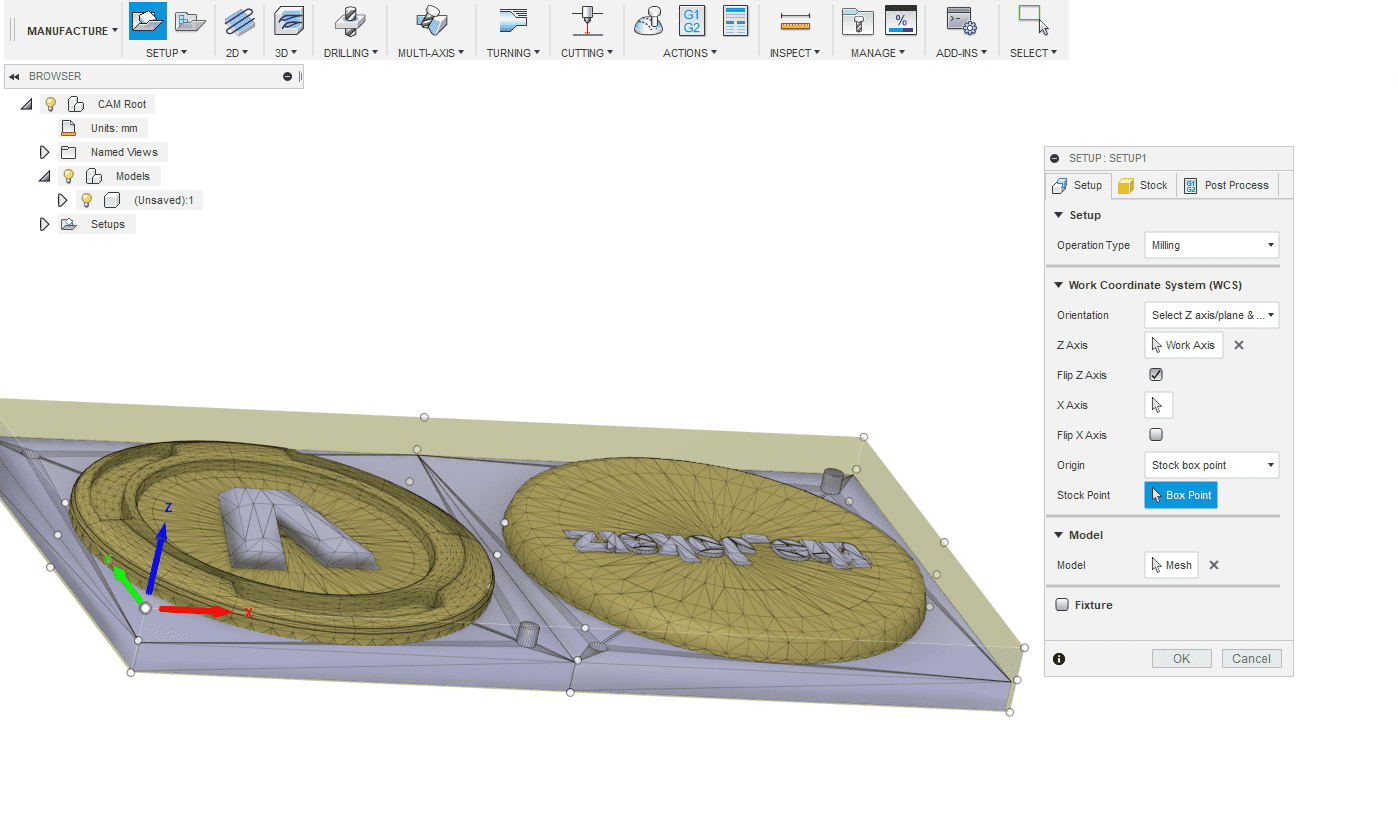
Then I create a new setup by selecting Setup -> New Setup. In the new setup we have to set an orientation axis according to the model this could change. The second thing to set is the stock point according to the zero point of our CNC-machine.
Also we have to define the size opf our stock, I have set the box according to the block of wax I had.
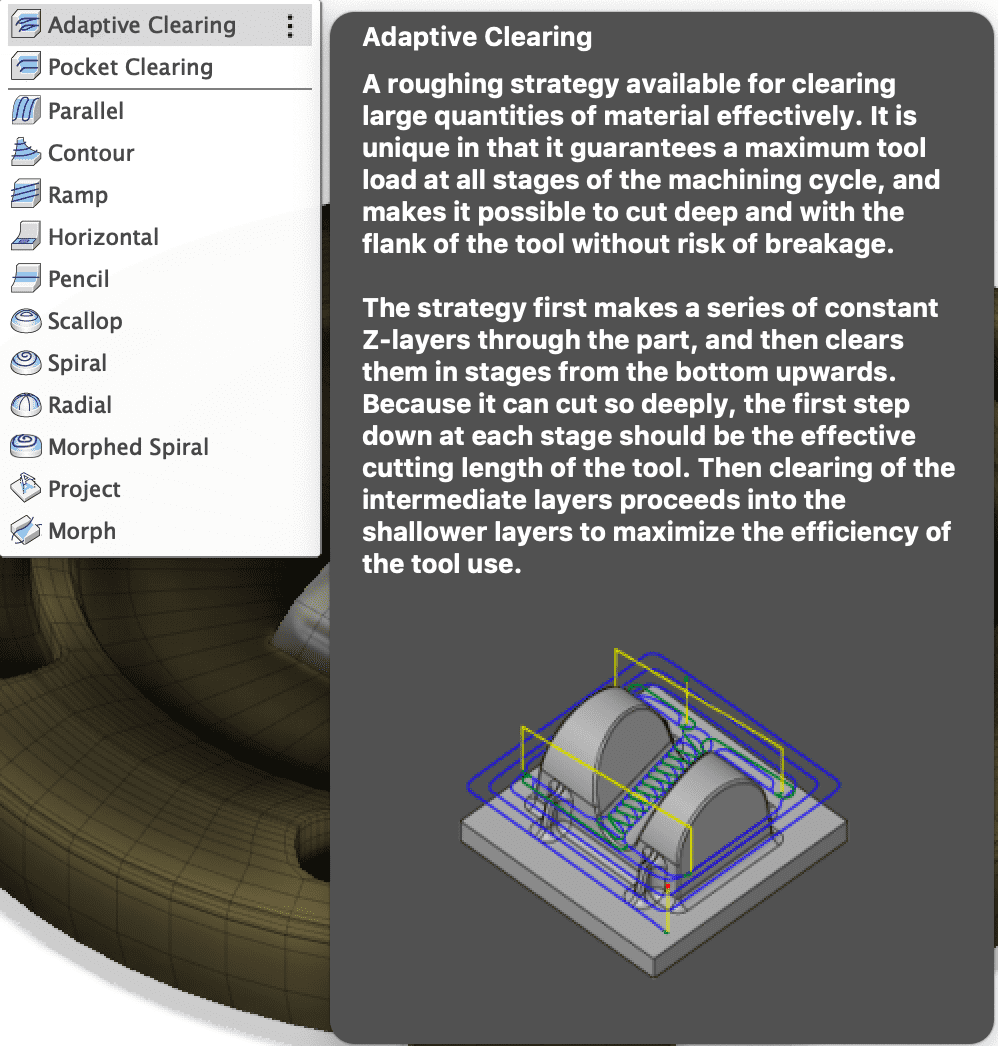
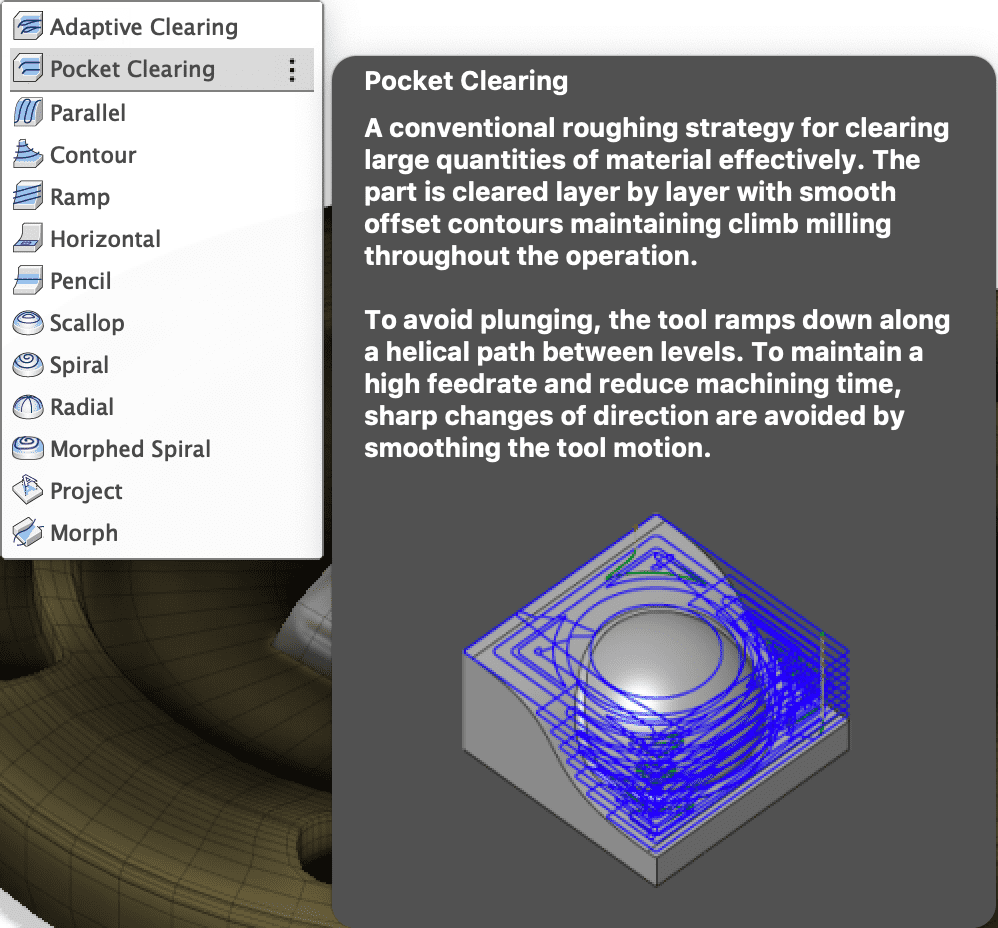
Now I was ready to select a milling technique, there are different techniques which are working in a different way to get a slightly different outcome.
The first technique is Adaptive clearing, which is used to get rid of most of the material, the technique guarantees a maximum tool load the whole process.
Another technique is Pocket clearing, which is also used to get rid of most of the material. The difference to adaptive clearing is that it takes of the material layer by layer and does not calculate a specific toolpath, which can save time and guarantees maximum spindle speed at any time of the process.
Tool settings
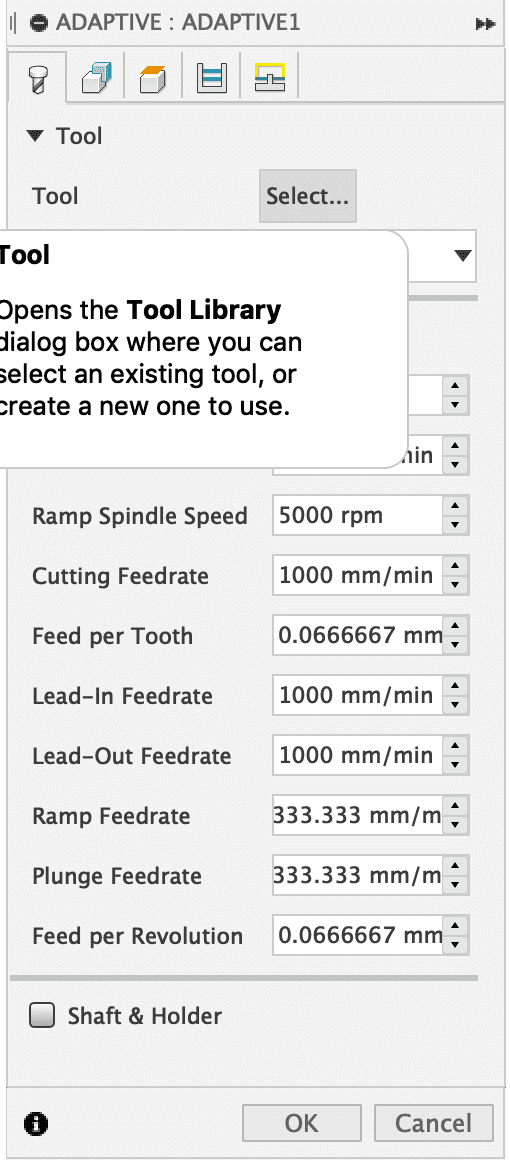
First thing first i had to selected a tool by pressing on the "select" button
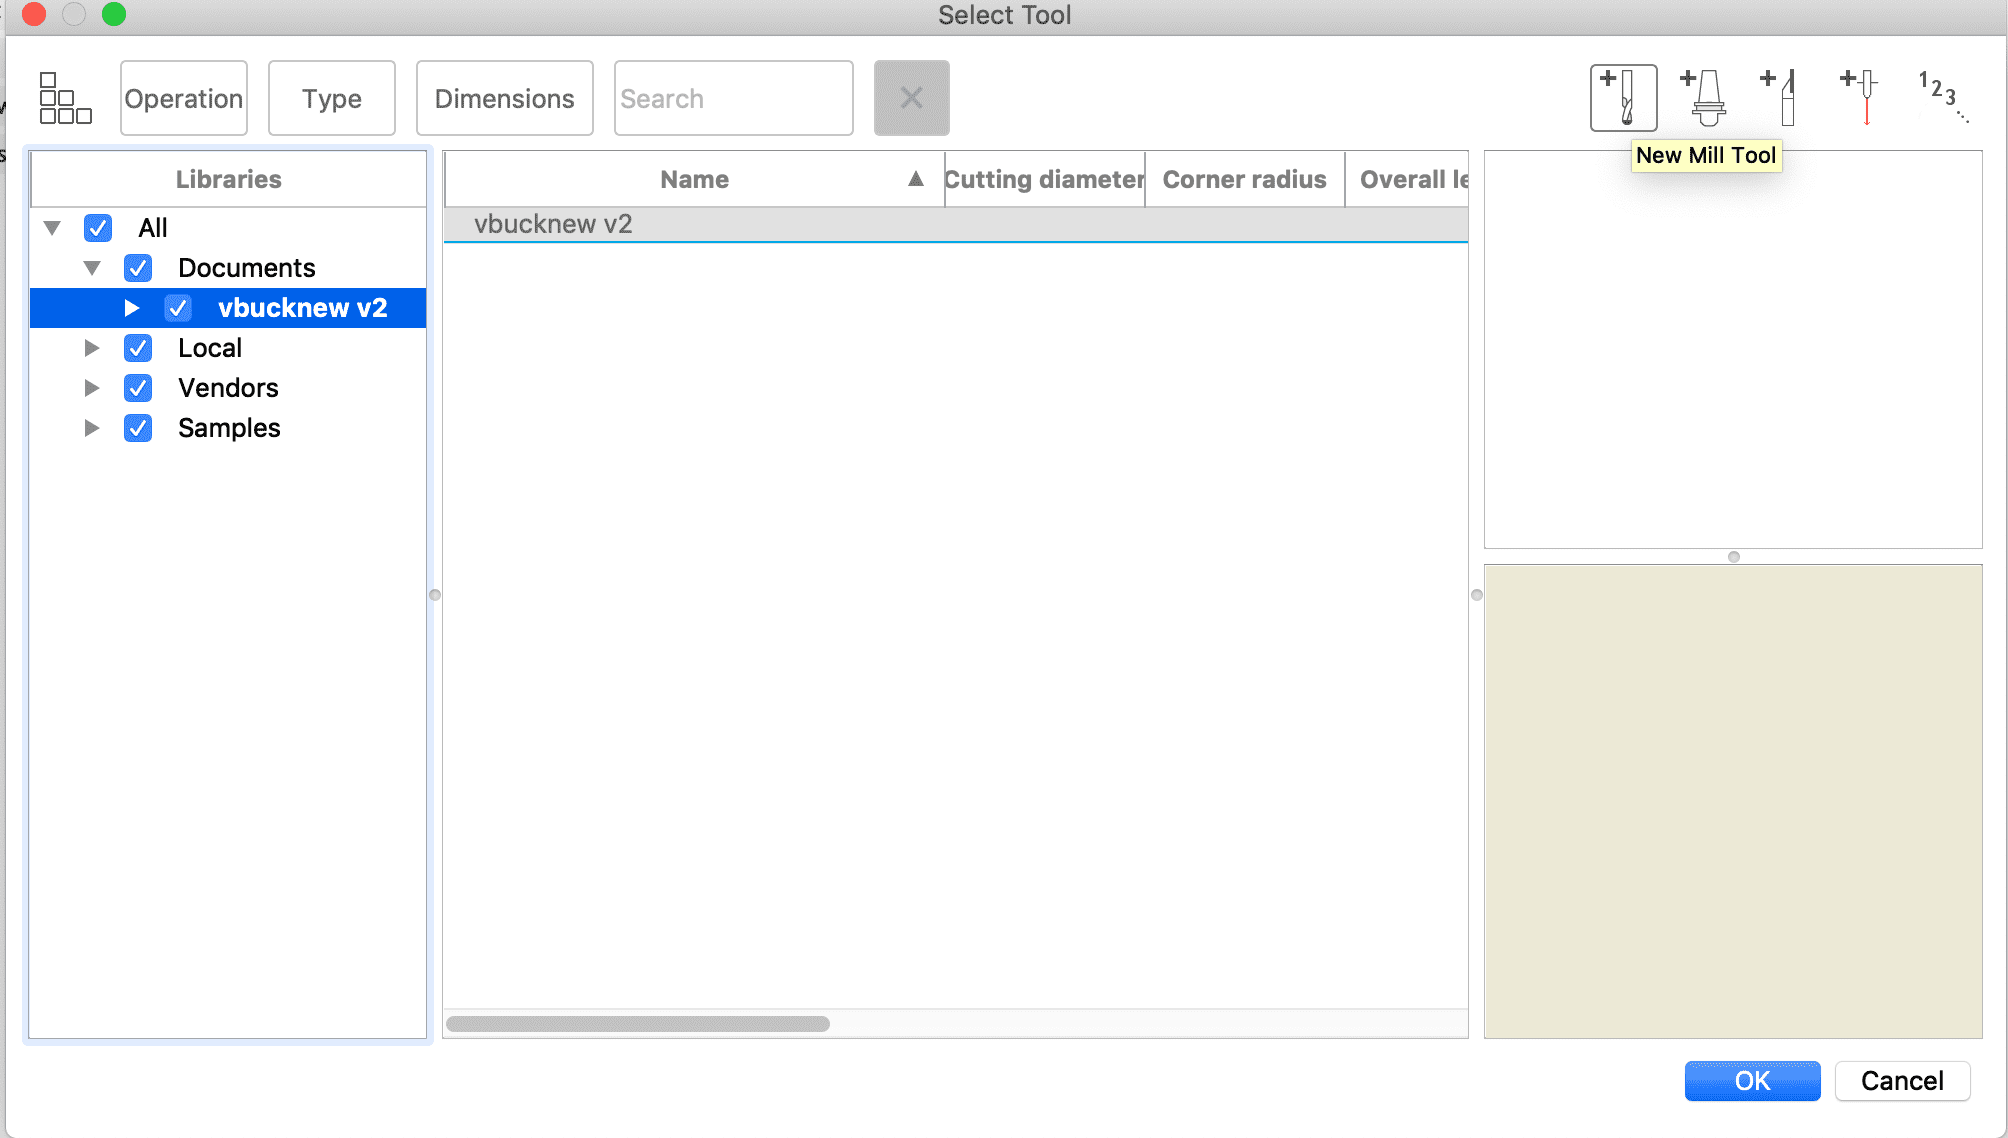
A window opens, in this window I am now able to select a tool. In my case I haven't got a tool yet so I had to add a tool by pressing on the new milling tool button on the right side
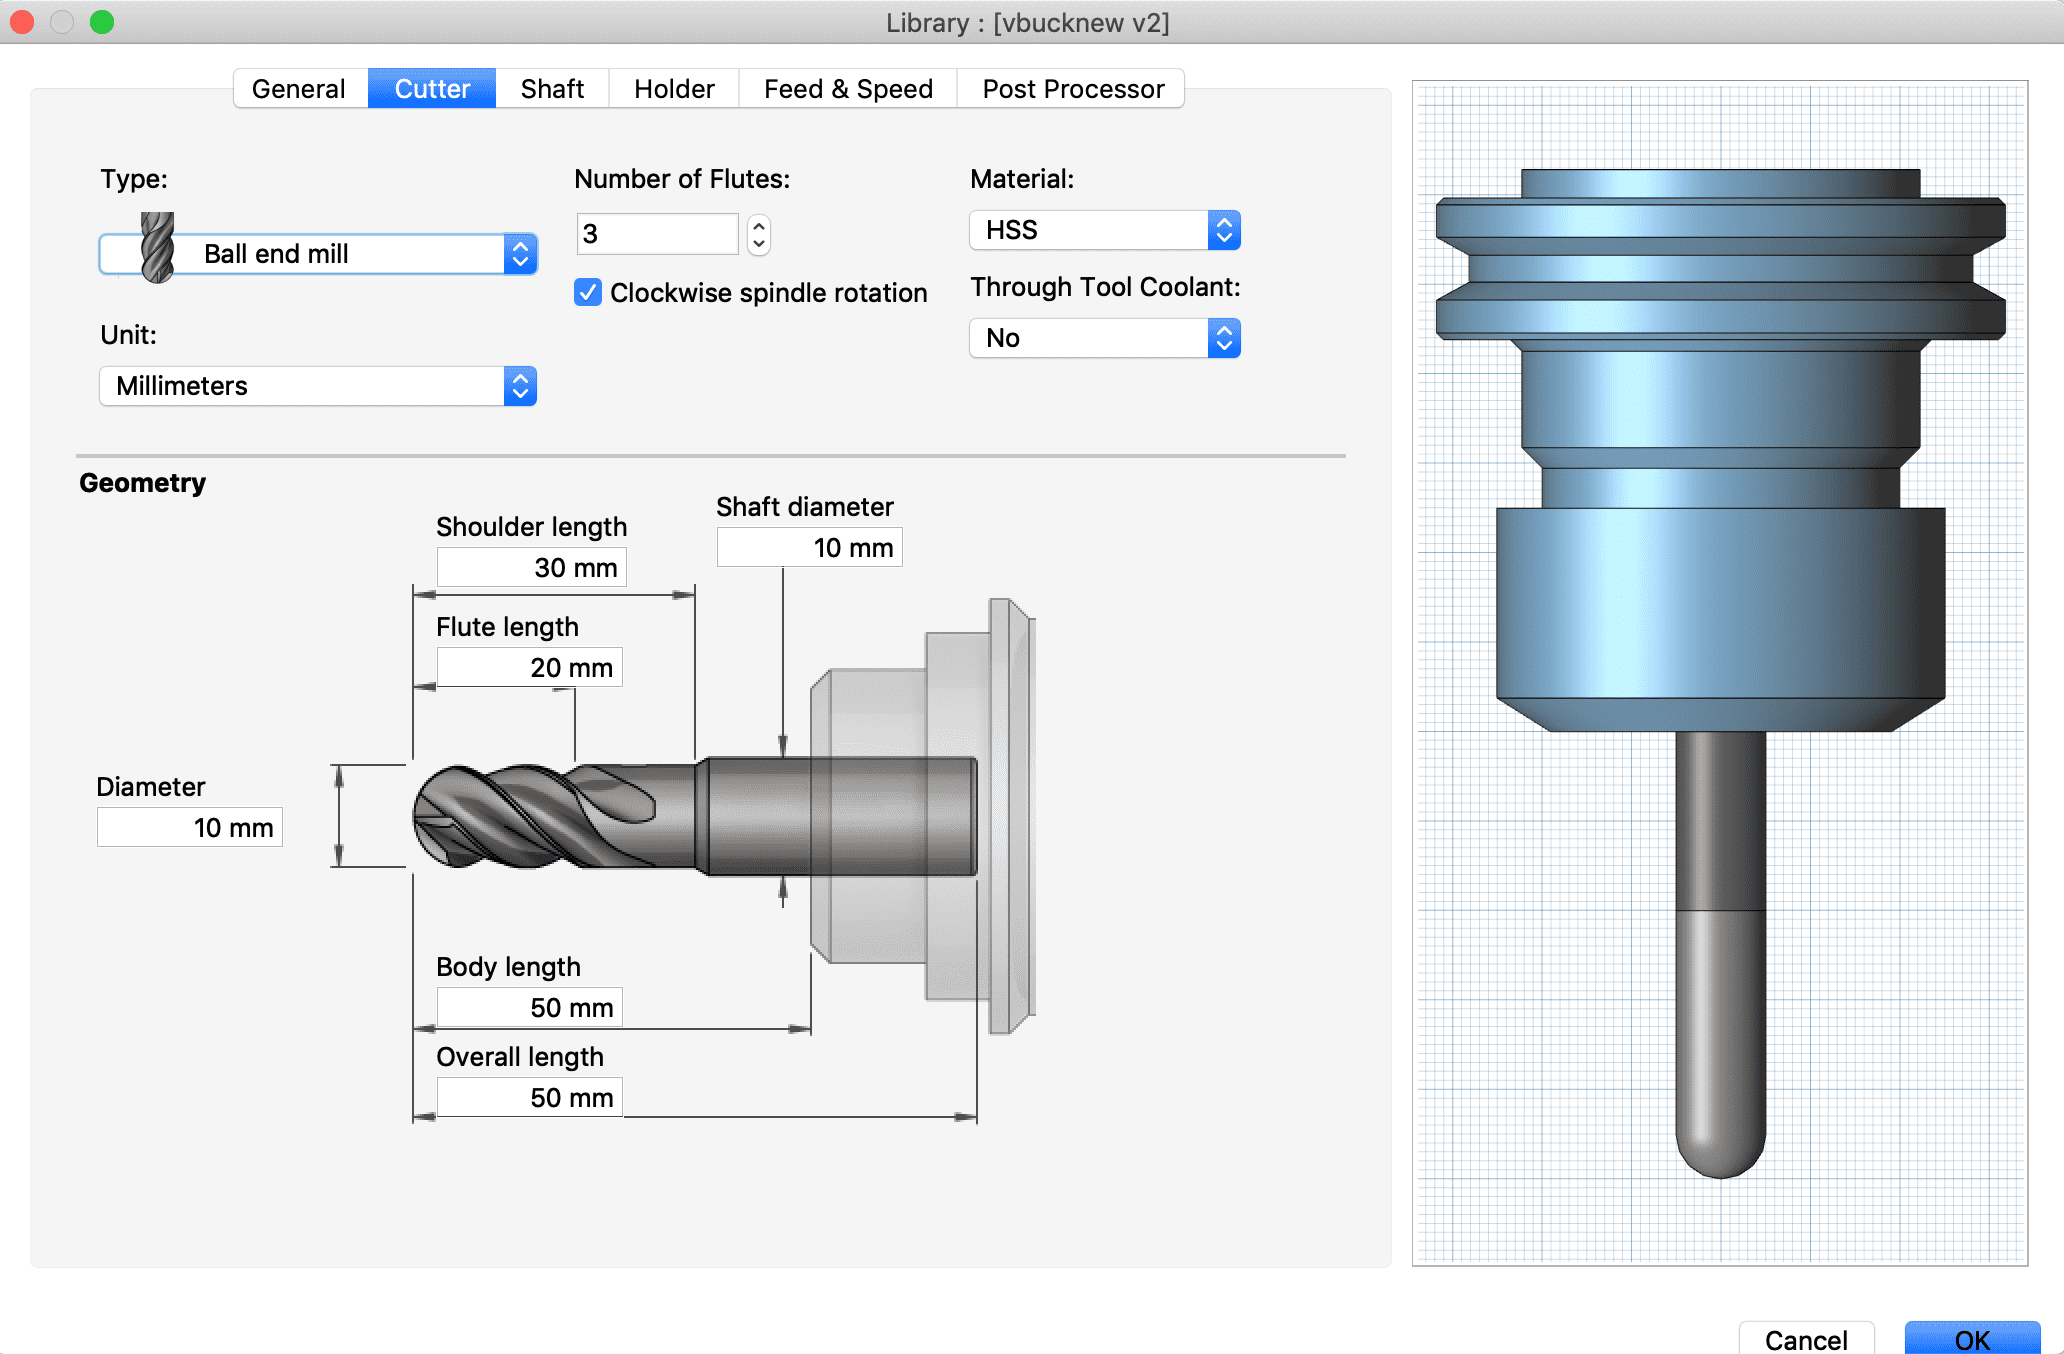
another window opens, in this window we can now set the parameters of our milling tool. These parameters are different with every tool and you have to measure them by your own. Fusion shows you what you have to measure in a simple graphic.
Spindle speed: The maximum speed our cnc machine can do
Surface Speed: Speed the tool goes over the surface with, this parameter I didn't changed
Ramp Spindle Speed: Spindle speed during ramps, didnt changed this parameter
Cutting Feedrate: cutting speed
Lead-In Feedrate: speed of the milling head plunging to the stock
Lead-Out Feedrate: speed of the milling head moving up from the stock
Ramp Feedrate: The speed of the spindle, when doing a helical ramp into the stock, didn't changed this parameter
Plunge Feedrate: Plunging speed, didn't changed this paramter
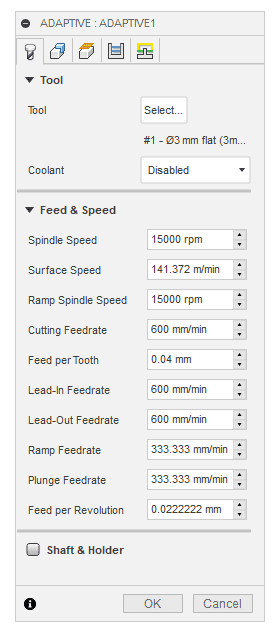
Now if I press Ok, the CAM porcessor will create a toolpath for the cnc-machine.
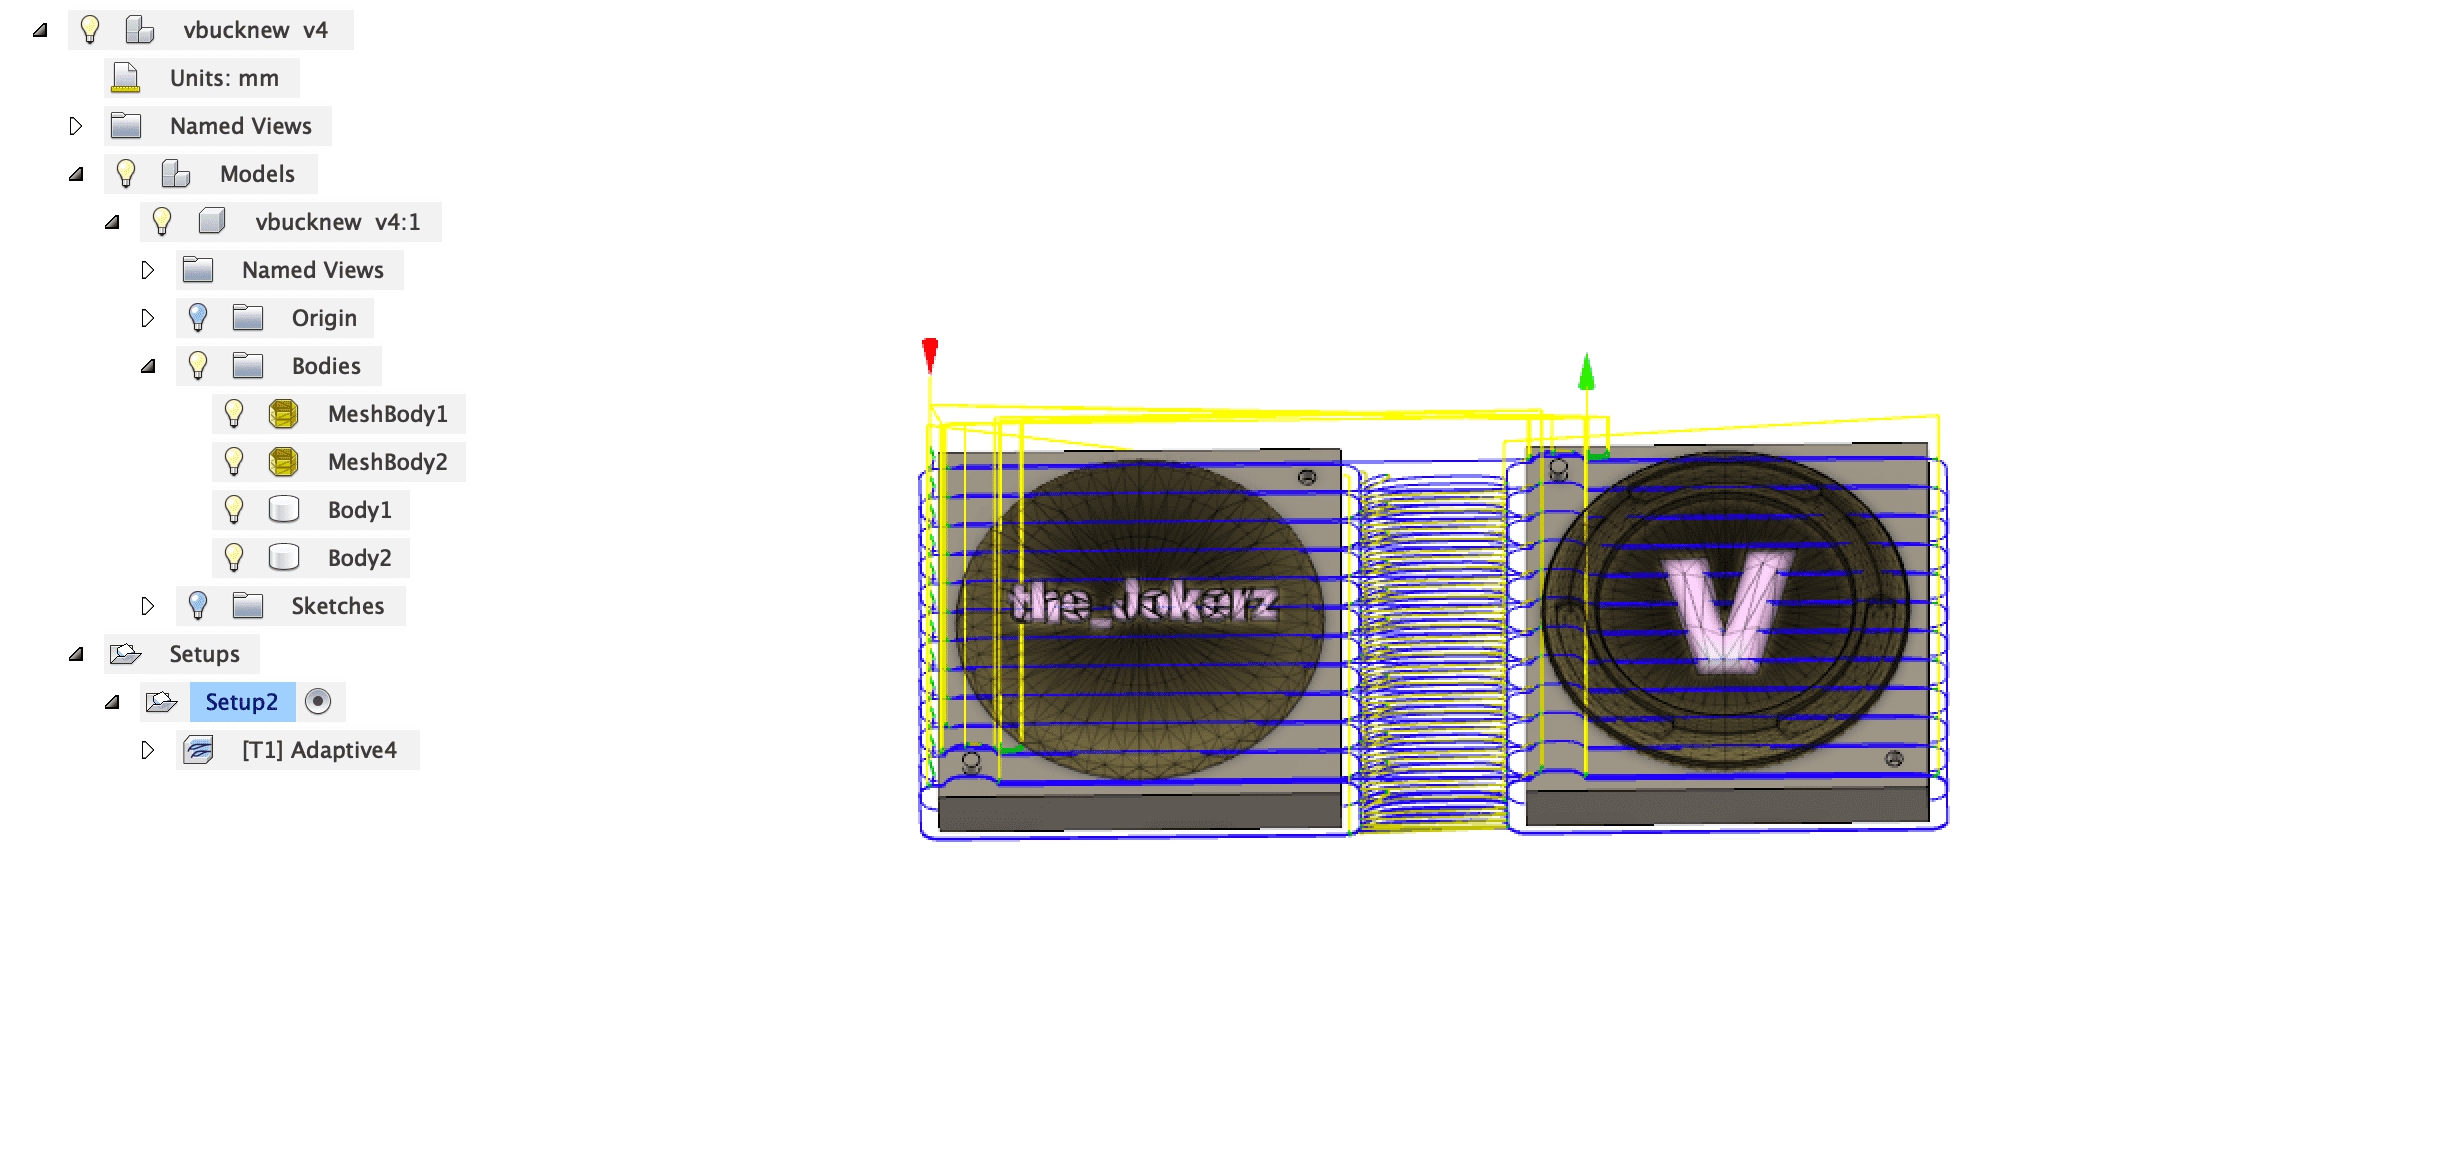
Fusion is able to simulate the whole process and it shows possible collisions in the process.Simply right click the adaptive cleaning process in the left bar and select simulate. Not every collision is a problem, check the collisions and decide wether they are critical or not. If the bar in the bottom is all green then we are good to go.
CNC-MACHINE
Starting to work with the cnc machine requires an safety introduction to the machine. Please never use a cnc machine when you dont have this introduction it could lead to fire, damage or even death.
For an introduction to the machine check my <machining assignment
The machine works his way through the material, but attention no machine is perfect stay in front of it as long as the job continues to be sure everything goes fine. Safety is the number one priority when using such big machines. Sometimes the machines will have problems, in my case there was a problem the machine had calculated a wrong path and started to destroy my wax mold. Luckily I stopped the machine before it could destroy the whole thing. Because I was working with wax it was quite easy to fix my failure. I simply melted a bit of wax and dropped it on the destroyed parts

Clearly to see, where I filled up the holes I was successfully able to fix this failure.
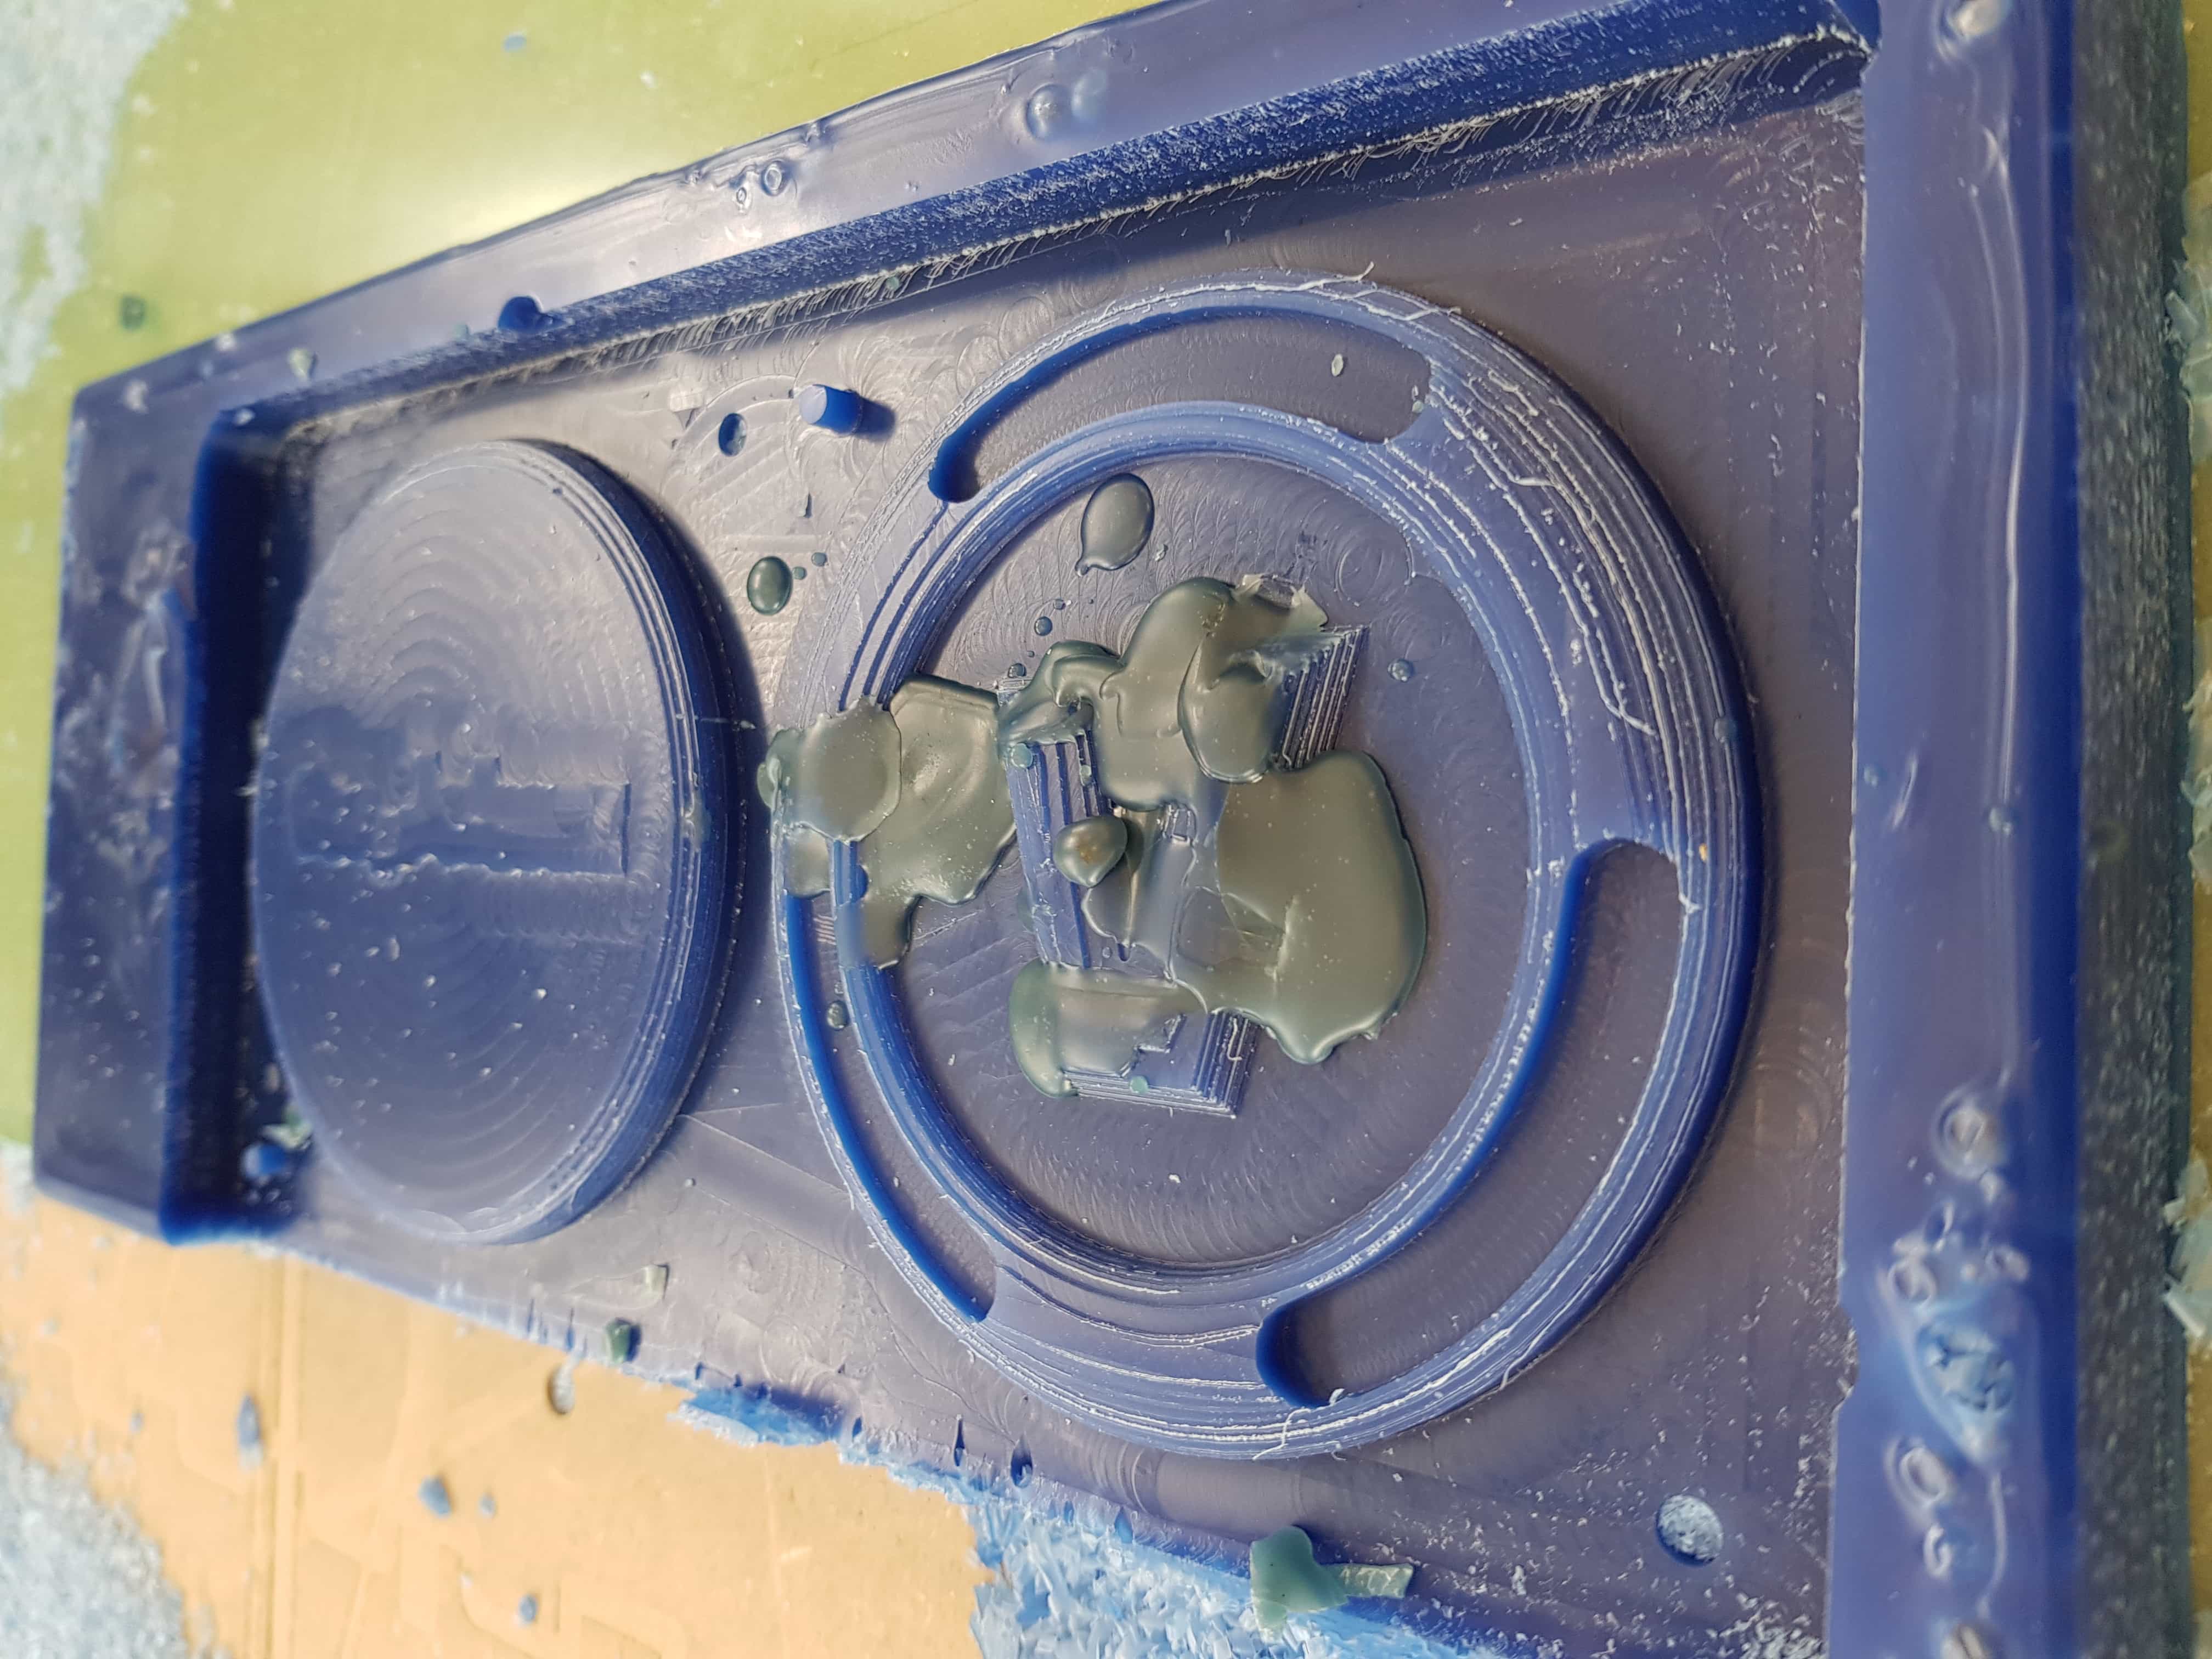
MOLD
The next step is to create a mold using the model we have created. I will use silicone to create this mold.
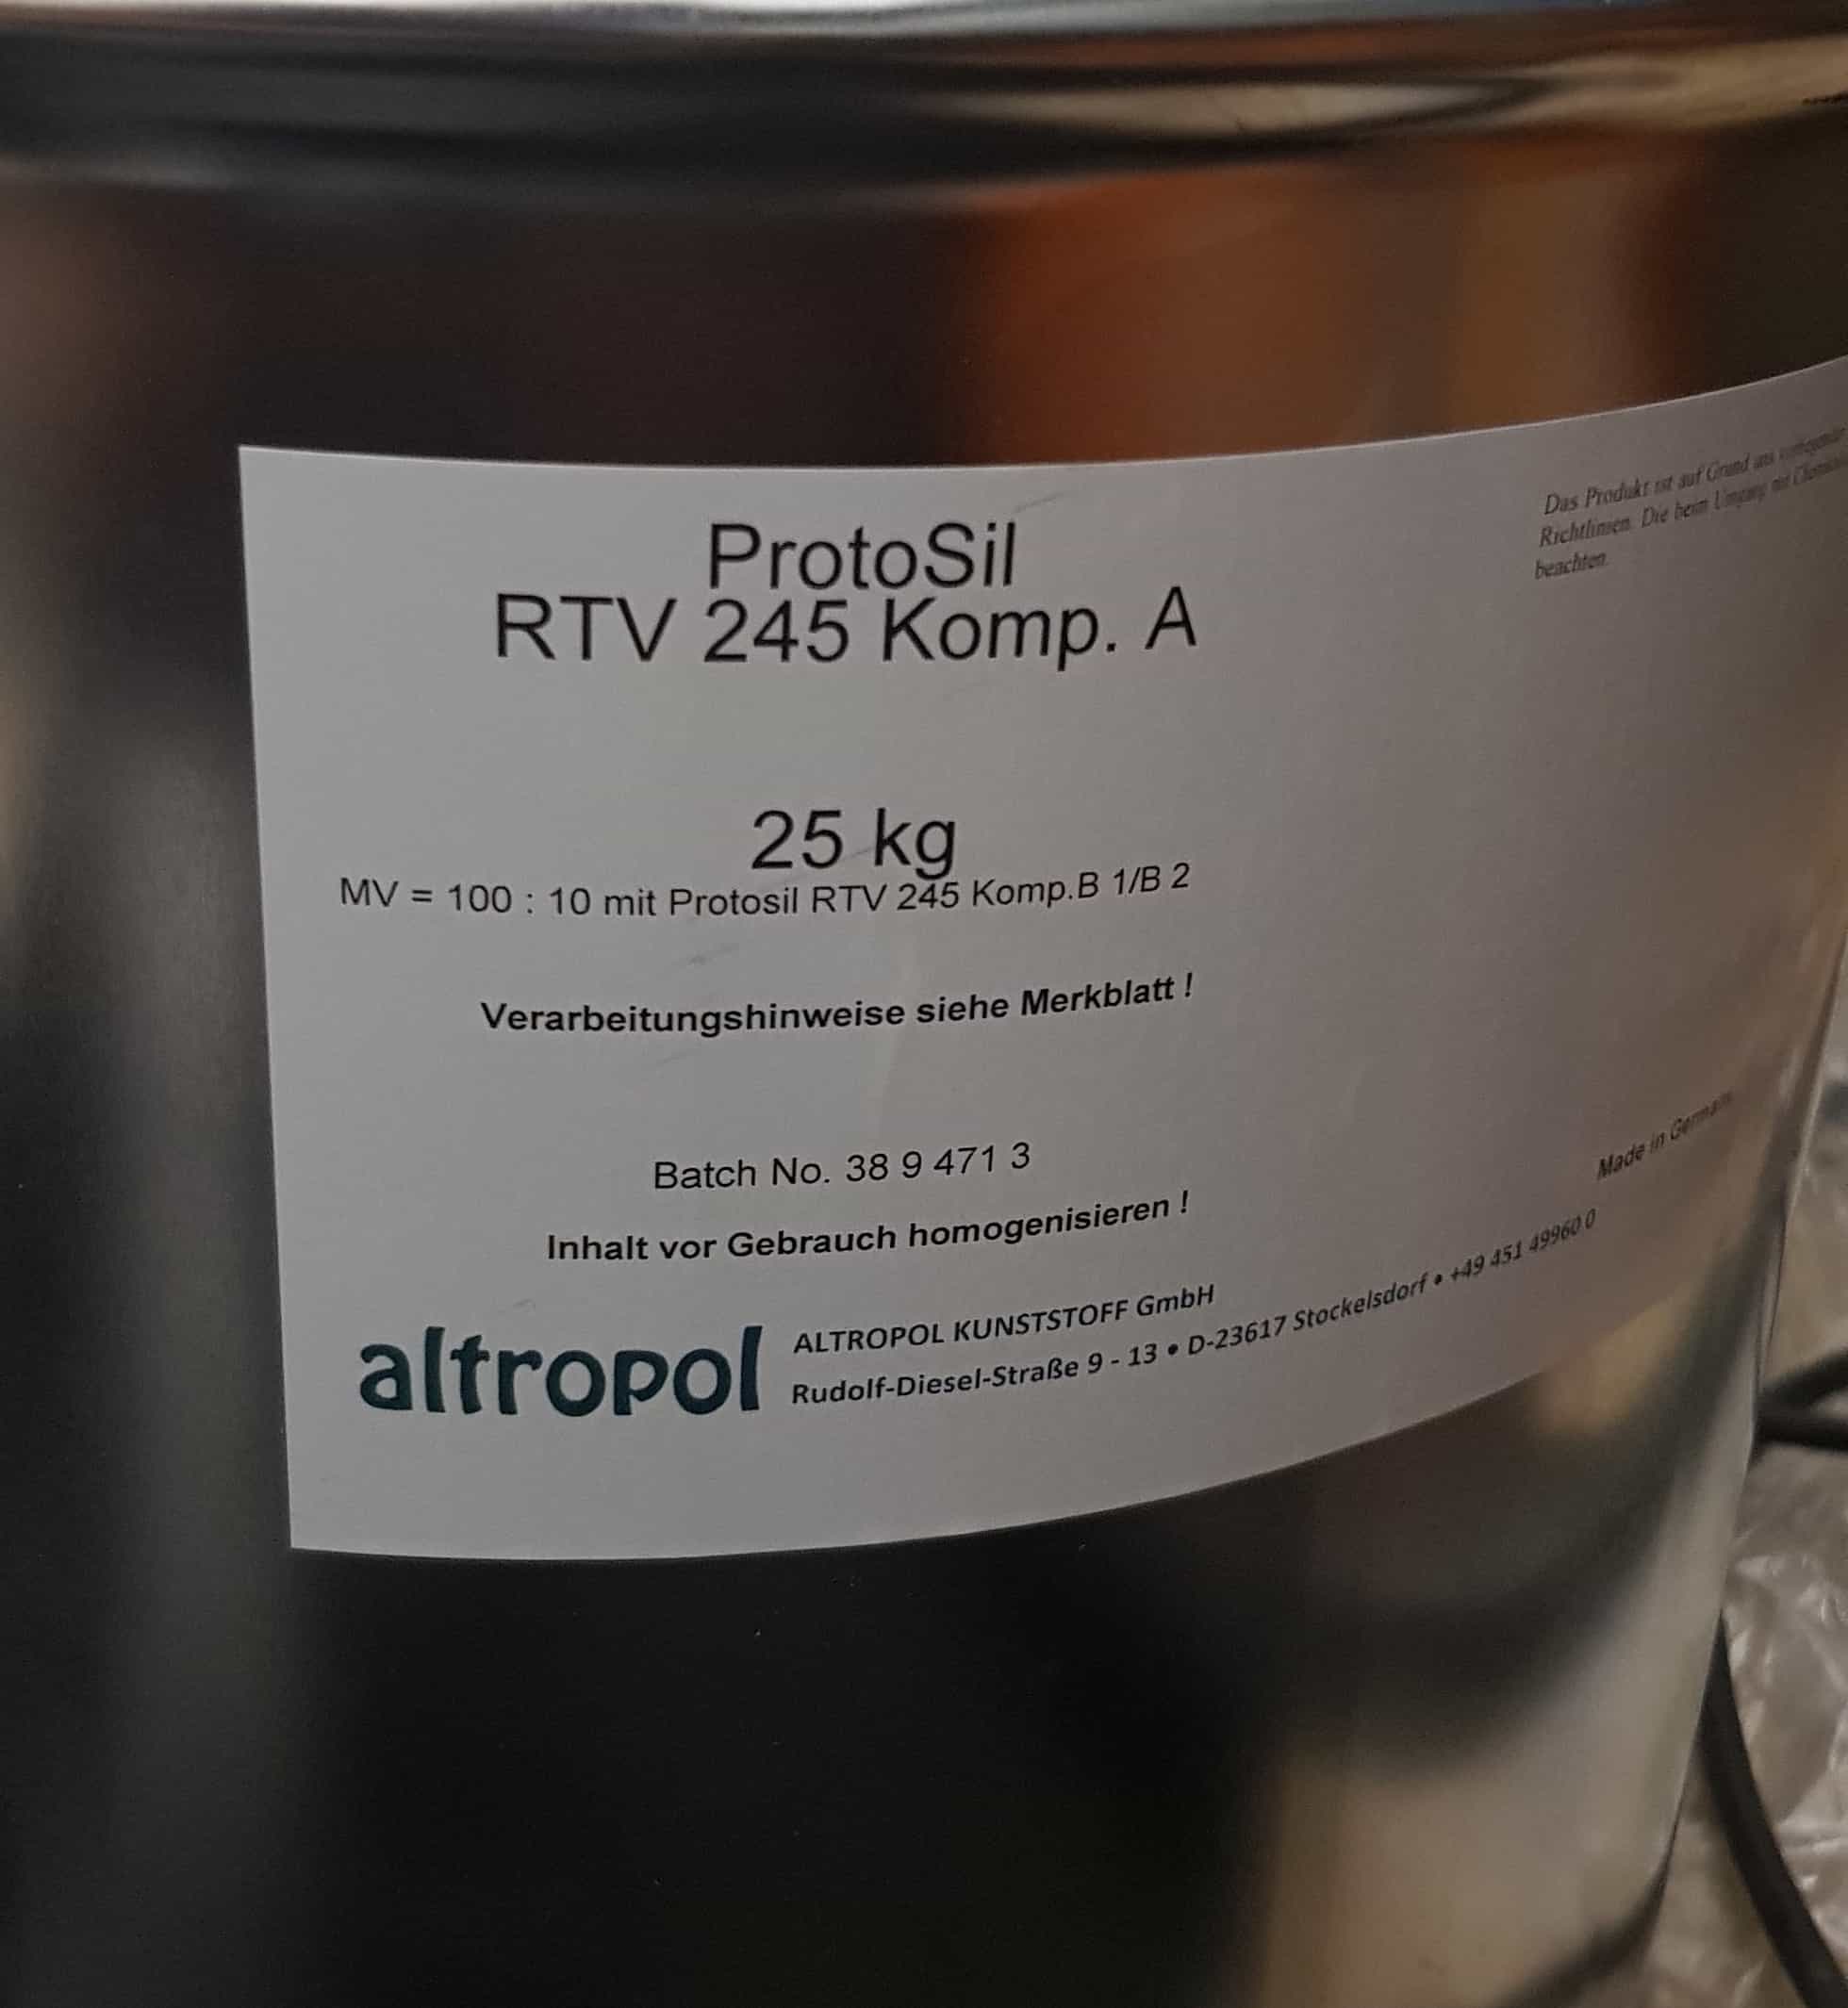
I have used ProtoSil RTV 245 from the company altropol kunststoff gmbh.
The safety datasheet is in german, so I will just tell the most important points and translate them.
1. Wash if one of the components spills on your body or your clothes.
2. If you feel dizzy while working with ProtoSil, get some fresh air before working on.
Link to safetysheet(german)
ProtoSil comes with two components A and B1.
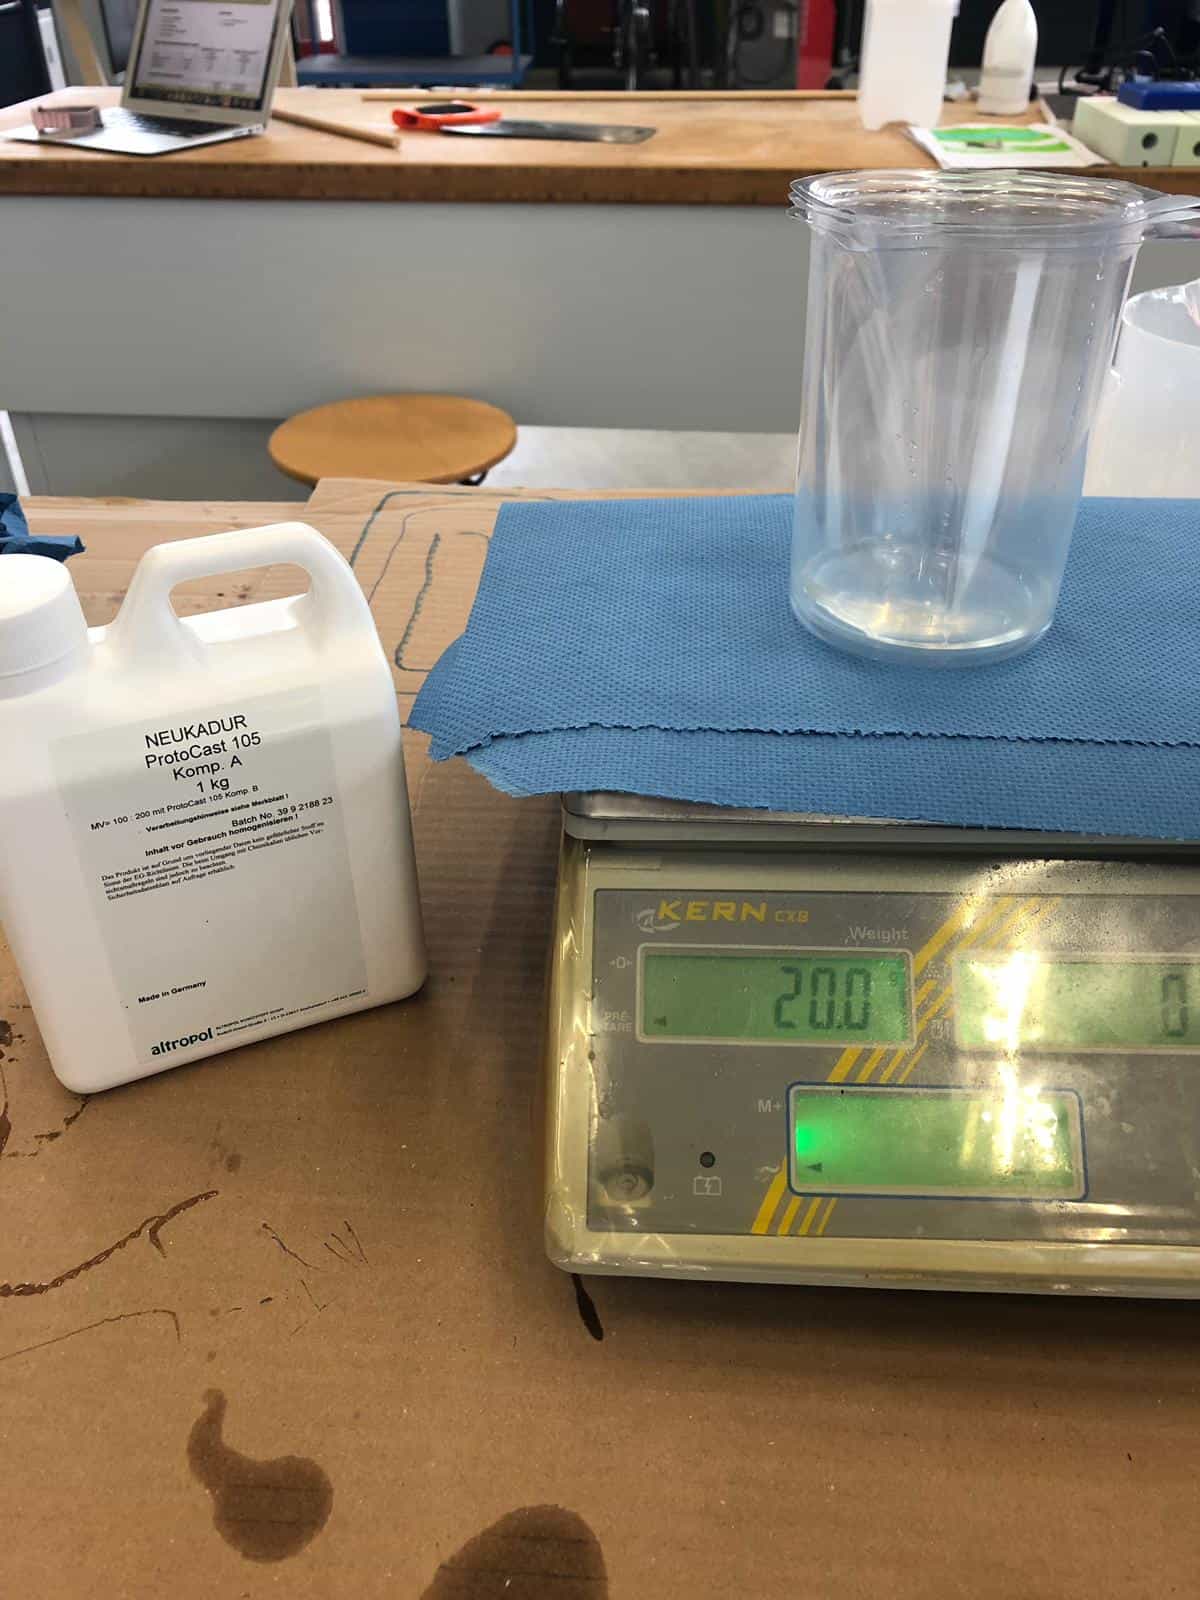
Component A
Component B
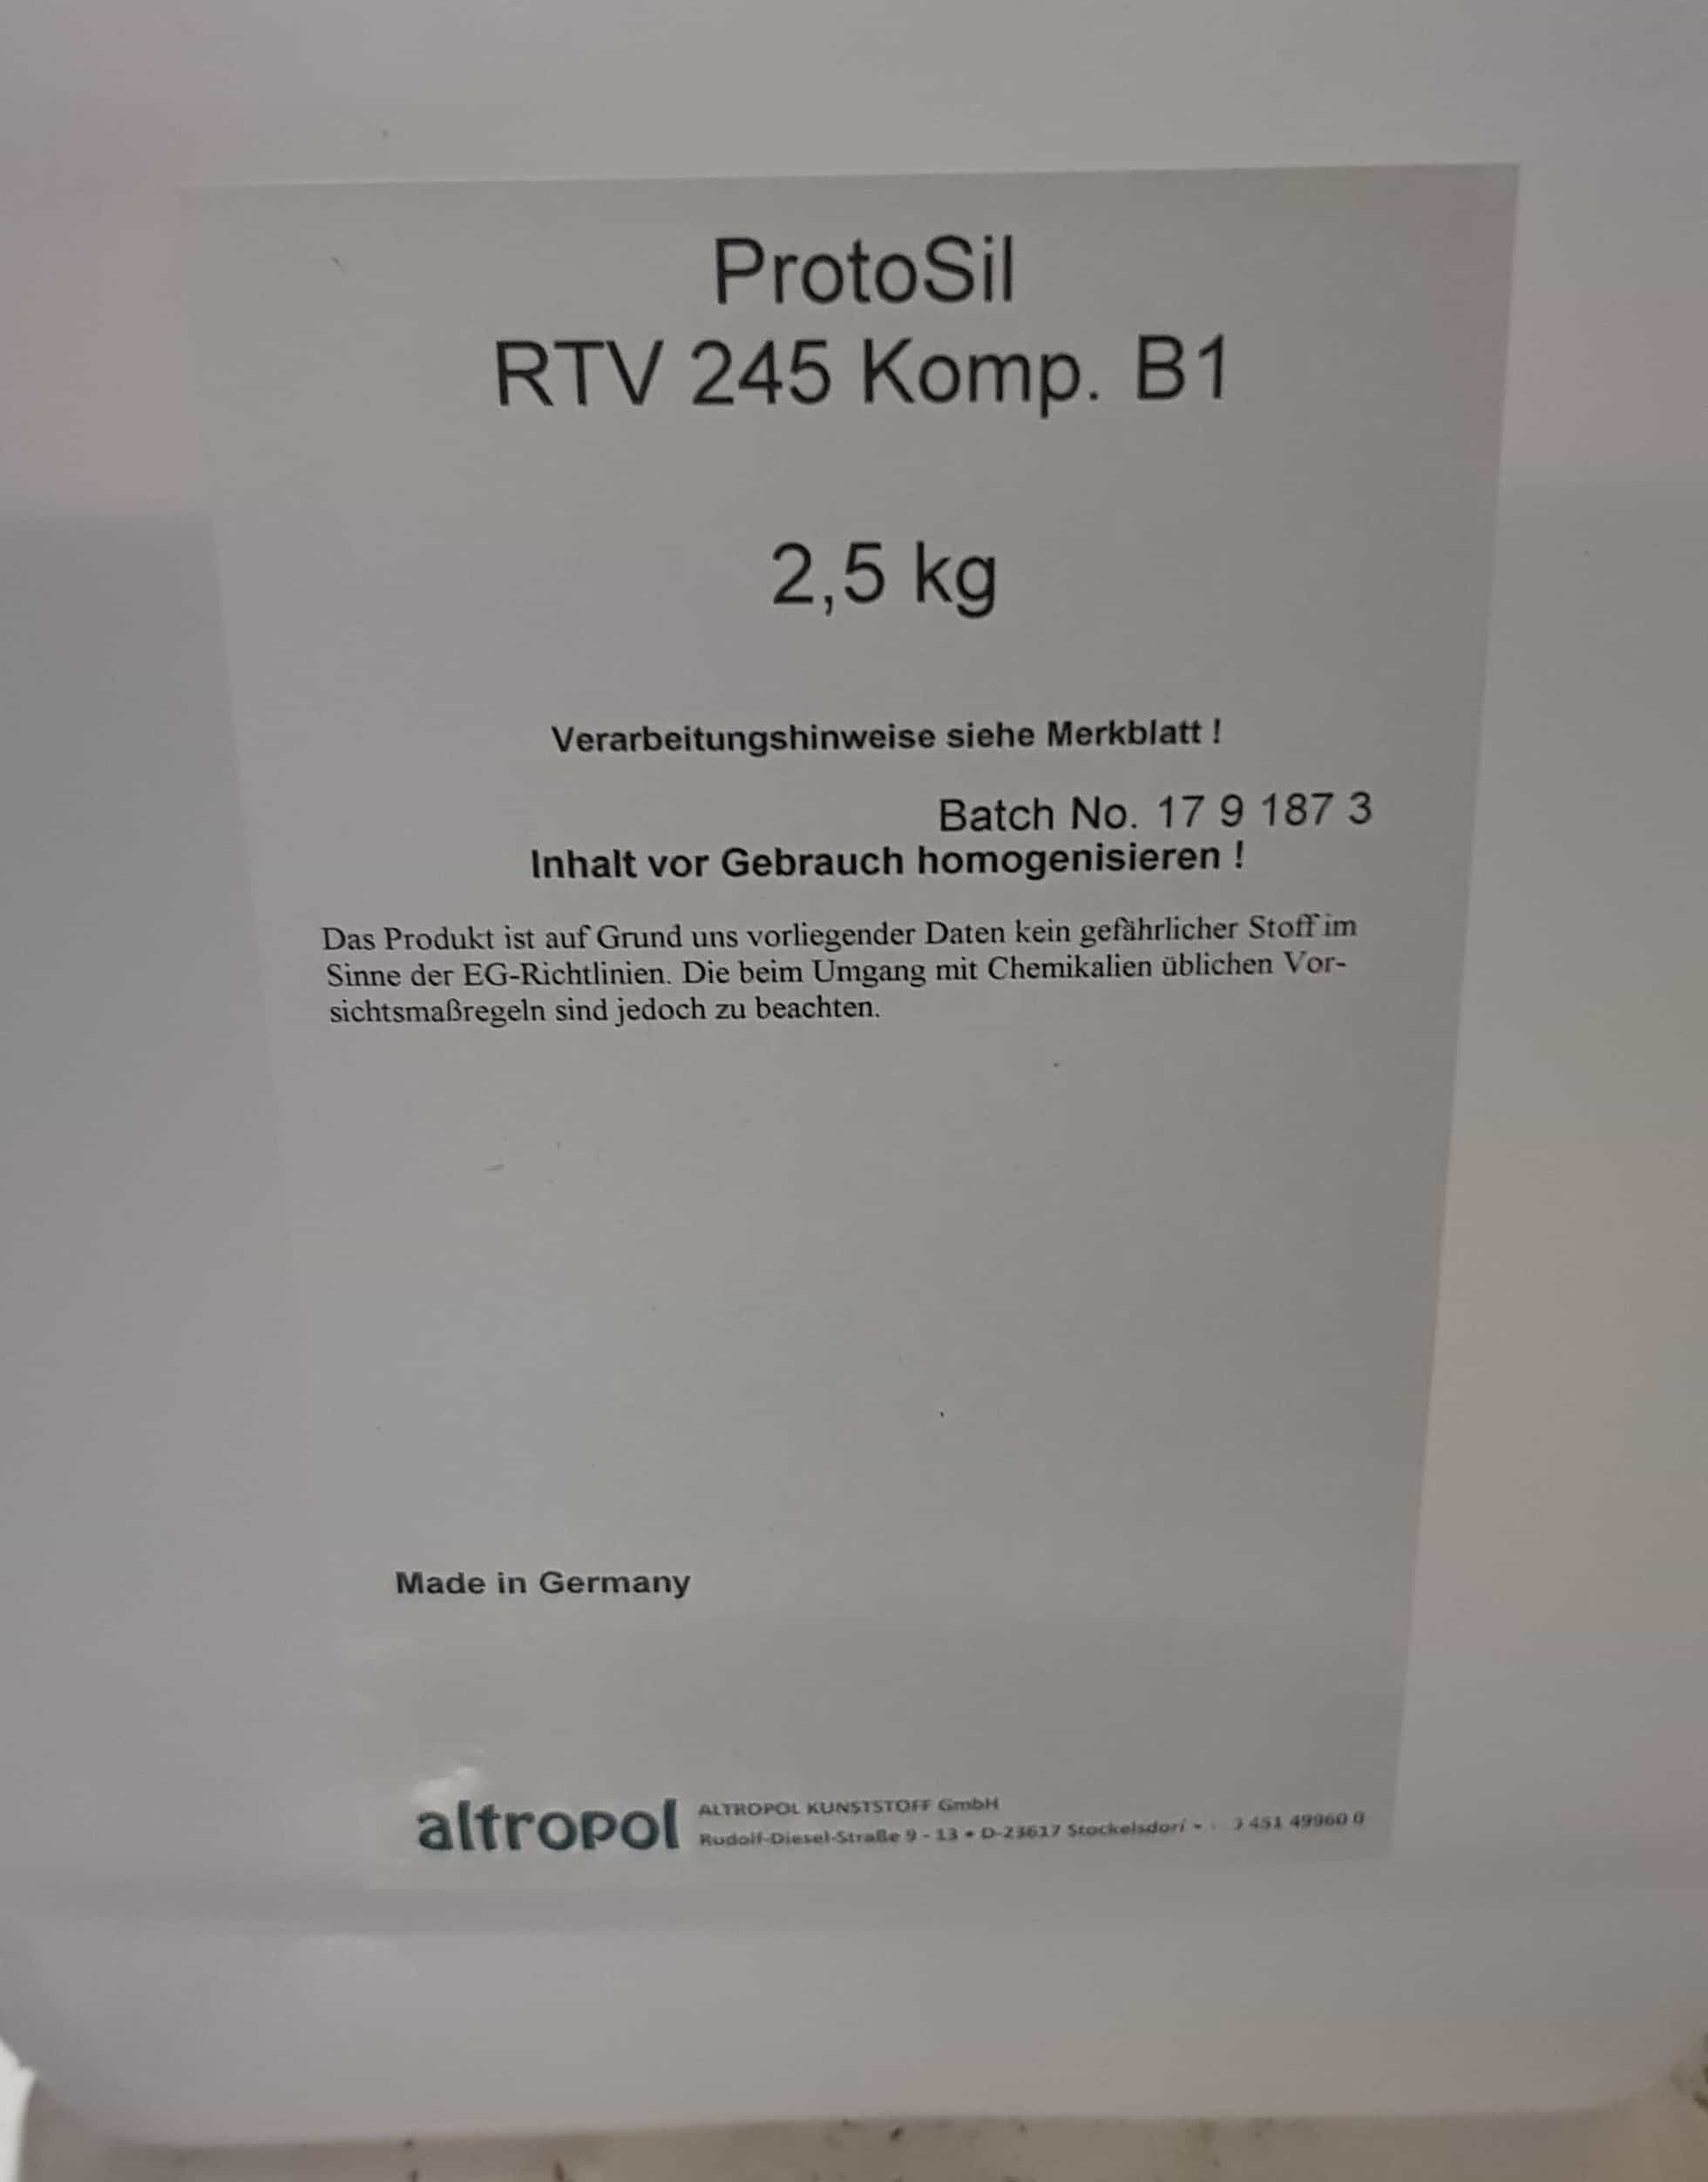
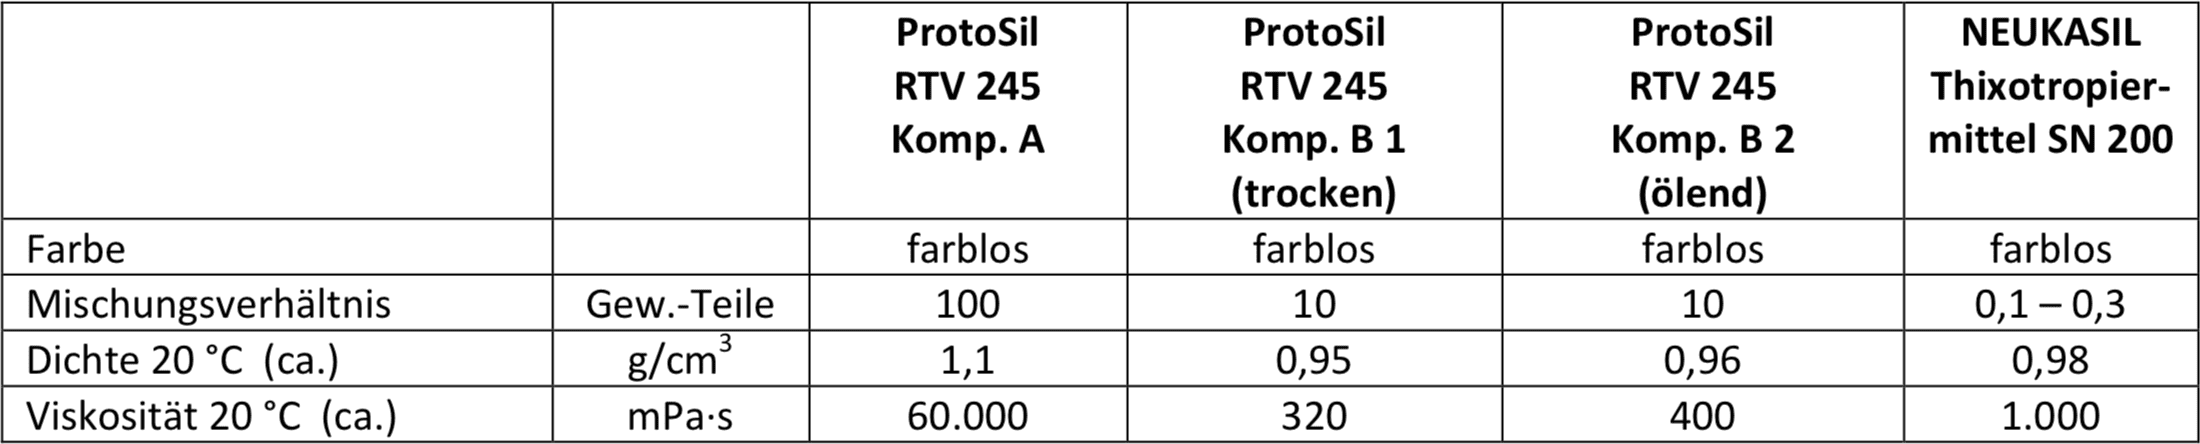
If we check the datasheet of the protosil we will find important informations such as the mixratio. In my case it is 100:10 so when having 1kg of comp a, I will have to add 100grams of comp b.
I've made a small calculation of how much silicone I need for the mold by calculating the cubic centimeter of my wax block. I came to the conclussion that I will need 1120grams of silicone. Ten percent of 1120 is 112g. When mixing the two components I try to stir it as slow as possible so I doesn't create bubbles. To get rid of all the bubbles I will put my cup into a vacuum machine. It's neccessary to have a vacuum machine, because if you have to much air bubbles in your silicone the mold will not be very clean and smooth.
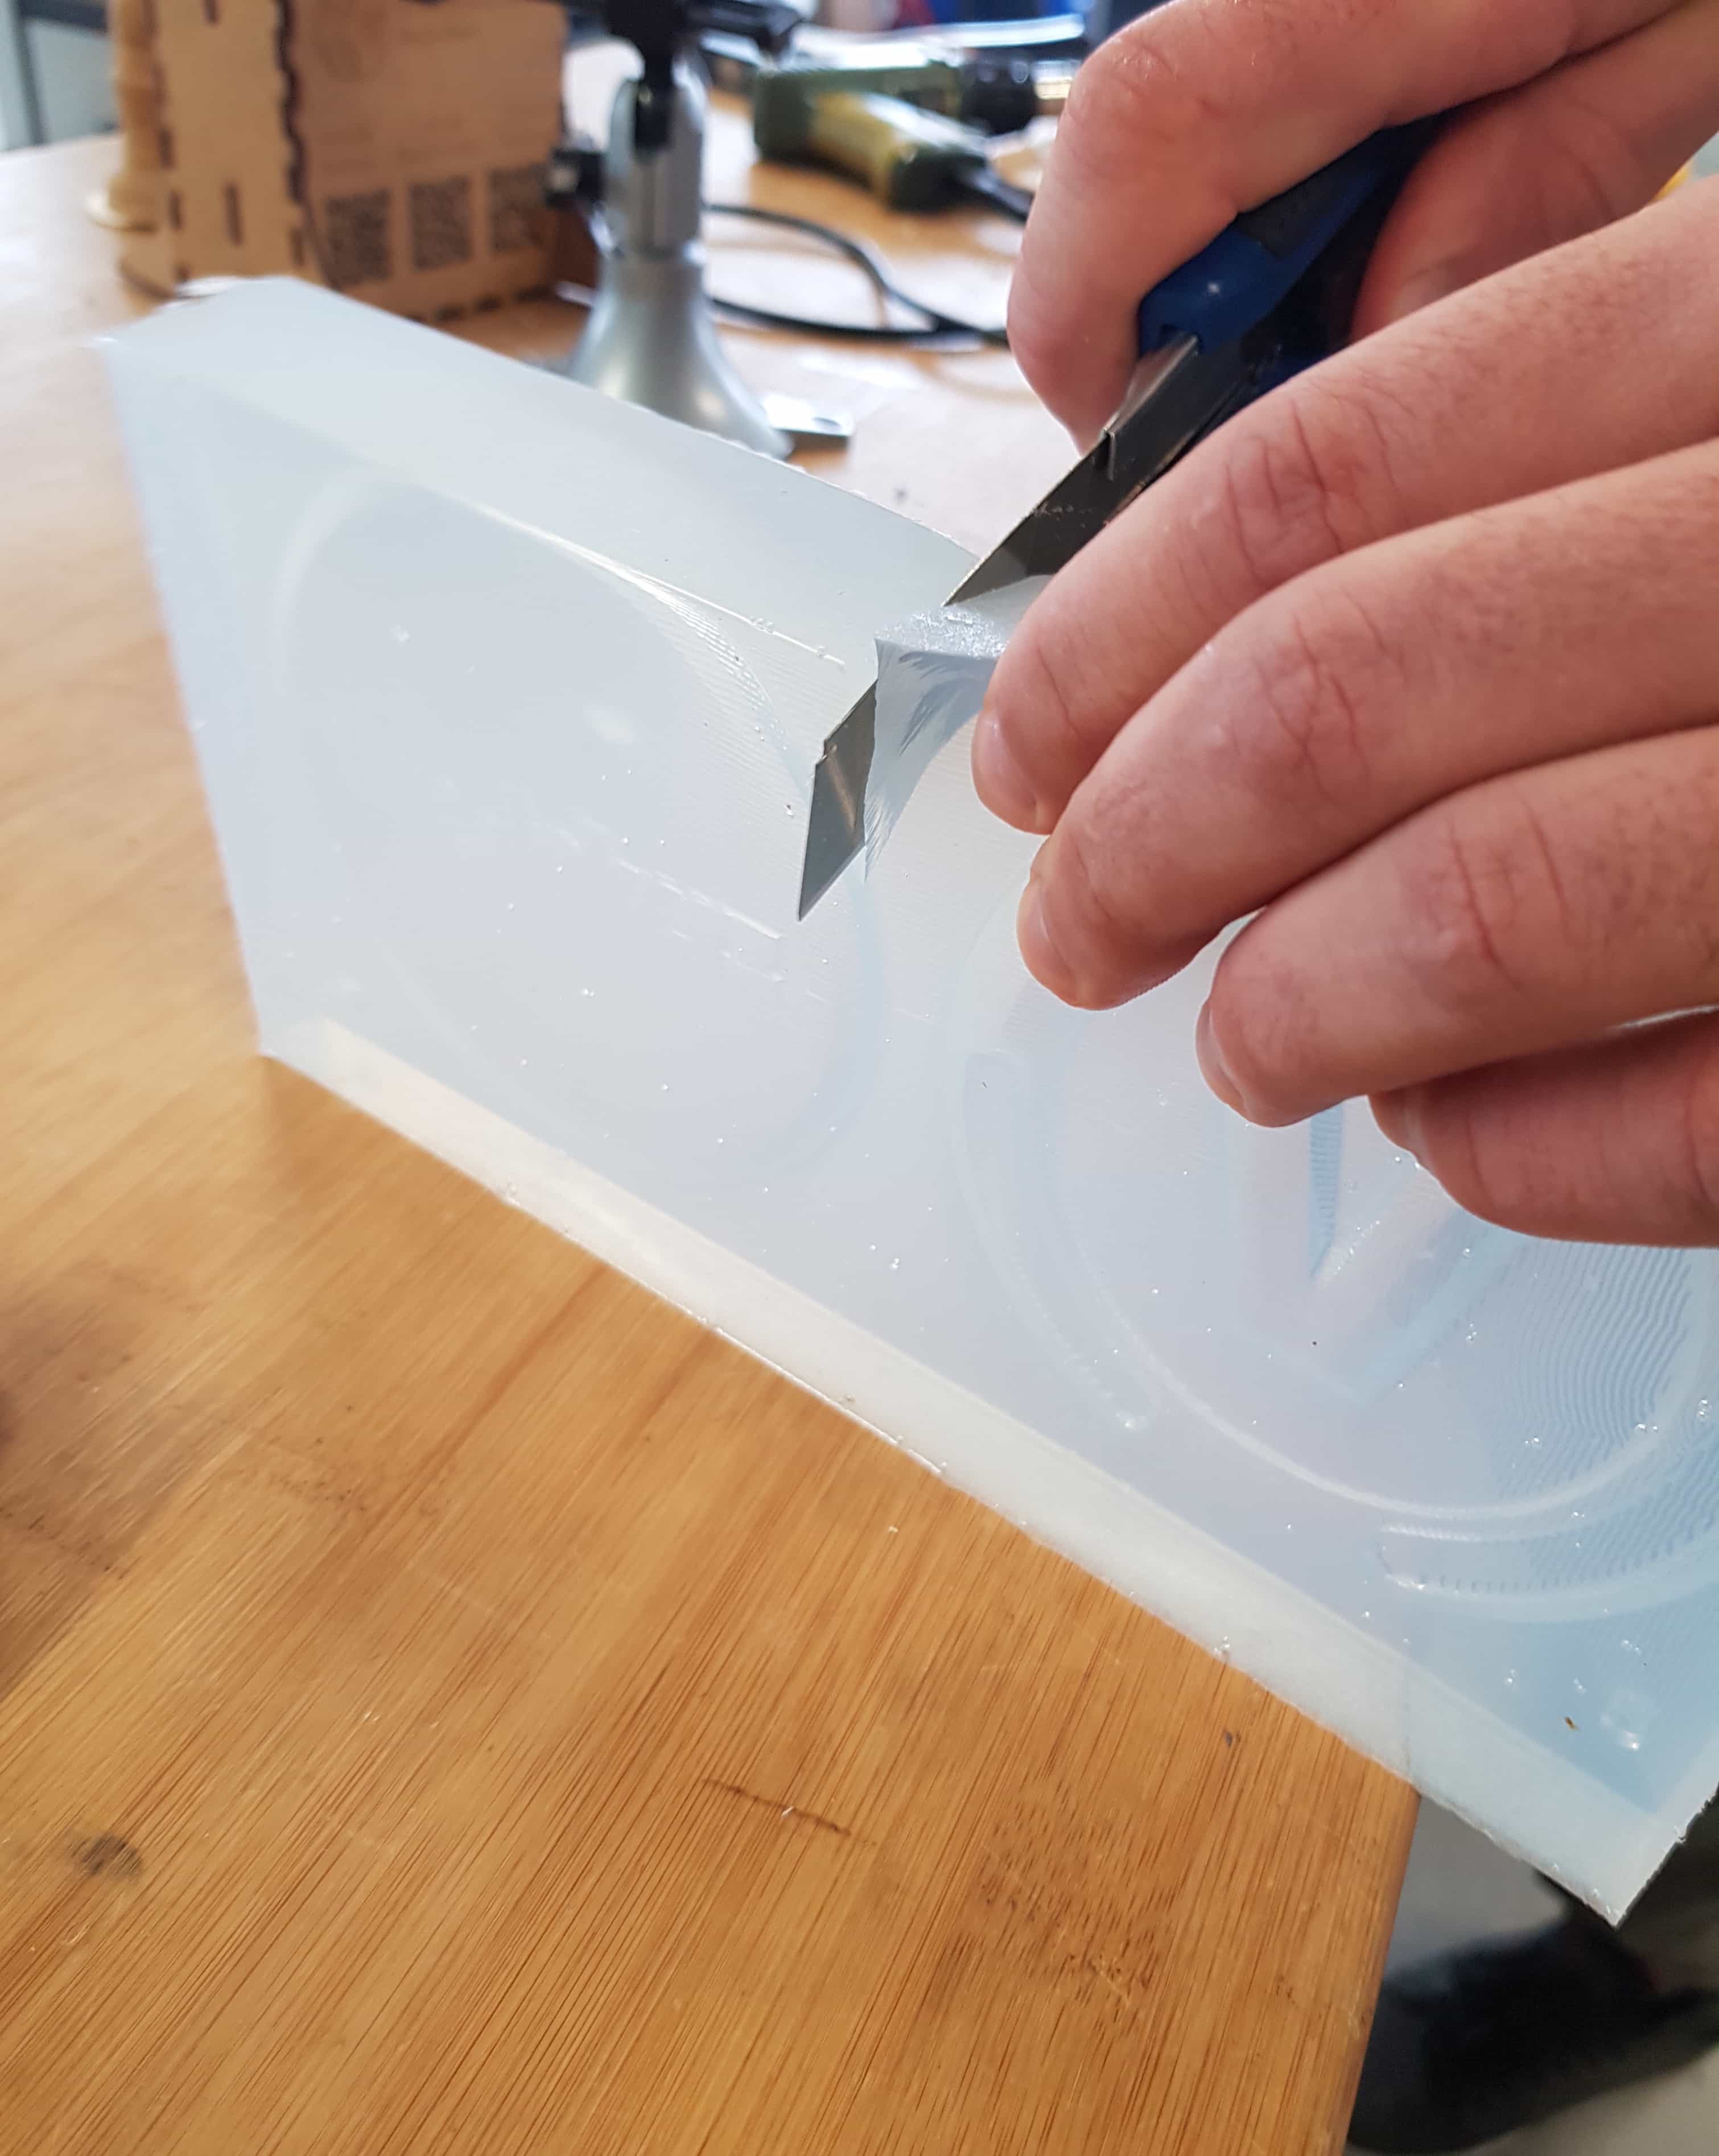
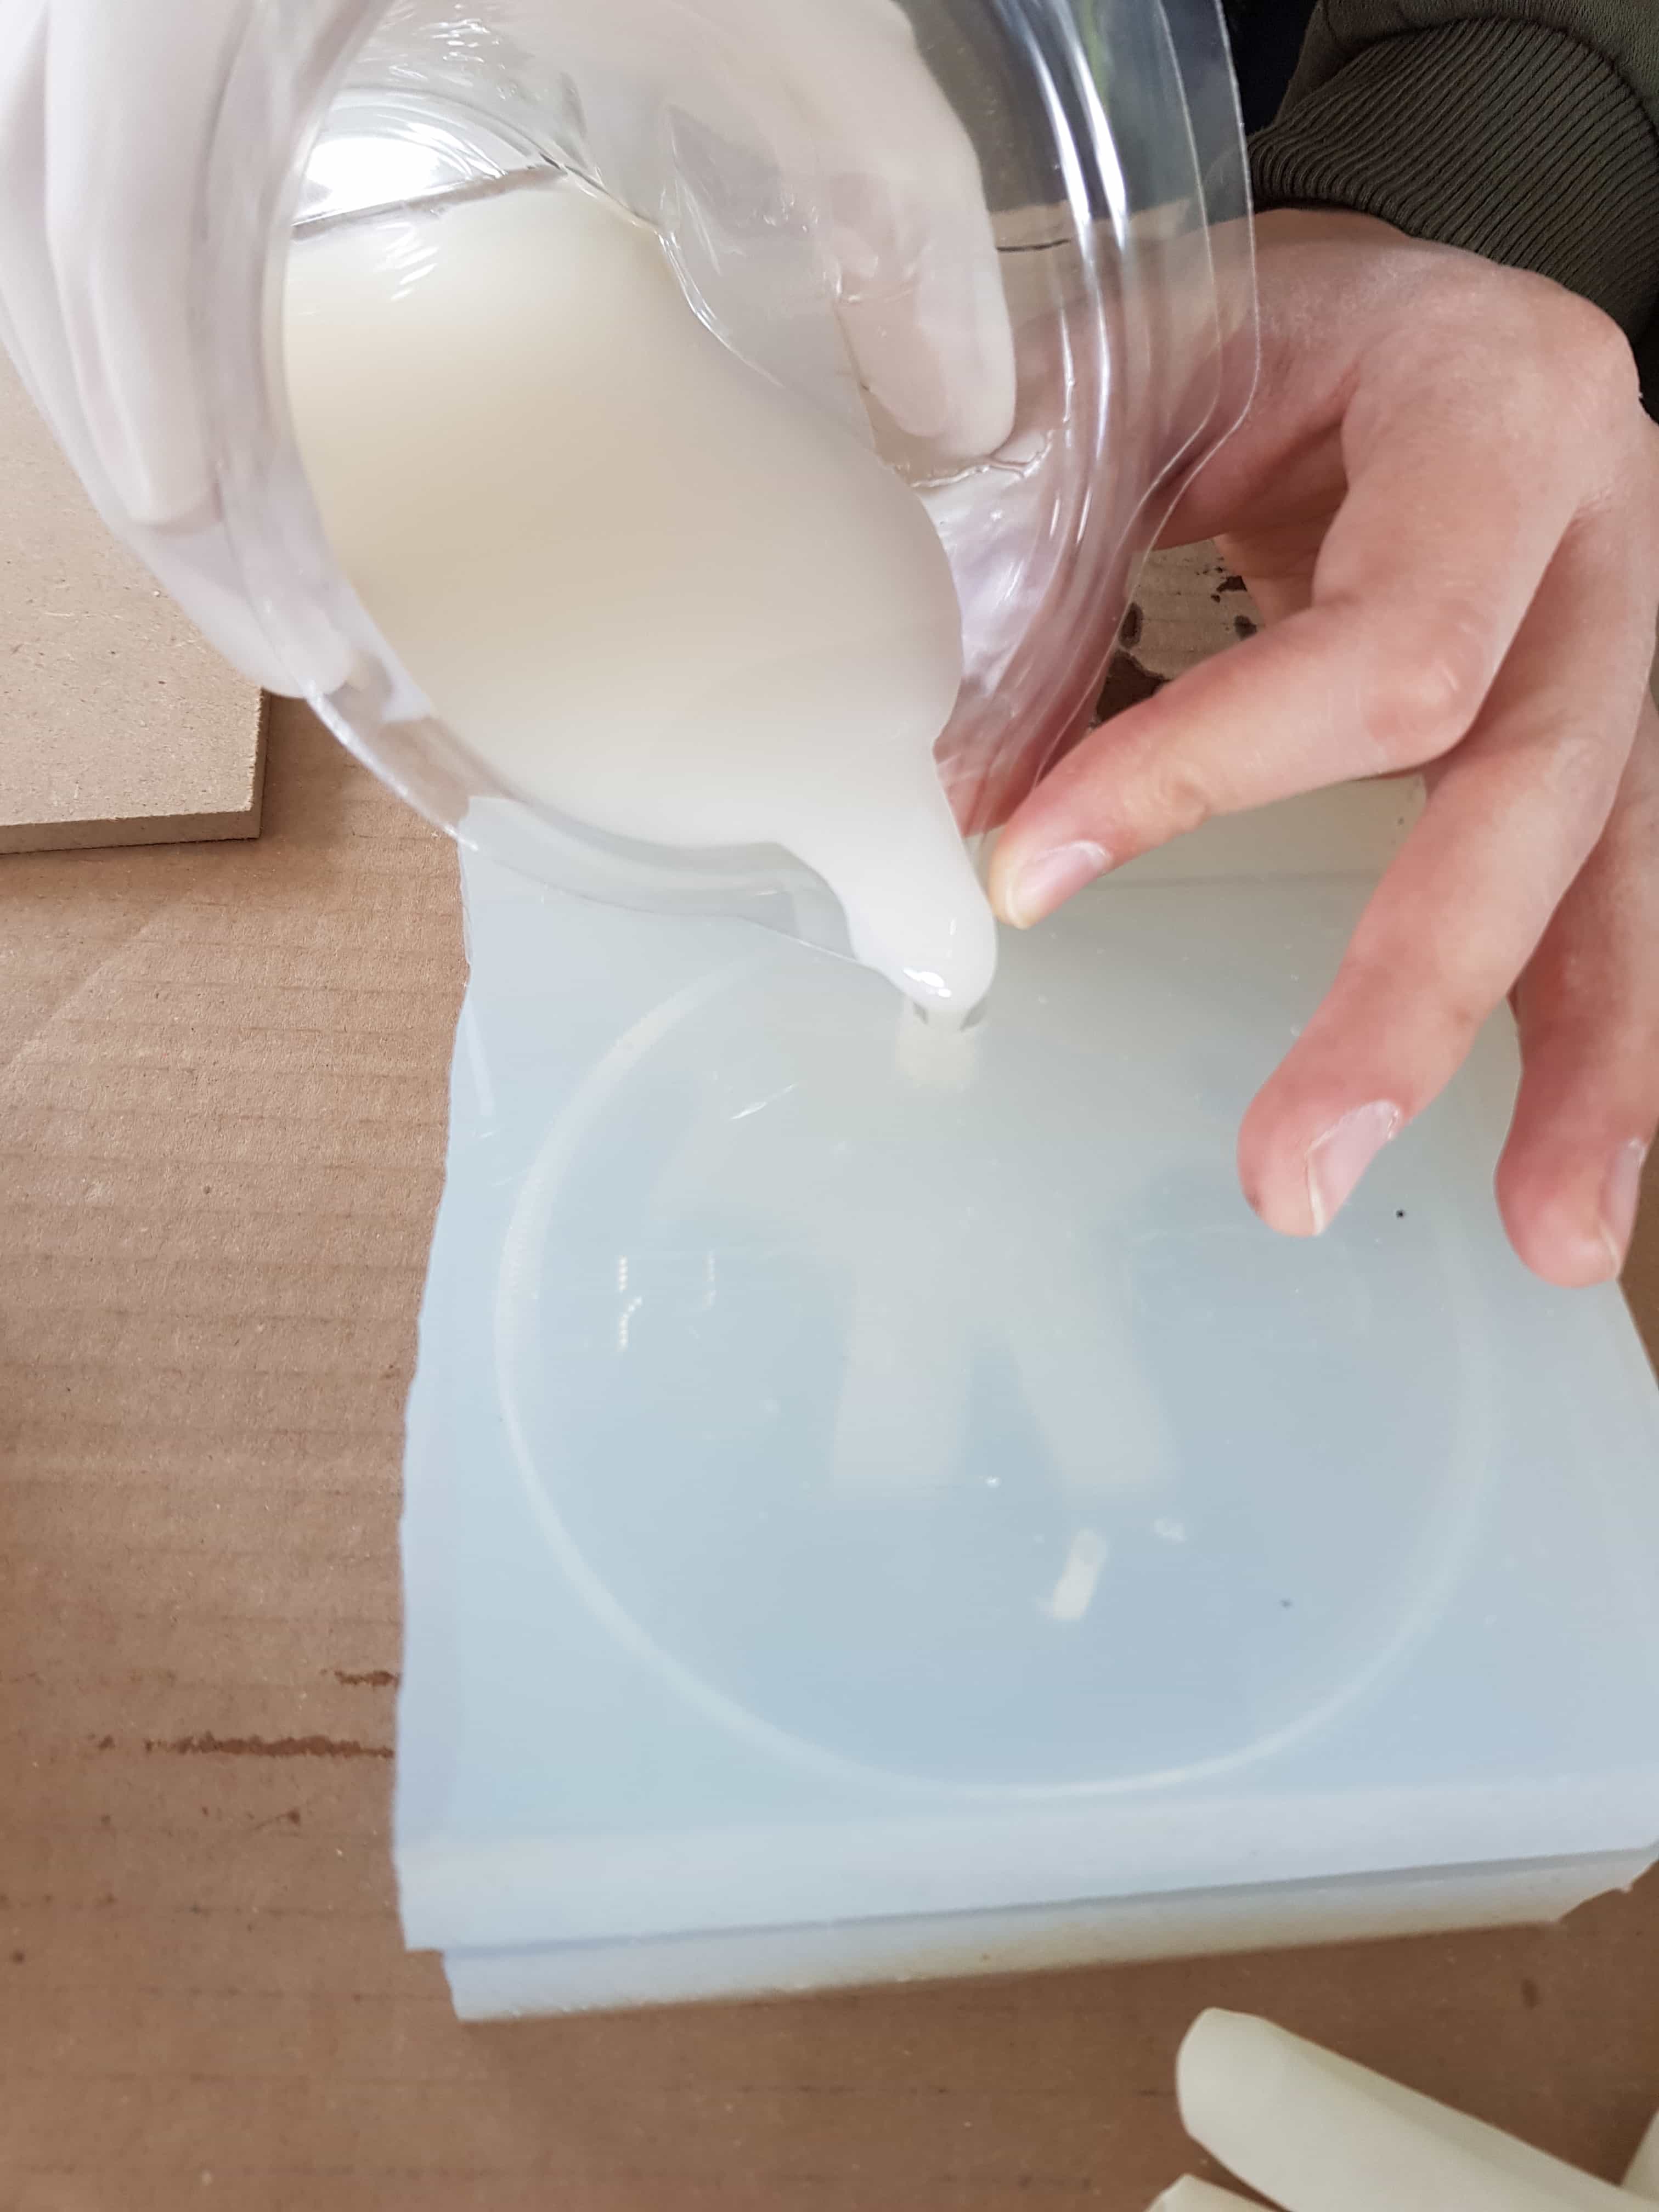
now put the silicone into my stock and waited for 24 hours. Trying to remove the silicone before it is dry could damage the mold, so let it dry. I took of the silicone mold and cut it in half to have the two sides of the mold.
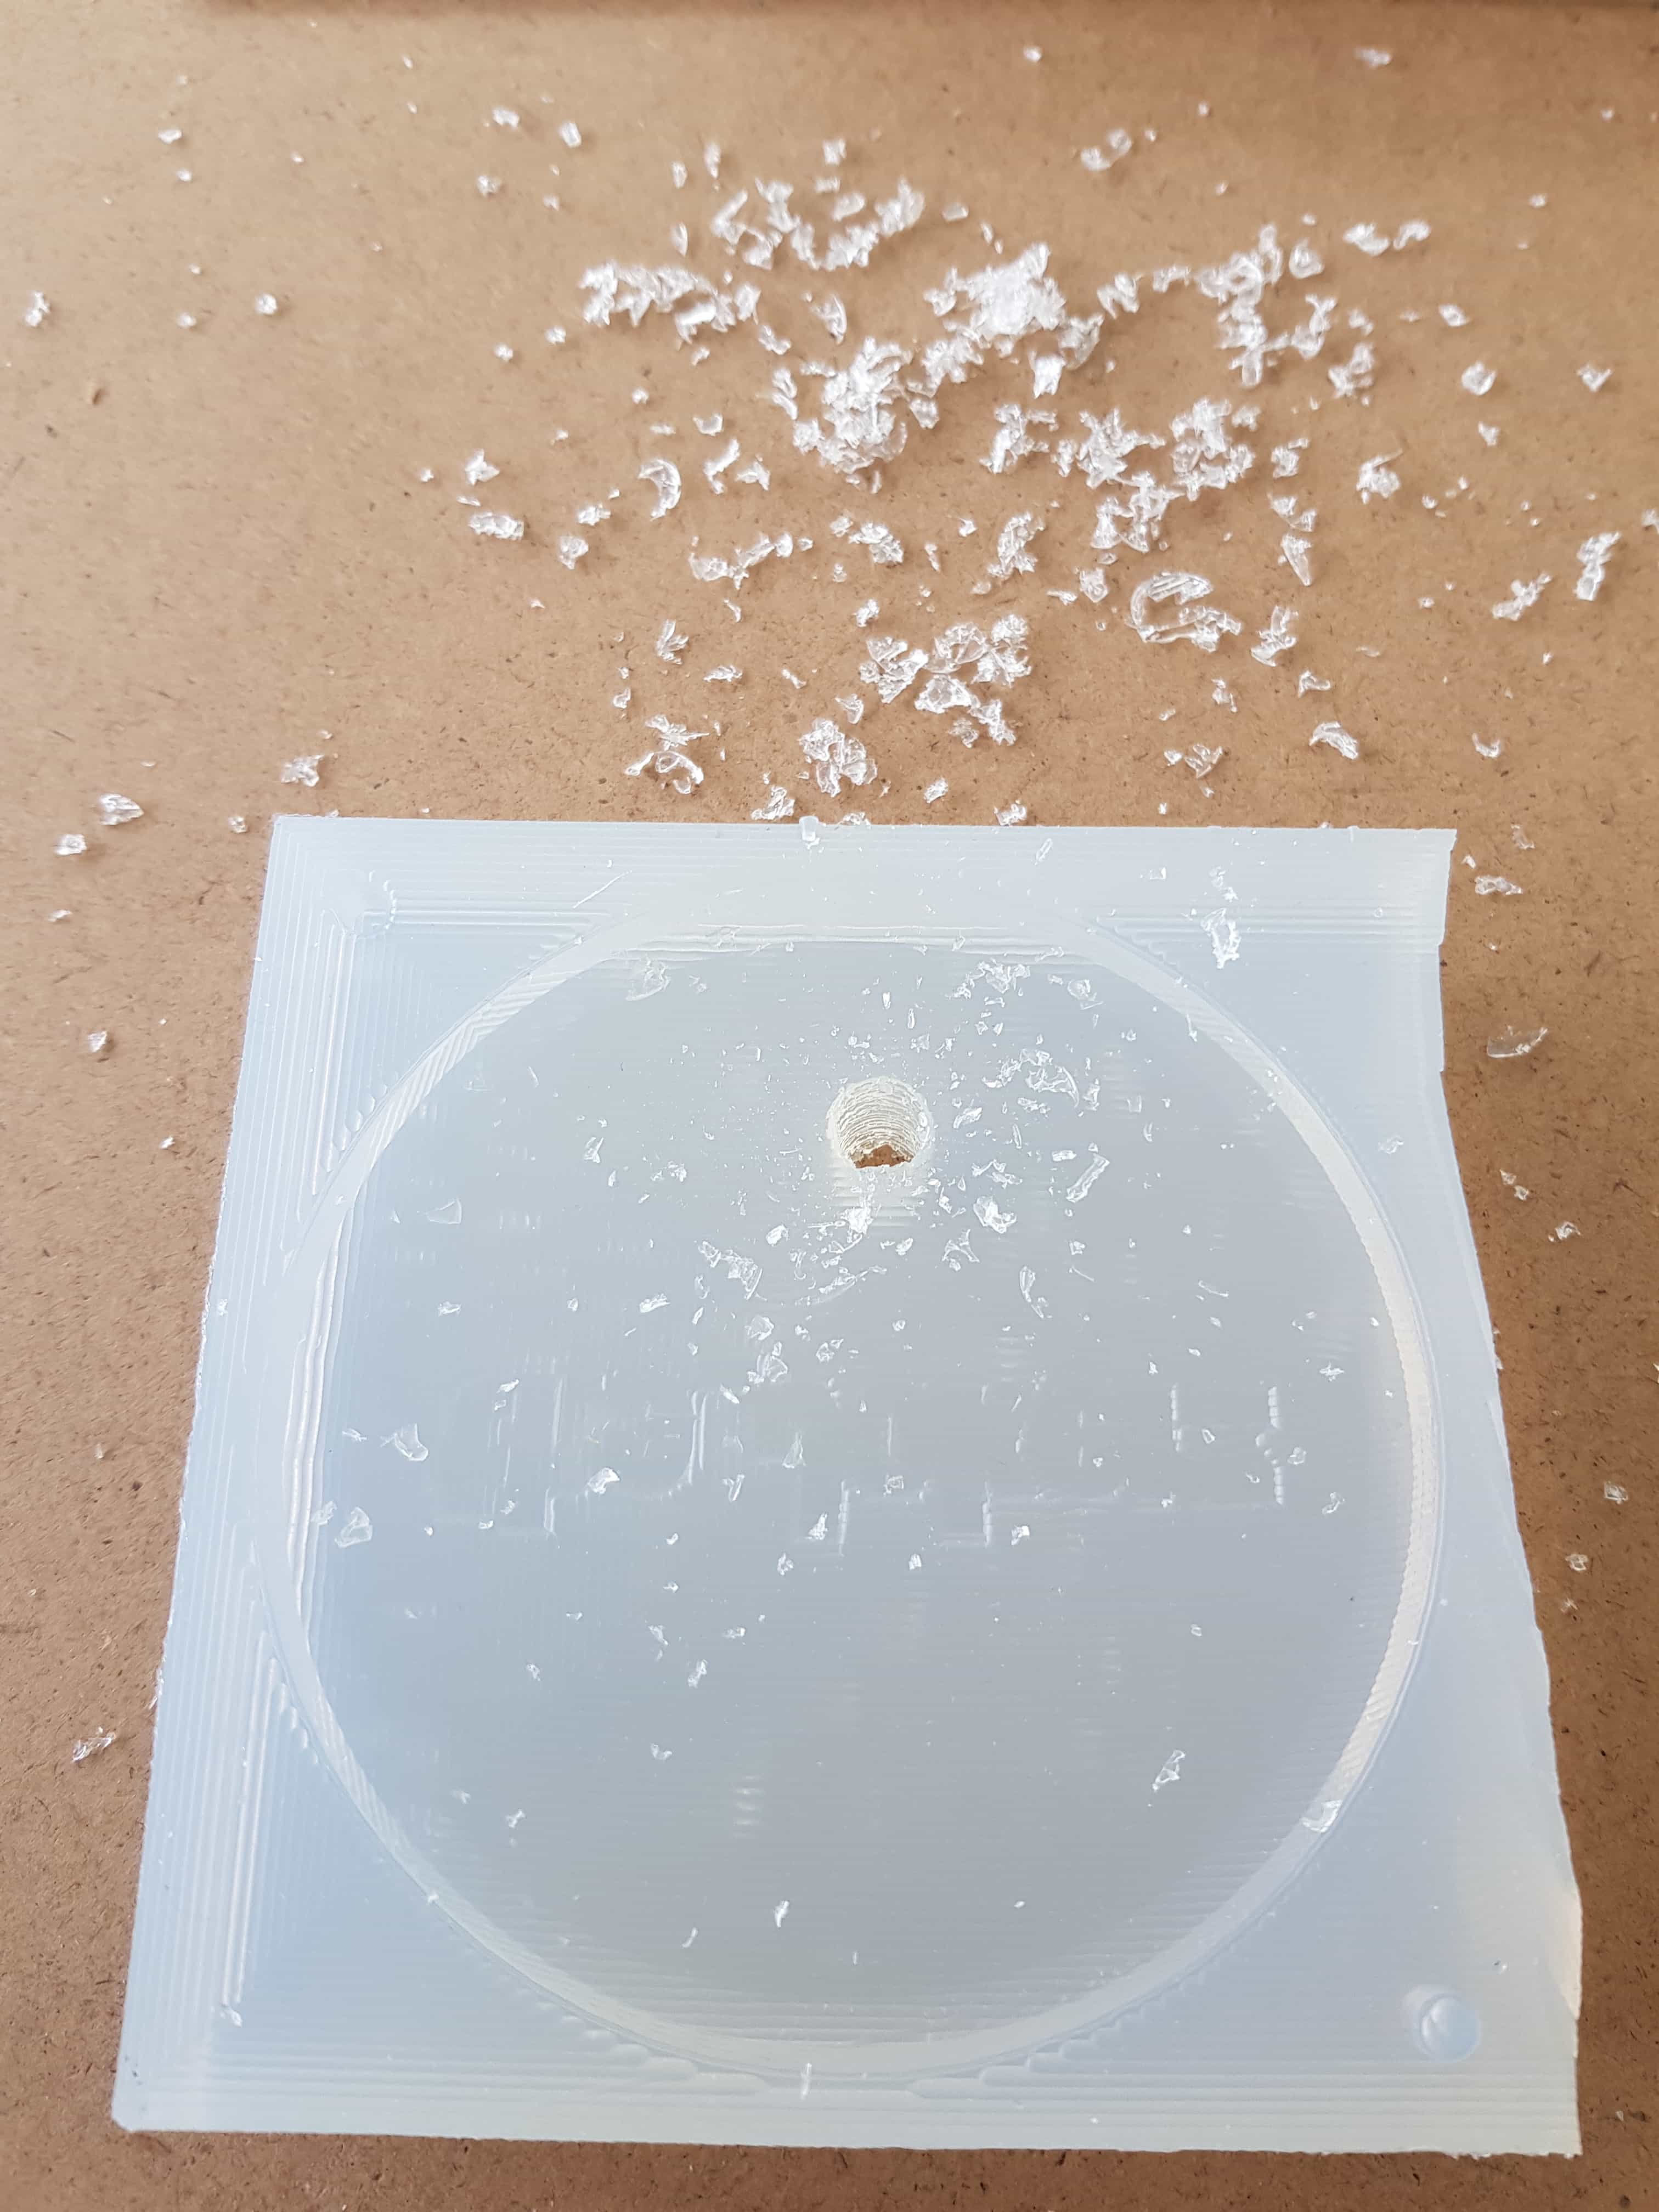
Then I drilled two holes into one side of the mold, one for filling the resin in it and the other one for releasing the air created within the filling process.
CASTING
I casted my created mold using NEUKADUR ProtoCast105 from the company altropol. The resin comes with two components the component a and b.
Component A
Epoxy resin is a very dangerous chemical material to work with. It can cause skin irritation, alergic reactions, eye irritation and toxic life long lasting affects. You should avoid breathing, wash your hands when coming in contact and use contaminating clothes only.
Link to safetydatasheet
Component B
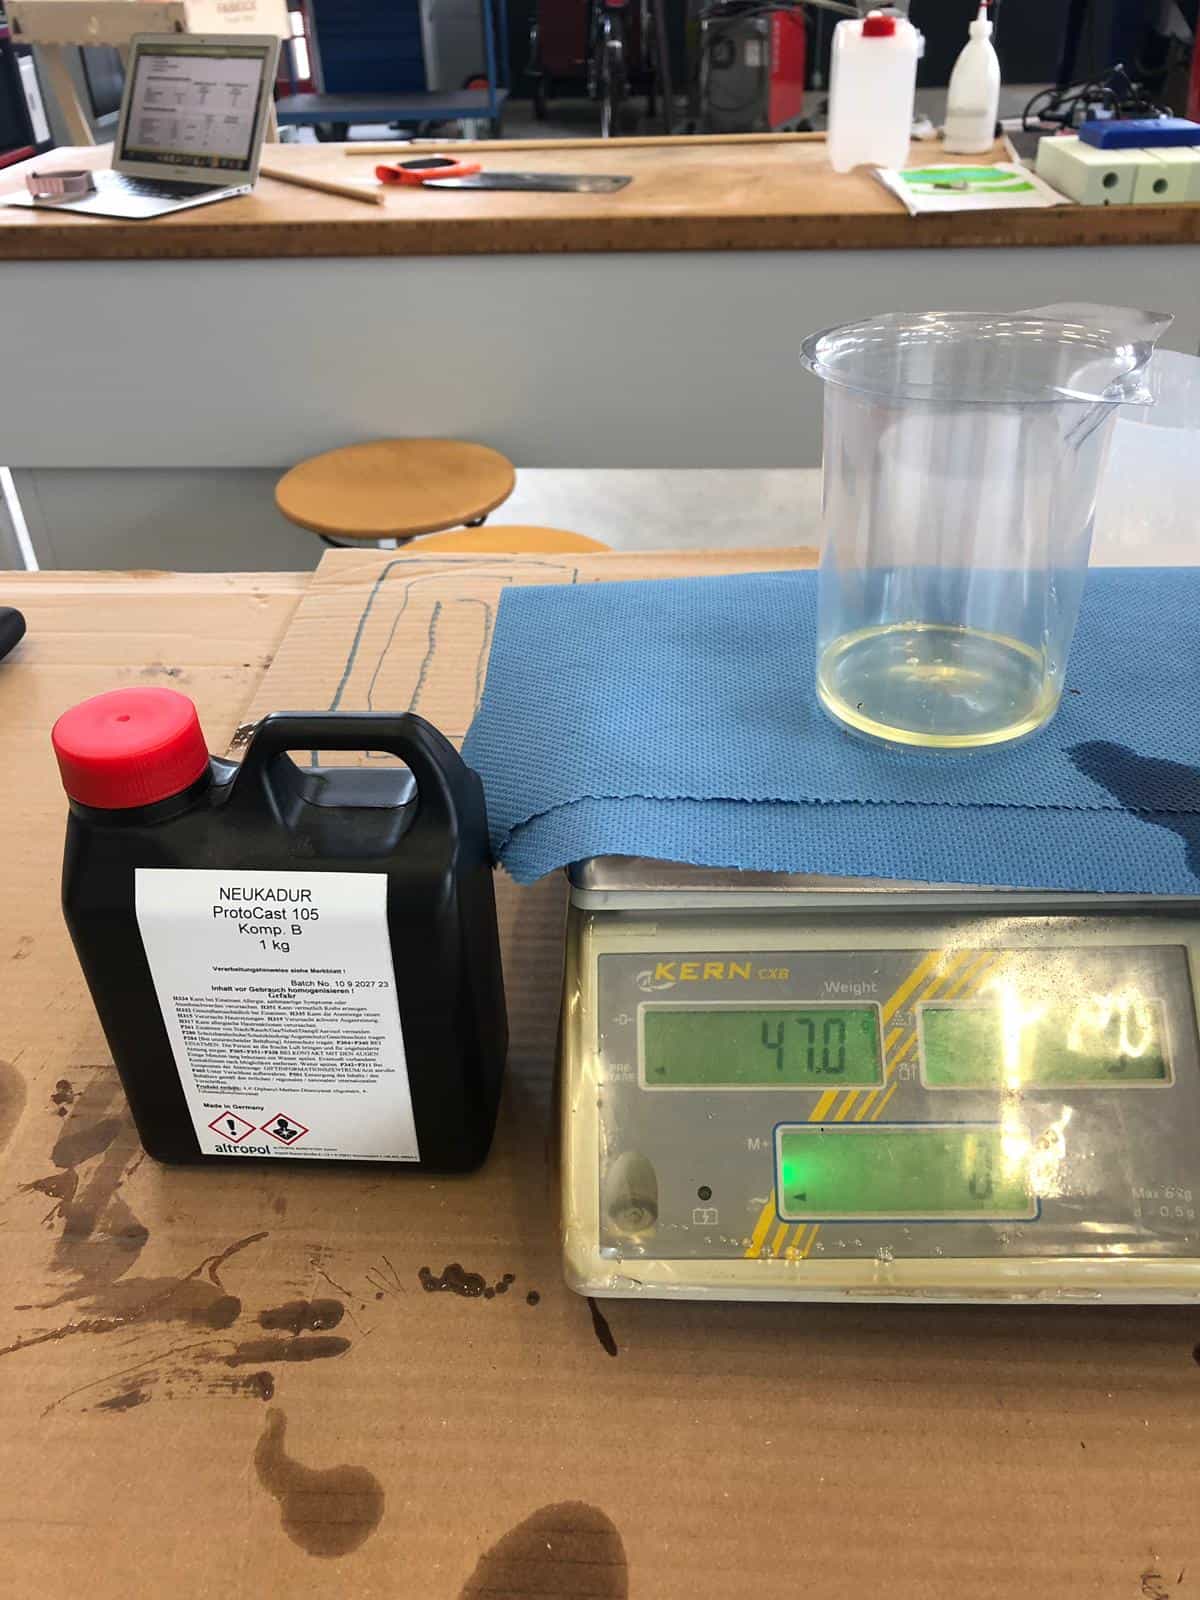
according to the datasheet the mixing rate of the resin is 70:100, so for example on 100 grams of comp b I have to take 70 grams of component a. I mixed them together carefully..
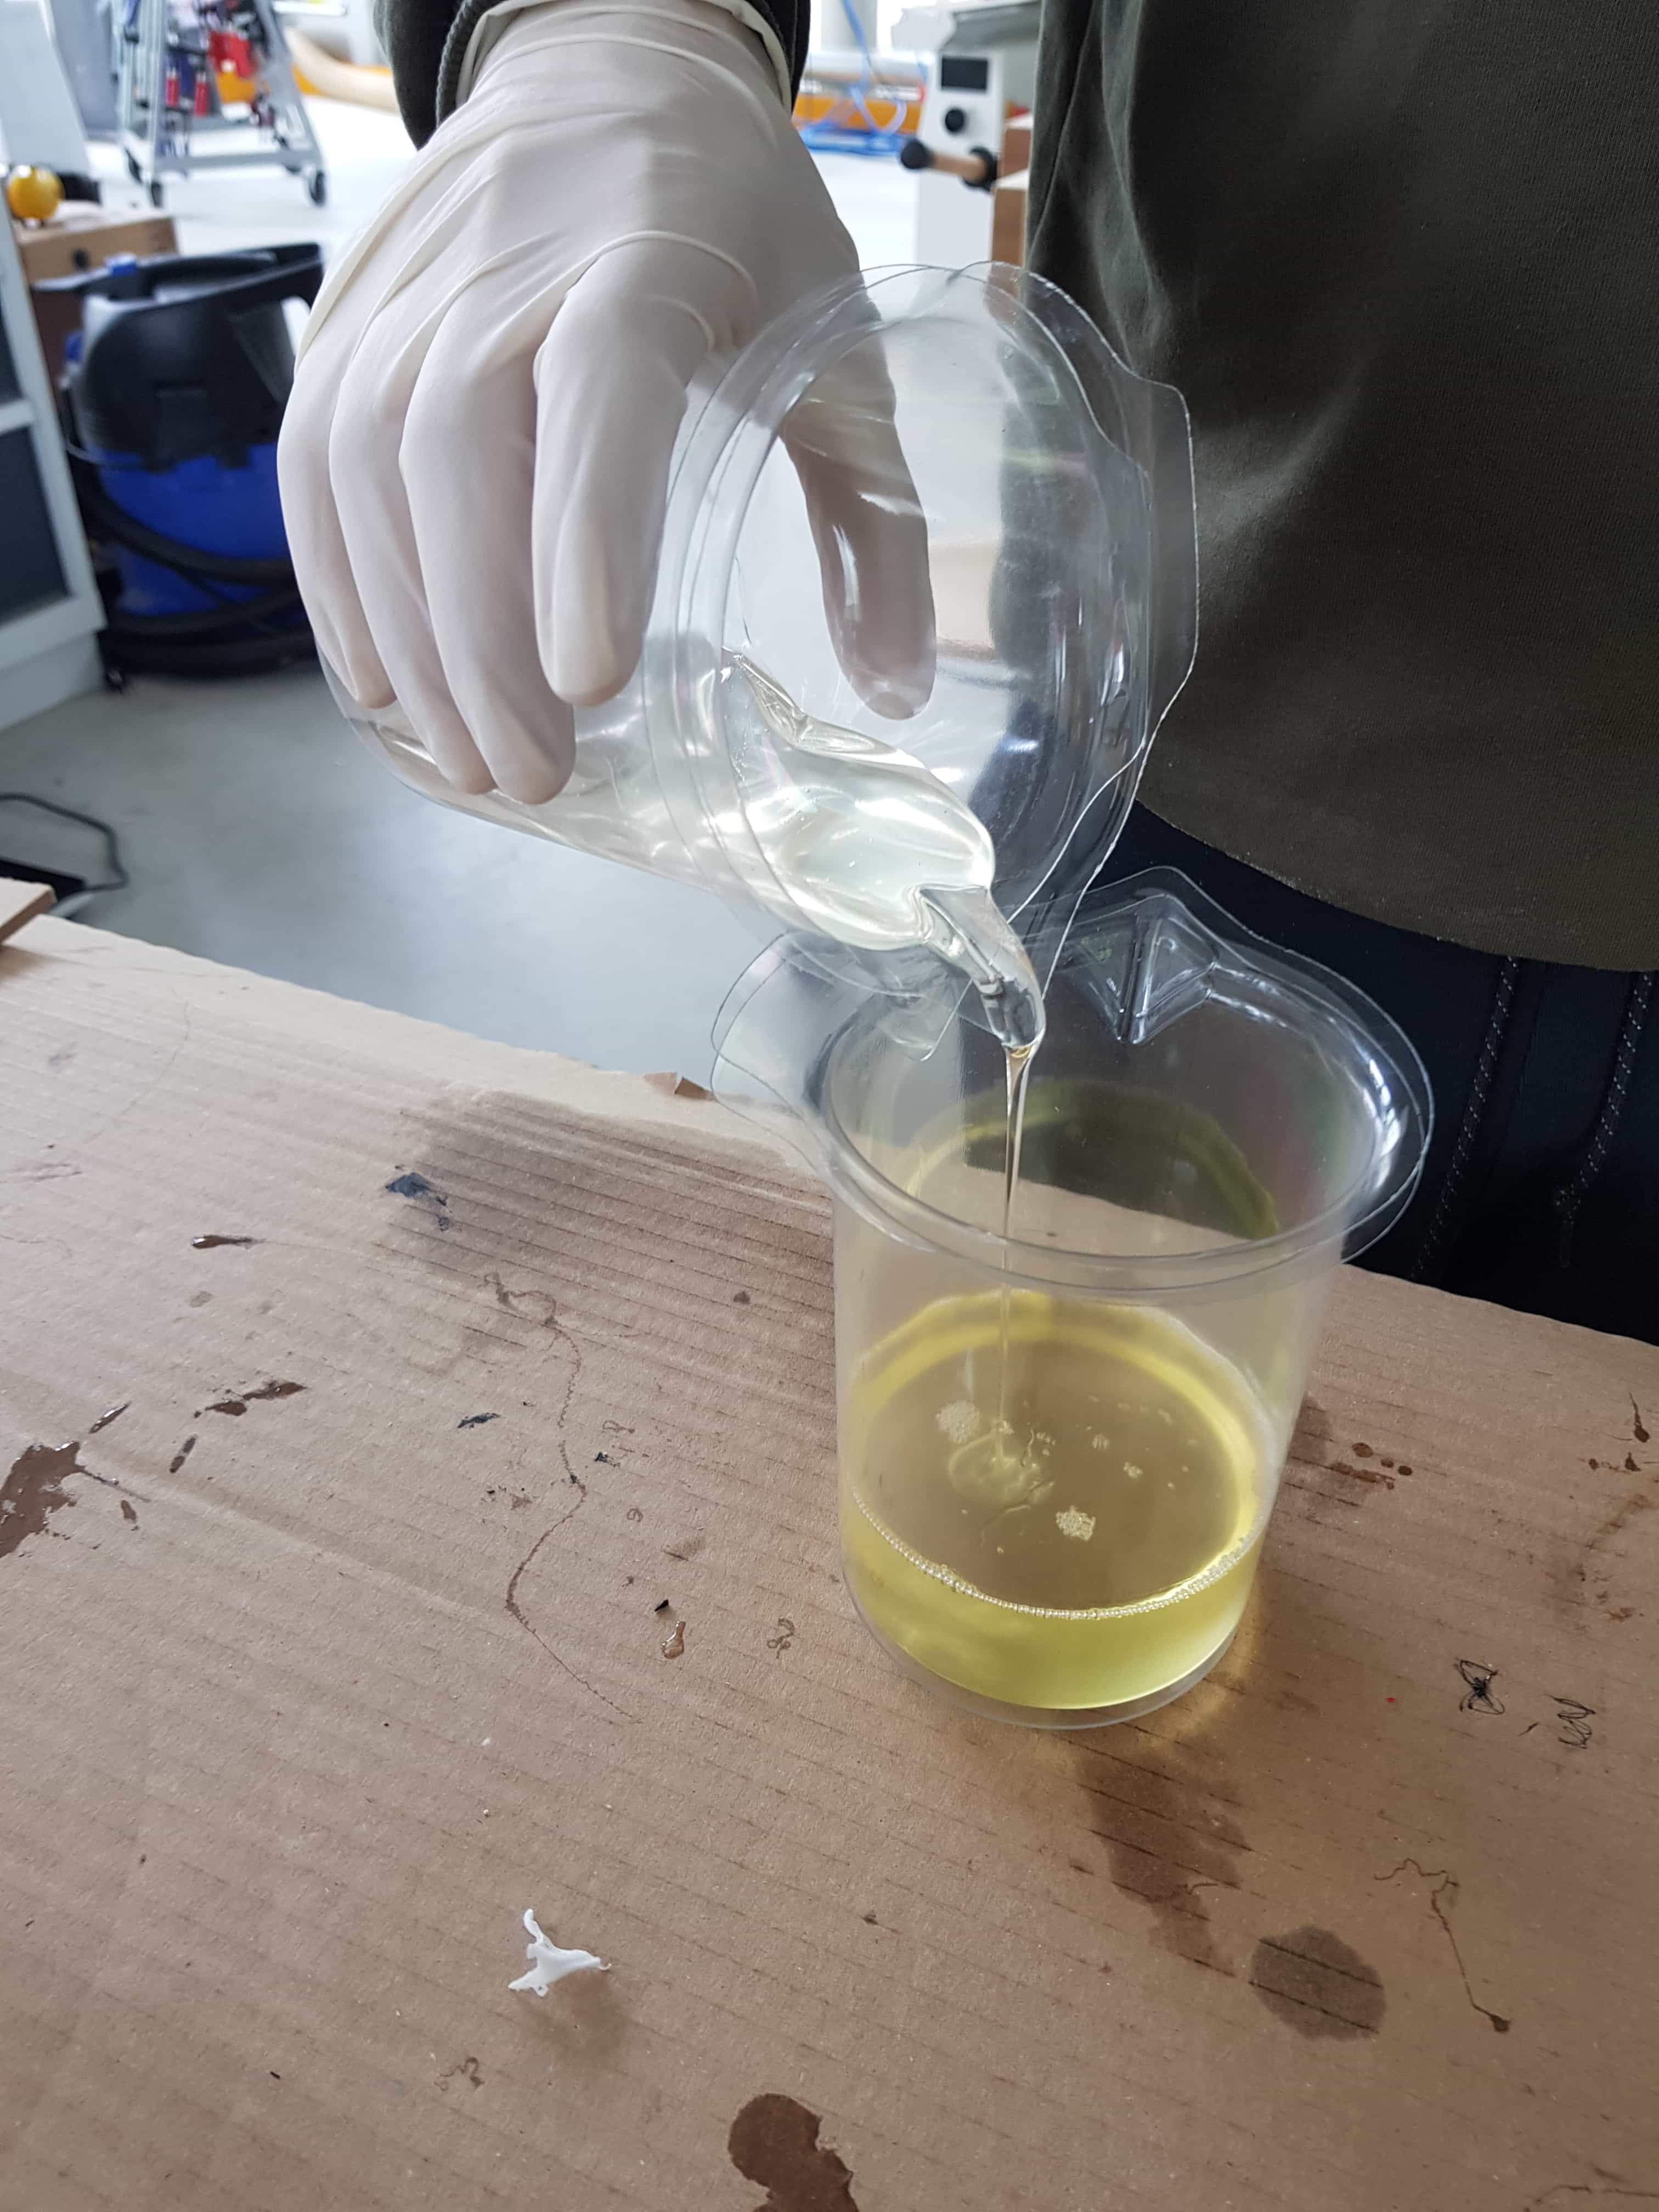
and fill it into the mold using the hole I drilled before.
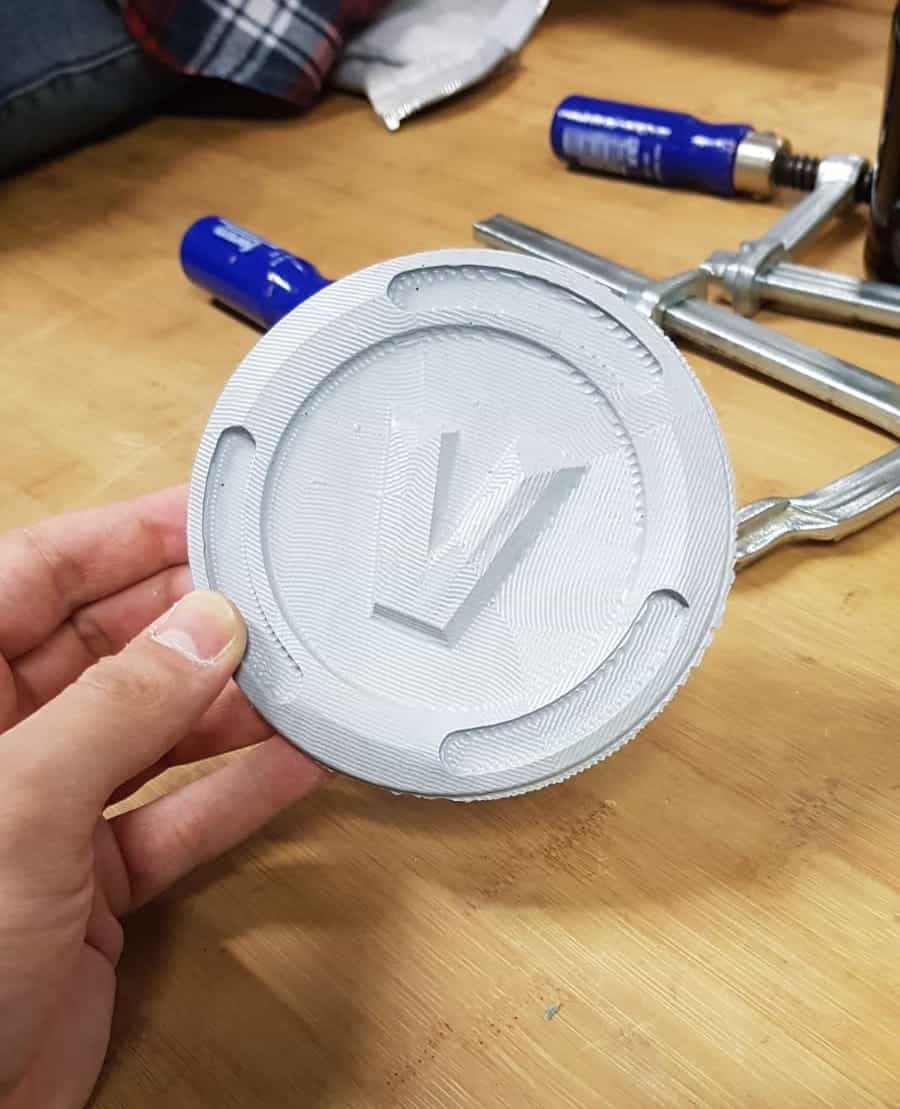
When the mold is filled all the way up, just put it somewhere to harden out. It takes quite a while until it is ready to take the cast out. I got my final object out after 24 hours and unfortenatly there was still a little bit of air in the mold which created a bubble on the font of the backside. The rest looks very beatiful so I decided to keep it as it is.
Click me for the v-buck!