Group assignment : Test the design rules for your printer(s)
3D Scanning and Printing
.jpg)
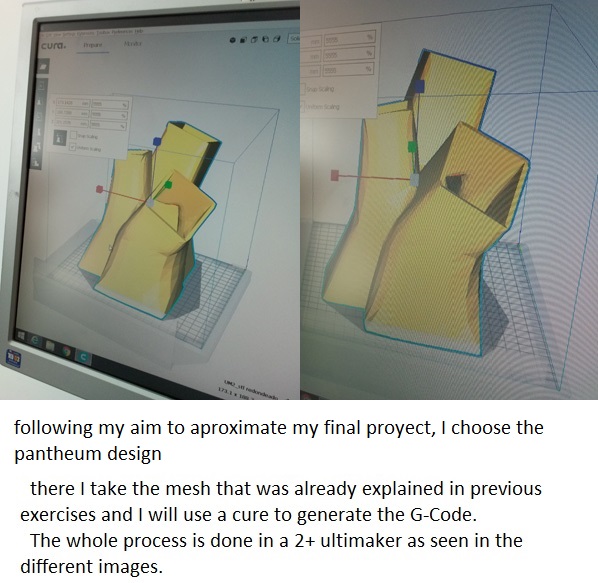
therefore we decided to go to a simpler model with which to be able to test results of the 3d printer
.jpg)
.jpg)
.jpg)
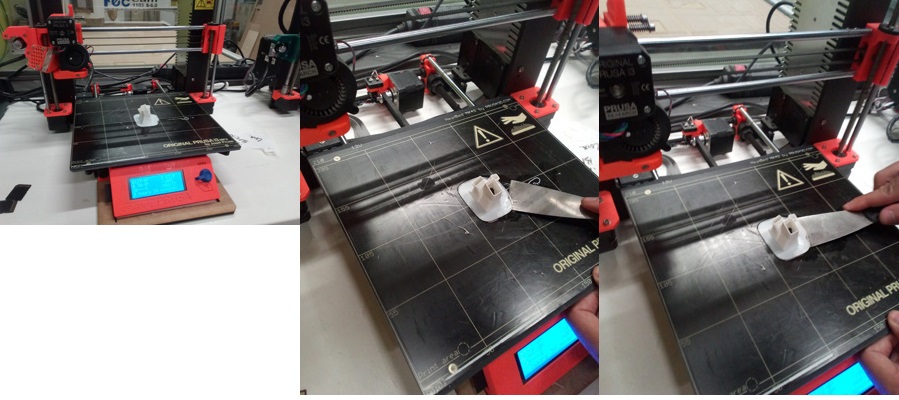
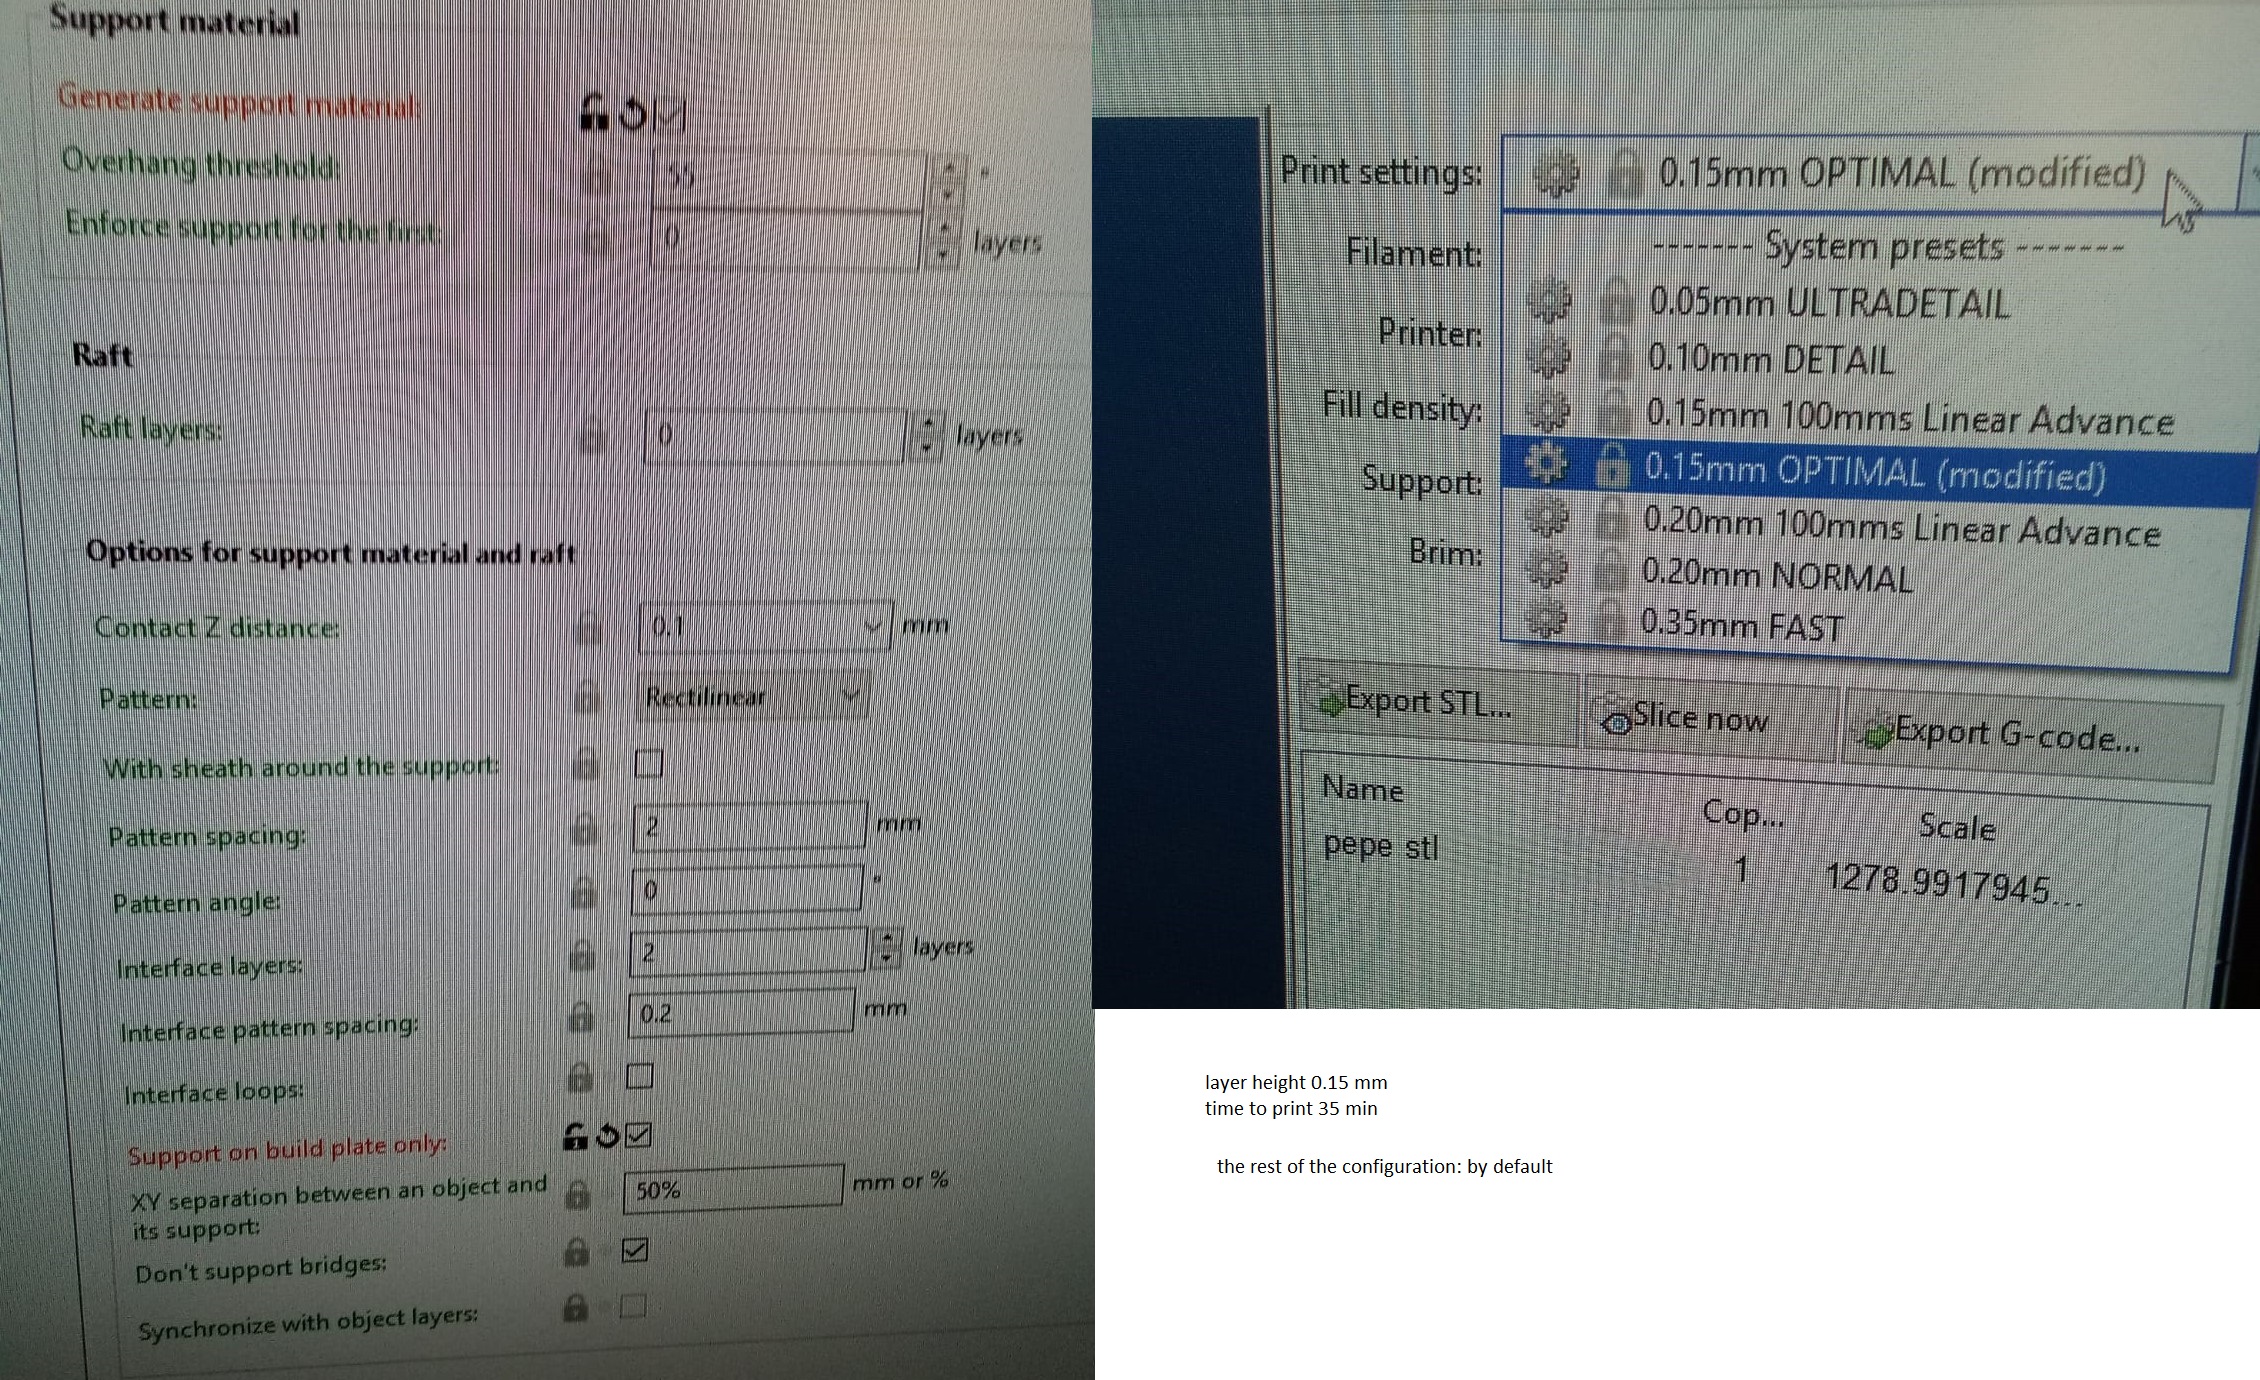
In our first attempt we used all the recommended parameters paying attention to form a small bed and the supports since we have most of our model floating in the air.
.jpg)
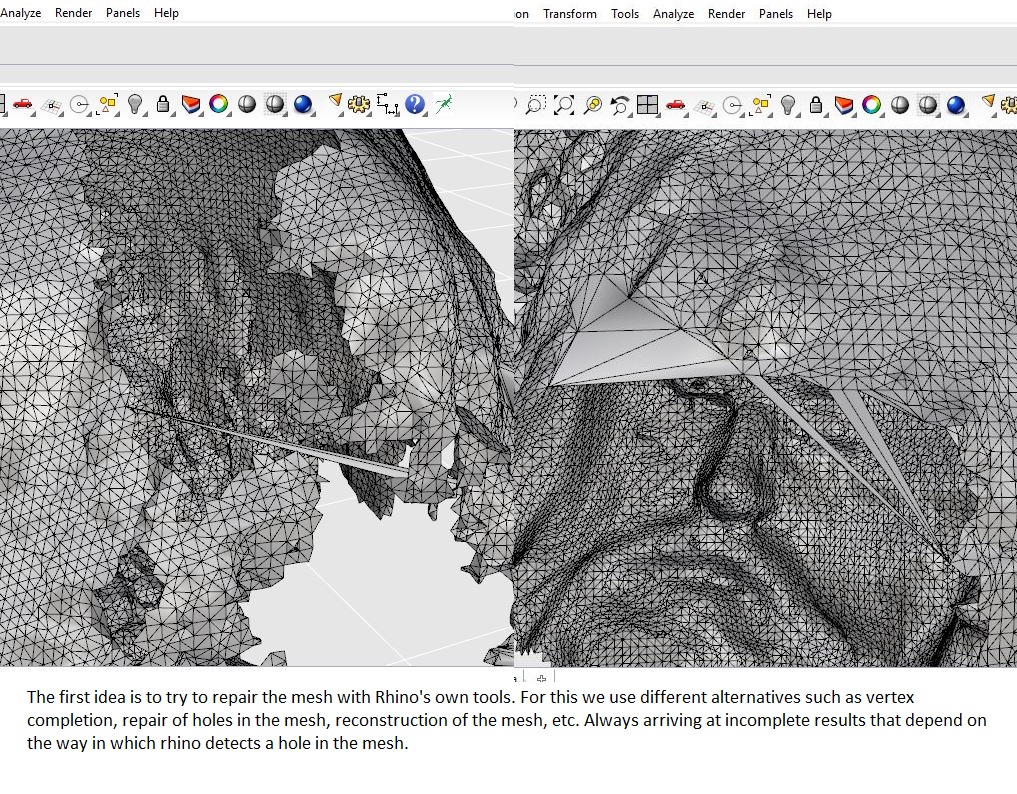
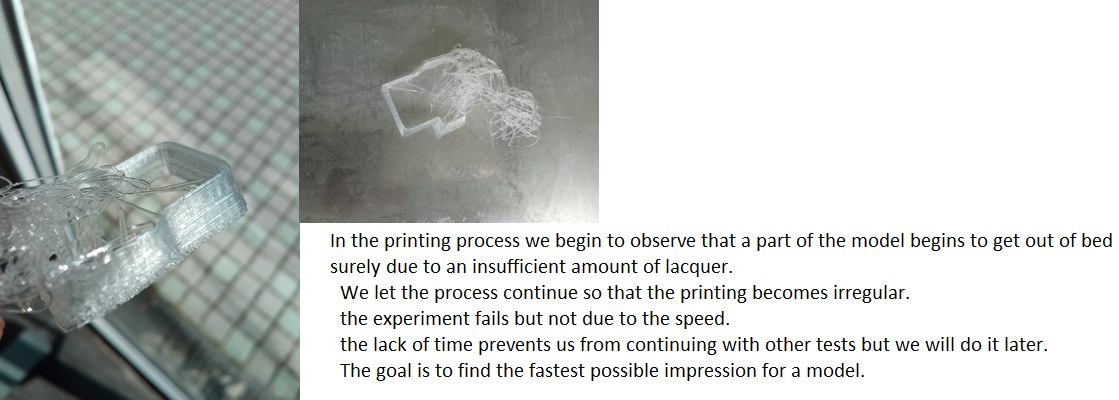
an explanation about the problems printing this first attempt
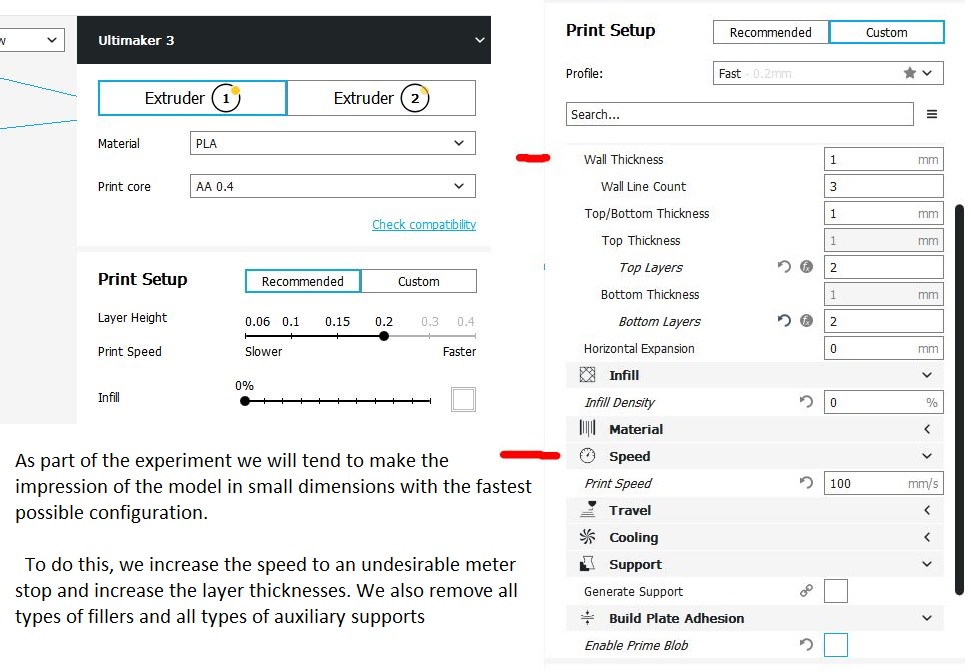
We chose a very small scale to reduce the printing time. The result as can be seen is not entirely satisfactory. The abundant supports would make the cleaning of the final model very difficult and laborious.
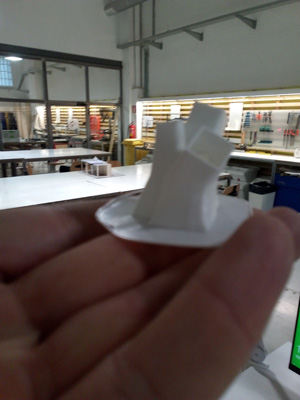
On the other hand, the results
of the printing can be significantly improved in this case by reducing the extrusion speed as well as the speed of movement of the head.
This fast model is carried out in order to detect possible failures in the use of the printer.
Therefore, this and other errors detected, will be taken into account later in the realization of models.
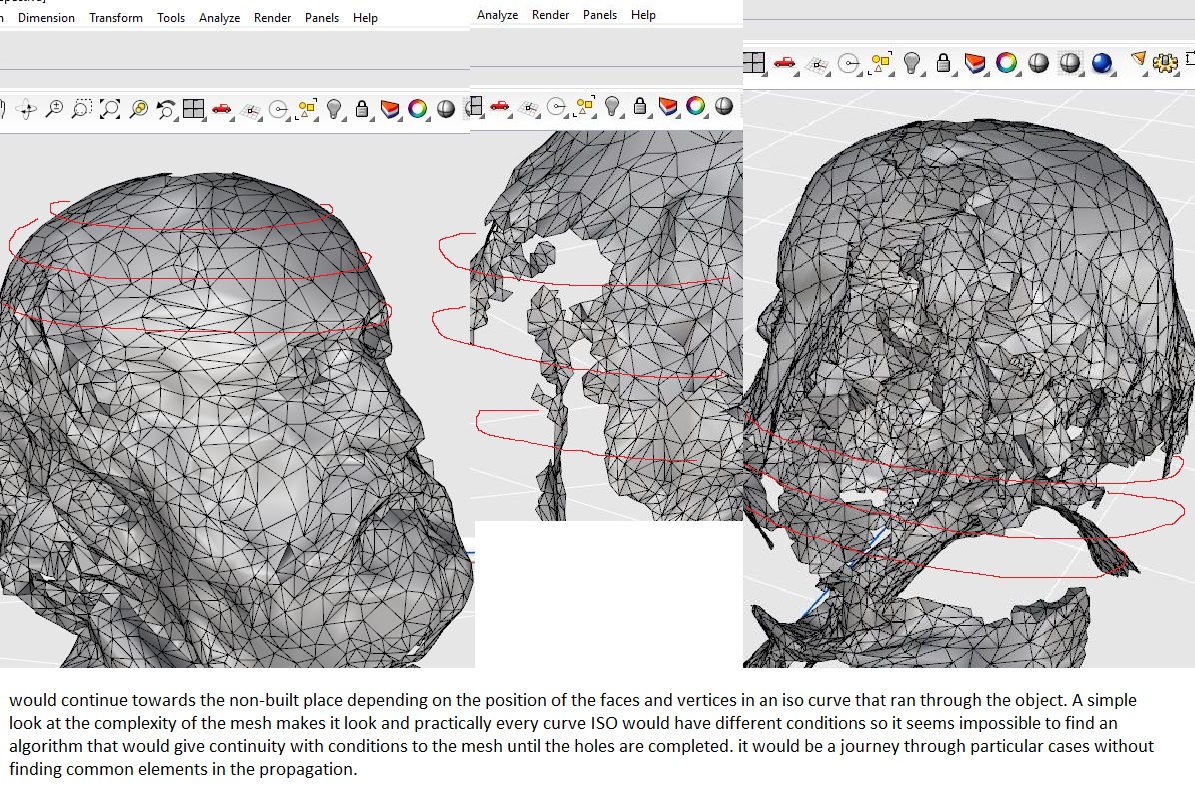
The chosen geometry is not the most appropriate to make a test because when the layered printing is formed each printed cord leaves a shape of its own that is only called the original geometry. So that the successive layers deposited
by the extruder can be appreciated trying to make me try as much as possible but with little precision to the twisted tube that we had proposed.
This figure of about 2.5 cm takes 3 hours 15 minutes to print and is printed with the recommended
parameters by default cure. (layer height 0.2) (print speed 10 mm / s)
explain why your model cannot be made subtractevely:
With the tools currently available in the fab lab we have to count on that the subtraction can be done with 2 degrees of freedom, that is 2 displacements in the X and Y axes and a plane displacement in the Z axis. This makes the geometry that we are using as a model can not be reproduced by subtraction since the tool that should subtract material could not access each part of the model that had a physical part above, ie a greater Z. In other words, each part of the proposed geometry prevents the tool from emptying material below it. A certain subtraction could be carried out taking into account the depth of the tool and always with a flat direction on the Z axis, but since the tool head can not rotate it could never leave this twisted tube in the air.
individual assignment : Design and 3D print an object (small, few cm3, limited by printer time) that could not be made subtractively
explain why your model cannot be made subtractevely:
In this case, the subtraction process of an element like this would be extremely difficult, if not impossible, in any case only within the reach of a robotic arm. Subtraction process of a machine that is basically active on two axes would make it very difficult to carve a piece like this. Reasons are multiple On the one hand there is the issue of the slopes the faces of the pantheon. A steep slope in the size would be limited by the length of the tool since beyond the clamp it would also touch the model, destroying the work that had already been done. On the other hand, the internal carving would be impossible since no common cnc machine could make the tool bend inside the piece to carve the interior walls in a slope as well.
Identify the advantages and limitations of 3D printing and scanning technology:
3D printing provides an immediate advantage that is easily noticeable in the first experiments. Printing a reduced model on a vector mesh is already a great achievement. but if we also take into account that from industrial manufacturing of prototyping as well as the customization of an element both in the domestic and industrial environment we are facing a new event in the processes of manufacturing and industrialization of construction.
Described what you learned by testing the 3D printers
although I have not had the opportunity to try a variety of servo printers, unique differences between the different models even with similar printing conditions similar materials and the same mesh that generates the original G-Code. Certainly a little more time and a methodical process analysis and comparison of test results would make more precise conclusions. It is a fact the enormous amount parameters can affect a seemingly simple process of melting extended plastic material in a mechanized process. so 3D printing tends to develop in a trade where previous experience with the machines is absolutely definitive of the final result. That way, only the experience will give control over obtaining the best results
why it could not be made subtractively :
There are certain angles where the subtraction tool could not reach in this model
Subtraction machines (other than robotic arms) cannot twist their head to subtract material at an angle. They are only vertical.
The chuck chuck has a much
larger diameter, so that exceeded in the subtraction the length of the drill would begin to rub with the piece for certain slopes.
Therefore, the piece can only be carried out by addition, layer by layer.
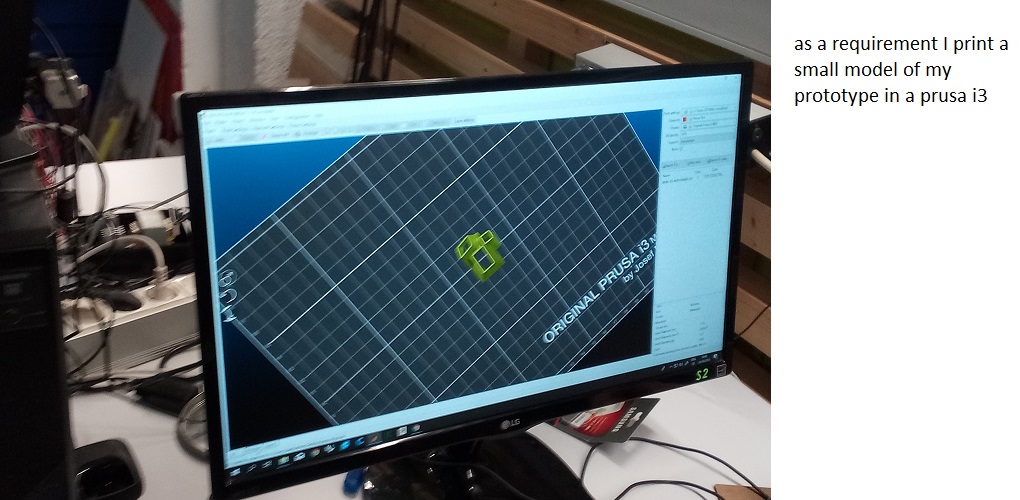
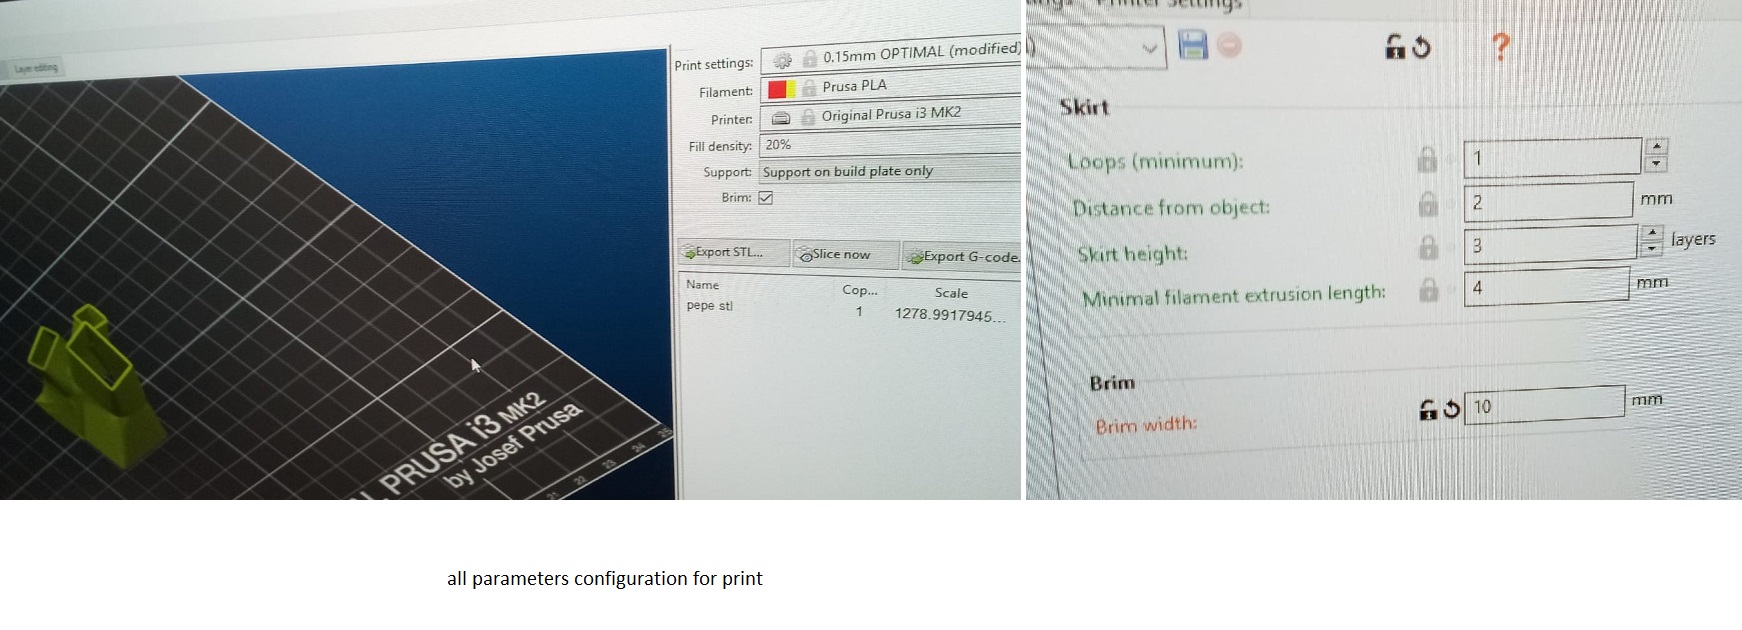
small model print in prusa

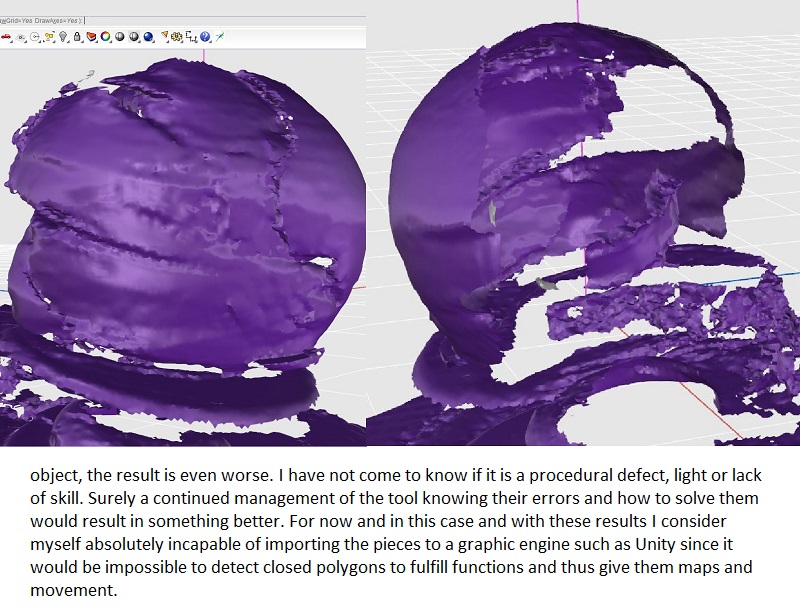
individual assignment : 3D scan an object