Interface and application programming
Assignments
#1 - Write an application that interfaces with an input or output device that you made
This week, my targets are the followings:
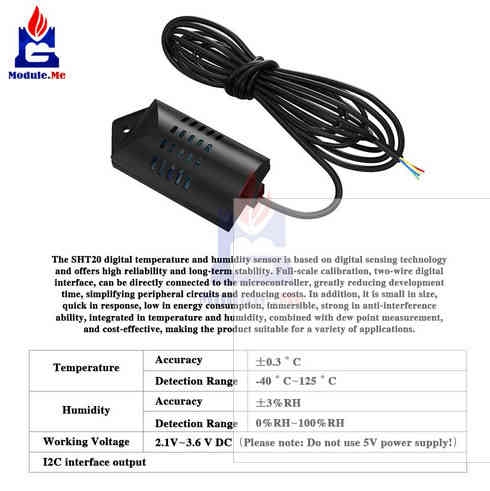
- Go ahead with the "Proofing box" project I plan to present in week 19, gather some components and build a PoC. For this week, I will leverage my work-in-progress capstone board, with a SHT20 sensor connected over I2C.
- Design the C based firmware that will run on the "Proofing Box".
- Design a Python based test tool that will gather the data from the "Proofing Box" over a wired link
- Display it on a graph and try to identify the optimal ramps
I'm also progressing with my capstone project and the main loop is in place. This week I...
References
Lecture
This week is about software interfaces and applications
Topics covered (course) Video recording (course) Students and Labs My files: (part 1) (part 2)Learnings
#1 - the "Proofing Box" firmware
As explained in week 19 , the box has a SHT-20 sensor. The sensor is connected as per the following
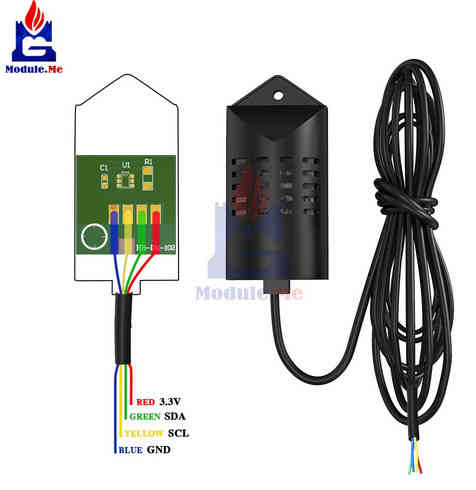
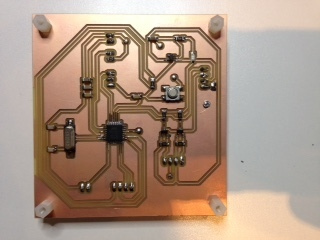
Here is the schematic: a logic level converter is needed since the sensor does not support 5VDC
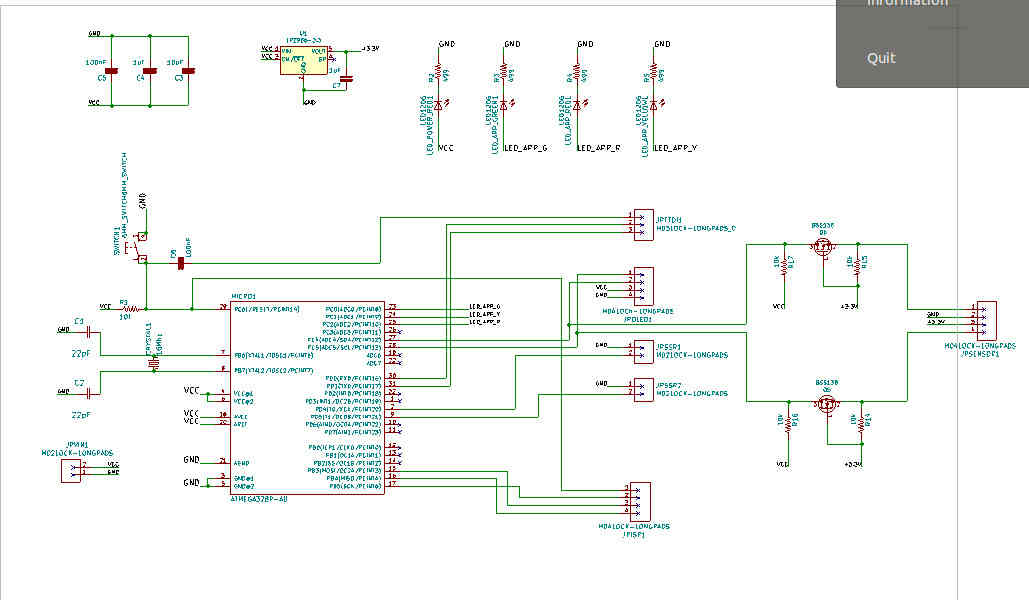
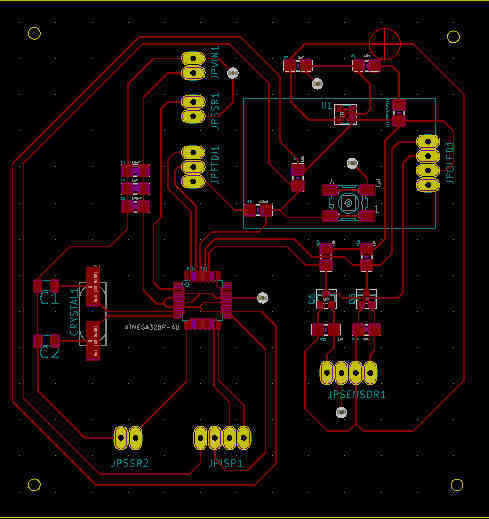
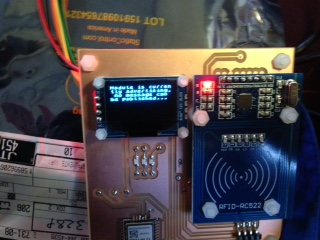
And here is the board
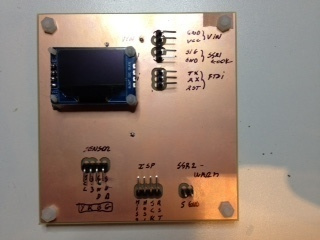
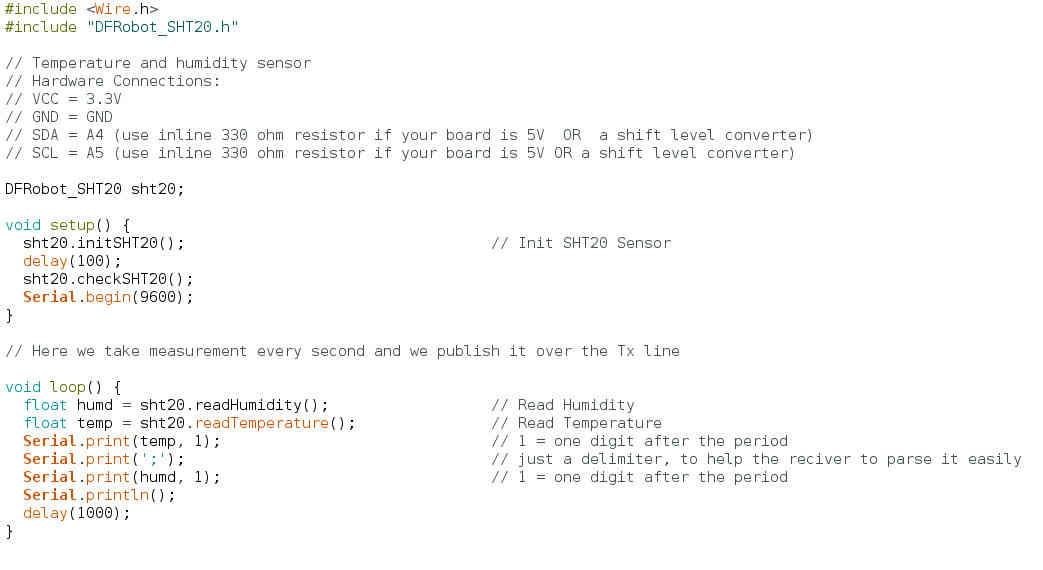
Here is a very simple sketch that gathers temperature and humidity measurements every one second and publish it over the Tx line. For this week, the OLED screen is not very usefull since I just want to gather data over a long period os time and to use it to draw a graph
#2 - the test and calibration tool
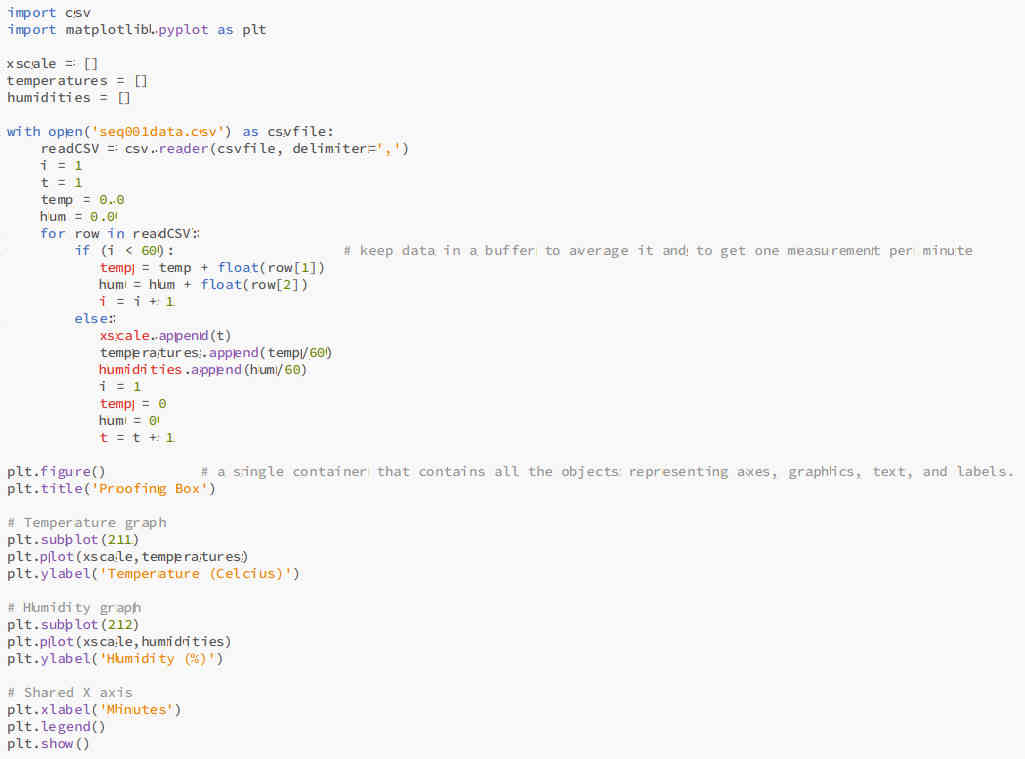
The idea is to get the data published by the "Proffing Box" and to store it in a file for further analysis. The code is written in Python

#3 - the graph
Matplotlib is a Python 2D plotting library which produces publication quality figures in a variety of hardcopy formats and interactive environments across platforms. Matplotlib can be used in Python scripts
As many other graph tools, it is extremely flexible - in fact so flexible that it's hard for the newcomer to know where to start ! Here is an example
And here are the results. The first picture shows what happens if I turn the rice cooker on in "cooking mode" and then I wait (a few minutes) up to the moment the humidity reaches 80%. Then I switch to "keep warm mode". As you can see, the temperature raises up to 35 C and then goes down slowly. Humidity does not go down and it is condensing.

The second picture shows what happens when I start the rice cooker in "keep warm mode". It takes 80 minutes to reach the 25 C level and humidity reaches the target of 80% quickly
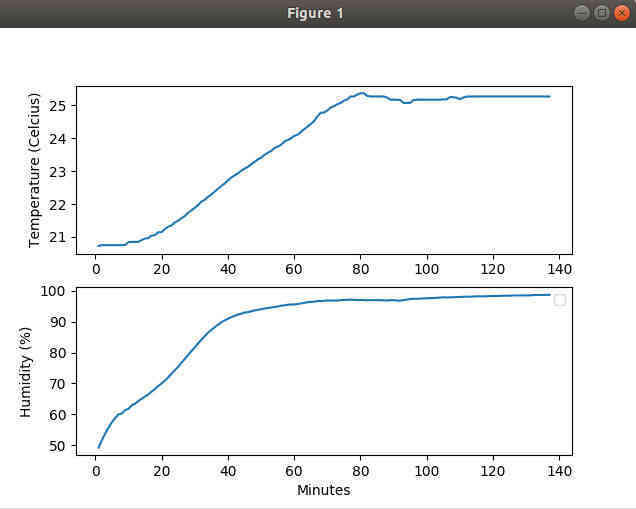
When I will build the final "Proofing box", I will try a third scenario, with a boost of temperature at startup (in "Cooking mode") for a short period of time and then switch to "Keep warm mode" just after. I guess I will reach quickly and maintain the target of 24 C at 80% humidity
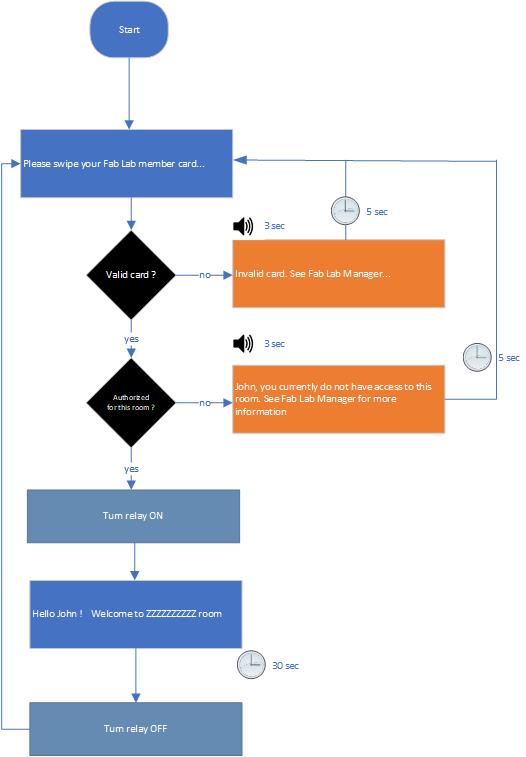
#4 - UI flow for my capstone project
There are three UI flows: one for the device provisionning, one when the device is used as a metering device and a last one used when the device is used as a security guard
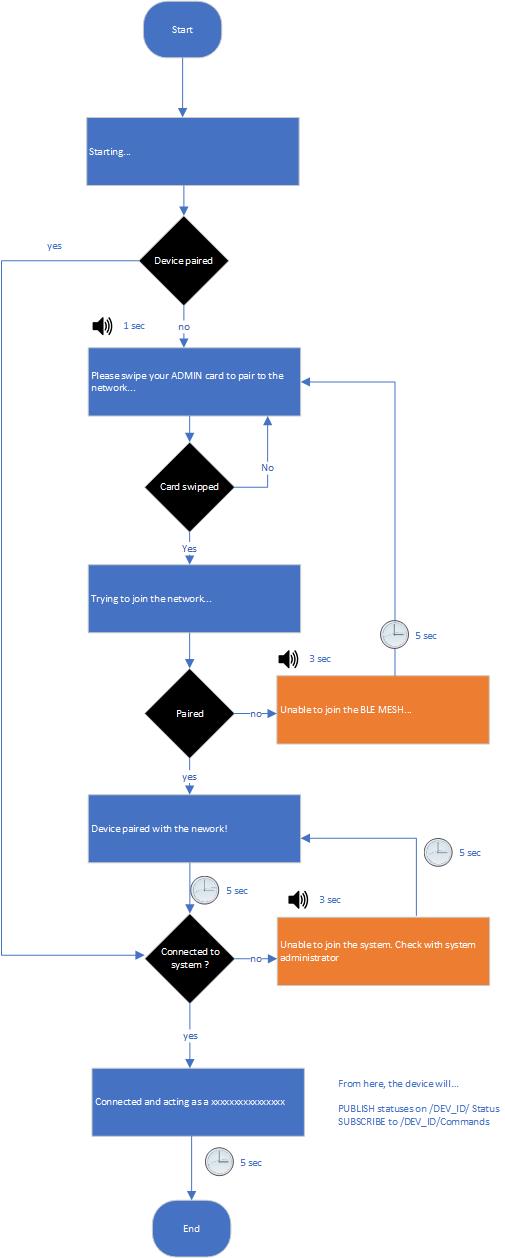

This week, I implemented the first scenario. See here for the source code and a detailed documentation. Please have a look on it, there are tons of documentation inline
For more information on how to convert an image and to embedd it in your code, see this tool