Setup your Fab Buddy Gateway

Prepare your Raspbberry PI

Hardware and operating system

Install your Raspberry PI: connect a screen, a keyboard, a mouse and optionaly a wired network connection

Get the Raspbian image from the official repositoty and flash it to the SD card as er the instructions

Configure it with your local country code, preferred language and keyboard, along with the proper timezone. Set the password for the default 'pi' user to 'raspi'. Optionly, setup your WiFi link if you do not plan to use the wired LAN . Update the software as suggested to get the most recent Raspbian fixes. The system will restart at the end of the upgrade.

Python

Python 3 is installed by default with RaspBian. Click on the small raspberry on the topleft corner, select Programming and then Python. You should see the Python console

Open another terminal and type the following command to create your first script within the text editor: sudo nano hello.py

Add the following lines of code

  • !/usr/bin/python
  • print 'Hello Fab Academy'

Type Ctrl-O to save the file and then Ctrl-X to quit the text editor

To test your first script, type python hello.py Note: if you want to start the script directly (without the python prefix), you have to update the file properties. To do so, type: chmod +x hello.py From there, you can start you script by typing ./hello.py

MQTT broker

Open a terminal and type the following commands

  • wget http://repo.mosquitto.org/debian/mosquitto-repo.gpg.key // to be able to access the repository where Mosquitto is stored
  • sudo apt-key add mosquitto-repo.gpg.key
  • cd /etc/apt/sources.list.d/
  • sudo wget http://repo.mosquitto.org/debian/mosquitto-stretch.list // to get the dependencies
  • sudo apt-get update
  • sudo apt-get install mosquitto // to install Mosquitto broker
  • sudo apt-get install mosquitto-clients // to install Mosquitto clients
  • sudo mosquitto_passwd -c /etc/mosquitto/passwd kitty // to create a user named "kitty". Password should be set to "kitto"
  • sudo mosquitto_passwd -c /etc/mosquitto/passwd kitty // to edit the configuration file. Add a line with the following content: listener 1883 localhost
  • listener 1883 localhost // to restart the server with the new config
  • mosquitto_sub -d -t mytopic -u kity -P kitto // start a client and subscribe to the 'mytopic' topic
  • if anything goes wrong, type sudo tail /var/log/mosquitto/mosquitto.log // to see the log file

Open another terminal and type the following command

  • mosquitto_pub -d -t mytopic -m 'Hello MQTT' // start a client and publish to the 'mytopic' topic

You should see your message in the other terminal, confirming the MQTT broker is is place and well configured

Now we need to install a library to be able to invoke MQTT services from Python code. The library is named Paho-MQTT and here is how to install it

  • pip install paho-mqtt

Here is the code to publish a simple message. Create a Python script, save it and run it. You you see the message popping up in another terminal where a subsciber runs

  • import paho.mqtt.publish as publish
  • publish.single('mytopic','this is my payload', hostname='localhost')
MariaDB database and database connector for Python

To install MariaDB, type the following commands

  • sudo apt-get install mariadb-server
  • sudo mysql -u root -p // this is your admin account. Note this is not a good idea to leave the password blank but this is just a demo

We now have a working database engine but no database yet. Type the following commands within the MariaDB shell

  • CREATE DATABASE IF NOT EXISTS FL;
  • You should see the following output : Query OK, 1 row affected

Let's add a user with less power than the root: CREATE USER IF NOT EXISTS gateway@localhost IDENTIFIED BY 'secret';

Let's grant that user the right to access our database: GRANT ALL PRIVILEGES ON FL.* TO 'gateway'@'localhost';

MySQL Connector/Python enables Python programs to access MySQL databases (and therefore MariaDB as well), using an API that is compliant with the Python Database API Specification v2.0 (PEP 249). It is written in pure Python and does not have any dependencies except for the Python Standard Library. To install it, open a terminal amd type : sudo python -m pip install mysql-connector-python

Let'S test it now. Create a new Python script with the following content

  • import mysql.connector
  • cnx = mysql.connector.connect(user='gateway', password='secret', host='localhost', database='FL')
  • cnx.close()

Save it and run it. You should not get any error

BLE (Bluetooth Low Energy)

On Linux the BlueZ library is necessary to access your built-in Bluetooth controller or Bluetooth USB dongle. The most up-to-date version of Raspbian we installed contains a recetn version of BlueZ and there is therfore nothing to do. Note: to check the version , just type bluetoothd --version in a terminal. My version was 5.43

The next step is to validate your HW. Just type the following commands:

  • sudo bluetoothctl // to start the interactive mode
  • power on // to power the module on, it should display 'succeeded'
  • scan on // to start the discovery and list all detected devices around you
  • exit // to close the interactive session

Now we need a library to be able to invoke BlueZ services from Python code. Here is how to install it

  • sudo pip3 install gatt // it should say it is successfully installed
  • sudo gattctl --discover // to test it, it should display information similar to the scan command we ran previously

Let's create a scipt file named discover.py and add the following lines of code

  • import gatt
  • class AnyDeviceManager(gatt.DeviceManager):
  •   def device_discovered(self, device):
  •     print("Discovered [%s] %s" % (device.mac_address, device.alias()))
  • manager = AnyDeviceManager(adapter_name='hci0')
  • manager.start_discovery()
  • manager.run()

Note: if you have more than one BLE adapter, check with "hcitool dev" command which one you want to use and what is its ID (hci0, hci1, ..), then update your script accordingly. Run it using the sudo python3 discover.py command. You should see a list of discovered devices

Node

Node.js is an open-source, cross-platform JavaScript run-time environment that executes JavaScript code outside of a browser. Node.js lets developers use JavaScript to write command line tools and for server-side scripting—running scripts server-side to produce dynamic web page content before the page is sent to the user's web browser.

:

Setup your laptop

How to setup your development environment

Hardware and operating system

I 'm using Ubuntu 18.04, on a multiple boot laptop. It works with a VM as well but there are additionnal challenges when you want to communicate with real HW, depending on your VM host.

Eclipse IDE and extensions

I'm using Eclipse IDE and some extensions

  • You can get the Eclipse IDE from here and there is a good tutorial here
  • To develop Python code, I added an extension (PyDev) as per the instructions I found here /
  • But.. wait ! Why are we installing Eclipse on the laptop if we know the Python code will run on the Raspberry ? Simple answer: you should never developp on your target, since it is painfull AND it will affect the target performance for sure. I followed the instructions I found here to setup remote debug, i.e to code my Python scripts on the laptop but to make them run on the Raspberry.
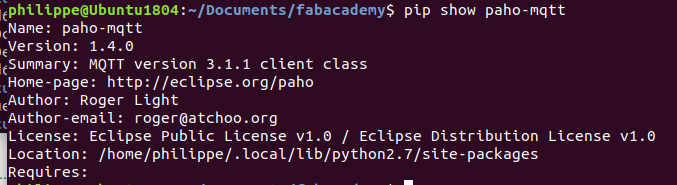
  • Note: it is sometimes difficult to figure out where packages installed by the pip tool are located. Here is a trick:

Arduino IDE

Download it from the official repo to your laptop

Then run install.sh in a terminal

Finally, run the following commands to allow your user to use the serial port and to program the board:

  • sudo usermod -a -G dialout yourusername
  • sudo chmod a+rw /dev/ttyACM0
Database design tool

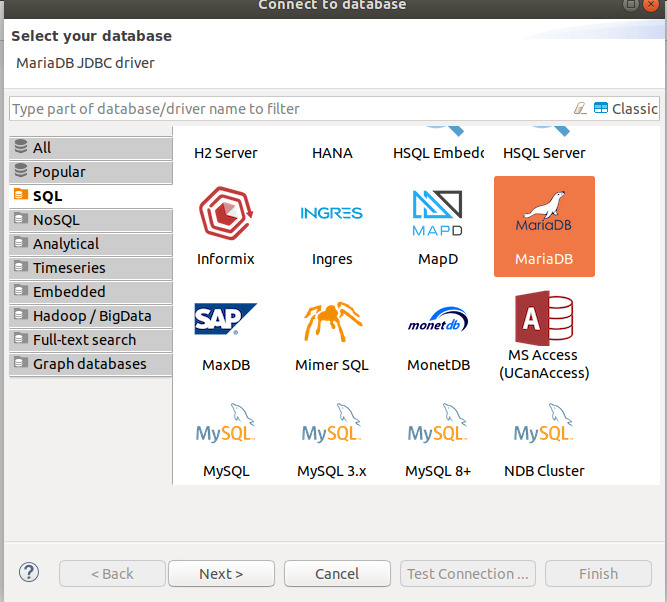
There is nothing wrong in designing a database schema using a simple text editor but there are more advanced tool. I'm using DBeaver. You can get it from here

By default, MySQL or MariaDB only listens for connections from the localhost. All remote access to the server is denied by default. To enable remote access, run the commands below to open MySQL/MariaDB configuration file.

Just edit the file by typing this command : sudo nano /etc/mysql/mariadb.conf.d/50-server.cnf and set the bind-address to 0.0.0.0. Then restart the service by typing: sudo systemctl restart mariadb.service

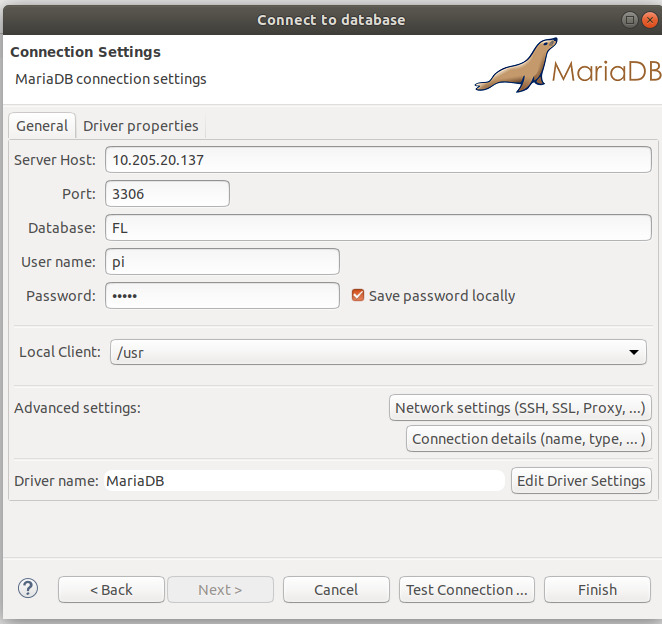
To allow a specific client to access the database, there are two additionnal commands to run (from mysql tool with a root account on the Raspberry)

  • CREATE USER 'root'@'your-remote-client-IP' IDENTIFED BY 'a password you will rememeber';
  • GRANT ALL PRIVILEGES ON *.* TO 'root'@'your-remote-client-IP' WITH GRANT OPTION;

From the remote laptop, connect to your Raspberry..

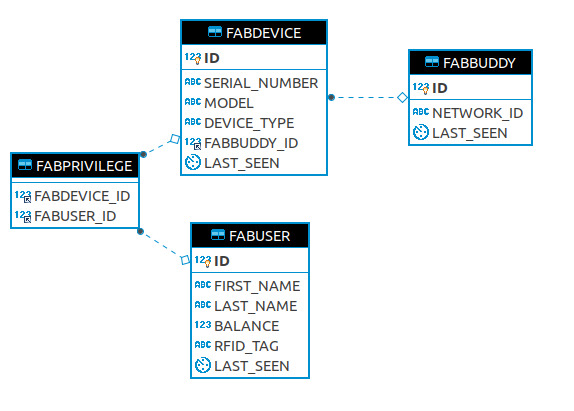
Here is how a basic database schema would look like:

File transfer

Using Eclipse remote extension tools, I can do a lot of things but sometimes it is easier to transfer files just between folders on different computers. I'm using Filezilla client on the laptop and SFTPD on the Raspeberry

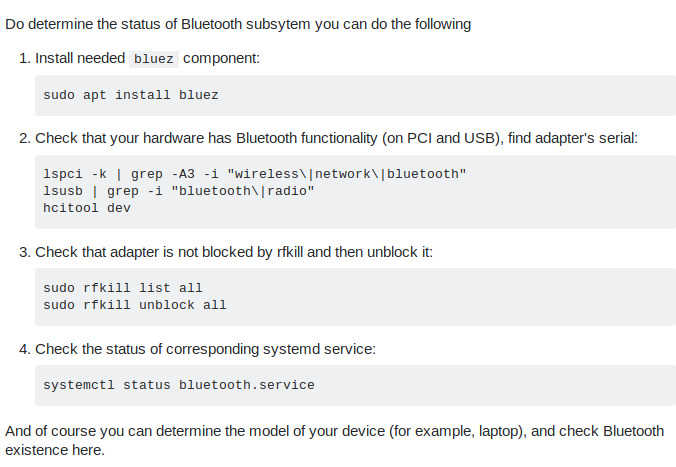
BLE dongle (or integrated BLE card

Depending on your laptop specification, you may need an external dongle (or not..). Here is a way to figure out if you have (or not) the required HW on bord
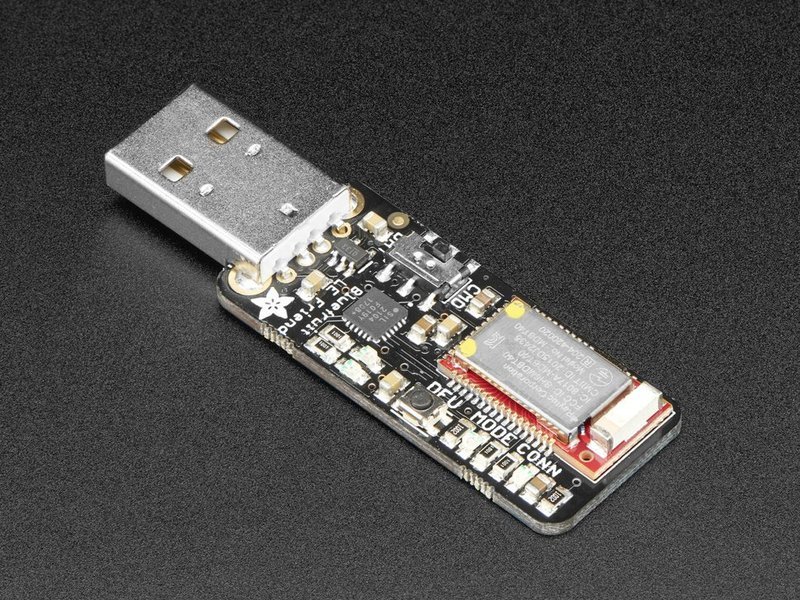
BLE sniffer

I'm using Adafruit BLE dongle to see in details the messages exchanged over the air over BLE

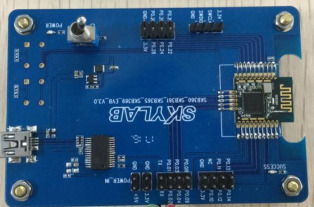
BLE development board

I'm using the SKB360_EVB. One of the biggest advantage is the fact that you can easily swap BLE modules without a heat gun

Node

To get full explanations and detailed instructions, see this site. In a nutshell, the idea is to install "node" (and "curl" as part of its dependencies), "nave" (a tool we use to swap between node versions), "yarn" (a packet manager), "angular cli"

  • sudo apt-get install curl (install curl tool)
  • make sure you have already a Node version installed by typing: node -v If not, get the latest version from nodejs.org and install it.
  • sudo npm install -g nave (install naeve tool)
  • sudo nave use 12.3.1 (tell nave we want to use node 12.3.1)
  • sudo npm install -g yarn (install yarn package manager)
  • yarn global add @angular/cli (install angular cli tool)
  • ng set --global packageManager=yarn

Let's create our first Demo Angular project

  • open a terminal and navigate through the file system to a place where you want your project to be saved. In my case, it will be under /Documents/FabAcademy/projects/capstone/gateway/angular
  • ng new hello-world-app (answer y to the question related to the routing and select css after)
  • cd hello-world-app
  • ng server (start your app and make it available)
  • Open your web broswer and navigate to 127.0.0.1:4200. You should see your Demo app. It confirms everything is in place to start developping

To create your own app, follow this tutorial. The main steps are the followings:

  • Setup environment (we just did it at previous step)
  • Create a workspace and an initial app (ng new MyApp)
  • Serve your app (i.e make it available to users) (cd MyApp and then ng serve --open The page you see is the application shell. The shell is controlled by an Angular component named AppComponent. Components are the fundamental building blocks of Angular applications. They display data on the screen, listen for user input, and take action based on that input.
  • Add new features to improve the app