20/2/2019
Test the design rules for your 3D printer(s)
Design and 3D print an object (small, few cm3, limited by printer time) that could not be made subtractively & 3D scan an object (and optionally print it)
In order to test the design rules for our 3D Printer which is the Ultimaker 3, we did two different tests
You first need to download the zipped file, unzip it, open it in Cura Software to generate the G code -you may download Cura from here
This is a tolerance test for a high res 3d printer, designed with features beyond machine resolution (~1500dpi) to demonstrate how the printer/material fails. Must be printed on a machine that uses some kind of support material. Includes thin walls and wells up to 0.00063425in thick, a wide range of curvature (including gently sloping surfaces to test z axis resolution), a sharp peak, a cavity, and several moving hinges of varying tolerances.
The test features moving hinges of varying tolerances ranging from 0.38mm up to 0.635mm. It also features thin walls and wells ranging down to 0.016mm
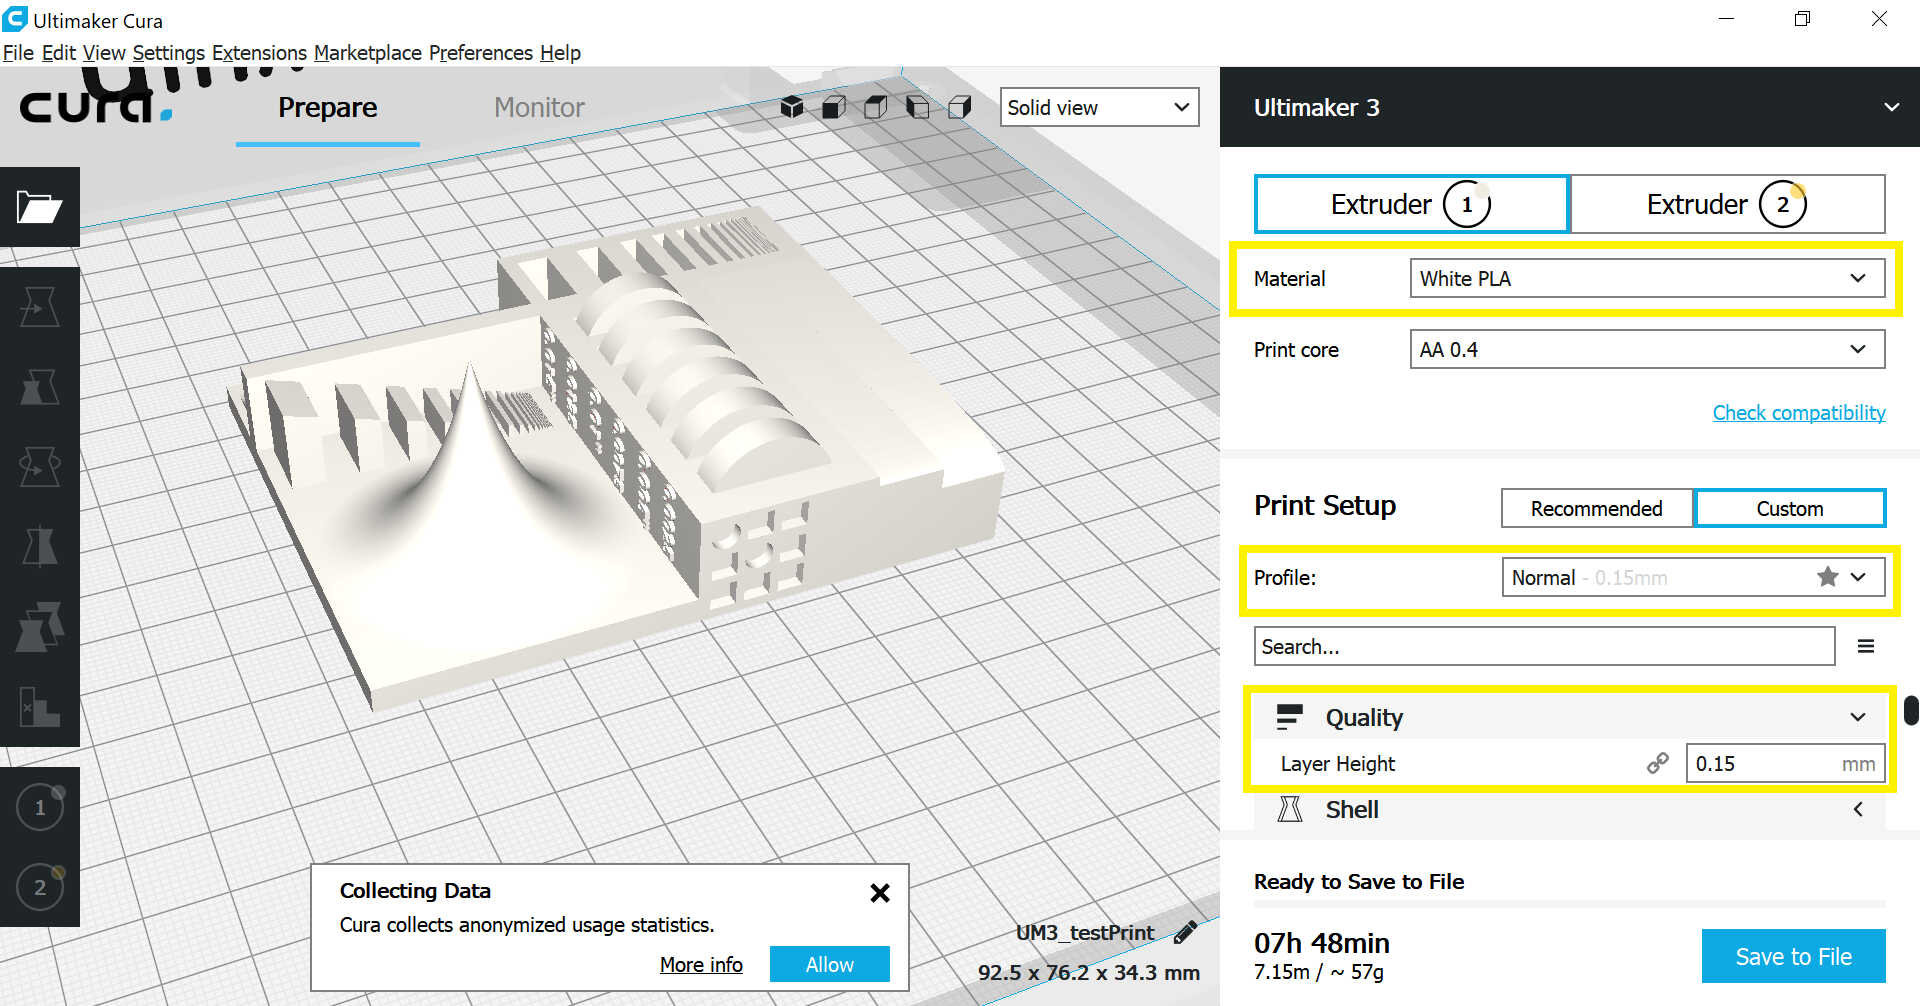
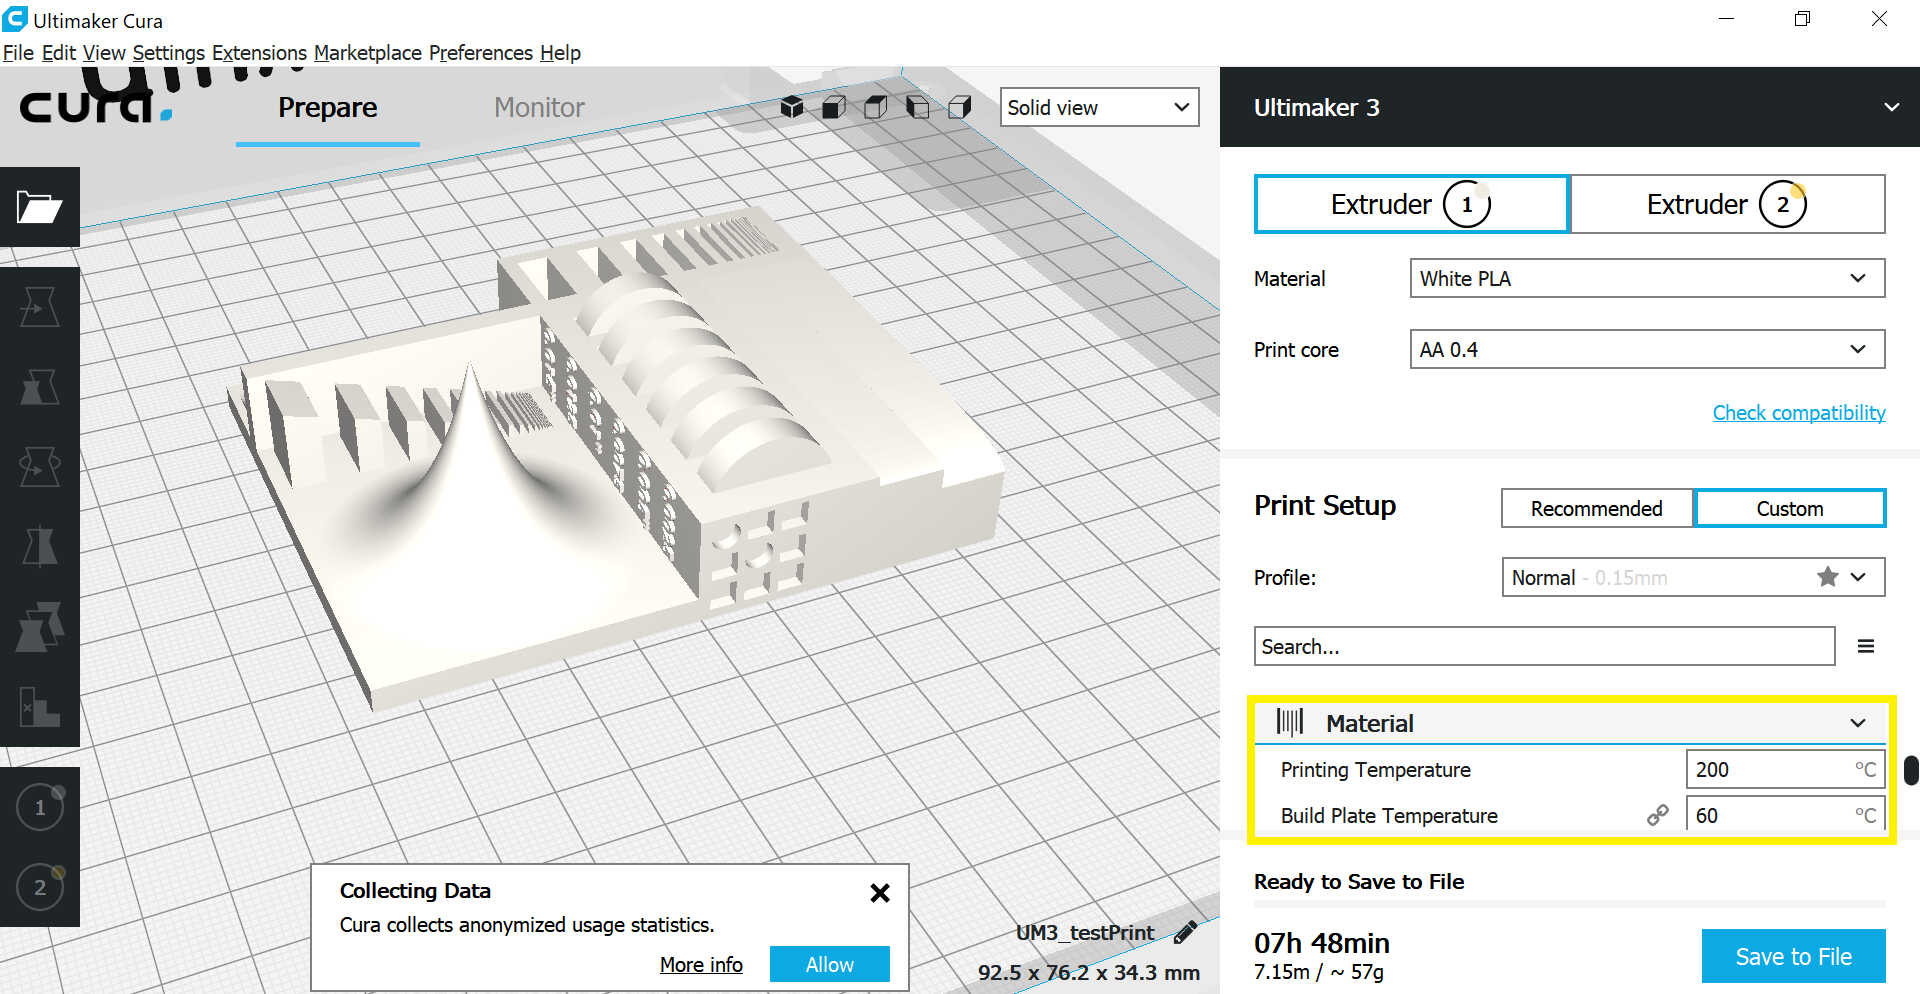
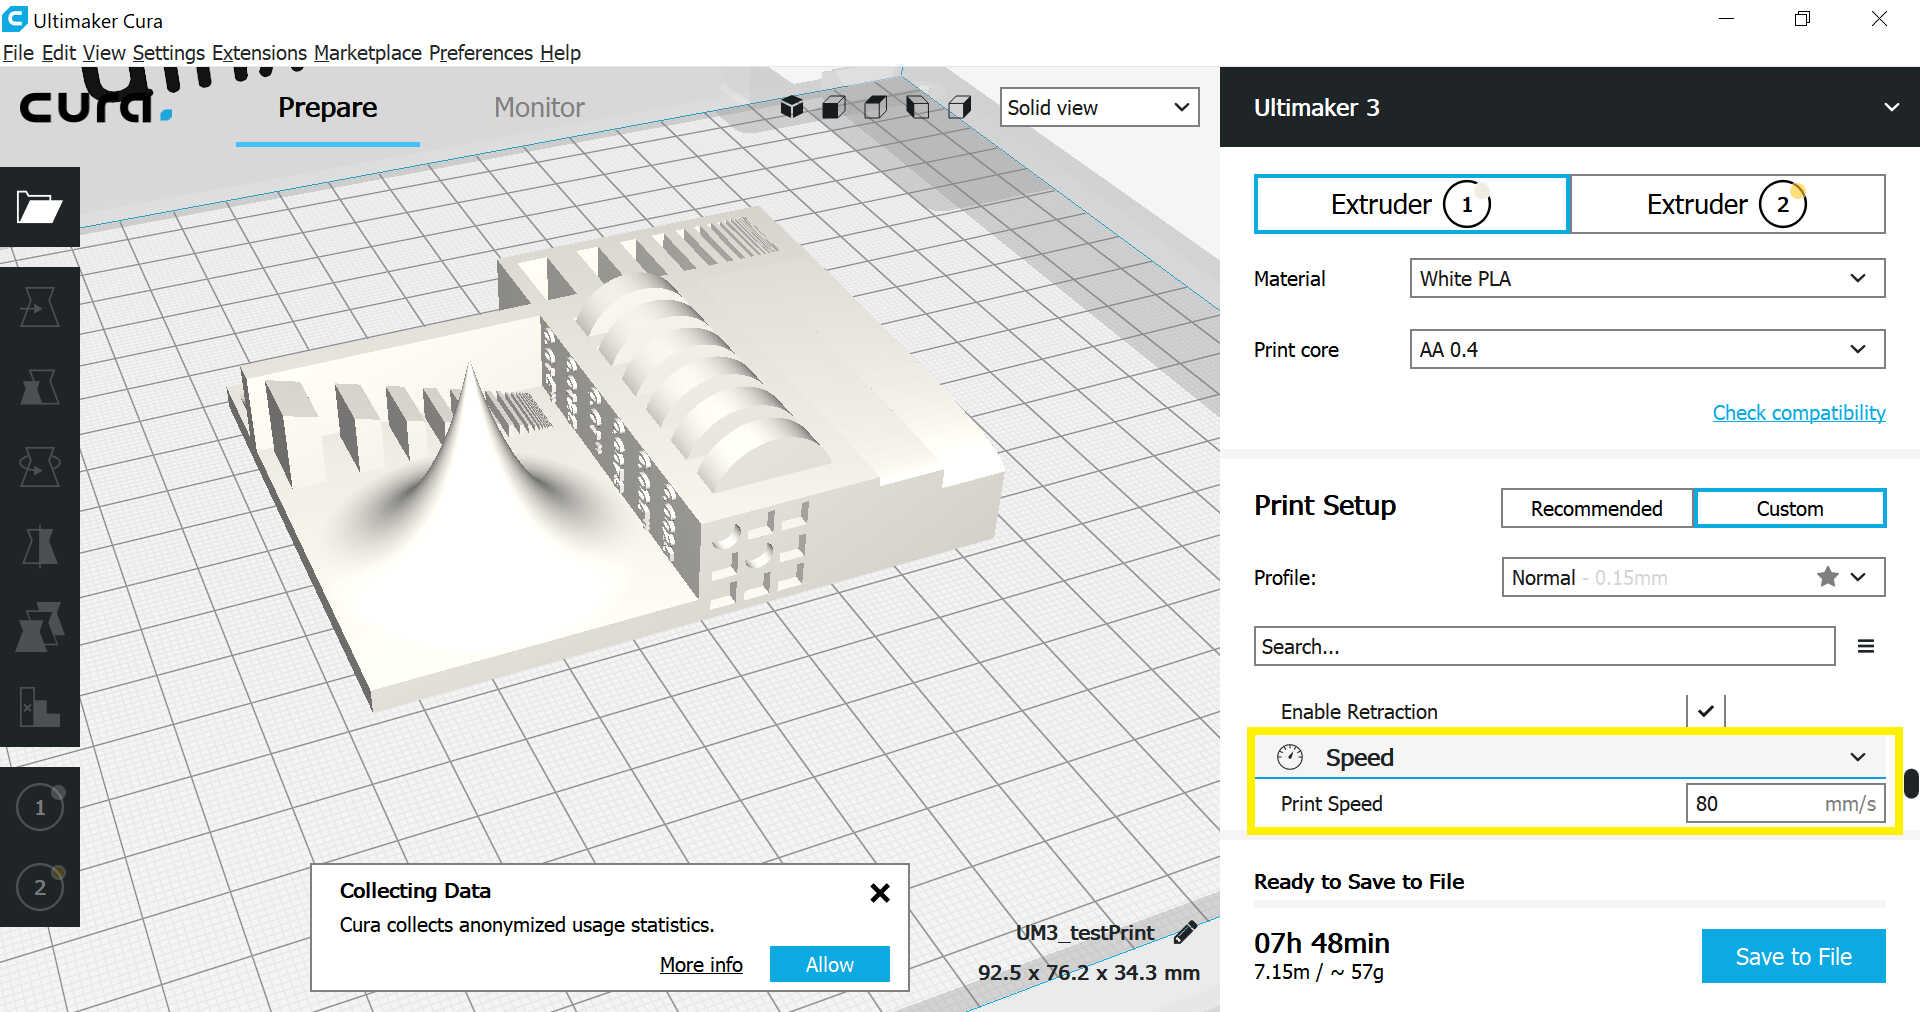
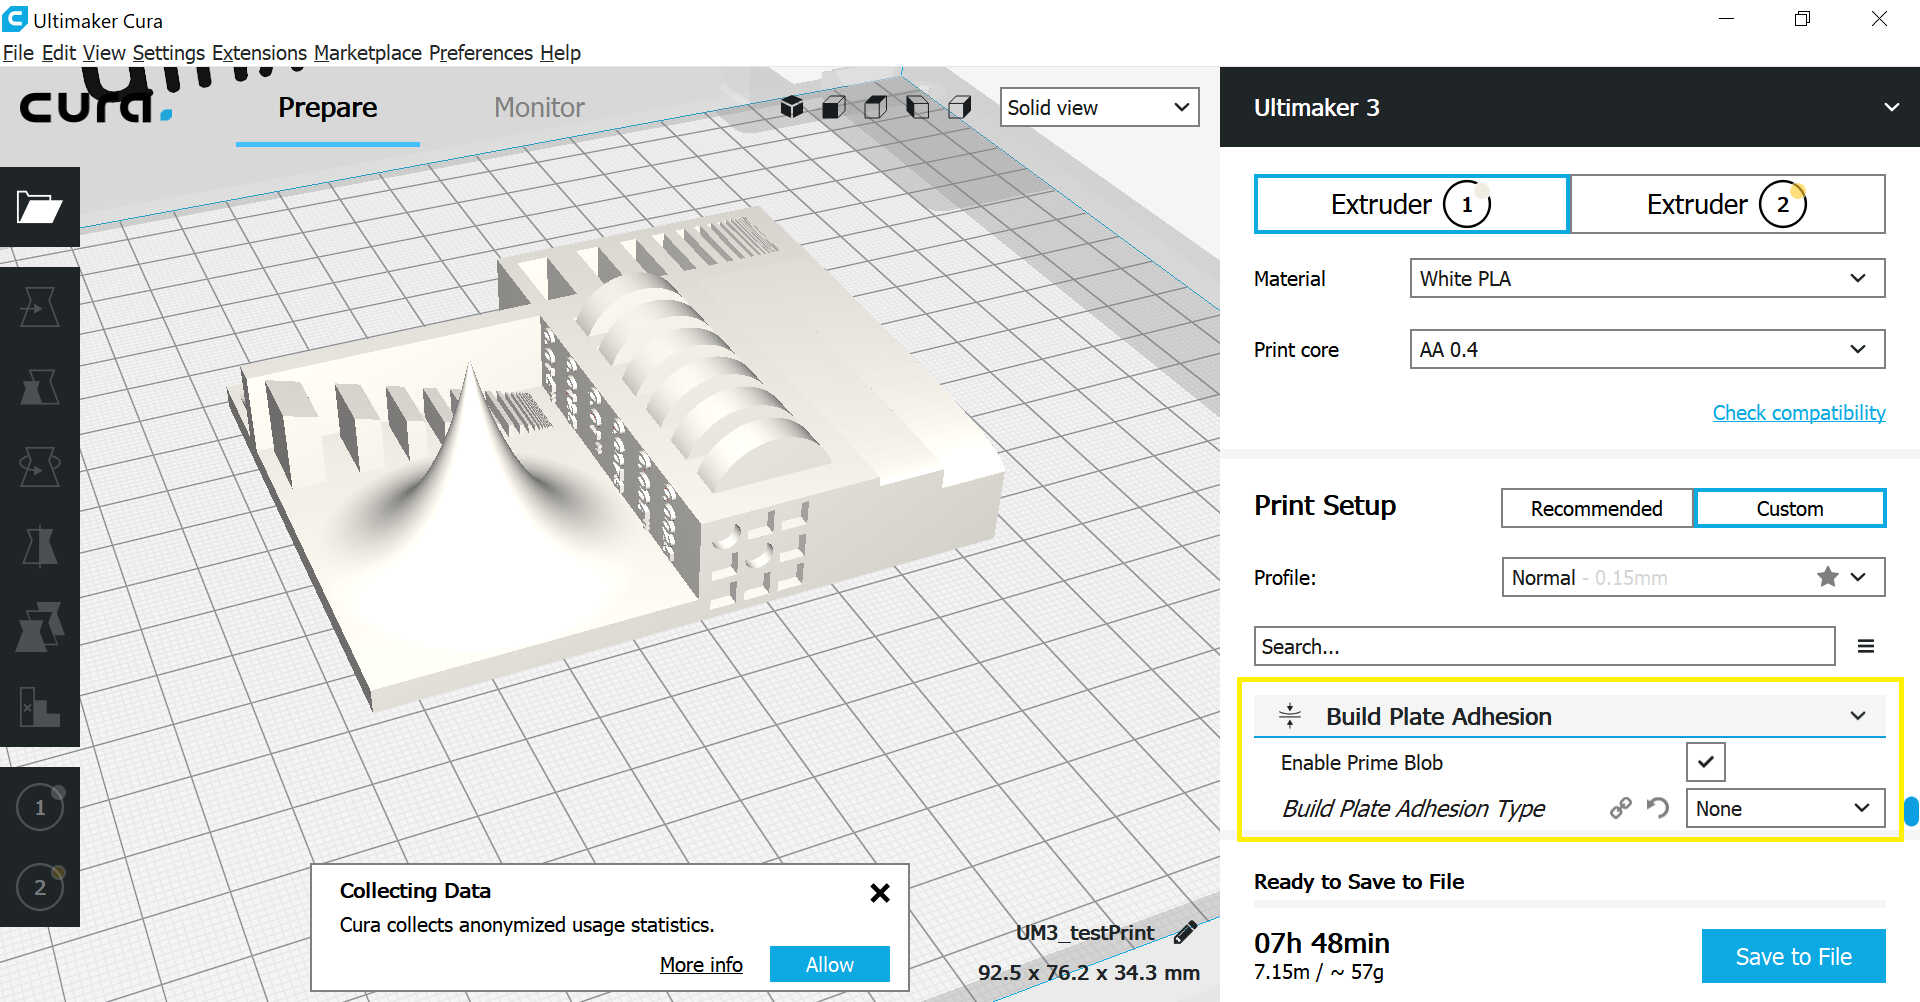
When you open your file in Cura, you will need to change some settings accordingly as per the below images:


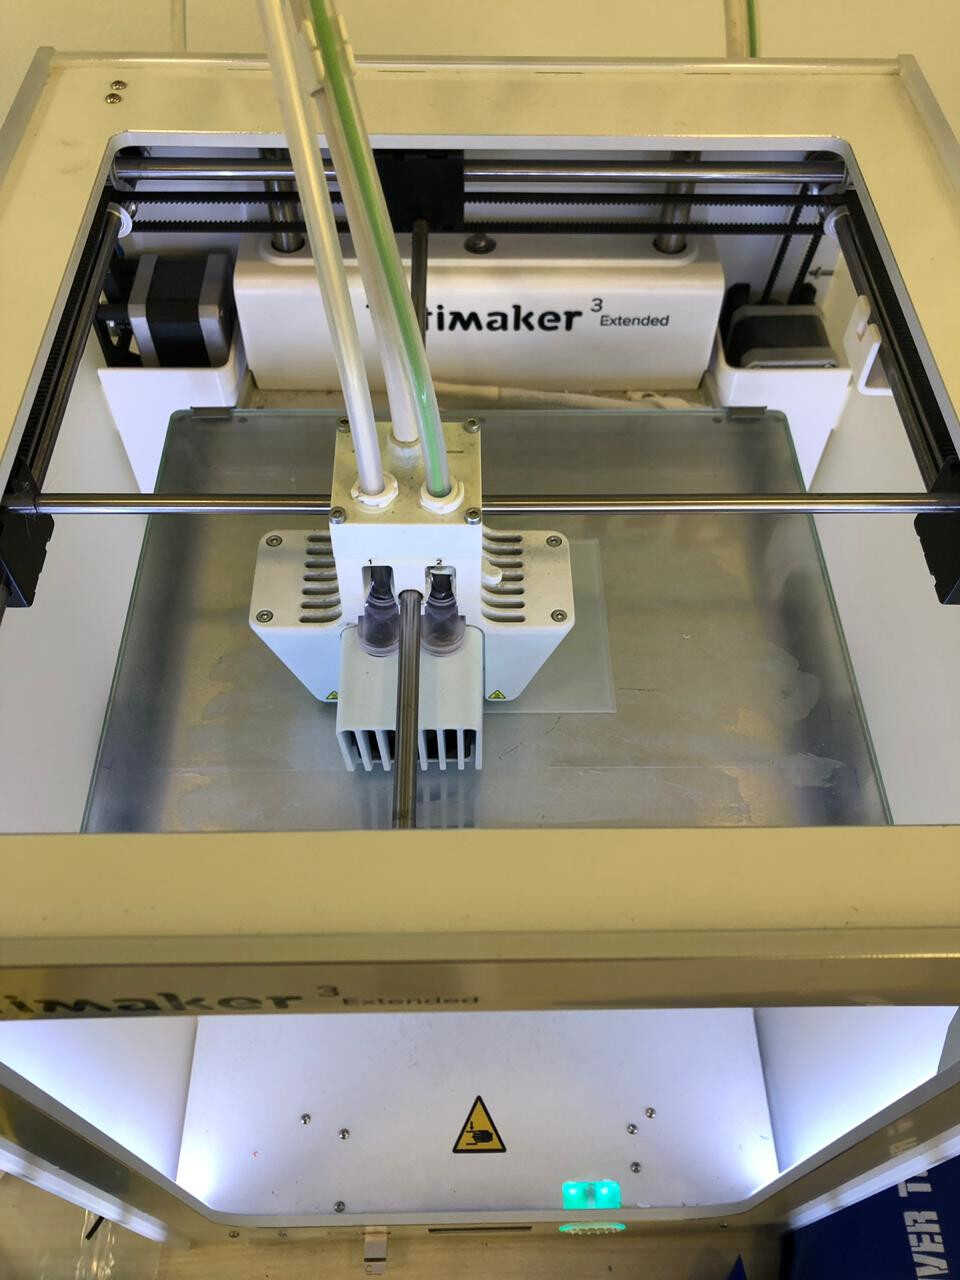
And you save your file on a USB and plug it into your Ultimaker machine so that it starts printing. The machine always pick the last file you saved
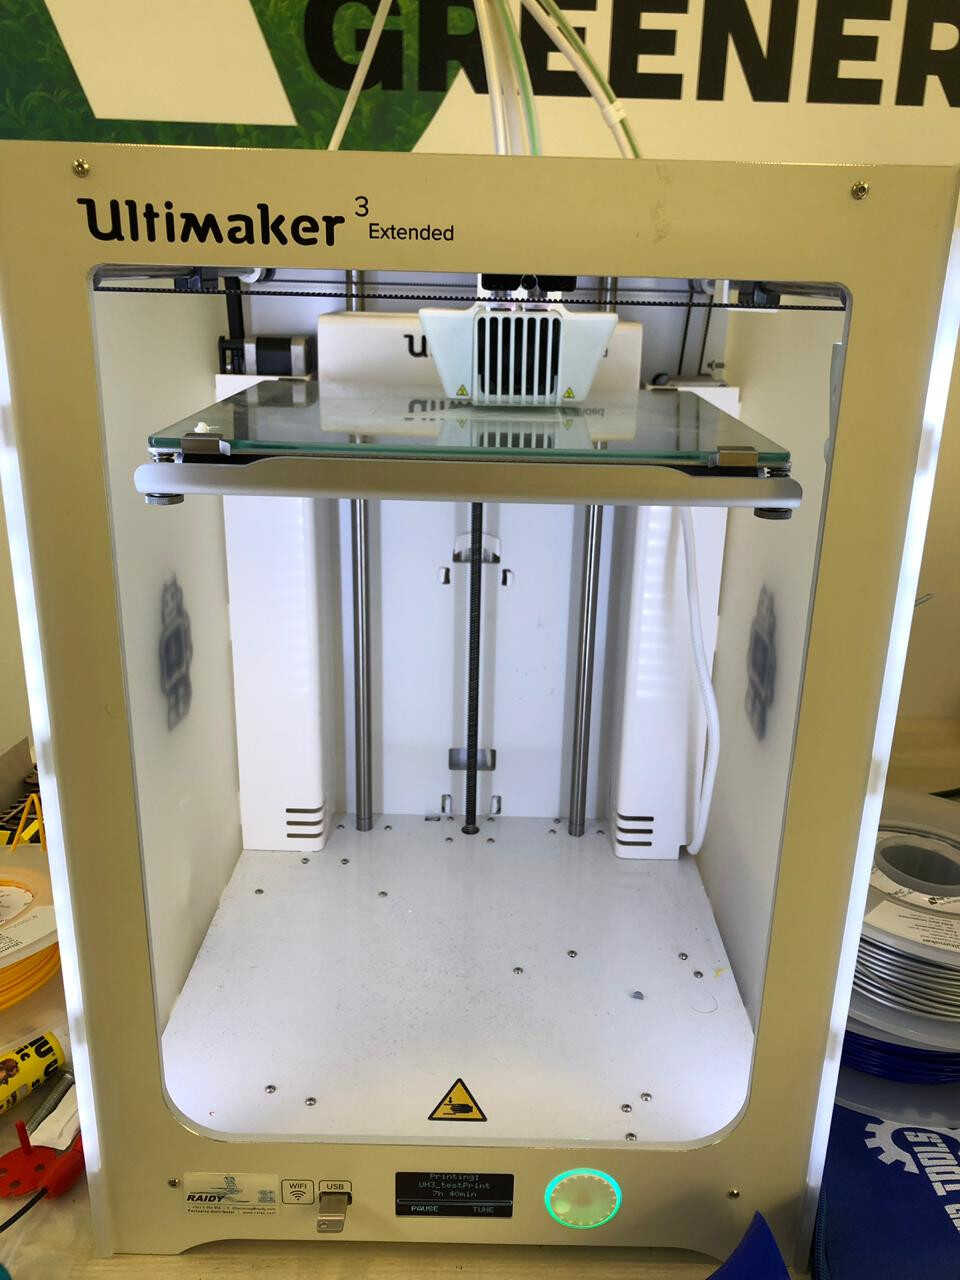
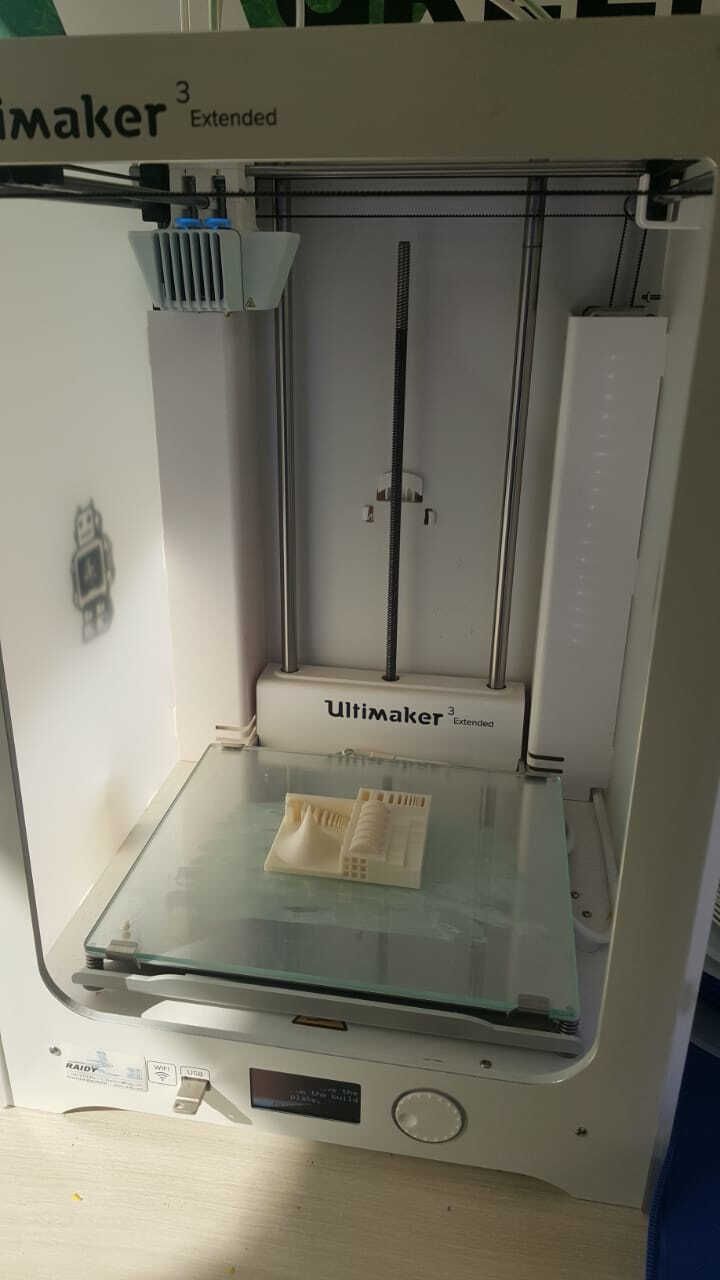
This file took 7h 48 min to be printed
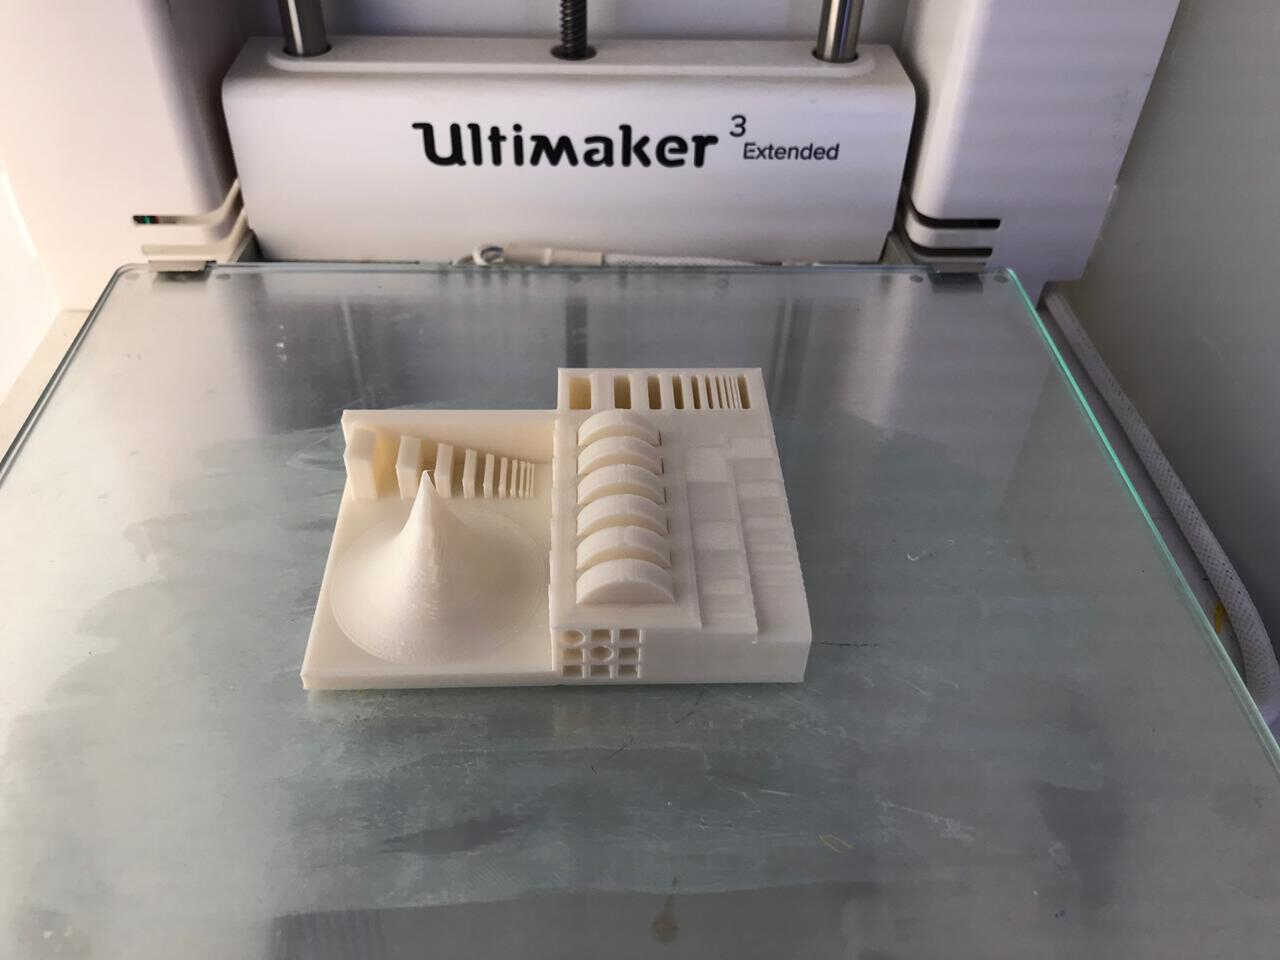
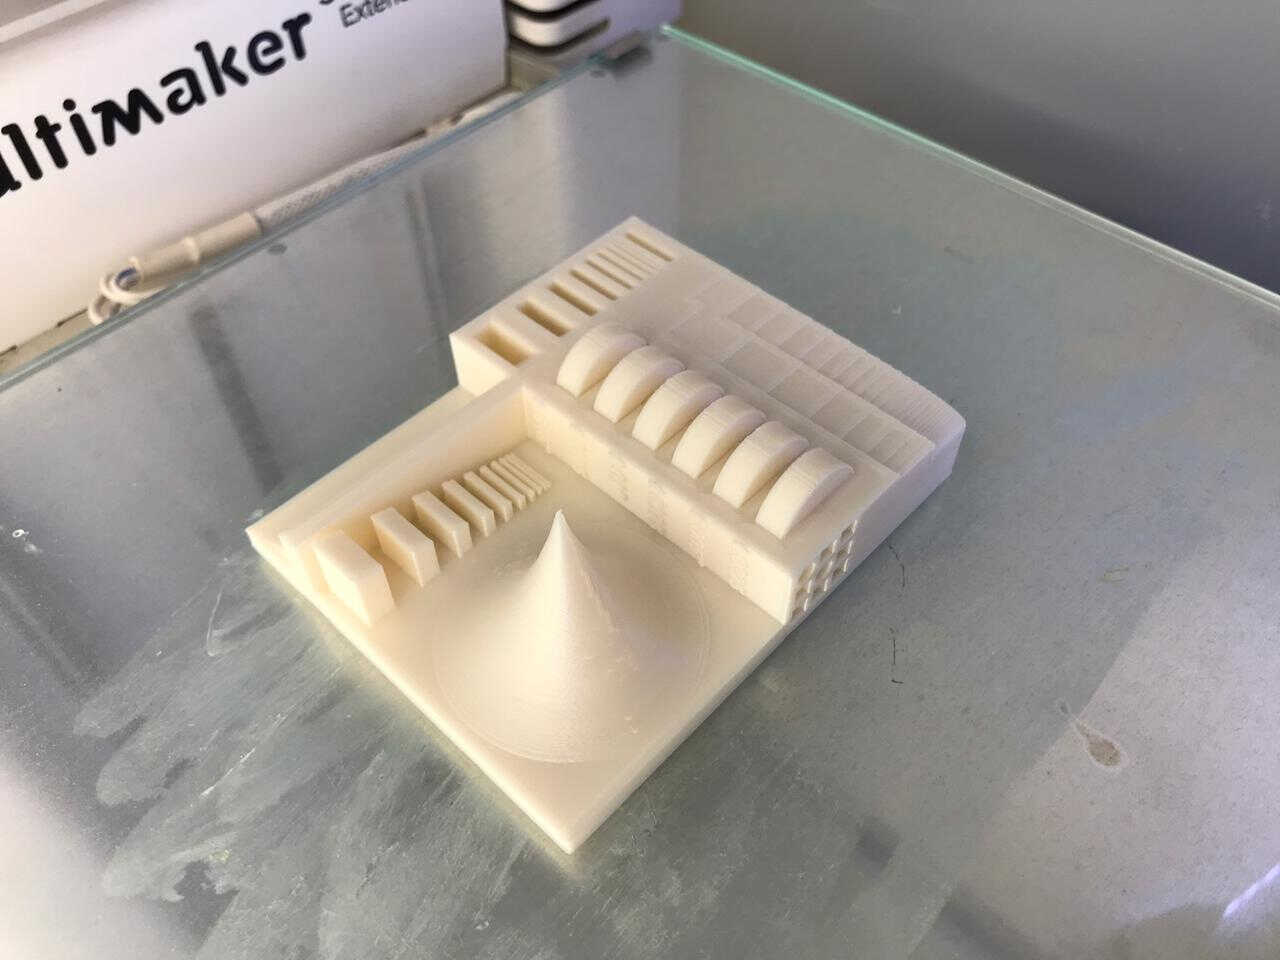
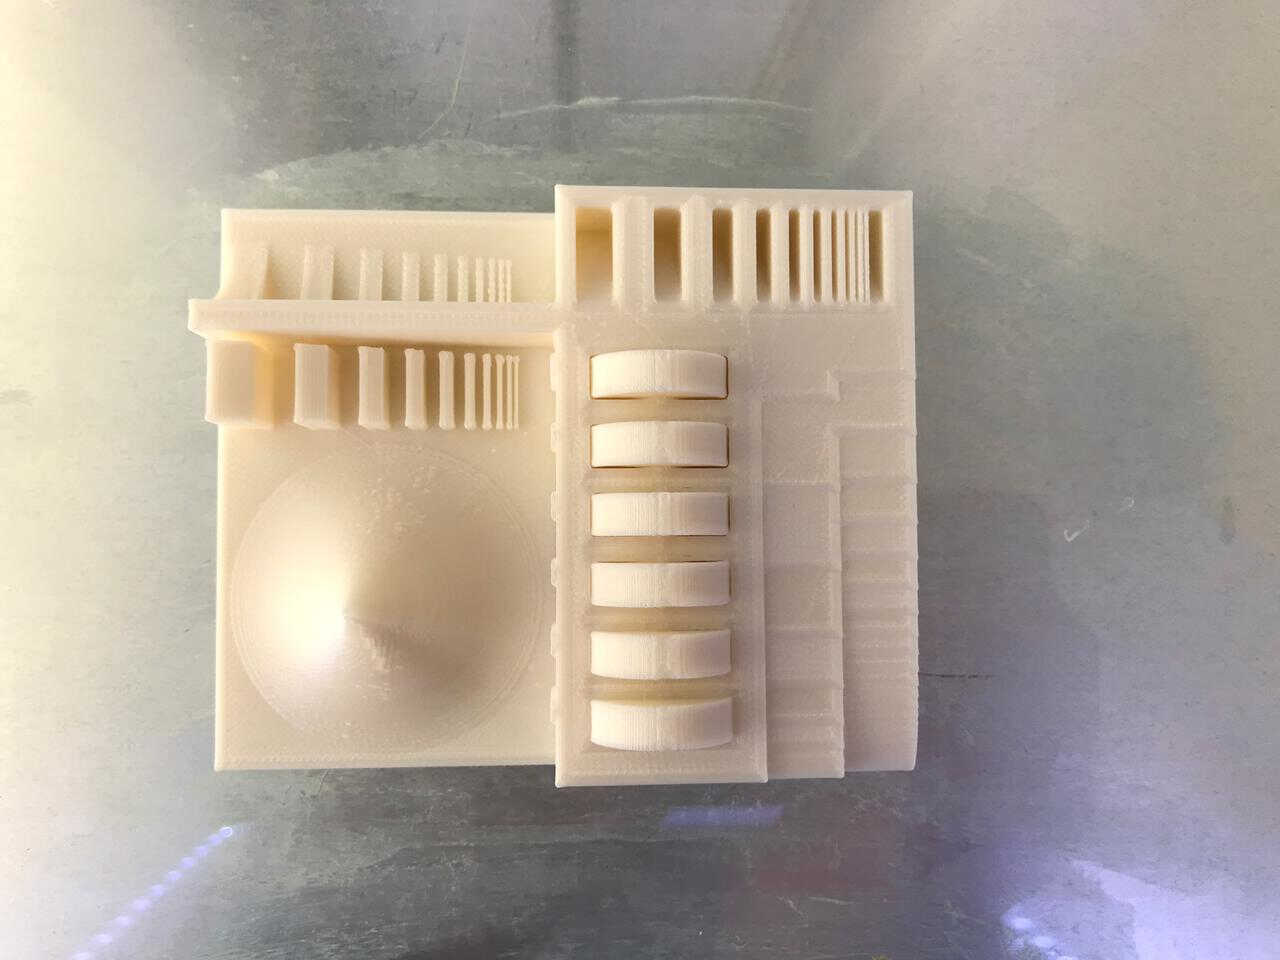
The results are as per the below:
This is a hard to print testfile! You usually don't know if your printer is ready for complex files; With this file you have an easy option to check problematic printing/slicing stuff. Size of the object is 2x50x30mm (baseplate)
When you open your file in Cura, you need to change the settings and make them the same as per the above test A
This file took 40 min to be printed
The results are as per the below:
For this assignment, I had to use Fusion 360 again
I have watched the following youtube video to help me out
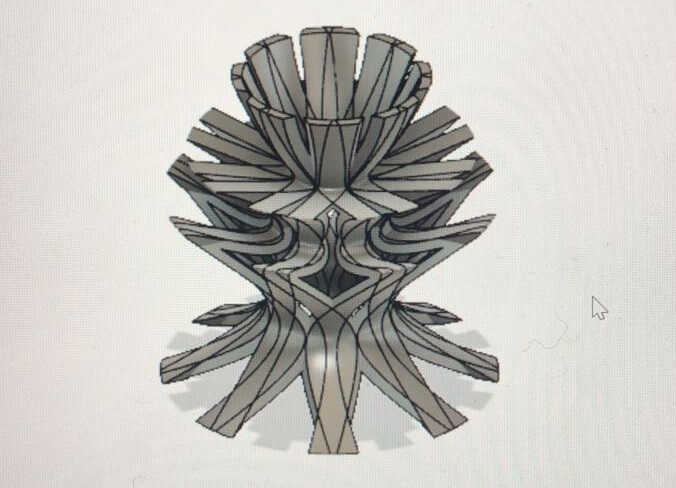
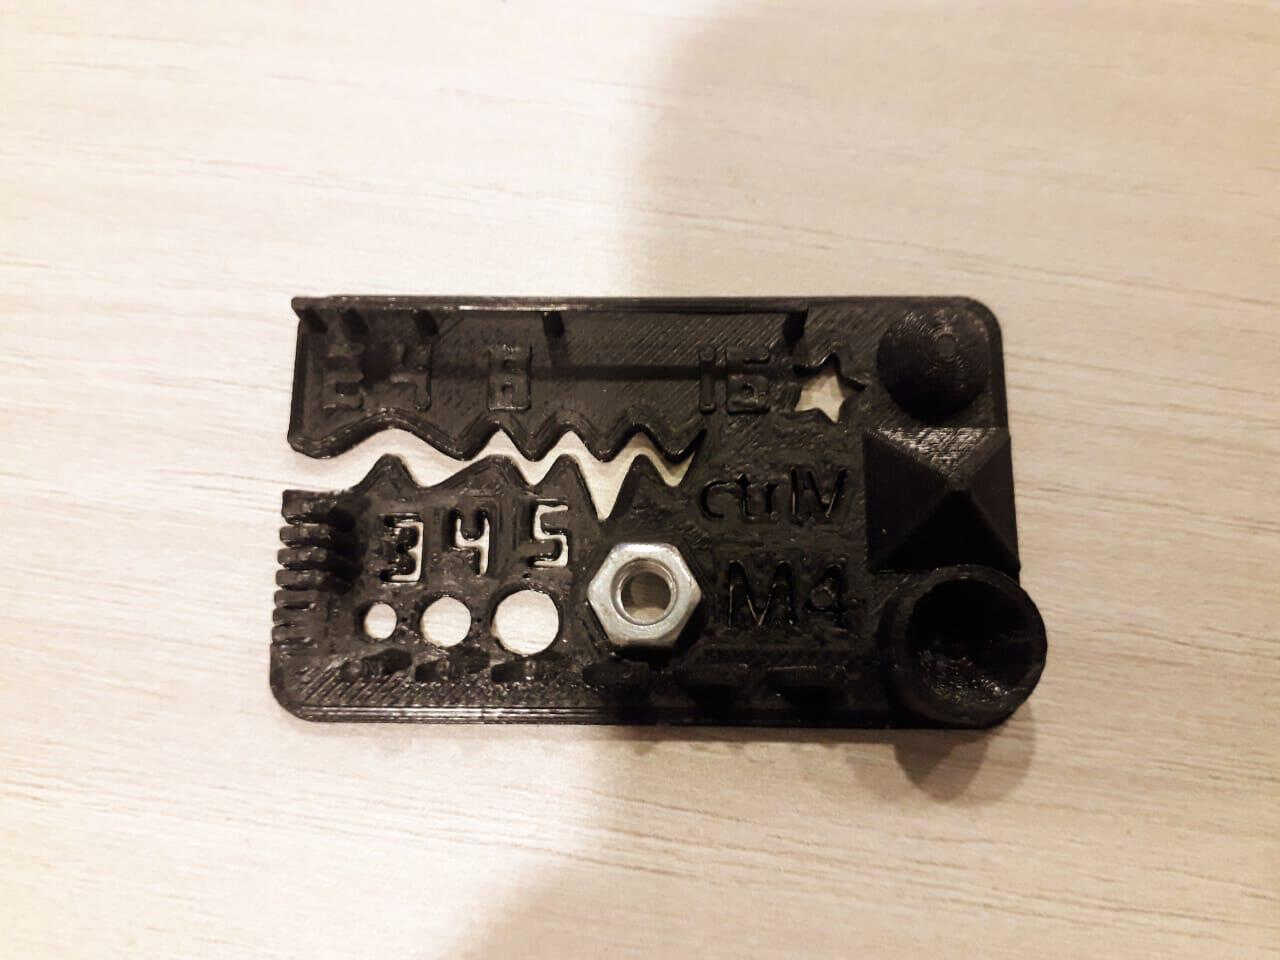
And I started to follow the steps as per the below in order to draw my vase of 10x10cm
So the first step is to draw half of the vase section. You draw the two baselines and then the spline that joins both and which can take any desired shape
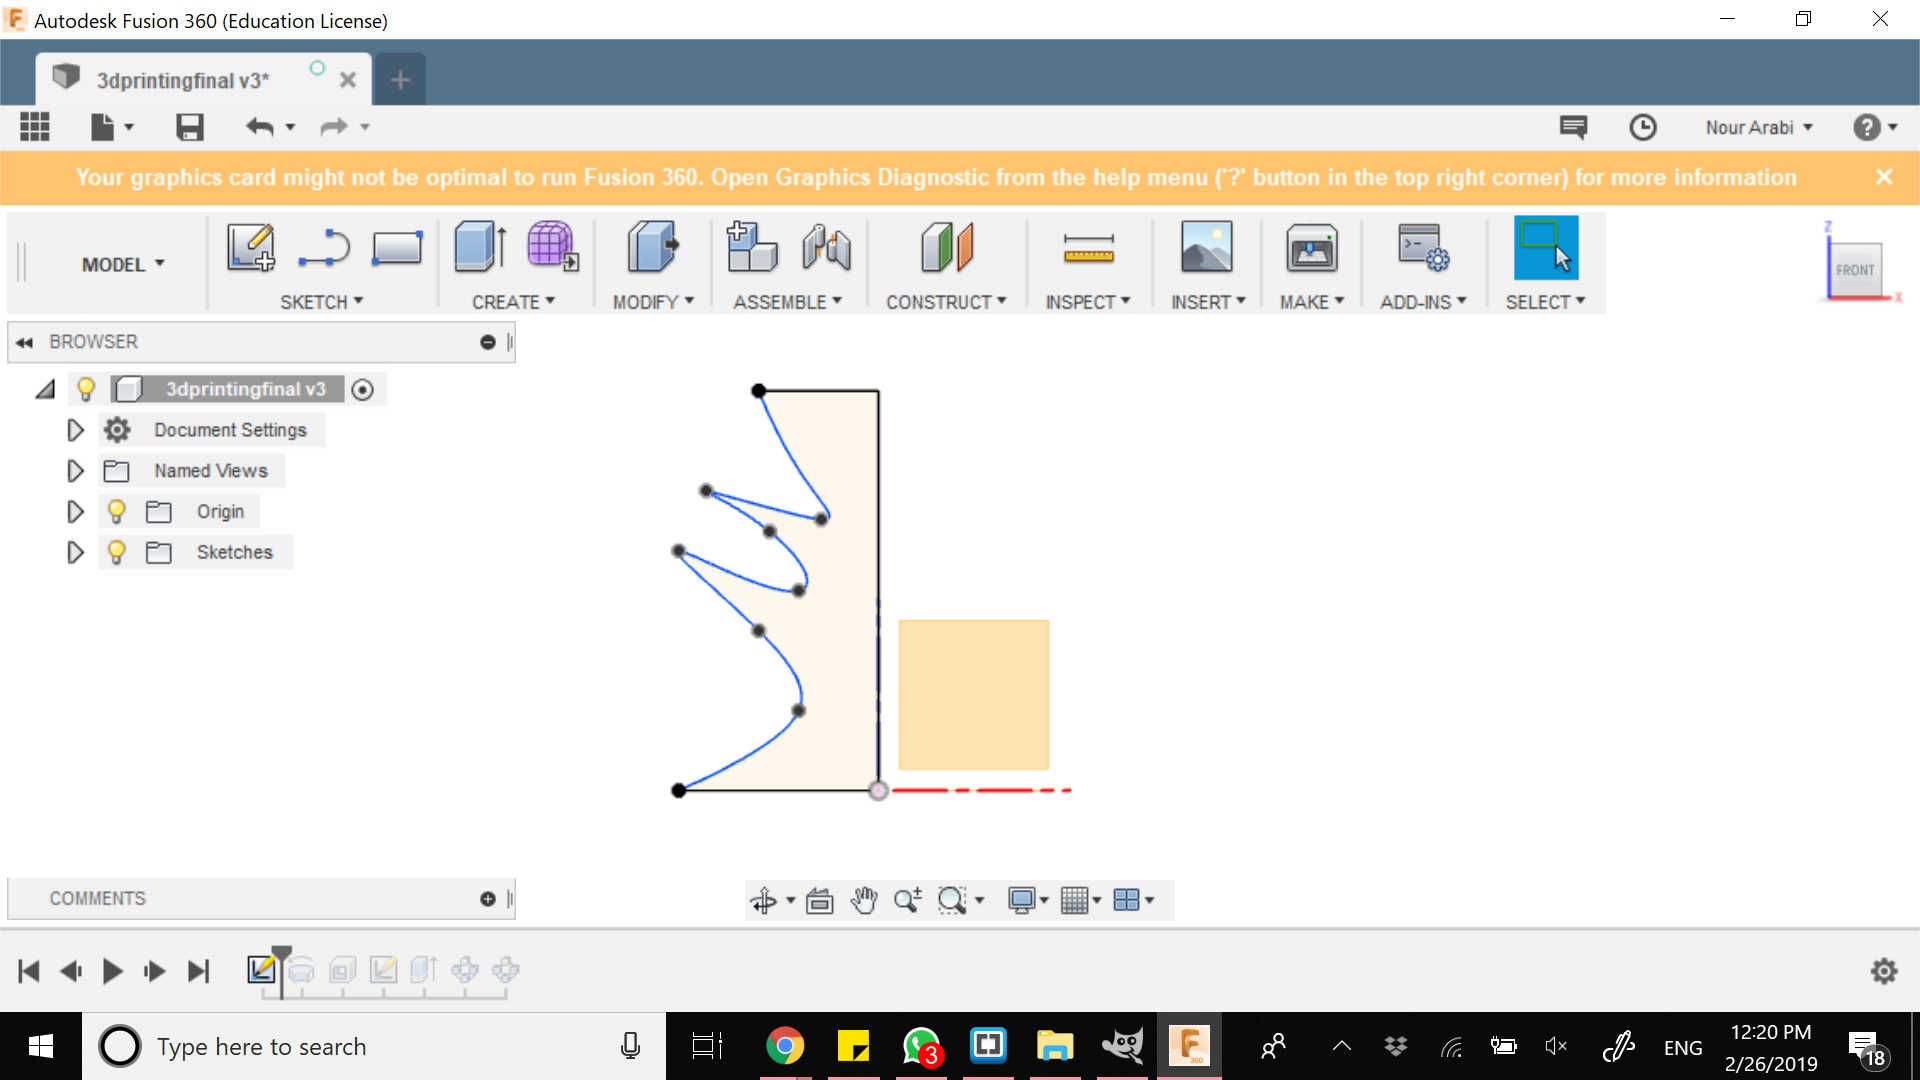
Then you use the REVOLVE command in order to have the above form
Then the SHELL command so that you make the vase hollow from the inside. You can pick the wall thickness you want
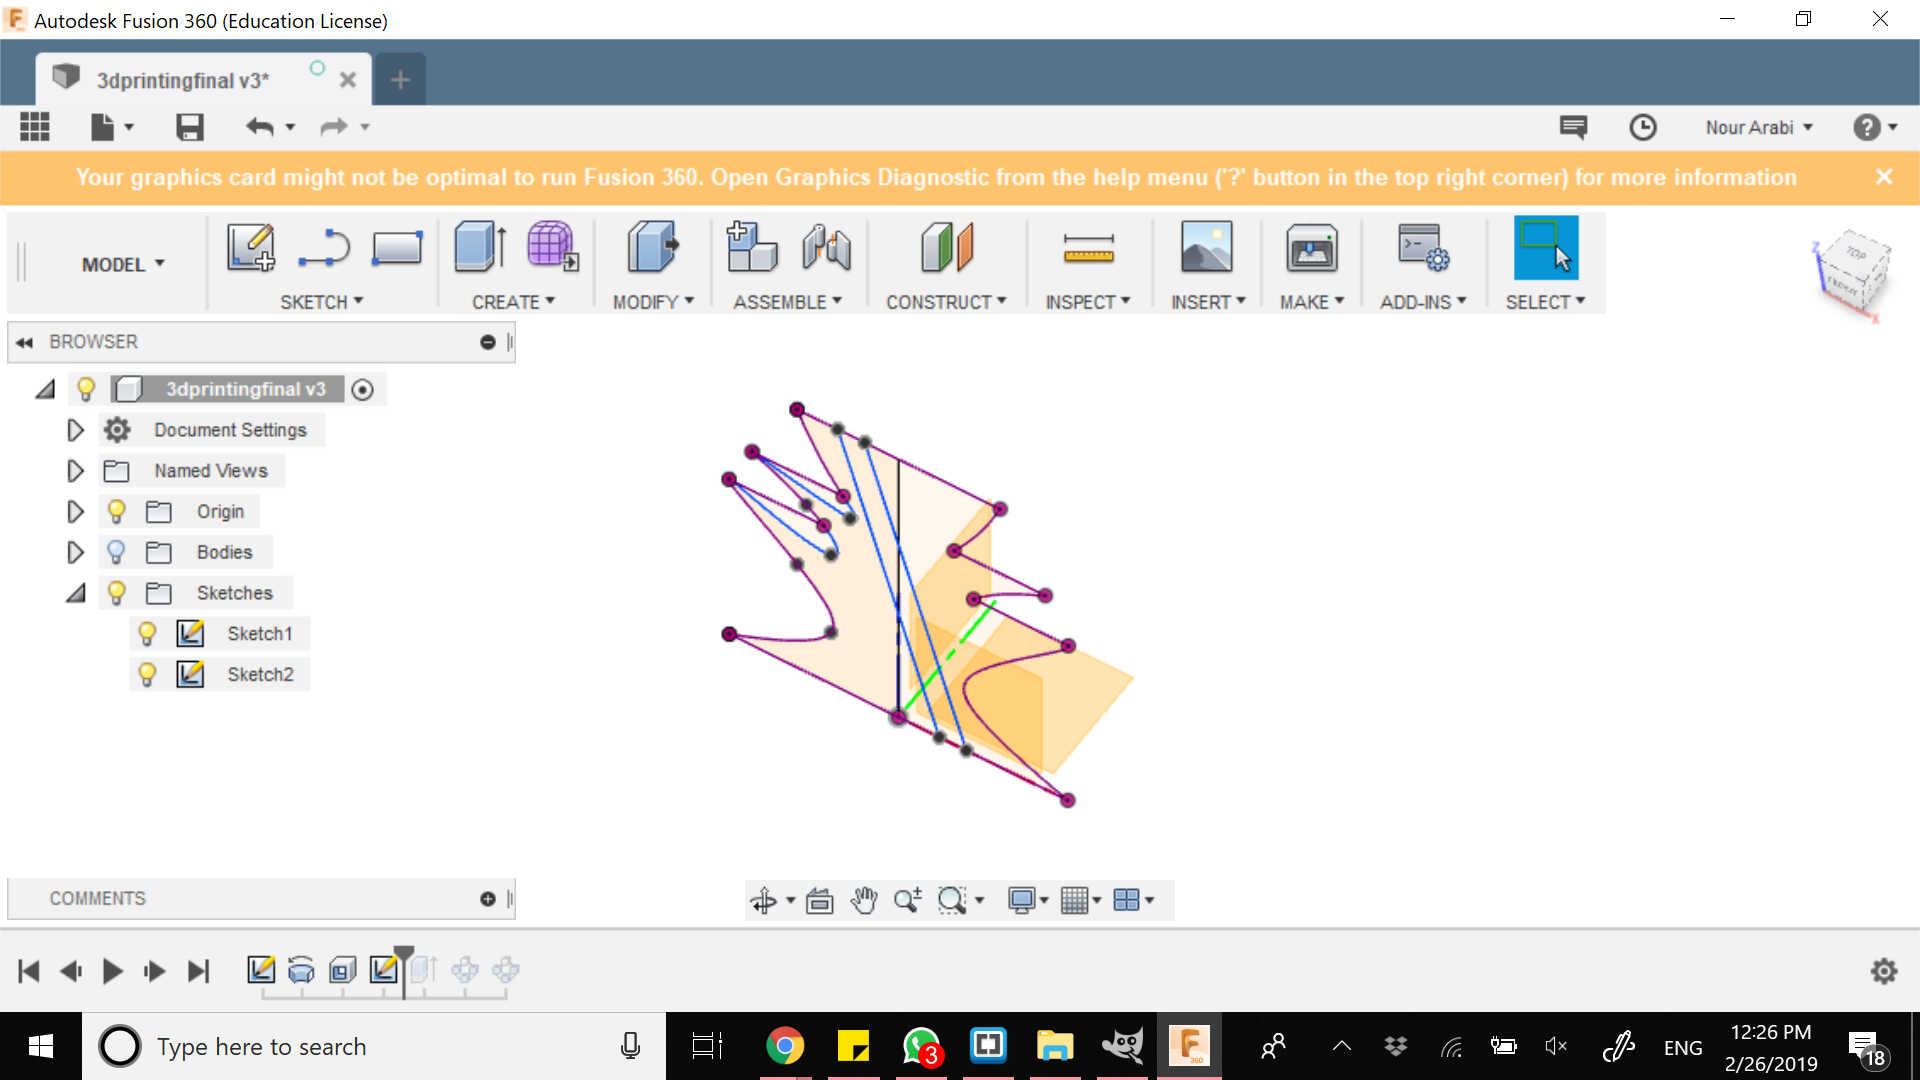
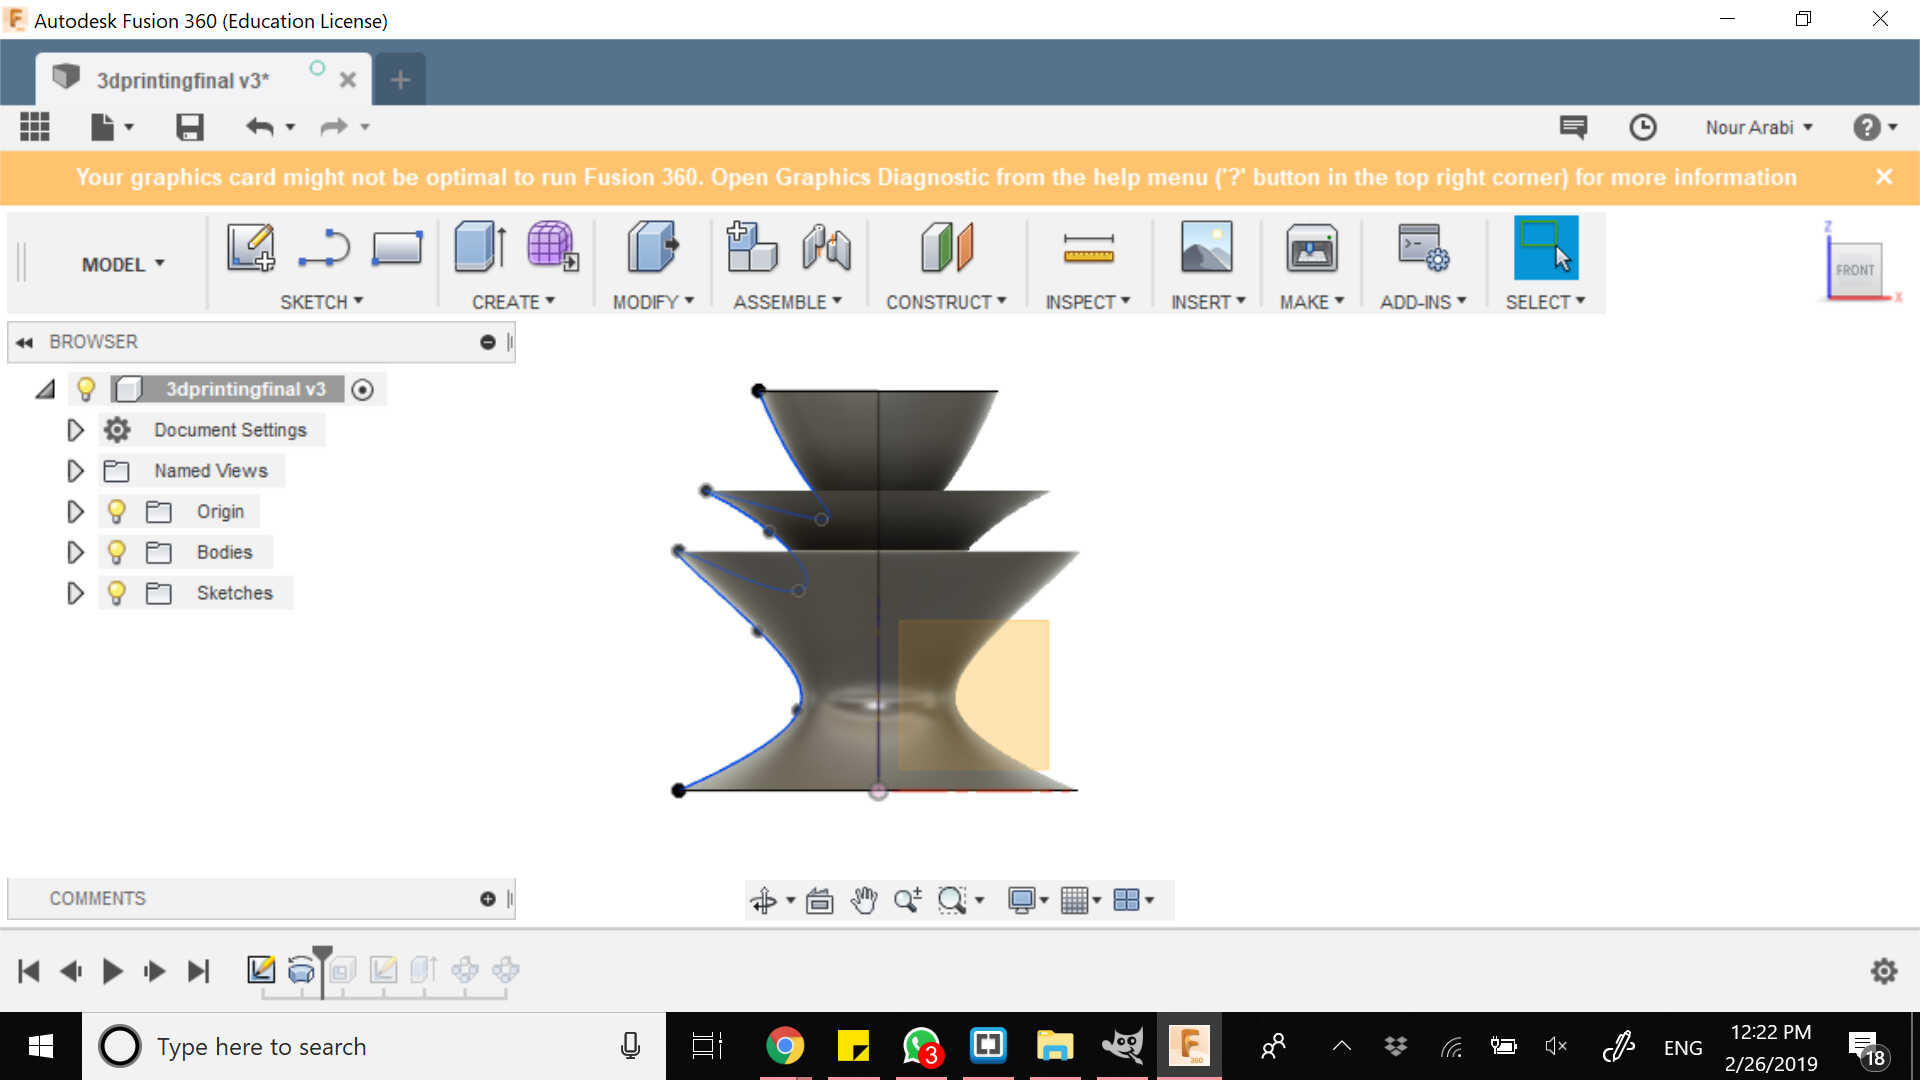
And you project your plane and draw two parallel oblique lines, which you need to extrude symmetrically and choose intersect so that you have the two below intersections
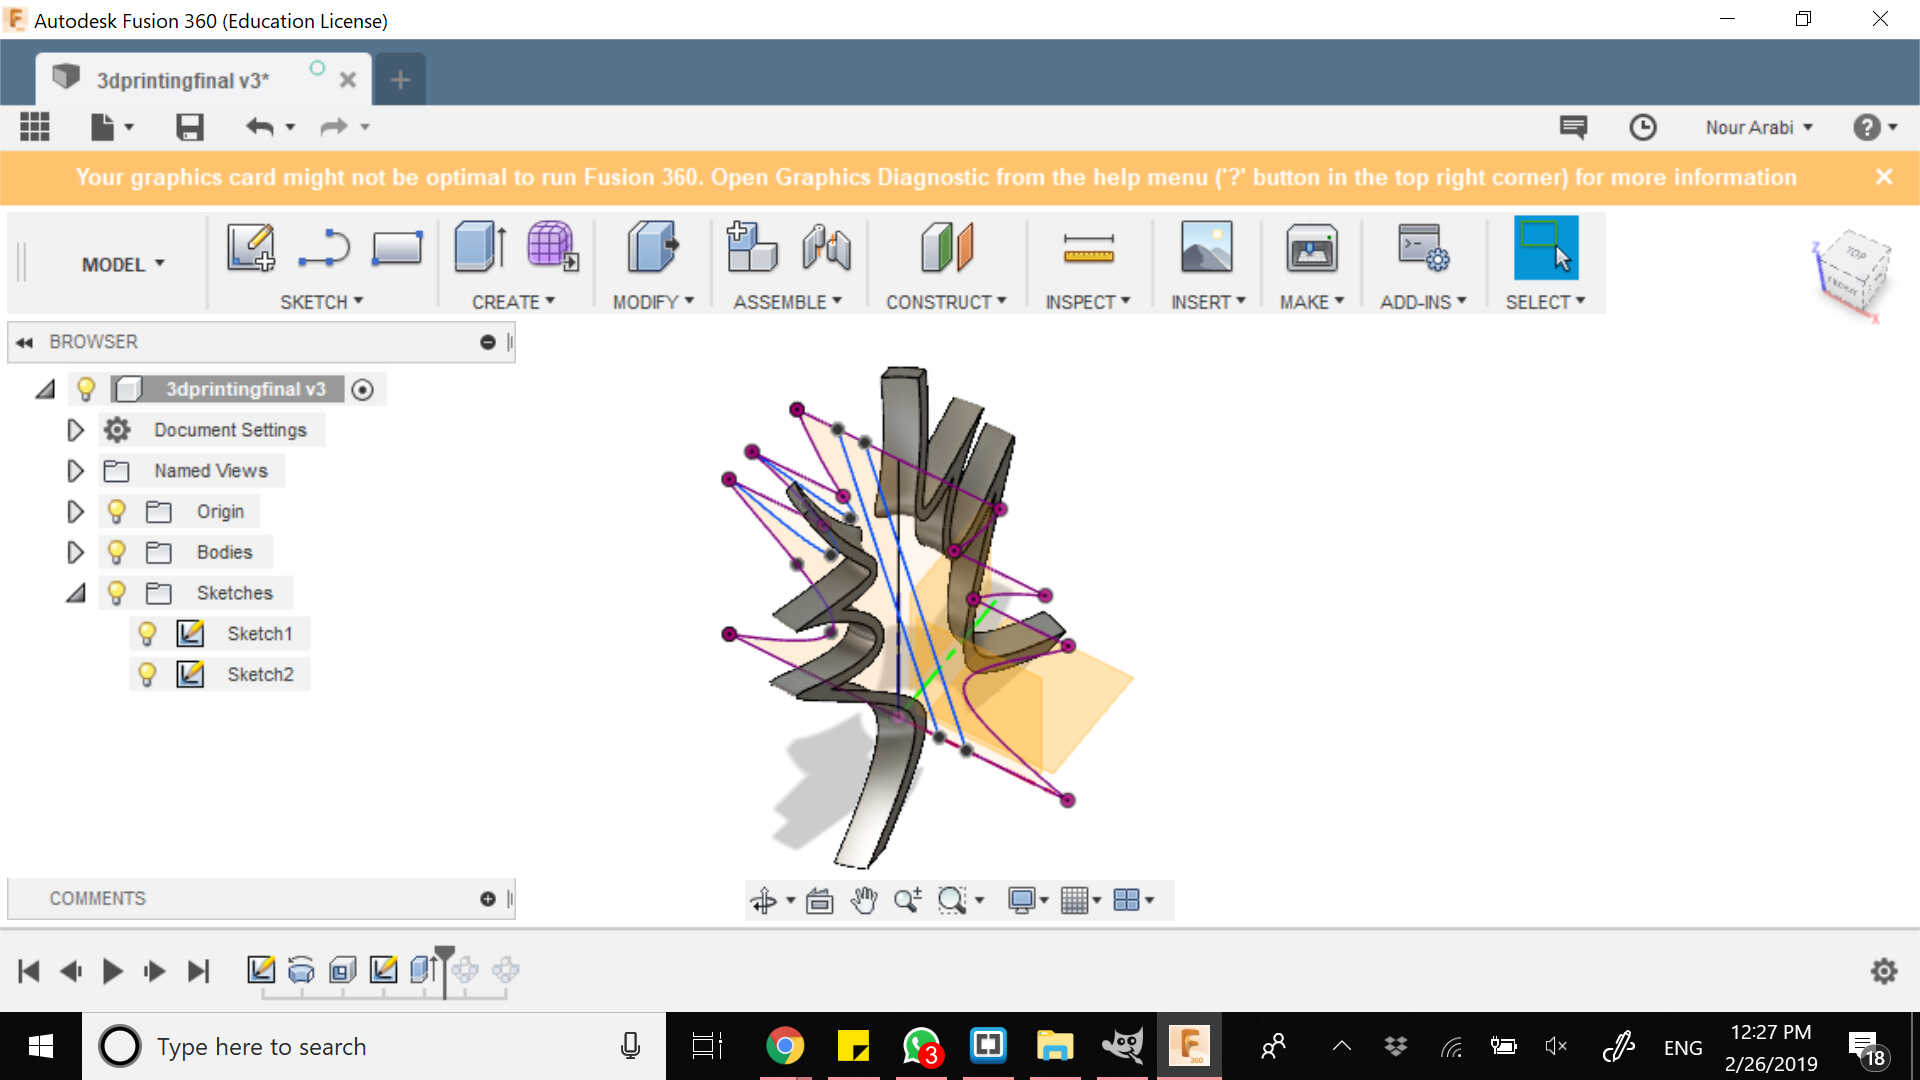
And finally, you create a circular pattern of each intersection


You may find below the video showing all the above steps
And you may also play with it and check it from different angles
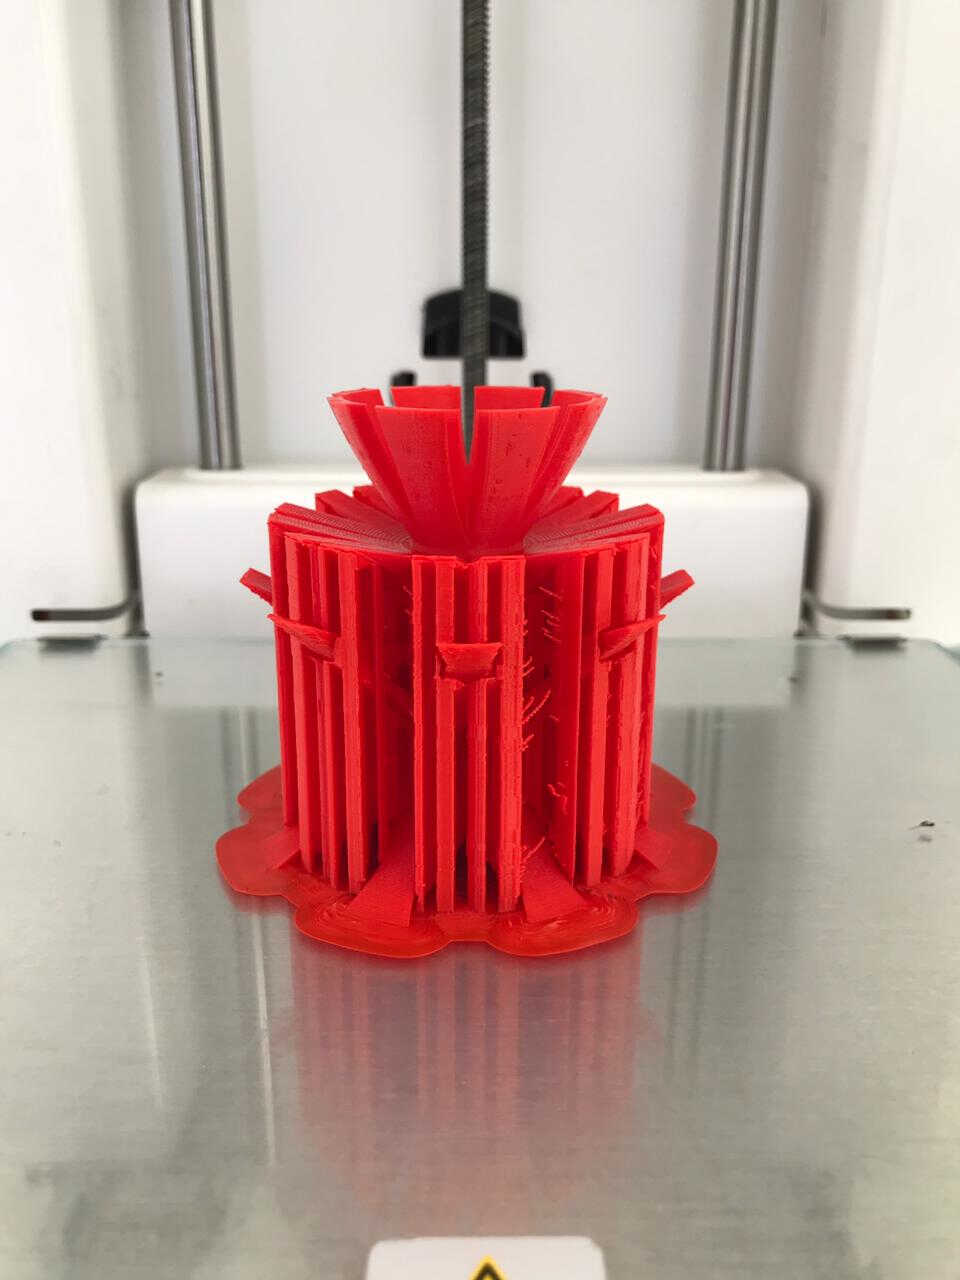
Then you need to save your file as STL and open it in Cura to generate the G code, save it and print it. I have chosen red PLA for my vase, and it took 12h 20 min to be printed
Note that the same printing settings were used as per the above tests
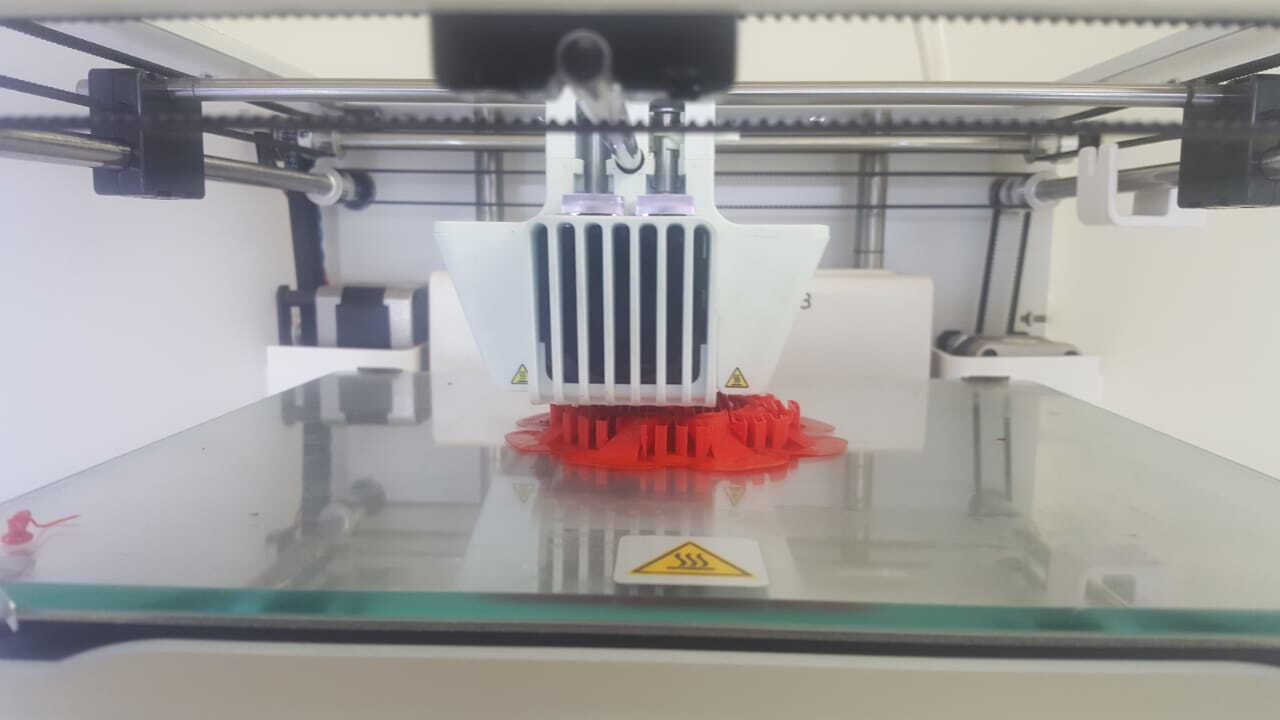
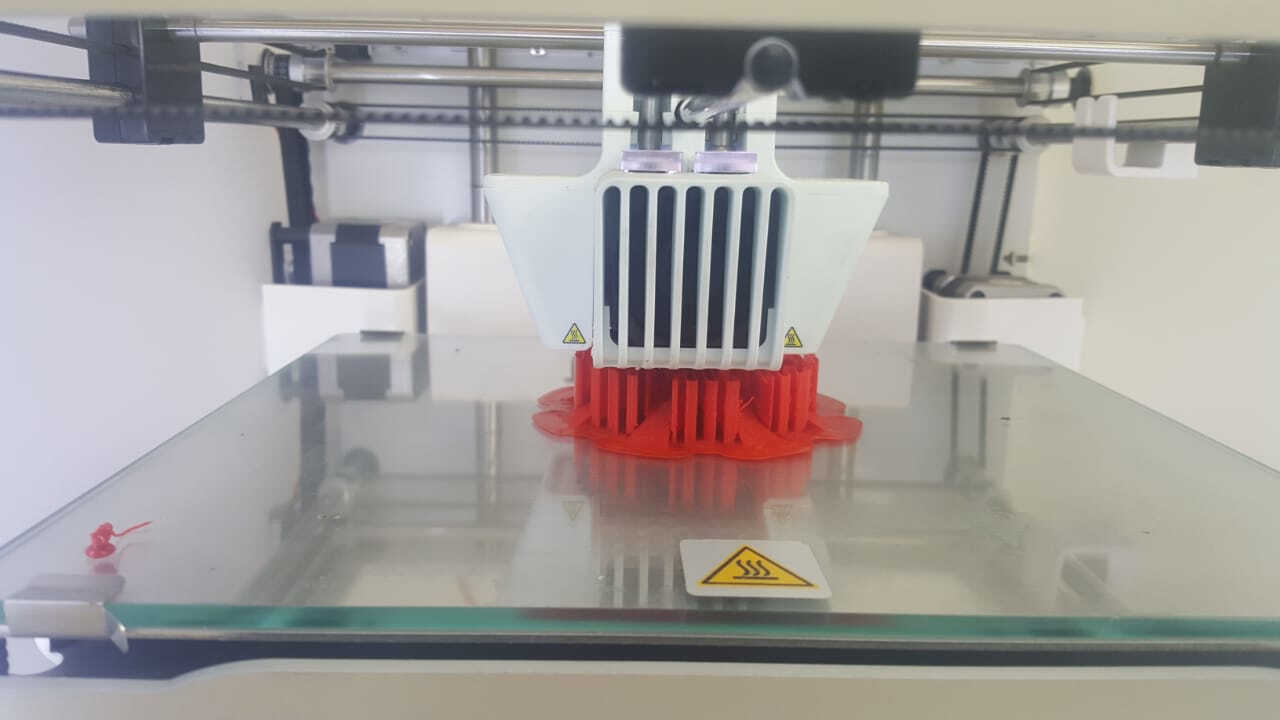
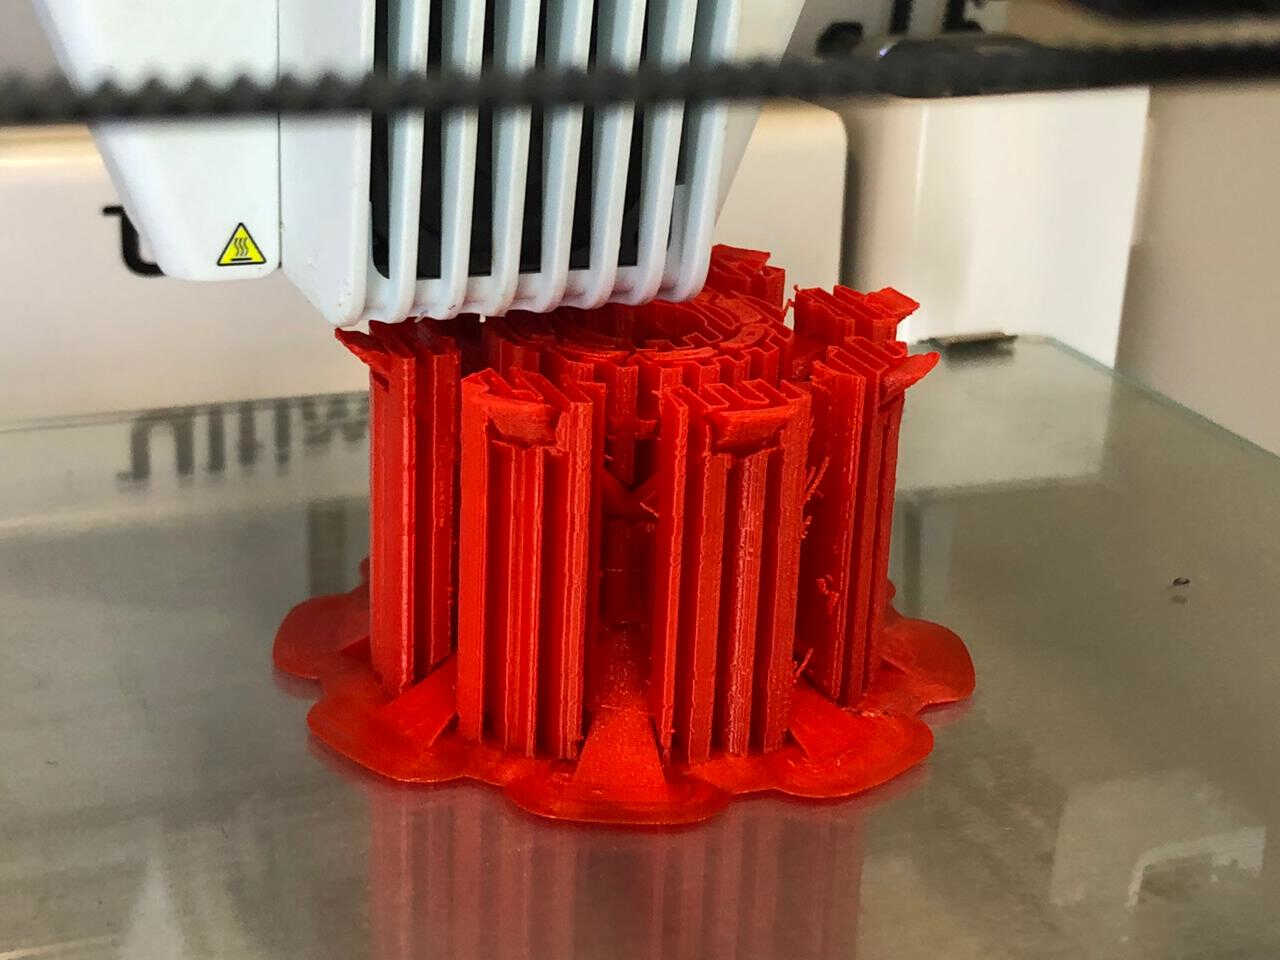
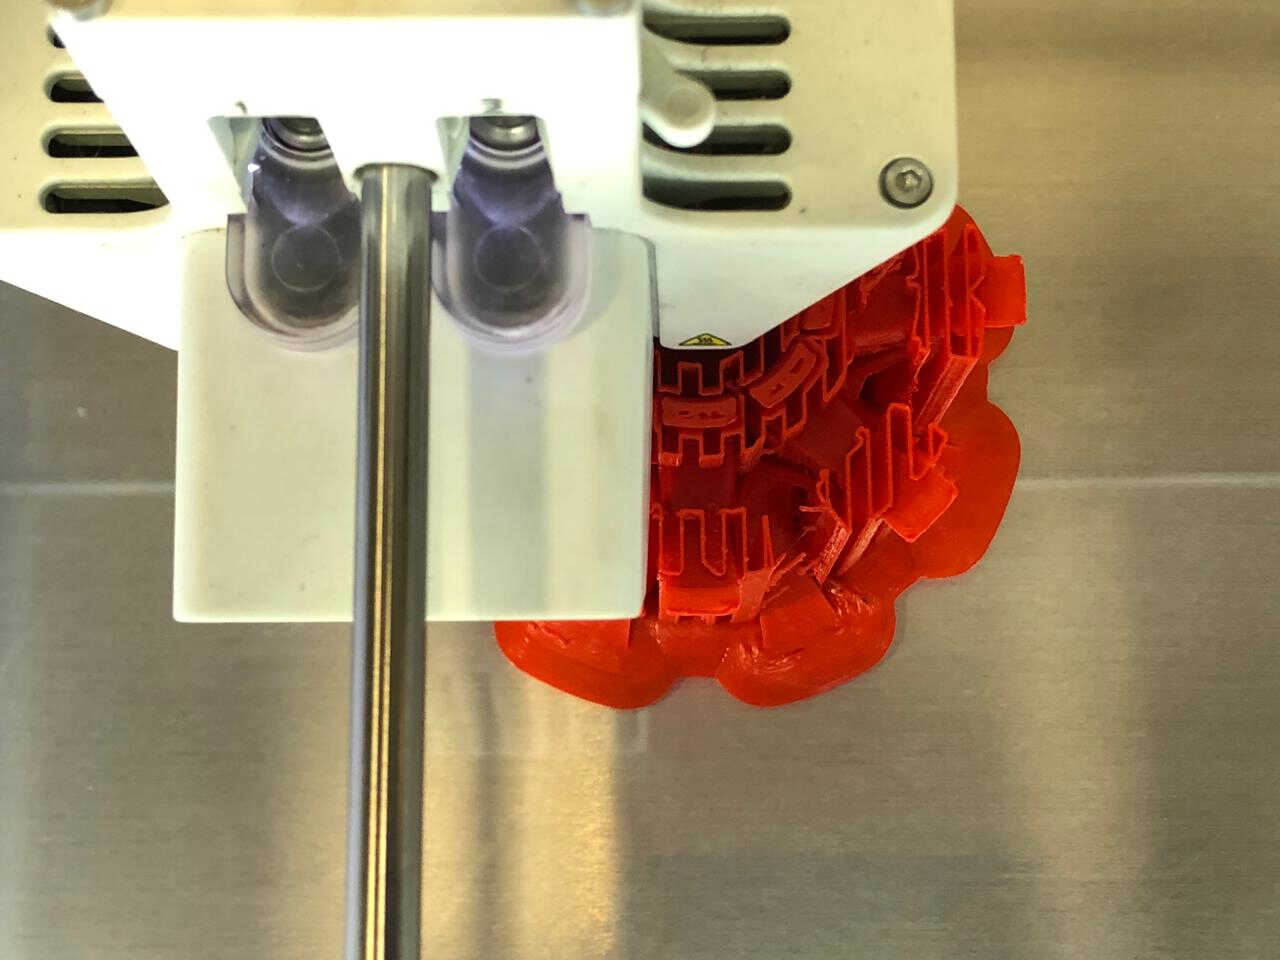
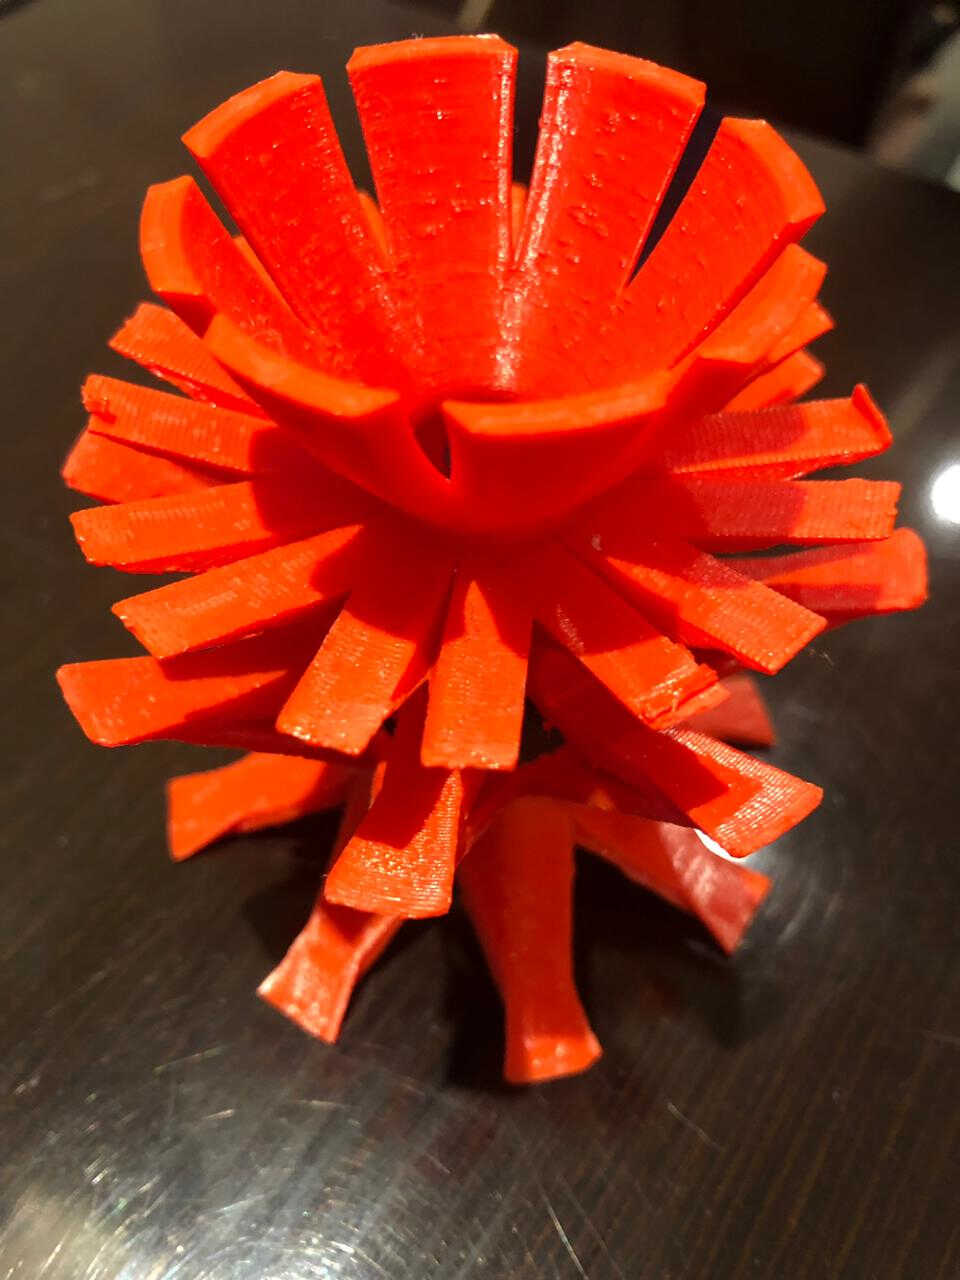
And the final result is...

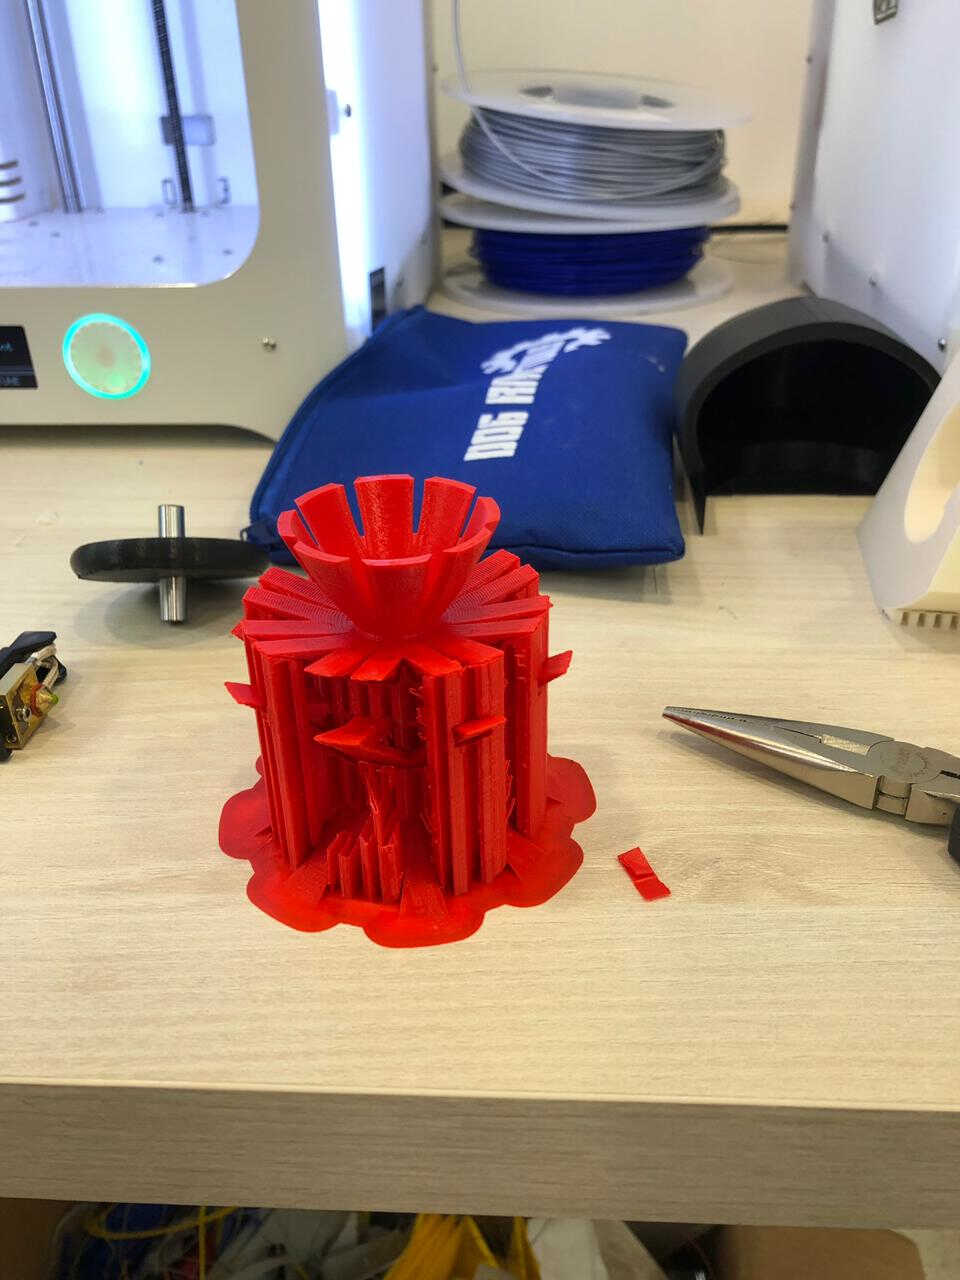
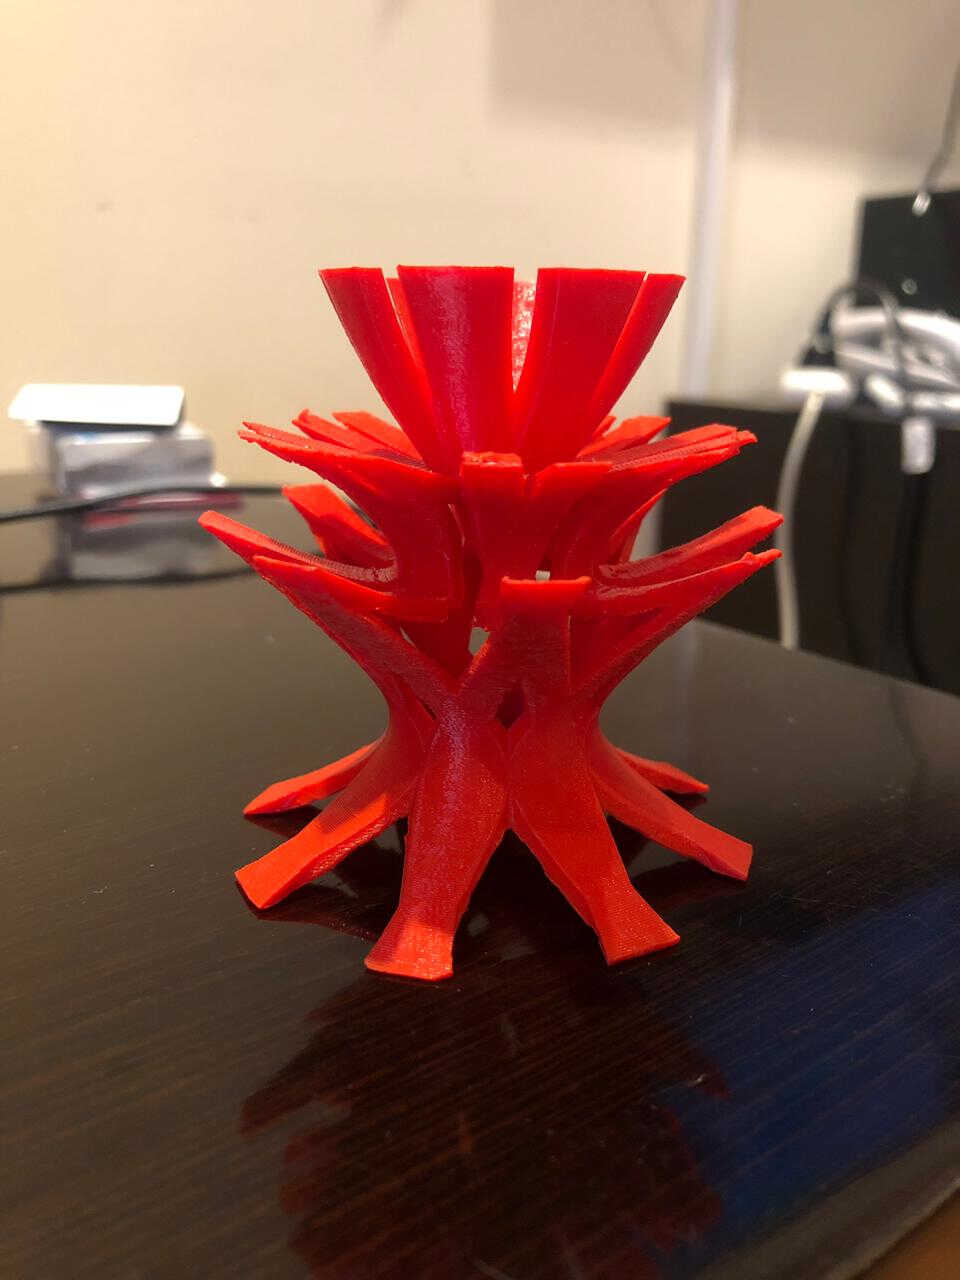
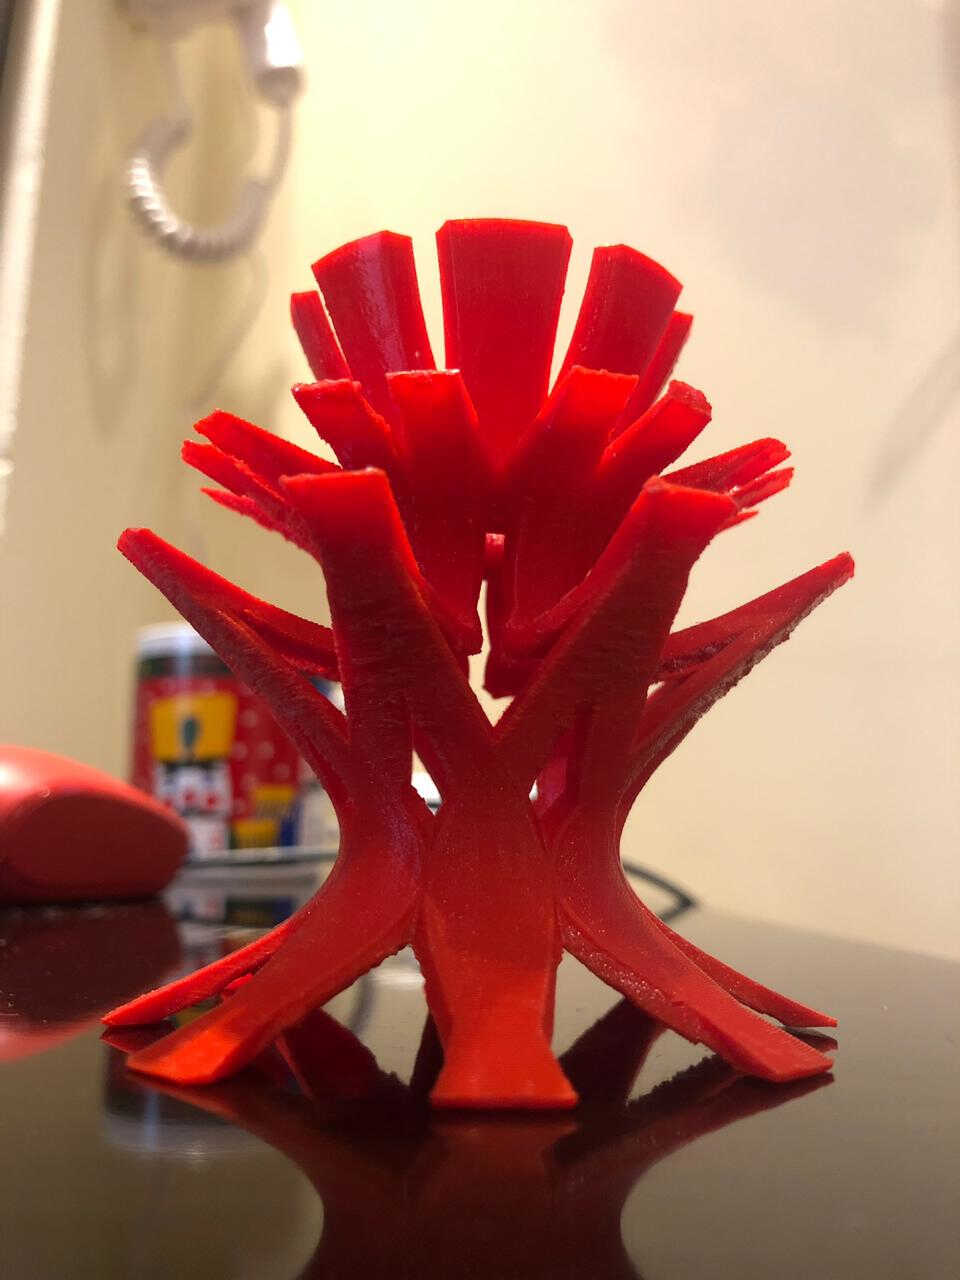
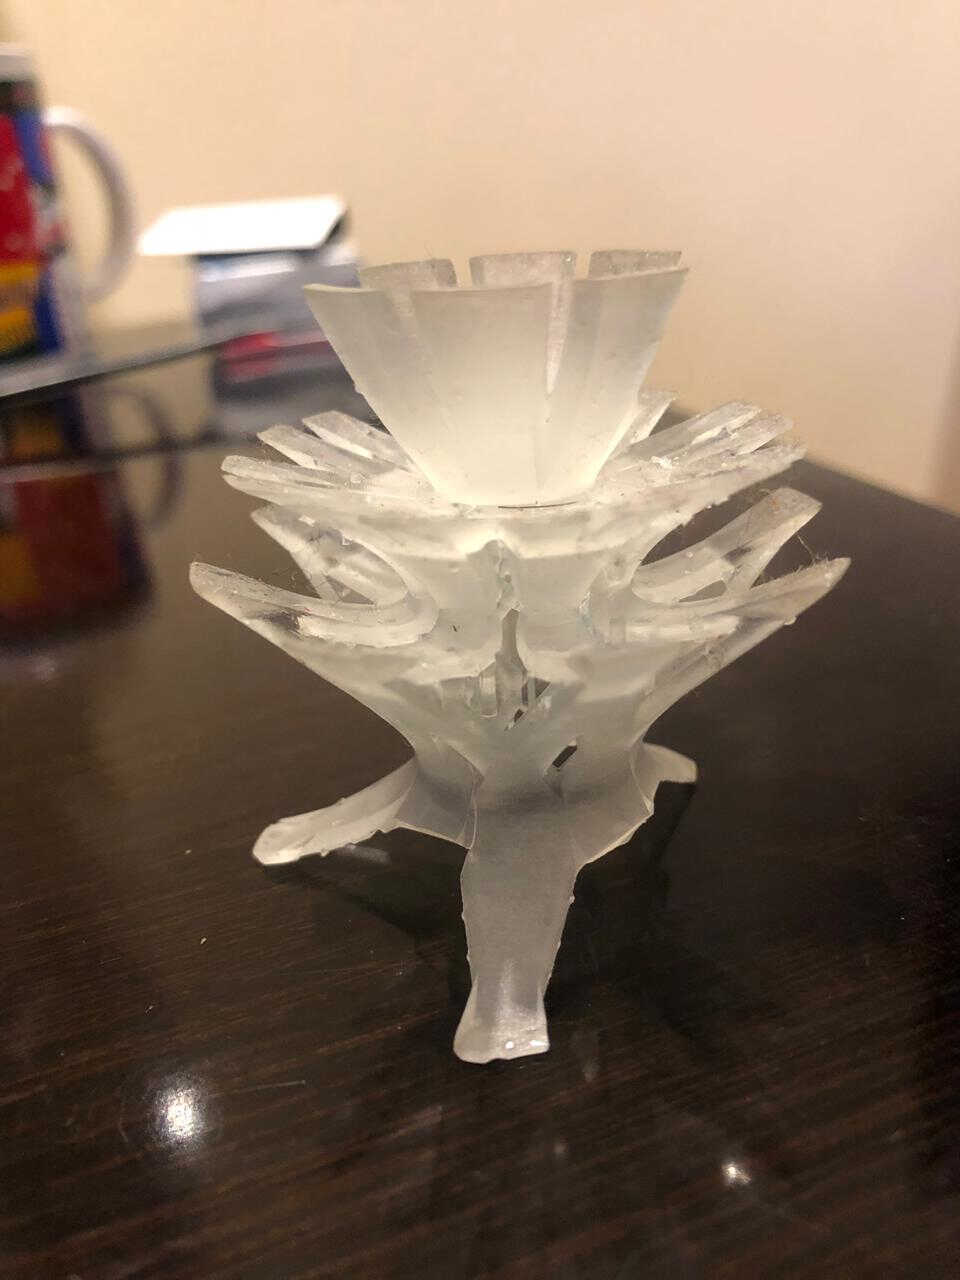
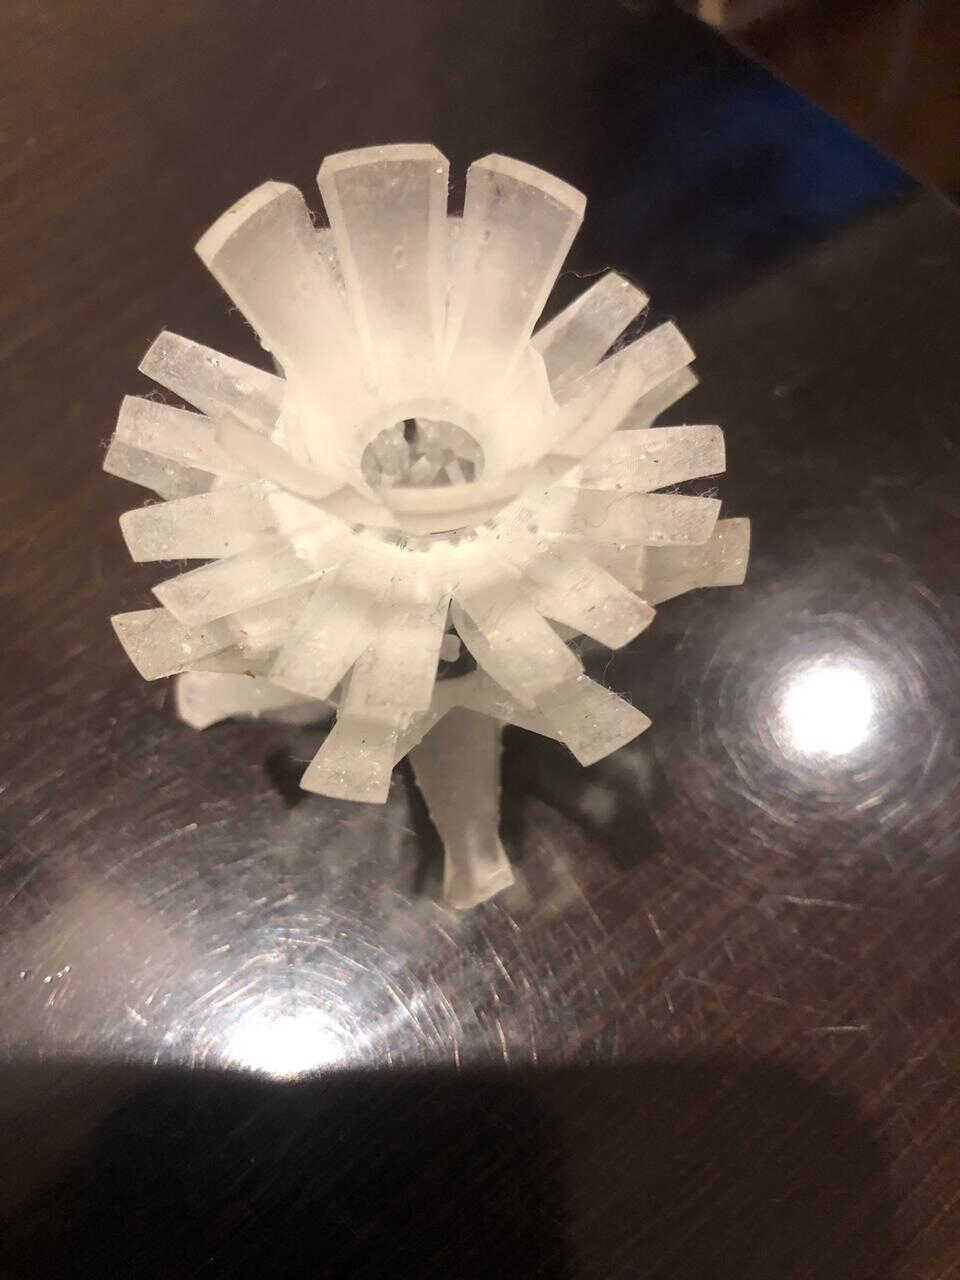
The results were quite satisfying; However, the curvatures of the vase were not as clean as I wanted them to be with FDM printing. So I went for another trial on a smaller scale with SLA printing. The results were quite better but I broke some legs accidentally! It is also much more fragile than the FDM

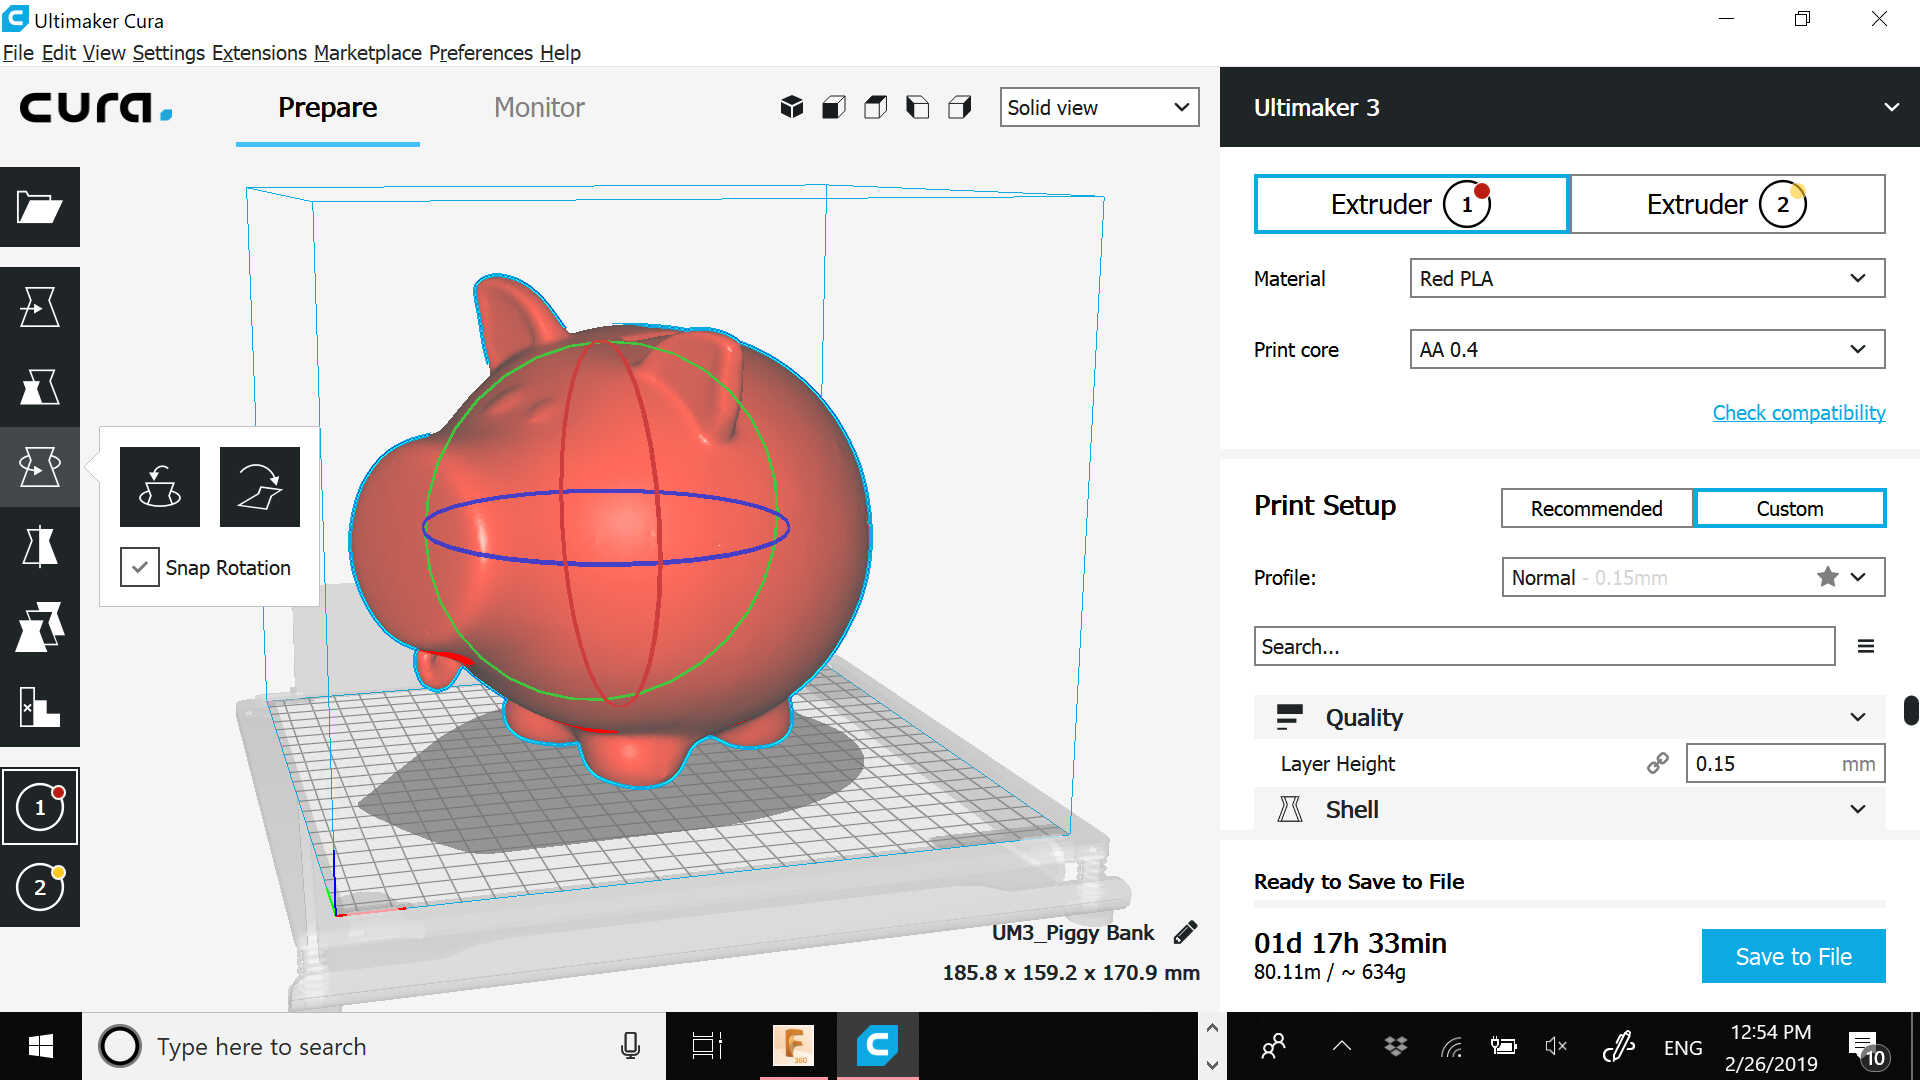
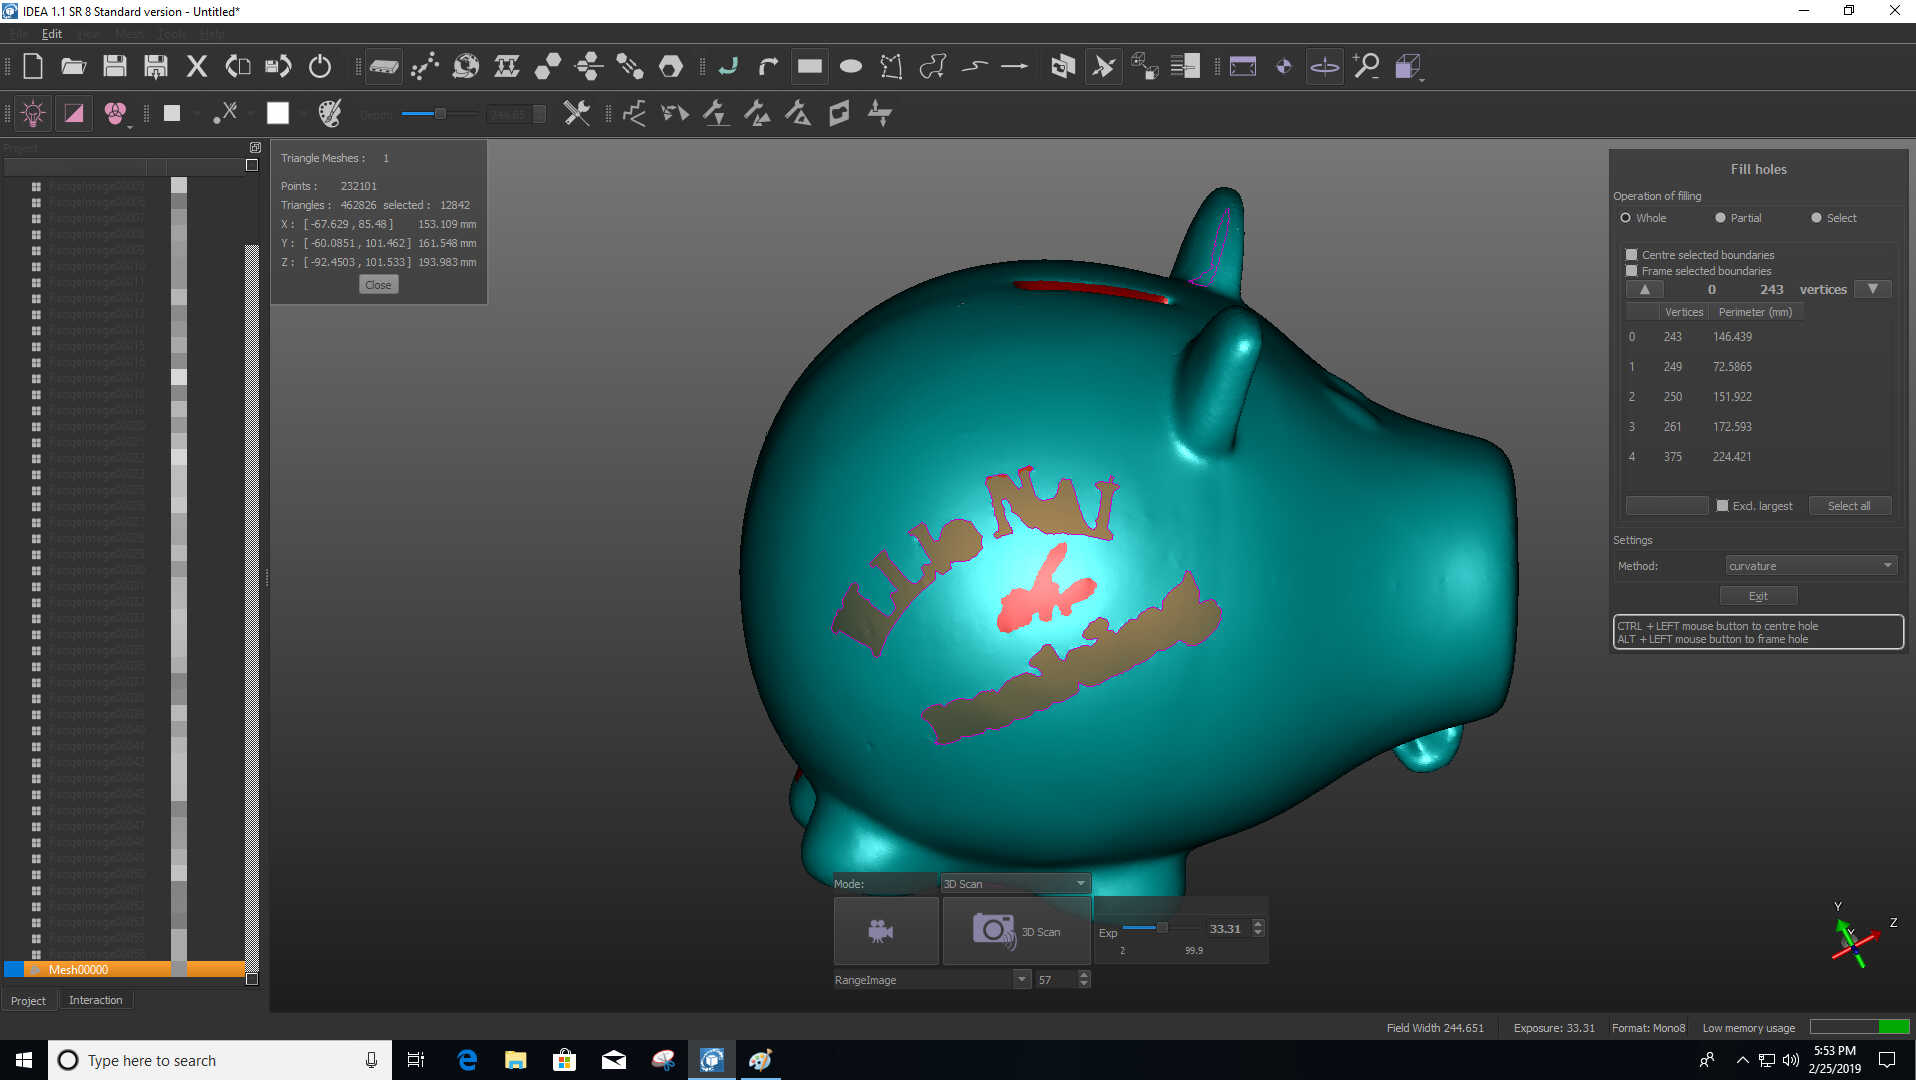
For this assignment, we had to get a white object that is not very glossy or reflective -no black or colored. My object is a funky white piggy bank
The first thing to do is to prepare the small stage set for the 3d scanner and place the chosen object
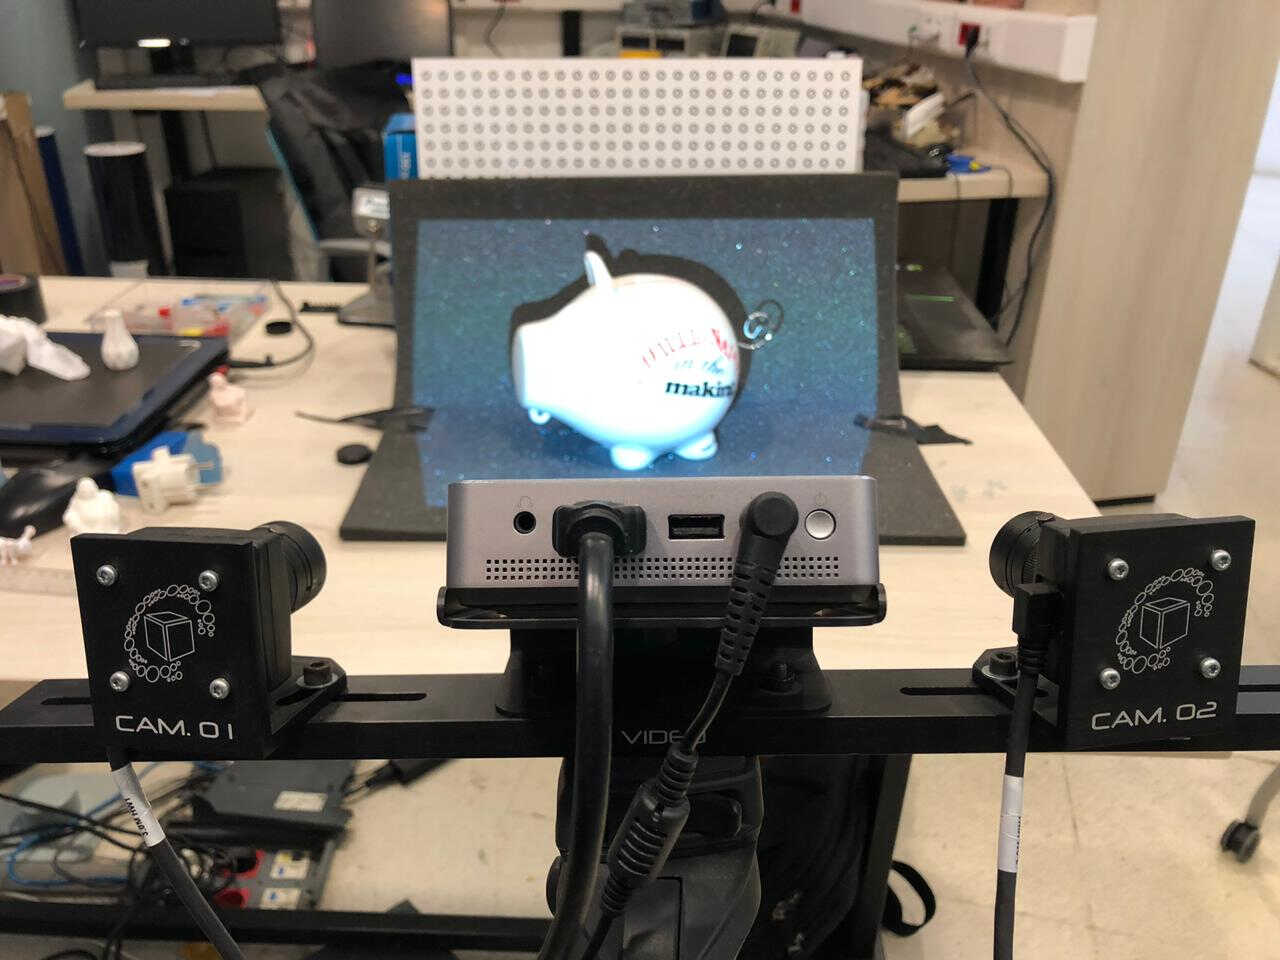
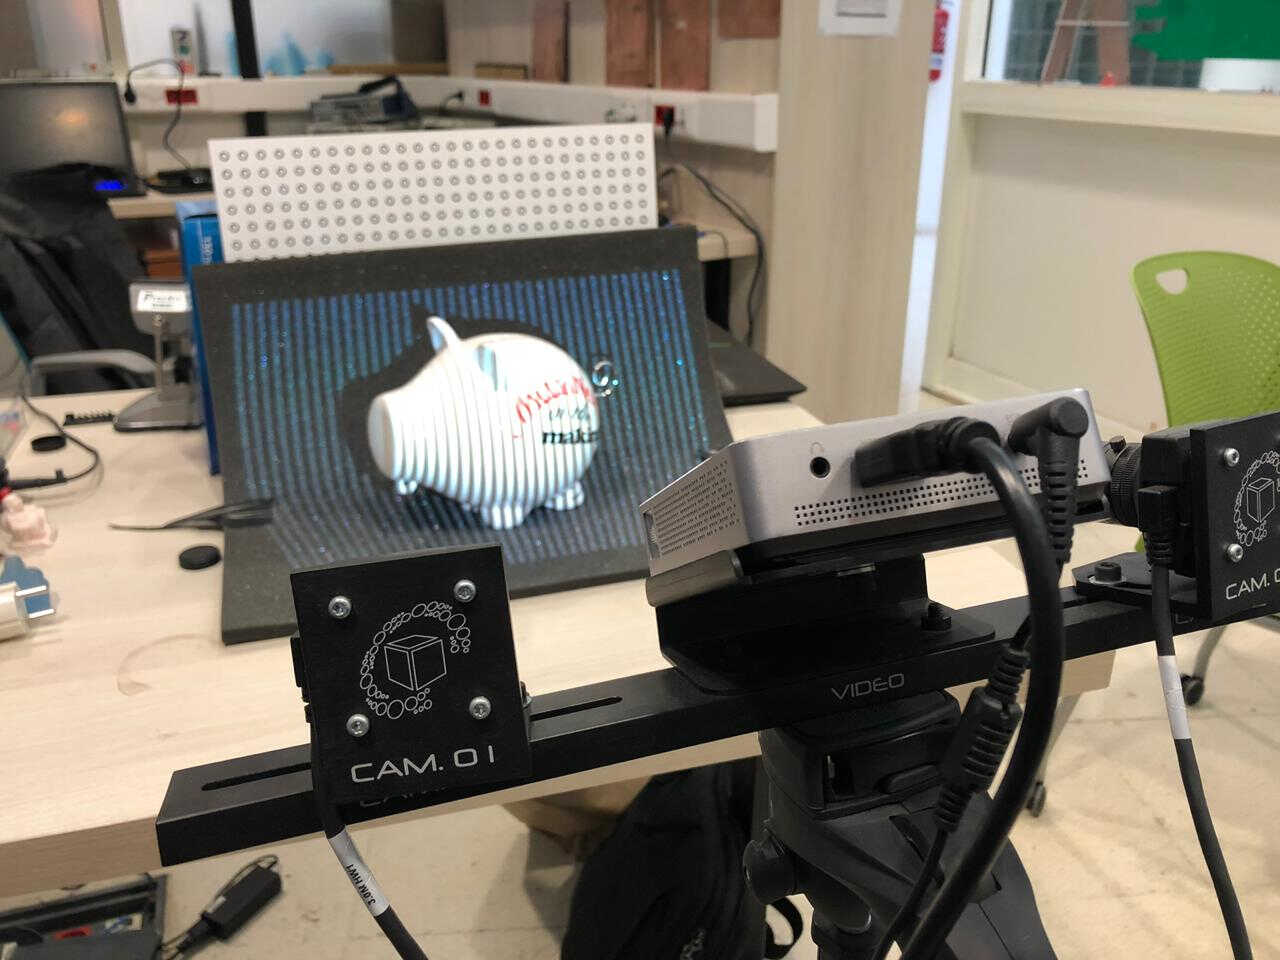
You need to 3d scan the object from different angles on IDEA software. Take as much scans as you can, while rotating the object every time around 20 degrees
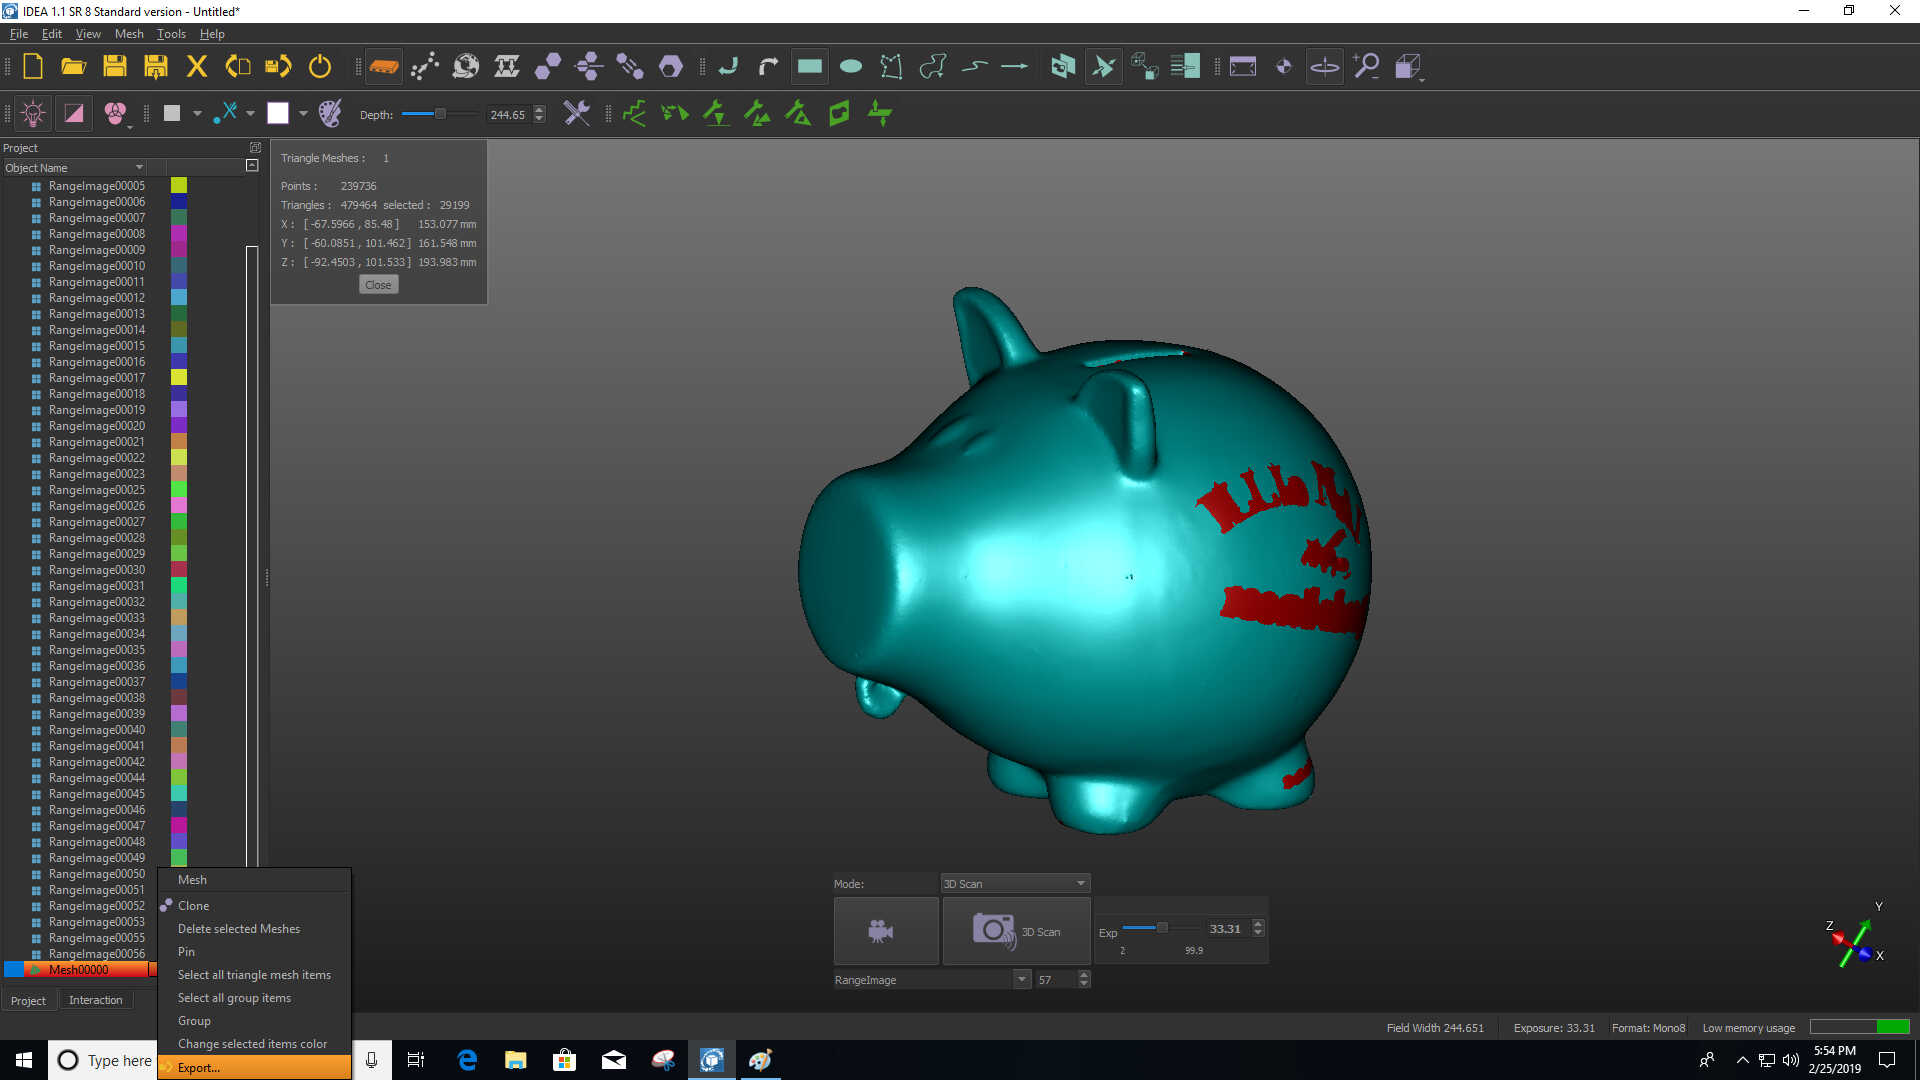
You will then have multiple meshes that you need to select

And then activate the manual alignment
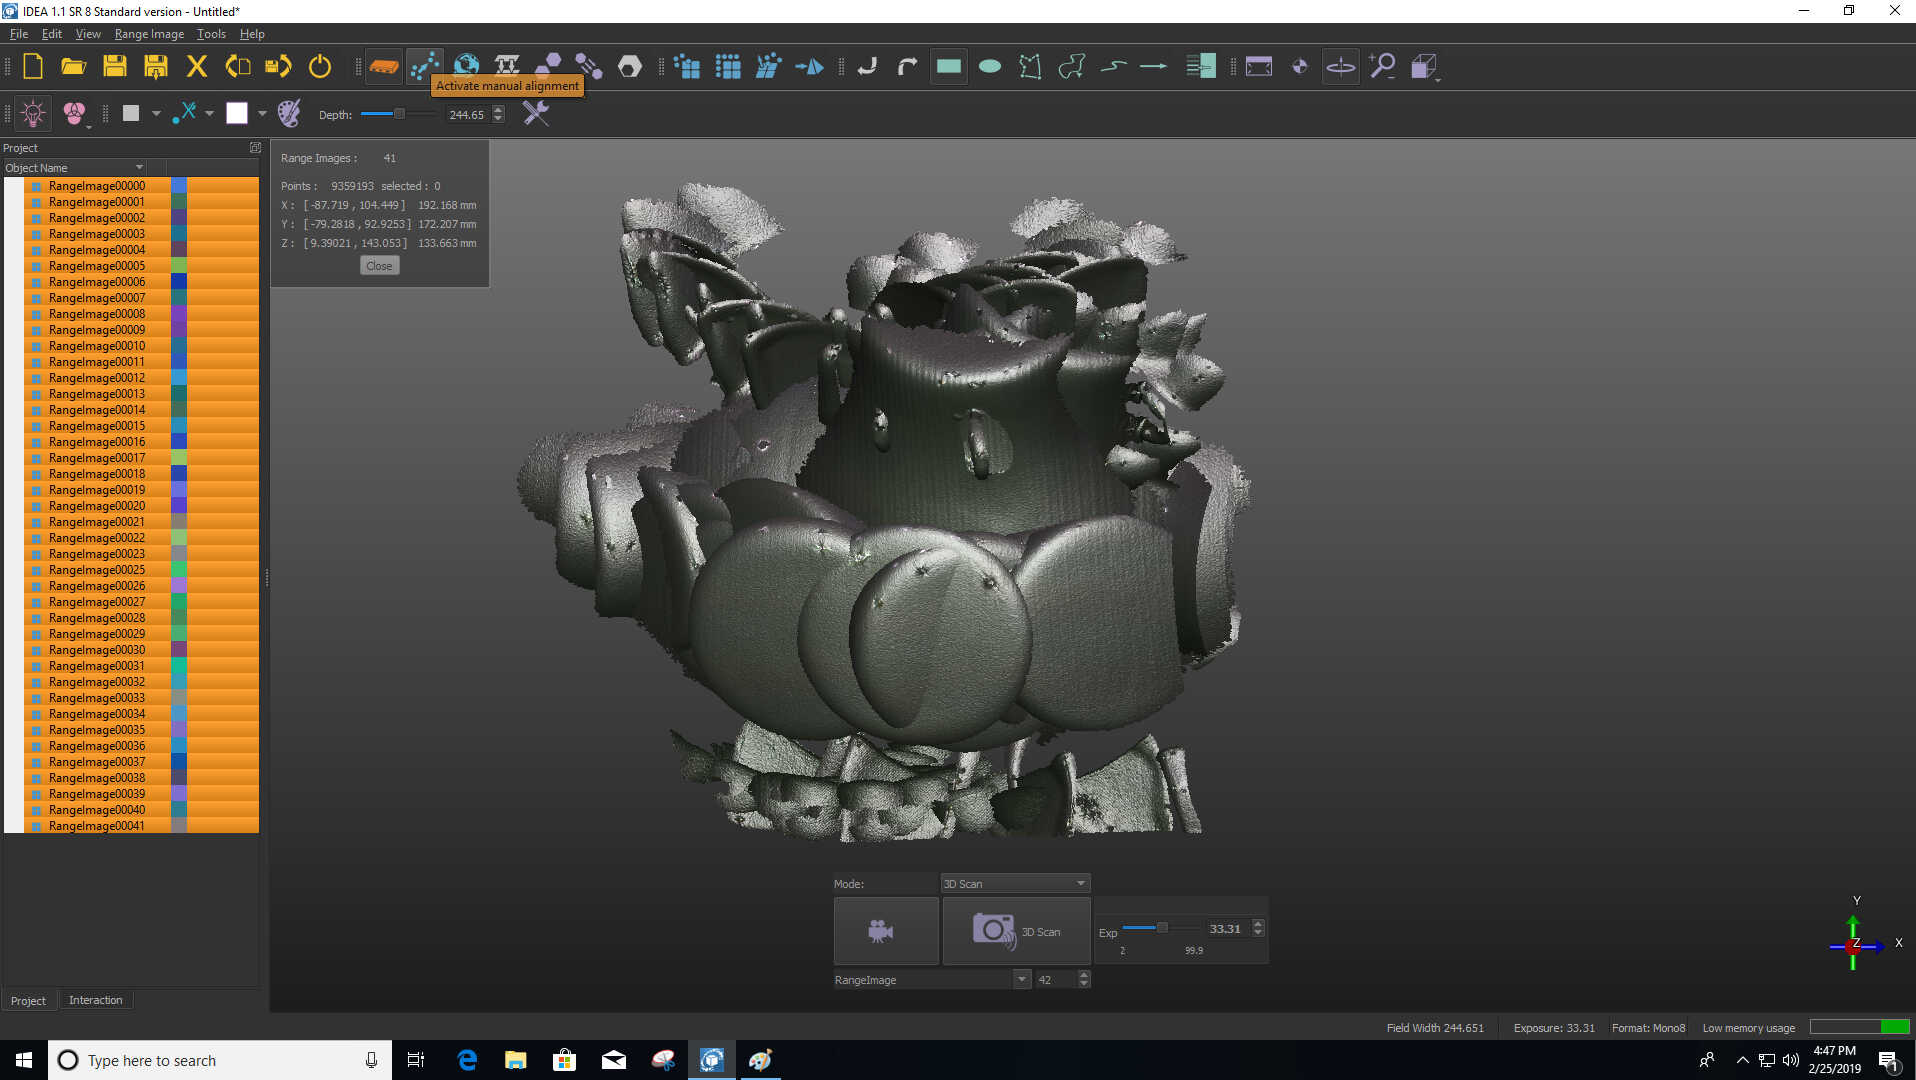
And you start aligning them until you get the whole image of the piggy. You may then fix your meshes and fill the empty holes -especially of the words since they were not white
And finally you export your STL file
You may then check it in Cura to see if you want to 3d print. Mine takes 1d 17h 33min to be printed so the printing option was ignored