So this week was the most interesting and challenging part. After the class I really got to know that what design means it's actually the language of mathematics that talks and we can see the result of it in form of shapes.We were introduced to various designing methods and tools like raster tools, vector tools, 3D tools as well as various types of designing like hierarchical, parametric designs and many more.
Raster and Vector
Raster image
or bitmap is is the representation in pixels, it has a resolution the dots per inches defines the resolution. It is a dot matrix data structure that represents a generally rectangular grid of pixels (points of color), viewable via a monitor, paper, or other display medium. Raster images are stored in image files with varying formats.
The different types of formats supported are JPEG/JFIF.JPEG 2000.Exif.TIFF.GIF.BMP.PNG.PPM, PGM, PBM, and PNM.I watched this
video
to get more about it.The different raster softwares available are
GIMP
Photoshop
Krita
Image Magick
Vector
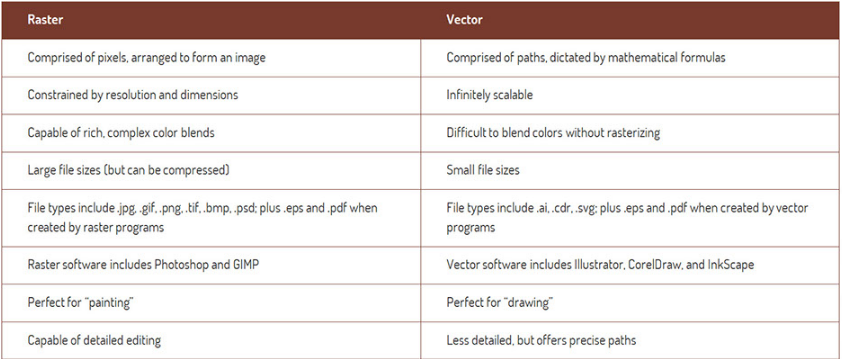
graphic is formed of digital images through a sequence of commands or mathematical statements that place lines and shapes in a given two-dimensional or three-dimensional space. It has some geometrical shape.It is made up of points, lines and curves related to one another using mathematical formulas. Its scalable, a good difference between them is displayed by belelow differnce table-
I found it on the last year's student from CEPT
Adhitya's week 3rd page.
Tye different types of format supported are SVG, EPS, PDF, AI, DXF.
Inkscape
Inkscape is professional quality vector graphics software which runs on Windows, Mac OS X and GNU/Linux.
You can download Inkscape from this
link.
I started to get my hands on it by followingbthe youtube video channel
Logos By Nick.
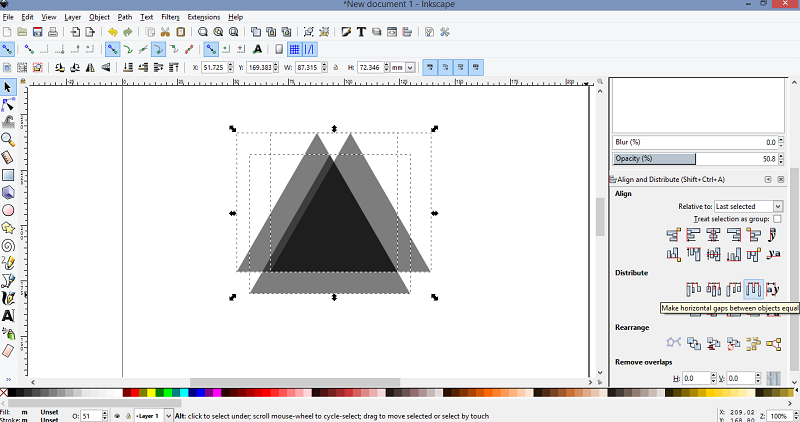
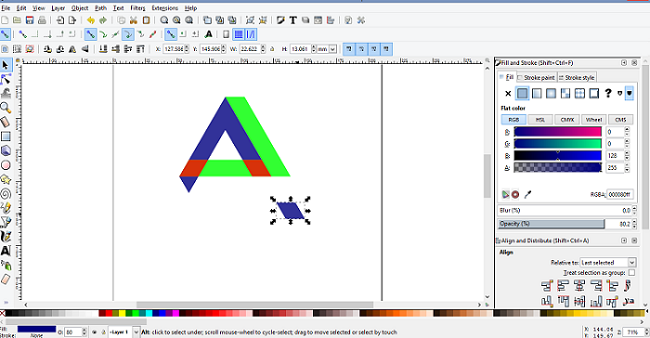
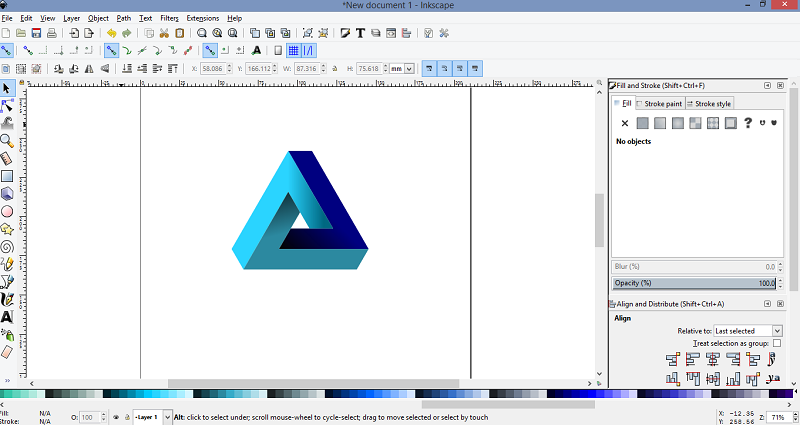
I tried making this
Infinity Triangle.
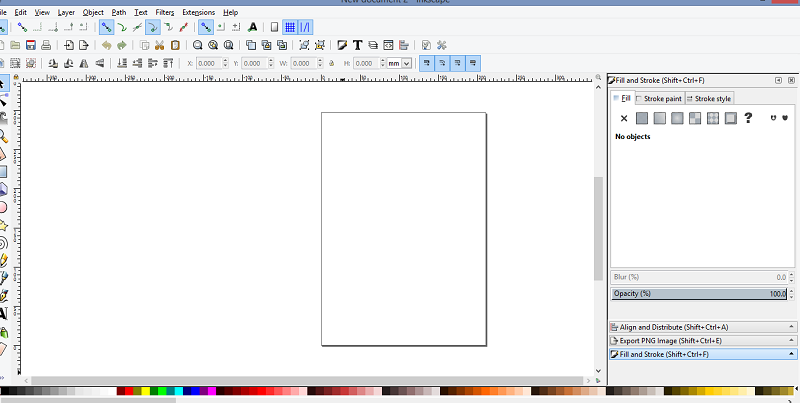
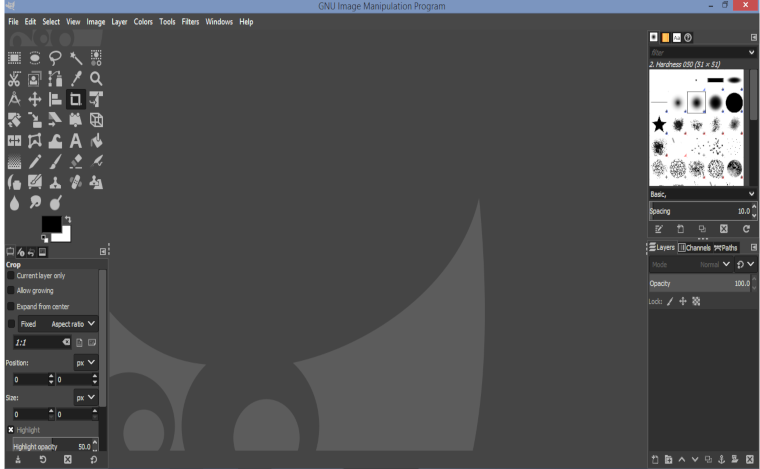
The inkscape work space looks like this
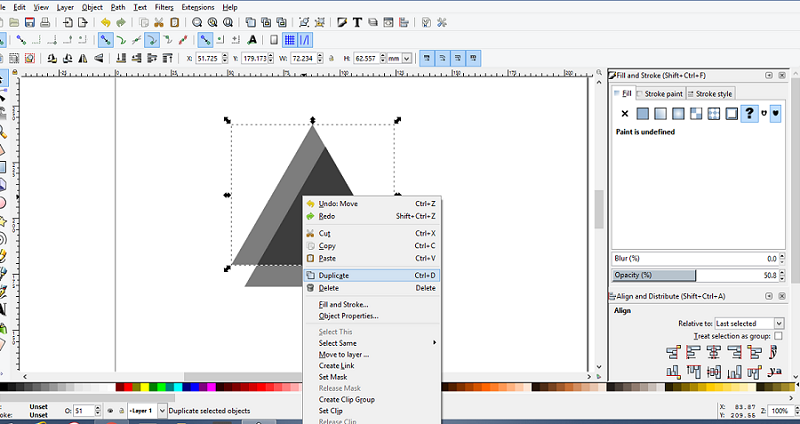
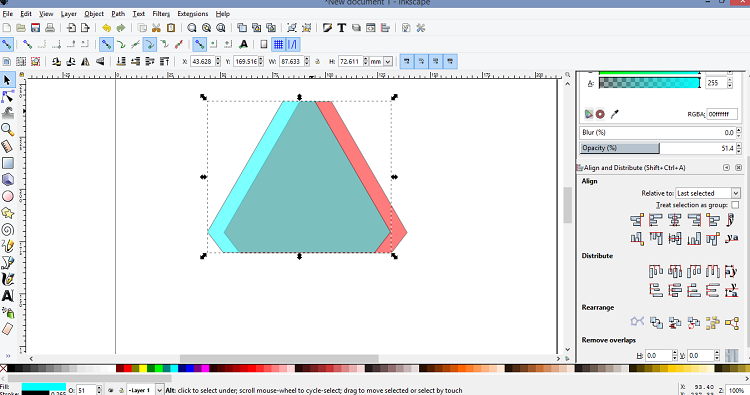
Here I duplicate the selected frame then describe some relation ship say difference as directed by the tutorials.
The basic operations I performed in this was adding one shape to other, the going to the path option on the above task bar and using the features like intersecting, union, difference. basically its addition of some shapes to another and ther relationship that results in beautiful output if we put correct input.
GIMP is an acronym for GNU Image Manipulation Program. It is a freely distributed program for such tasks as photo retouching, image composition and image authoring.It has many capabilities. It can be used as a simple paint program, an expert quality photo retouching program, an online batch processing system, a mass production image renderer, an image format converter, etc.You can read more about GIMP from
here.
It runs both on Linux as well as Windows, it can be downloaded from
here
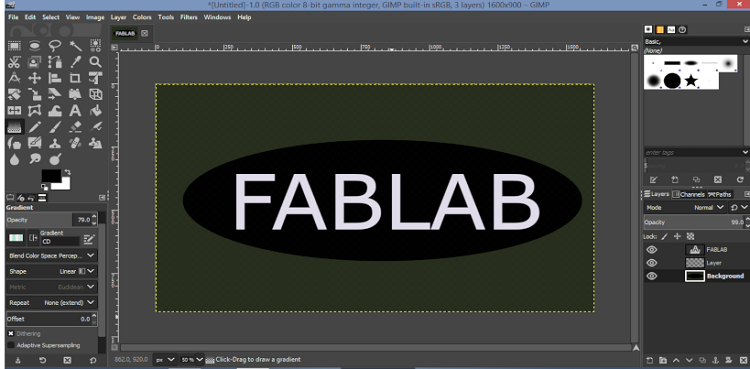
The workspace of GIMP is little spooky i felt..
On the left and right side there are toolboxes, the images of the tools describes their features.I decided to write a simple FABLAB name and try to give it layers and shades using it.
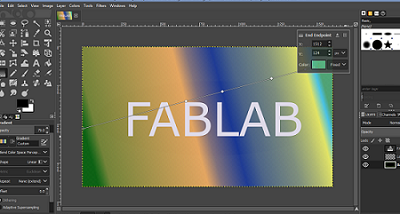
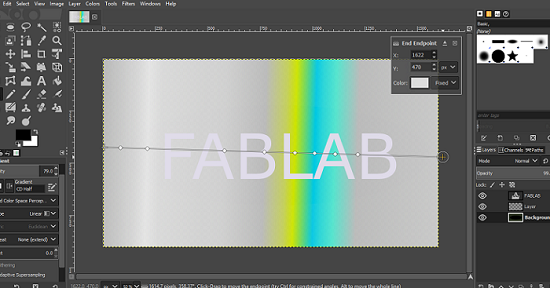
Here I was just playing with the blend tool to stylize my image from various available options.
You can download this gimp file from here
(gimp1.xcf)
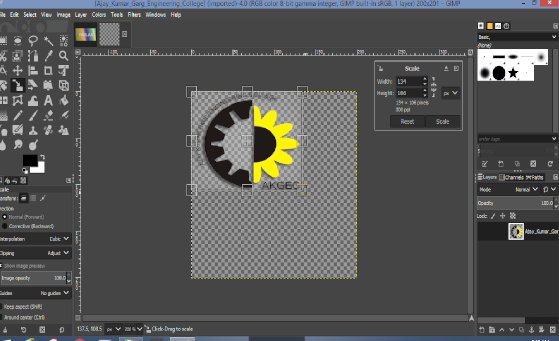
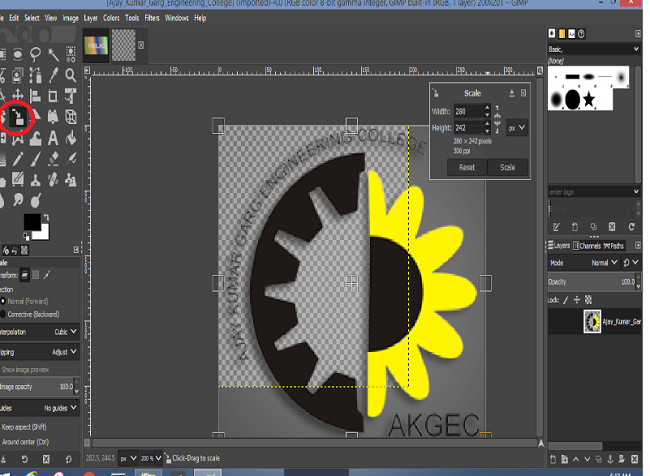
Scaling Images with GIMP
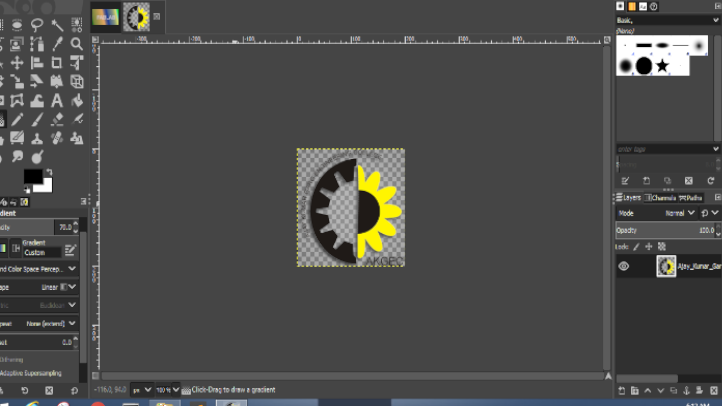
I never used to convert my resolution of the image or scale it using this, I preferred paint as the easiest but the results after using gimp to convert my images or to scale them using the Scale tool i was compelled to change my perspective. Images can be scaled by using the scale tool on the left of the tool bar. Initially I tried simply to scale my college logo.
You need to select the SCALE tool as shown and either enter the parameters like width or height manuallly or u can set it by just dragging it with your mouse.
Experience with GIMP
It is small light weight software but comes with some very good features, the tool box is auto explainable for any newbie to get hands on. Moreover it's free to download, It has open source architecture means anyone can modify the core code and develop plugins and new features, you don't need to be approved by Adobes' development team in case of Adobe Photoshop. Only problem I faced during my usage with GIMP was that initially to start its takes a bit of time otherwise it performed smoothly.
Comparison
Inkscape
Availabe for Free
In one word Inkscape is AWESOME. If you know how to use it, you can do wonders with it. Literally, wonders. Its free has tremendous power produce high quality vectors graphics in the league of illustrator and again its FREE
I'm not a graphic designer but some of my friends who do designing prefer Illustrator on most of the things but as I haven't explored it yet I felt comforatble using inkscape for this work.
Gimp
Available for Free
I never used to convert my resolution of the image or scale it using this, I preferred paint was the easiest but the results after using gimp to convert my images or to scale them using the Scale tool i was compelled to change my perspective. It's much easy and avialable for free.
If you compare in terms of high-end plugins available, Photoshop wins in that case, but often these Photoshop plugins work with GIMP too
GIMP comes with impressive selection and montage features, various ways to retouch your images, cropping, noise reduction and colour adjustment tools, customisable brushes, gradients and so much more. There's plenty for the more advanced user, too, including layer masks, bezier curves, filters and even an animation package.
3D
3D modeling is the process of developing a mathematical representation of any surface of an object (either inanimate or living) in three dimensions via specialized software.3D modeling software is a class of 3D computer graphics software used to produce 3D models.Basically it's a projection of 2D. There were various powerful softwares introduced some of them are listed
Sketchup
AutoCaD
Fusion 360
Solidworks
Xdesign
Openscad
and many more it's like ocean of them each of the powerful in their own aspects.
Some are open source some are paid I decided to go gor the opensource one's.
AutoDesk Fusion 360
Fusion 360 is one of the most powerful software in the market, It allows all 3D, CAD, CAM, CAE tool of it's own kind that connects to your entire project development process. You can download Fusion 360-AutoDesk from this
link(download Fusion)
Working on fusion 360 was a big challenge of it's own, most of it's features are still obscures to me I followed video tutorials straight away from
youtube
There are several youtube channels regarding this
you can refer to any one of them.
I sarted searching "How to make small parts like vase,lego blocks etc." Fusion 360 comes with a paid license, but they do provide Free Education License
if you are a Student, I entered the details of my college and got the education license version of it.
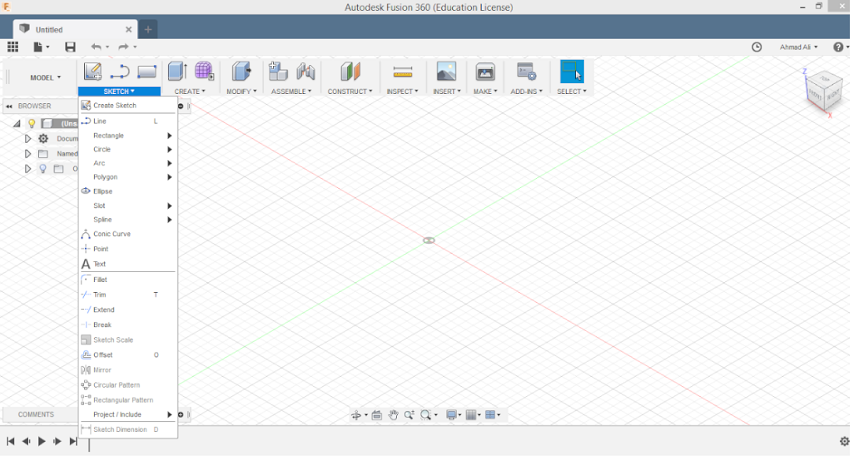
The work space of Fusion 360 looks like this-
For the learnig of any software you should give some time to get to the workspace and hands on the tools, I'm following the same for this software.
Fusion can be used for 2D parametric designing as wel as 3D rendering.
Parametric Design-
A lot has been talked about it since the class also in our Local Lab Sessions our Remote Guru
Puneeth
made us clear about it, it is basically the design which is mathematically related to it's parameters viz. width, thickness, height etc. so that if you make change in one parameter automatically the whole design file is affected by it. I will be making more parametric design for the upcoming week assignments probably for the press fit kit assignment
The most widely used options while using fusion falls under these categories-
Sketch
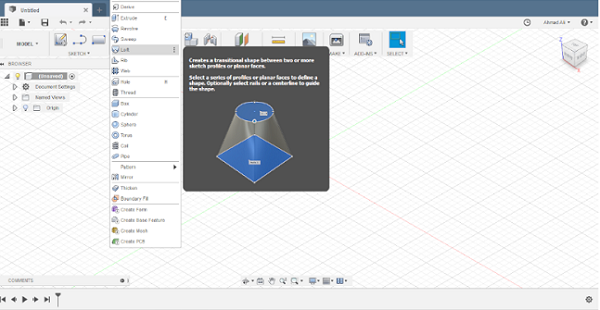
Create
Modify
Extrude
Fillet
Chamfer
Creating Shapes
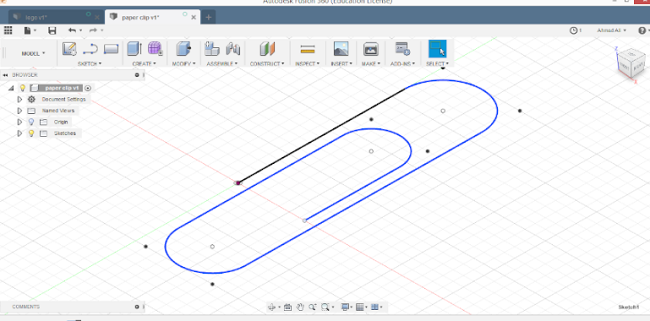
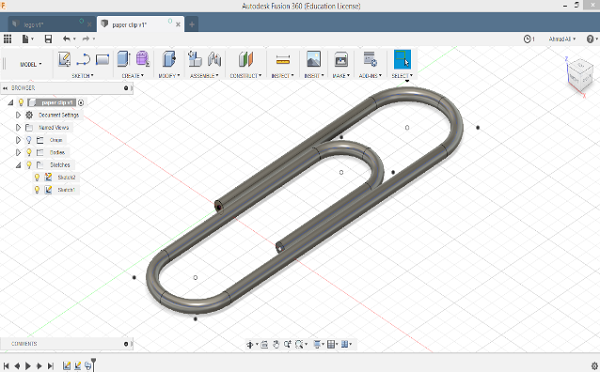
First I tried making simple paper clips using
this
video tutorials from youtube.
Adding a simple sweep feature to the selected path gives the 3D model of the clip.
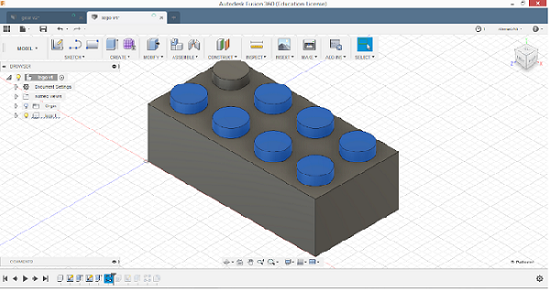
Then I tried to make a lego block following the video instructions
It is made by selecting a plane then making a rectangle and using Extrude.
After the extrude select the front face darw a circle then again extrude use the pull option then we copy all the circlles symmetrically on the block.
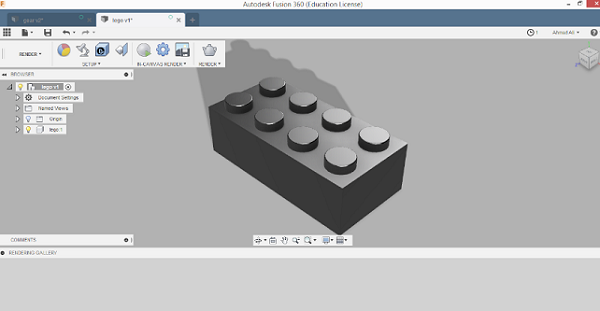
Adding features like fillets give it a more redefined and realistic. Fuision allows 3D rendering just by clicking on he Rendering option on the top left and the results were satisfying.
This Fusion file can be downloaded from here
lego.f3d
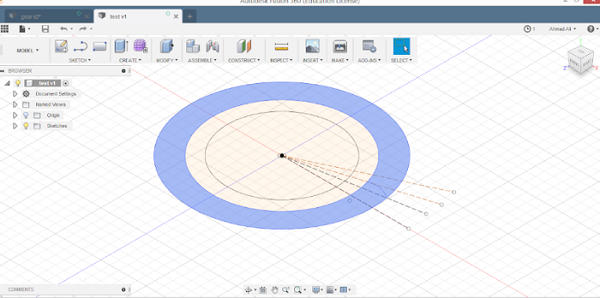
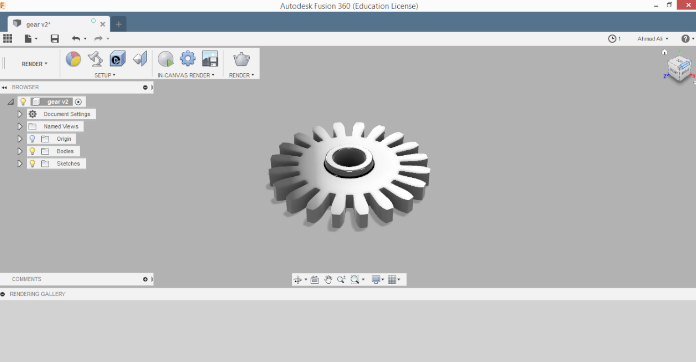
After making simple parts I found it quite interesting and tried to make a spur gear i watched the tutorial and followed creating different sketch of circle making the relations and using the TRIM command. I followed this
Youtube tutorial
for making of my spur gear. I watched each step and paused the video then copied those steps
in Fusion although it took a long time in actaully making the whole part because pausing and making simultaneously took a bit long to me but it's a good learning process to learn an interactive design tool
to just follow the steps as given and after that play with them once you get comfortable with it.
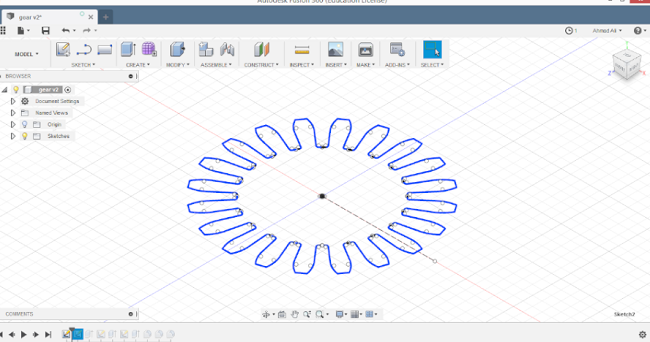
I made some concentric circle and made some construction kines from the mid point to make a shape and give respective angle for making of the Tooth of the gear.
Following the tutorial I kept the angles at it was given in the tutorial and made one tooth and patterned it in a circular pattern and defined its number.
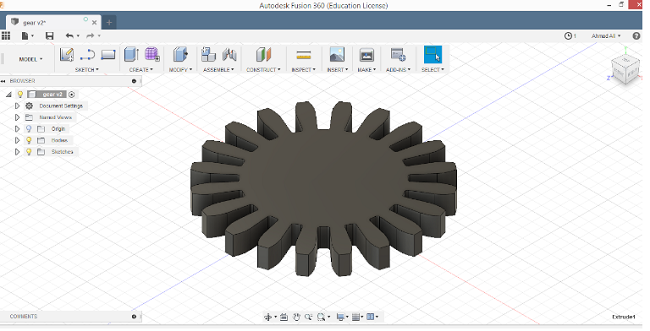
The I used the extrude function to give it a 3D look.
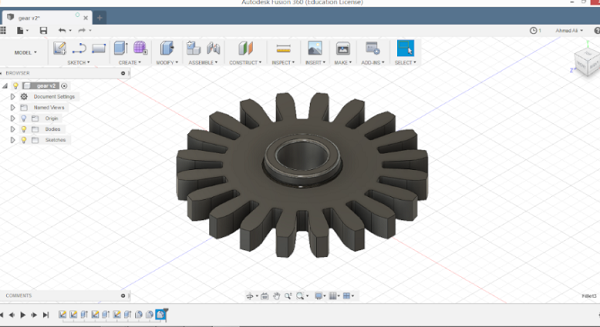
Final step was making a hole in the centre and adding the minor detailing lie adding fillets and chamfering on the sides of the teeth of gears. Finally I tired to render it by just dragging and dropping the the type of apperanace I wanted it to look.
The rendered part was very satisfying
Download this fusion files
gear.f3d
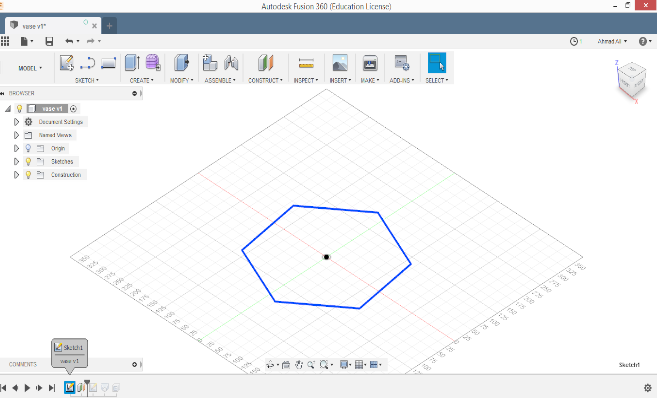
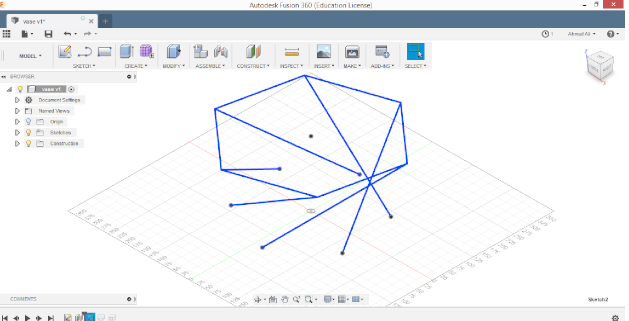
Playing more with fusion- Creating a Twisted vase
Considering the upcoming weekly assignments I decided to make a twisted 3D vase which i willl be printing in the upcoming weekly assignments. I took a rough dimensions and tried to make a vase structure.
After selecting a polygon i made another plane the top of my existing plane and made another polygon a bigger than earlier, the I tried to make lines from the top to bottom via sketch and made it rotate to give it a twisted look.
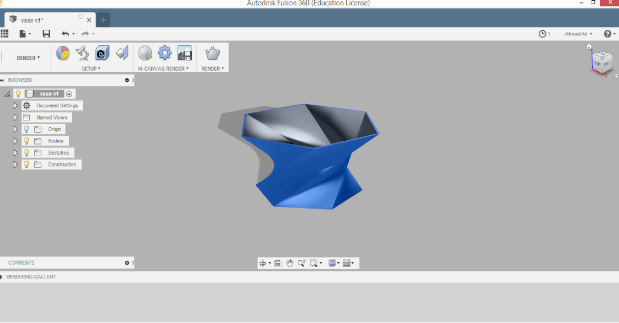
The rendered look
.
You can download this file from here
vase.f3d
Experience with Fusion 360
Fusion 360 has some serious features which really make it stand out from other CAD systems. While each one has its benefits and downsides, Fusion has some features which other CAD systems are nowhere near having. Mainly things such as the Cloud capability. I can access all my files from anywhere in the world, on any computer as my personal laptop is low on graphics so I used fusion in the Lab's system or my friends pc.I also like the fact it has multiple features already built into the package - such as CAM and analysis software. Then finally, it's great value, there's no crippling seat fees and annual subscriptions into the thousands. Aso if you get used to working on Fuion there are Keyboard shortcuts to select various tools like- Press L to select line tool, Press C to select circleIt becomes very easier to use and save time fromslecting the dropdown bars. What i disliked the most the CTRL to orbit is so annoying and unnatural.One has to go to the top right for viewing at different angles.
SolidWorks
SolidWorks is another solid modelling software that I came across during the week, it allows you to design products in 3 dimensions. The technique is generally to sketch 2D profiles then use methods like extruding and lofting to produce the solid shape. It is product of Dassault Sytems, It cnabe downloaded from here
Download Solidworks
Plugins are available for electrical design, FEA, optical rendering, electromagnetic simulation and more. It is probably the most widely used and taught CAD suite worldwide and is used in a full spectrum of industry sectors including automotive, aerospace, communications, energy, mining and construction. It comes with a license but fortunately in My College Robotics Club many of the designers were having the full version of SolidWorks 2016 so I asked them for the setup file, the installation process was quite a long but I installed all the additional plugins too.
The basic working space of soild works-
Now clicking on New you can either select to make a part or assembly, an assemnbly is formed after mating or merging the parts.
The work flow is similar to fusion in solidworks there are similar Sketch tools, Features etc. I started on working after watching this
Youtube tutorial
it is very well explained of making parts as well as forming assemblies.
Starting to make simple parts-
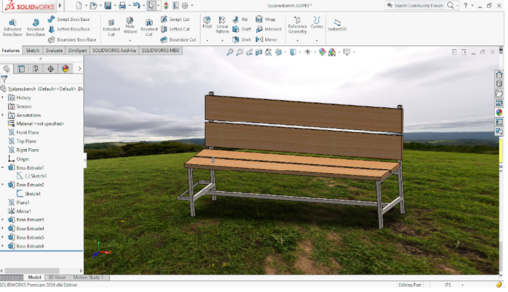
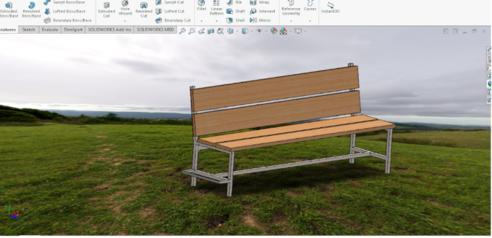
I started to make a chair and may aim was to render it in a space.
I basically started off by making a sketch the adding some dimensions to it.
After making the side view selecting a plane from the middle and creating a Mirror.
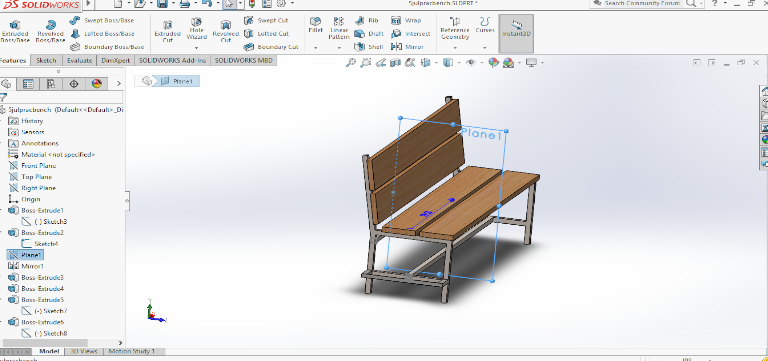
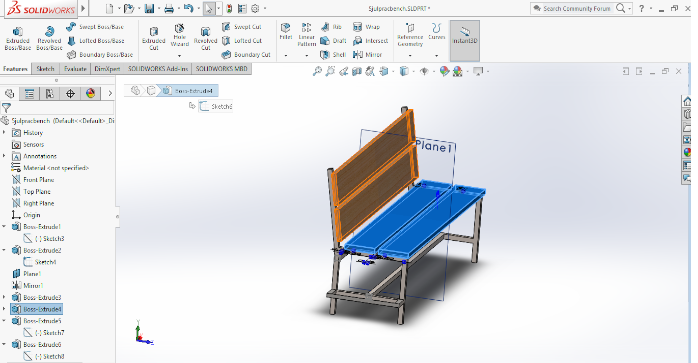
Now i joined the two sketches by using
sketch --> rectangle tools and form small rectangles like there is in benches at the parks. Now extruding them and adding material wood to it to look more like wooden bench it can be done simply be using appearence and dragging and droppping the type that you want.
Tried rendering the chair and applying the scene from the selected options I found this was the perfect for my chair.
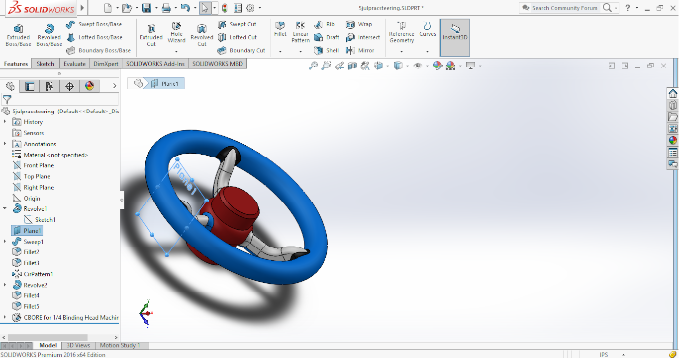
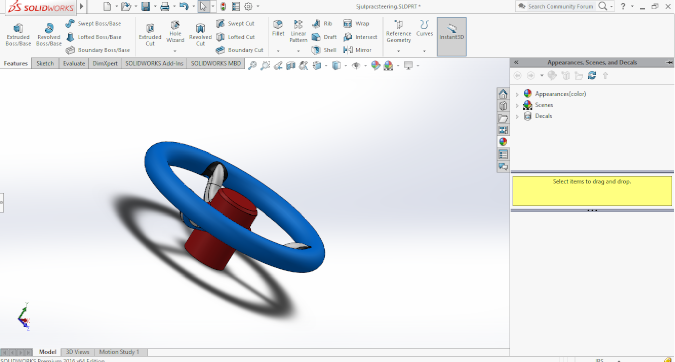
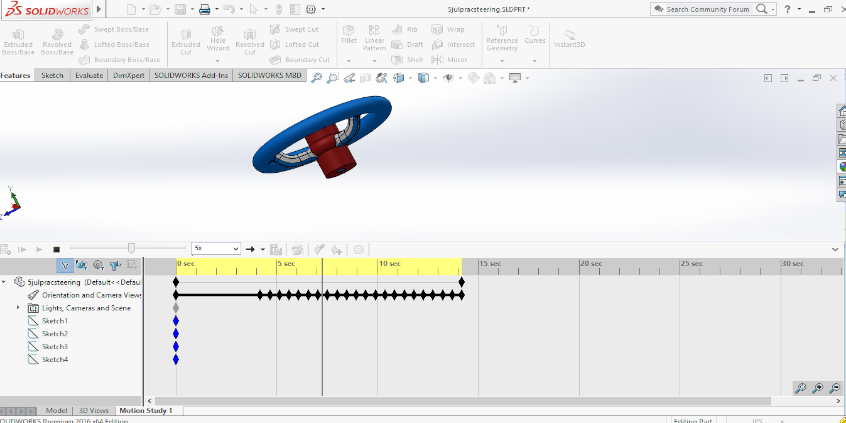
Making some more parts, I tried to make a steering wheel and explored and gave it a motion study to steering wheel.
I'm not sure exctly about the features and outcomes of the motion study maybe after frequent usage i'll try to deep dive into this topic.
You can download this step file from here
Steering.step
Working towards Final Project
Experience with Solidworks
Working on Solidworks was a better experience than fusion I don't know the exact reasons but they both are similar in some manners.
Advantages- The advantage I found in Solid works over fusion was a more friendly environmet separate plugins. Overall the work experience was good.
Disadvantages- The only cons I am facing is the disk space and no cloud platform. After Installing all the plugins my laptop became too slow(I have an older version pc AMD processor) and the deskop was flooded by solidworks tools.
However I might be using a mix of both Solidworks and Fusion because I kinda have similar experience and to switch on either of the software won't take any time for the user.
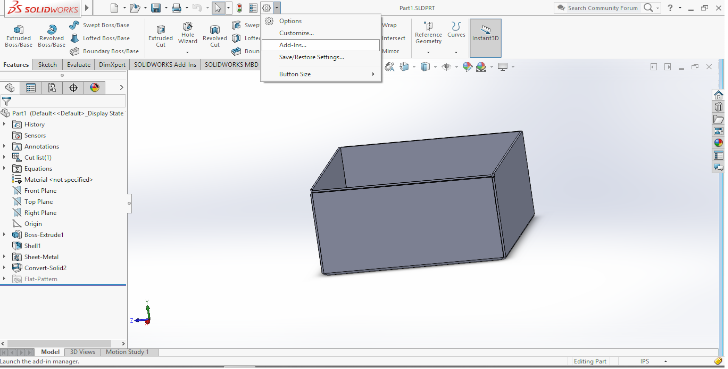
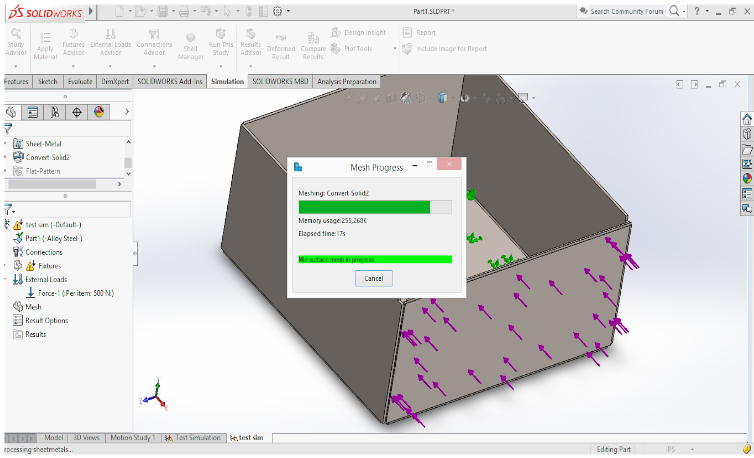
Simulation
It enables you to optimize your design, determine product mechanical resistance, product durability, topology, natural frequencies, and test heat transfer and buckling instabilities.
It tells that how much material is being used what is required to prevent failures we can add an external force or torque ans see the result.
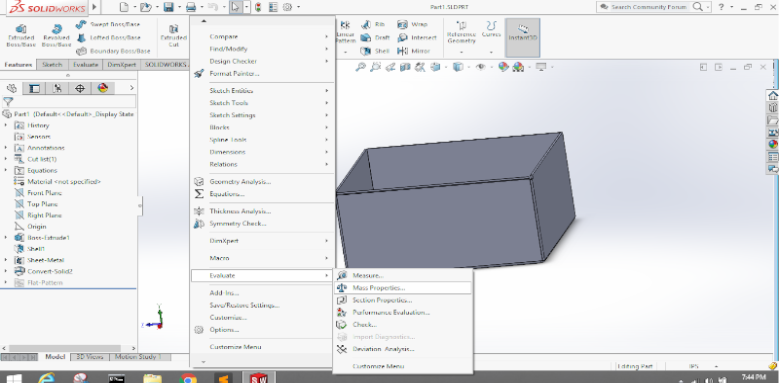
I tried to make a simple open box and tried to give a force sideways on one of its wall to see the amount of bending.
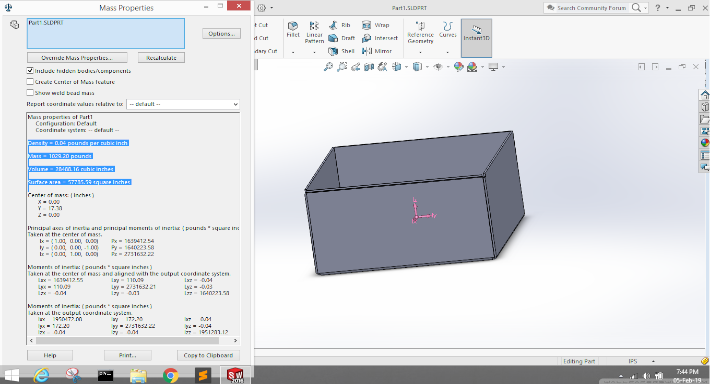
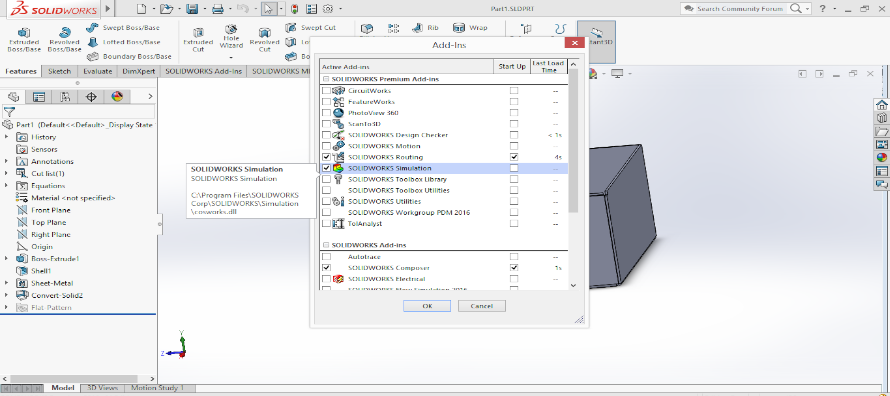
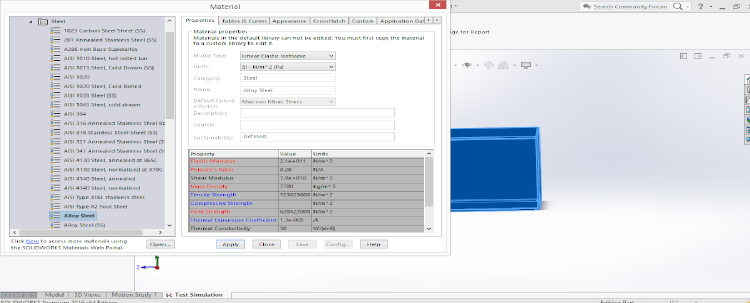
First you have to make the simulation check box on from the menu and the give the material propertie to your object for my boxt I gave it a property of Aluminium with the defaud density and material properties.
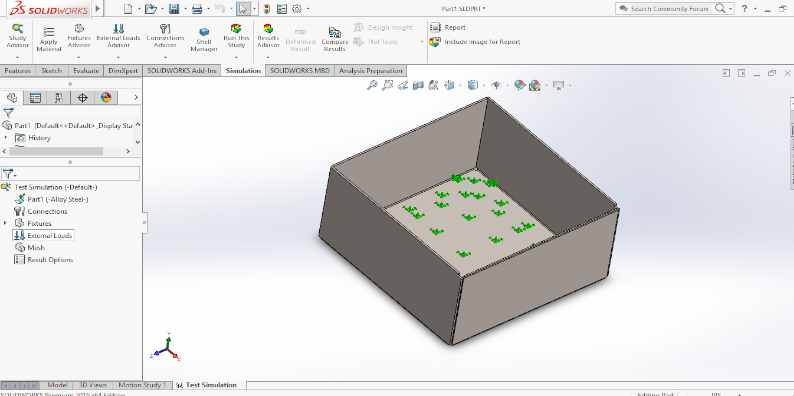
The I going through the eft panel to each of the property I made one surfavce to be fixed and the normal to it an external load /force of 200N was appliead to see its bending.
It gave me a stress strain curve in the form of diagram in right side and the highest limit of my applied force to the material in optimum conditions. The force type and magnitude can be varied It can be torque also etc.
Experience
It can be helpful in finding out the maximum breakdown limit of the material also one can find the limits in otimum condition can change the matrial to see the changing limits without actually using the material and developing the design which can be used to save the material or to say choosing the right material for the right work.
Comparison
Fusion 360
Education License
Fusion 360 has some serious features which really make it stand out from other CAD systems. While each one has its benefits and downsides, Fusion has some features which other CAD systems are nowhere near having. Mainly things such as the Cloud capability. I can access all my files from anywhere in the world, on any computer as my personal laptop is low on graphics so I used fusion in the Lab's system or my friends pc.I also like the fact it has multiple features already built into the package - such as CAM and analysis software. Then finally, it's great value, there's no crippling seat fees and annual subscriptions into the thousands. Aso if you get used to working on Fuion there are Keyboard shortcuts to select various tools like- Press L to select line tool, Press C to select circleIt becomes very easier to use and save time fromslecting the dropdown bars. What i disliked the most the CTRL to orbit is so annoying and unnatural.One has to go to the top right for viewing at different angles.
Solidworks
Paid
Working on Solidworks was a better experience than fusion I don't know thte exact reasons but they both are similar in some manners.
Advantages- The advantage I found in Solid works over fusion was a more friendly environmet separate plugins. Overall the work experience was good.
Disadvantages- The only cons I am facing is the disk space and no cloud platform. After Installing all the plugins my laptop became too slow(I have an older version pc AMD processor) and the deskop was flooded by solidworks tools.
However I might be using a mix of both Solidworks and Fusion because I kinda have similar experience and to switch on either of the software won't take any time for the user.
Learning Outcome
My personal progress and what I learned through this week was insanely some crazy stuffs
I got to know about raster/Vector graphics tried hands o innumerous softwares which I have never even heard of before. This experience was tough, crazy as well as self learning.
I can't say that I completely understand designing for now, it is big Ocean of which I was able to draw a bucket of water. Because what I did was like copy and paste and trying and error correction , which is not like imagining of something and just making a 2D and 3D design. But I'am practicing more and more to get a hold of it.
What I learned that I should keep following points to keep in mind for designing
Selection of plane- You need to get an idea what are you making and in which plane so that you should select that plne it can be either front/top/bottom and start sketching
Giving Dimensions- After sketching you should give proper dimensions to it.
Adding features- You have to add a 3D look by using various features based upon your design
Extrude/Fillet/Chamfer/Loft/Sweep/Spline etc. you have to chose accordingly.
Mating- If you are going to create an assembly select the part to where you want to create either you could sketch on that part or mate with the another part file(in case of solidworks)
and give some relation like concentric/equal/parallel etc. acoordingly.
Rendering-It is the process of formulating, adding color, shading, and texturing, It gives a photorealistic effect to your 3D model.
Motion study- If you model is having various motions or fluid dynamics you can analyse it by motion study I'am still in a learning phase for this feature.
One of the main goal of this week was to try as many softwares and review nd chose the best suitable for you for the purpose of building the final project. Which seems getting accomplished because I'm finally thinking to stick to Soliworks and Fusion to design 3D and 2D as well as I will be exploring inkscape more for upcoming weeks.
I couldn't get my handson any gaming rendering softwares like Unity, but I'am looking forward to it as my other fabbbers are having a good designing background like
Jay Sir
I'm hoping to get the most from each of them.
 Now clicking on New you can either select to make a part or assembly, an assemnbly is formed after mating or merging the parts.
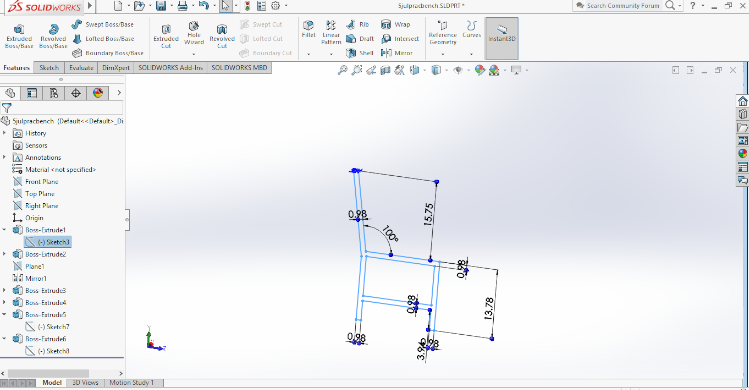

