2D Design
Raster vs. vector based images
First of all, there are two different approaches how two-dimensional images can be represented: For raster based images a grid is defined, where for each cell of the grid a color is stored. In a vector image, each object that is shown is saved as a mathematical expression. For a circle, for example, the middle point and radius would need to be saved.
It is easy to see what the advantage of vector images is: When you zoom in a raster image too much, the shapes will get pixelated like shown above. But you can scale vector images as much as you want and they will never get these pixelated artifacts. That is a clear advantage of vector images.
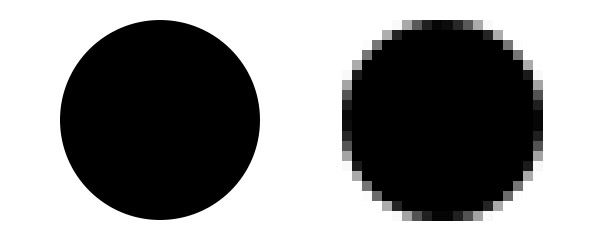
Two small circles on a very high zoom level
An area where raster images are better than vector images is for example camera images. Those images usually have a lot of colors and color transitions to show details. Things that are hard to express mathematically are the branching of a tree or non-linear color gradients, therefore a lot of simple shapes would be needed and then it would be less efficient than the raster image.
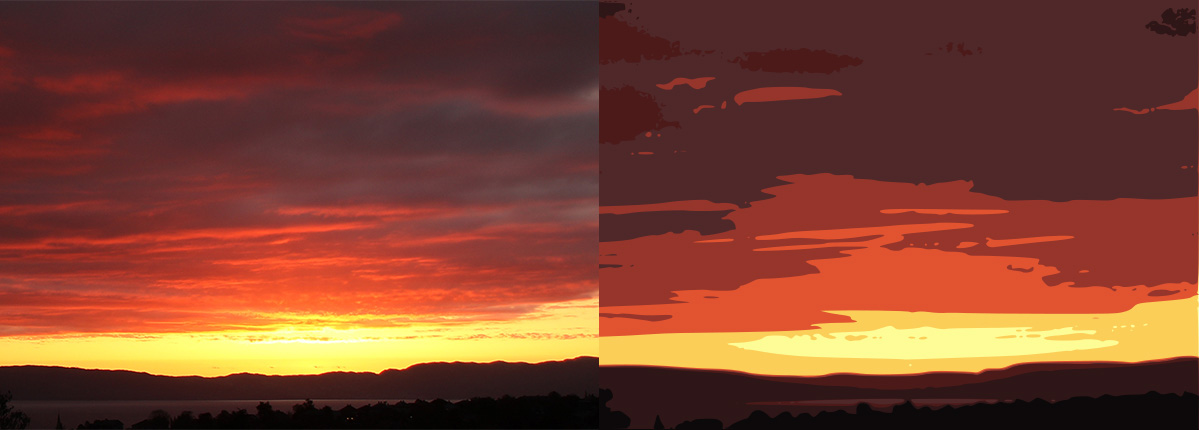
Part of a (rastered) camera image recreated as a vector image
It can be said that both have advantages in different areas and while vector images are definitely better suited for logos, raster images are better suited to create more realistic pictures.
Draw.io
Draw.io is a simple online editor to create vector graphics. It's easy to use and has the advantage that it doesn't need to be installed. Basically, you can draw shapes on a grid and resize them, change the appearance, add text and much more. It's my favorite tool for simple drawings or flow charts.
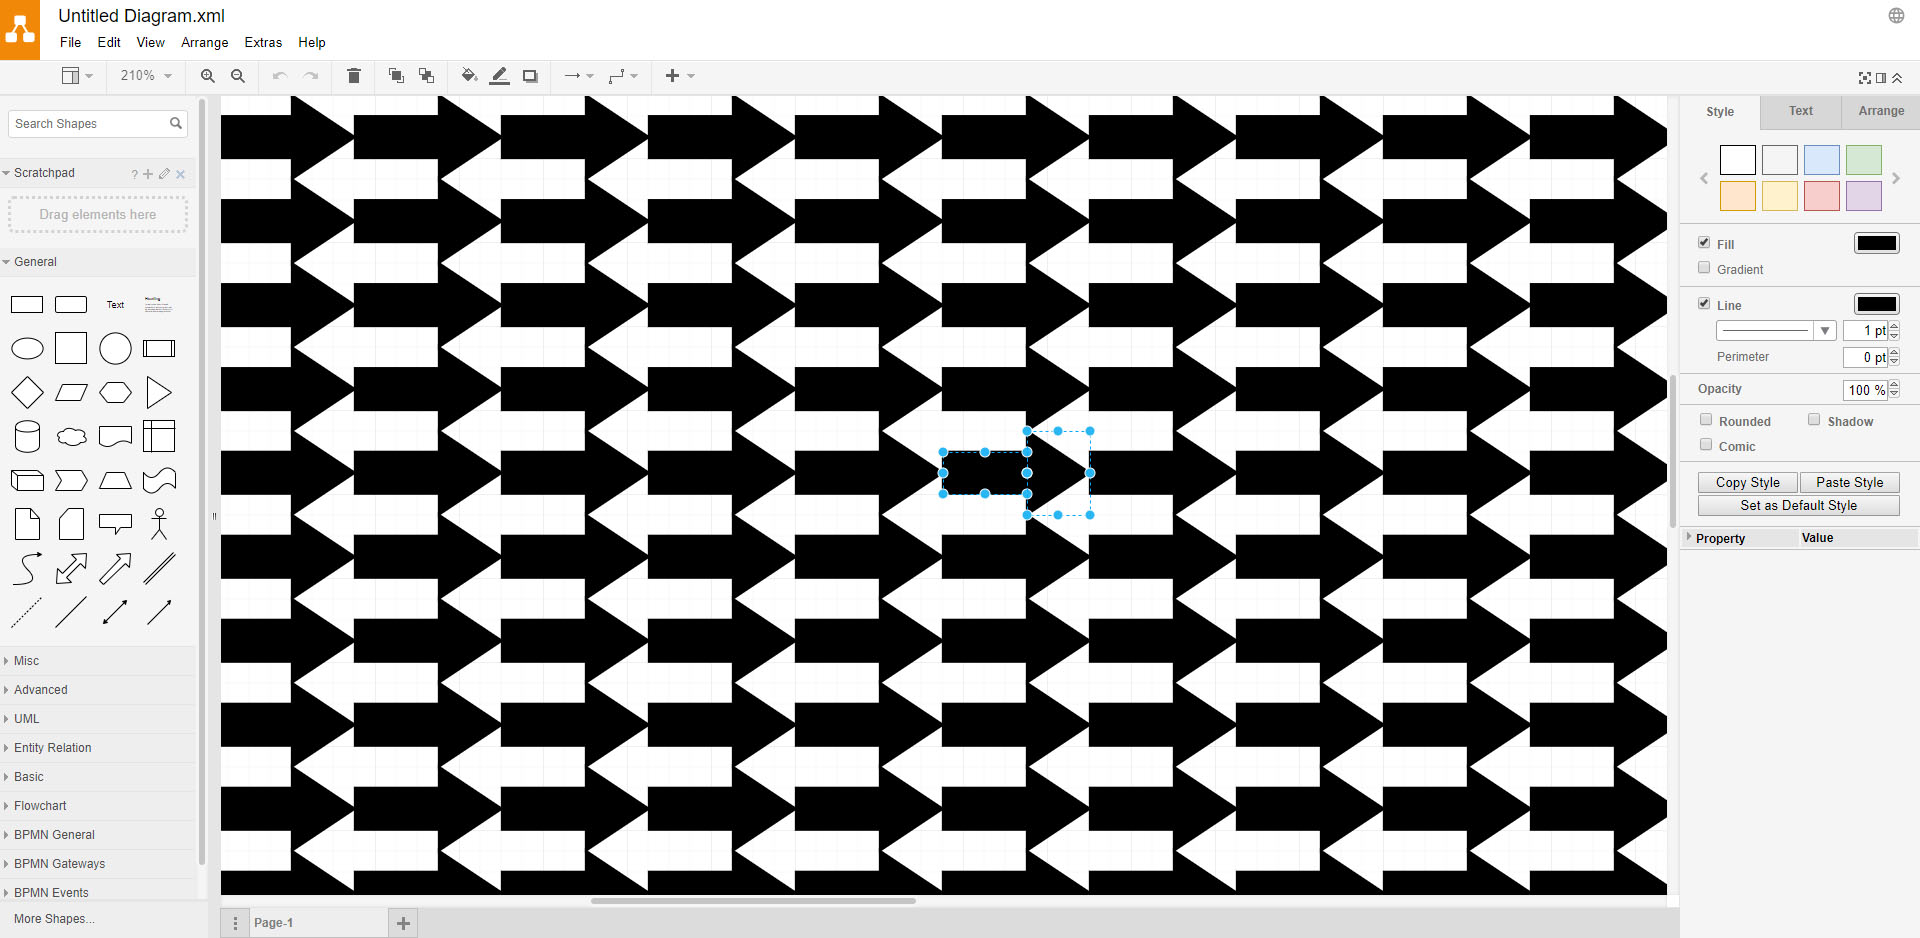
The interface of draw.io
I like patterns so I created the arrow pattern shown above and down in the gif all the steps are shown. Basically, I created a rectangle and then a triangle to form an arrow. Then I copied the arrow a lot and put him in the positions so that it would look like there are also white arrows.
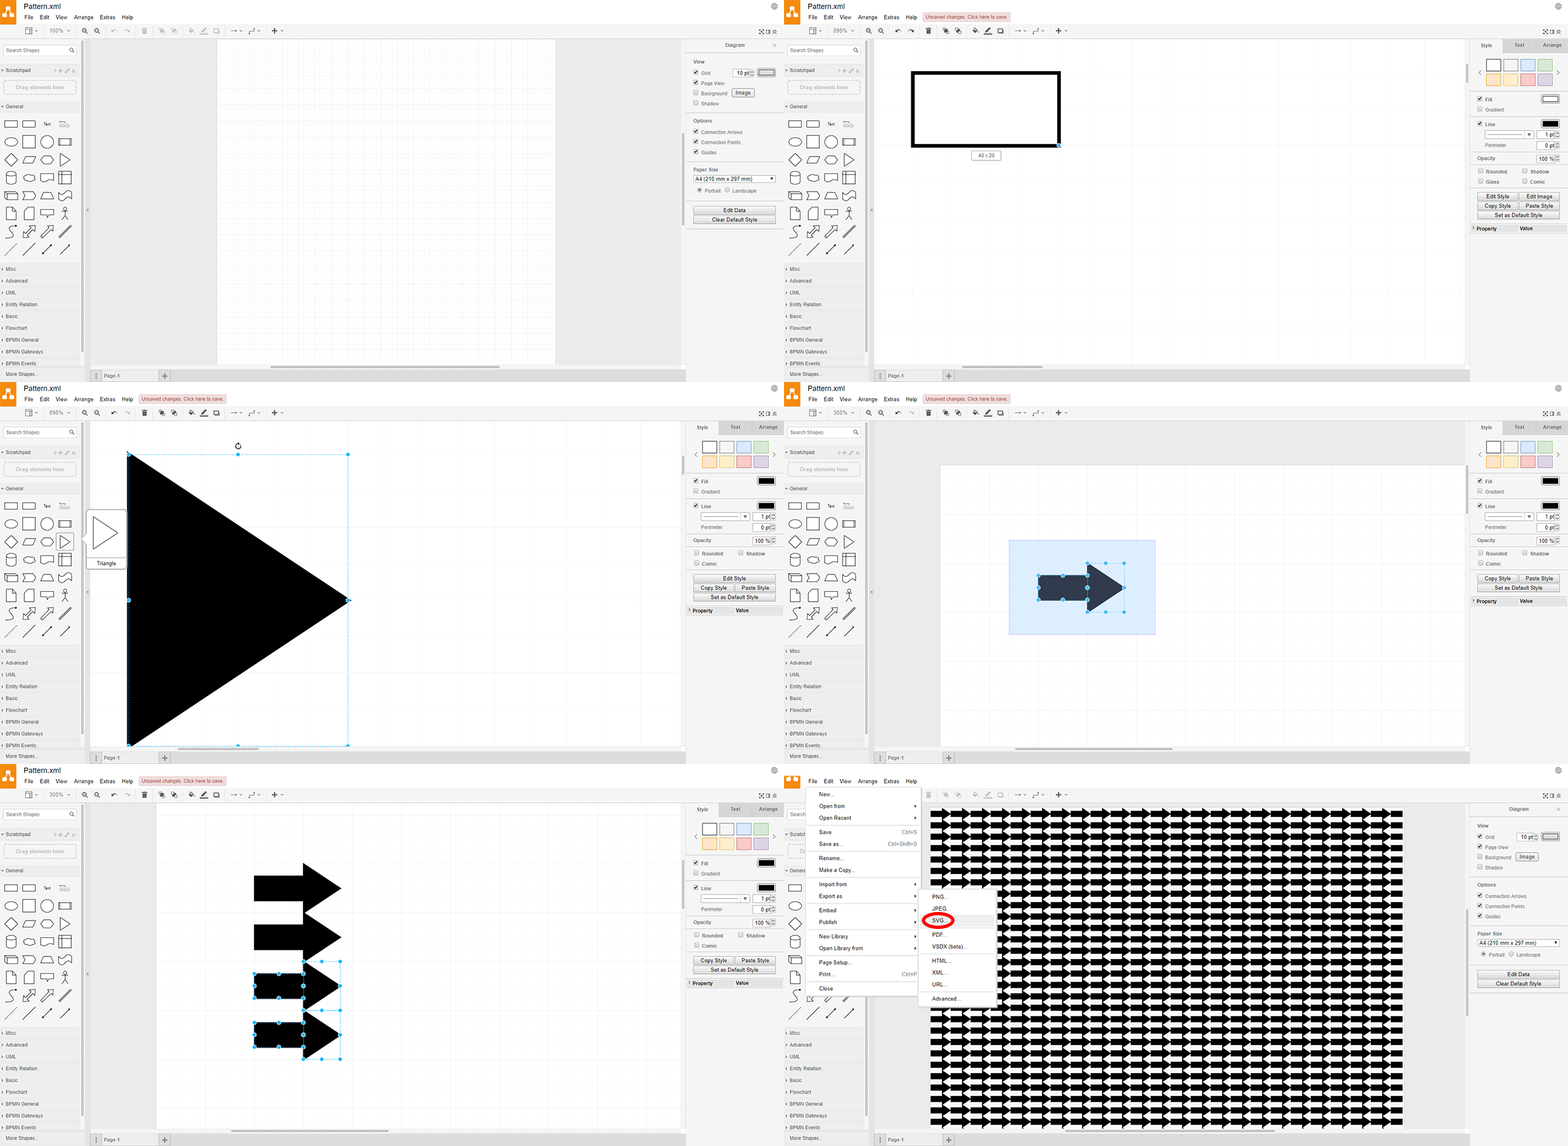
How the pattern was created
Inkscape
Inkscape is a vector graphics editor, which has a lot of features. You can do the same as on draw.io and way more. I have never worked with it before, but it looks like it has a lot of functions. This is good but it might take a little while to get known to it. I want to show how to trace a color image with Inkscape. Tracing is the name for the process to go from a raster image to a vector image. Inkscape already has six different options to trace a raster image built in. I will only show the option which works with colors. Threshold, edge detection and more can be found in this tutorial.
After you loaded an image you can select Trace Bitmap in the menu Path. Select the options color to get a traced image with colors and in the scans option, you can set how many colors the traced image shall have.
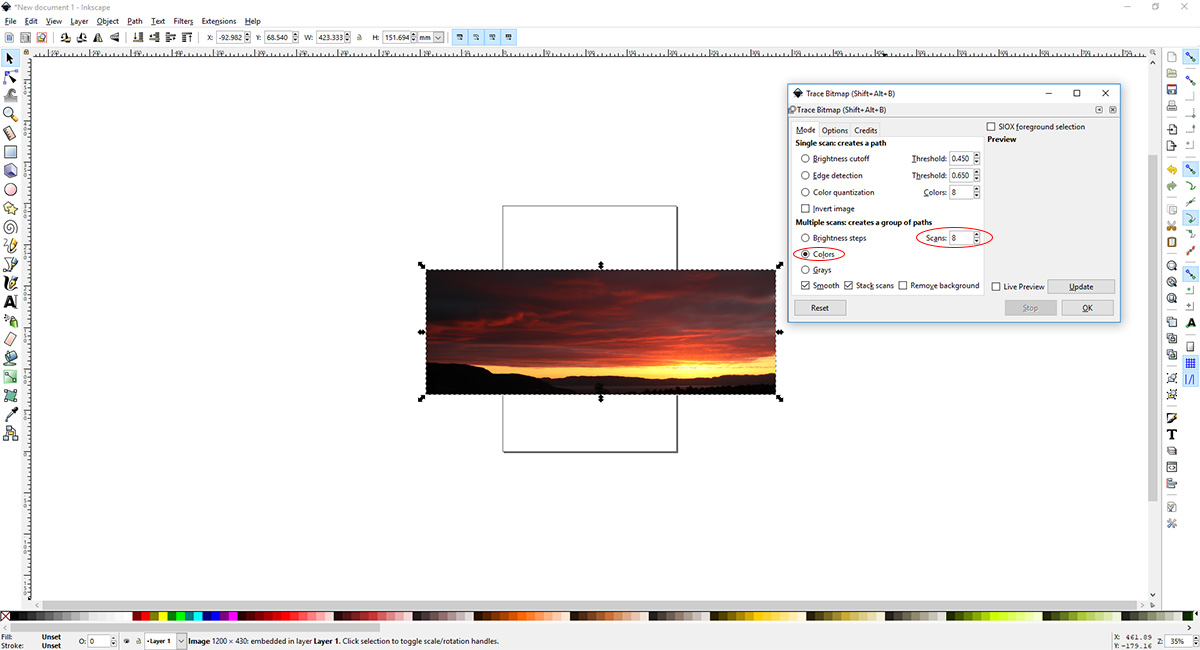
The Trace Bitmap Menu in Inkscape
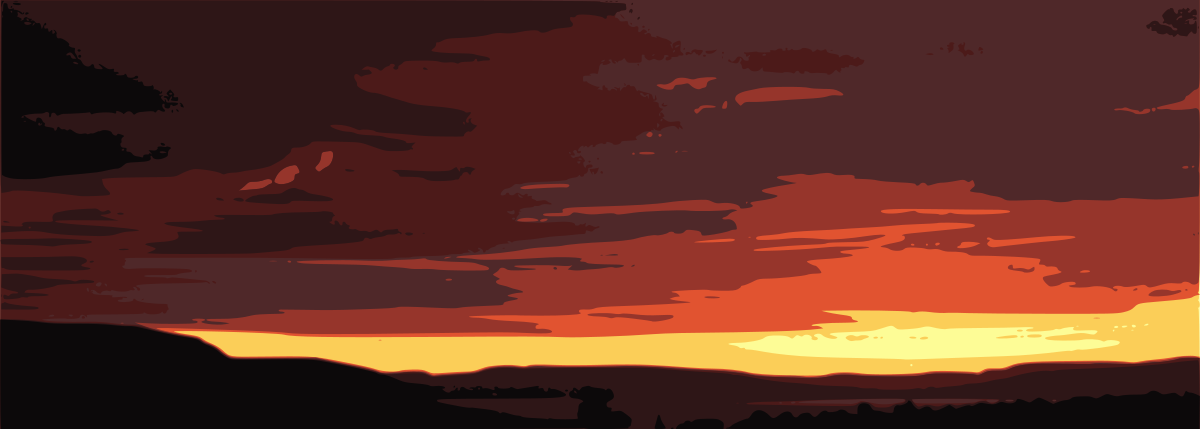
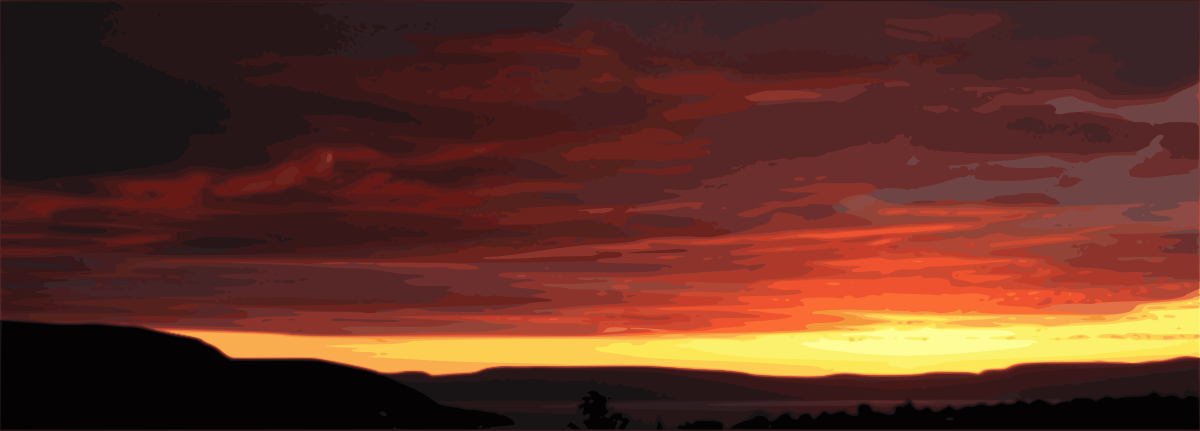
Here you can see the original image as well as traced ones with 8 and 32 colors:
3D Design
Subtractive vs. additive manufacturing
Let's first start with the different ways to manufacture the designed objects in reality. Because this also has implications on the design, as not every possible 3d model can be printed or milled. In subtractive manufacturing, you get your object by removing material from e.g. a block. Examples are (cnc) milling or plasma cutting. In additive manufacturing, you add material to something or just add layers of material without having anything before. All kinds of 3d printing are examples (metal printing, handheld printing).

Milling / CNC machine and 3d printer
An advantage of subtractive manufacturing is that it is possible to use it on most materials, so you can also make parts from steel when needed. Also, the material can be a solid block, which makes it more resistant than objects that are created by adding layer to layer. The downside is that creating intricate and nested objects can be impossible.
One advantage of additive manufacturing is that it is normally cheaper than subtractive manufacturing. And by using layering nested objects can be built without problems. But on the other hand, it is also a lot slower. And sometimes the part needs to be finished by hand because the surface is rough/stepped or you needed to print support structures that need to be removed.
OpenSCAD
OpenSCAD is a software for creating solid 3D CAD objects. The special thing compared to traditional CAD program is that you have no normal tools to create primitives. You need to create objects using a programming language. This is pretty cool because you can automize all kinds of tasks. You can create your objects with parameters and when you are finished you can just change everything with those parameters.
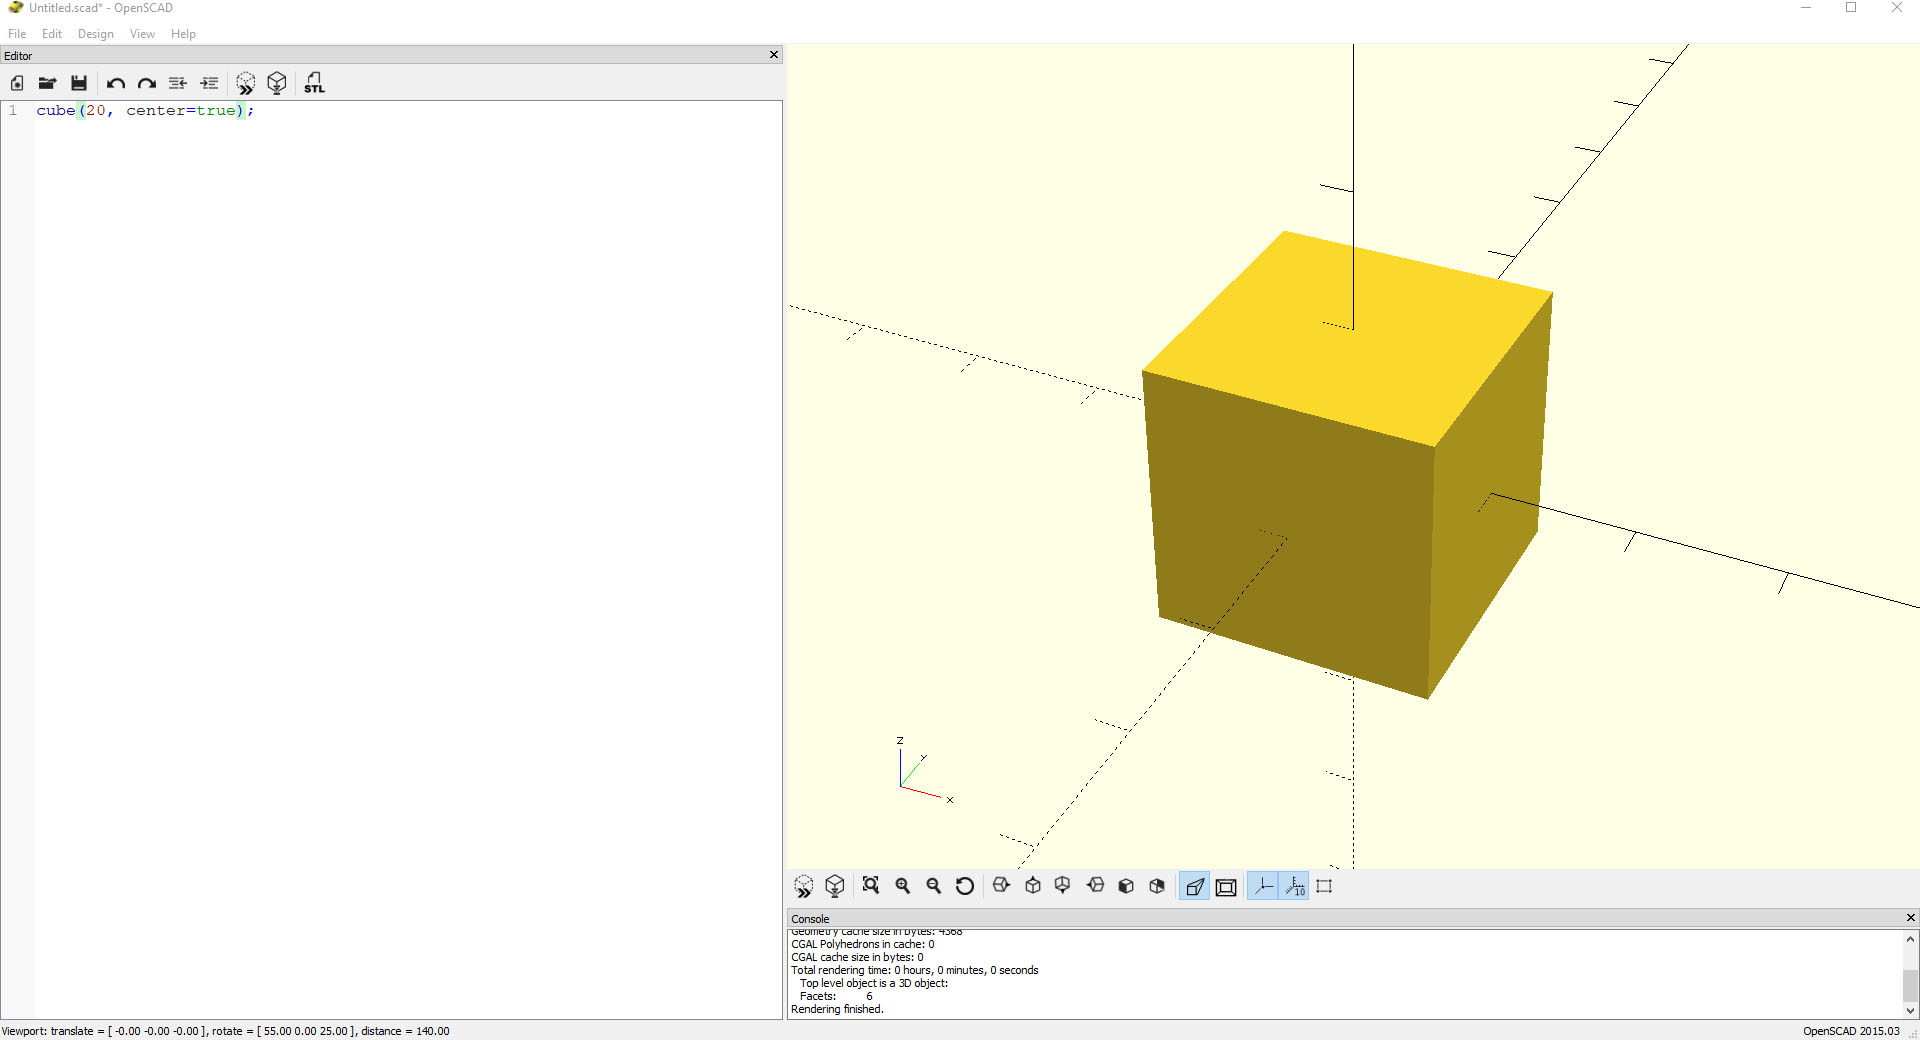
The basic openSCAD interface
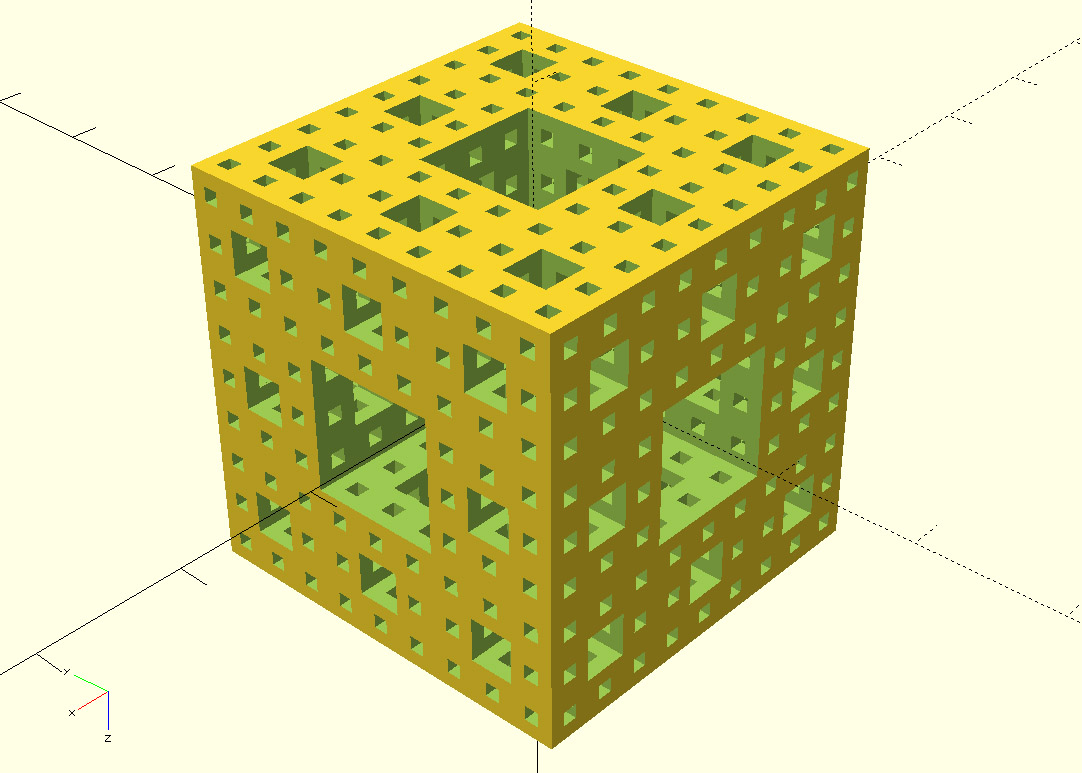
I went to create the Menger sponge because I like fractals and thought that would be a nice example to get impressive results with quite easy code. I just started playing around with the program to get to know how to use the functions, and therefore I found all the information on the OpenSCAD CheatSheet. This is a super helpful resource because you have all the information you need on the hand. The only functions I needed are:
cube(size, center=true);
union(){...};
intersect(){...};
transform([x,y,z]){...};
The cube function creates a cube around the origin, the transform function will move all the structure in the curly bracket in the given directions. Union will create one mesh from all the ones in brackets and intersect will remove all further meshes from the first one in brackets.
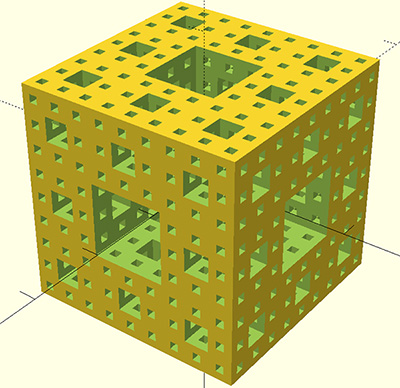
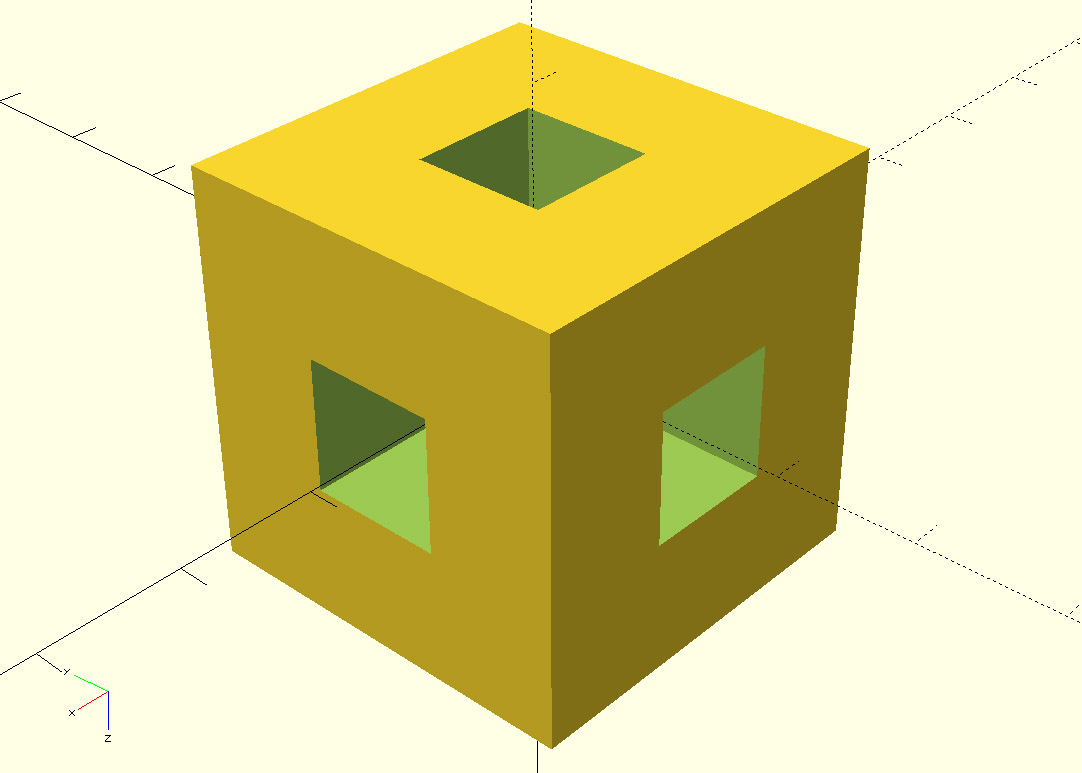
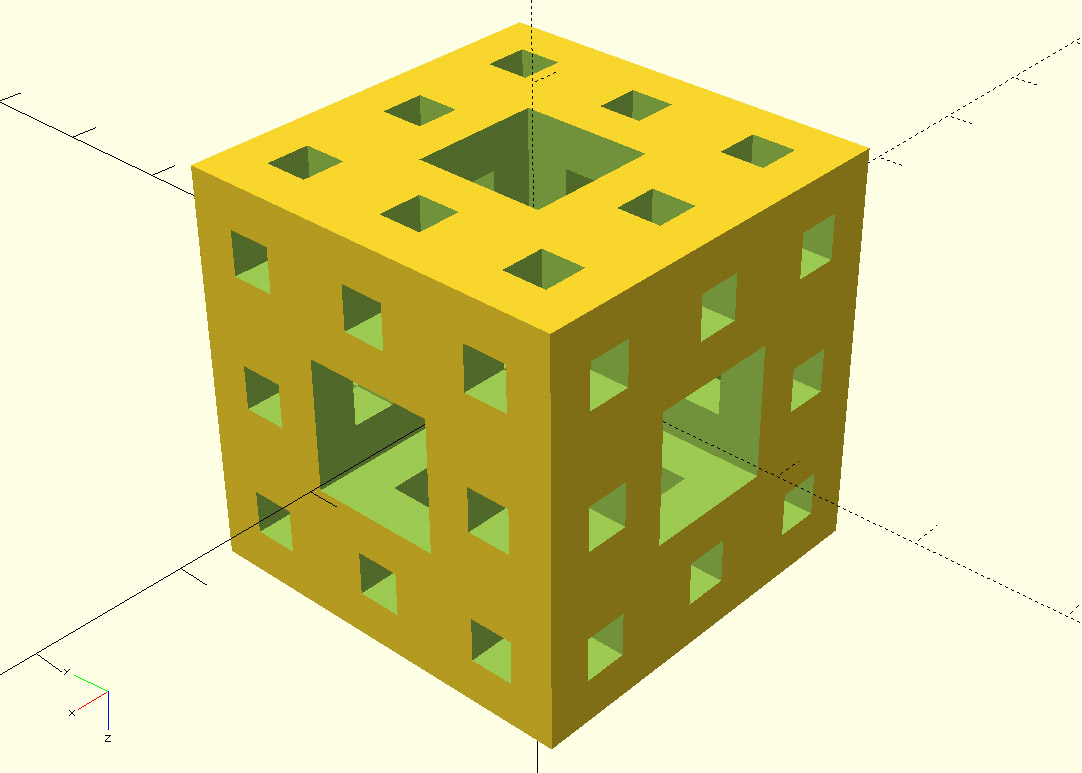
The Menger sponge
I came up with a code that creates a "negative" Menger sponge so that it can be intersected with a normal cube. The code therefore just calls itself iteratively from each position 27 times for all the new positions in the cube.
module menger_schwamm_neg(iter, x, y, z, w) {
    union() {
        translate([x,y,z]){
            cube([w/3, w/3, w*1.1], center=true);
            cube([w/3, w*1.1, w/3], center=true);
            cube([w*1.1, w/3, w/3], center=true);
        }
        if (iter > 1) {
            for (xo = [-w/3:w/3:w/3]) {
                for (yo = [-w/3:w/3:w/3]) {
                    for (zo = [-w/3:w/3:w/3]) {
                        menger_schwamm_neg(iter-1, x+xo, y+yo, z+zo, w/3);
}   }   }   }   }   }

module menger_schwamm(iter, x, y, z, w) {
    difference() {
        translate([x, y, z]) cube(w, center=true);
        menger_schwamm_neg(iter, x, y, z, w);
    }
}

menger_schwamm(1, 0, 0, 0, 3);
One disadvantage is that I either made a mistake or already found the boundaries of processing geometry with it. When I tried to preview the mesh with iteration depth 4 the program is crashing. When I try to render it already takes forever at depth 3. But it already looks nice.
Other software
In later weeks I also used Fusion 360 and Maya as 3D modeling programs. I used Maya while the 3D scanning assignment to simplify the mesh. I used Fusion during the machining assignment to create the model and the molding assignment to create the negative for the mold. I would say that Maya is the best to work with already finished 3D models where you only have a model (obj/stl) file. I like OpenSCAD, but more complex things are really hard to write. So it's nice for smaller models with only repeating details. Fusion is my allround favorite and especially powerful when it comes to technical stuff. As an easy CAD program it is good to start with but at the same time really powerful. Also to model technical things really fast.
Files
Here you can download the files created during this week:
2D Design Files:
draw.io xml file
draw.io svg file
original sunset image
sunset image traced
3D Design files:
The OpenSCAD file
The exported stl file with iteration depth 2
The exported stl file with iteration depth 3


