Computer-Controlled Machining
Week 8
In this week there is one individual assignment and one group assignment. The group assignment is to test runout, alignment, speeds, feeds, and toolpaths for our machine. The individual assignment is to make something BIG.
Group Assignment
We have not finished the group project. The documentation will be on our
group website. But we also took part in the group project in FabLab Reykjavík
Designing something BIG
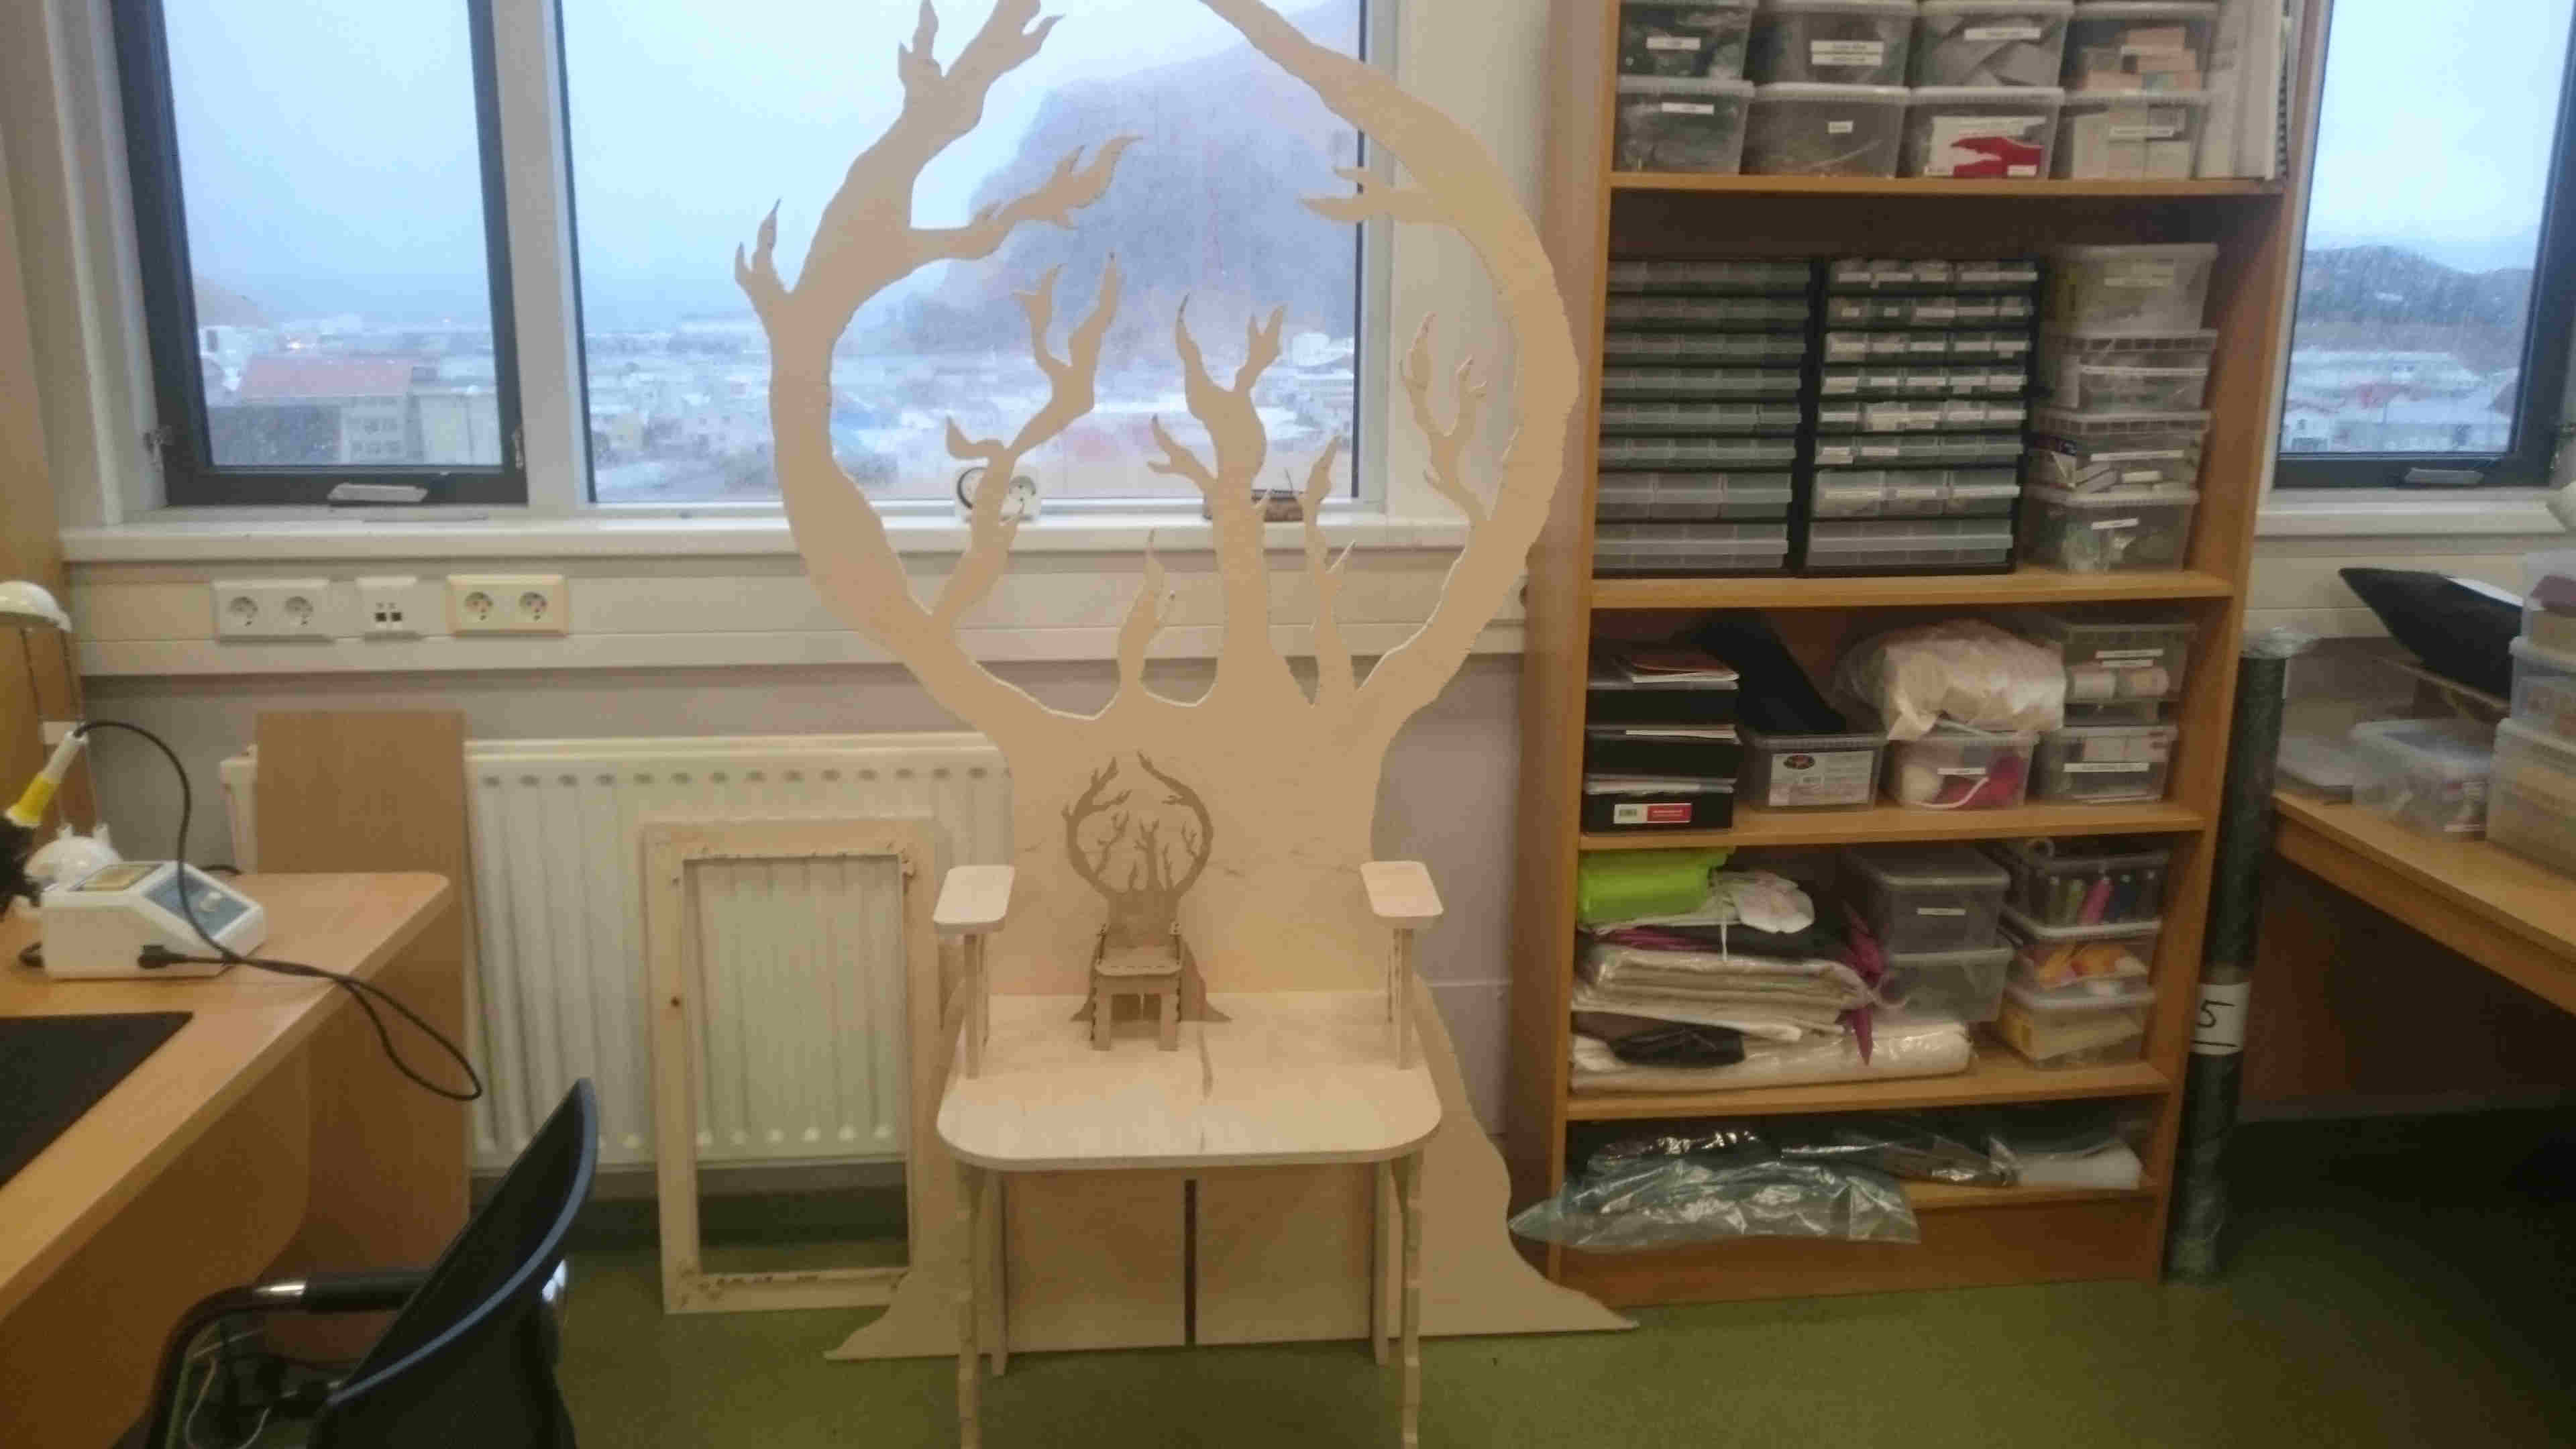
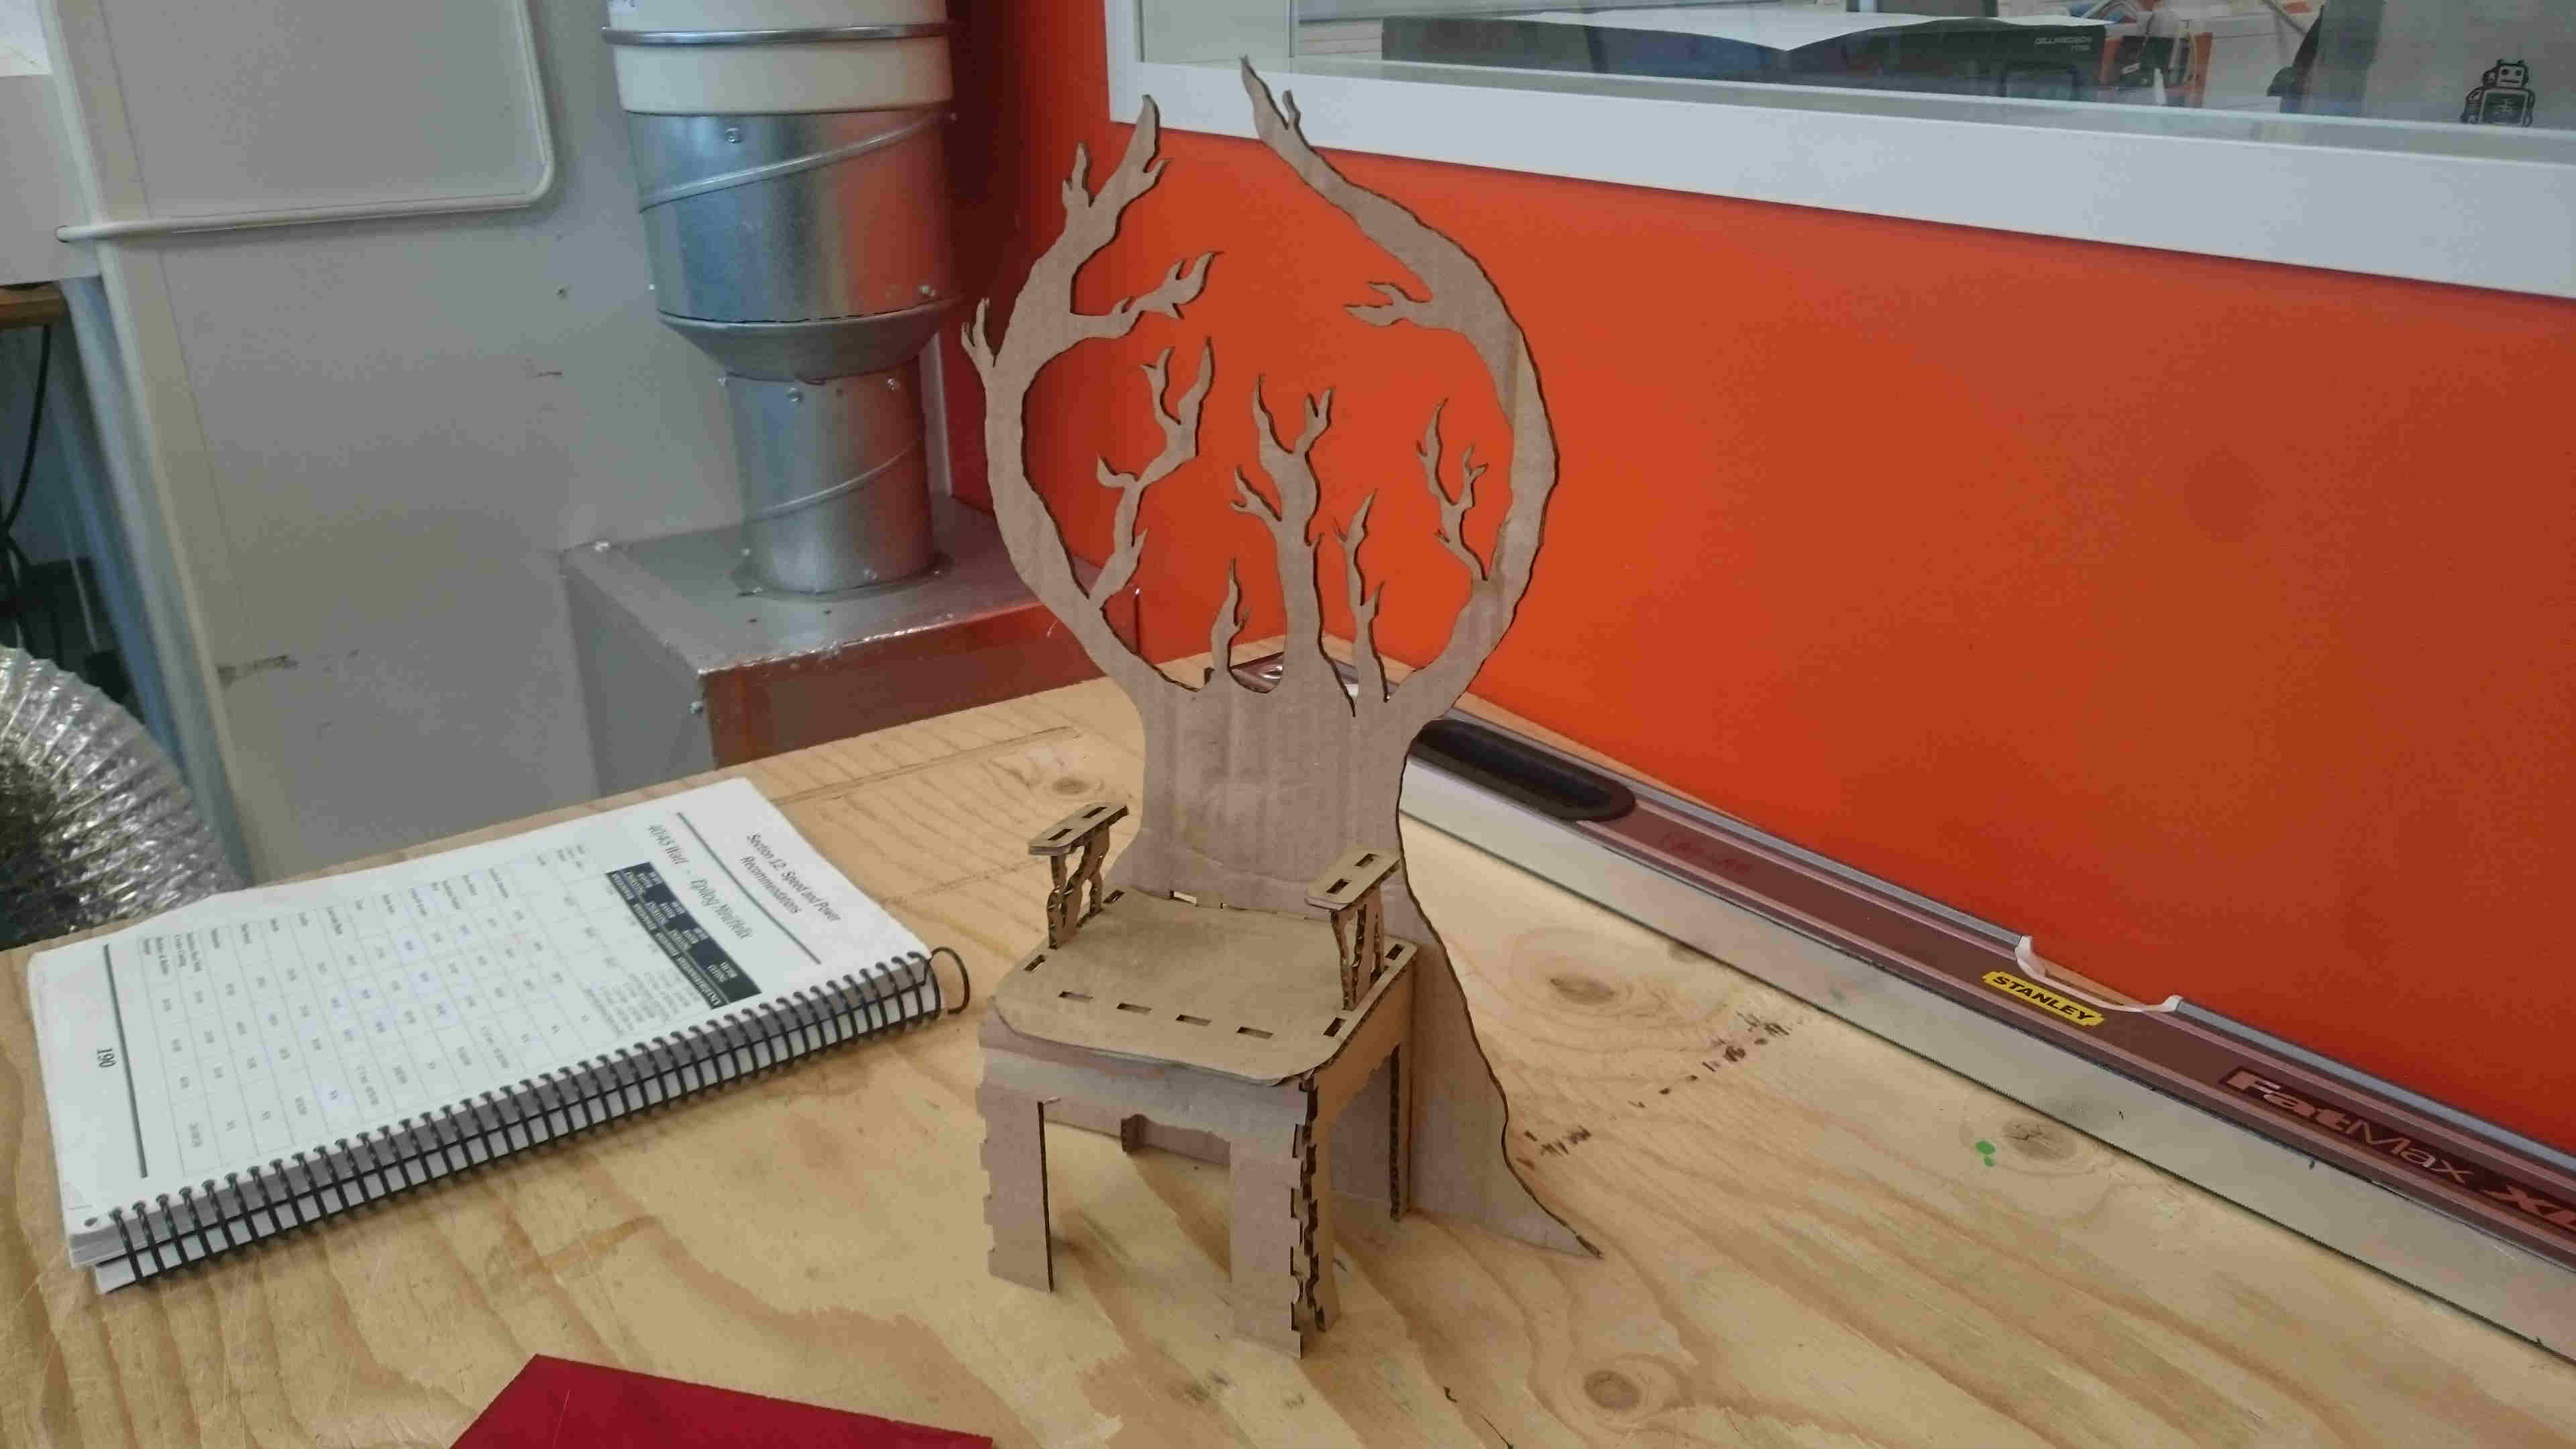
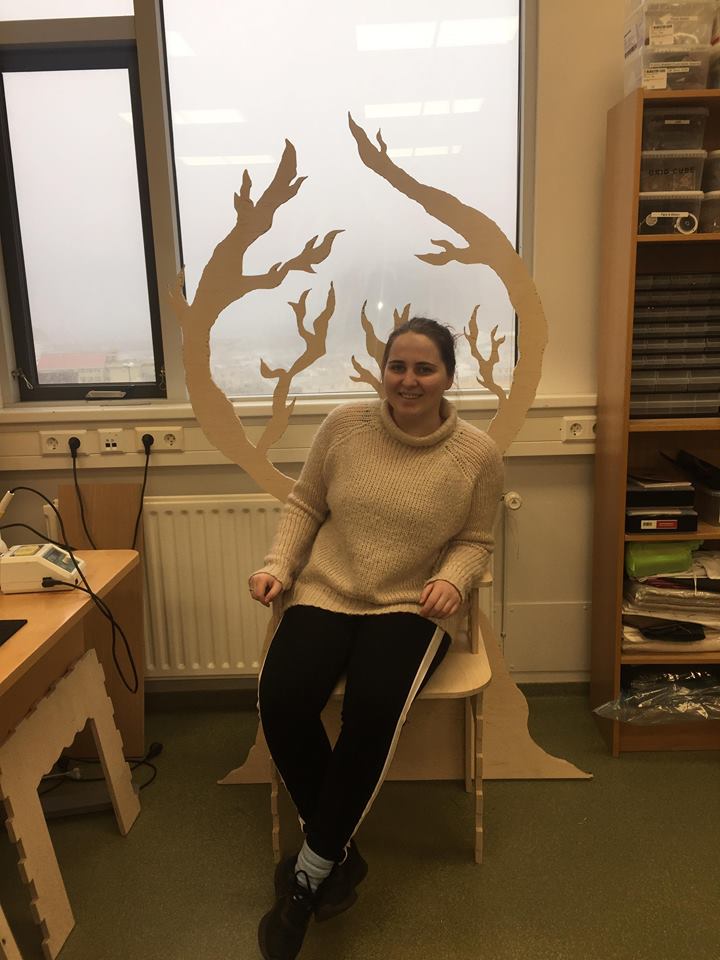
Making something big opens up endless possibilities but I decided to make a chair that I can use to demonstrate my final project on.
In this week we went to Sauðárkrókur for a boot camp from Thursday to Sunday so this weeks project was made in two days.
I made a few sketches and thought a lot about how it would be best to make the chair so it withstands strain.
After a lot of time thinking, measuring other chairs and drawing on paper I finally got to drawing it on the computer.
The computer was not having a good day and for 8 hours I was just going through hell and in my anger and dispare I did not take many photos.
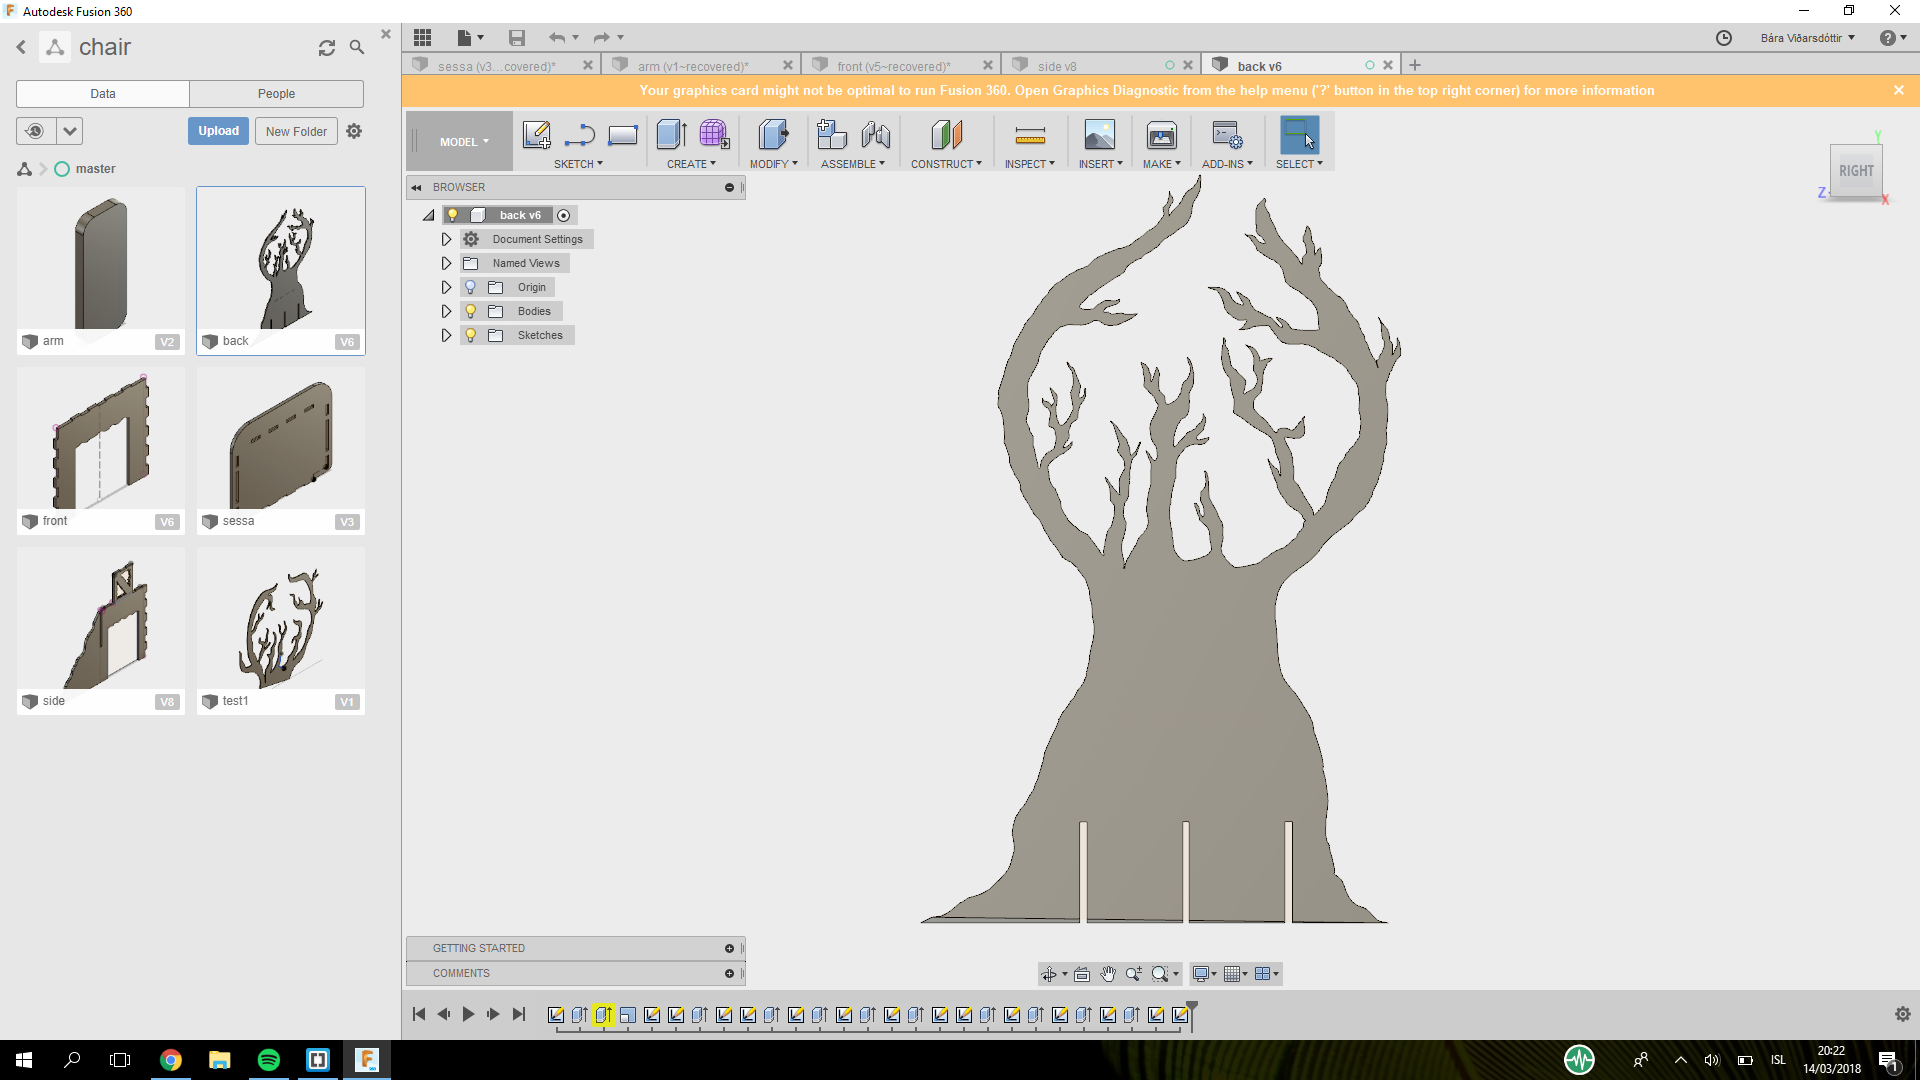
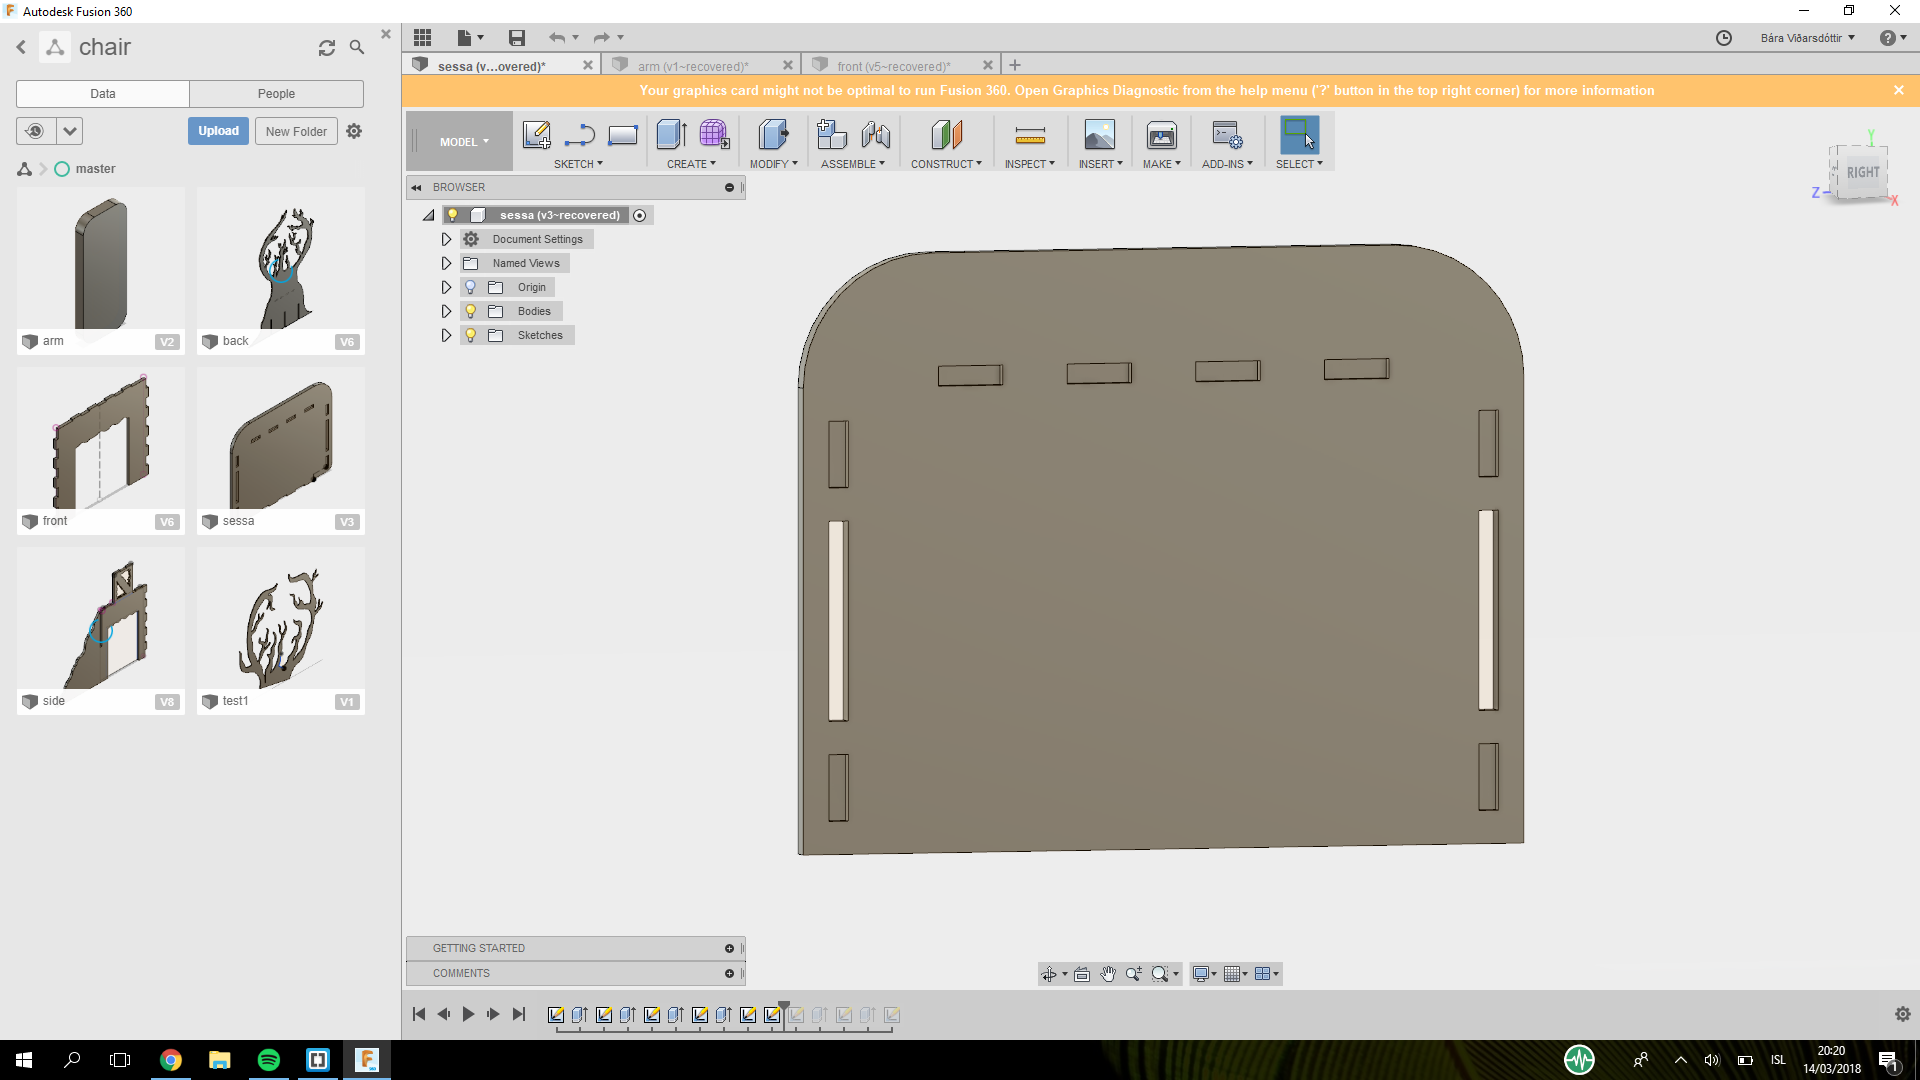
Because the back of the design is complicated I had to spend a lot of time figuring out how to make the back in the best way.
First I tried making it in Krita but all the measures were wrong.
Then I tried drawing it on paper and scanning it in.
Then I was going to do trace bitmap in Inkscape but the file was a PDF so it was not possible.
Then I tried changing it from PDF to jpg but for some reason that was not working.
Then I decided to have the pdf file open and drew over it in inkscape using the Wacom touchpad.
Then I wanted to move it from Inkscape to Fusion. In Sauðárkrókur Jón told me that saving it as an DXF and importing then into Fusion would be better then importing it as an SVG.
When I imported it the first thing I noticed was that it would not become a body because there were a lot of holes in it.
I went around the outlines and closed all the holes I could find but I was still having problems with extruding it.
I think there was a hole somewhere in the outlines but I could not find it.
I then went back into inkscape and drew it again making sure there were no holes in the outlines.
I then imported the new drawing into fusion and it would extrude but I then realised the proportion changed when I moved it from Inkscape to Fusion.
Now comes the part where everything went wrong.
Fusion kept closing for some reason and I think I sent around ten error reports because it kept shutting down.
Then Inkscape stopped working and always when I pressed Ctrl it would close down.
I lost a lot of work when Inkscape closed and I thought my work from Fusion had also been lost.
Now being on the verge of a brake down Frosti told me to take a short brake.
I definitely needed that so I went home for an hour talked to my mother and cried a little.
Then I went back to the Fablab and was very happy when I opened Fusion and it had auto saved all of my work.
Now everything finally started working. Even tough the proportions were a little different then I originally planed I could make it work.
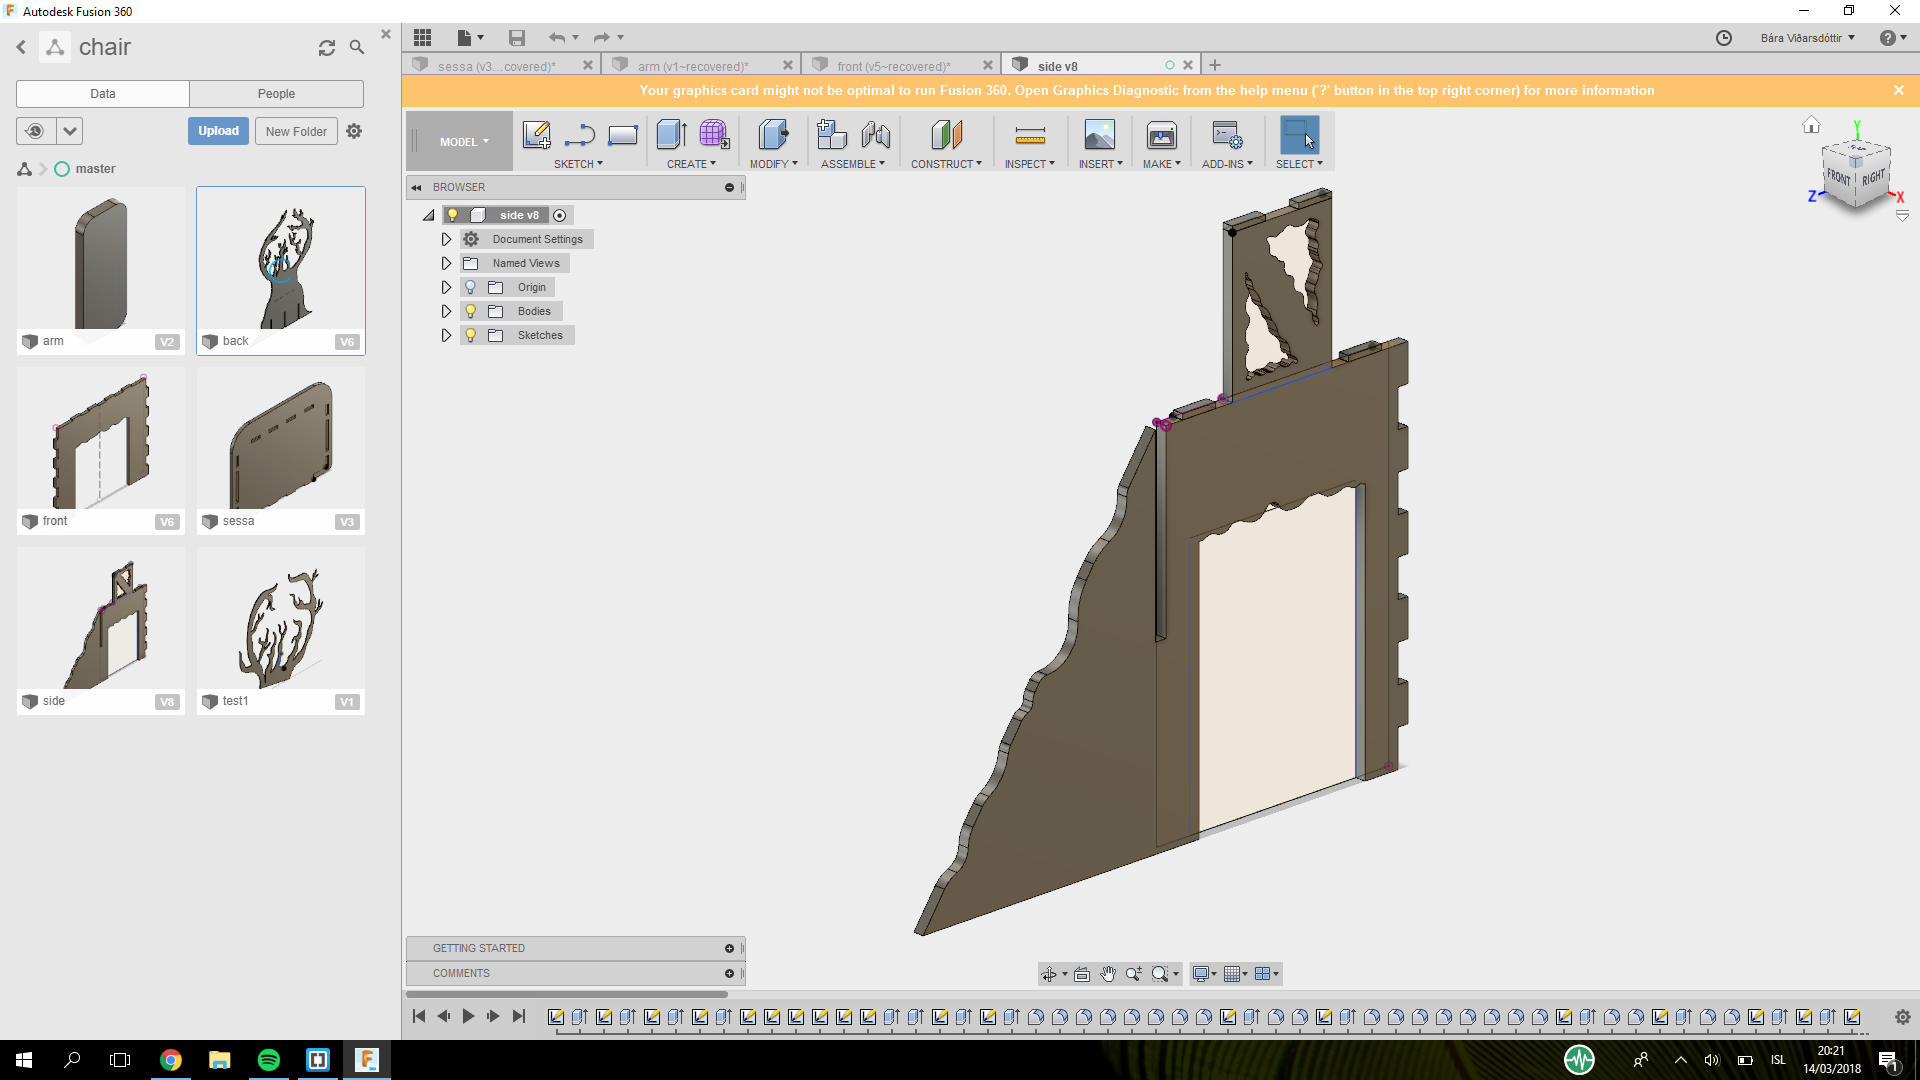
I then tried making the chair in 3D but I was having a lot of problems wrapping my head around how to make it in 3D
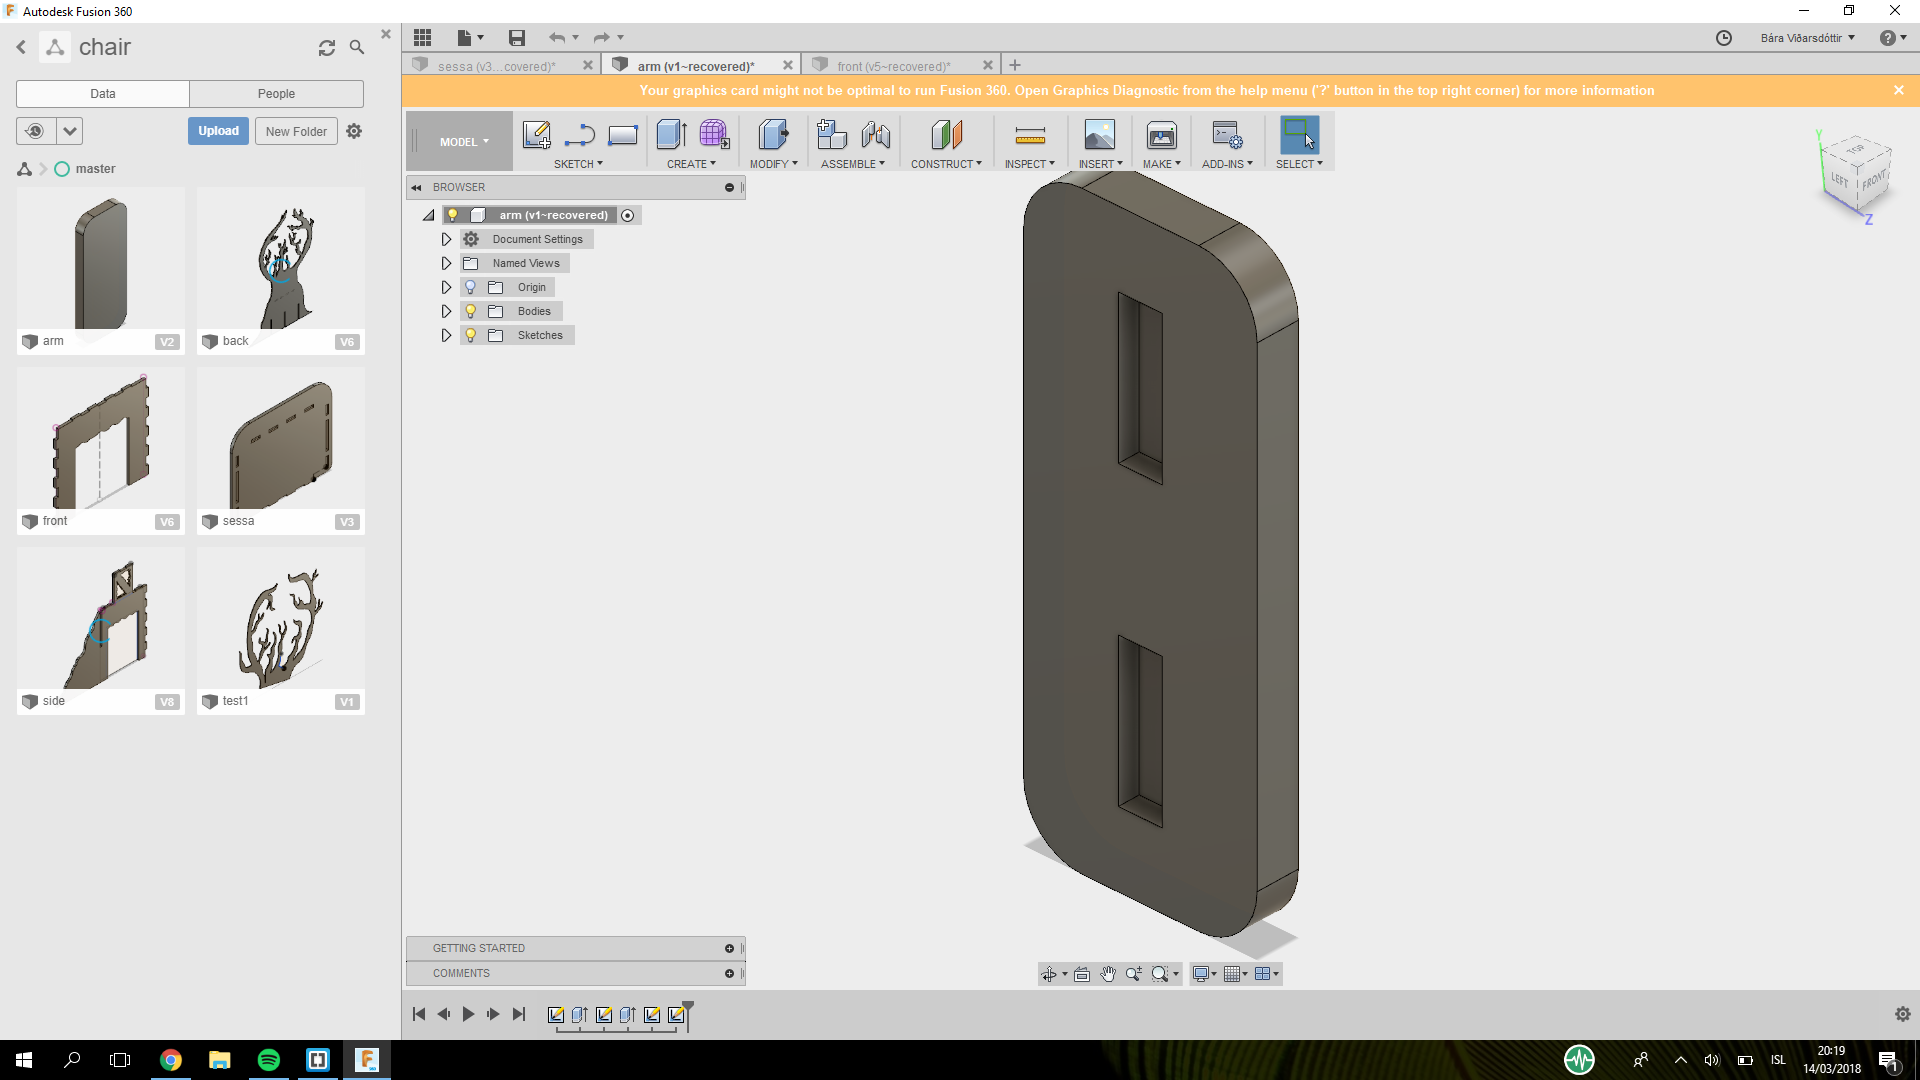
so I ended on making each part on it´s one instead of making the chair as a whole.
I made the width and the size of the press fit parametric but the rest of the design is not parametric.
After drawing all the parts Frosti made a comment about the stability so I changed the design a little bit making it slide and click.
Cardboard prototype
I made a little prototype in cardboard using the lasercutter.
When I did that I realized I had to make it only slide,
even tough I could make it work with the cardboard because it is so bendy but it would not have worked with the plywood.
I also noticed when the lasercutter was cutting it did small bits at a time when it was doing the back instead of cutting it all together.
Preparing for the Shopbot
I fixed the design and moved it over to Vcarve pro.
There I saw that the back was just a lot of little lines in stead of being a whole.
So I did join it with the join open vectors. Then I put the dog bone on all of the press fit joints.
Then I make the toolpaths. Make sure you choose the right tooth when you make the toolpath
and it can not go more then half of the length of the tooth. Also check if you are cutting the inside or the outside.
Then name the toolpath, I always put in the end of the name the size of my tooth.
Then make sure the toolpaths are in the right order, starting on the inside and ending on the outside.
Then save the toolpath. I also made little drill holes so I could put in screws.
Save the toolpath for the drill on its own and do not save it with the other toolpaths.
My design is so big it did not fit on one sheet so I had to put it on two sheets.
The Shopbot
We have the PRSalpha CNC ShopBot. Here you can see more about it. Our shopbot is 120x60x8 in size. Here is more documentation about the machine. Here is documentation about how to use the machine. And Here is documentation in Icelandic about how to use the shopbot.
Here is the manual.
Cutting in the Shopbot
I have used the Shopbot before but it was two years ago.
Frosti and Birita were busy so I was using some Icelandic instructions on how to use the Shopbot.
The instructions did mostly work but some of the instructions did not work for our Shopbot, because it has a lot of weird problems,
and it took a lot of time figuring out what to do then but in the end it did work.
So the first thing to do is put in the right tooth.
In my case Birita had just been using the Shopbot with the same tooth I was going to use so I did not have to change it.
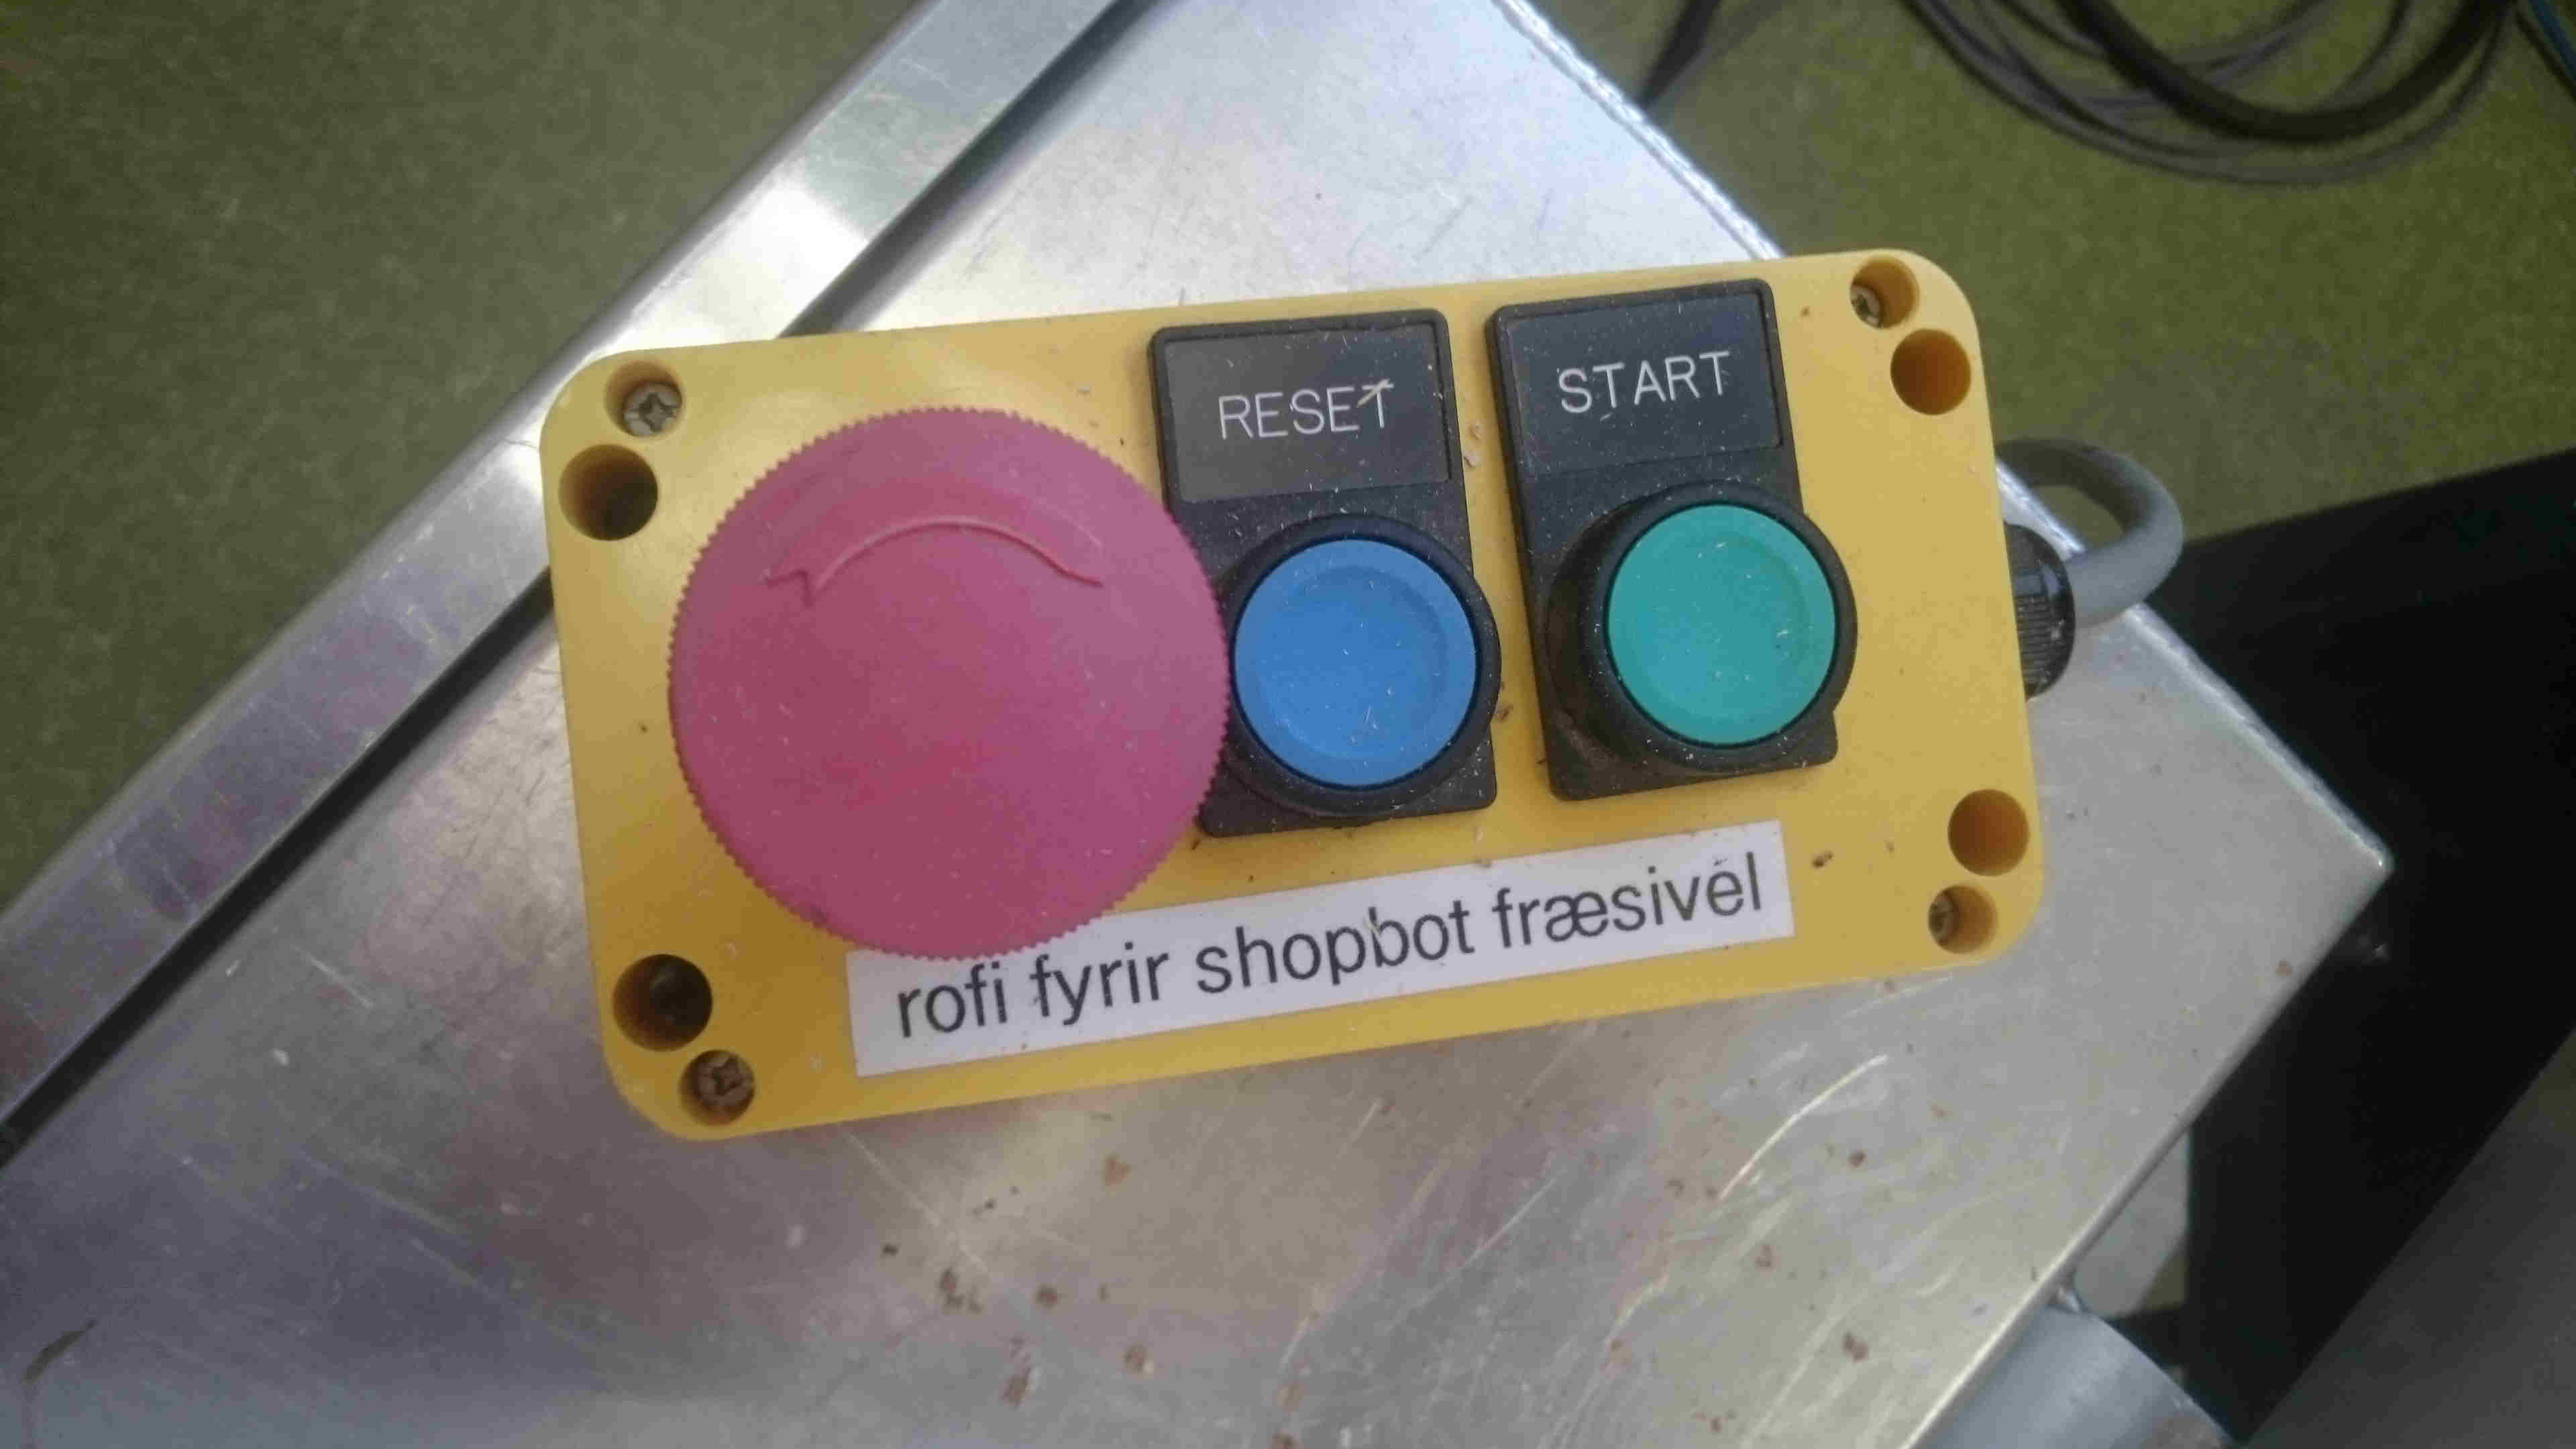
Now turn on the machine, when I do that I have press the reset button.
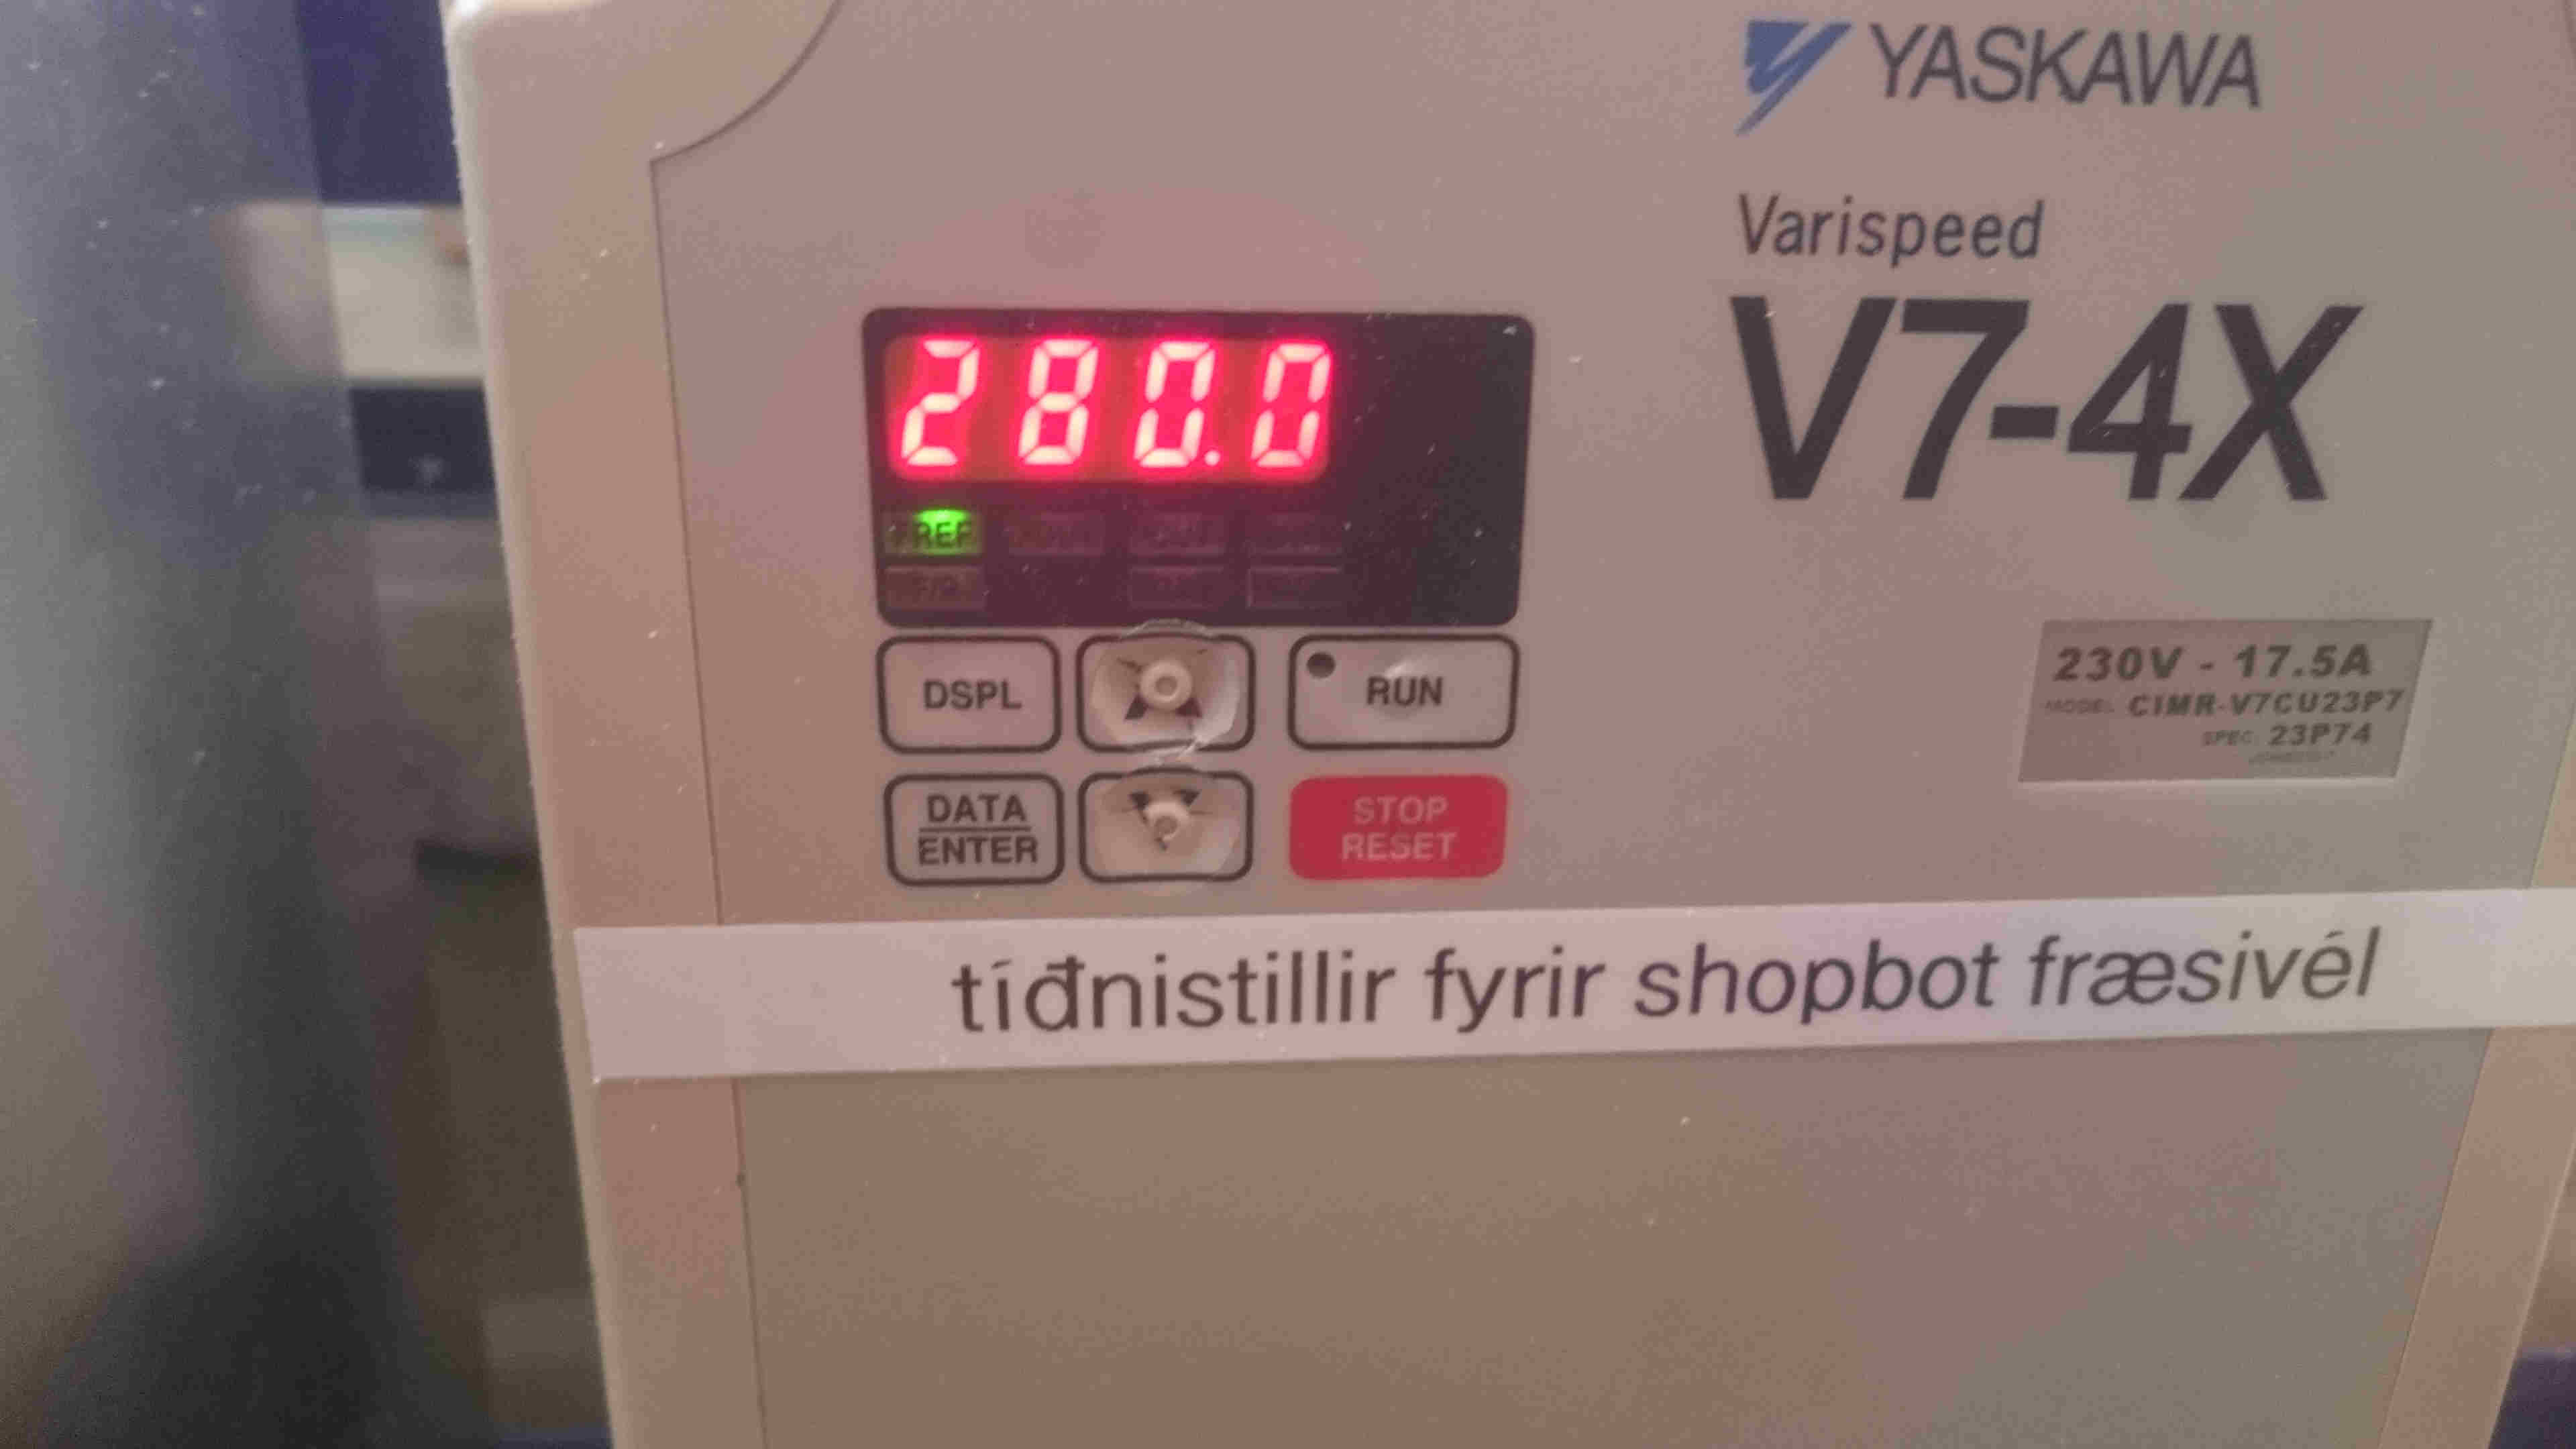
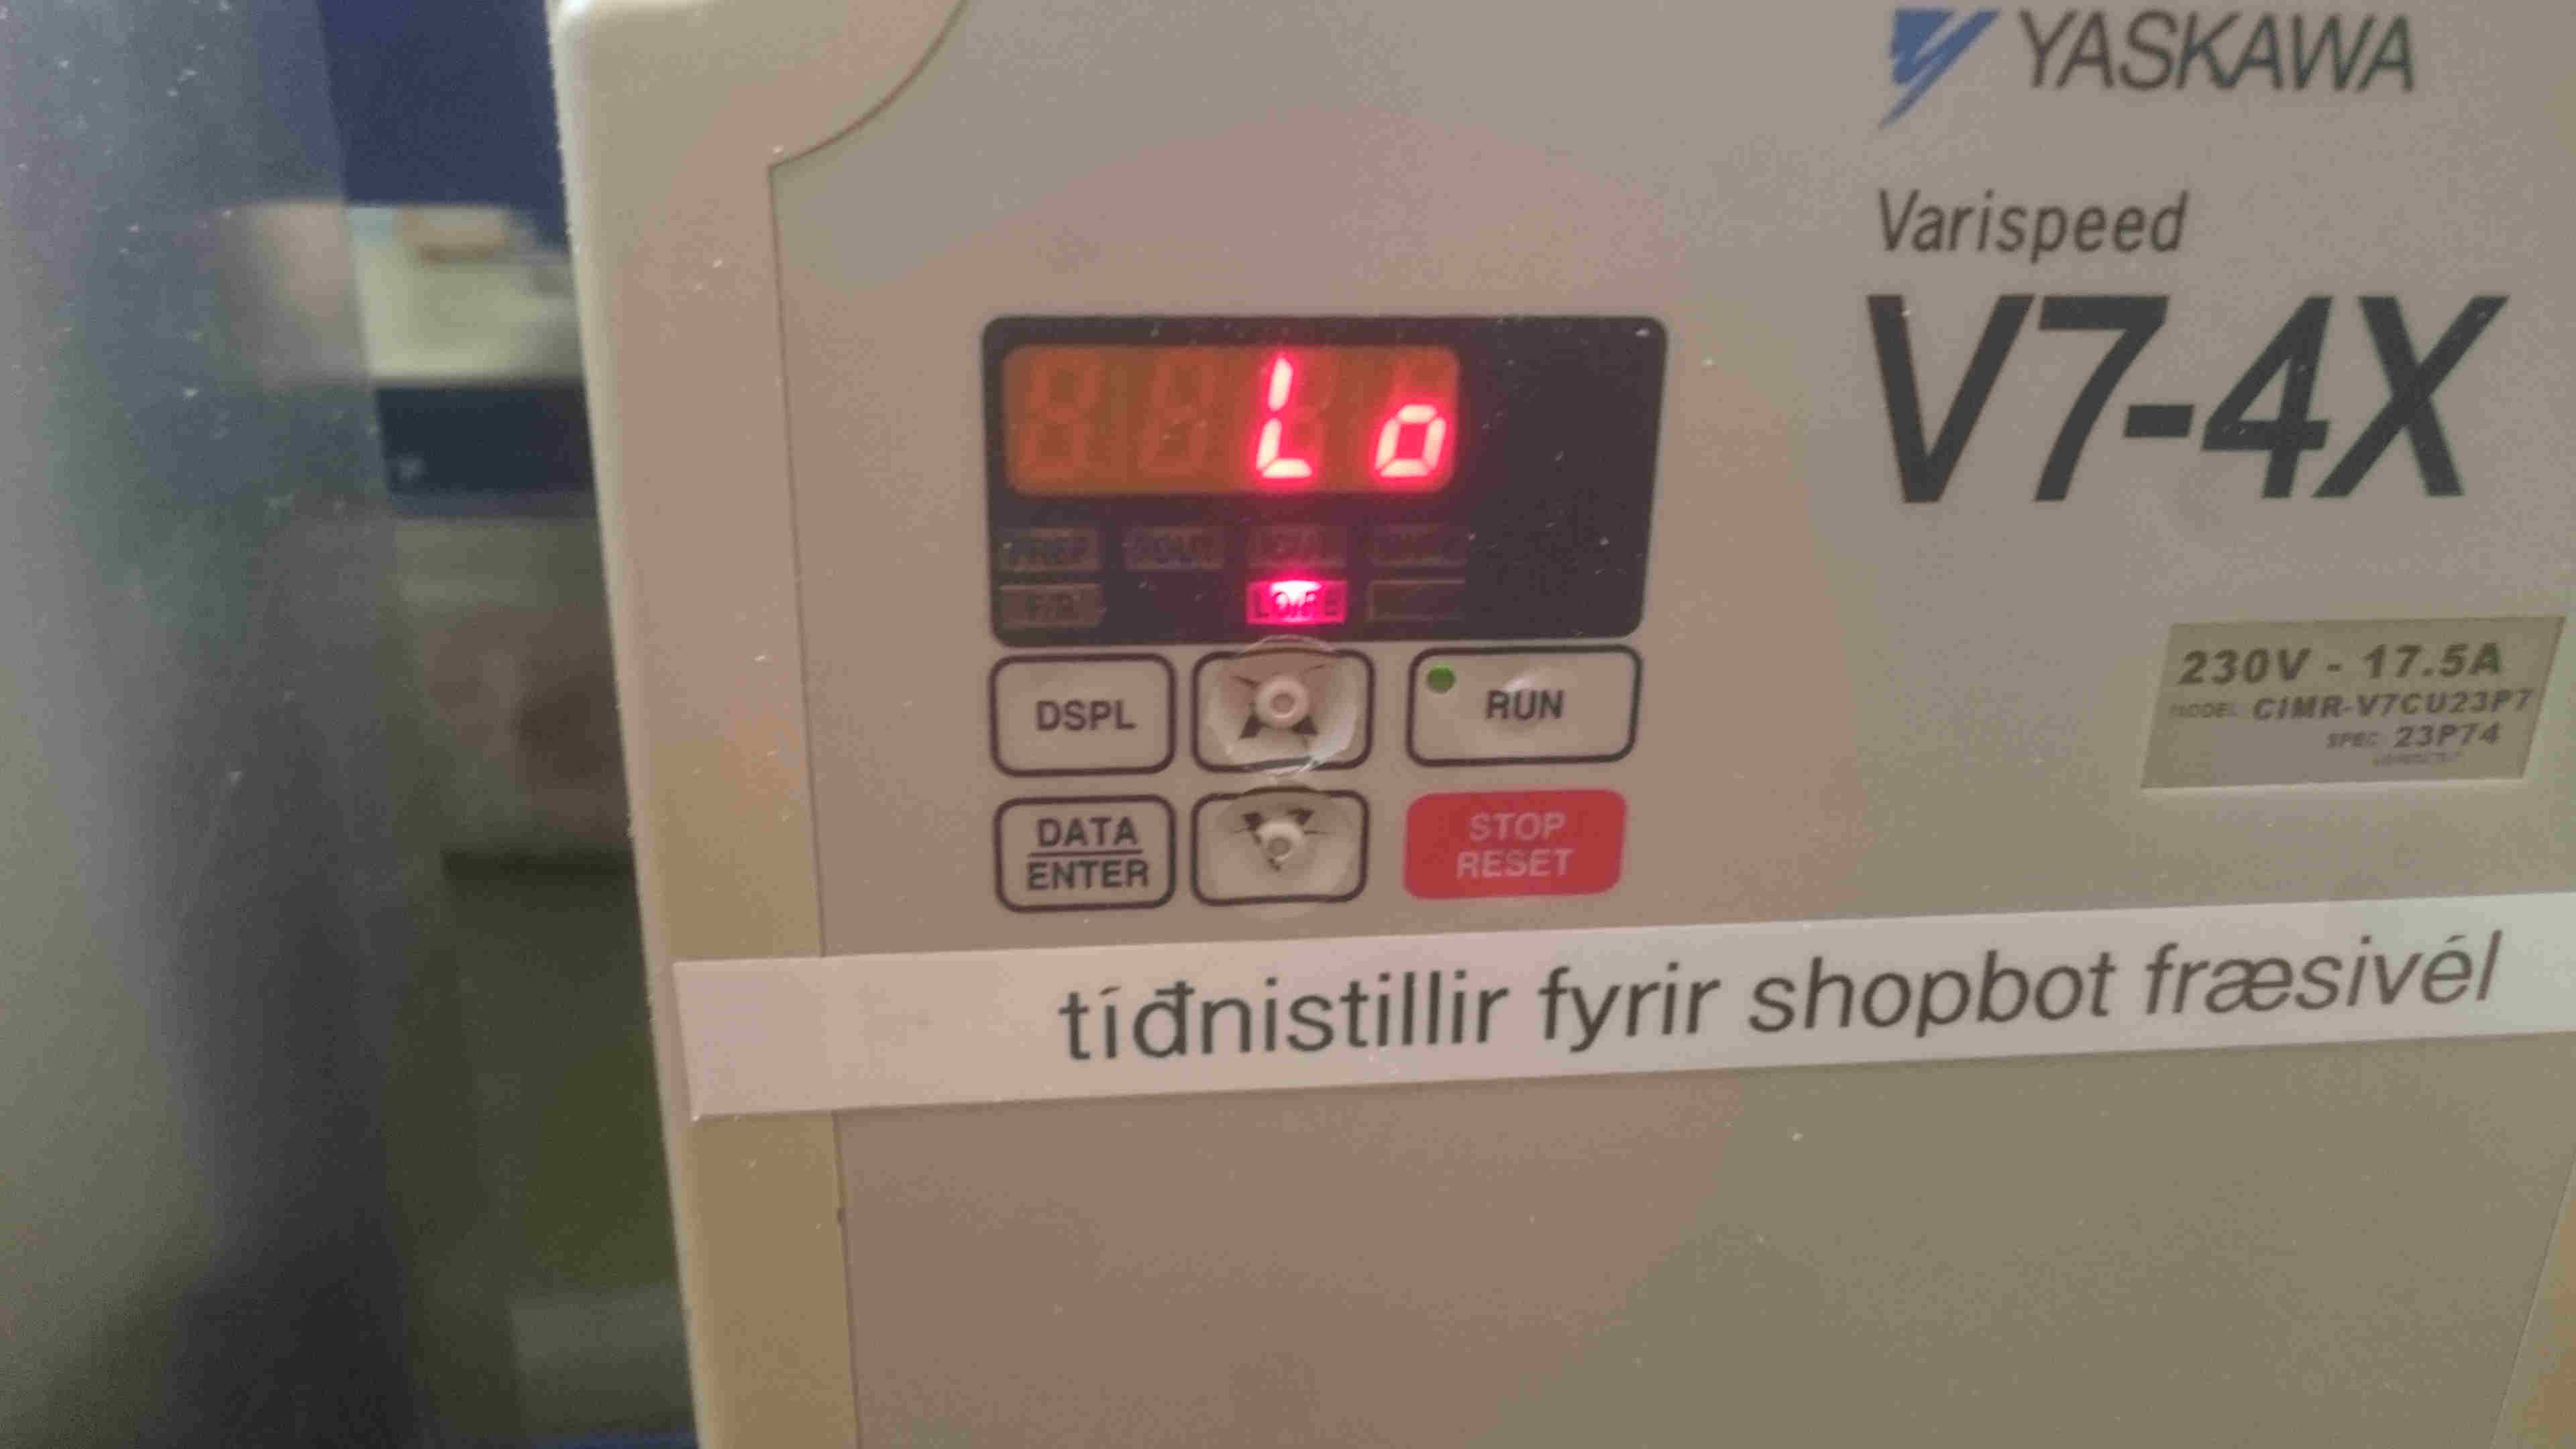
Now heat up the spindle. I have to do it manually.
Start at 140 and work your way up every three minutes making it go 20 more each time until you are at 280.
Then I moved the spindle to the end and turned the machine off. Then I put the plywood sheet and screwed it down on each end.
When we use our Shopbot we have to take it out of internet connection and turn of the antivirus software.
So I get the file and save it on the desktop and then turn of the internet connection and make sure the antivirus software is turned off.
Now on our machine I have to make it go to absolute zero and then I can zero the axes.
To move the motor you can press the yellow button or press k on the keyboard.
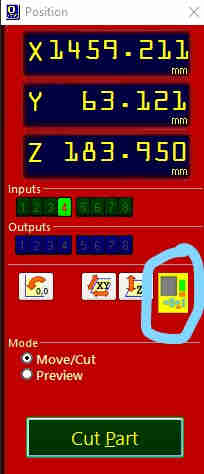
To move it slower press the fixed key and it will only move the amount you put in.
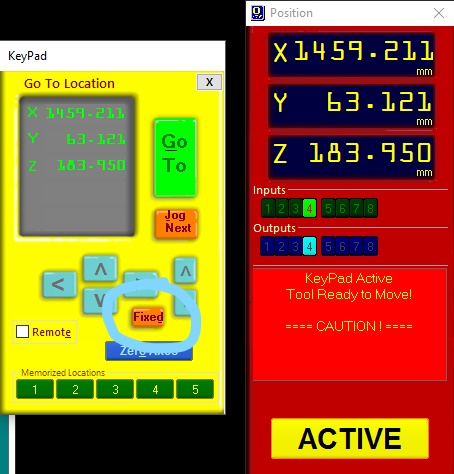
Now move it to the starting point and zero the x and y axes.

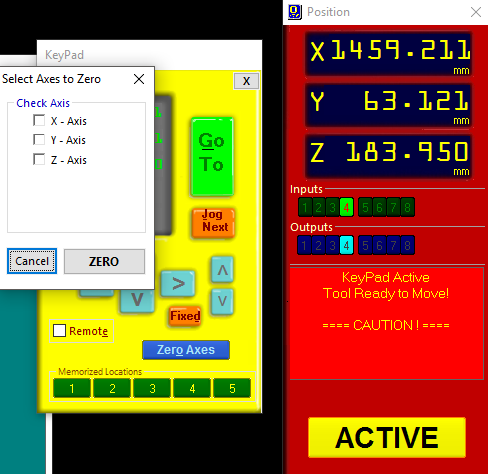
When that is done close the yellow box and zero the z axe.
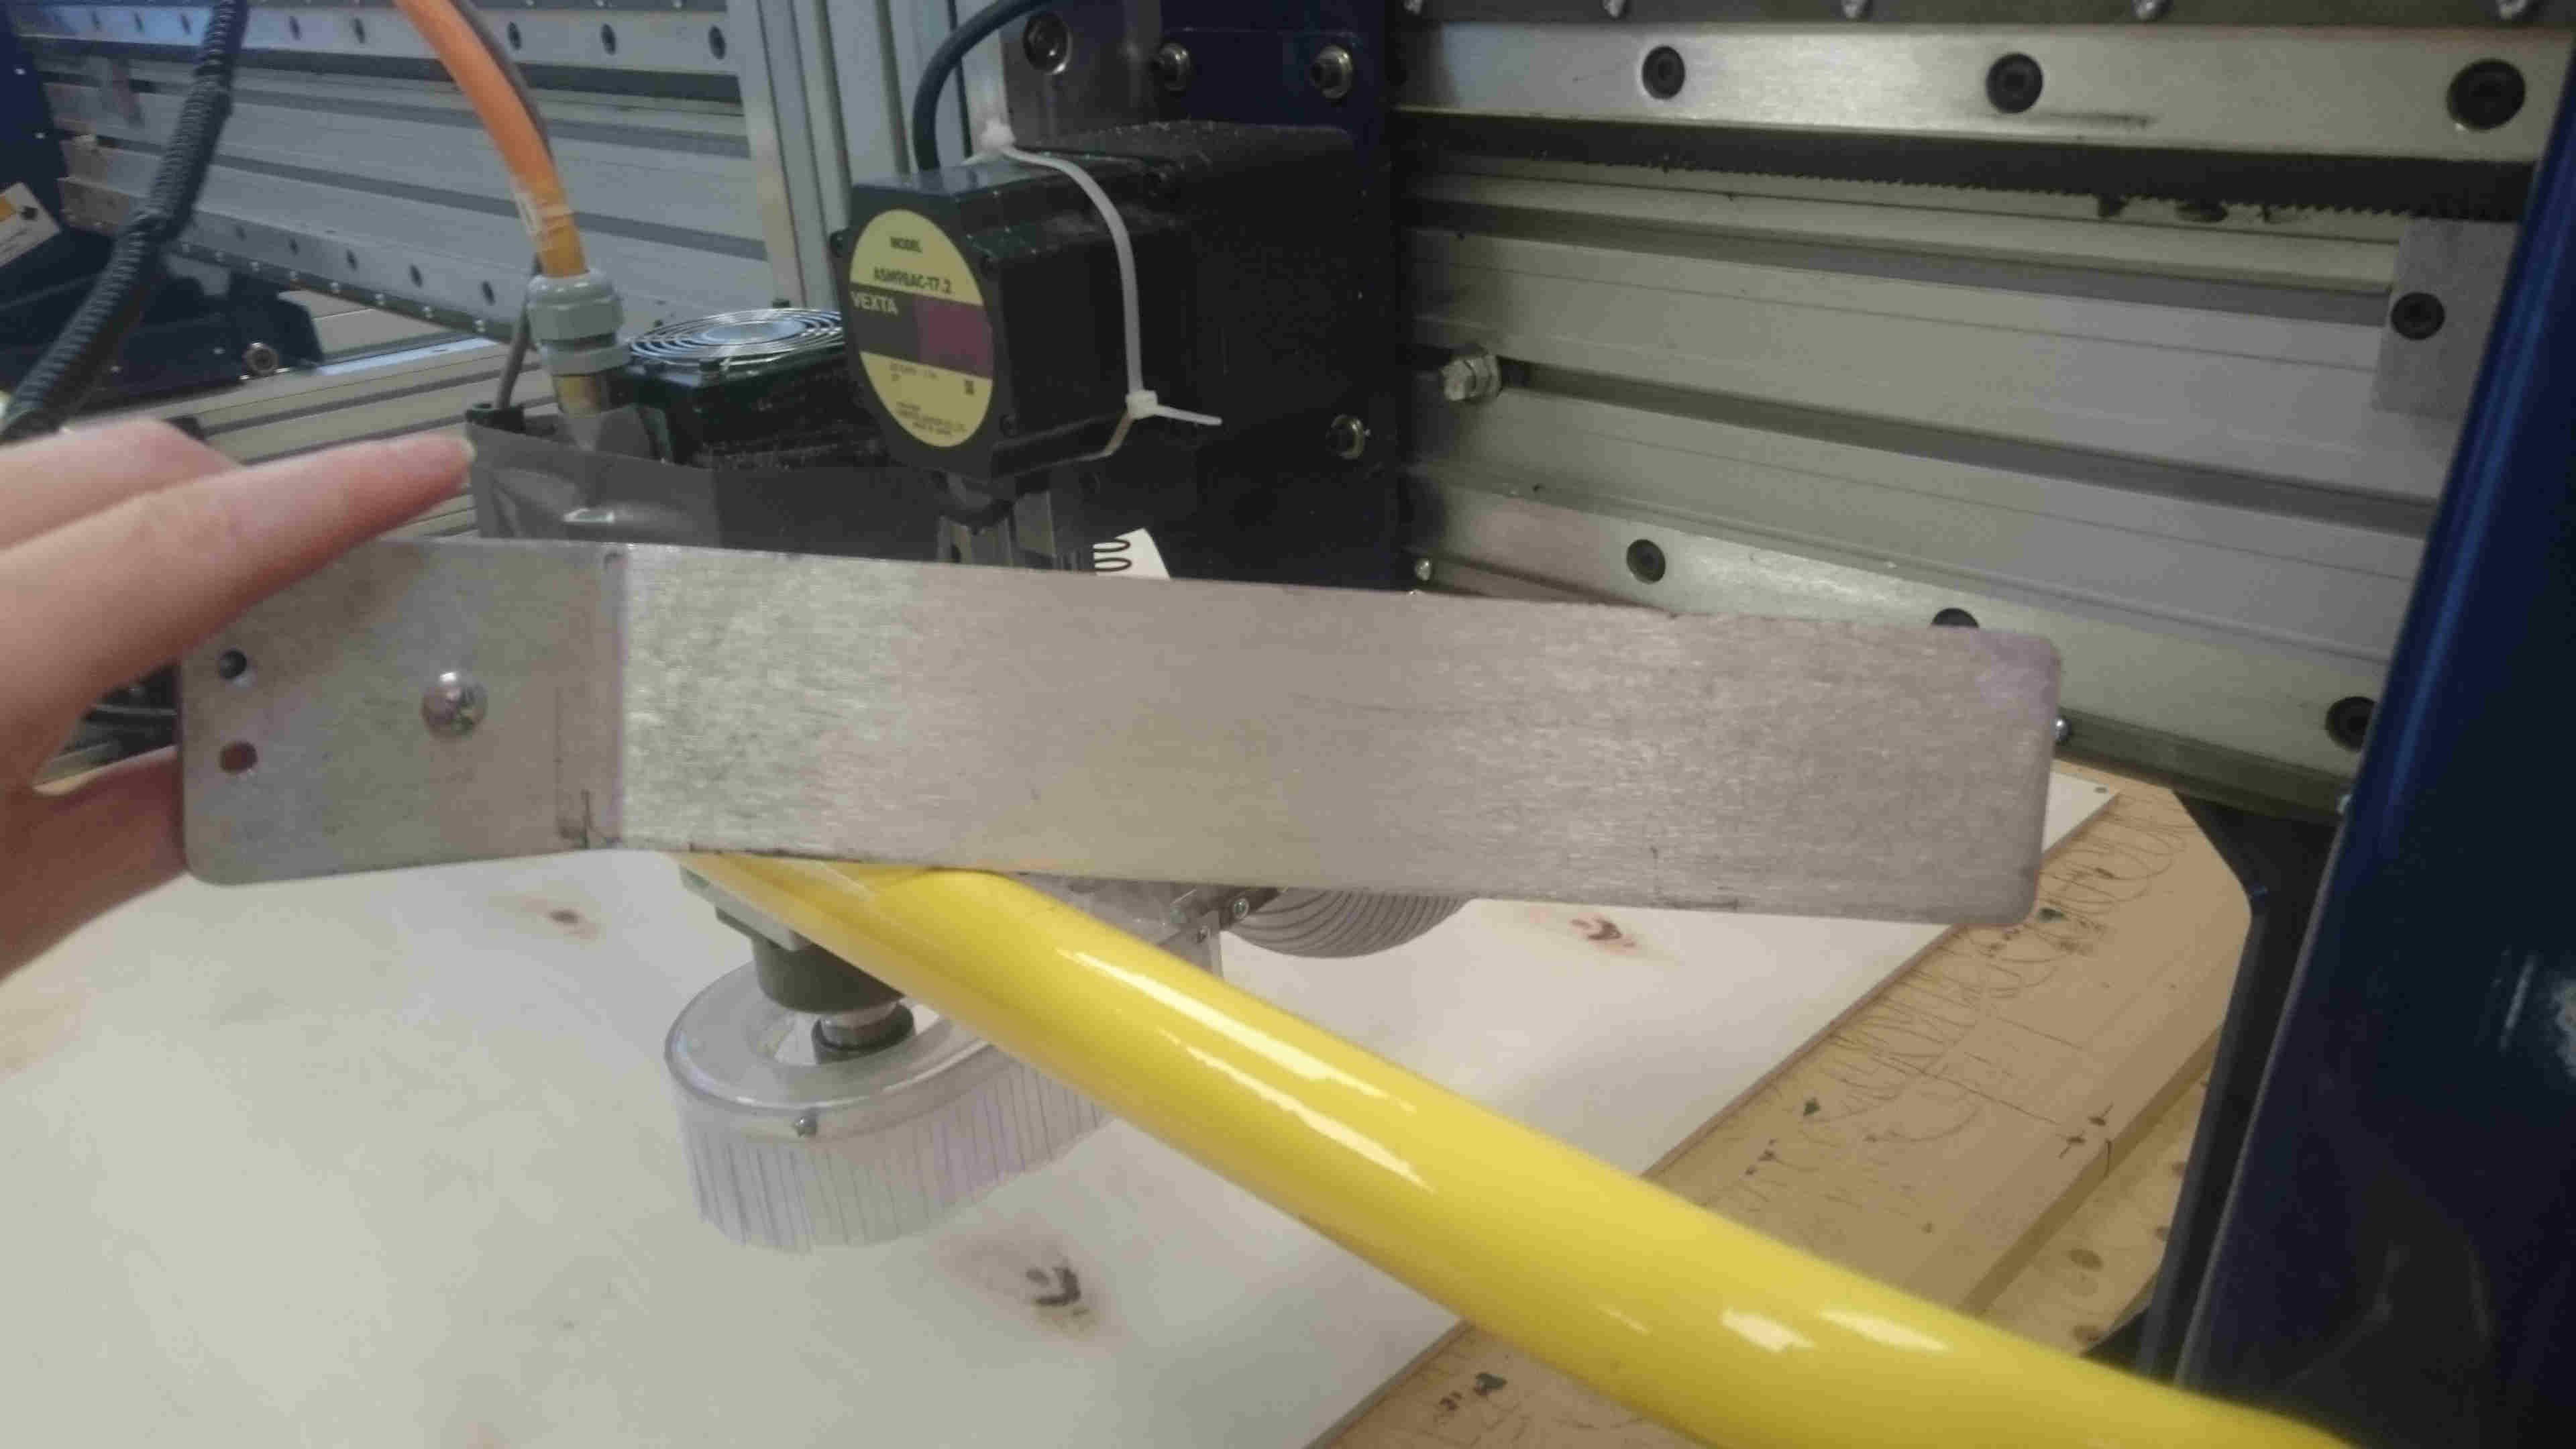
To do that take the z-plate and put it under the tooth, before you do that make it touch the tooth to check the connection.
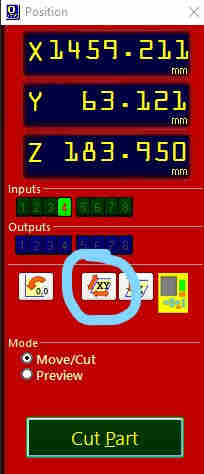
It is connected if the green number five is lid up. You can both zero on top of the sheet you are using or on top of the Shopbot table.
I do it at the top of the sheet. Then press this button (insert photo). Now all the axes should be zeroed.

Now I am ready to cut.
With our Shopbot I have to turn on the spindle it does not work to press the start button.
Press the cut button and choose the file you want to cut.
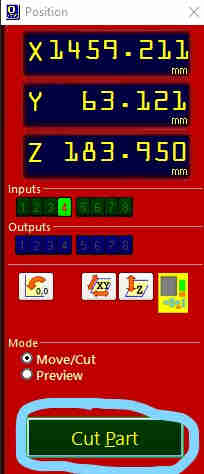
I first want to do the drill holes,
so I choose that and press okay, now it tells you to press start but we do not do that just make sure the spindle is turning and press okay.
Now it should drill the holes. After that is done I move the motor away and turn of the machine.
I now drill screws into the drill holes. When that is done I turn on the machine (remember to press reset)
and I make it go to the zero I made (Do not zero the axes again). Then press cut and choose the file you want to cut.
Make sure the spindle is turning and press okay. Now it should work but our computer is weird
and sometimes stopes for no reason so I have to look at the line it is on so I will not have to start all over again.
So this time this actually happened to me so to start again move the tooth to your zero and go into file – start from line.
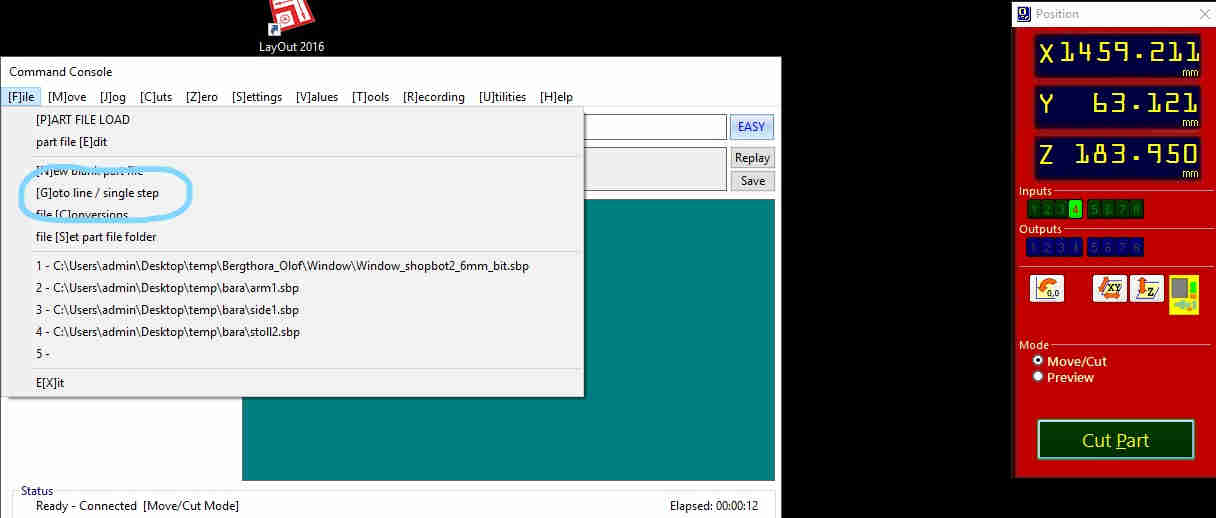
There a window will pop up where you put in the line you want to start from. First you go to line and then run it.
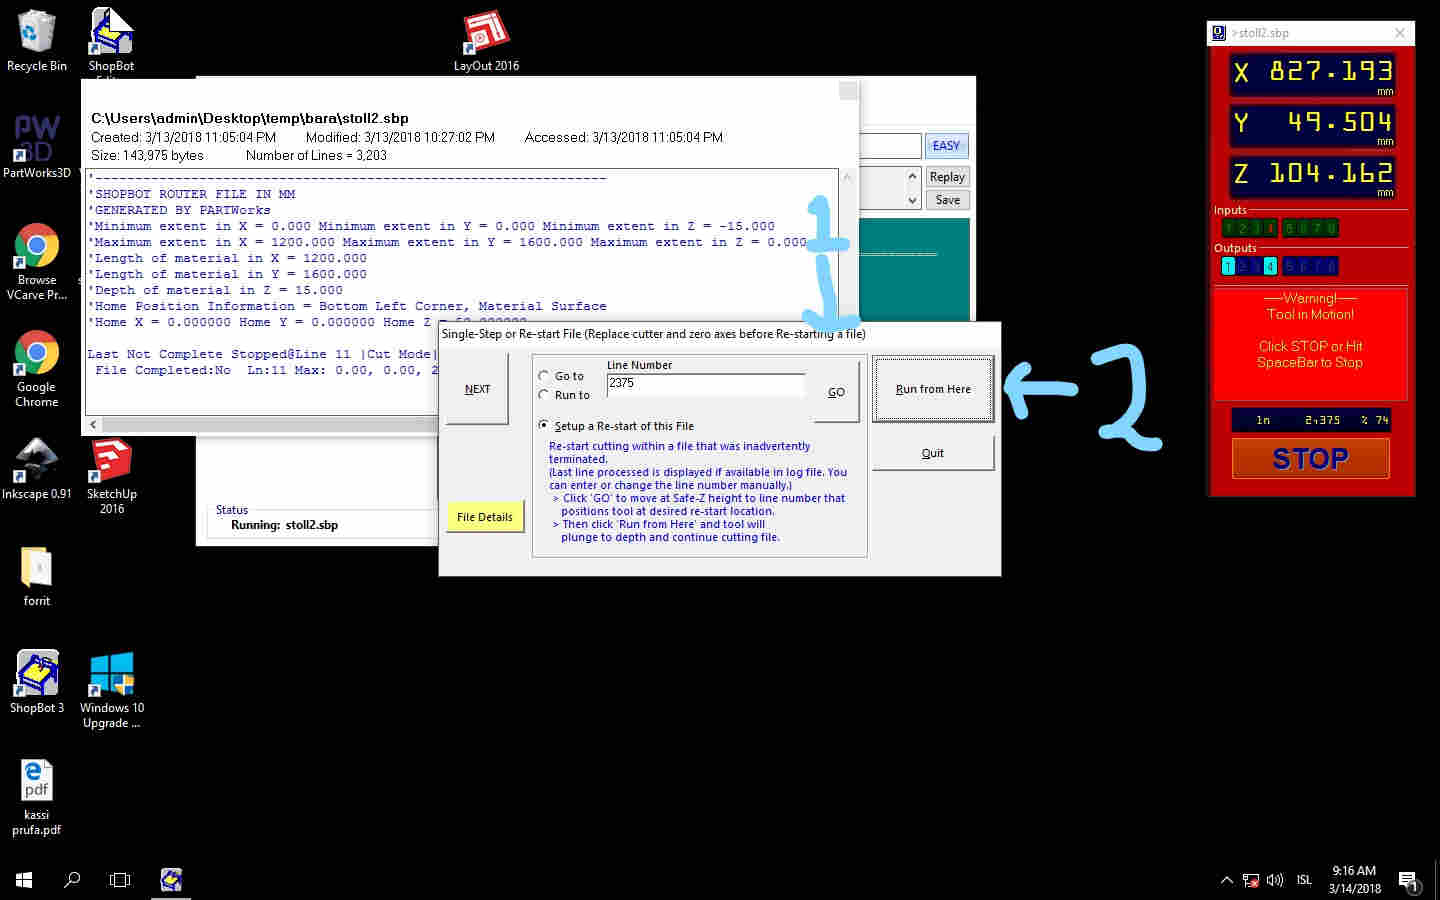
I did forget to press the go to and it cut through my project. I just stopped it and started over.
Now it ran through the design without any problems. After it was ready I moved the motor to the end and turned off the machine.
I removed the sheet and all the parts and put in the new sheet. Now do everything over.
This time I had to stop the cutting mid-way through because the security alarm goes on at half past eleven so I turned it off.
I did write down on what line I turned it off and where the zero axes were.
When I came back in the morning the zero axes had been lost and I put them in again,
but they were wrong because I made the starting point be some weird number it would not go to the exact same point,
so me and Frosti spent the whole morning trying to get it to start at the right spot.
I ended on making a new file with the starting point in the end of the part we were cutting and after a few tries it looked good.
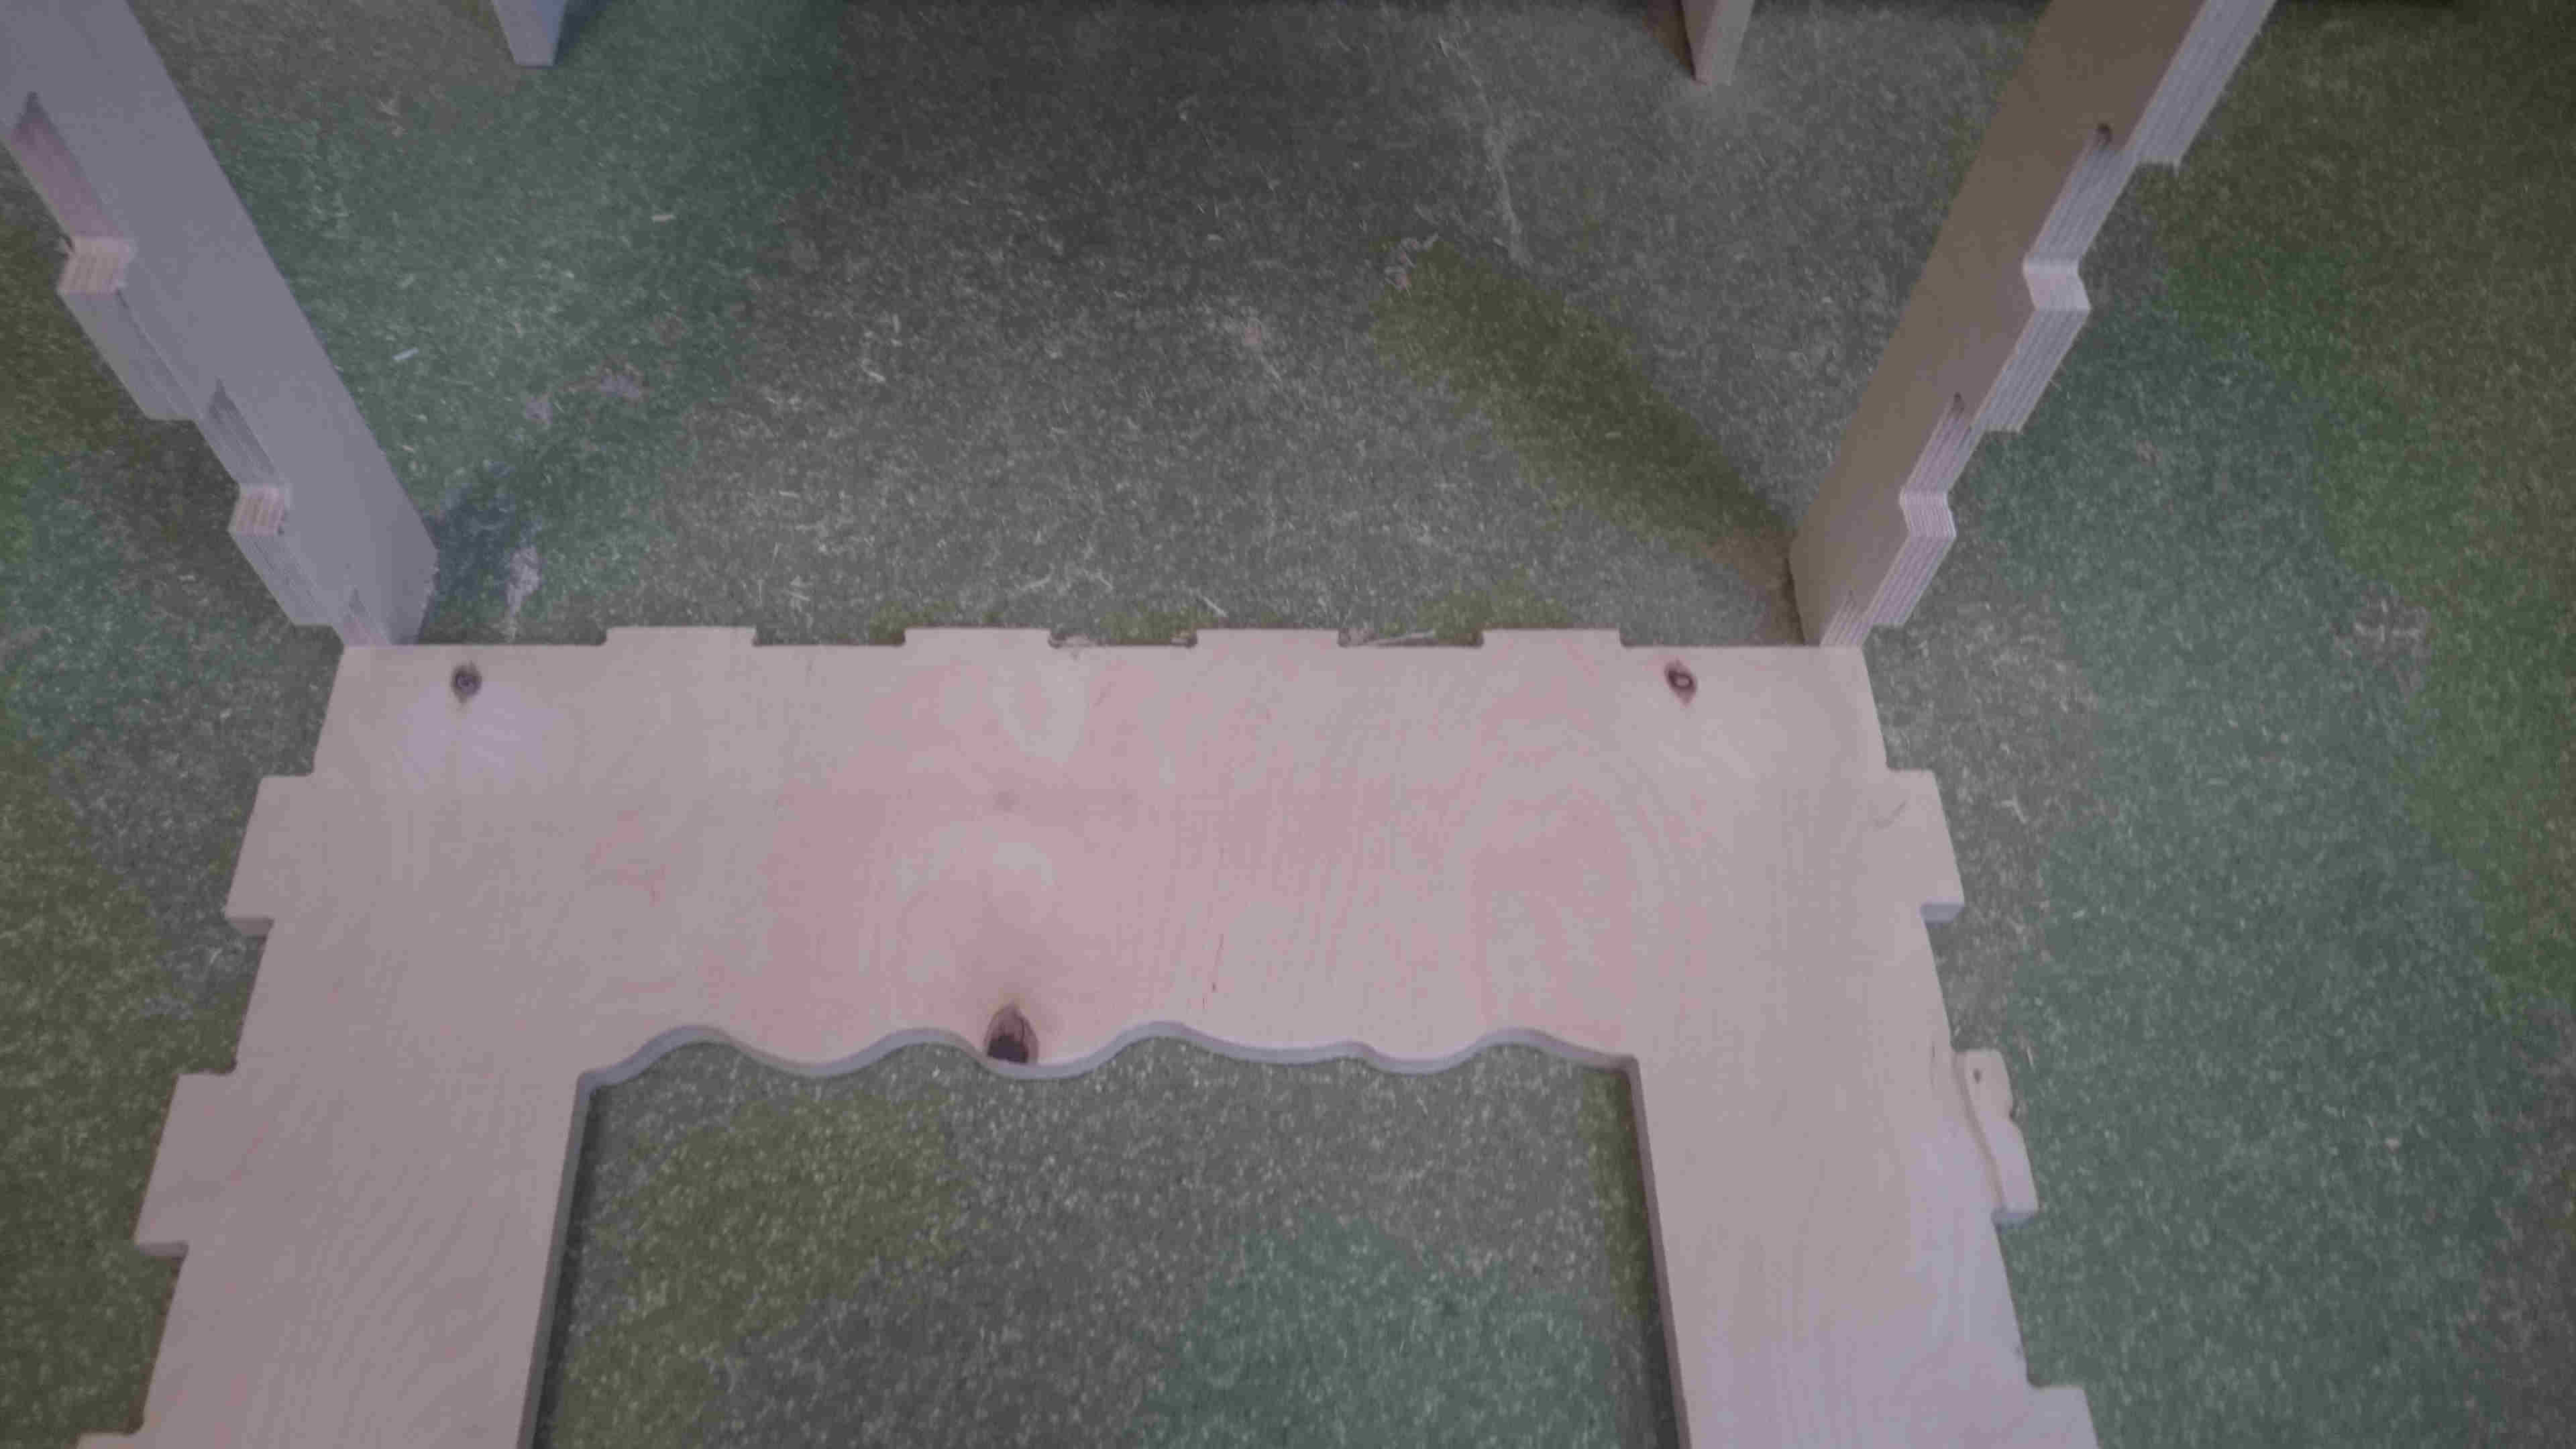
Now I had everything cut out and it is time to assemble the chair.
At first it was looking good but the side that I had to stop is a little bit higher than it is supposed to be
so the back is a little of the floor but it is fine and the chair still works it just wobbles a little.
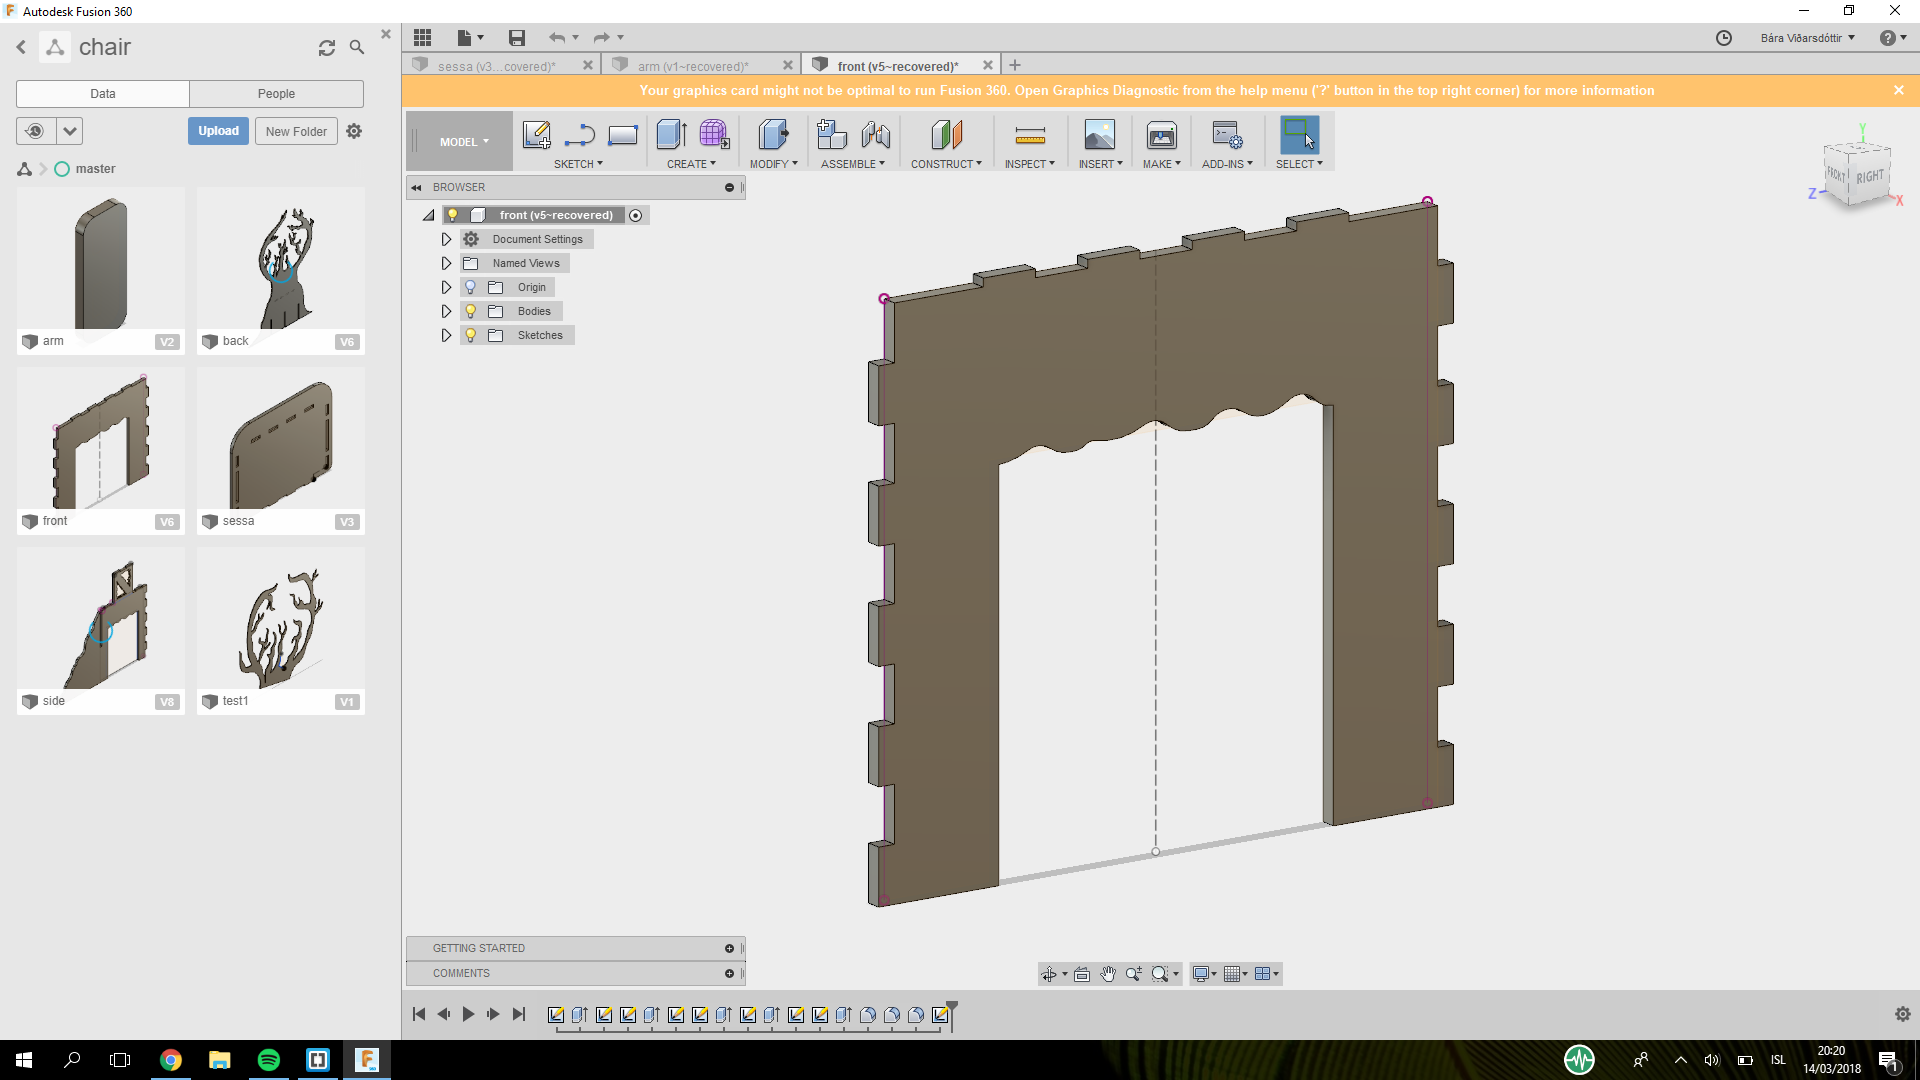
Now to the big mistake. When I was making the front foots I was supposed to cut out of the piece I made but instead I dragged out,
so it is to big and wont fit. I should have seen it with my prototype,
but the cardboard was so bendy and bad I just thought it was not fitting because of the cardboard but it was the design that was wrong.
I am going to fix it as soon as possible.
Problems and solutions
If you read through my documentation you know I had a lot of problems this week
but I am going to list the main ones and also what I would do differently if I would do it all over again.
Problems in the designing process.
The programs were not being my friends and kept shutting down,
unfortunately I had not saved everything and lost a lot of work so I learned from this
and from now on I will regularly save when I am working on the computer.
Problems with the Shopbot
Our Shopbot sometimes just shuts down so I checked reguleraly on wat line it was on
and then when it stopped I could start from that line instead of starting from the beginning.
However make sure you go back to the zero and go to the cutting point before running it.

Have your zero point a comfortable number, if you stop at 233.334 change it to 233.000
then it is easier to start at the same point again later.
Problems with the design
The front was to big. I was suppose to drag in not pull out the taps so it would not fit.
What I would do different
First I would have skipped all the problems and started with the solutions.
If I had the time I would have loved to make the legs a little more pretty with some tree and flower design.
I would make the hand rest a little higher, at least for me it is just a centimetre away from being comfortable.
I would also make the hand rest bigger it is kind of small compared to the rest of the chair.
I would also have made a better support for the back but I did make a gap in the back if I would need more support so I can fix that easily.
Software I used
Microsoft Photos
- For photo editing.
Gimp
-For photo editing.
Inkscape
-For designing and drawing the back.
Krita
- For raster.
Fusion 360
- For 3D modeling.
Files from this week
First sheet I cut, an sbp file.
Drill holes for the first sheet I cut, an sbp file.
Second sheet I cut out, an sbp file.
Drill holes for the second sheet I cut, an sbp file.
The sbp files are ready to be cut with an 6mm tooth in an 15mm width wood.