
Tables tabled me.
I spent way to much time on this completely-disconnected-from–my-final-project-project. But in the end I finally had at least one printed table and the full print possibility of another one.

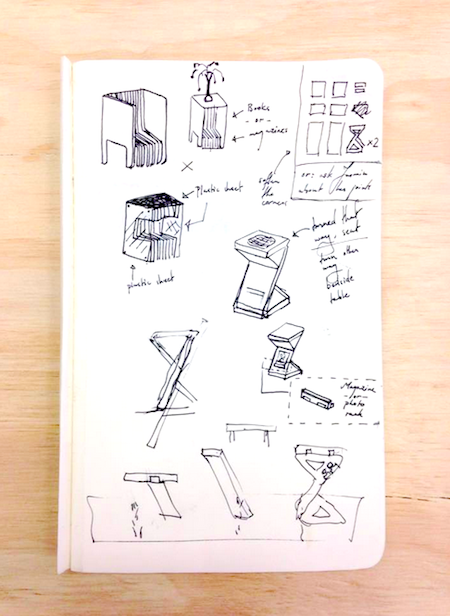
The scetching stage
As previously mentioned, this whole process was long... very, very long. I had made 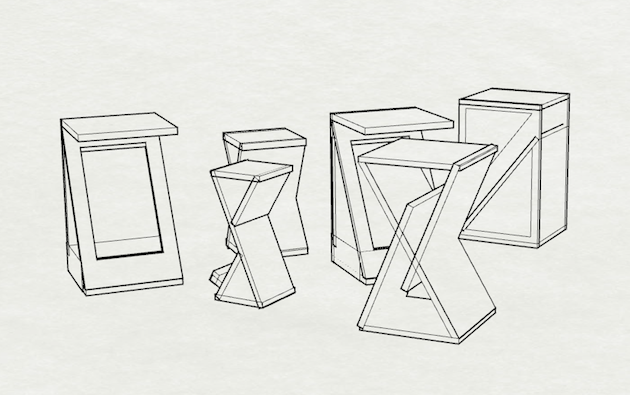 a lot of different designs including the early version of the
 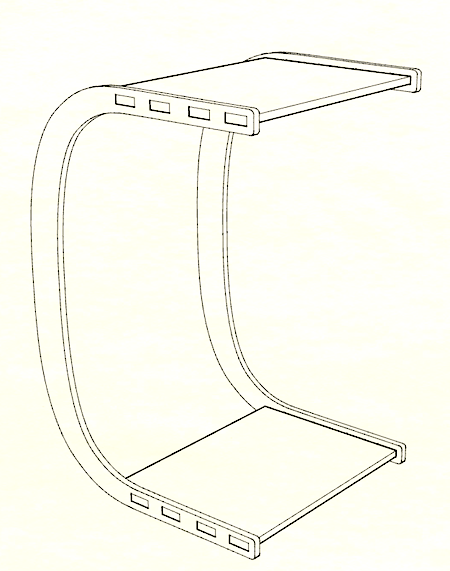 inbed-table. Below you can also see a bookcase/recordholder table and a magazine rack as well as stool table. Obviously I have a thing for multi-purpose furniture.
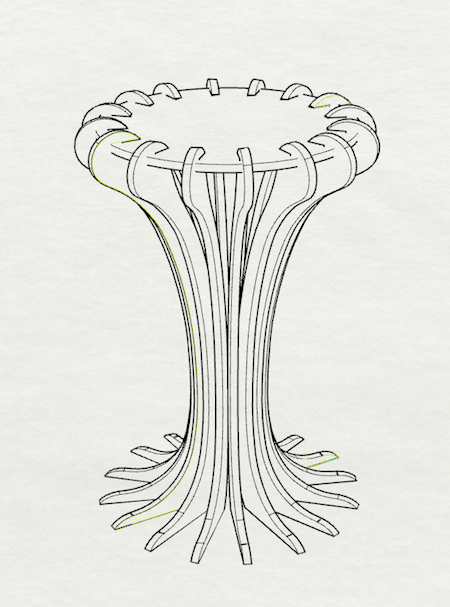
The Lamp Table
The table I printed is unfourtunately not a lamp table in it's current state but the aim is for it to become one. The idea is that it looks the way I designed it but additionally it would have a (copper coloured) lamp pole coming from the ground and ending in the hollow space between the legs. It shouldn't need any more shading since the table top is under eye-level and the legs would create a nice pattern on the ground. Much like 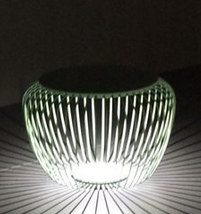 these.

The image above is a Chantarelle and was the original inspiration for the table, it stemmed from my hunger, quite literally. A mushroom very difficult to get ahold of in New Zeeland but the base for one of my favorite pies. I had been walking around thinking of the flavour of these mushrooms for a long time, they were an my mind, perhaps in the same vicinity as my thoughts on bedside tables. Then it came to me, I needed a taberoom.
Designing nature back into furnature
Chantarelles have several stripes and thus my first iteration of the table had several legs, 16 to be exact. I didn't feel that this made for a very even feel though, it reminded me more of an alien waterfall than of my original inspiration. I scaled down the amounts of legs and it looked a little  less threatening.
During this design faze I was playing around and happened to notice that the bedside tables shape would actually have been a very beautiful chandellier 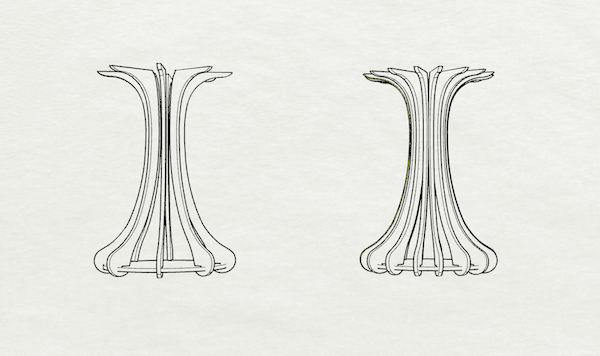 beautiful pendant. Perhaps for a future project I'll make mushroom chandeliers. High ceiling 'shroom lamps that is.
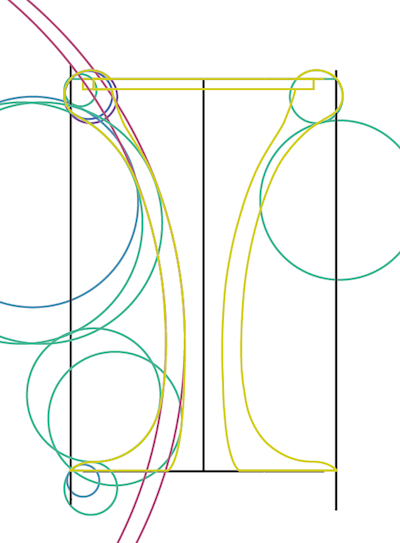
Next up was deciding for the exact measurements. I worked solely in Illustrator and used 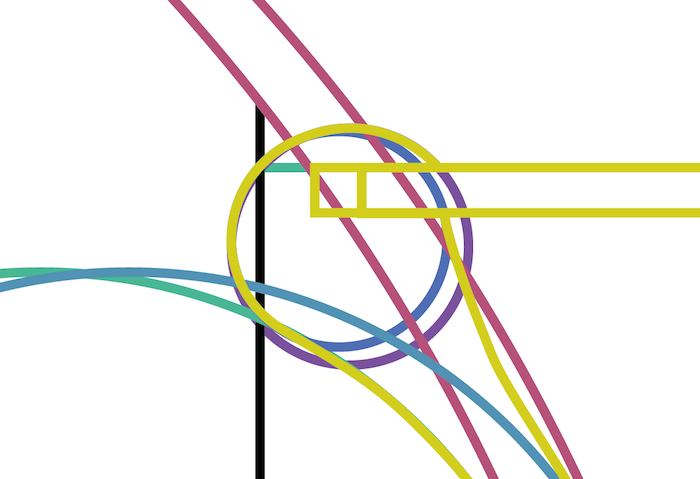 circles as literal guidelines to create an even shape and to make sure there would be an even thickness, see pink lines in img below.
OBS OBS lifesaver .ai tip OBS OBS
Whenever I'm working in Illustrator a lot I have a lifesaver tool. It's the use of the Move and 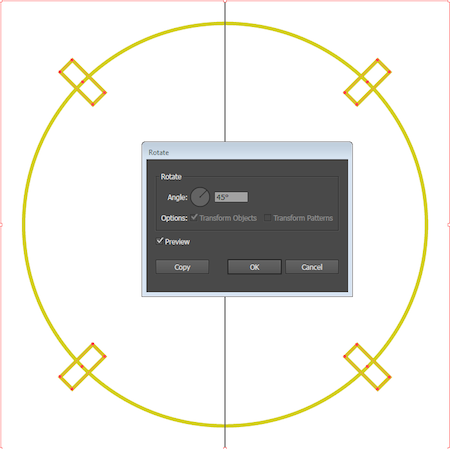 Rotate tools in combination with CMD + D. What one does is move or rotate the objects to the position you'd like them and once in the right place (use preview to ensure) instead of clicking OK click copy. This gives you the exact new placement in relation to the original position.
Next up was deciding for the exact measurements. I worked solely in Illustrator and used circles as literal guidelines to create an even shape and to make sure there would be an even thickness, see pink lines in img below.
The On-Bed Bedside Table
The On-Bed Table was meant to be a table one could roll in under ones bed and then use as a laptop rest or simply a table for breakfeast in bed. The design aspect was in focus rather then functionallity, mostly so the table would work well even when not used in bed.
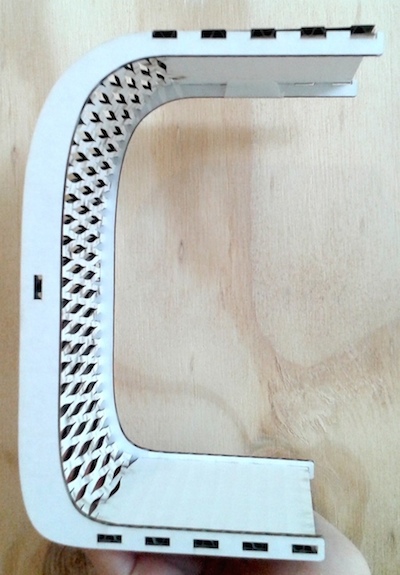
This was actually the first table I set out to make. Att first it looked more  like this and then in the end as the picture above. The Lamp Table was a spur of the moment inspiration but I am currently very grateful for the idea since it's the only one I've been able to print out successfully so far. The On Bed Table has only been printed as a miniature with the lasercutter. I suspect that it's making up for not being able to be shopbotted by having me print it
 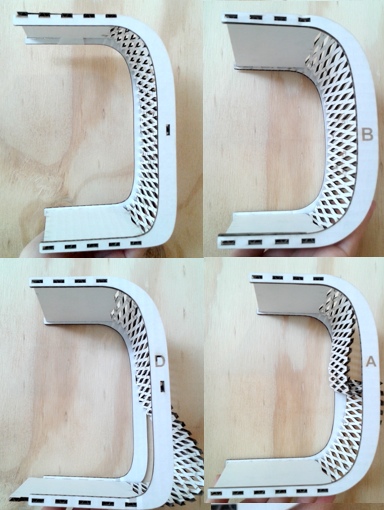 several times over in the lasercutter. All together I think I cut it out about seven times.
The On-Bed table became complicated once the living hinges were added. There were three main complications. All of them were time consuming but one was bad enough to stop me from being able to print the table.
90 degrees is important!
The first design I made, see picture above, wasn't stable enough and would tip pretty easily as the bottom feet were  rounded, I changed this to more of a
 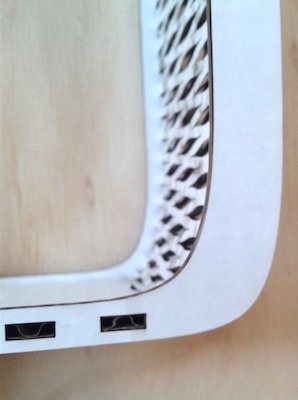 sharp edge and it worked much better, even compared to making the bottom longer in an attempt to change the center of gravity.
Longer is not always better
There were a lot of issues trying to measure out the living hinges on the back since the whole shape is bent. I found the Document Info tab in Illustrator which helped a lot since it shows the length of a line. This helped but Illustrator would sometimes switch from measuring in mm to points. The conversion between the two threw me off a bit and resulted in a , I changed this to more of a 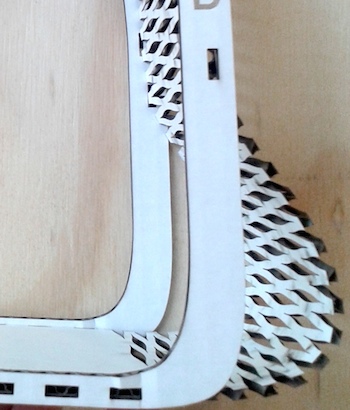 too long back for some of my prints.
Slywood, Plywood
I knew it was possible to make living hinges out of wood but I hadn't thought of all issues which could occur. Some of them I had accounted for, such as the mill bit not being thin enough to make the final slits in the print. I accounted for this in my test by making  two different patterns to try and mill out. They ended up giving off the same result, milling all (the shopbot could reach) out. What was finally the biggest issue was that it couldn't bend,
 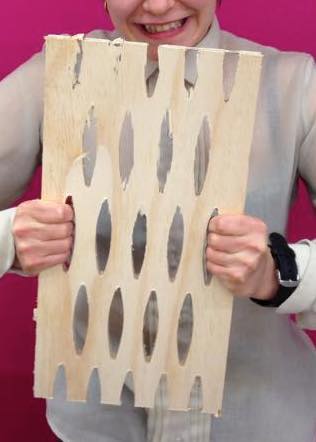 i really tried, but it wouldn't give me even the smallest arc.
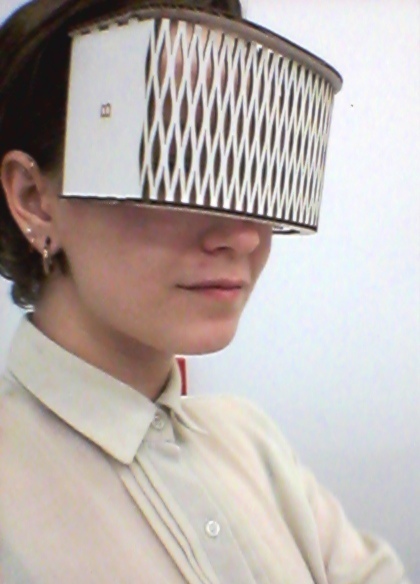
If not a table, awesome shades
My lady, I'm Milling
And Milling I was, although perhaps not by name.
The milling took a while. I had set up the board on the wrong end (1200*2400 instead of 2400*1200) which resulted in the shopbot trying to go places it really couldn't, kind of like Michael Jackson. I followed the guidelines of Annas's blog post and some thorough web crawling, it seemed to get me through  just fine.
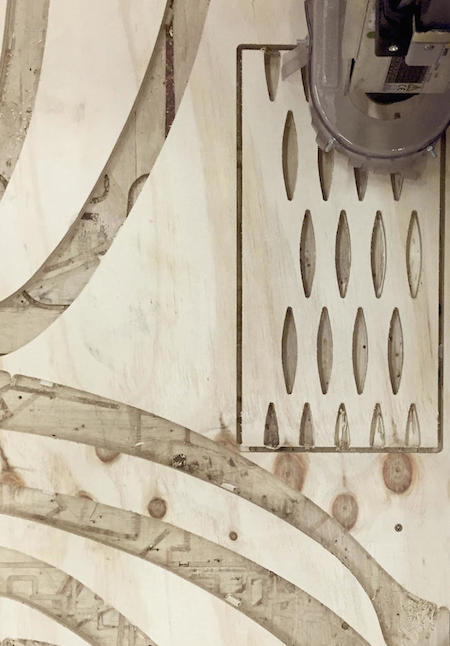
Immortal Technicalities
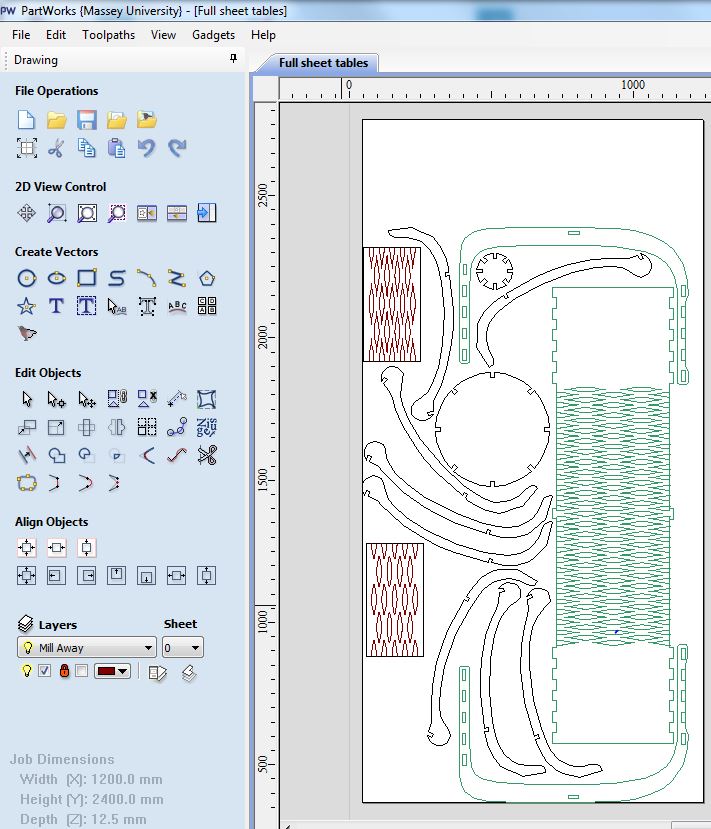
As you can see in the above picture I colour labeled the different layers, as well as naming them appropriatly. The turqouse parts are not to be cut out since I wanted to see what the small test versions of the living hinge would result in beforehand.
The thickness of my plywood was at a magic 12.01mm-12.03mm which fit with my prepared joint thickness of 12.5mm.
I added tabs to keep my pieces in place rather than using screws which I instead used for holding the remaining plywood in check with. After setting the x+y+z heights I was ready to go. I started out with running a drilling round to mark out where I should place the screws and then continued on with the remaining drilling paths.
The drilling depth of the pieces I had to cut out were divided up in four parts which in turn were divided into two files, one for the down mill and one for the up mill in order to get a nice end result. The Down part only had one section to it which went from 0-3.5mm. The up part had 3 sections, each the same depth as the others which went all togther from 3.5-9mm. (The reason behind this is to not burden the milling bit too much by doing a bigger thickness all at once.)

All together this equals a 12.5 cut depth, which to my suprise wasn't enough (as you can see in .jpg above). It ended up being fine once I'd sanded it all down. I had small song mantra going in my head while sanding, "making it soft like a baby's bum" I think it helped since I was quite successfull!
One last note, remember to wear your 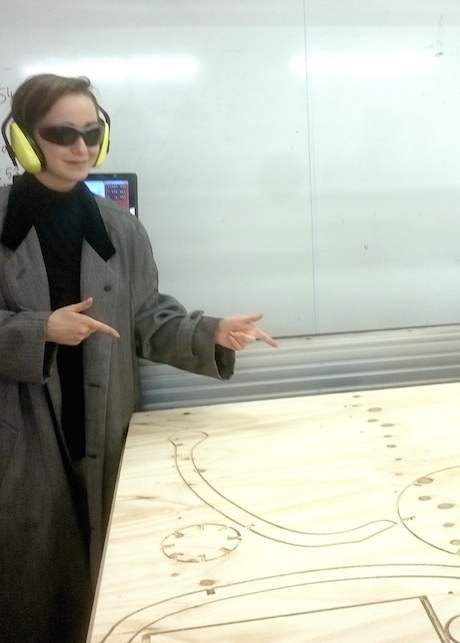 safety gear!