Embedded Networking
and Communications
Week 14
ASSIGNEMENT
- design and build a wired &/or wireless network connecting at least two processors
SOFTWARE USED
- Arduino IDE
- BT terminal
- Fritzing
HARDWARE USED
- My sashakit homemade board (see week9)
inspired by Daniele Ingrassia's sashakit - A portable computer
- Breadboord
- HC O5 Bluetooth from DSD tech
- resistor 500 ohms,1 Kohms
- Waterproof temperature sensor DB18S20
- resistor 4,7kohms
- A smartphone
FILES
Communication serial bluetooth
Bluetooth thermometre
networking_communication.zip
LEARNING EXPERIENCE
For this week's assignment I decided to work on wireless communication to practice for the final project.
I wanted to read a temperature from a DS 18B20 sensor on a smartphone.
To achieve that I used a HC05 bluetooth transmitter who communicates through serial.
I learned to communicate both ways, from the computer to the smartphone and vice-versa.
I also tried a very simple app wich transform data to graphic.
First I wanted to be sure the HCO5 Bluetooth module was recognised by the smartphone
I installed on the smartphone Bluetooth terminal.
Then I wired the HCO5: GND, VCC, TX, RX , DTR with a FTDI cable to have the serial communication between the module and my board.
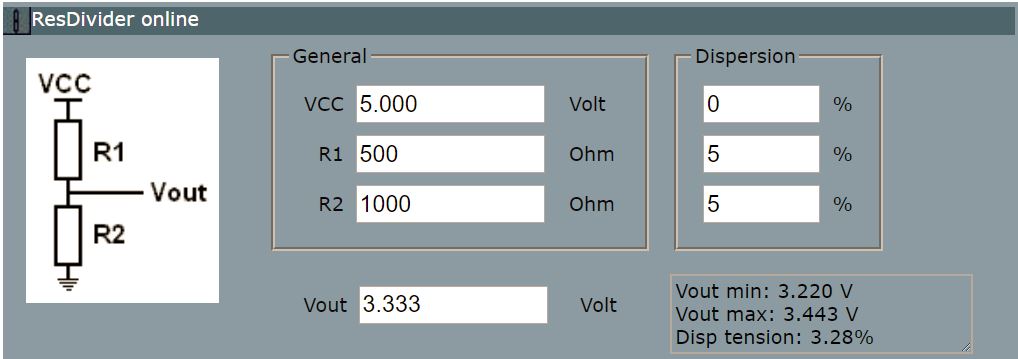
The HC 05 module is working on 3,3 V. So with the help of Axel, Denis's assistant.
We made a voltage divider with 2 resistors: 500 ohm and 2 k ohm to bring the voltage on the RX to 3,3 V
Here is a website to calculate it Voltage divider calculation.

SERIAL COMMUNICATION
I opened a sketch in Arduino IDE "Software serial exemple".
It allows the terminals to communicate in both ways, sending and receiving data.
I had change the Baud rate to 9600 Bd, because it is the communication speed by default of the HC 05 module .
Code I used
#include < SoftwareSerial.h>
SoftwareSerial mySerial(10, 11); // RX, TX

void setup() {
  // Open serial communications and wait for port to open:
  Serial.begin(9600);
  while (!Serial) {
    ; // wait for serial port to connect. Needed for native USB port only
  }


  Serial.println("Goodnight moon!");

  // set the data rate for the SoftwareSerial port
  mySerial.begin(9600);
  mySerial.println("Hello, world?");
}

void loop() { // run over and over
  if (mySerial.available()) {
    Serial.write(mySerial.read());
  }
  if (Serial.available()) {
    mySerial.write(Serial.read());
  }
}
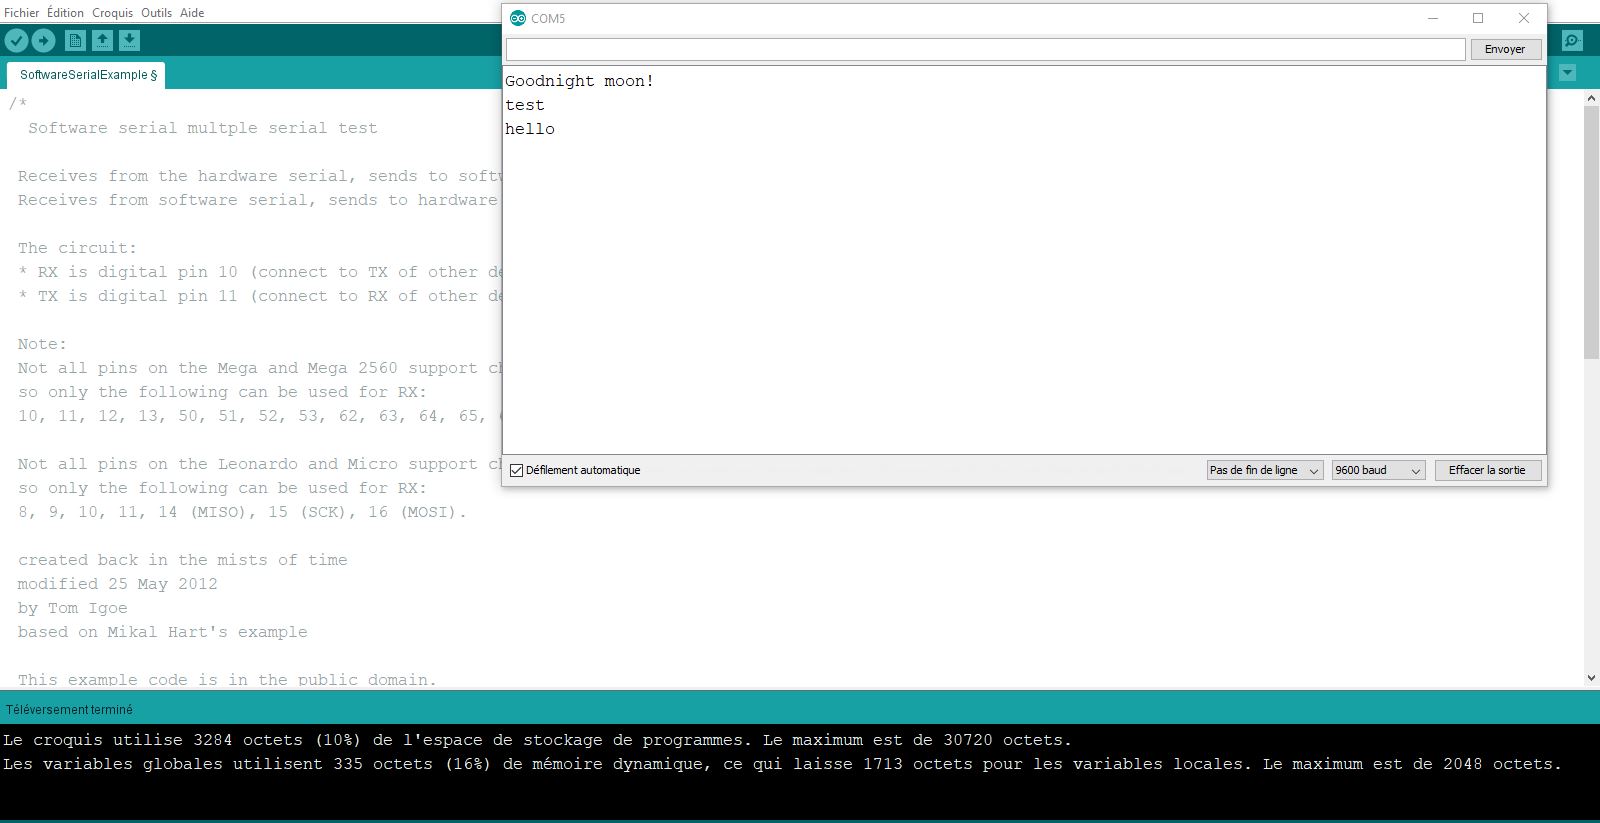
Here is a print screen of the computer showing the serial monitor on Aduino IDE.
At the start of the sketch Good morning moon! is displayed.
Then I wrote test and test 123 on the smartphone
TROUBLESHOTING
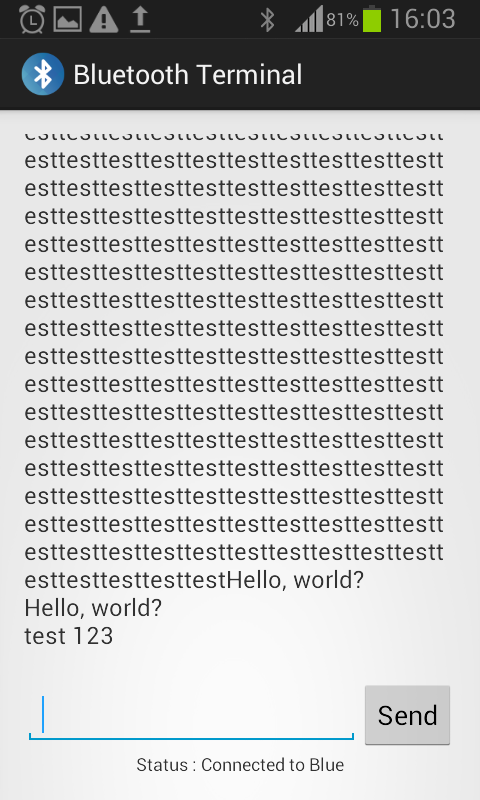
On Bluetooth terminal of the smartphone,it showed without stopping testtestesttesttestesttesttestest ...
The end of the line command was not activated on the serial monitor of the computer.
It is an option situated on the bottom right of the monitor.
The smartphone was waiting for a signal to understand that the ligne was over
I changed it to NL and it worked fine, both ways now on both terminals.
READING THE DS 18B20 SENSOR
Now comes the time for the real exercise...
I first connected the sensor to VCC, GND, data.
I forgot to connect the resitor of 4,7 kohms and it went wrong...
The sensor was very hot and the monitor only showed the number 1024.
The other mistake was to have connected the sensor to the pin A2 in analigic.
After connecting the resistor and the data to the pin digital 5,everything went well.
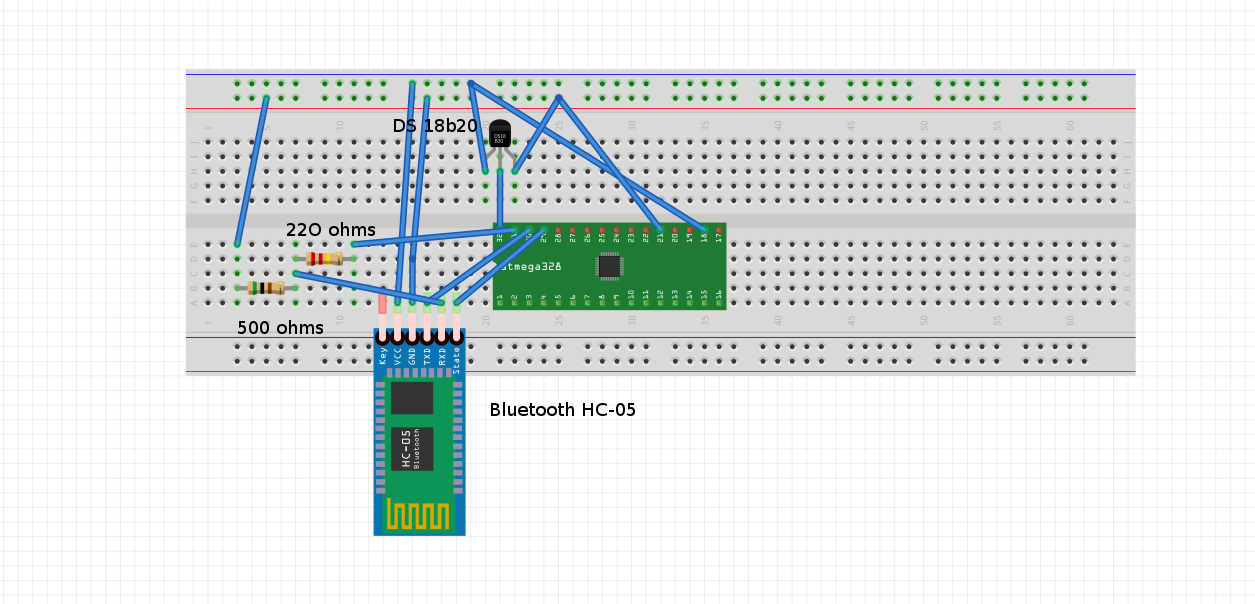
DIAGRAM CONNECTION
I used a softwareFritzing to draw this diagram.
I heard about it and wanted to test it.
Quite easy to use...
Code:

/*

Original Code for the DS18B20 is comming from http://bildr.org/2011/07/ds18b20-arduino
Copyright (c) 2010 bildr community
Modified by Victor Levy ,Fab Academy 2018, Networking and communications week.
Permission is hereby granted, free of charge, to any person obtaining a copy
of this software and associated documentation files (the "Software"), to deal
in the Software without restriction, including without limitation the rights
to use, copy, modify, merge, publish, distribute, sublicense, and/or sell
copies of the Software, and to permit persons to whom the Software is
furnished to do so, subject to the following conditions:

The above copyright notice and this permission notice shall be included in
all copies or substantial portions of the Software.

THE SOFTWARE IS PROVIDED "AS IS", WITHOUT WARRANTY OF ANY KIND, EXPRESS OR
IMPLIED, INCLUDING BUT NOT LIMITED TO THE WARRANTIES OF MERCHANTABILITY,
FITNESS FOR A PARTICULAR PURPOSE AND NONINFRINGEMENT. IN NO EVENT SHALL THE
AUTHORS OR COPYRIGHT HOLDERS BE LIABLE FOR ANY CLAIM, DAMAGES OR OTHER
LIABILITY, WHETHER IN AN ACTION OF CONTRACT, TORT OR OTHERWISE, ARISING FROM,
OUT OF OR IN CONNECTION WITH THE SOFTWARE OR THE USE OR OTHER DEALINGS IN
THE SOFTWARE

This code is made to read a temperature comming from a DS 18B20 temperature sensor on a Bluetooth terminal on a smartphone
With the command Myserial , *T is the data's that is read the BT terminal

 */


#include < OneWire.h>//library for a onewire sensor
#include < SoftwareSerial.h>//library for serial communication

SoftwareSerial mySerial(10, 11);
int DS18S20_Pin = 5;


OneWire ds(DS18S20_Pin);
void setup(void) {
  Serial.begin(9600);
}

void loop(void) {

  float temperature = getTemp();

  mySerial.print("*T");
  mySerial.print(temperature);
  mySerial.println("*");

  delay(1000);

}

float getTemp(){

  byte data[12];
  byte addr[8];

  if ( !ds.search(addr)) {
      //no more sensors on chain, reset search
      ds.reset_search();
      return -1000;
  }

  if ( OneWire::crc8( addr, 7) != addr[7]) {
      Serial.println("CRC is not valid!");
      return -1000;
  }

  if ( addr[0] != 0x10 && addr[0] != 0x28) {
      Serial.print("Device is not recognized");
      return -1000;
  }

  ds.reset();
  ds.select(addr);
  ds.write(0x44,1); // start conversion, with parasite power on at the end

  byte present = ds.reset();
  ds.select(addr);
  ds.write(0xBE); // Read Scratchpad


  for (int i = 0; i < 9; i++) { // we need 9 bytes
    data[i] = ds.read();
  }

  ds.reset_search();

  byte MSB = data[1];
  byte LSB = data[0];

  float tempRead = ((MSB << 8) | LSB); //using two s compliment
  float TemperatureSum = tempRead / 16;

  return TemperatureSum;

}

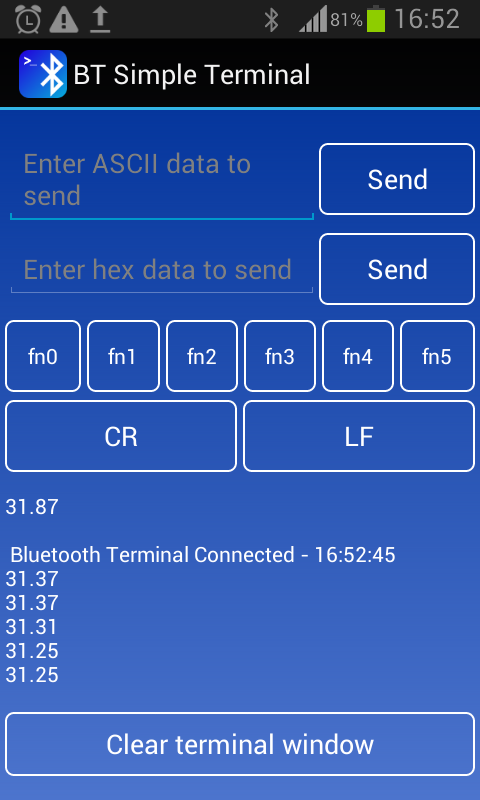
And finaly this picture shows the temperature from the sensor received on the smartphone....
HOME