Interface and application programming
Week 13
ASSIGNEMENTWrite an application that interfaces with an input and/or output
device that you made,
comparing as many tool options as possible.
SOFTWARE USED
- Kicad
- Arduino IDE
- Processing
- Board Fabacademy 2017( see week 11 )
- Breadboard
- 10kohms Potentiometer
- TPM 36 Analog temperature sensor
- 1 Led Red
- 1 Led green
- 290 ohms Resistor
- 310 ohms Resistor
Arduino IDE code
Processing and java code
LEARNING EXPERIENCE
I wanted to link this week's assignment to my final project.
I started from one of my Arduino sketches that was made to read a temperature on a monitor through serial communication.
It can also turn on and off a green led and a red led according to a set temperature.
The idea was to see what can be done with a graphical interface.
I chose Processing. This software immediately attracted me by its resemblance with Arduino IDE
and the large amount of possibilities of GUI interfaces.
FIRST STEP ON PROCESSING
I first downloaded Processing and viewed some tutorials.
To understand the way it was working, I tested a first exercise Processing getting started
I changed from the sketch the size of the screen (800,700)
And from ellipse to rectangle using the Processing reference to find the way to code the form I wanted to design

CHANGING THE ARDUINO SKETCH
For this assignment I wanted to be able to regulate a set temperature.
And depending on this temperature and the actual temperature read by the sensor,
I wanted something to be displayed in processing.
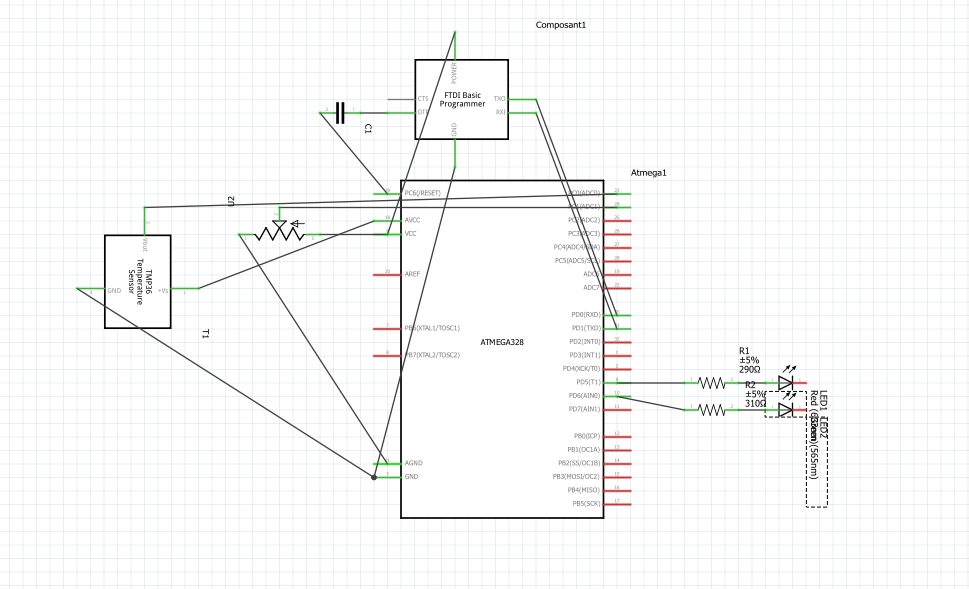
I started from a basic sketch I made to read the temperature and added a potentiometer on the analogic pin A1.
I used the map function to correlate the values, read from the potentiometer in 10 bit (1024),
to the values I wanted to have for the set temperature:
from 20 to 30. degrees C .
By doing so, each increment on the potentiometer increases the set temperature by 10/1024: 0.097 degrees C.
Code:

/*

Victor Levy, Fabacademy 2018, week 13, interface annd application programming
Reading temperature from a DS18b20, changing calour at a set temperature.

 */

int capteur = A0
int potentiometre = A1

void setup() {
Serial.begin(9600)
pinMode(5,OUTPUT)//LED VERTE
pinMode(6,OUTPUT)//LED ROUGE

}

void loop() {
int valcapt = analogRead(capteur)
int consigne = analogRead(potentiometre)
int mesuretemperature = map(consigne,0,1024,20,30)
float voltage = valcapt / 1024 * 5
float temperature = 100-(valcapt * 0,1609)

delay(200)

if(temperature > mesuretemperature)
{
digitalWrite(5,HIGH)
digitalWrite(6,LOW)
Serial.write(1);

}
else
{
digitalWrite(5,LOW)
digitalWrite(6,HIGH)
Serial.write(0);

}

Serial.write(mesuretemperature);
Serial.write(int (temperature));

}
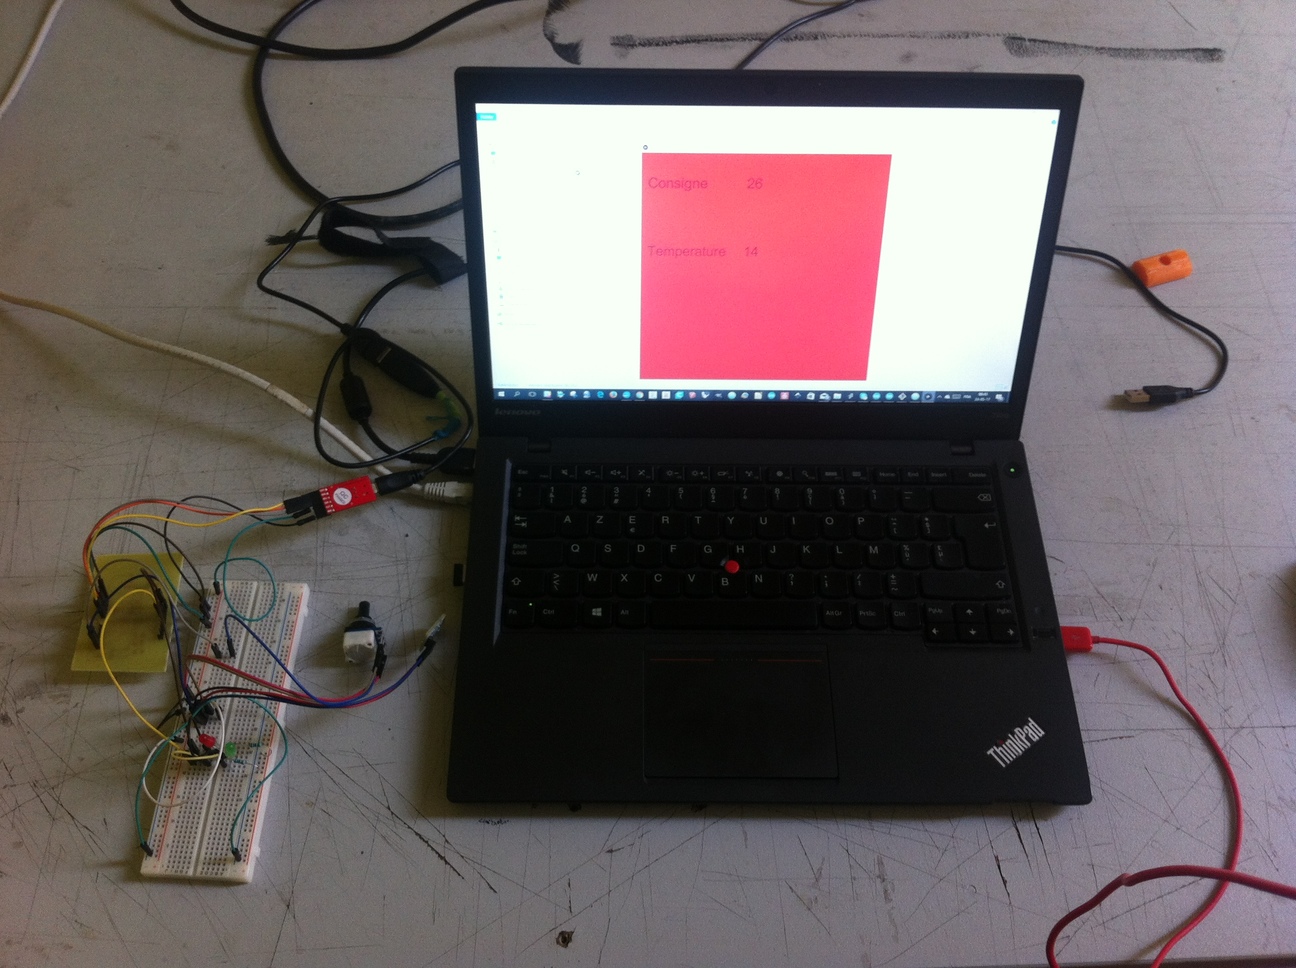
I reloaded the modified sketch, after making the connections (see diagram).
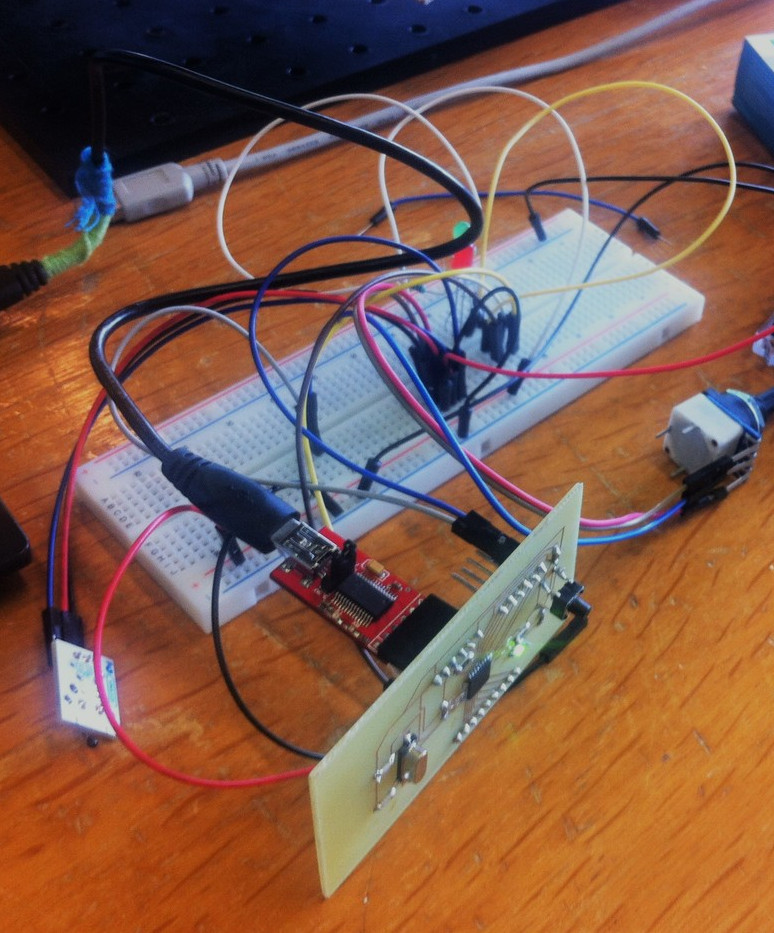
From there It was a little bit tricky...
I had Arduino IDE with the serial monitor and the temperature,volts,values and Processing in front of me
and impossible to know how to make them communicate
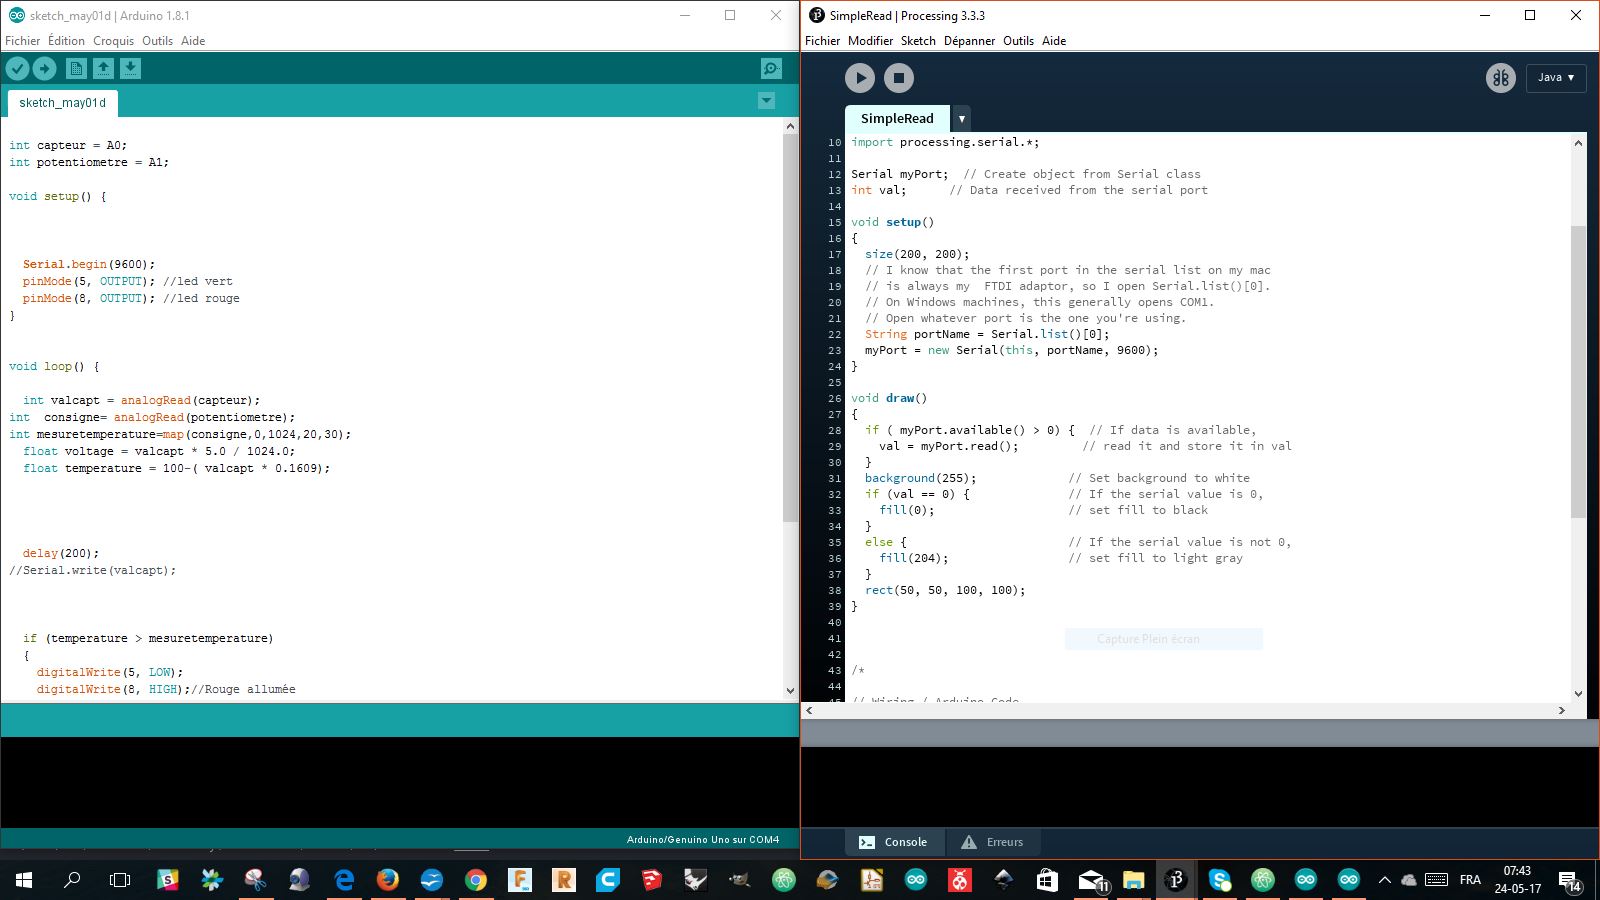
That was my greatest mistake...
The 2 software don't communicate, they receive and send data from the serial port
and I get some help from Axel.
First we changed the size, the colour of the rectangle and font in the void setup
The first principle to understand is that Processing will work with data that comes from the board
and its embedded program: in this case Arduino IDE.
Processing will read data from the serial communication we have established with FTDI's RX TX.
For that we will load a processing.serial library. For this exercise, I started to make the code from a serial.read example
that allowed me to put the basics of communication between the board and the computer to read the datas on the computer.
I then modified the information that I wanted to obtain in the code: val, consigne and temperature.
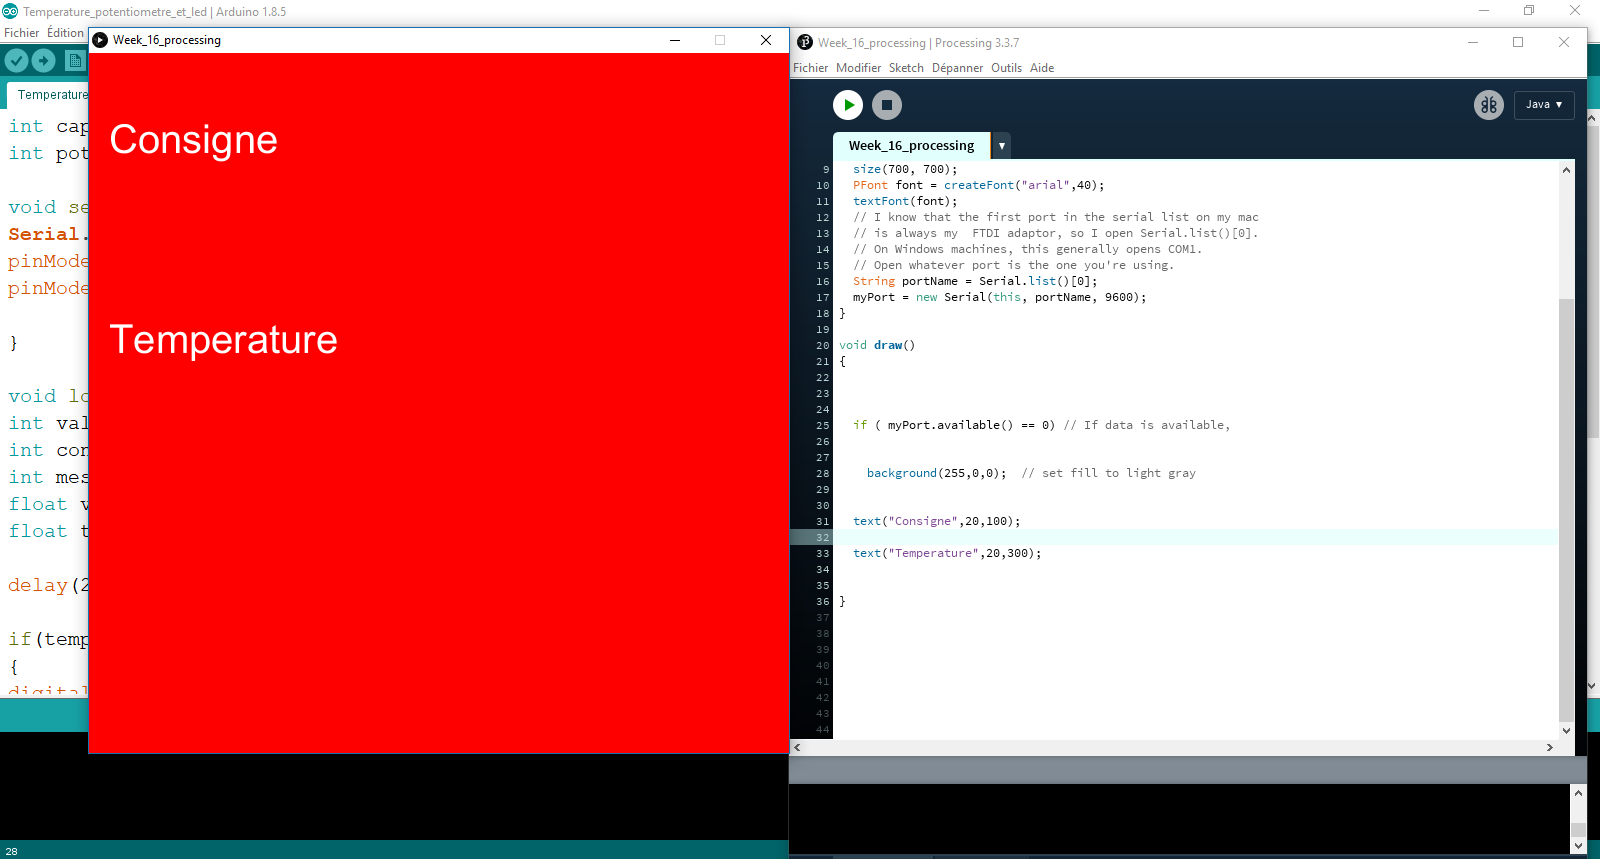
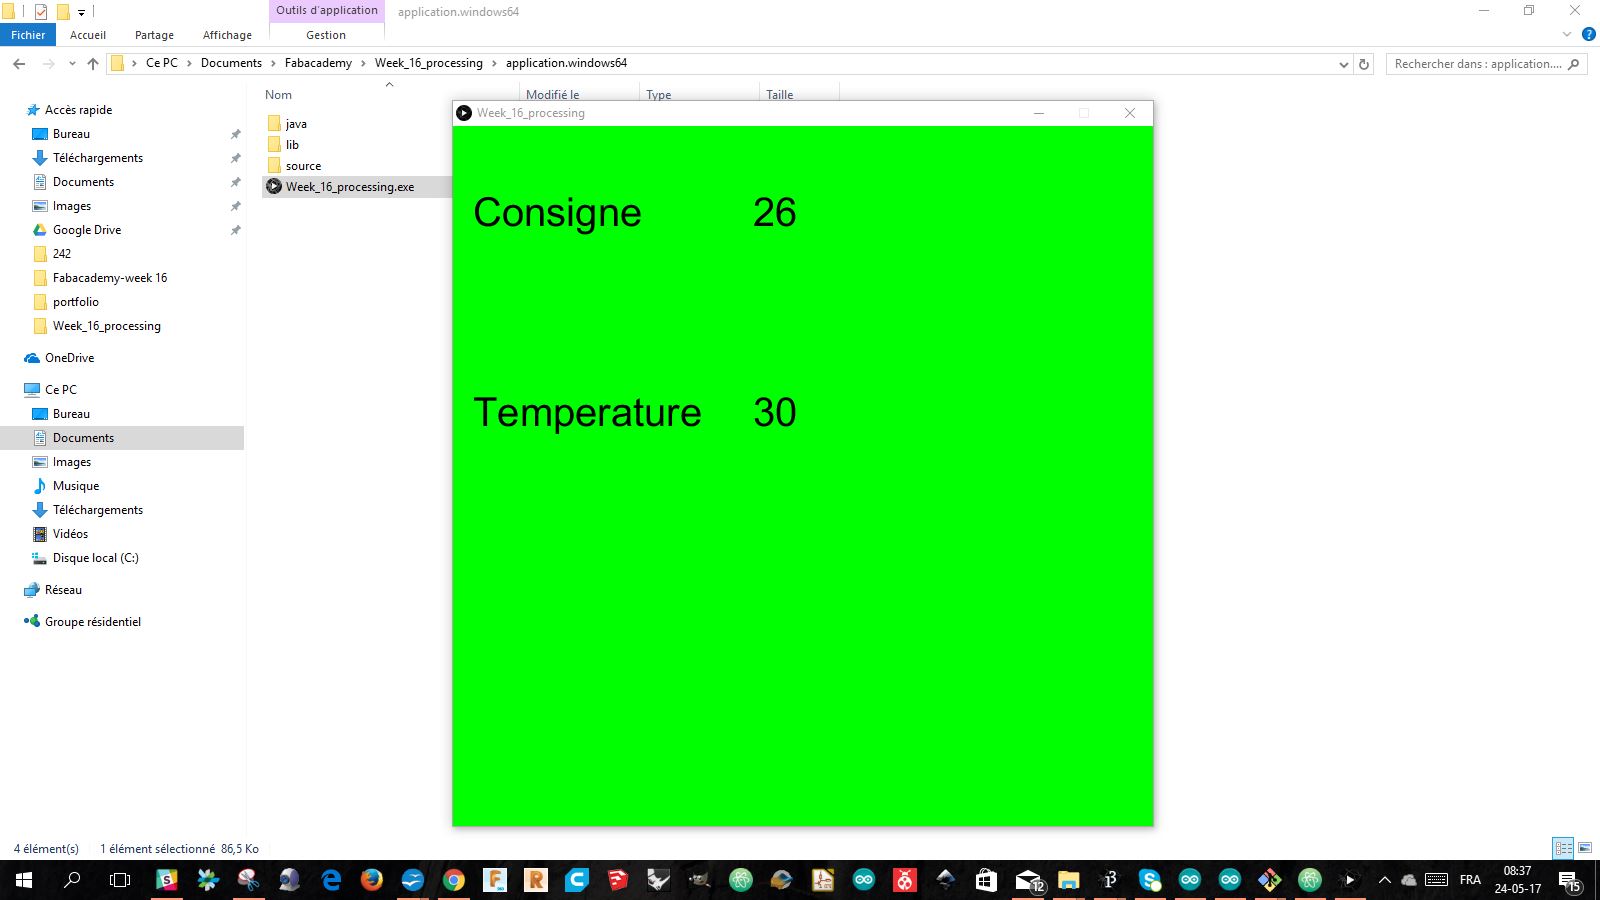
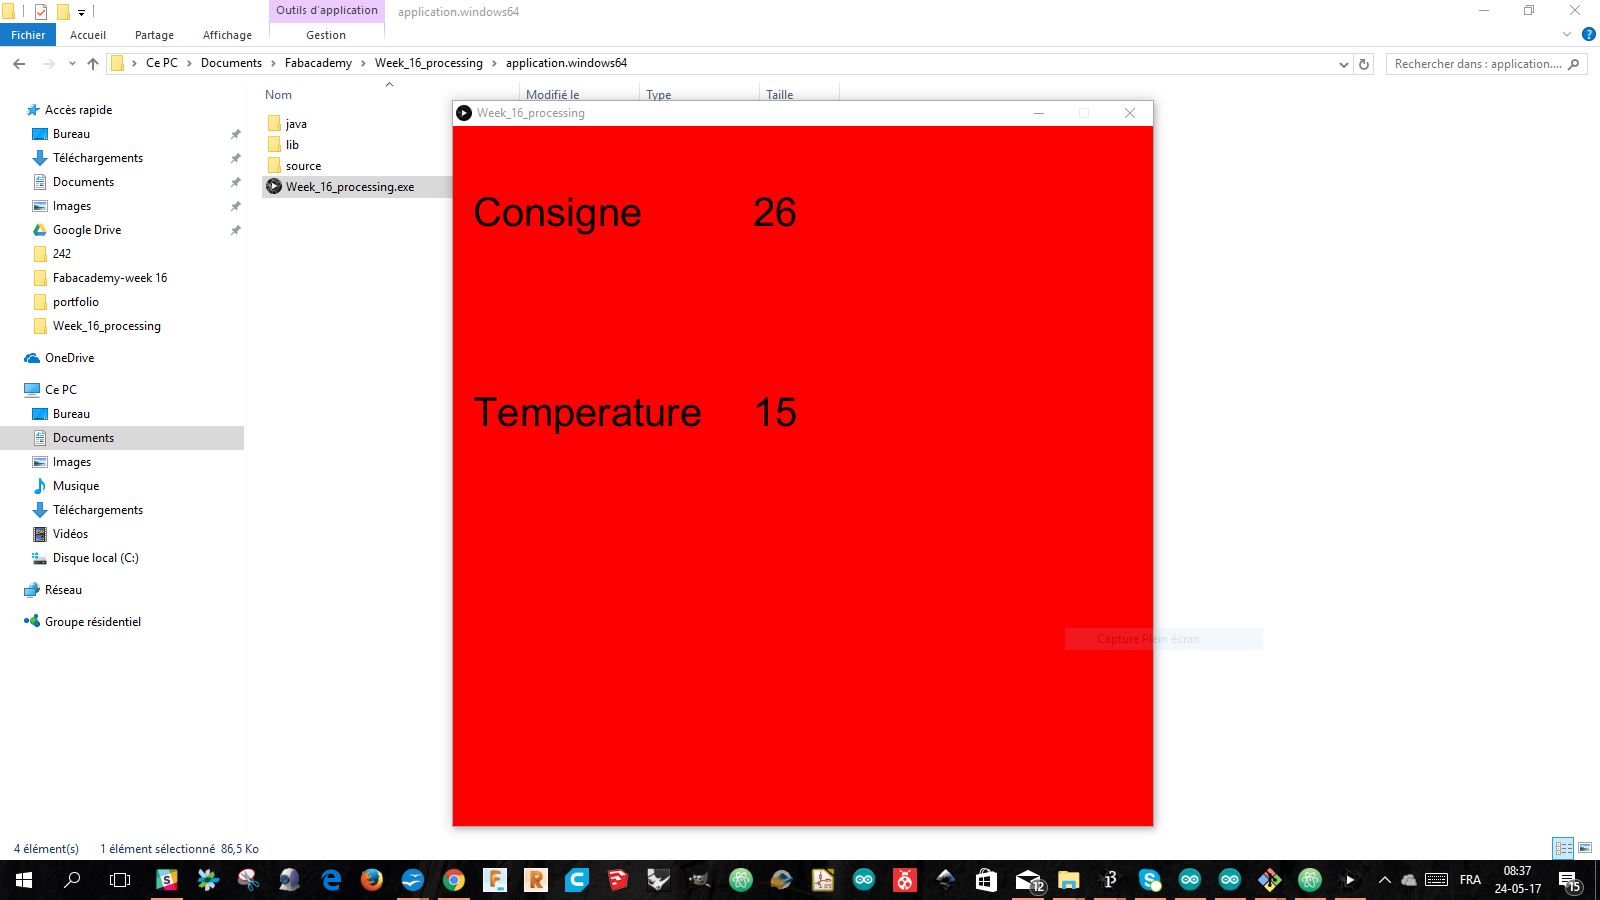
I set up the condition for changing the background color of the rectangle: 0 or 1 with the value val.
The colors were determined by their value in RGB (255,0,0) for red and (0,255,0) for green.
I then displayed the values and texts giving them a position in X and Y in the color rectangle.
And there it was...
Finally I saved a Java program and it worked fine ...
Code
/*

Victor Levy, Fabacademy 2018, week 13, interface annd application programming
Reading temperature from a DS18b20, changing calour at a set temperature.

 */

import processing.serial.*;

Serial myPort;
int val,temperature, consigne;

void setup()
{
  size(700, 700);
  PFont font = createFont("arial",40);
  textFont(font);
  String portName = Serial.list()[0];
  myPort = new Serial(this, portName, 9600);
}

void draw()
{

  if ( myPort.available() > 2) {
    val = myPort.read();
    println(val);
    if (val == 1) {
    background(255,0,0);
  }
  else if (val ==0){
    background(0,255,0);
  }

consigne = myPort.read();
temperature = myPort.read();

     fill(0);
  text(consigne,300,100);
  text("Consigne",20,100);
  text(temperature,300,300);
  text("Temperature",20,300);
    }

}
HOME