Final Project
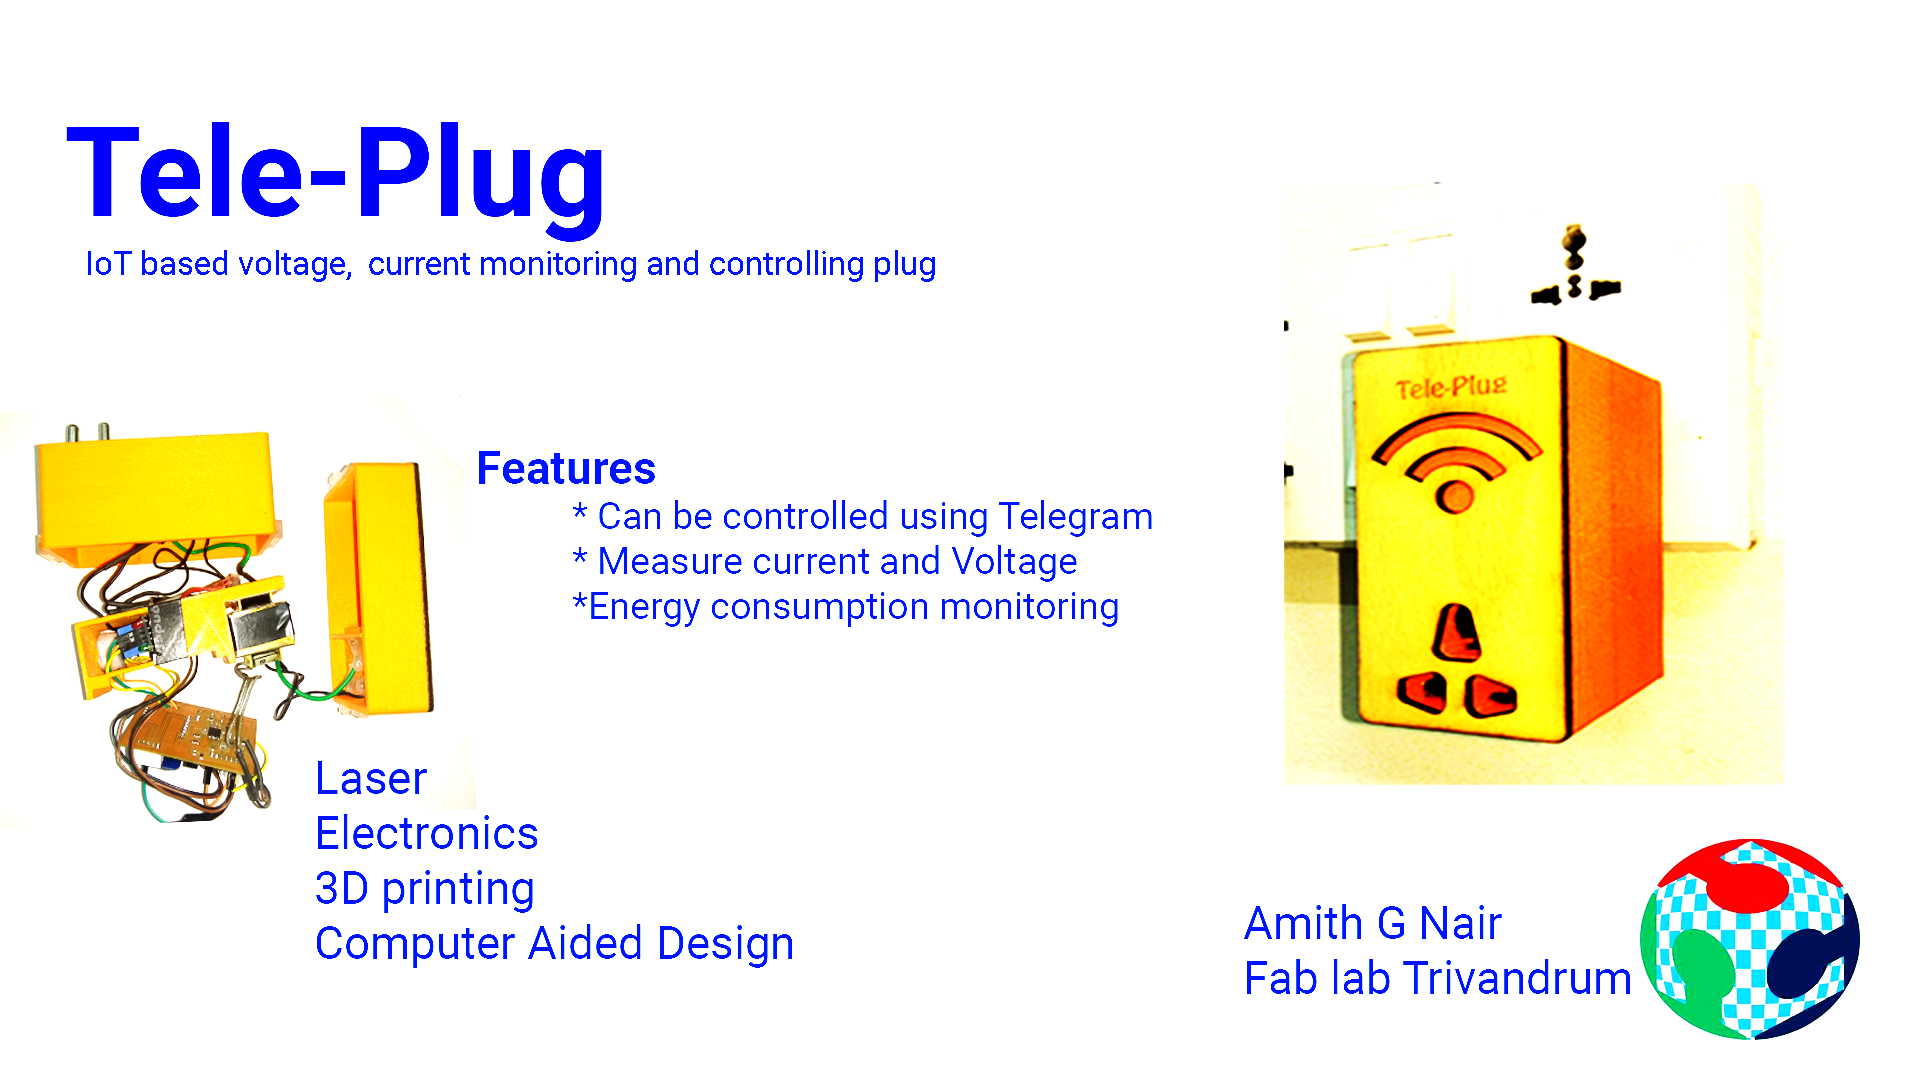
Tele-Plug :Iot based smart plug contolled by telegram
My Final project is Smart Plug named as Tele-Pug it's an IoT device that, can control over Telegram. Main Advantage is once we use to connect any of equipment to a power supply using this we can know the voltage and current consumption also we can on and off its operation.
Components Used
- MCU board equipped with Atmega328p IC measures Voltage and Current
- ESP8266 Mini Board: Used for connecting with Telegram API over the internet
- .Small 5V 2A SMPS: Provide clean supply for working this device
- 220V/9v Stepdown transformer for measuring the voltage
- ZMCT103C current Transformer
- Small Relay BOX ( 5V) on and OFF the power supply
Bill of Material
Total cost the project is of 2200 INR its around USD of 33
Vist my Applications and Implication page to know more about project plan and vist Project development page for details about the work i done
Working
Atmega328p board is used to measure the voltage and current. For measuring voltage, we used a signal conditioning circuit that consists of scale down part and offset part. The output from this connected to Analog pin of Atmega328p(A1) and the Current sensor has two inputs Signal and GND; Signal connected to A0, Eiter neutral or Phase should pass through the current sensor. After made the calculation data from MCU send it to ESP8266 using serial communication, it receives data and stores it in particular locations. Inside the esp we need to write a program that can communicate with telegram API, I got the useful library named Universal-Arduino-Telegram-Bot This library helps me to communicate ESP8266 with telegram For More details Refer the Project development page
Parts Included
Body: The case for the Product printed in PLA - Fusion360 file named ( fabplug v7.f3d) Which includes all the three cases. It includes 3 Parts and export as Bottom .stl, Top.stl and Inner .stl.These printed in ultimaker and GCODe is generated using cura by giving fill density of 30 per cent and top and bottom layer thickness 1.2mm and Shell thickness of 1.2mm and shell thickness of 1.2mm.
Electronics: PCB designing did on eagle file named Fab_final. For more details visit my Project development page.
Programming: There are two code one for Atmega board ( atmega328p.ino) and second for ESP8266 mini board ( telegram.ino)
All the files can be downloaded from download linkon the bottom of page
License
My work is decided to licence under Creative Commons Attribution-NonCommercial 4.0 International License.This licence allows anyone to copy, change and use my work without any restrictions. More information visit my page Invention, Intellectual property, and Income week
Acknowledgement
I am interested in DIY activities but I don't know how to make a product. For understanding more about that, I join this course. I would like to express my thanks to Kerala startup mission for offering support for doing this course. I would like to express my special thanks of gratitude to our instructor Yadhu, Vinod and Lancy for helping and supporting us to do this course. My thanks are also extended to all my colleagues in Trivandrum fablab. I would also thank my family members for encouraging me to do this.