|
Groupwork
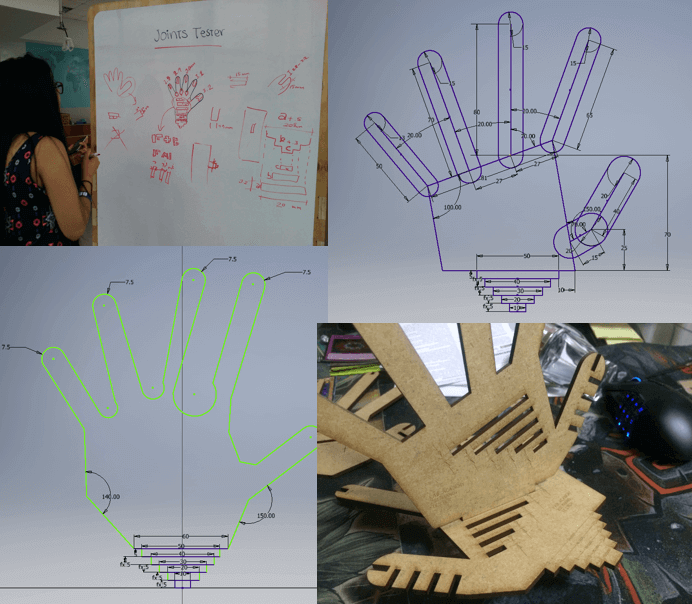
For this week assignment, the group decided to go with a joint tester. As the name suggest, the idea
was to have something that allow us to understand and test how laser cut is made. With an interesing hand-like tester
every one cut its own tester with different size slots
In this part worked with Inventor. I decided to design my own hand from scratch and put different dimension slots
in each finger tip, ranging from 2.80 to 3.20 mm. Also in the tumb, there are 4 slots with dimensions between 2 fingers (ie 2.85, 2.95, etc).
Finally, 5 slots where added in the palm and a stair-like tab for thickness measure. Each slot have its size increased in 0.02 mm.
Comments
This was my first time doing laser cut. To this day, I never had to use this technology before and found it really interesting.
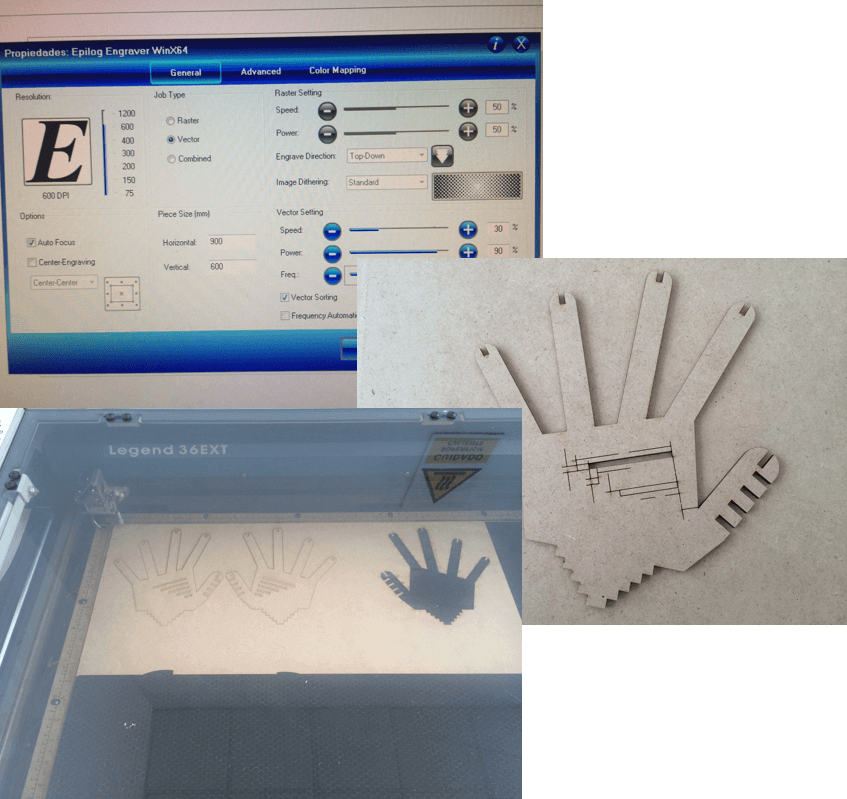
Sending the job was not that difficult, but jumping from Inventor, to Autocad and then to CorelDraw just to set the print layout was kind of tedious.
Sending the actual order to print was easier. In the lab there are known settings for each material. I used 3mm MDF, so run the print with 30% speed
and 90% power. The first try, there was a problem with dimension lines being cut insted of just be engraved. That was solved erasing the lines, cutting
then engraving.
Finally when doing the actual test, found that using the same dimension for tab and slot will cause loose-fitting. I was not considering laser diameter
and the slots were not the size wanted. The only time could get some close-fitting was using the tester thickness on the palm slots, probably because
"thickness" is not a value where laser diameter is involved. Next time I will be considering using a bigger dimension for tab and same for slot.
|
Parametric Set
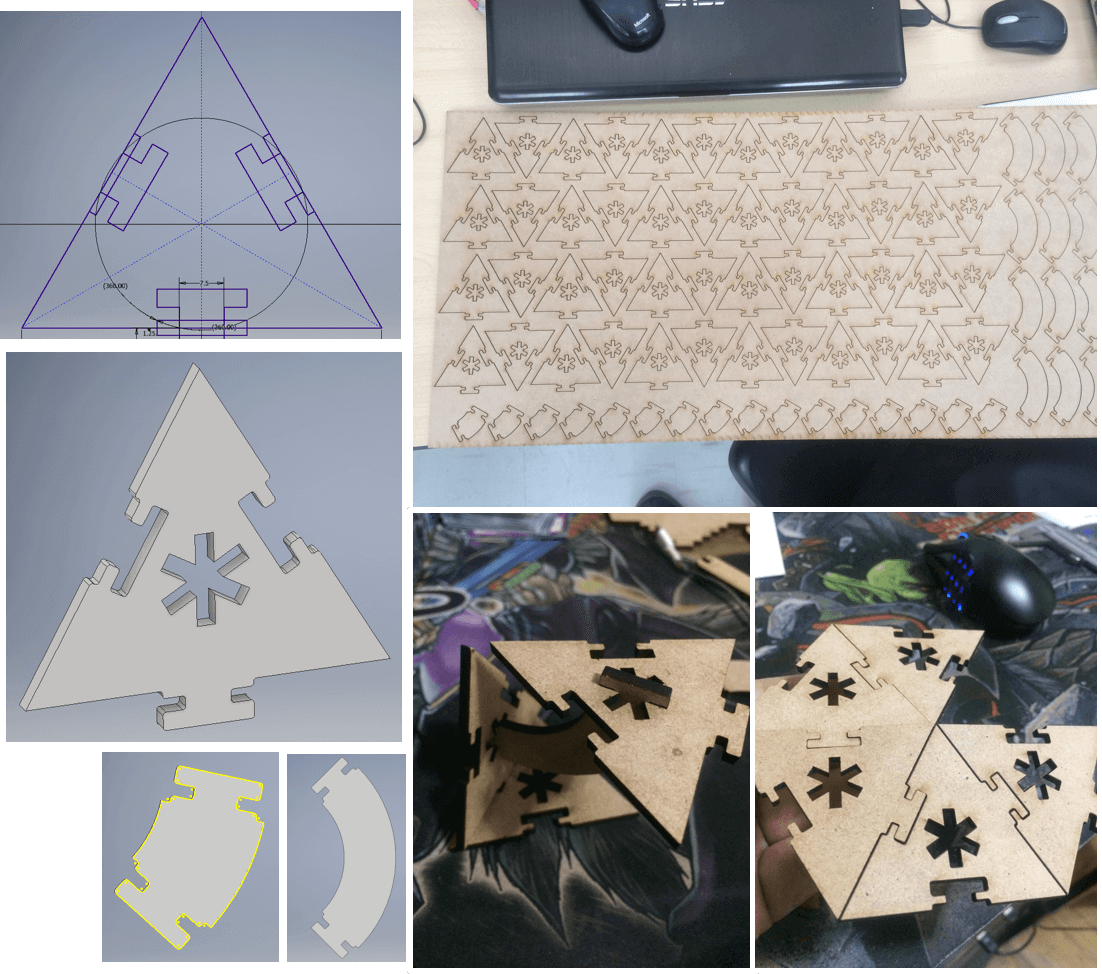
For personal assignment we were to make a parametric set of pieces which allow us to build different things. I decided to make triangular pieces, with 2 slots
and 1 tab (see image).
Using . Since I'm more used to it's parametric tools, was easier for me to work. Designning the piece was not that difficult. I already
have in mind that would be a equilateral triangle with 2 slots and a tab. When thinking about the main piece, the idea of adding connections and a central slot
(actually 3 centered-slots but rotated 60 degrees between them) appeared. Finally I ended with the main piece being a triangle and 2 extra pieces for connections.
Comments
It was harder thinking how the main piece would be than actually design it. Lucky for me I used to work doing parametric assemblies so was a piece of cake.
After receiving the laser cut, I notice my pieces where loose-fitting. Why?! That was the first question in my head. Every tab-slot test I did was really loose.
I was thinking in my design. "Where could be wrong? I'm sure my tab is 3mm and the slot is 3mm" After talking with one of the instructors everything came clear.
In my first test (with the hand tester), I thought that designing with same nomimal values (in this case 3mm) was correct, because I tested thickness with a similar slot.
But as detailed in the section above, thickness is not affected with laser diameter, so when designing the tab needs to be 0.1mm bigger than the slot. In my job I increased
the slot dimension (0.02mm) thinking that using nominal values will be too tight. The pieces did not wored as my cut is too loose to even stand by its own.
|
|
|
Vinyl Cut
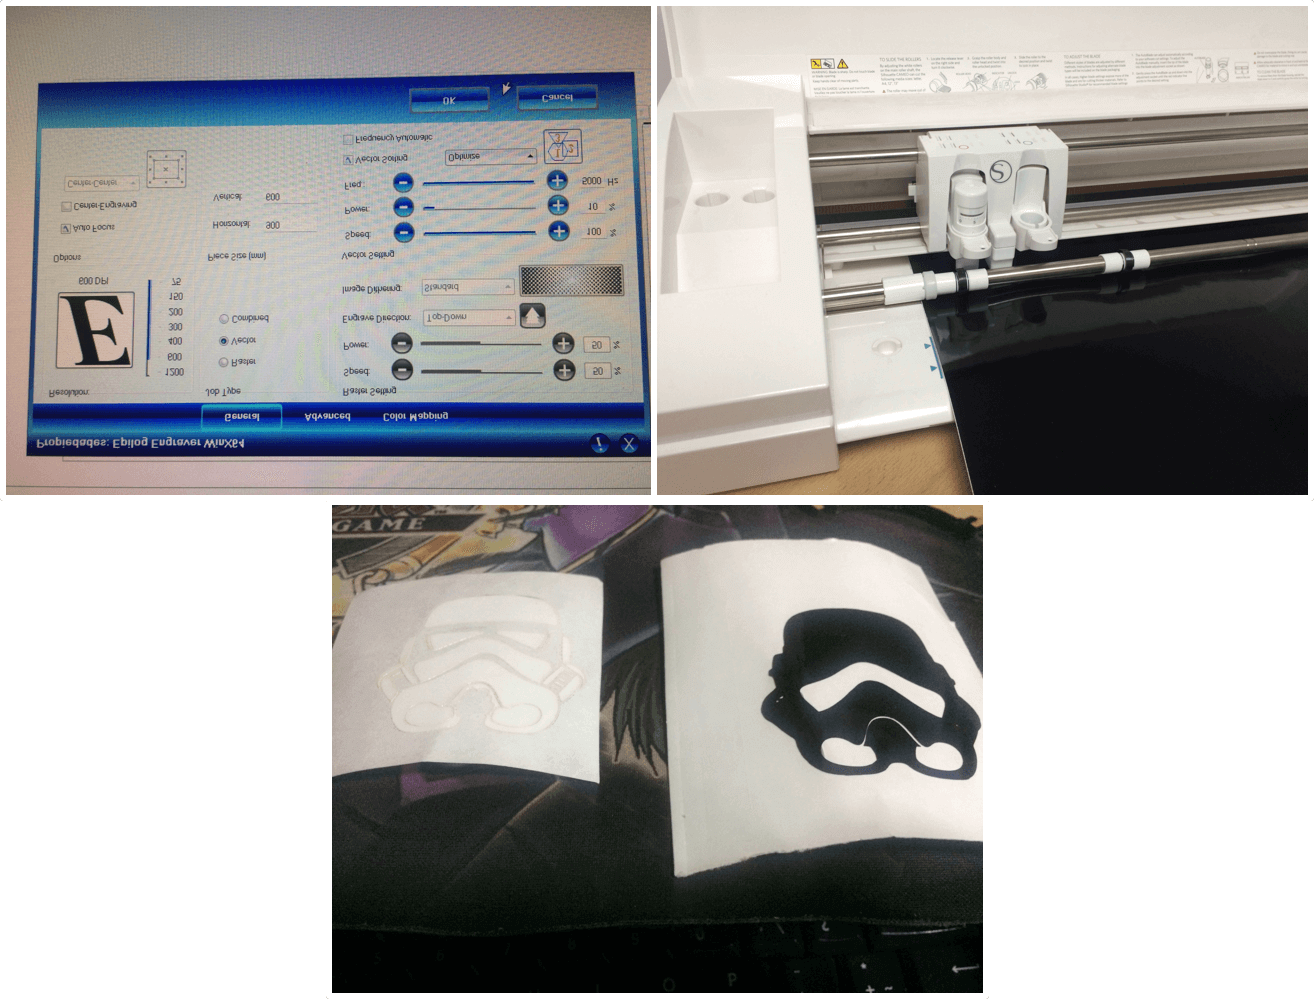
I wanted a Star Wars Stormtrooper sticker in my celphone for a long time, and this assignment was the right one to try to get it.
I downloaded an image from internet and paste it in CorelDraw, then vectorized to get the cutting lines. Once did that, exported to DXF format which the vinyl cutter accepts.
Since is a stormtrooper I want it to be black or white.
Vinyl cut - laser
I also cut vinyl with the laser cutter. I used the same files since the laser cutter accepts DXF and send it cut. The cut parameters where different from the MDF
material (see image).
Comments
My design have a lot of details, also I reduced the image to fit in my 50 x 50 mm celphone back. With the vinyl cutter, I noticed that after several minutes, some details start
to separate. Even if you don't touch it, some details deforms. I used black vinyl and the most difficult part was trying to stick the image to my celphone. Due to its many details
it was imposible. Same thing happened with the laser cut. I could not manage to stick it, but noticed the cut was smoother than the vinyl cutter.
As a resumen, doesn't matter what machine you use for vinyl cut, it is important to use an image that you could "transplant" in less posible moves.
|
|
|
Files
Files from this assignment are here.
|
