
EMBEDDED PROGRAMMING
Assignment:
Read a microcontroller data sheet program your board to do something, with as many different programming languages and programming environments as possible.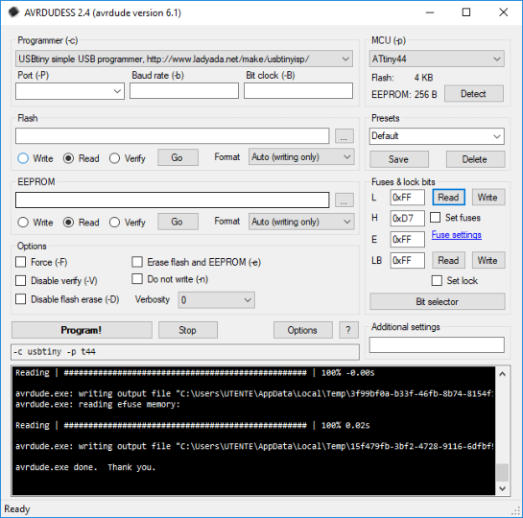


Program my Board To do something …
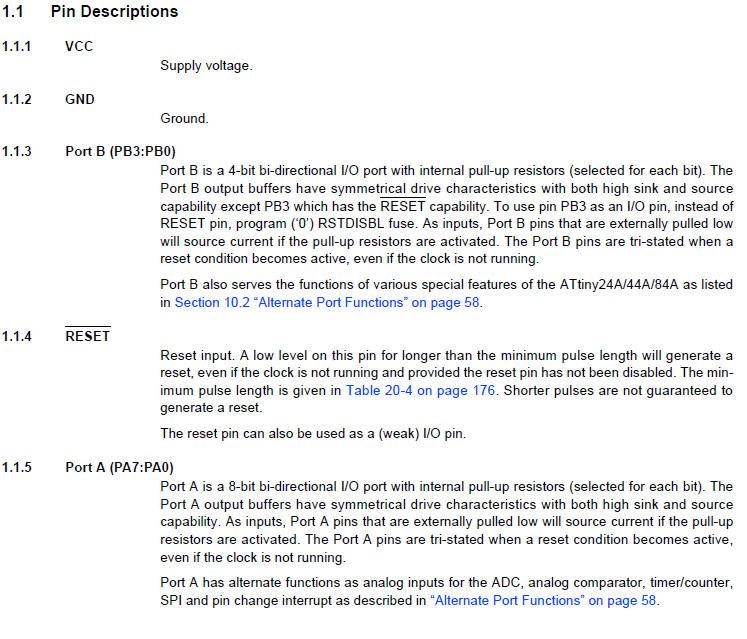
To complete the assignment this week I have to program my electronic board. To do this I have to use development software and understand how the ATTiny 44 microcontroller works by reading the datasheet.To start work, an overview of the microcontroller pinout is certainly useful.
Original Files and Useful Links


/* Embedded Programming
MyTiny44
Program my Board To do something …
Giuseppe Allocca
FabLab 2018
Santa CHiara FabLab (Siena) - Italy
*/
int
led = 2;//Define pin button (is pin 11 of microcontroller)
int
button = 3; //Define pin button (is pin 10 of microcontroller)
void
setup
() {
//Define direction of data
pinMode
(led,
OUTPUT
);
pinMode
(button,
INPUT
);
}
// the loop function wait to detect pressed button and turn on the led, else led is off
void
loop
() {
if
(
analogRead
(button) ==
LOW
) {
digitalWrite
(led,
HIGH
); // turn LED on:
delay
(400);//wait
}
else
{
// turn LED off:
digitalWrite
(led,
LOW
);
delay
(400);
}
}
…Arduino IDE
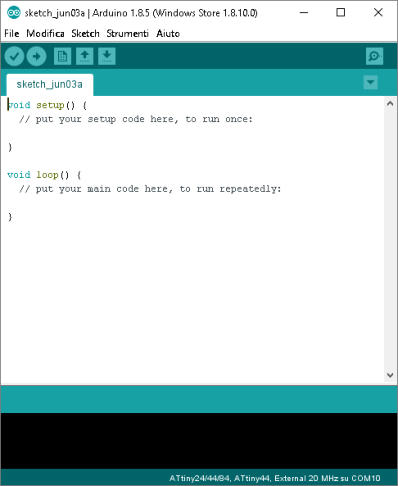
From the Arduino site I download the software and after installation, at the start of the program the interface is very simple and practical.
Installing ATtiny support in Arduino
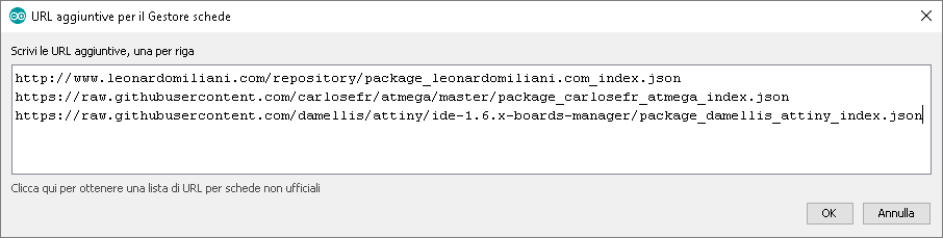
To use Arduino IDE to program my Tiny44 board, first, I have to add the AtTiny family boards in the IDE. To do it , I must Go to “Files/ Preferences” and in the field “Additional Boards Manager URLs” , I paste the link.: https://raw.githubusercontent.com/damellis/attiny/ide- 1.6.x-boards-manager/package_damellis_attiny_index.json
At
this
point
I
have
to
set
the
right
parameters
for
my
card,
I
choose
the
microcontroller
ATTiny
44,
the
external
clock
(20
MHZ)
and
USBTinyISP
as
programmer.

Supported Arduino Commands /
Limitations
Due to the memory limitations of this microcontroller, not all of the Arduino commands are supported. The following Arduino commands are supported: pinMode() digitalWrite() digitalRead() analogRead() analogWrite() shiftOut() pulseIn() millis() micros() delay() delayMicroseconds() SoftwareSerial (has been updated in Arduino 1.0)My sketch
Upload the Sketch
Using “Sketch” menu, I select “upload with programmer” and after few seconds the sketch is loaded on my board.
My board connected to USB Tiny Programmer(Fab ISP Optimus)

AvrDude and Fuse Calculator
AVRDUDE - AVR Downloader Uploader - is a program for downloading and uploading the on-chip memories of Atmel’s AVR microcontrollers. It can program the Flash and EEPROM, and where supported by the serial programming protocol, it can program fuse and lock bits. AVRDUDE also supplies a direct instruction mode allowing one to issue any programming instruction to the AVR chip regardless of whether AVRDUDE implements that specific feature of a particular chip.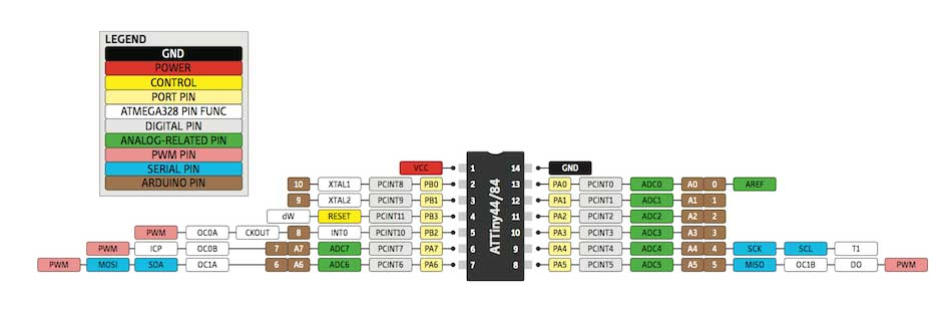
Fuse Bytes
The
ATtiny24A/44A/84A
have
three
fuse
bytes.
Table
19-3,
Table
19-4
and
Table
19-5
briefly
describe
the
functionality
of
all
the
fuses
and
how
they
are
mapped into the fuse bytes. Note that the fuses are read as logical zero, “0”, if they are programmed.
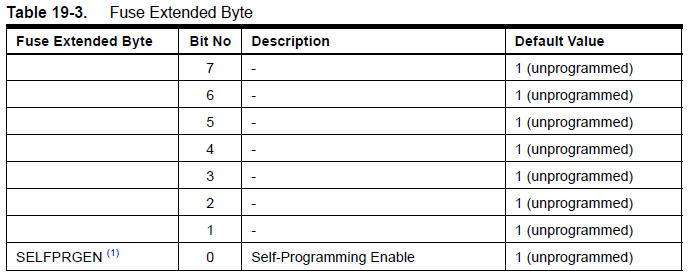

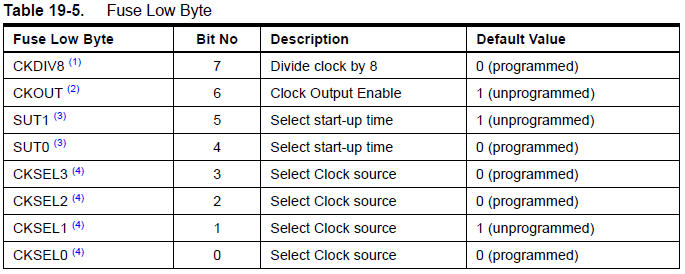
“0” is active “1” is inactive”
In simple terms, the fuses are registers that allow to modify particular characteristics of the microprocessor. The fuses are not modifiable by the software that is inside the Tiny44 but only by using an external programmer. It must be remembered that to activate the function of the desired bit, it must be set to "0" and to deactivate it, it must be set to "1". For example, the flash memory cells after formatting all have the value at "1".Final Conclusion
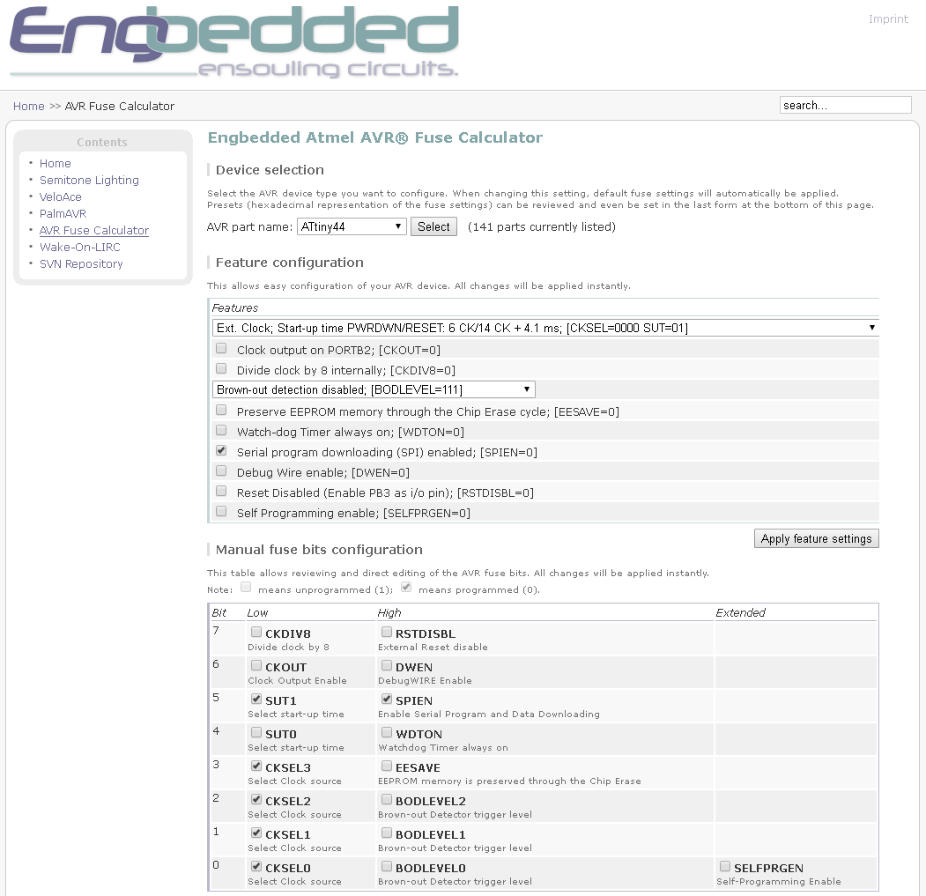
This week was very interesting, and I learned a lot. I would like to learn the full range of microprocessors, to know which one to use at my best in every personal project. I wonder if it is possible to create a software that can automatically choose the type of microcontroller to use, map the pins, all depending on the information we give to our project; and also I would like to design a circuit capable of programming more than one microcontroller at a time ... but these are ideas for the future!Fuse Calculator
It is a free online software that allows you to calculate the mergers and access particular microcontroller functions.
Video of myboard44
My sketch on Arduino IDE
Interface of Arduino IDE
Software Download Options
Additional Boards Manager URLs
Input the Additional URLs
Setup of parameters: type of processor, External 20 MHZ clock and type of programmer used
voltage and button test
my card correctly recognized