Computer-Aided Design
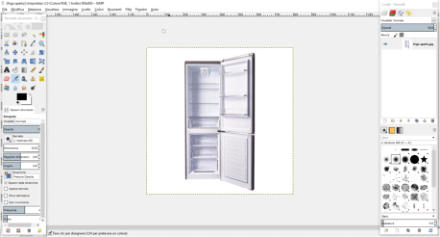
This week I will use different software both 2D and 3D. First I look for an image for the montage of the food saver box in the refrigerator. Using google to
find a good photo to use, I find one and open it with the GIMP software. First, I resize it, then save it.GIMP is a powerful free software that allows you to
process images in any way you need. Really useful.


from GIMP: go to menu “File” and select “open” then select the file to open
Select rectangule around image and cut image to selection then save it

The
next
software
for
the
photo-montage
of
the
food
box
saver
in
the
refrigerator
picture
is
INKSCAPE.
Inkscape
is
professional
quality
vector
graphics
software
which
runs
on
Linux,
Mac
OS
X
and
Windows
desktop
computers.Features:
Flexible
drawing
tools,Broad
file
format
compatibility ,Powerful text tool,Bezier and spiro curves.
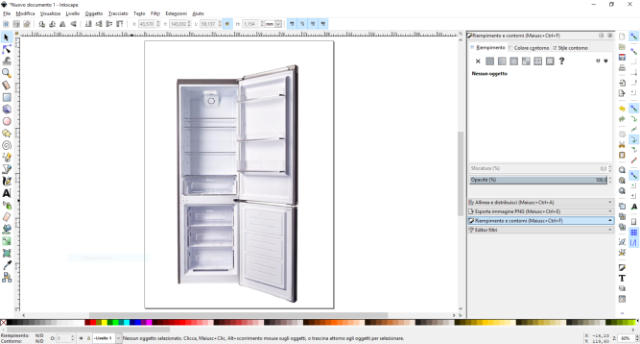
Now
I
run
the
inkscape
software
and
load
the
file
been
saved
before.
To
draw
the
box
in
picture
of
fridge,
I
think
to
use
tracks elements, so I proceed to draw.
zoom to selection
select track mode
I design the lines and fill the polygons
with different colors.


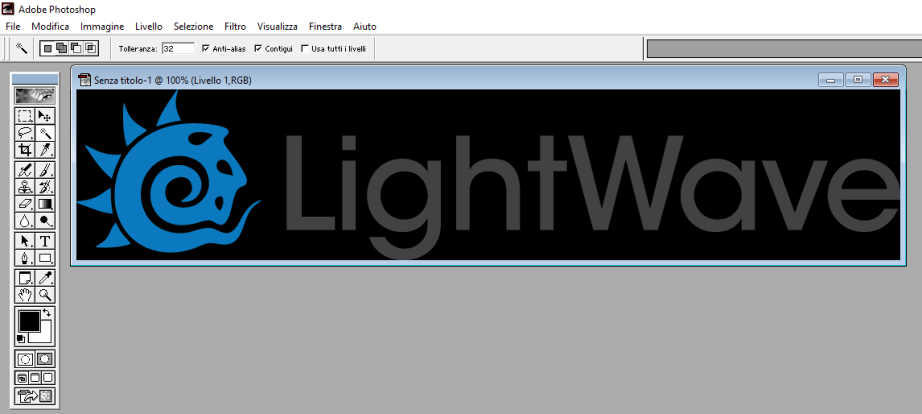


To Made this web page about documentation to computer aided design, also use
an old version of photoshop software, for example to clean logo of Lightwave 3d
software.Below the work made with photoshop step by step.
LightWave 3D is a 3D computer graphics software developed by NewTek. It has been used in film, television, motion graphics, digital matte painting,
visual effects, video games development, product design, architectural visualizations, virtual production, music videos, pre-visualizations and
advertising.
https://www.lightwave3d.com/
Personally I was fascinated by the potential of this software that goes back to the Amiga time of the commodore computer. I bought a book and I'm
studying it but it's complex enough to use even if its interface is more user friendly than other software.
My desire is to learn how to use this wonderful software very well, but I understand that it will take me a long time!
The 3D Software: Lightwave
the cleaned final logo


example of lightwave modeler
example of lightwave layout
How Install Lightwave…

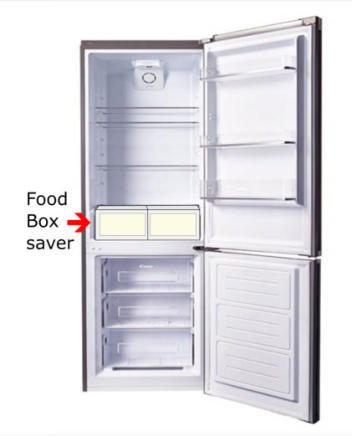
box

exercises to learn rhino 3d
To improve my knowledge of rhino 3d I follow the tutorial that explain how model a glass with water inside. This is very interesting experience and I can learn a lot about rhino functions and commands.All the steps for making the glass with water are well explained in the tutorial, step by step, which can be found at the bottom of this page in useful links.

My First Final Render!
After modelling the glass and water inside, the render was launched and I have to wait 20 minutes to view the result The quality parameters is not set to max value because this operation need a lot of hours to finish the render. the final image satisfies me, there are endless possibilities to represent anything that can be modeled in 3d.
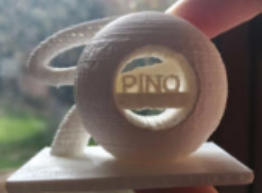
My 3D object
modelled by Rhino3D and printed by ultimaker 2.


from
the
official
site
of
lightwave
you
can
download
a
trial
version
to
test
the
software.
After
downloading
the
file
and
starting
the
installation
wizard
(very
easy
to
do)
on
my
desktop
I
find
two
icons
related
to
the
"modeler"
and
"layout"
that
they
are
the
two
operating
environments
of
the
program.
The
first
is
used
to
create
three-dimensional
objects,
the
second
to
assemble
scenes
and
produce
video
or
static
rendering
images.
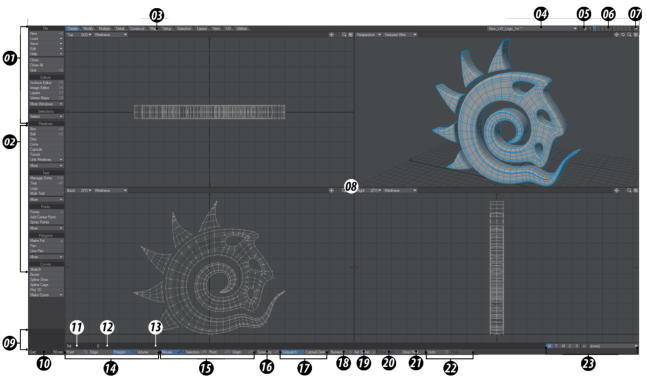
Modeler User Interface Overview
Try to use Lightwave
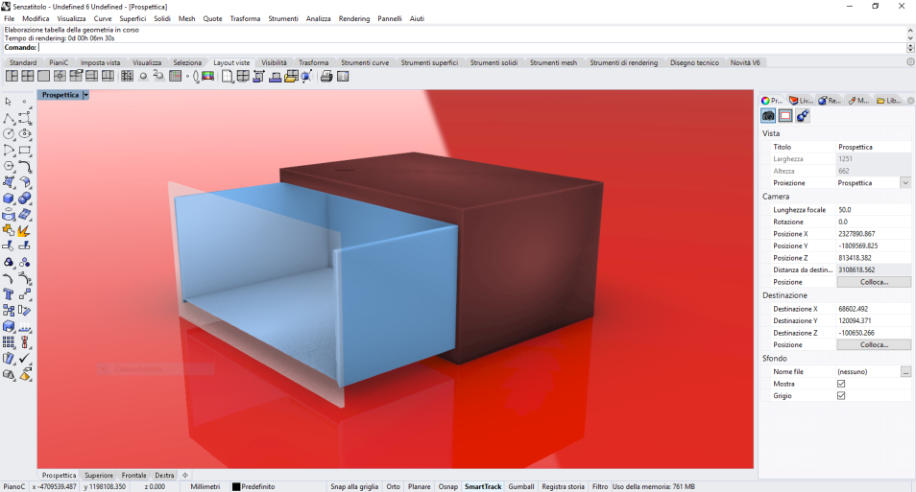
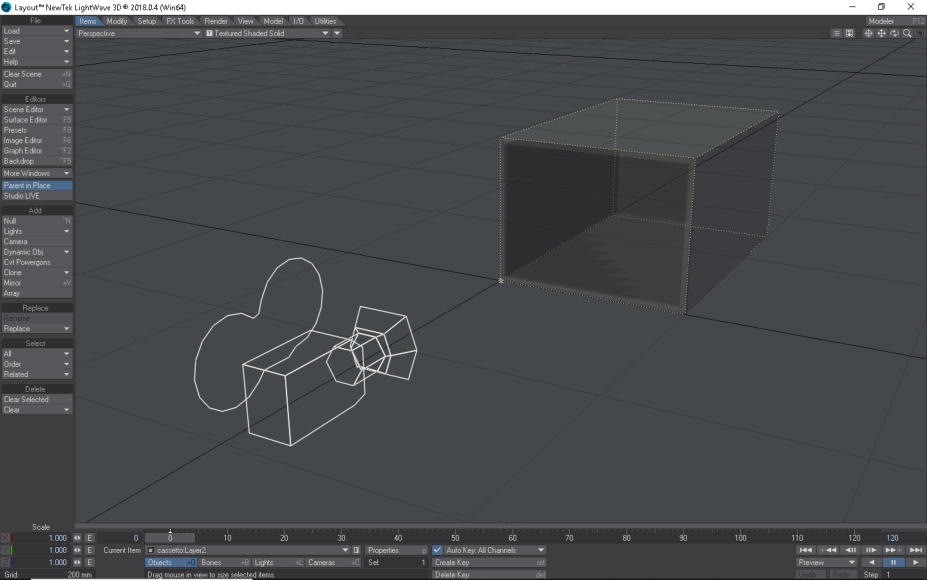
To try the software I would like to create the 3D model of my "box food saver" .( see my final project ) at the top of the software window, there are the "tabs" that access the commands of that section. The command I want to use is the one that allows the creation of "boxes". Then I select the tabs "create" and in the menu on left, under the heading "primitives" I select "box".(figure A) To create the box, I can proceed in two ways: 1) define the angles using the mouse, click to fix the first point and then the next, 2) use the "n" key to open the "numeric box tool" and insert manually numerical values (figure B) at this point the "enter" key confirms the data entered and the box is generated (figure C)
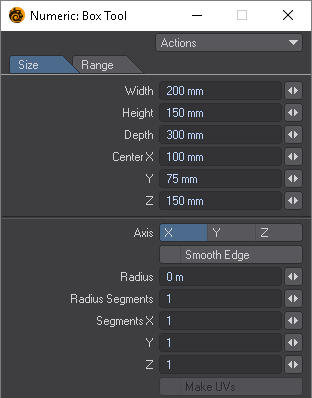

FIG.C
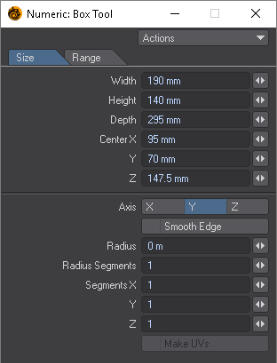

Inner box
The same procedure was applied to generate the inner drawer, with "numeric tool box". (fig. D) Obviously I considered the thickness of the plexiglass of 5 mm per side.(fig. E) I can use the Boolean difference to "dig" the external box with the inner drawer.I select the tabs "Construct" and in the menu on left, under the heading "boolean" I select "Subtract".(figure F)
FIG.D

FIG.F

The same procedure was applied to dig the inner drawer. (figure G) next I generated the front of drawer (fig.H) and place it to correct position.(fig.I)
FIG. G
FIG.E
FIG.B
FIG.A
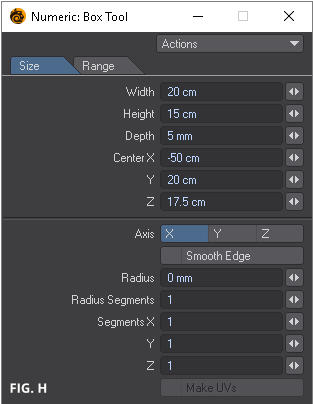

FIG. I

FIG. L

The
three-dimensional
box
has
been
modeled
and
finally
I
can
save
it,
the
export
format
is
a
.lwo
file
owner
of
the
software.
This
model
can
be
loaded
inside
the
"layout"
that
will allow me to obtain the final render or an animation.
Layout software of Lightwave
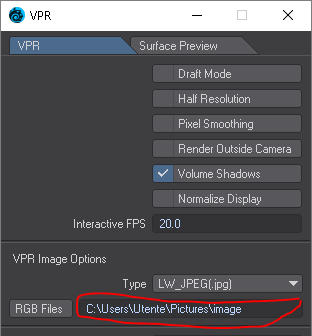
The second part of Lightwave is a scene creator, a video creator and a renderer of previously modeled and imported objects. In fact, I can load my previously modeled box and once the camera frame is positioned, I can generate the render of the scene, using the "render frame" command (F9 function key).

First render of Box Food Saver
Original Files and Useful Links