
|
|---|
Assignment |
Final Project |
About Me |
|---|
Week 9
0.Assignment
*individual assignment:
read a microcontroller data sheet
program your board to do something,
with as many different programming languages
and programming environments as possible
1.Data sheet
I looked at the data sheet of attiny44 and found out where each pin has this name in place.
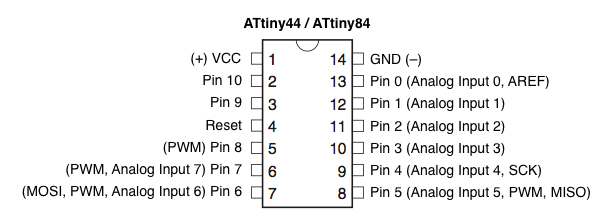
The positions and names of the pins are as follows, and each pin has a different role.
*important conceptions
-SPI: Serial Peripheral interface (used in Atmel for inputting and reading program or data)
-MOSI: Master Output, Slave Input (output from master) -- to give output
-MISO: Master Inout, Slave Output (output from slave) -- to accept input
-SCK: Serial Clock(Clock means special signal to get programs activate)
-ADC: Analog to digital converter (translating analog to digital)
-AVCC: The Analog Supply Voltage pin for Port F and the A/D converter.
-AREF: Voltage Reference that the chip will use to know the range of voltage.(Pin which is the standard for analog VCC)
-PDIP/SOIC : PDIP(Dual in-line package, through hole package), SOIC(Small-outLine integrated circuit)
-EEPROM (128/256/512 Bytes of In-System Programmable EEPROM) : Electrically Erasable Programmable Read-Only Memory, Non-volatile memory.
Used in computers and other electronic devices to store small amounts of data that must be saved when power is removed
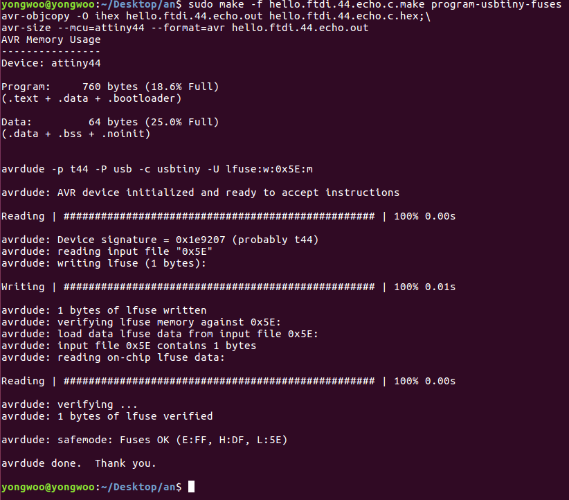
2.Programming
I wasn't make the FabISP, but finally I made the fabISP!
So I was able to start embedded programming.
Also, I started programming a Echo.hello.world.board without any problem.
I watched and followed this site.

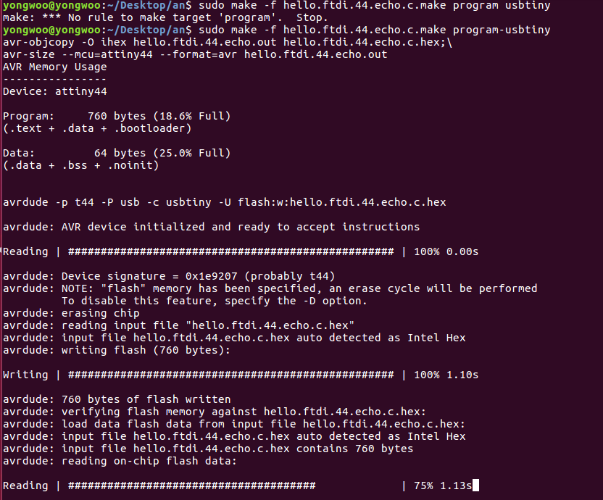
There were no other problems and I was successful!
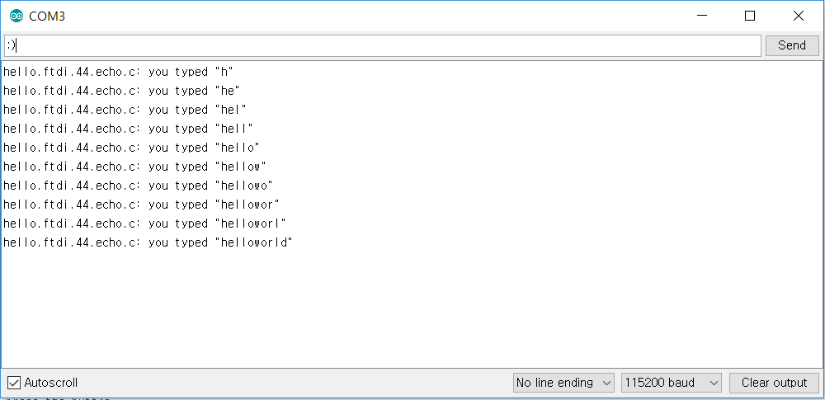
So I opened an arduino serial monitor, type 'helloworld'. success!
Then, I programmed with Arduino, before I started a programming, I looked at the sites of people who had worked in fablab seoul in the past,
and I watched the videos on YouTube that explained about Arduino, I studied a bit.
The main referenced site was High-Low-Tech,
also I followed at all in this site.
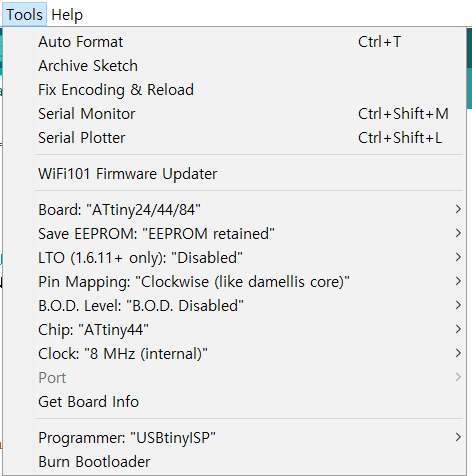
The setting of arduino is this.
What I would like to do is simply push the switch to turn the LED on and off to turn it off.
The basic code is arduino-examples-blink.
The following are the Arduino codes and pictures, video.
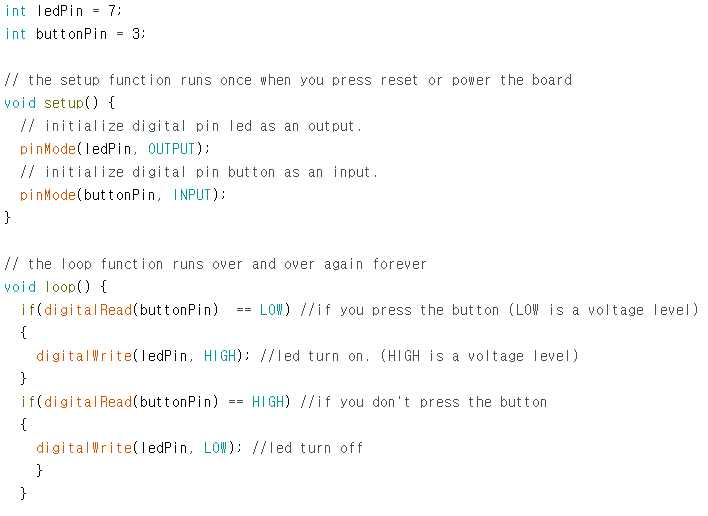
int ledPin = 7;
int buttonPin = 3;
// the setup function runs once when you press reset or power the board
void setup() {
// initialize digital pin led as an output.
pinMode(ledPin, OUTPUT);
// initialize digital pin button as an input.
pinMode(buttonPin, INPUT);
}
// the loop function runs over and over again forever
void loop() {
if(digitalRead(buttonPin) == LOW) //if you press the button (LOW is a voltage level)
{
digitalWrite(ledPin, HIGH); //led turn on. (HIGH is a voltage level)
}
if(digitalRead(buttonPin) == HIGH) //if you don't press the button
{
digitalWrite(ledPin, LOW); //led turn off
}
}
You can download my work here
zip file download