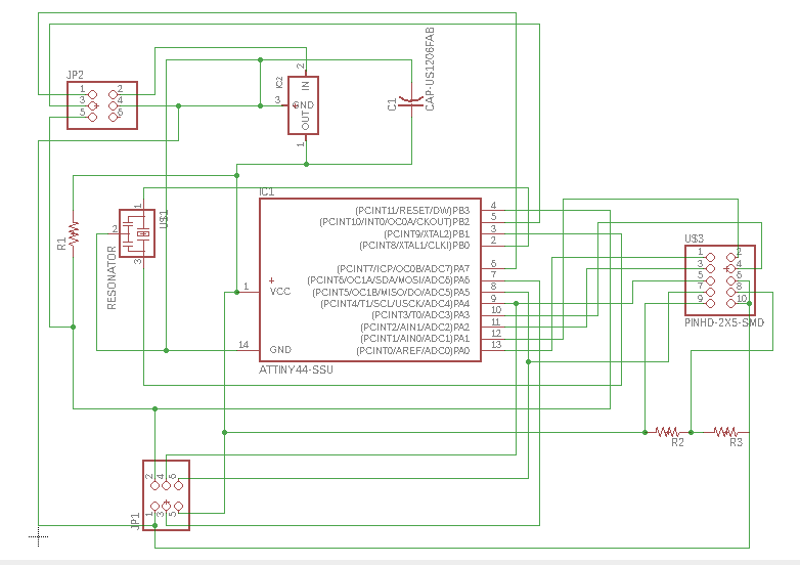
Assignment: Add an output device to a microcontroller board you've designed and program it to do something.
I decided to make the hello.LCD.44 board.
I had made an error setting the design rules in Eagle, so there was one area on the board where the Modela's bit could not get past and I did not spot this until I had milled the board and populated it.
I managed to salvage some of the components, including the IC and regulator.
I could not remove the 20mhz resonator.
Freshly milled board. I could have polished the rough edges of the traces better.
This is the LCD panel that I will be using.
Connecting ribbon soldered to the LCD.
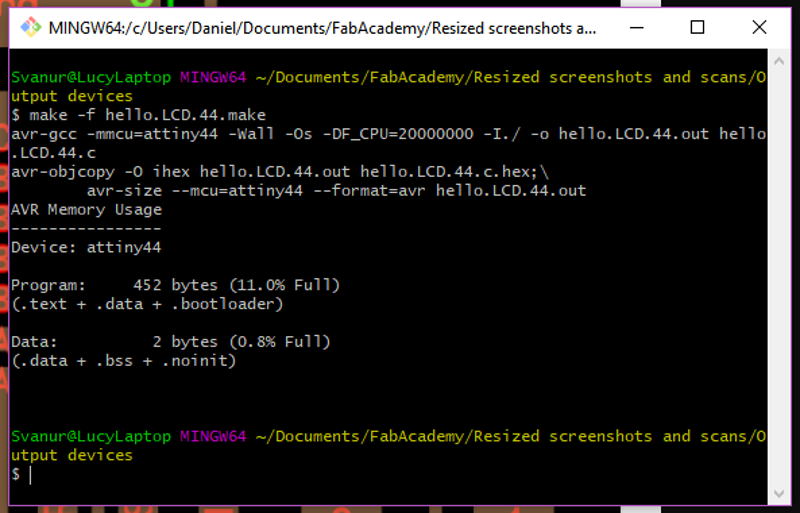 I ran the make file which produced a .hex file.
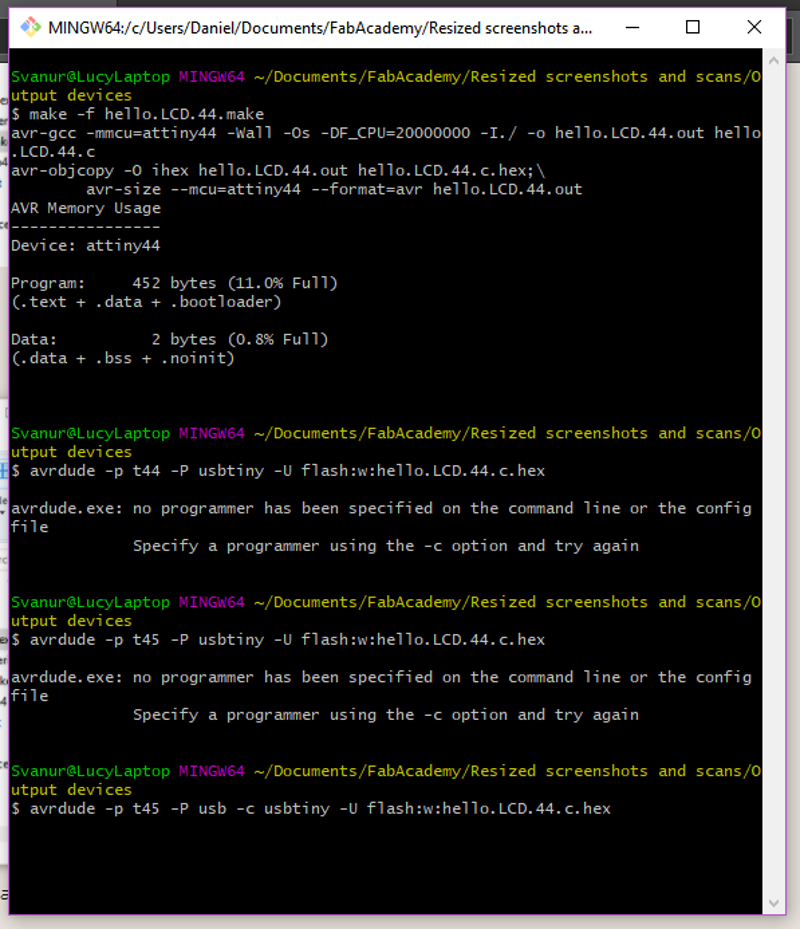 I made some errors flashing the .hex file, first calling the programmer a t44, then failing to specify a programmer. It was only much later that I discovered that the t44 command referred to the board to be flashed and not the programmer and should not have been changed.
 With the -c option corrected, I got an Initialization failed message.
The power supply was set for 7 volts.
The alligator clips from the power supply are awfully close together.
Both the LEDs on the programmer light up when power is applied to the LCD board.
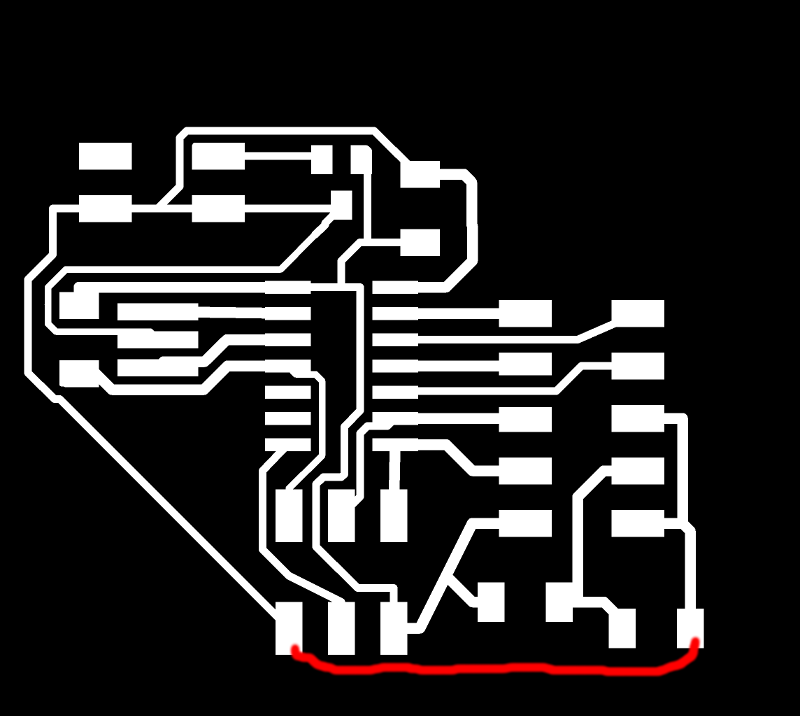 There was a ground trace missing, so I had to add a jumper wire to the board.
I also soldered a wire to the power header's ground pin, to keep the power supply's clips far enough apart.
Linda spotted some suspect soldering on the programmer.
I reflowed the solder on that pin.
At this stage I gave up and made a new board with new components, with the missing ground trace in it's rightful place. However, when I had mostly populated the new board, I discovered I had made excactly the same error as with the original one, I had set the design rules in Eagle so there was one place where the milling bit could not go and left two traces fused together. I had rectified this in Gimp, but not in Eagle, so when I used Eagle to add the missing ground trace, the resulting board still had the original error.
I managed to desolder the header I had partially soldered to the board without damaging the traces and used a broken 1/64in milling bit to carve a gap in the traces.
I connected the board to the power supply, using the trick Bas had tought me, to insert a piece of paper between the power and ground pins, so the alligator clips would not touch. This time only one LED lit up on the programmer, like it should, but avrdude reported a processor it was not expecting and did not proceed to flash the board. Bas took a look at the screen and explained to me that the t command had nothing to do with the programmer and should be t44, like the board.
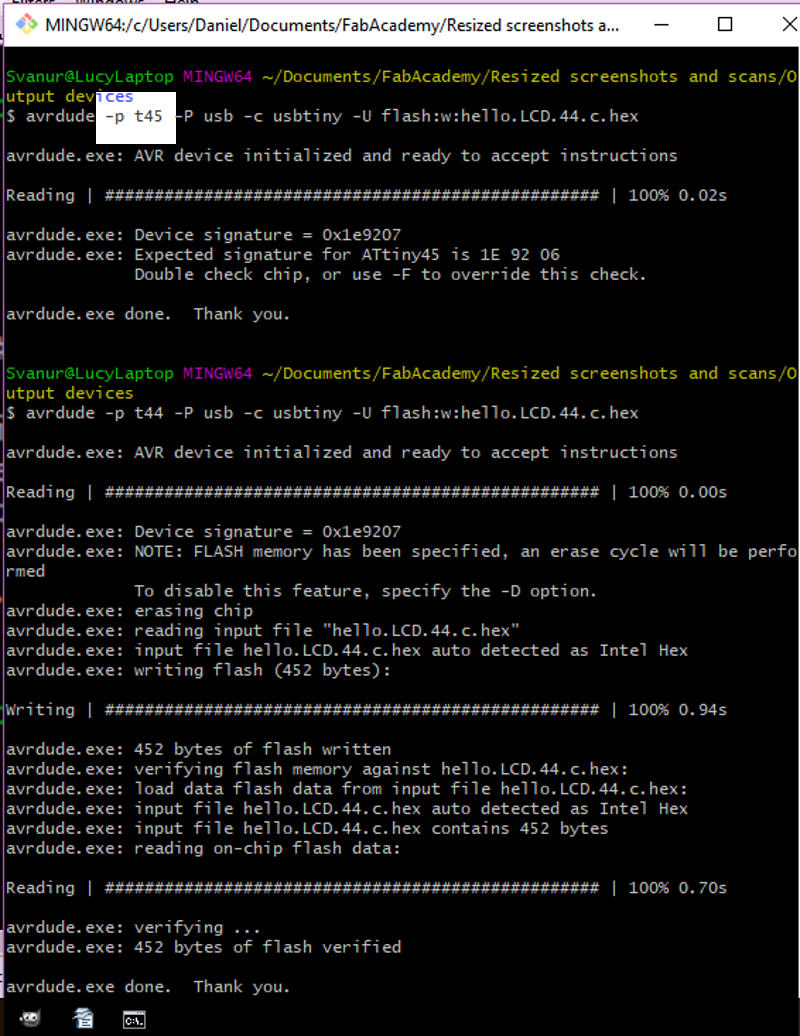 With that corrected, avrdude now went ahead and flashed the board.
This time when power was applied, magic happened.
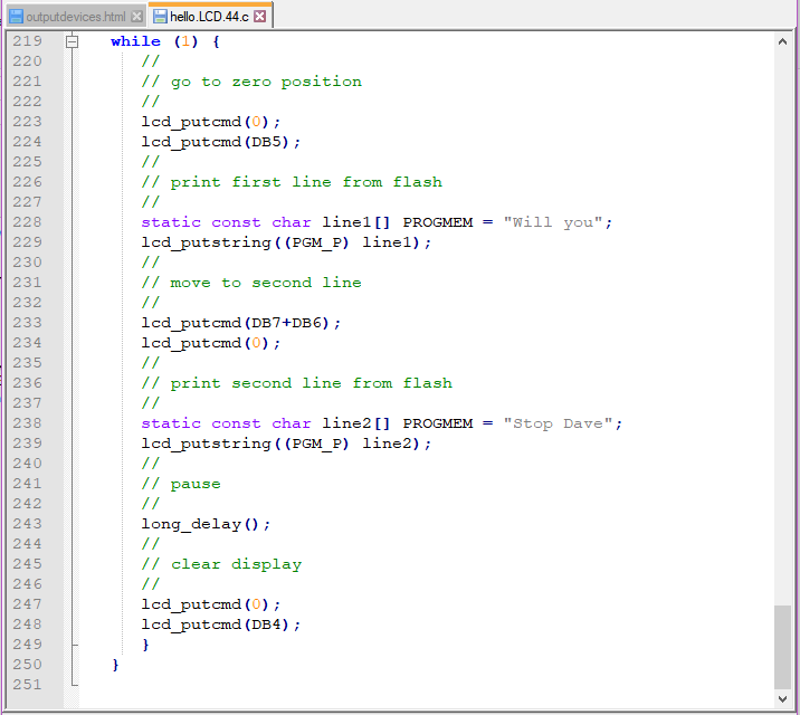 I tried changing the letters on the display by opening the c file in a text editor and where I found the words Hello to the world, in line 228 and 238, I replaced them with new ones and saved the file. I then ran the makefile again and flashed the board with avrdude.
Success.
