Individual assignment:
Read a microcontroller data sheet. Program your board to do something, with as many different programming languages and programming environments as possible.
Group assignment:
Compare the performance and development workflows for other architectures.


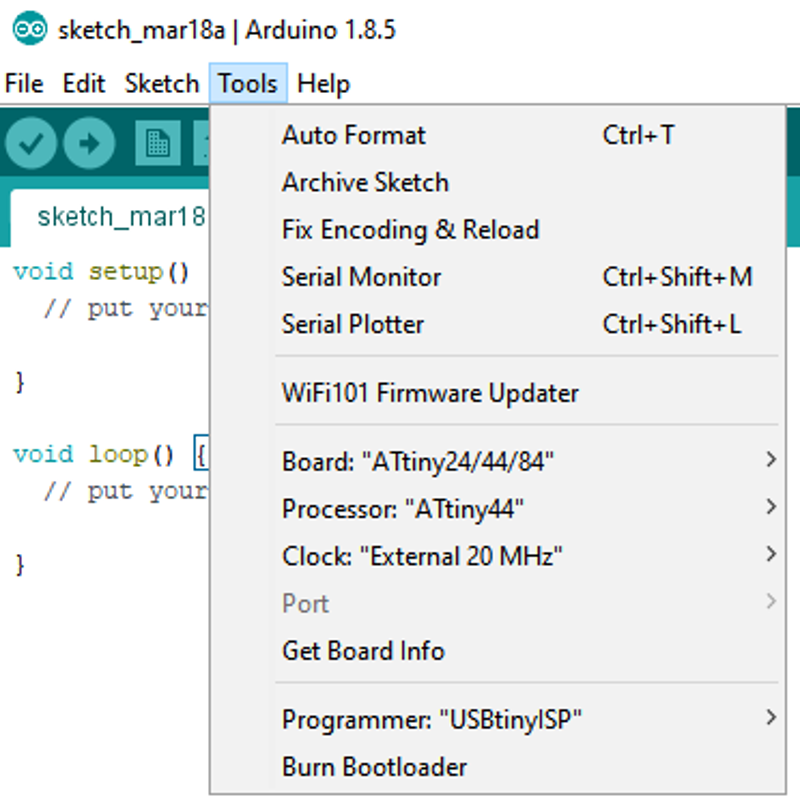
Programming the Attiny 44 board with one LED and one button using Arduino.
We used the HighLowTech tutorial on how to program an ATTiny board with Arduino, we copied the link https://raw.githubusercontent.com/damellis/attiny/ide-1.6.x-boards-manager/package_damellis_attiny_index.json , opened preferences and pasted the link into the Additional board manager URLs field. Now the entry for attiny showed up in the Tools > Board menu with the option to install. When that button was clicked, the word Installed appeared in green by the attiny entry. Now the Atiny board can be seen in the Tools > Board menu and we select the Atiny 24/44/84 board, latest version, the Atiny44 processor, Clock: External 20Mhz and, on my laptop, port 1. Now we are ready to burn the bootloader, which is the same as using a makefile to program fuses. Now, when redefining the initial “Blink" sketch in Arduino to account for pin allocation differences in each board and uploading it, the Led on the board starts blinking on and off ad infinitum.
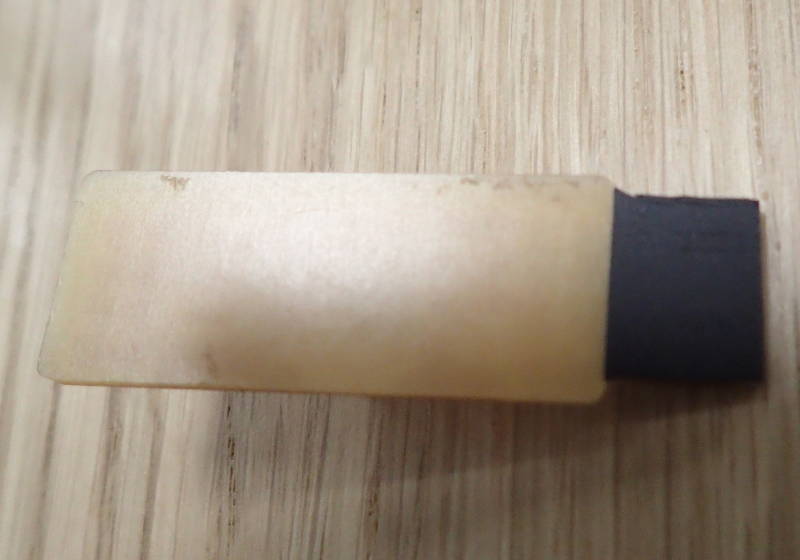
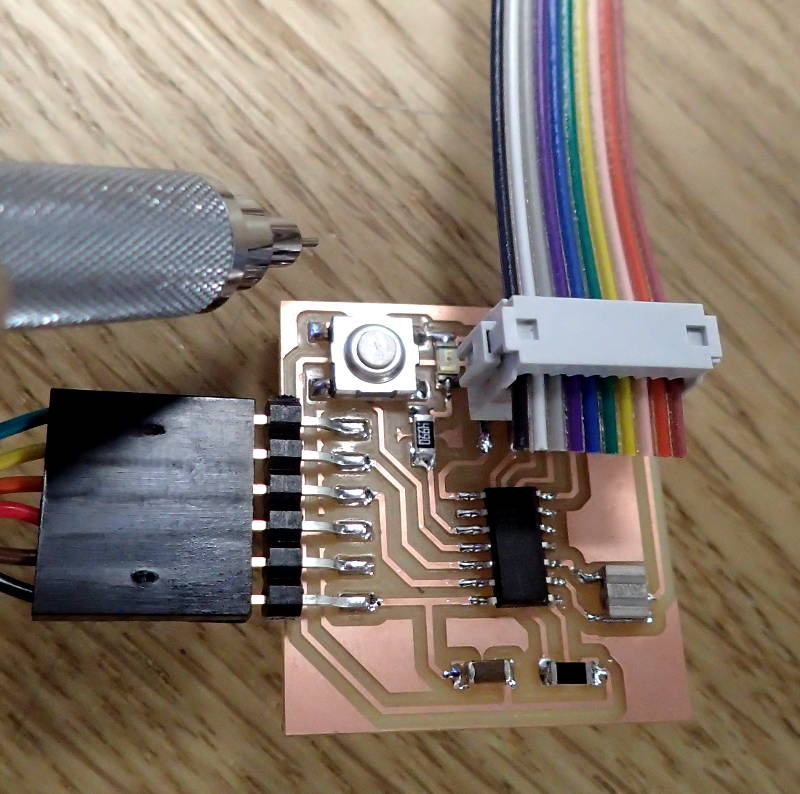
I tried to program the Hello world board with Arduino to flash the LED when I pressed the button, but my programmer did not work when I plugged it into a USB port. Linda Wanders advised me to apply some tape to it's underside to provide some pre-loading on the contacts and that worked.
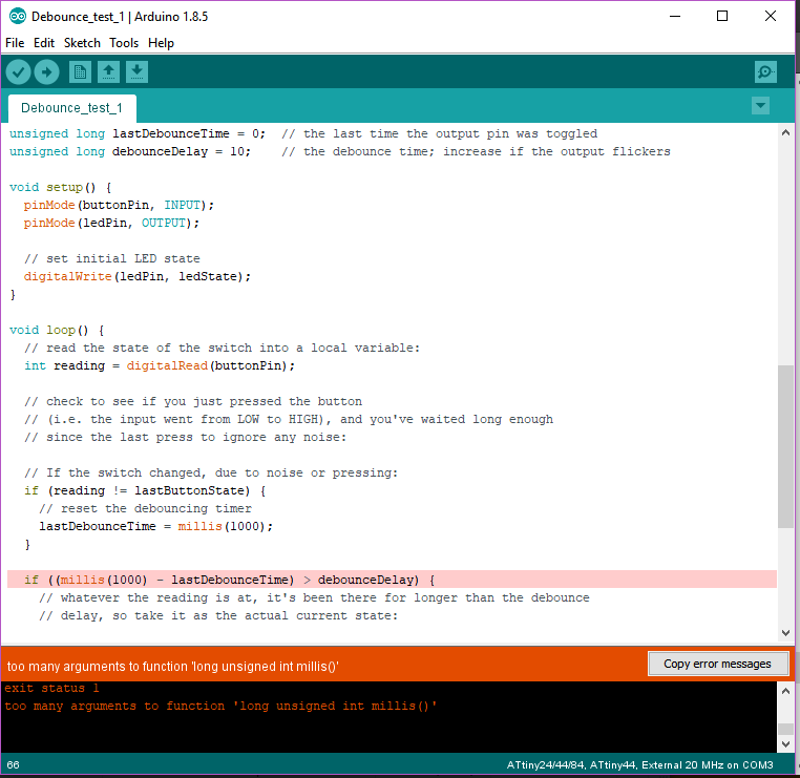
Not quite having got a handle on the debounce test yet.
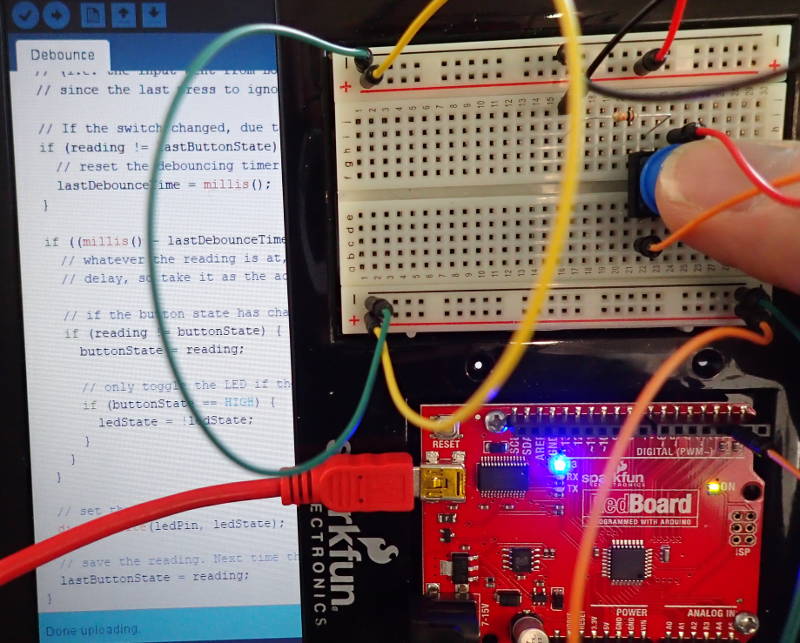
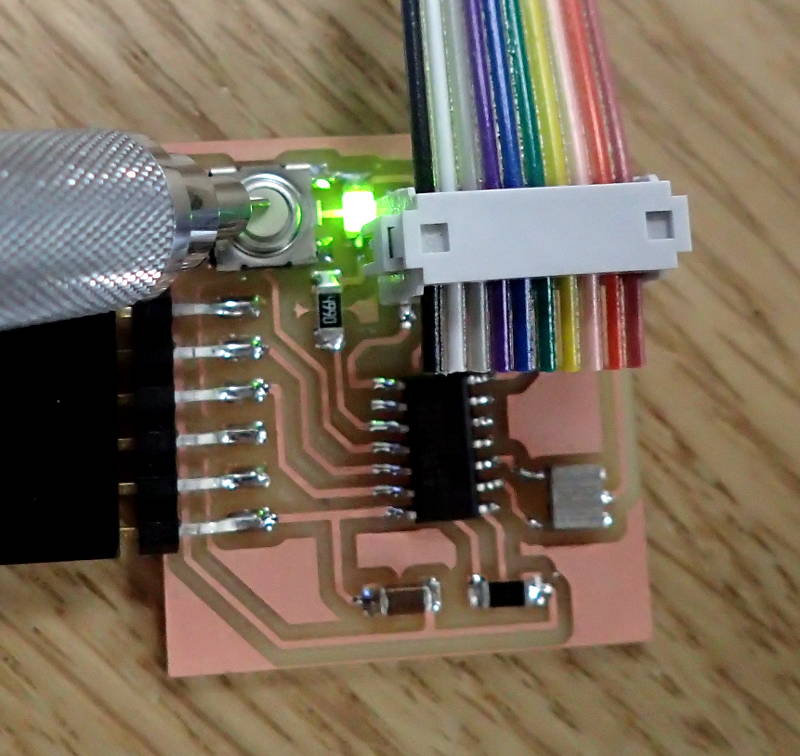
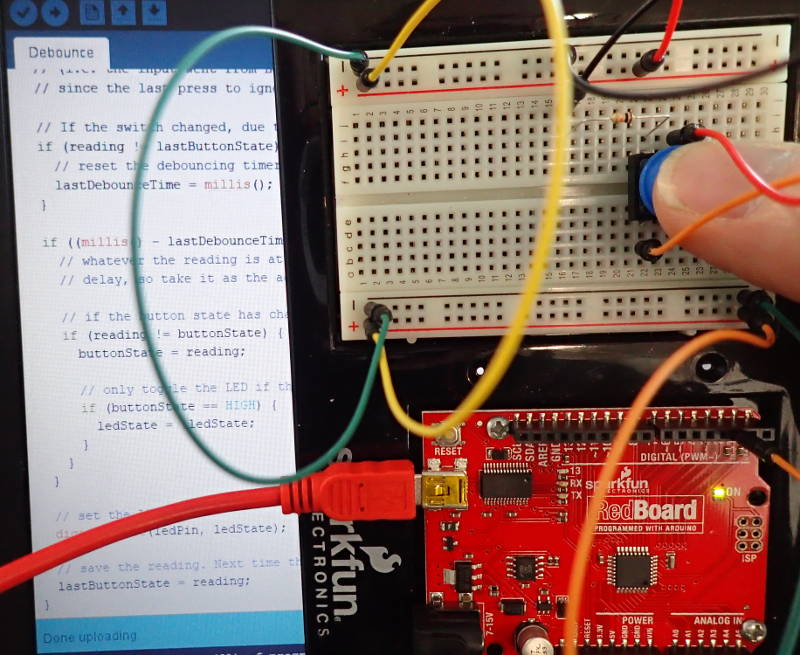 I was going to set up the debounce test with my Hello world board and change it around and see what happened, however it would not turn on the led when I pressed the button, but acted randomly on it's own. The debounce test did not work either right away when I breadboarded it up with a Sparkfun Arduino board, but that turned out to be a faulty button. I tried again using my board and then it displayed some strange behaviour. It would not flash when the button was pressed, but if i lightly touched the insulated part of the connector with my fingertip, it would act like it was a touch-sensitive switch. Most peculiar. I examined my solder work closely, but did not spot any cracks or cold joints. The blink test worked just fine.
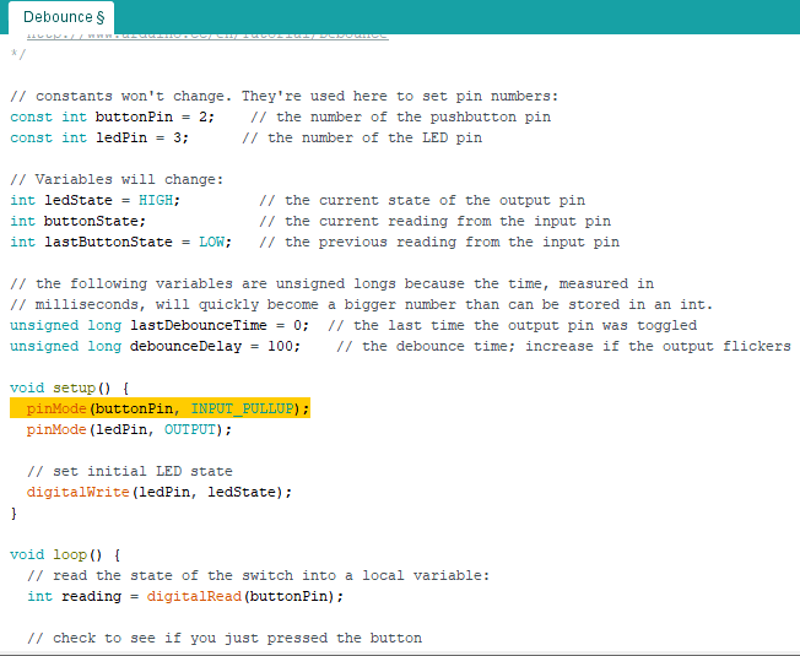
What I had done wrong is not enabling the pullup resistor, when that had been added, the debounce test worked.
The debounce test makes use of the if statement, to read the last button state and compare it to a set interval in milliseconds to make sure the reading is valid and the button has indeed settled in to it's current state after the last change, as the processor would otherwise get confused and give a random reading of the button state, because as the button is changing states, there is a period of "bounce" i.e. a series of rapid changes of state. The trick is to set the interval to the shortest time in milliseconds that will give a consistent reading.
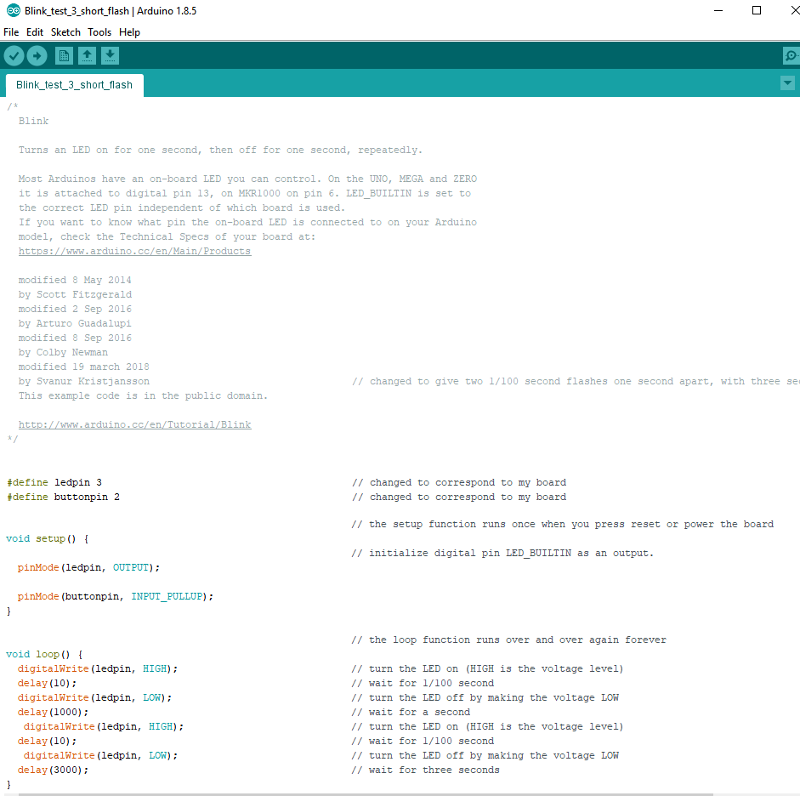
Here is a variation of the Blink test, amended to make two short flashes with a one second interval and repeat after three seconds and to correspond with the pinout on my particular board, i.e. the button on pin 2 and the LED on pin 3.
Arduino file, two short flashes with three second intervals
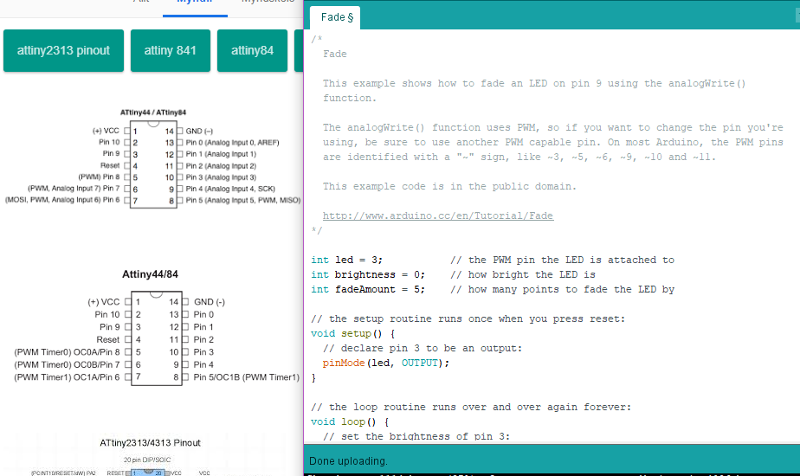
I tried the Fade example code, but my LED pin is pin 3 and Fade needs a PWM capable pin, which on the Attiny44 are pins 5 and 6.
I had a look at the datasheet for the Atmel Attiny 44 and the built in temperature sensing function caught my eye, as it might make an extremely cheap and simple temperature sensor for my final project.
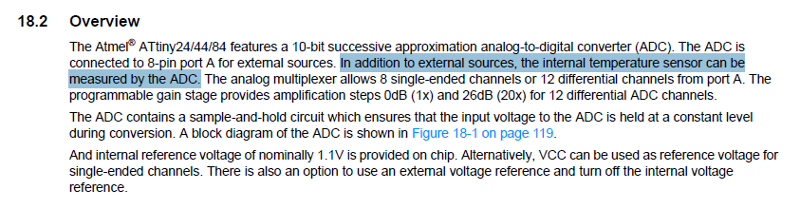
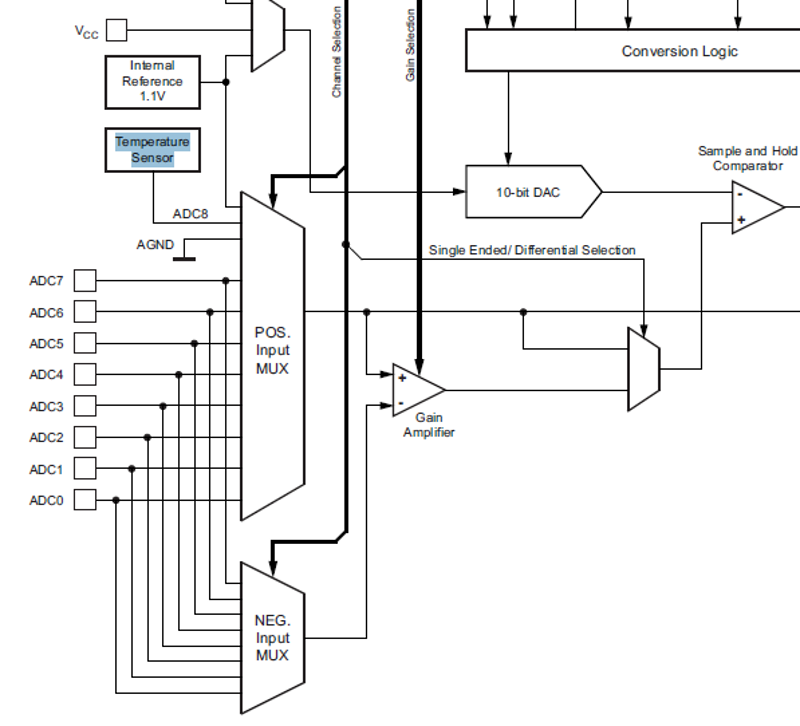 It seems this function was mainly intended to measure the goings-on within the chip itself and that the accuracy left something to be desired for practical applications.
 Some Googling brought reports from people who had successfully calibrated the temperature measurement using an ice cube (just starting to melt, in a plastic bag – to give 0 degrees while not flooding the chip) to give readouts accurate to about 1 degree. For serious applications, it seems that an investment in an external temperature sensor would be wise and not unduly complicate the project, but the ATtiny's small form factor and automotive grade environmental temperature tolerance would make it a viable alternative in some cases.

For the group project segment, we compared the speed of a ring oscillator across the GPIO layer of a Raspberry pi using, on one hand, C and on the other, Python. Which is to say, a little dooverhicky of data is sent on it's merry way through the deep, dark centre of a processor and back out, where the speed of it's journey can be displayed for all to see on an oscilloscope.
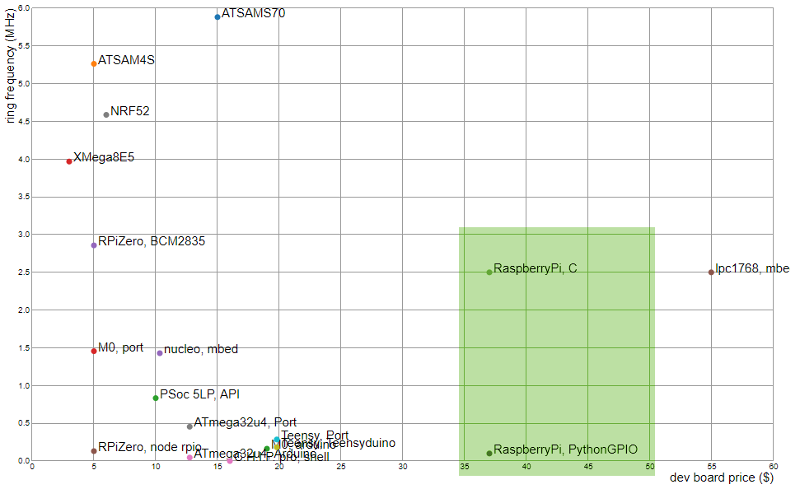
This happens to be the first image that comes up in the Architectures section of the Embedded programming assignment. This neatly demonstrates the difference in performance, as there are two instances of an identical processor, one running Python, a high level code, the compilation of which extracts a toll of blood, sweat and tears from the programmer, but then proceeds to run with alarming alacrity - and the other C, which utilizes handy ready-made libraries, which takes the bulk of the effort out of writing the code, at the expense of considerable resources on part of the poor processor.