9

Embedded programming
What I learned: I learned to program in both Arduino and Atmel.
I would like to learn more about other examples and ideas I could create with embedded programing.
Sources and inspiration used:
Arduino: https://www.arduino.cc/
Atmel: https://www.microchip.com/
AVRDUDE: http://www.ladyada.net/learn/avr/avrdude.html
ATMEL: http://www.microchip.com/
Arduino: https://www.arduino.cc/en/main/software
http://forefront.io/a/beginners-guide-to-arduino/
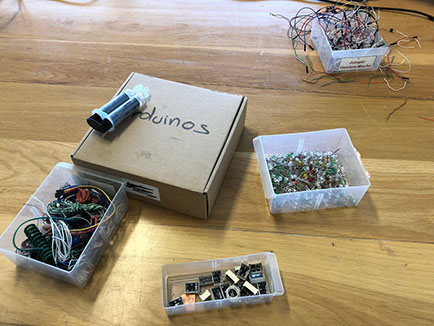
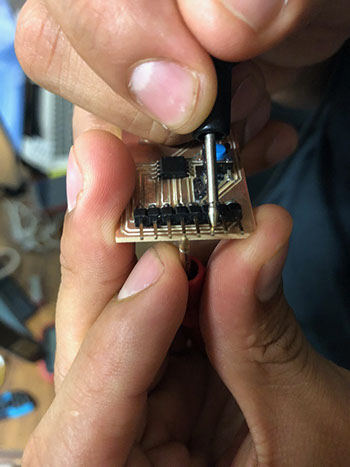
What I did: First I had to install the driver until USBTiny appeared in the screen. I decided to use an Atiny85 because it is a great microcontroler and it is somewhat easy to weld. After weilding it I tested it, and then I realized that I had to correct the circuit because I welded it wrong and it had a short circuit, that made imposible to program the LED. Regarding the coding, I personally like more Arduino than Atmel (both softwares I had to download from its official websites, its really easy below you can find the links). But, although both are similar, I find that Arduino simplifies the programming language (the downside is that the program will be heavier in Arduino than in Atmel). To programm, I used the circuit elaborated in the last electronic assignment. Once the codes were programmed in Arduino. First you have to install the libraries of ATtiny in Arduino by using the Library Manager, click to the "Sketch" menu and then Include Library > Manage Libraries, there you will find list of libraries that are already installed or ready for installation, finally click on install. Then I used cmd.exe. When opening cmd.exe I wrote in the cd desktop console and later used avrdude, to program the code inside the circuit.
So, I used Avrdude, a command line program that runs from the command prompt. First I programmed the code in arduino then I used Avrdude. Once I had the code I wrote in the command prompt cd desktop (because that’s where I save my .hex file with the code made in Arduino).
Then I wrote after C:\Users\Yvonne\Desktop> " avrdude -c usbtiny -p t85 –U flash:w:2.hex "
You should write where I typed “2.hex” the name of your file.hex
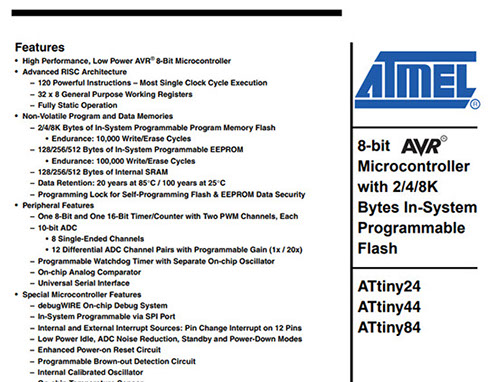
I also did programming with Atmel. In both softwares, the first thing to do is find or download the library for USBTiny. I tried to use different codes as shown in the images however not all were correct (I should practice a lot more my programming skills). I learned from my data sheet the configuartion from the pins, I also learned that there are special Microcontroller Features like debugWIRE On-chip Debug System, in-System Programmable via SPI Port, external and Internal Interrupt Sources, low Power Idle, ADC Noise Reduction, and Power-down Modes, enhanced Power-on Reset Circuit, programmable Brown-out Detection Circuit, internal Calibrated Oscillator.
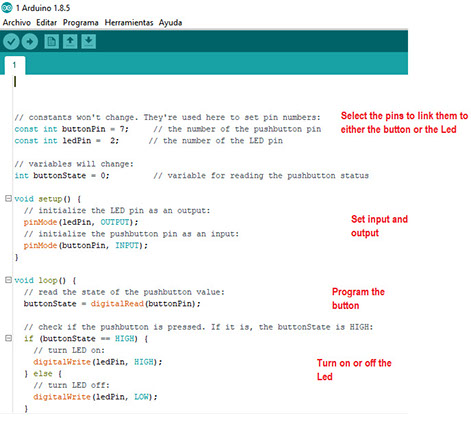
So what you need to do is create the code in Arduino, then compile it to check it's alright. After that save the file in your desktop so it is easy to find. Then connect your circuite to your PC and make sure all pins are correctly paired so the programm can pass from the computer o the circuit. Them open CDpromt to program, there you will use AVRDUDE command and tell were your .hex file is located (it is in the desktop). So, the command that I used to upload my code to your microcontroller is: avrdude -c usbtiny -p t85 -U flash:w:name.hex in the CMD window. The different segments of my code are described in the picture below.
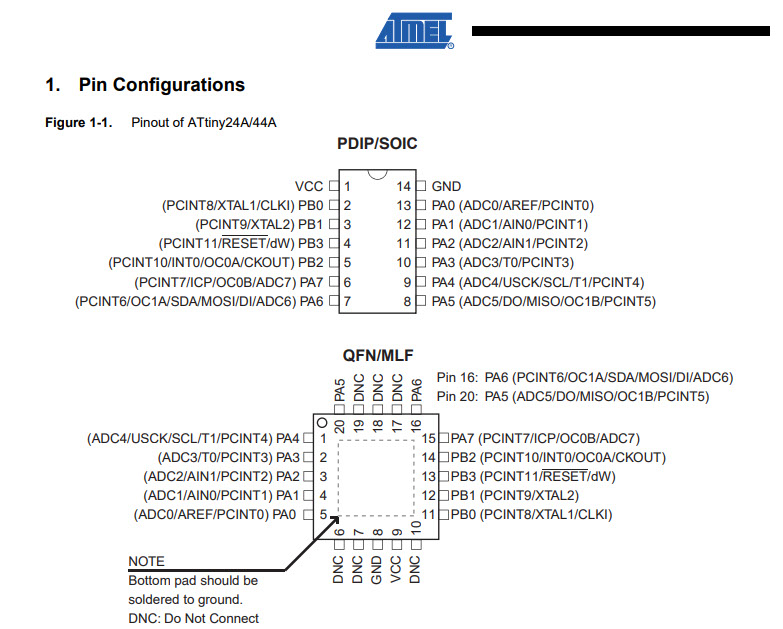
From my datasheet I learned what are the features of my microcontroller, what I found most helpful is the pin configuration (I added the picture next), that helped me a lot to find where I should connect everuthing to programm my board, without it it would have been very difficult and it would takea lot of time (using the multimeter). I would love to know what other projects I can make with this microcontroller, see other people projects and why they choose this microcontroller over others. I also learned how to program my board with Avrdude, below you can find my code.
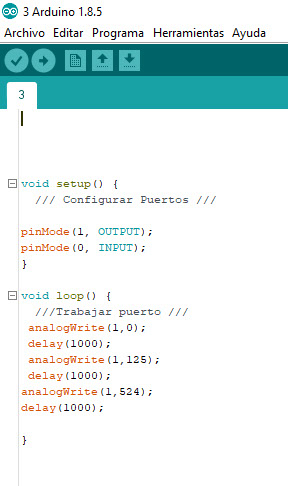
Click on the image
to download file
Explanation of the programming of the code found in ladyada (link below)
-C <config-file>: The config file tells avrdude about all the different ways it can talk to the programmer. Theres a default configuration file, so lets just use that: don't use this command switch
usbtiny is the device
-p <partno>: This is just to tell it what microcontroller its programming. For example, if you are programming an ATtiny2313, use attiny2313 as the partnumber
-U <memtype>:r|w|v:<filename>[:format]: OK this one is the important command. Its the one that actually does the programming. The <memtype> is either flash or eeprom (or hfuse, lfuse or efuse for the chip configuration fuses, but we aren't going to mess with those). the r|w|v means you can use r (read) w (write) or v (verify) as the command.
The <filename> is, well, the file that you want to write to or read from. and [:format] means theres an optional format flag. We will always be using "Intel Hex" format, so use i
So, for example. If you wanted to write the file test.hex to the flash memory, you would use -U flash:w:test.hex:i. If you wanted to read the eeprom memory into the file "eedump.hex" you would use -U eeprom:r:eedump.hex:i
To program in Atmel I had to start a new project choose the device and make the code then I built it and compiled. Just as with Arduino I had to look for the adress where the file was saved, I pasted it in my desktop and used the same comand in CMD promt. You cannot copy and paste an Arduino code to Atmel, you must change the comands and make sure both libraries match, in case they don't which they are likly not to, youmust make the changes needed. It is better to just write a new code.
Below is an example of code made in Atmel to turn on and of a led:
/*
* GccApplication1.c
*
* Created: 14/03/2018 11:21:40 a. m.
* Author : Yvonne
*/
#define F_cpu 1000000UL
#include <avr/io.h>
#include <avr/delay.h>
int main(void)
{
DDRB= 0x10; //PINMODE
/* Replace with your application code */
while (1)
{
PORTB=0x10; ///Prende PB4
_delay_ms(1000);
PORTB=0b00000000;///Apaga PB4
_delay_ms(10000);
}
}
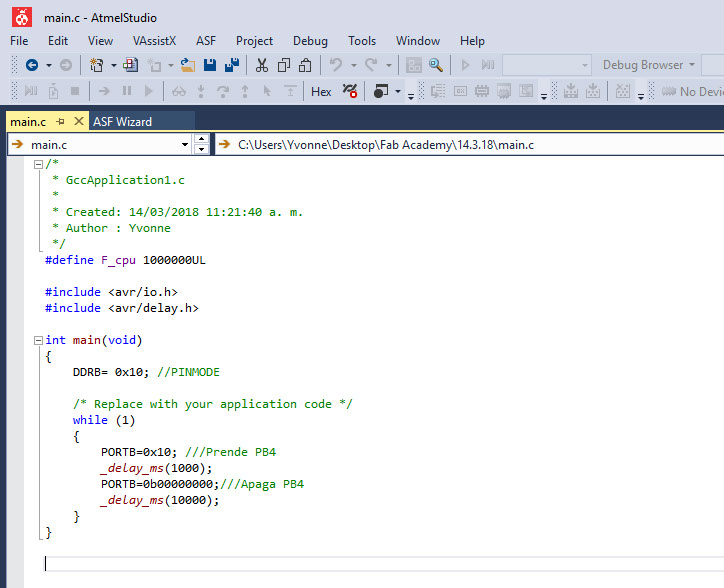
Click on the image
to download file
Click on each image
to download files
Click on each image
to download files
The pin configuration can be found in page 2
To program with Arduino you have to download the Arduino Software package for your operating system from the Arduino download page, then open the Arduino software. You have to setup the environment to Tools menu and select the type of Board you'll be using (in my case was Arduino UNO). Then you begin to code, the code you write for your Arduino are known as sketches (and it is written in C++).
You can access to many examples that will help you code (I have found them great to use!). Then you have to complie the code and at the bottom you will find an adress where your file has been saved, go to that address and place that .hex file in your desktop. Then I used my programmer to program my new circuit, I saw were each pin should be connected and I used CMD console to program. I typed "avrdude -c usbtiny -p t85 -U flash:w:name.hex " were it says name.hex you just have to type the name of your file.
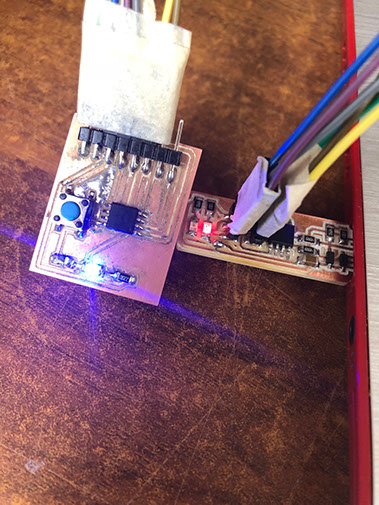
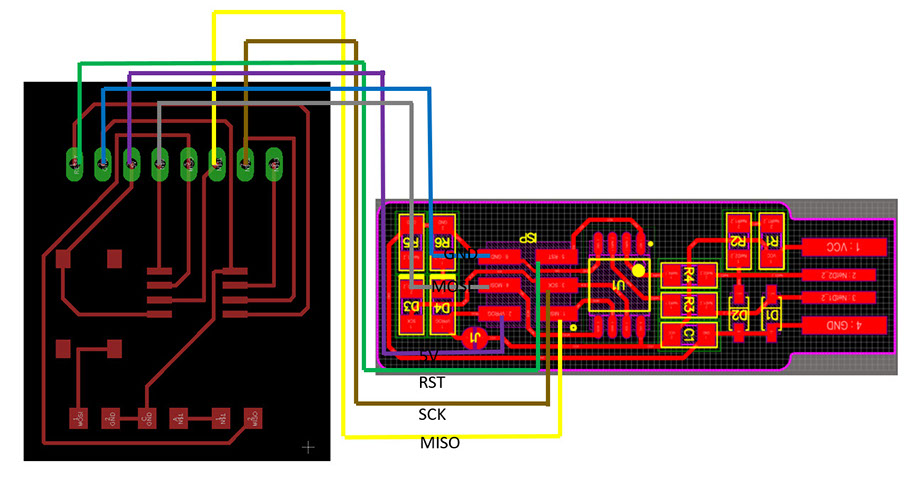
Tconnect the FabISP to the board you just have to see what each pin of the FabISP does and what each pin of the new circuit does and just link them together. Below you can see a connection layout.
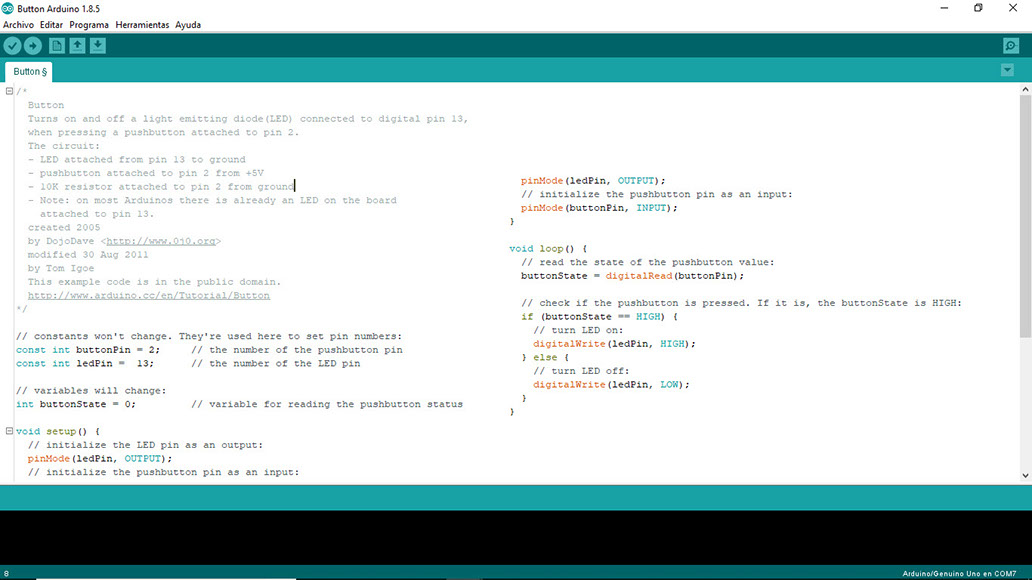
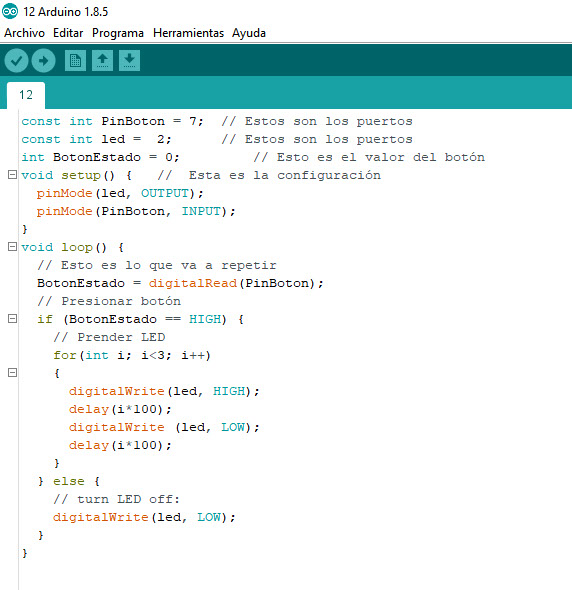
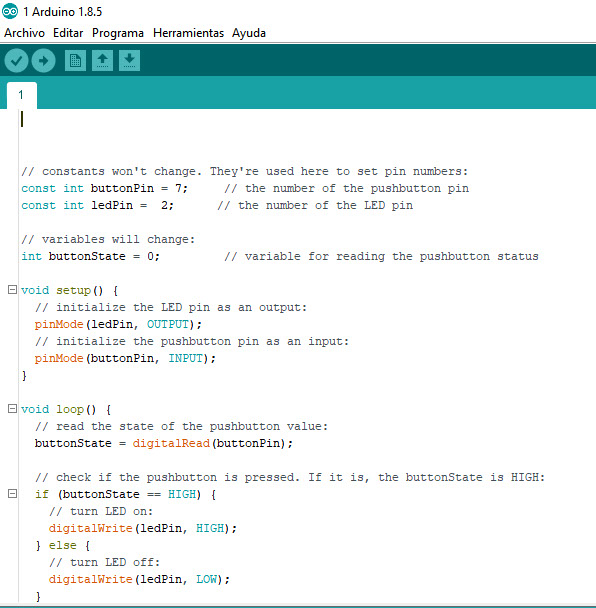
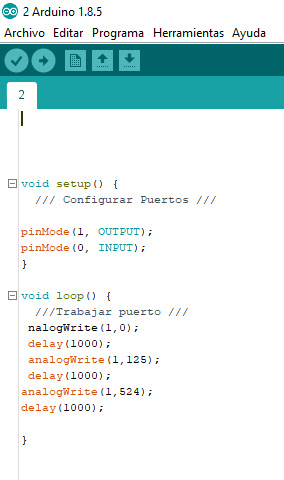
This is the Arduino example that DojoDave made, click on the image to download it
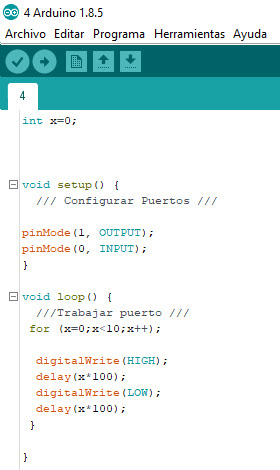
This is the Arduino example code with my modifications so the led will turn on and off three times in diferent times eachtime faster.
Click on the image to download it