13

Interface and application programming
What I learned:
How to write an application that interfaces with an output device made by me.
Sources and inspiration used:
MIT App Inventor http://appinventor.mit.edu/explore/#
Arduino Software Serial Example
What I did:
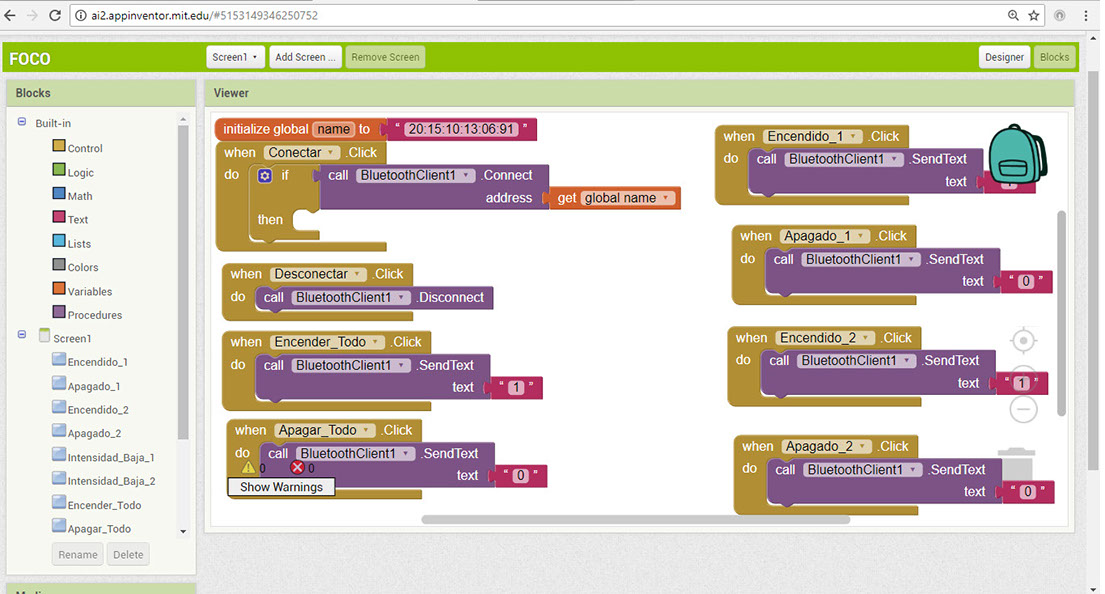
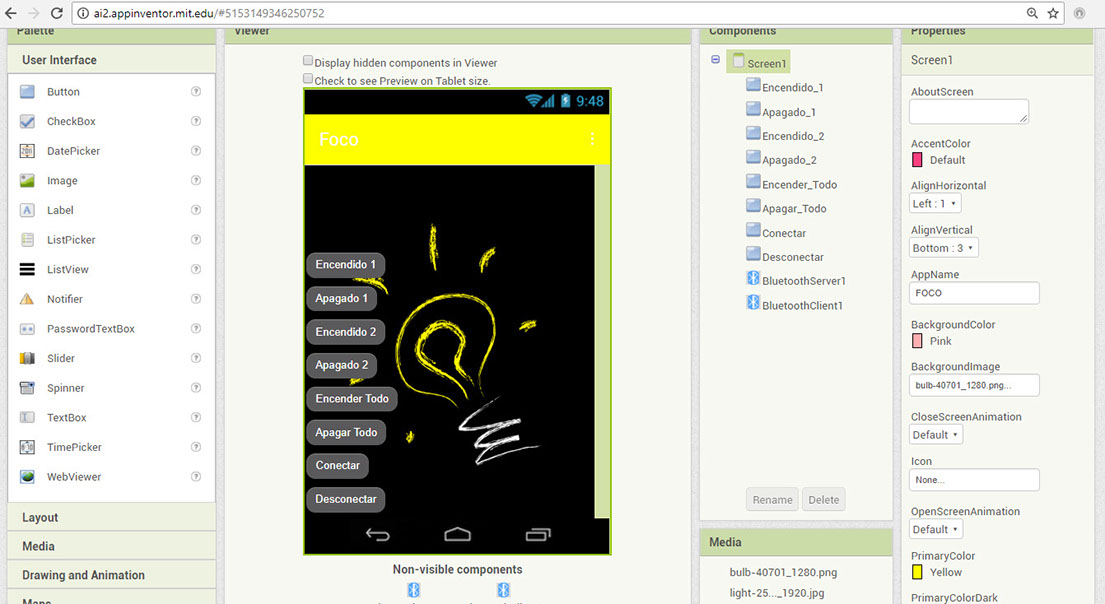
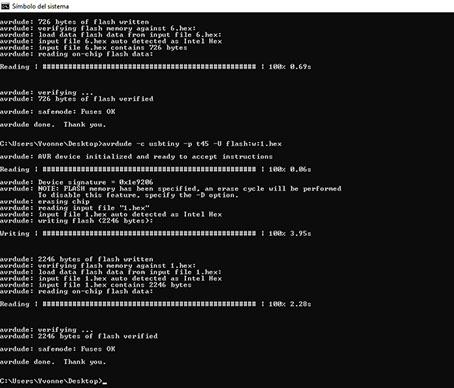
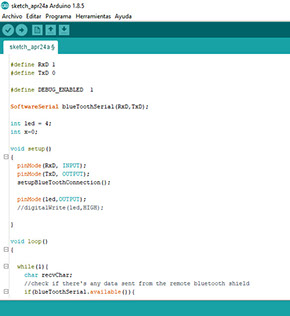
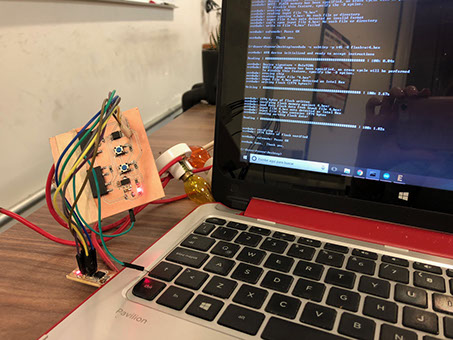
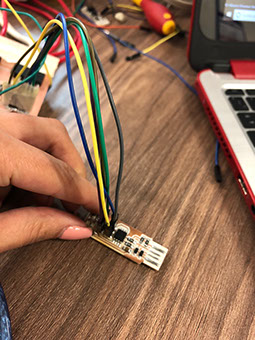
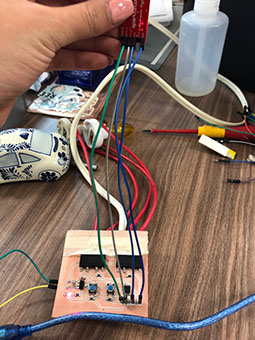
For this assignment, I decided to use what was created in the last assigment. Instead of turning on the light with a button I decided made an application. Through Bluetooth you can turn on the light. The application was developed online on the MIT App Inventor page. I find it a very good programmer, because it is simple to understand and very visual. Altough I must say I invested a lot of time to get it right, below you can see the pictures showing different versions. I added different buttons to the interface to turn the light on and off. It also has a connection button and a disconnected button. It is worth mentioning that as a team we compare different tools. I also made it look pretty by adding a background image. I used a programer to program the new card and I learned how to use Bluetooth to conect it wireless to a phone. The blocks used to program the app, allow to connect and desconnet the blutooth by sending a signal to it. The blockes used are: The first block used is the "initialize global" that has the number regarding the Blutooth device. Then it has a conect button to make theconnection to the Bluetooth. Afterward I have a set of blocks to either turn on one light, or another or both at the time. Finally I have a turn off block and a disconect one. Either the number for the block is 1 for on or 0 for off.
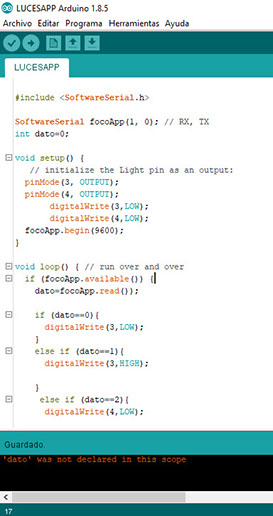
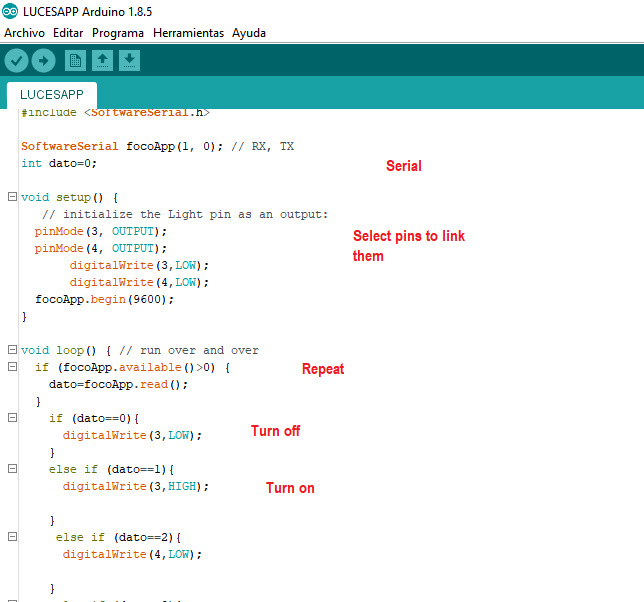
On the other hand you can also turn on and off the focus depending on the value you send either 0 or 1. The code is below:
#include <SoftwareSerial.h>
SoftwareSerial focoApp(1, 0); // RX, TX
int dato=0;
void setup() {
// initialize the Light pin as an output:
pinMode(3, OUTPUT);
pinMode(4, OUTPUT);
digitalWrite(3,LOW);
digitalWrite(4,LOW);
focoApp.begin(9600);
}
void loop() { // run over and over
if (focoApp.available()>0) {
dato=focoApp.read();
}
if (dato==0){
digitalWrite(3,LOW);
}
else if (dato==1){
digitalWrite(3,HIGH);
}
else if (dato==2){
digitalWrite(4,LOW);
}
else if (dato==3){
digitalWrite(4,HIGH);
}
}
Click on the image
to download file
Click on the image
to download app file
The app interface is easy to use. It has an on and an off button for each light-bulb (it has two), as well as a connect and disconnect button to connect to blue-tooth. It also has a button to turn both light bulbs on at the same time as well as another button to turn both bulbs off.It finally has a low intensity button to turn on the light bulb in light way.
The blocks are related to the interface of the app, it uses the same components and it is an easy way to peogramm inseatd of code. The first thing I had to do was to initialze, and I did it by typing the number of my bluetooth.
Then I made a block to connect the app to the circuit via blue-tooth. Then I created a block to disconect it. I also have two buttons to turn on both light bulbs. To conect them I had to type 1, to disconect I typed to (as in on and off).
I did the same thing but to turn on either the first or second light bulb.