10
Molding and casting
What I learned: I learned how to design a 3D mold and use it to cast parts.
Sources and inspiration used:
Tutorial for the crayon: https://www.youtube.com/watch?v=4jrSYMrmbyQ
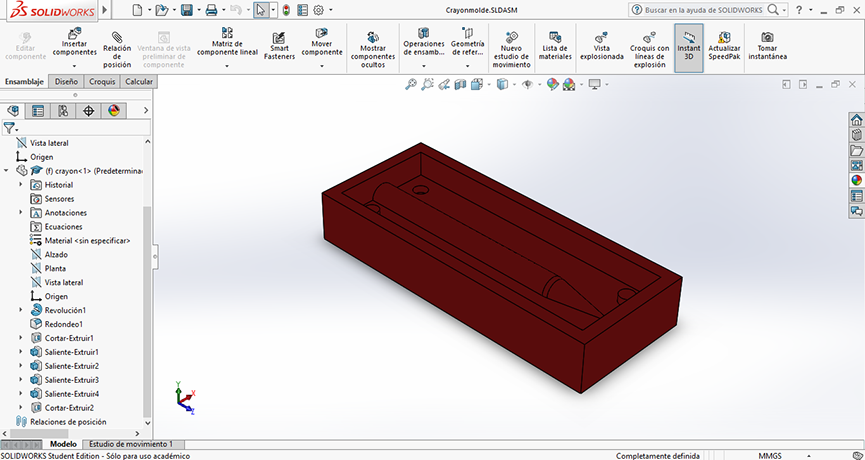
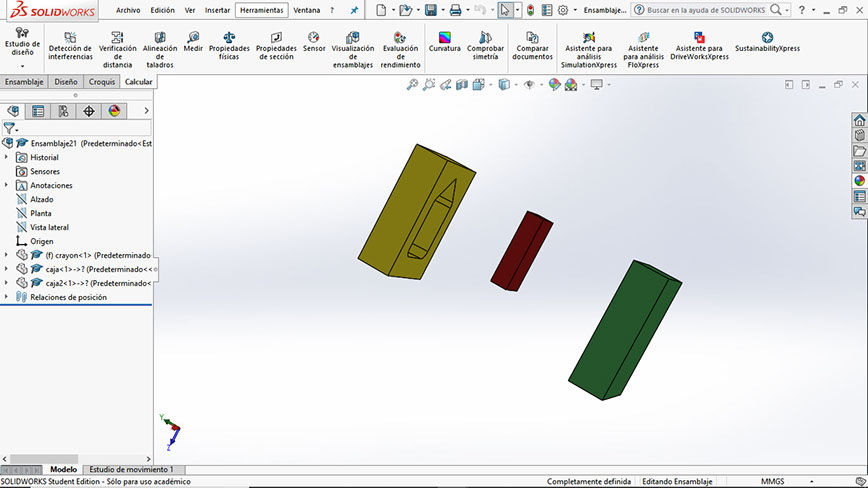
What I did: I made a mold design with Solid Works. It has the shape of a crayon, it started being a large and think one and it ended being a rather small and thin crayon. I would like to share the whole experience with you because it was a lot of fun. The first mold I did came out wrong because it had the shape of a mold made with silicone, it had the cavity for the crayon. After I finished that mold I realized that it should have a cavity, it should have the shape of the crayon standing out, that way I could make the mold afterwards.
To make my first attempt of a crayon mold I started by working on then top plane. Then I inserted a center line and afterwards I made a profile. Then I gave the dimensions to the shape as well as the angle which in this case is 45°. I closed the sketch and in feature I selected the Revolved Boss feature. After doing that I used the fillet option and changed the appearance of the crayon. I saved that file as pattern. Afterwards I opened a file as an Assembly and inserted the pattern file. I had to first create the two parts of the mold. First, I created a new part and in Plane I made sure it was a symmetrical plan by choosing the top plane.
I used the rectangle shape and changed it measures so the crayon fitted inside of the rectangle. After exiting the sketched I used the extrusion option. After that I had to make the cavity in insert option I selected the cavity option and chose the component I want to subtract. I changed once again the appearance of the new piece. I draw a new rectangle and in features I selected the extrude feature and I accepted. I selected the cavity and the pattern and clicked, afterwards I renamed the piece and changed its appearance. I selected the explorer view and separated the pieces by dragging them.
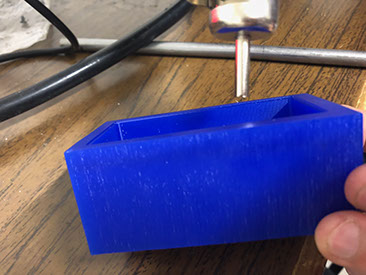
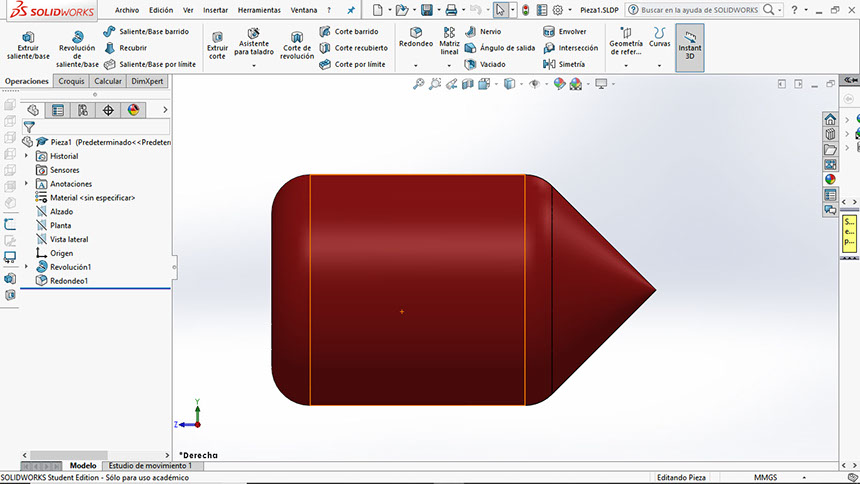
Once I realized what I did wrong, I started to work with the crayon piece and left put the pieces that had cavities. I sliced the crayon by the middle and work with one half. I made a box for the crayon making sure the dimensions and measures of it where small enough, so the piece wouldn’t brake the tool once I started cutting and milling it. The measure for the height of the box is 1 cm.
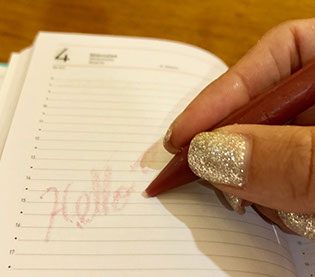
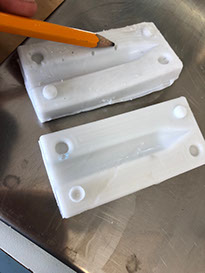
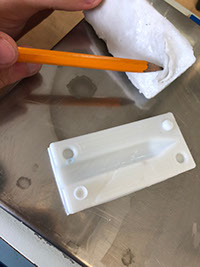
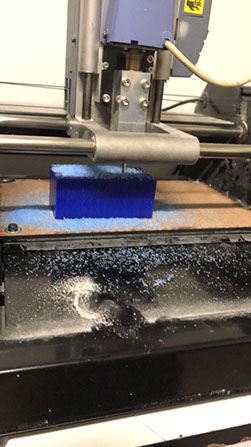
I also realized that the crayon was very width and tall, that was a problem because the crayon didn’t fit inside the box and that could also break the tool. That why my final Solid Work file looks leaner. I did that by using the smart dimension tool in Solid Works. I also draw a canal in the final piece so the material can enter the mold leave it. I must say that when I cut the crayon there was a part where the tool could not enter because it was too close, you can see in the pictures below. I also made a crayon with colored wax to be able to write.
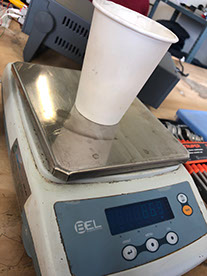
As a team we reviewed the safety data sheets for each of the molding and casting materials, then compared.
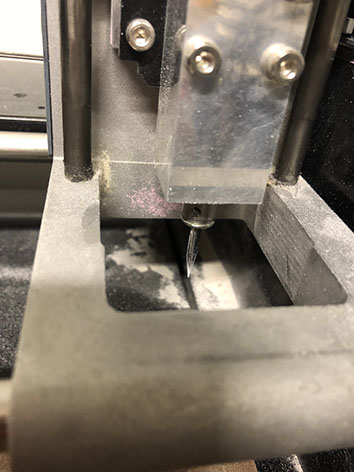
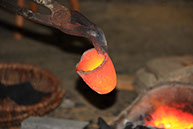
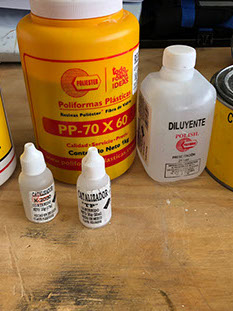
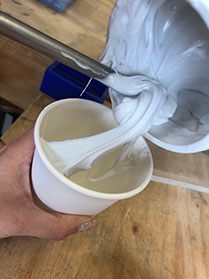
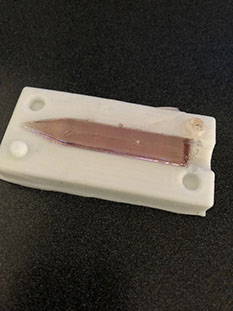
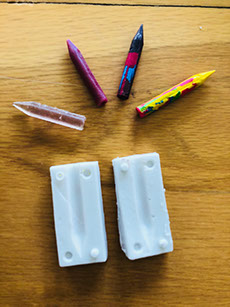
Once I had the design I made a mold in wax. using a molding machine. It had a small mistake because the space between the crayon and one hole was to close and the tool could not enter. I had to fix that by cutting a bit of the piece. I also used hot air to soften the crayon. Afterwards I made the mold twice in silicone and once I had that I made the crayon in resin. I used the materials shown in the pictures. I took my silicon and used thinner and I mixed it together until it flows, then I mixed t with the catalyst to 3% of it's whole wight. I put the mix inside the mold, and then when I had both molds I pured the resine to create the crayon, I pured silicone and then 3% of the wight of the silicone was a catalyst solution. Afterwards, once I had the two molds, I used resin and its catalyst in 2% to make the crayon. The first mold I made had air bubbles and as you can see it had to much catalyst at the back.
Click on the image
to download file
Click on the image
to download file
Click on the image
to download file
Right click here for .stl
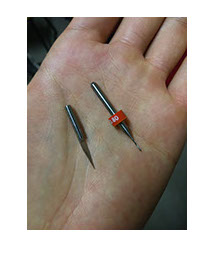
To cut the mold in wax I used the tool seen in the picture to the left. This tool was used because we do not own a ball one it measures 1.32 inches.
The specs for the milling machine are:
Safety:
Keep out of the reach of children.
Wear latex or neoprene gloves and lenses
security.
Do not eat.
Avoid contact with the eyes.
In case of contact with the skin or eyes, wash
abundantly with soap and water for 15
minutes
The resin took about 20 minutes to be cured while the silicone took a bit more, something like 25 minutes, it did match with the datasheet. Regarding the pot life of silicone and resin, I would like to add that pot life is a defined timed during which the viscosity of the mixed system doubles.
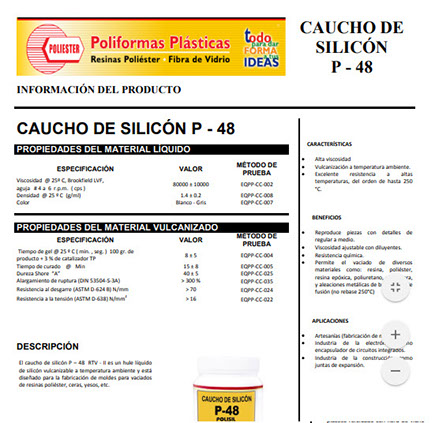
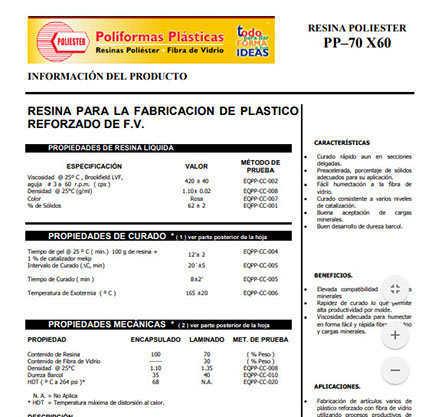
Resin:
Gel time @ 25 º C (min.) 100 g of resin + 1% catalyst mekp 12 '± 2 EQPP-CC-004
Curing interval (C, min) 20' ± 5 EQPP-CC-005
Curing Time (min) 8 ± 2 'EQPP-CC-005
Exotherm temperature (º C) 165 ± 20 EQPP-CC-006
Silicon:
SPECIFICATION VALUE METHOD OF PROOF
Gel time @ 25 º C (min., Sec.) 100 gr. from
Product + 3% catalyst TP 8 ± 5 EQPP-CC-004
Curing time @ Min 15 ± 8 EQPP-CC-005
Shore hardness "A" 40 ± 5 EQPP-CC-025
Rupture elongation (DIN 53504-S-3A)> 300% EQPP-CC-035
Tear strength (ASTM D-624 B) N / mm> 70 EQPP-CC-024
Resistance to tension (ASTM D-638) N / mm2
> 16 EQPP-CC-022
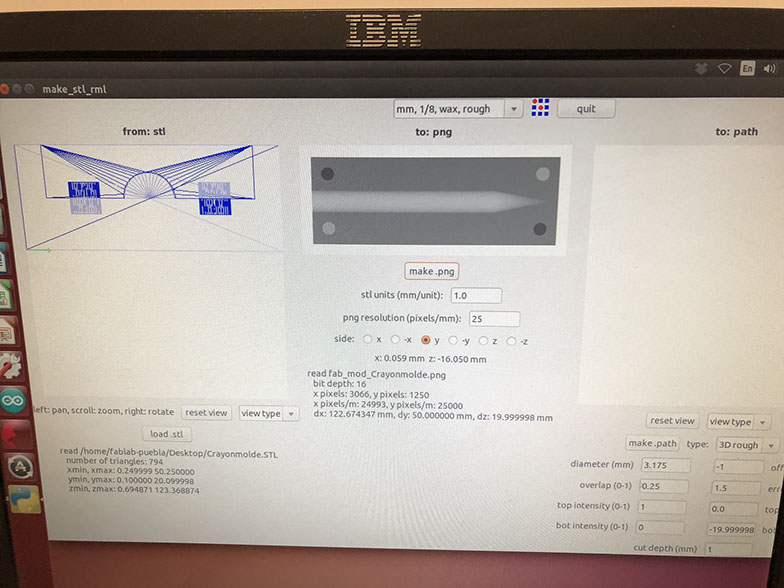
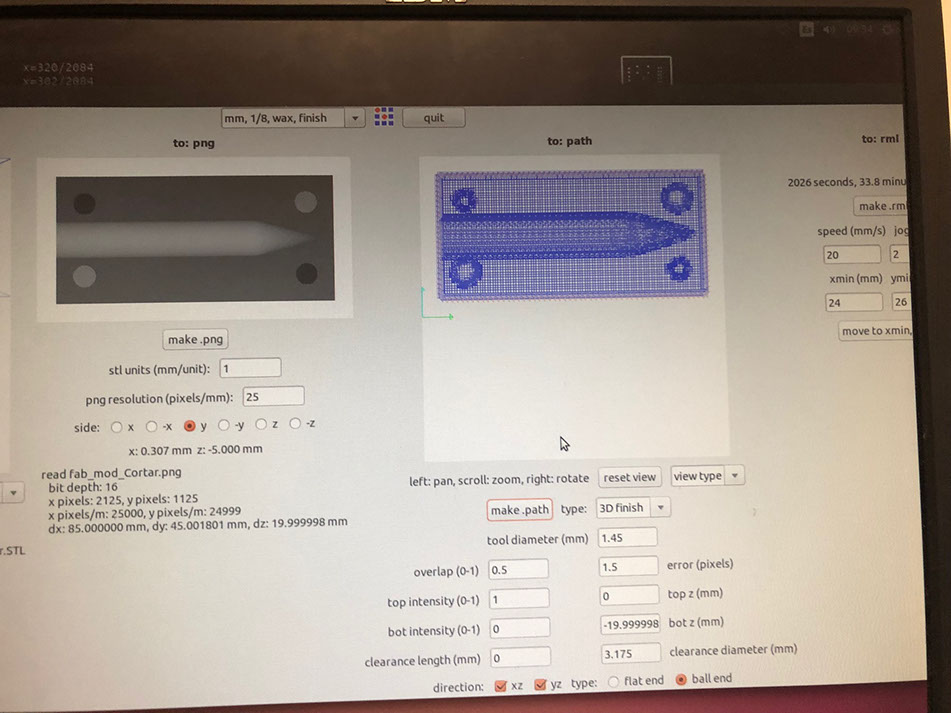
3D rough with 1.45 diameter, overlap of .5, -1 offsets, 1.5 error (pixels), top intensity (0-1) in 0, topz 0 mm, bot intensity 0, bot z is -19.9 and the cut depth is 2 mm
For mm,1/8,wax,finish:
The make.path type is 3D finish
overlap (0-1) is 0.5
error (pixels): 1.5
top intensity (0-1):1
topz(mm):0
bot intensity(0-1):0
botz (mm):-19.99
clearance lenght(mm):0
clearance diameter (mm): 3.175
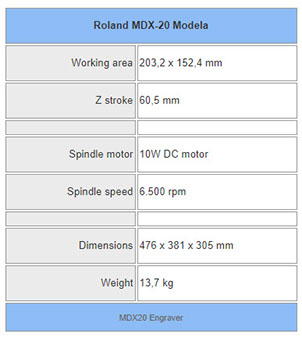
Click on the image to download PDF with Modela specifications
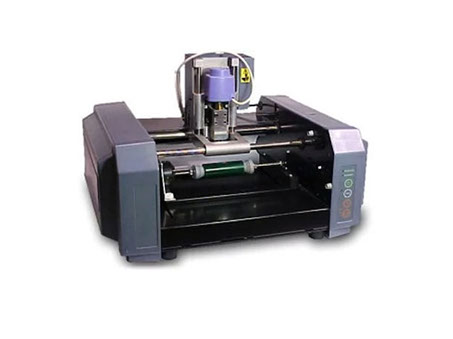
Milling Machine used
Engraving tool (left), cutting tool (right)