Choosing 2D and 3D modelling software
I have not used any 2D or 3D modelling software since I had an introductory course to autocad in the polytechnic some 15 years ago. I however remember that I managed to model a regular pencil, and even though it was really hard, it was also much fun. So I was really looking forward to this weeks tasks.
I started out by go through the list of suggested software to see what I might like, and also consulted my friend Dorina Rajanen for any suggestions for software, as she completed FabAcademy in 2016.
Ultimately I ended up downloading Gimp, a free and open-source raster graphics editor, as well as Inkscape which is a free vector graphics software. I also installed Coreldraw. For 3D modelling I downloaded SolidWorks, and Fusion 360, and also tested out TinkerCad which you can play with through your browser without having to install anything.
Out of the 2D programs I used, I liked Inkscape the best. I have no idea at this point if it is the best for my purposes or has the most functionality, but seemed like a simple, clean software, that I liked it from the start - It has a familiar feel to it, everything is where you expect to find it. Gimp seems useful for adjusting any images or photos, so I will most likely be also using this one later.
Out of the 3D programs tested I really enjoyed TinkerCad the most. It was easy to use, clean and simple. Using it felt like playing - And because of that it is a great tool that I will keep in mind for when working with children on 3D modelling. Had we had these kind of tools available 15 years ago, maybe my first experiences with 3D modelling would not have been so scary :D Both SolidWorks and Fusion seem massive and complicated after testing TinkerCad - But they are more for professional use. They certainly have much more functionality. Even though I liked TinkerCad, I however ended up using Fusion 360 for the 3D part. This is because I learned from this week's local instructor Yrjö Louhisalmi that Fusion360 is the modelling program most people use at FabLab Oulu, and I figured I would have help near if I chose this software. It is also good to start learning now, early on in the process.
3D Modelling
This week I knew I would be strapped for time, as I had a lot of teaching, and a paper deadline coming up that I needed to prioritize. Therefore I just did the bare minimum for the task (i.e modelled some experimental objects), and continued to experiment with the program more afterwards. To get started I looked into the simple tutorials at Fusion 360 website.
I modelled my first 3D object with the help of a tutorial called: Learn to create 3 dimensional features from sketches.
According to the website, the purpose of this lesson is to: "To get started, get an overview of sketch elements, learn the importance of design intent to create predictable results, and understand the importance of fully defining sketch entities."
1. The first thing to do was to select a plane you want to start sketching your 2D entities on.
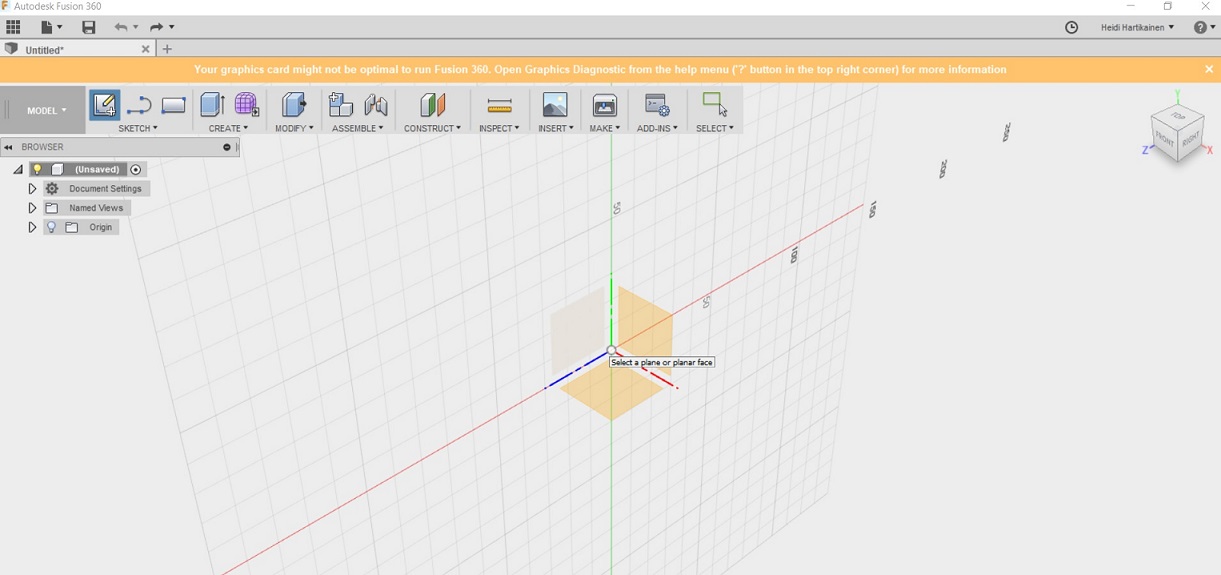 2. Then i clicked on sketch on the top menu, and selected the pentagon shape. I placed it at the center of the sketching plane, as was suggested in the video. Apparently it can provide many advantages later on it the design process. What those advantages are, I have no clue.
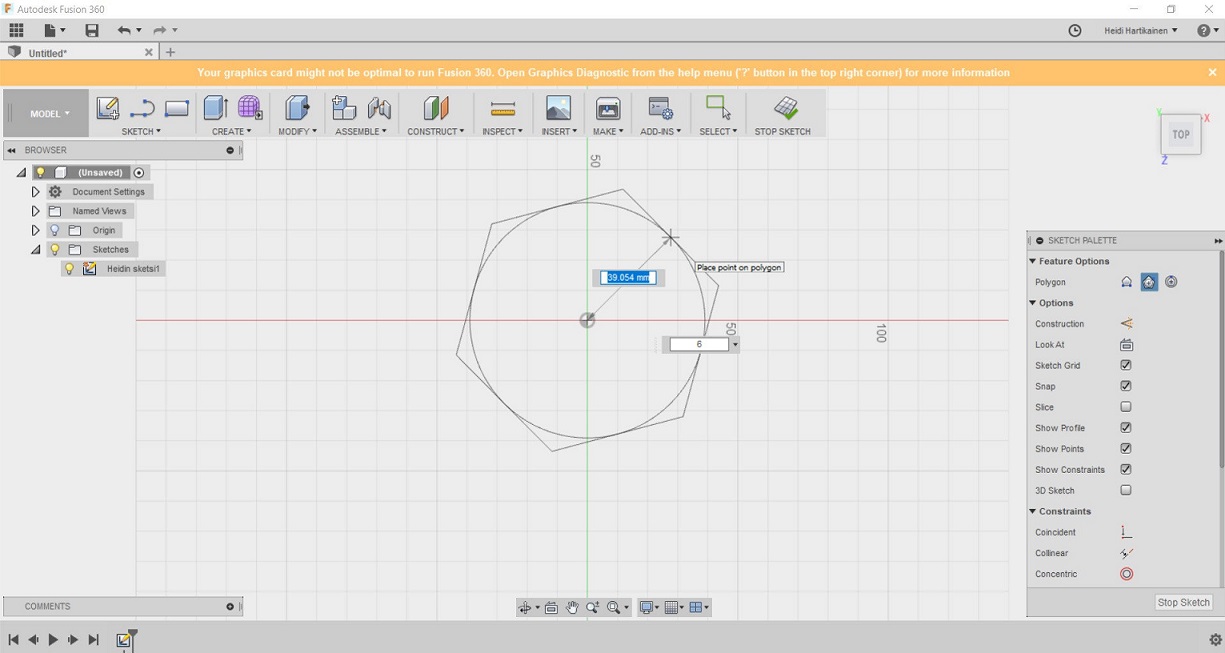
3. After that, I proceeded to add another 2D entity in the picture. This time a a circle, which I positioned inside the pentagon. I bet you can now see what the tutorial is aiming to build :D
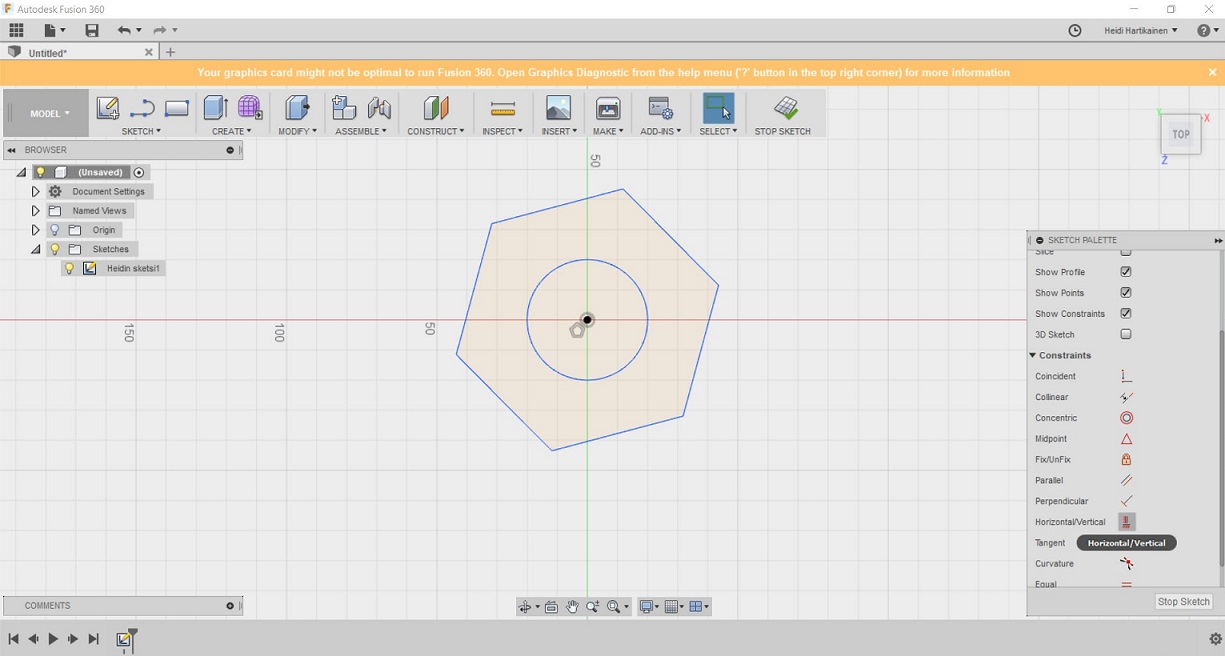
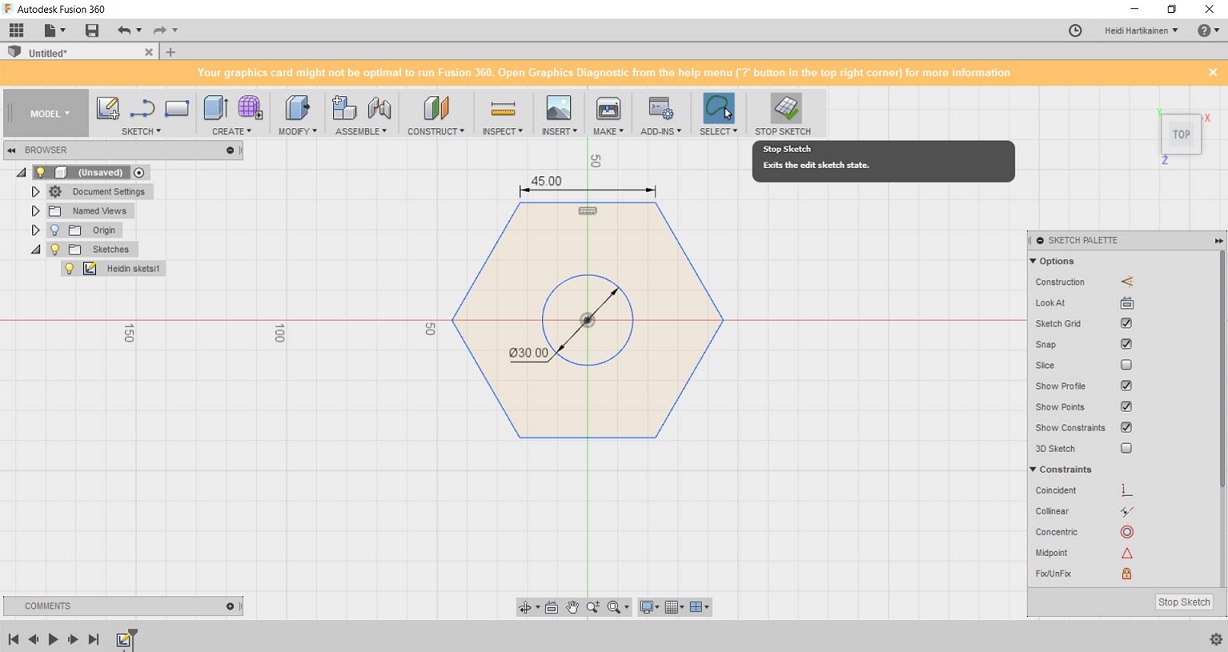
4. Then, the tutorial instructed me to experiment with some constraints that we can apply to our sketch entities. I proceeded to add a horizontal constraint to the top line of the pentagon. After this, even if i resize or move the oject, it always stays horizontal. I also applied dimensions to set the size of the sketch elements, as illustrated below.
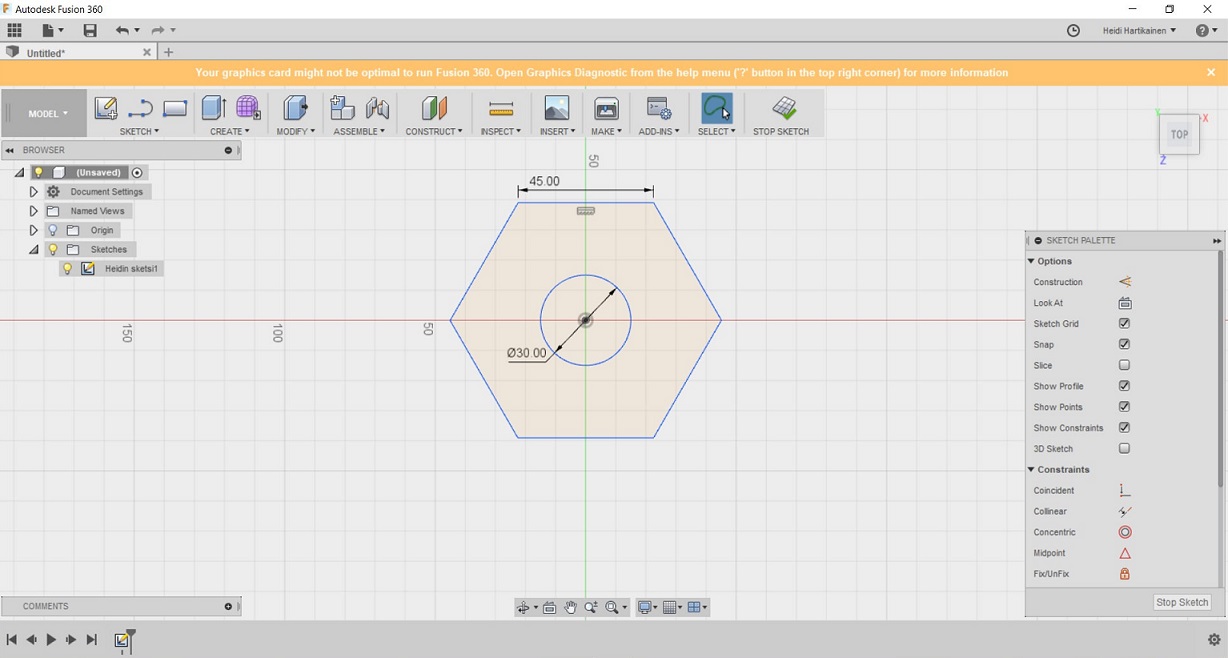
5. Then it was time to exit the sketch stage and start to work on building the 3D shape.
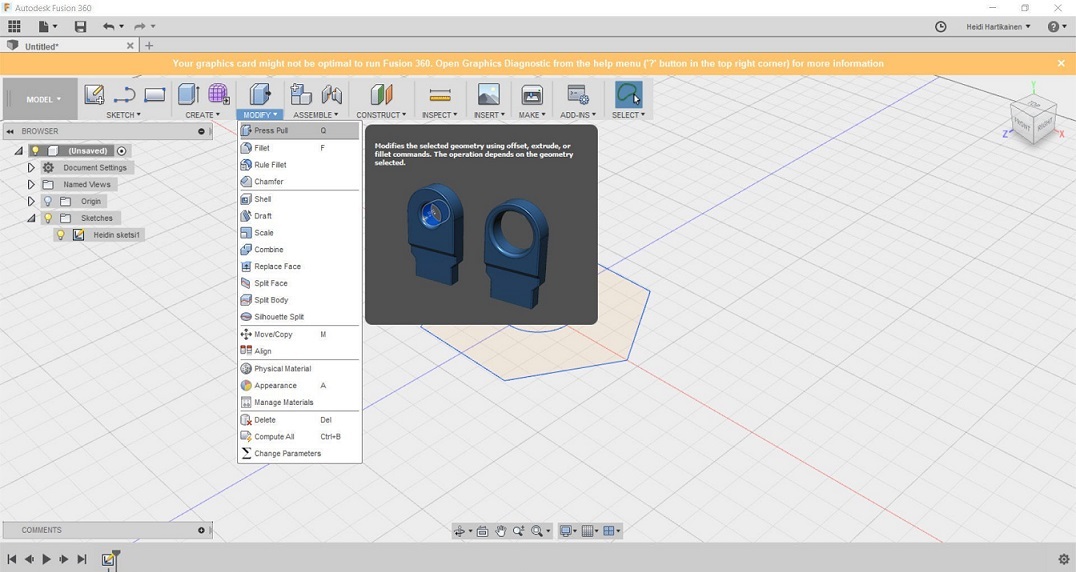
6. I used the "push/pull tool" to manipulate the shape as suggested in the video. You can select which 2D entity to modify here, i.e. if you want to work on the pentagon or the circle.
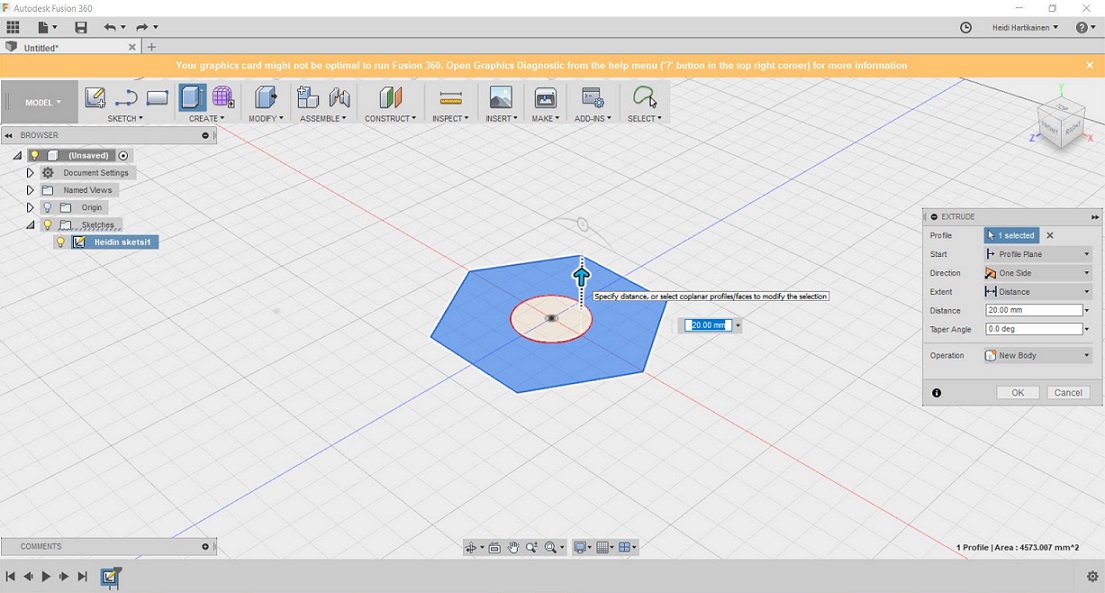
7. I proceeded to "pull" on the pentagon upwards.
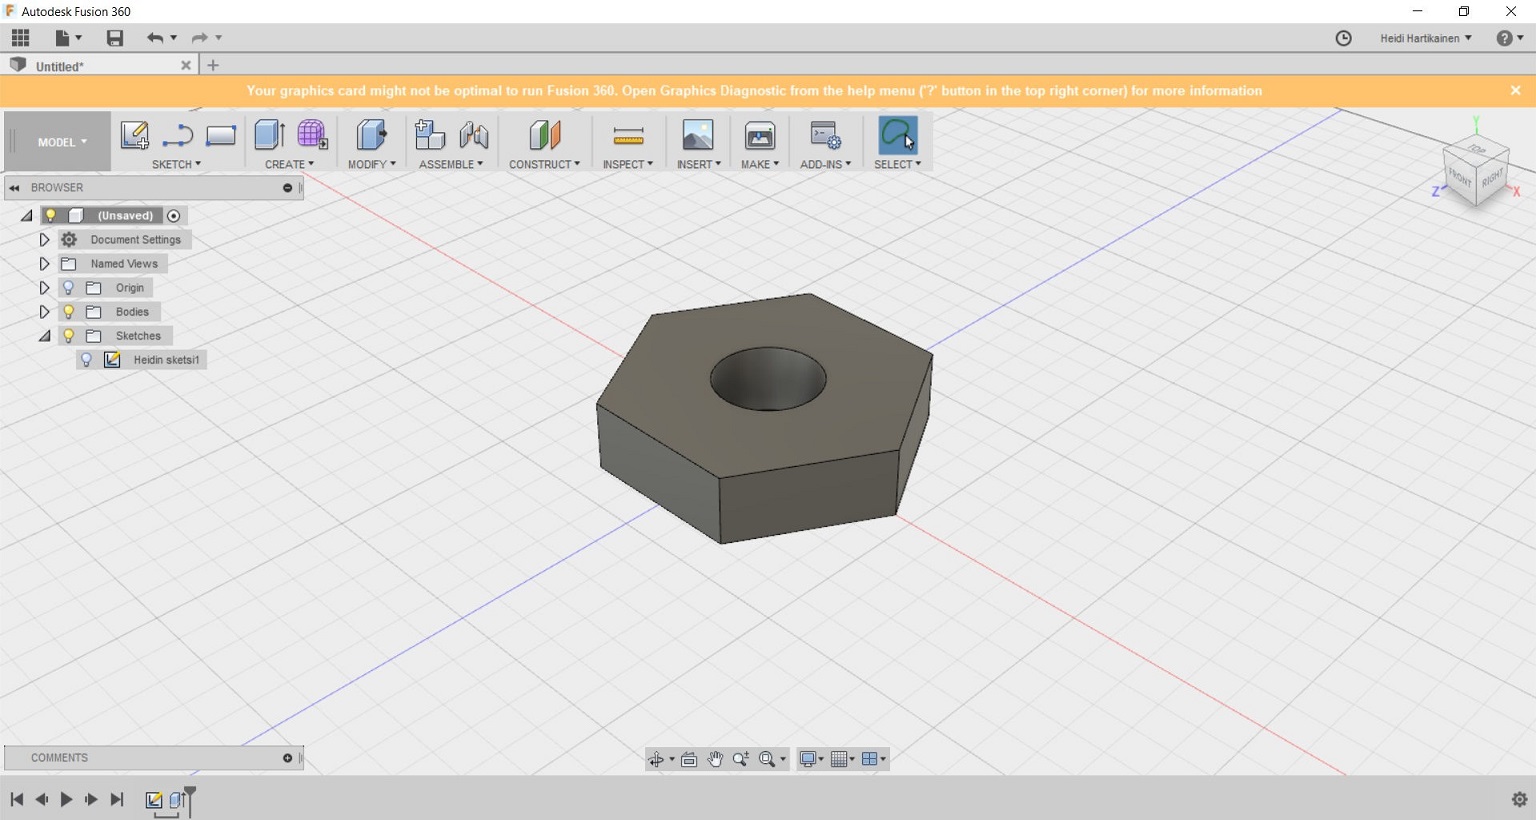
8. And voilà, I had created my first 3D shape
Lastly I proceeded to save my 2D sketch as a .dxf file, and my 3D file as a .stl file.
Files
You can download my files below.
Download my sketch here (dfx file)
Download the 3D model here (stl file)
Download the fusion 360 project here (f3d file)
------------------------------------------------
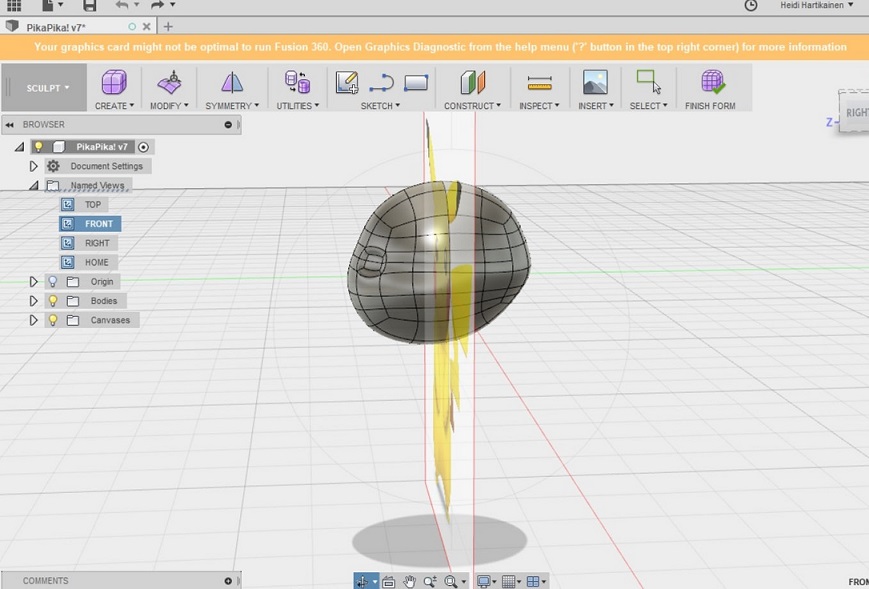
After finishing my first project described here, I did some similar simple sketches and models using the same methods. Then I stumbled on to a tutorial on how to use the sculpting tools in Fusion 3D which I found interesting. I am currently in the midst of trying to model a Pikachu with Fusion 360 with the help of a YouTube tutorial by Allie Ved.
I figured that this tutorial ties to this weeks assignment (designing a part of a possible final project), as I was thinking about making a digital pet of some sort as a possible final project on week 1. No better place to start than a tutorial. Some screenshots of my progress with a slightly lopsided Pikahcu below.
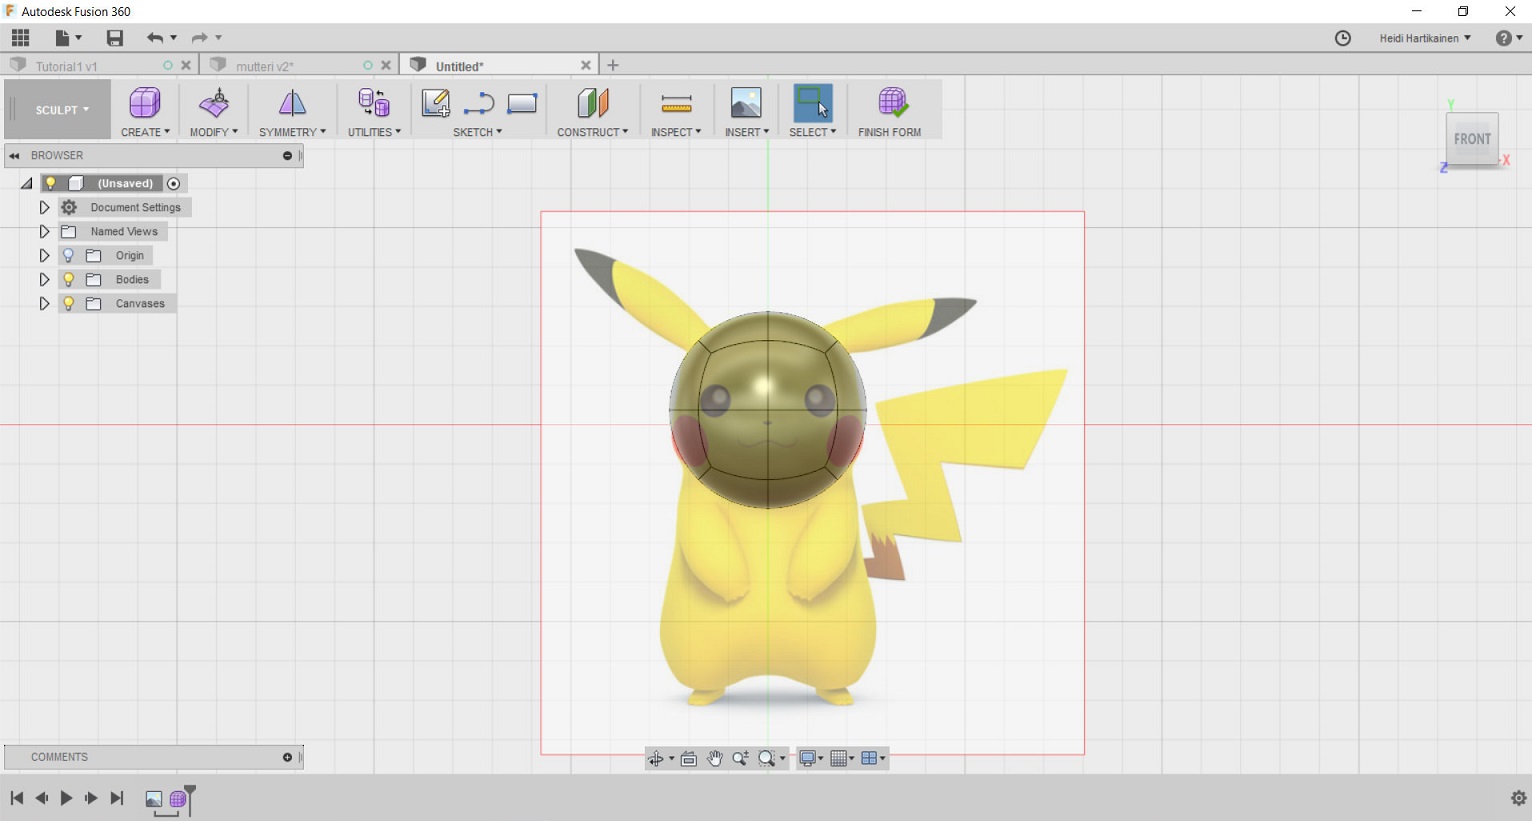
Basically you uploaded a picture of the pikachu in the program, and entered the sculpt environment --> Created a sphere to represent the pikachu's head
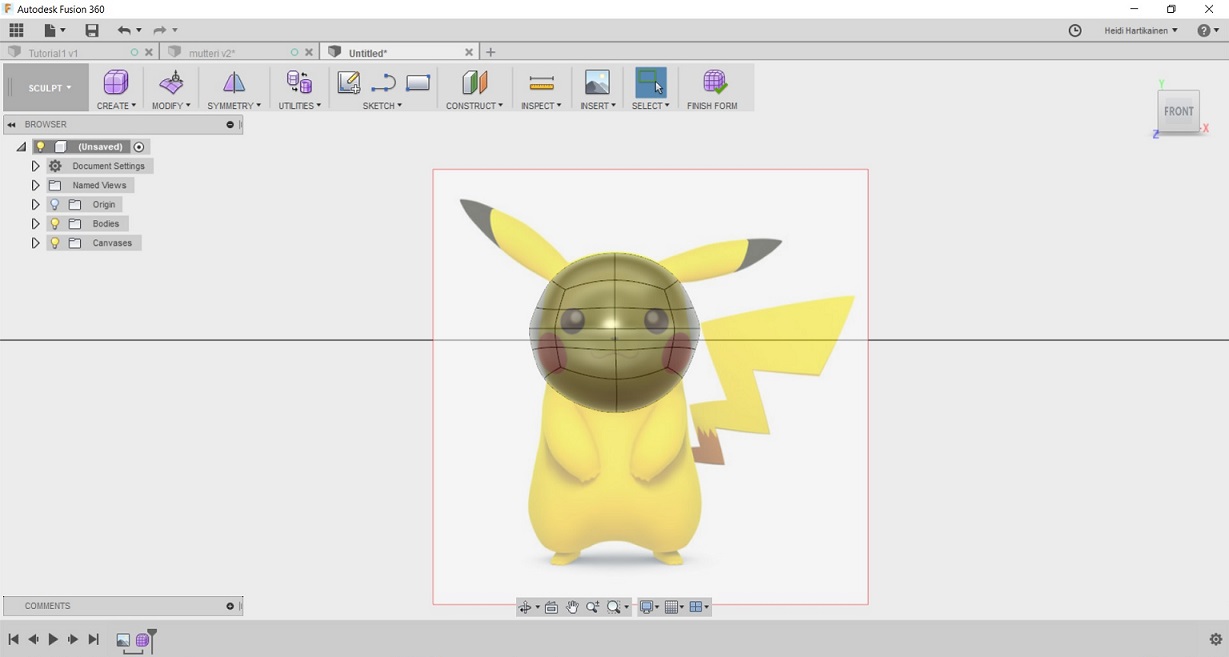
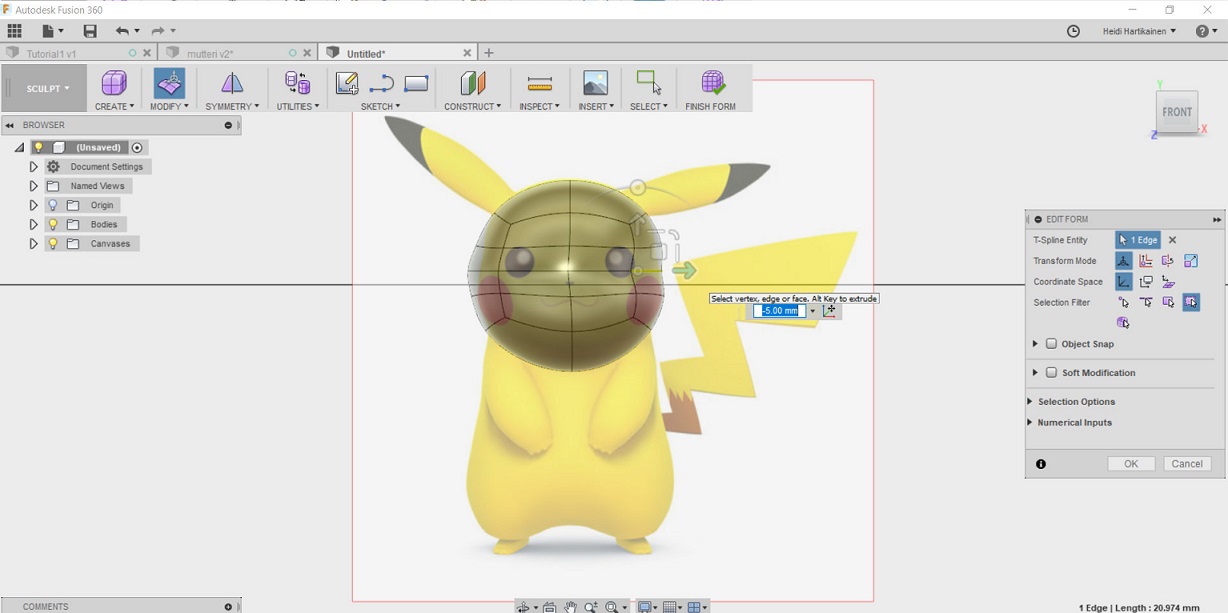
... and started editing the form by selecting certain "faces" on the form, and pressing and pulling according to instructions
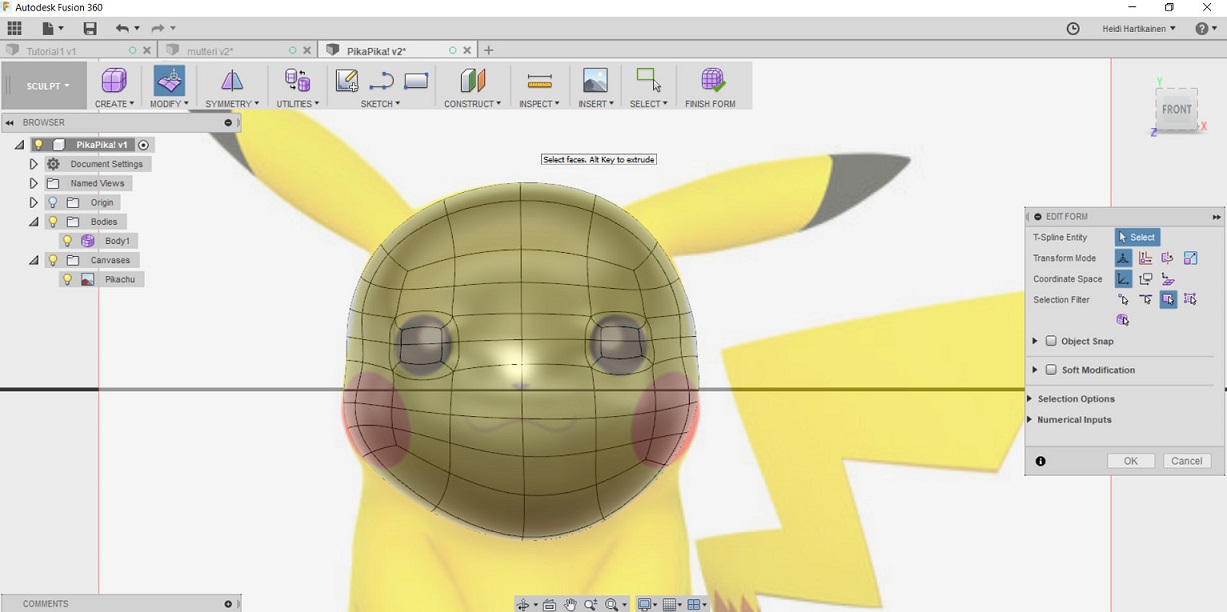
This is what it looks like from the side.
Download my Pikachu head here (f3d)
Download my Pikachu head here (stl)
------------------------------------------------
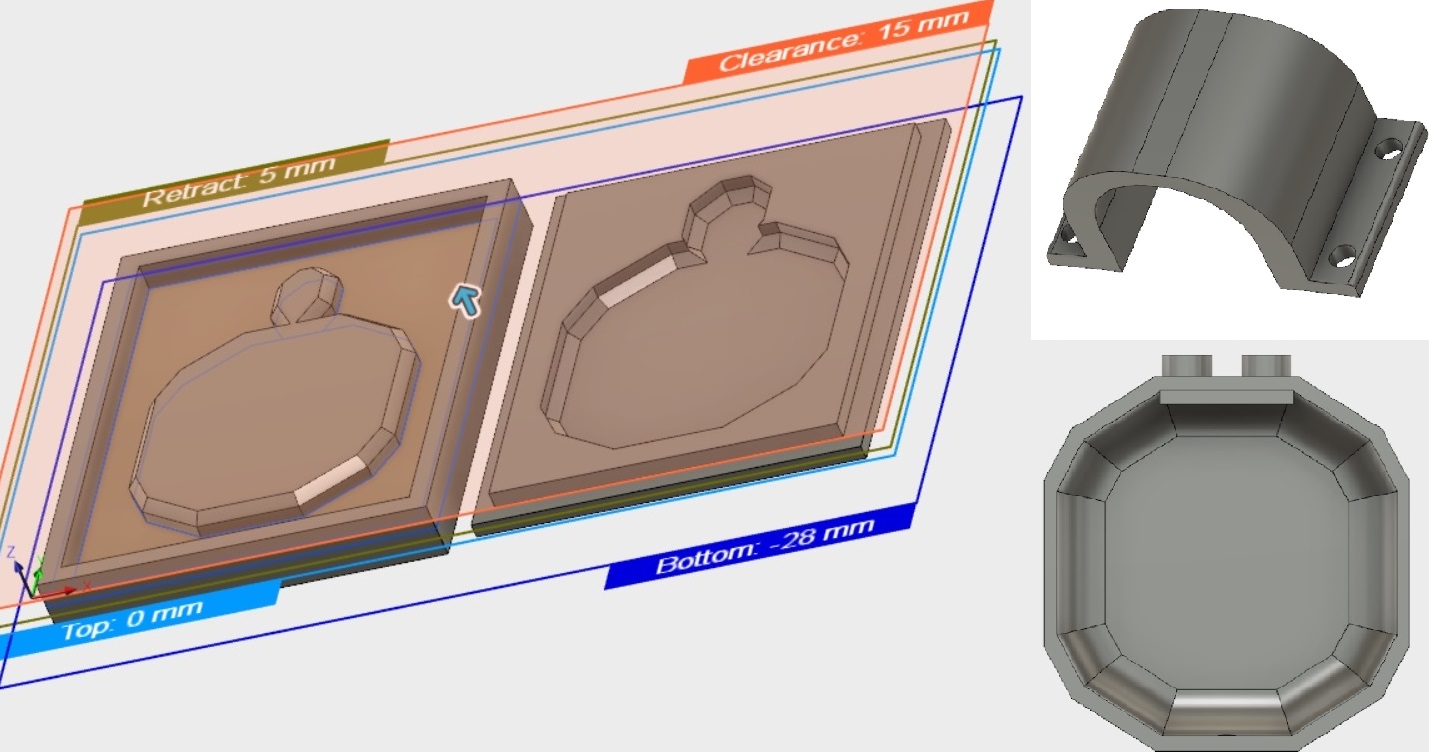
Edit 20.6: Even though my design skills with 3D design left a lot to be desired at this point, and the only things I could create with Fusion360 were these really basic shapes using tutorials - I did eventually end up designing many wonderful things using it during FabAcademy.
Many of my designs were related for to my Final project: For example I created a mold for composites on wildcard week that was cut out with a CNC machine and used to form the basis of my final project (the TurtleBot). I also used Fusion360 for the final project later to create the shell for the robot, and some mounts to attach motors underneath it. Even though I still have a lot to learn, I love seeing my learning curve - It has been a great 6 months!
2D modelling
I kept this assignment equally simple, by attempting to design a first draft for the lid of an electronic treasure box, also envisioned as a possible final project on week 1
I started by creating a rectangle that represents the lid of the treasure box.
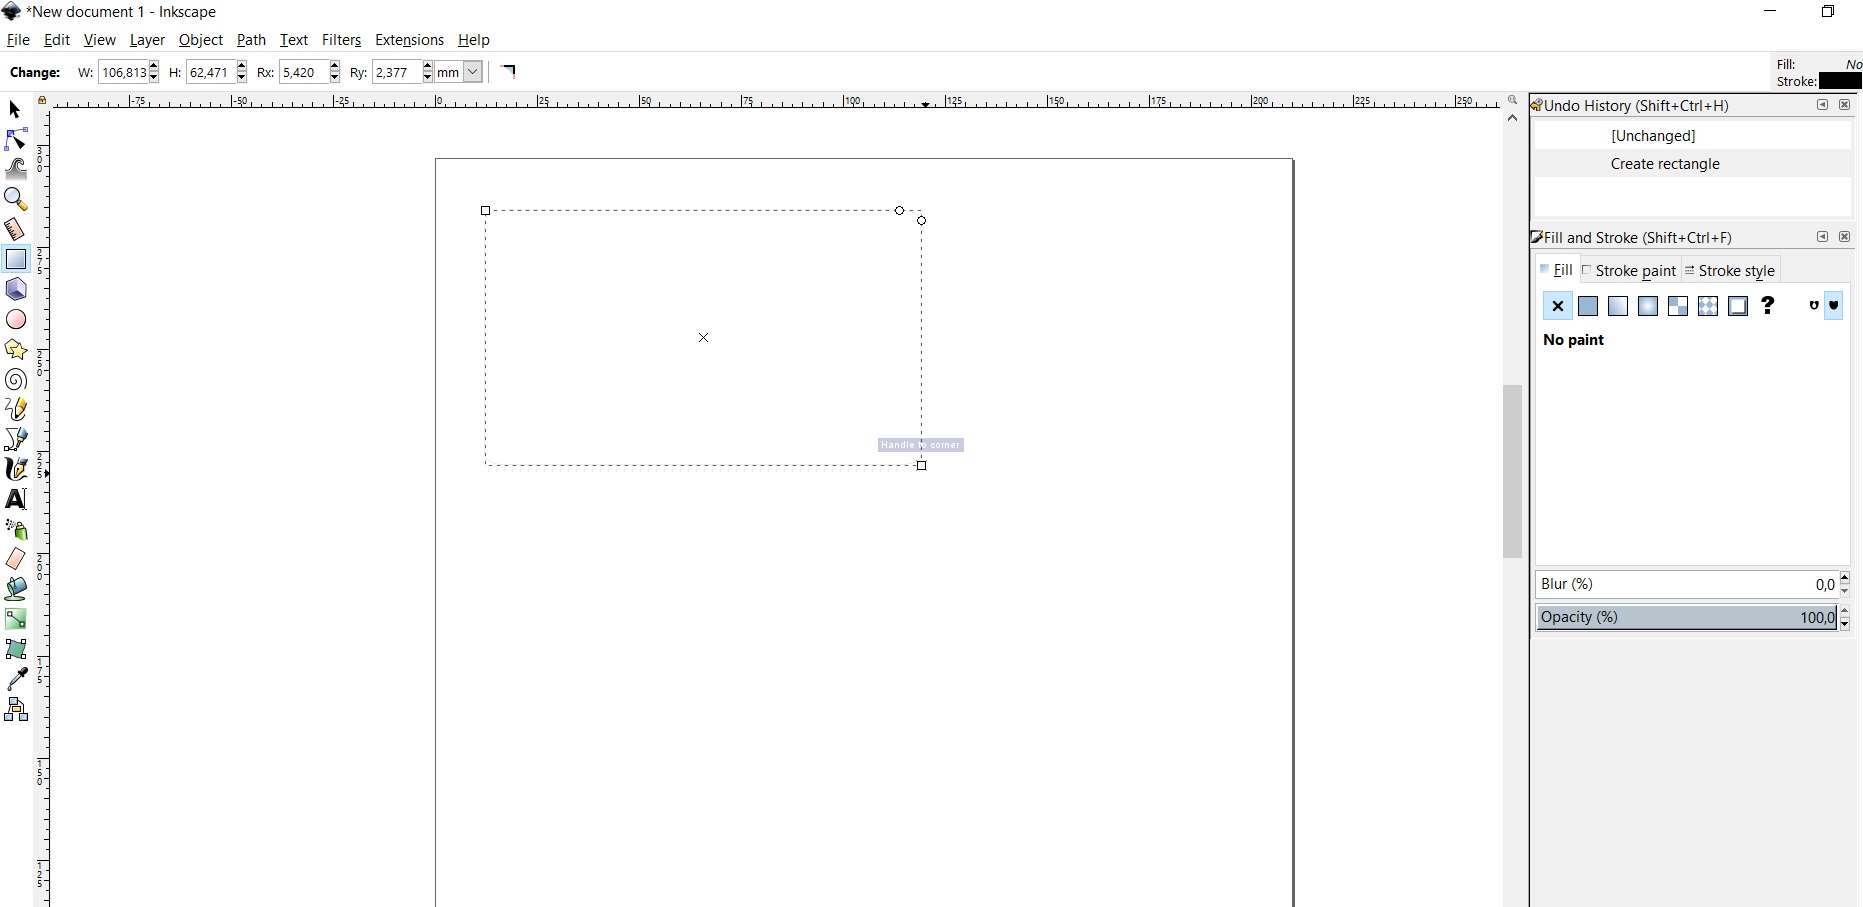
After drawing the rectangle, I looked at it's dimentsions. While having the rectangle selected, from the menu above, I selected to view the measurements in cm. I made the lid 10.683cm wide and 6.249cm "tall".

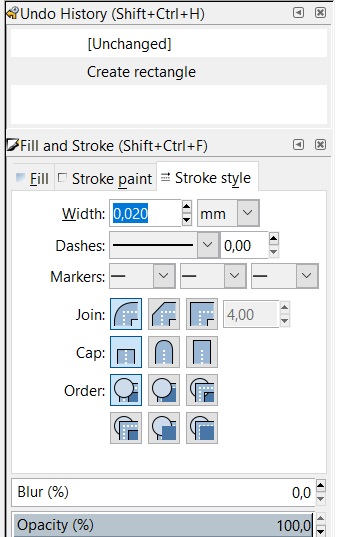
While still having the rectangle selected, from the menu on the right hand side, from the stroke style tab I selected the stroke width to be 0.020mm. I was explained by our local instructors that lines that are this wide will be cut through by the laser cutter - and this is what I want to do (to cut the lid outline through).
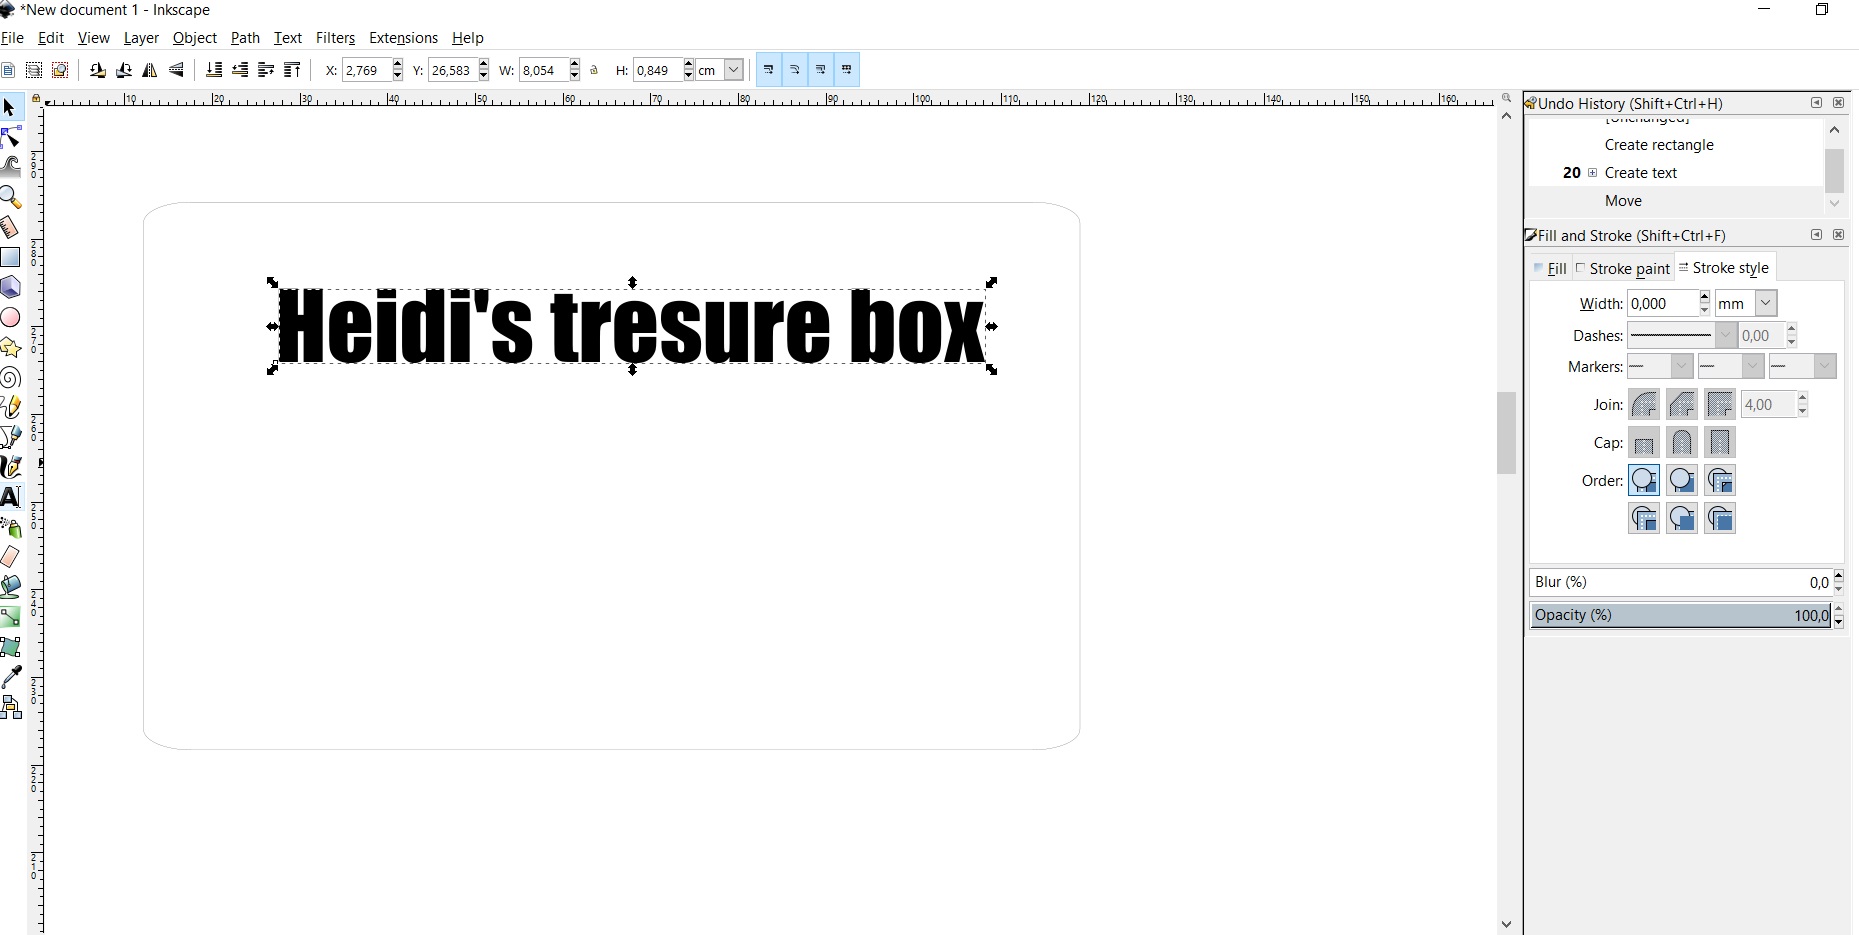
Next I started to do some decorations on the lid. I added text, from the text tool visible on the menu on the left hand side. I noted that the text stroke width should be anything other than 0.020 mm if I want them raste(rized on the material, and not cut through.
And yes, I noticed the typo on the word treasure (afterwards) - hey - atleast it would be unique!
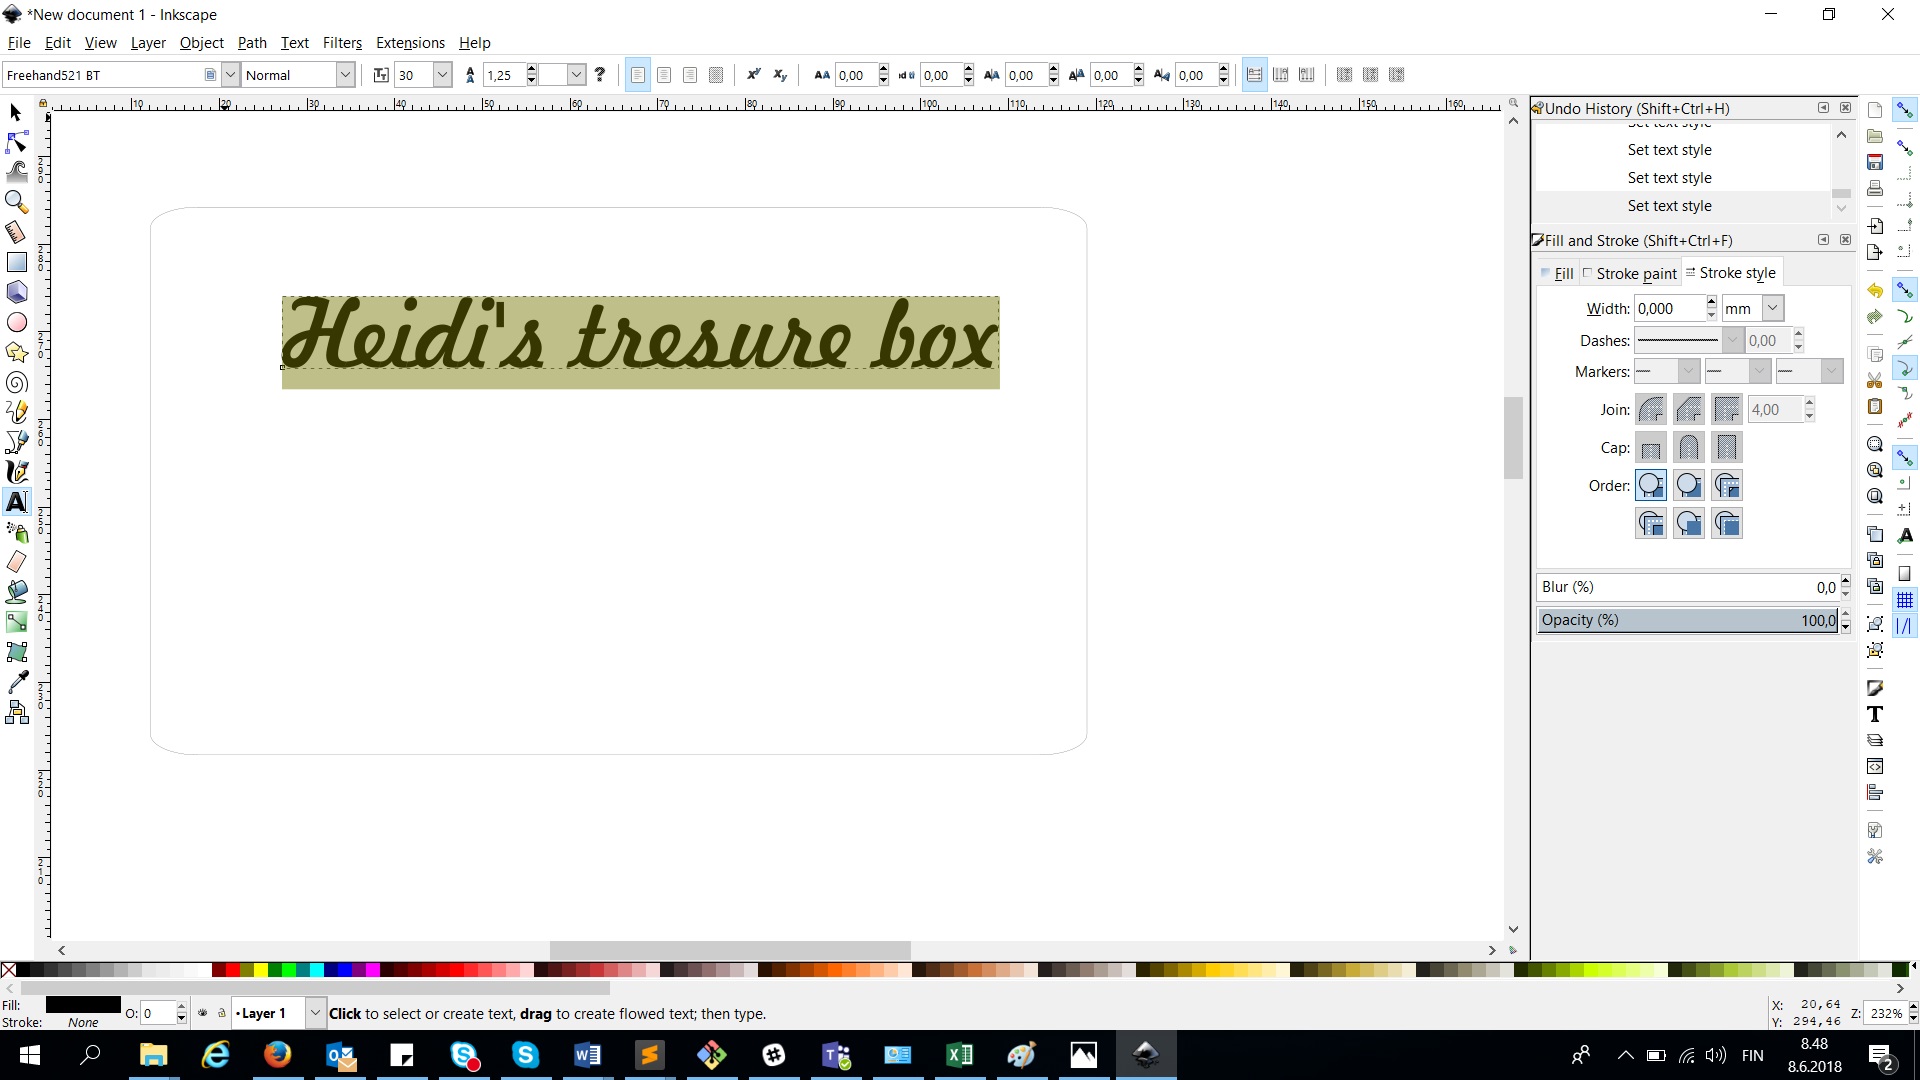
I double clicked on the text, and got the option to change the font. It is visible now on the above menu. I browsed through and selected a more ladylike font.
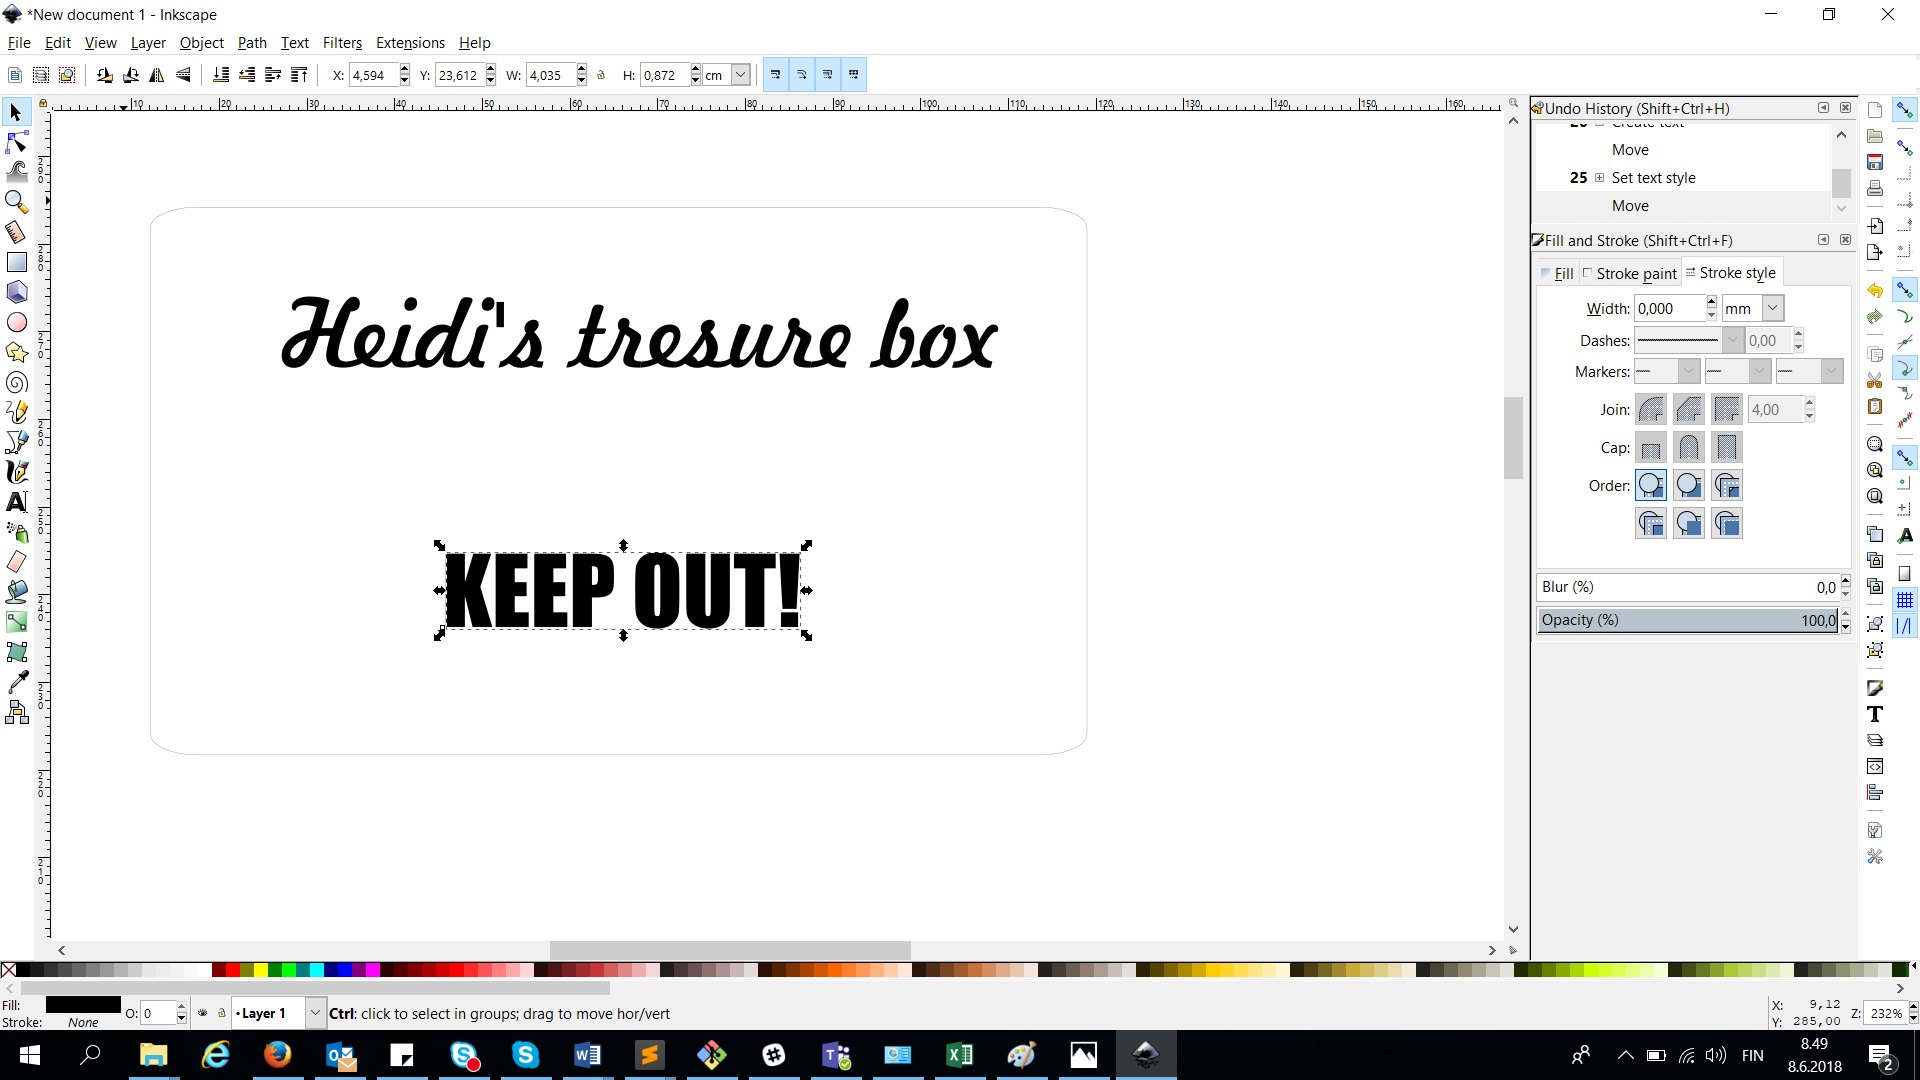
Also added a stern warning text there. You know, so that people know to keep out...
And I decorated the box with some star motifs also found on the left hand side menu. The line width for these stars is also 0.020mm so they would be cut through. People could peer through to see my treasures, just as long as they do not touch :D The objects can be resized by grabbing a corner and scaling to the size you want.
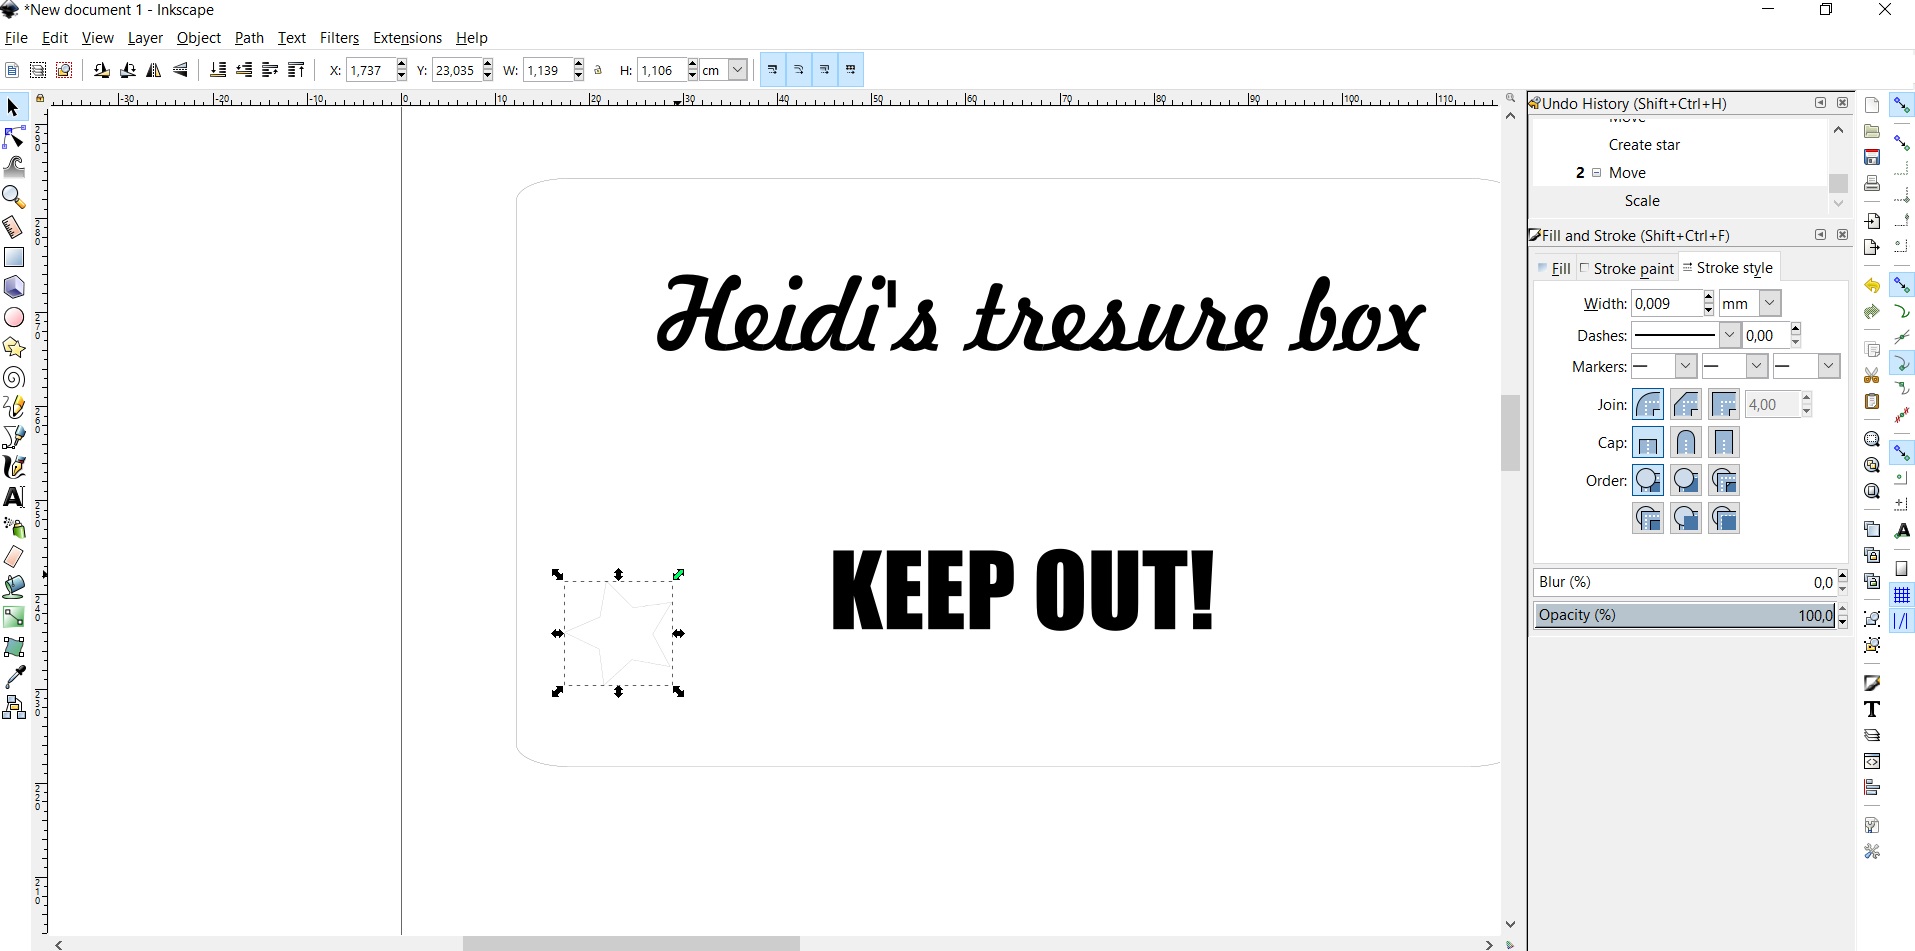
And that is the lid finished, you can download the amazing design below
- Download the .svg file for the treasure box lid here
Problems had, lessons learned, questions that remain
- My problems with GIT continue - Still can not access from home, and when I push changes from the university, it seems that while the updated files are visible in my GITlab, my website is not updating. Is it just being really, really slow? *
- There were no problems with the modelling if you do not count some difficulties in time management. I would have loved to spend more time tinkering with this software but something tells me I will get many more chances
- This week I learned the basics of sketching, and how sketches can be turned into 3D elements. Much more to learn still, I feel I have only scratched the surface.
* edit: I found the error myself. The image link to week 3 was not showing up on my page, as in my html code I had written the image name without a capital letter, and the image file of course had a capital letter. Worked fine when I previewed on my computer so took a long time to realize.
Copyright © Heidi Hartikainen 2018
Template copyright ©Blackrock Digital LLC 2013-2018

This work is licensed under a Creative Commons Attribution-NonCommercial-ShareAlike 4.0 International License.