Week1+2
Project Management
GIT and WEBSITE
Assignment:
Build a personal site in the class archive
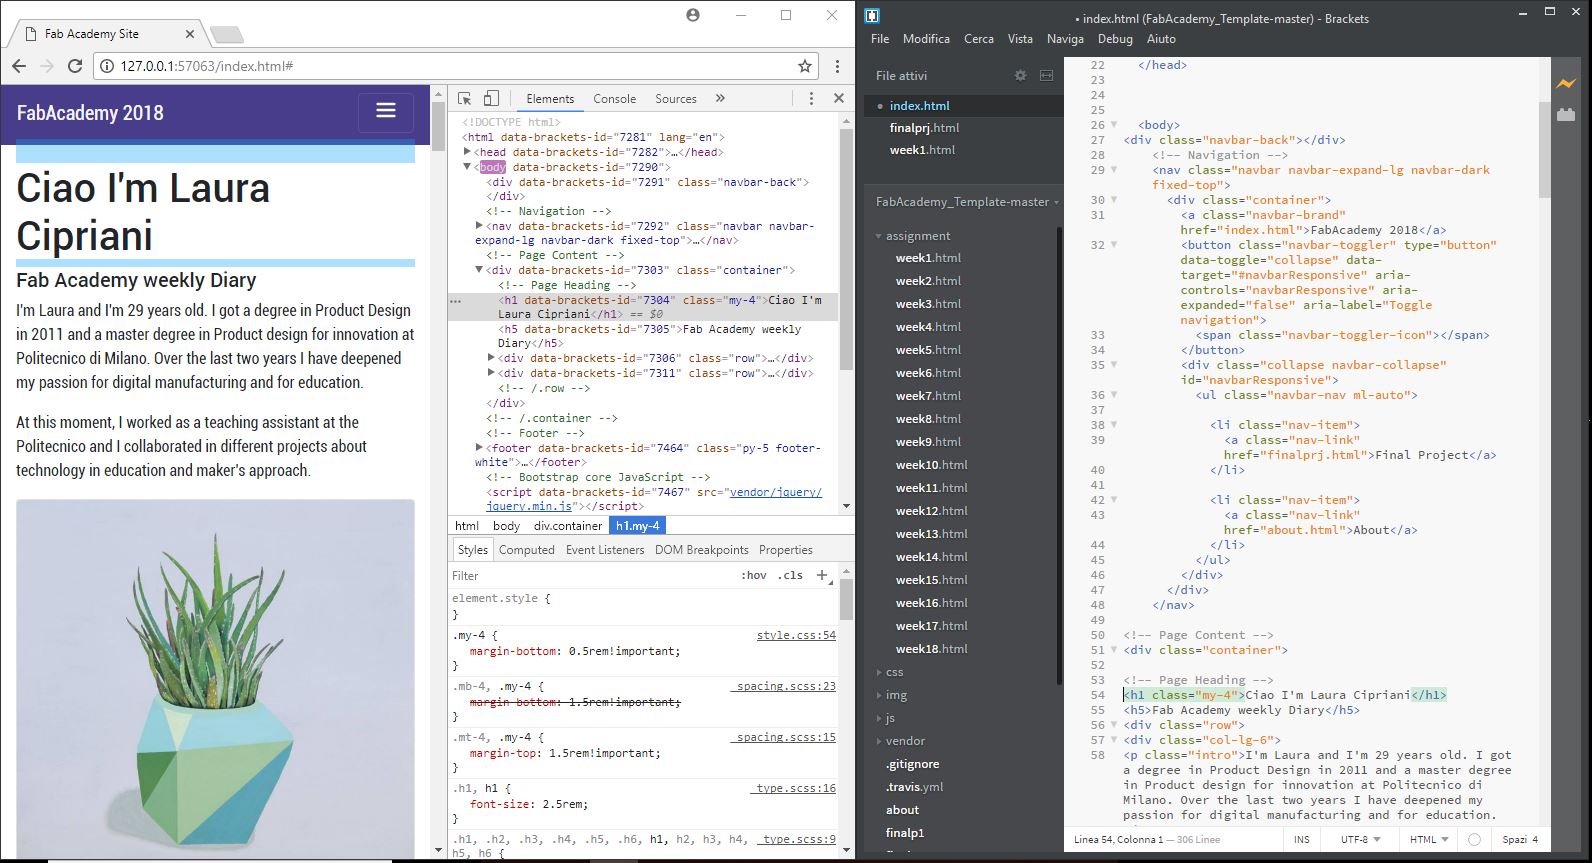
To build my site I decided to use a Bootstrap template recommended by Ernesto Voltaggio during the Opendot in-depth lesson. I started to edit a different template, then I started again with the current one. For writing and editing of the HTML code and the style sheet I have used Bracket, a very user friendly code editor software. Two other very usefull tools are W3school and the inspector command (ctrl + alt + i) on browser.
Useful NOTES
<i> Defines italic text
</i>
<b> Defines bold text
</b>
<ins> Defines inserted text
</ins>
<a> link-The link's destination is specified in the href attribute.-
</a>
Work through a git tutorial
After Fiore's lesson I'm trying to figure out what could be the best tutorial for me and for FABKIT users to undestand and learn to use a Version Control System tool like GIT. I watched this video after I read this official tutorial , useful for the operational phase. In the following days, however, I found this Atlassian.com Tutorial that is very discursive but clear for those who need to understand the why of things.
When you have a web page (I start with download a bootstrap template, and modify it with Bracket) and a git profile, you can put online your site.
- Download and install and open GIT BASH
- Tell Git who you are with git config
- Generate SSH key using this text
- Clone the opendot repository to a local repository with git clone
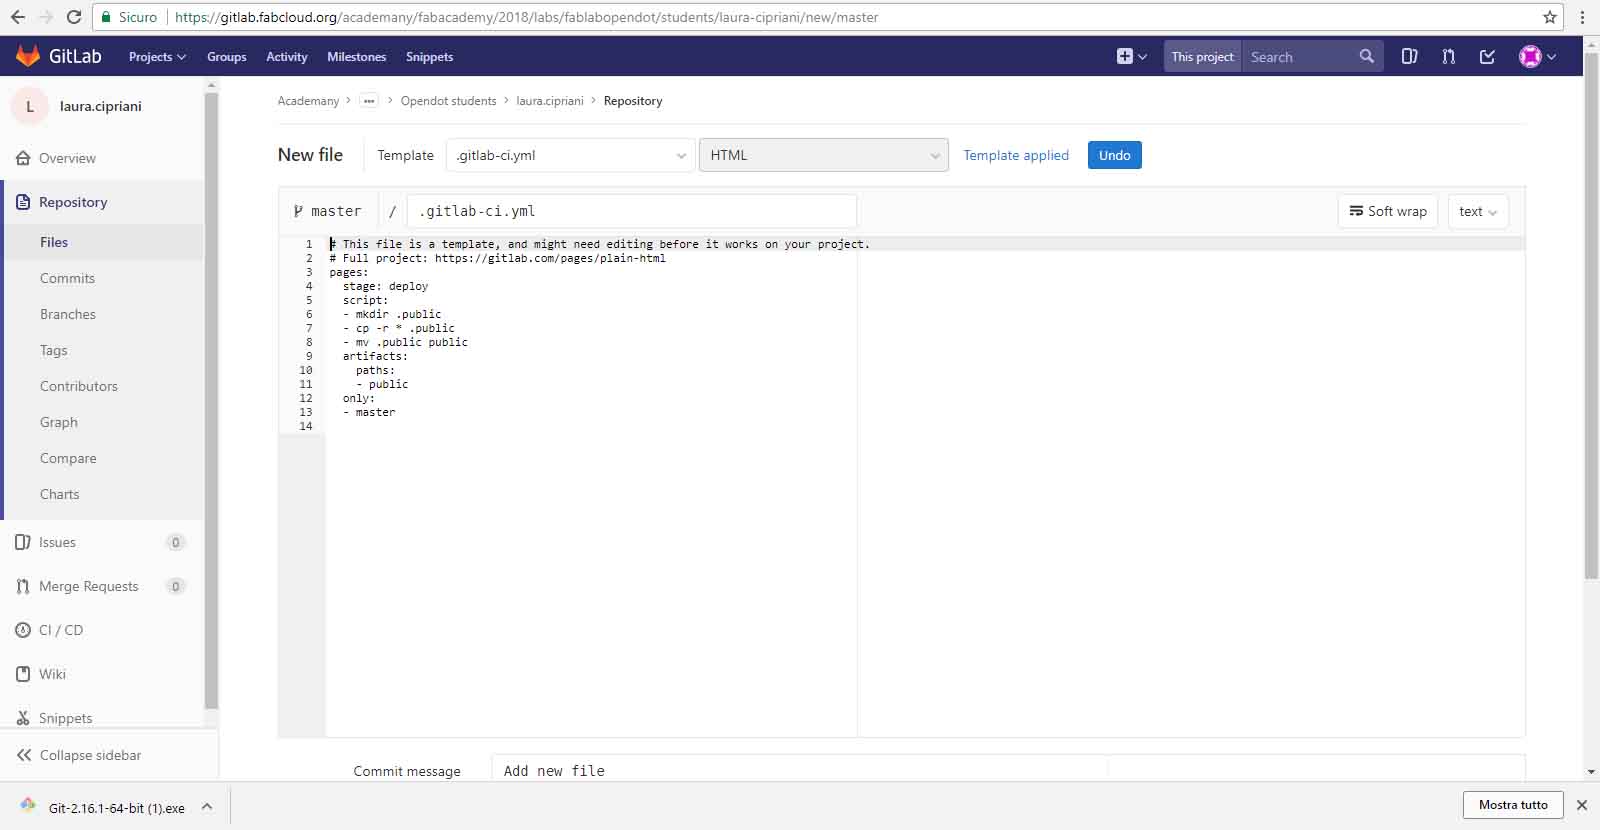
- After I add all, commit and push my web site but it doesn't run. I later realized that I had forgotten to generate CI file on GIT LAB.
-
Modify the project and push your changes to the remote repository with this:
cssh-keygen -t rsa
(after in my case I follow the instruction on my gitlab profile and copy here the key)
- cd (open the file path to the folder)
- git pull in order to get an updated version of everything
- git add and file name for selecting a specific file
- git add . for selecting all files
- git add -u ffor selecting already tracked files that are modified
- git commit -m "message" for saving a commit in the local repository
- git push in order to send everything you commited to gitlab
Generate CI file in GITLAB

Principles and Practices
you can
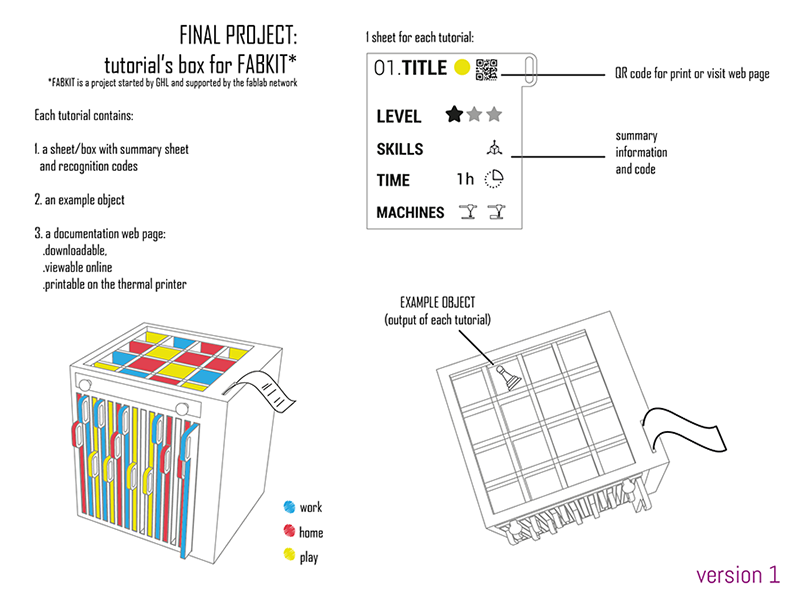
All the information concerning my idea for the FINAL PROJECT can be found in the dedicated section of the website.