- Assignment 13
Networking and Communications
This week I used my board to control the turning on of a led using an NFC reader and an RFID tag.
NFC communication
Hardware
The hardware I used was my board that I made 2 weeks ago, an NFC reader and some RFID tags.
NFC Reader
The reader I chose is based on the PN532 chip and can read a wide range of RFID tags, it also supports 5v power supply and all three major wired protocols: UART, I2C and SPI.
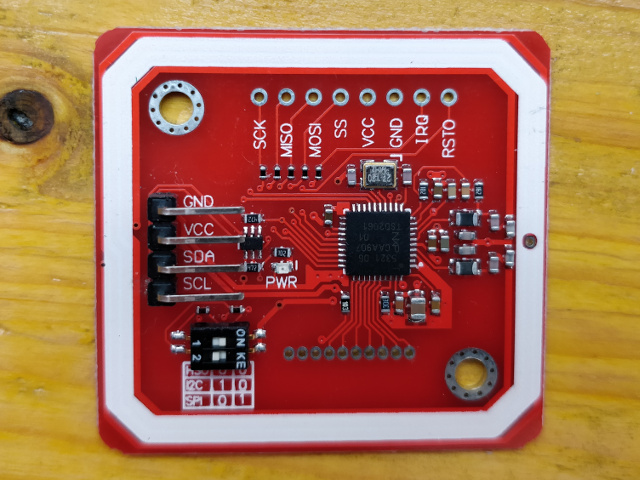
Figure 1. The PN532 NFC board
To used the I2C protocol I changed the interface by setting the toggle switch.
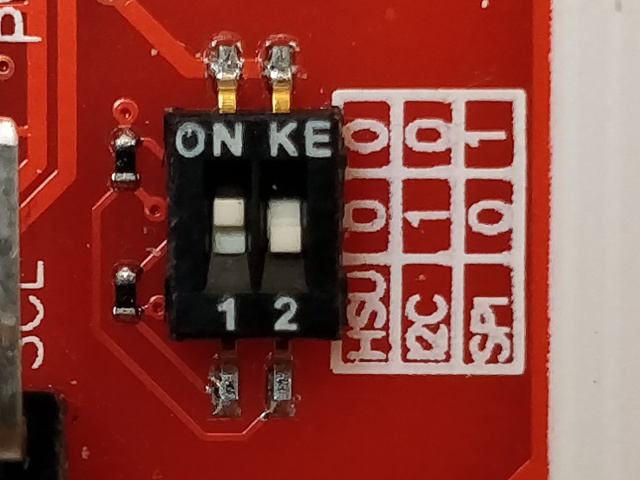
Figure 2. The toggle switch to set the interface
NFC Tags
To test the reader I used a 13.56MHz RFID Key IC Card with build-in chip Mifare S50.
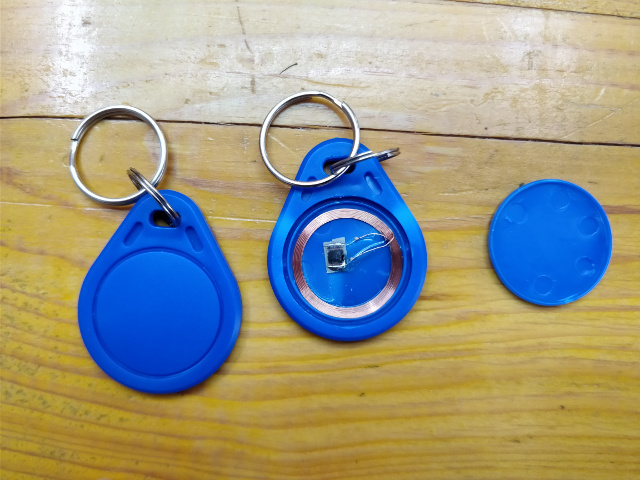
Figure 3. 13.56MHz RFID Key IC Card
Board
On the board I had already prepared a connector to connect two devices via I2C. The double connector is placed near the reset button and the pinout is GND - VCC - SDA - SCL as on the NFC reader.
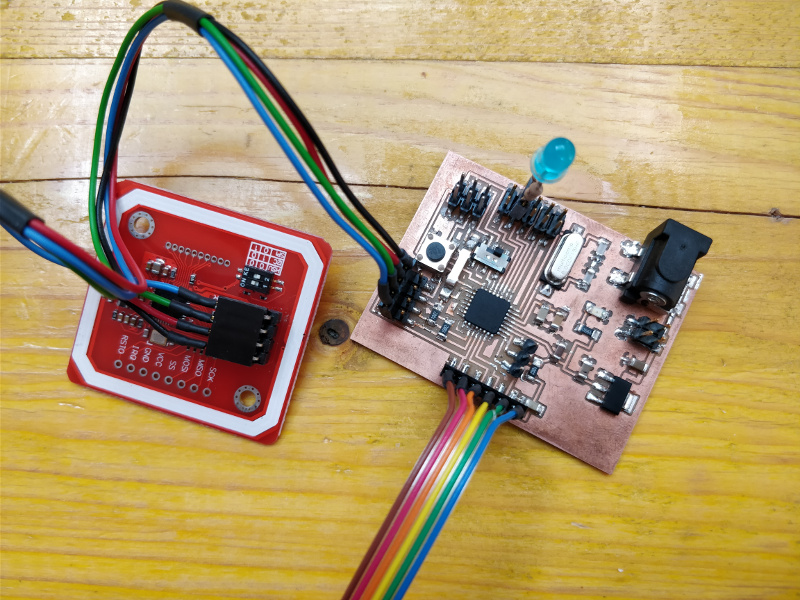
Figure 4. The cabling
Software
To use RFID tags I had to write two sketches, one to write on them and one to read them.
Requirements
To use the NFC reader with the Arduino IDE I had to install its libraries manually. To do it I downloaded from respective Github repositories in zip format and are:
- NDEF : to read and write NDEF messages on NFC Tags
- PN532 : for PN532 to use NFC technology
Then I extracted them in the folder C:\Users\Paso\Documents\Arduino\libraries
keeping only the
subfolders in <reponame>-master. In this
case the folders are: NDEF,
PN532, PN532_HSU (unused), PN532_I2C,
PN532_SPI
(unused).
Writing
To write the sketch that will be written on the RFID tag I started from this present on the book Beginning NFC.
My sketch at the beginning turns on a led to signal that the NFC
reader is ready to write the data; when
passing the RFID tag, the username saved in the variable string2write
is written using as
context type text/admin. If the writing is
successful the led will turn off and
the NFC reader will not write anything anymore.
Reading
Like the previous sketch I started from another present in the same book, all these and others are available at this Github repository.
My sketch reads the RFID tag, compares the first record it finds with one containing the same data I wrote before and, if they correspond, then changes the status of the led.
download NFC_reader 1,65 KB (.ino)Result
Here is a video with writing and one with reading of RFID tags.
Serial communication
To implement the communication between two boards I made I chose the Hello Board and the Output Board and Serial protocol.
Hardware
For serial communication I used two pins for the data, RX (which receives the data) and TX (which transmits
the data).
The RX pin of a board must be connected to the TX pin of the board it wants to communicate with and vice
versa. In addition to this, I have also connected Vcc and GND to each other in order to power the
boards.
To the Output Board I also connected a led and a button because it is not provided, unlike the Hello Board.
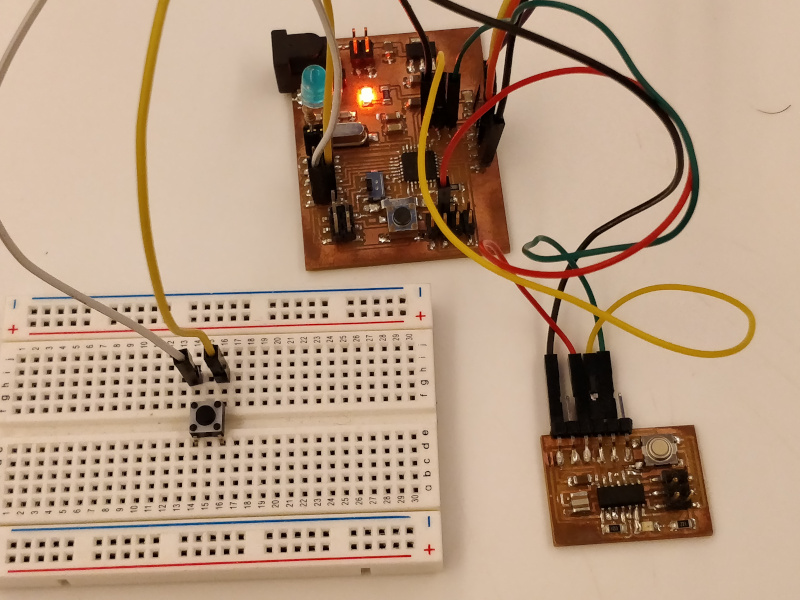
Figure 5. Wiring
Software
The sketch used on the boards is almost identical (only the pin definition changes) and very simple:
when the button is pressed a signal is sent in serial to tell the other board to change the status
of the led.
It is essential to set the baudrate with the same value, it is recommended to use those present in the
Arduino serial monitor, I chose 4800.
#include <SoftwareSerial.h>

// RX, TX
SoftwareSerial mySerial(3, 4); //(0, 1) on Hello Board

#define LED_PIN 5 // 7 on Hello Board
bool led = false;
#define BTN_PIN 9 // 3 on Hello Board
bool prev_btn = false;
bool btn = false;

void setup()
{
  // Set the data rate for the SoftwareSerial port
  mySerial.begin(4800); // this is the baudrate!
  pinMode(LED_PIN, OUTPUT);
  pinMode(BTN_PIN, INPUT_PULLUP);
  digitalWrite(LED_PIN, led);
}

void loop()
{
  btn = !digitalRead(BTN_PIN);

  if (mySerial.available()) {
    digitalWrite(LED_PIN, mySerial.read());
  }

  if (btn && !prev_btn) {
    led = !led;
    mySerial.write(led);
  }
  prev_btn = btn;
}
Result
Group Assignment
More info on the Opendot group assignment page.