Project Management
Introduction
This week we was introduced to the version control concept which I was really fascinated by.
To be honest I had prior knowledge in HTML, CSS and bootstrap, so I started looking for template and luckily after ONLY 3 hours looking for a creative and artistic one I found this template, and started to edit it using brackets code editor.
Getting Started:
Firstly, I use brackets editor to edit the template which you can download from their official website.
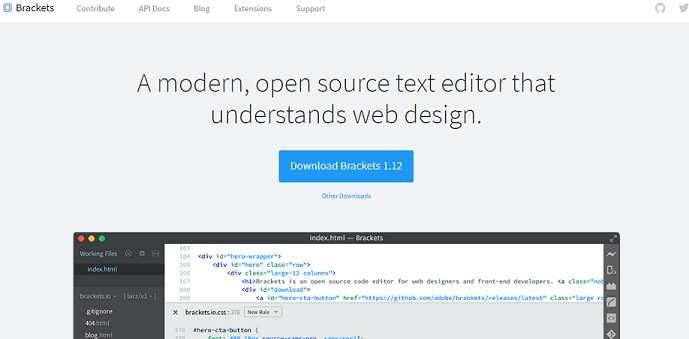
the easy/painful part comes in editing when I had to stare in more than 100 lines in different pages and editing the same side bar information about me in each page.
Briefly, Why I chose Brackets ?
- First of all, brackets is a really customizable editor and the most important thing that it works on Windows, Mac and Linux and supports more than 20 language.
- Secondly, the most important thing is the LIVE PREVIEW feature which shows you instantly your edits.

Edited tags:
I edited different tags in the template I'll explain each one specifically in the upcoming list:
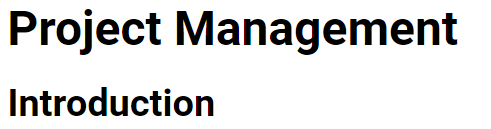
- Tag (h1): Header 1 tag which's the main tag with the biggest font
- Tag (h2): Header 2 tag which's the secondry tag with the second biggest font
- Tag (P): This tag is a paragraph tag which hold all text paragraphs such as introductions, also about me page is almost a p tag cause most of it consists of a paragraph mainly.
- Tag (blockquote): This header is one of the tags I previously knew and it adds a fascinating shift from the main text alignment.
- Tag (img): To import an image inside a website.
- Tag (a): The tag defines a hyperlink, which is used to link from one page to another and the href=" " function gives the website desired.
As you can see below the difference between h1 tag and h2:

Version Control (Git):
To be honest this part was the trickest in the entire assignment.
- Firstly, I had to reset password for the provided account on gitlab.
- After that I downloaded and installed git bash which will create the SSH (Secure Socket Shell) key
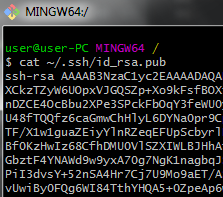
- Using git bash you need to check that you don't have a previous SSH key using the command: cat ~/.ssh/id_rsa.pub
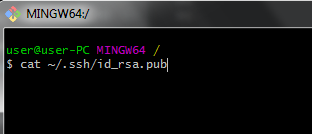
If you have a previous key it will show a lot of letters and signs - If you don't have any key then write: ssh-keygen -t rsa -C "yourmail@example.com" when prompted for location and file name, just press enter to use the default so that the key can be used automatically.
Then enter a password. - After that go and copy the generated SSH key from the location given at the last message after entering the password (try to open it by a simple Notepad software).
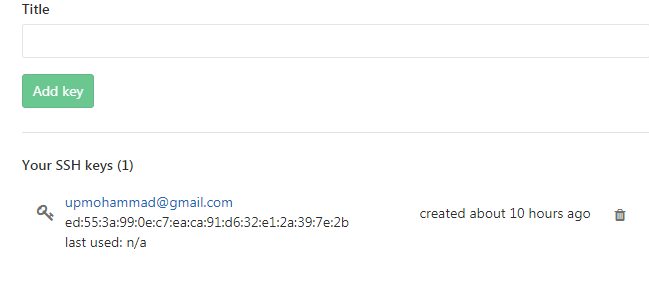
- You need to go to your profile on GitLab to add the SSH key (Top Right)
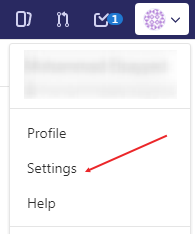
Go to profile settings then SSH keys (Bottom left)
then paste it in the key box and give it any title you want then click ADD KEY button. Now you are ready to push and pull the repository, and the SSH key will be saved as shown below.
What is SSH and how to generate it ?
SSH stands for (Secure Socket Shell), SSH keys can be used to establish a secure connection and in our situation we use it in Git operations from your local machine.
Through my journey I followed this tutorial steps and they were extremely beneficial and organized.
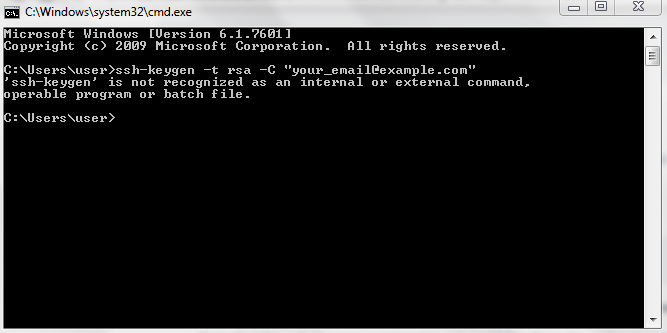
My advice, in tutorial's step 3 use git bash instead of CMD cause for unknown reason the command "ssh-keygen" shows the error below
After some research I have found that the general reason is not having get on your local machine, yet I had it on my machine, so I still don't know why it doesn't work.
Using SmartGit
Why?
I used SmartGit cause it hides a lot of git complexity and have friendly interface, also not to mention that it works on all operating systems.
After installing SmartGit with selecting all the default options (You can follow this tutorialif you need guidance)
- Click on repository tab and choose (Clone) option or press (Ctrl+Shift+O)
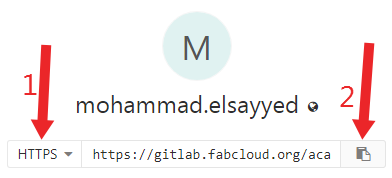
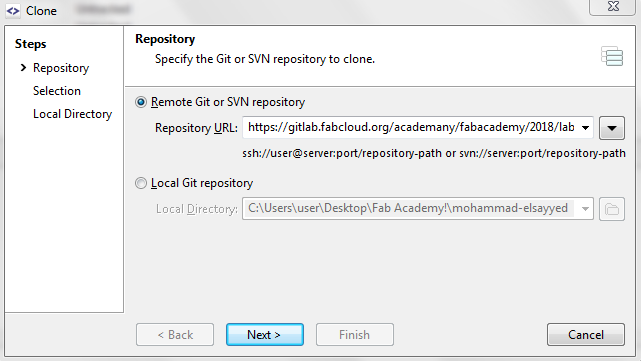
Make sure its HTTPS(1) then copy(2) it to use in SmartGit - A window will appear asking for the Remote Git Repository, which you'll find in Gitlab website
- The Path is where the folder that have all your website files that you'll later on push it or pull to it.
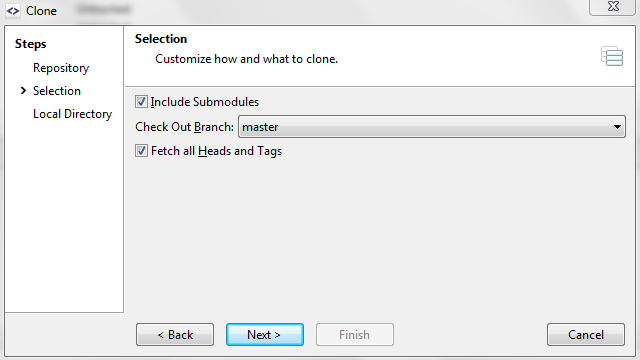
- This option after selecting your allows you to make milestones to get back to in case of later on cras or bug found, yet it doesn't update the online academy website
- This one also allows you to make milestones as same as the commit button, yet this one pushes the data to the online repository.

Final Part: Push-ing & Pull-ing
After setting up SmartGit all the only two buttons you'll need is Push & Pull
First, the Pull button used to take any data on any online repository in my website there was only a text file uploaded by FabAcademy IT crew.
 Second, the commit button which's the most important button you'll need frequently to make you local files that you edit synchronized with the online academy website.

Once you click on the commit button the window below will appear with 2 options.
