3D Printing & Scanning
The fun week, this's what I call this week. We were asked to Scan anything beside that to design and print something that's not millable on a CNC milling machine.
Designing Phase:
First, I used SolidWorks because I've said before that I have prior knowledge in using it.
My Design consists of several steps to make exactly the same through these short videos:
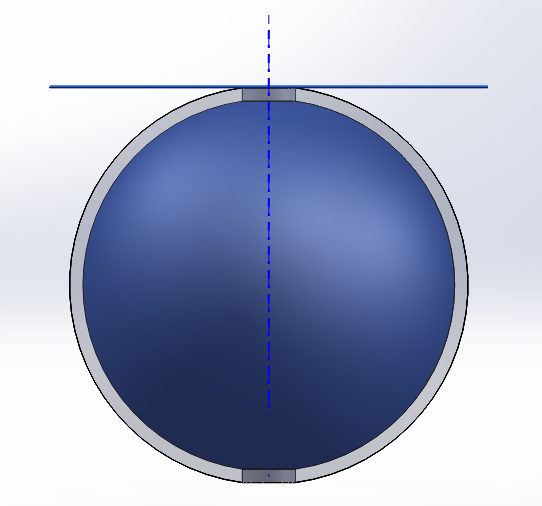
- The Sphere
- Hole for the Sphere
- The Shaft
- The Orbit
- Hole for the shaft placement
- Changing the 3 parts appearances.
Before you see the video and adding the plane make sure that the plane is touching the sphere like the photo below, but it won't matter, if you chose the cutting method "Through all".
However, in large complex parts you can't do that, or you'll find things you didn't want to get rid from cut.
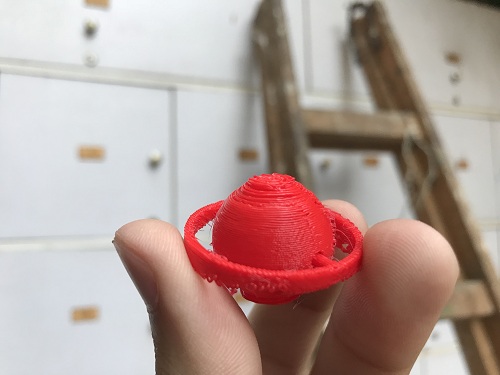
Also, in the first video described as failure from the outside you'll find them exactly the same, yet it's hollow from the inside as I thought that it will be way efficient in printing, but it made my part so weak at the end.
First Video ( Failure ):
Failure because the sphere was hollow from the inside, which made the printing gaps in the sphere after printing as you'll see in further steps.
Second Video ( Successful ):
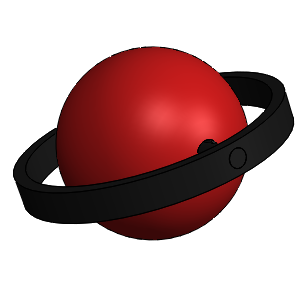
This how I made my design and we can now move to the 3D printer part WOHOOO!
Printing Phase:
Our Fab Lab machine is "Replicator 2", but before getting started with how to use the machine I have to show you how to convert you 3D CAD model from SolidWorks to the STL, and now you're wondering what's STL format which's briefly the most common and multli-purpose format used my professionals and hobbyists. However, after reading this article you can call yourself a STL file format expert.
Converting 3D file from SolidWorks to STL format:
The 3D printer:
3D printers lies under the additive manufacturing tab which means that the machine adds material to create the object not subtractive like the CNC miling machine which subtracts from the material.
Firstly, you have to download and install your official machine software.
Mine for Replicator 2 is MakerBot Print which is completely free and supports all MakerBot machines.
Secondly, you have to import your model and setup your software to give you your machine dimensions as you can in the video I've changed the machine to show you the difference that choosing the machine make.
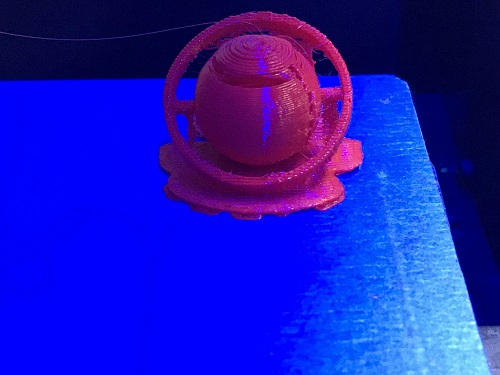
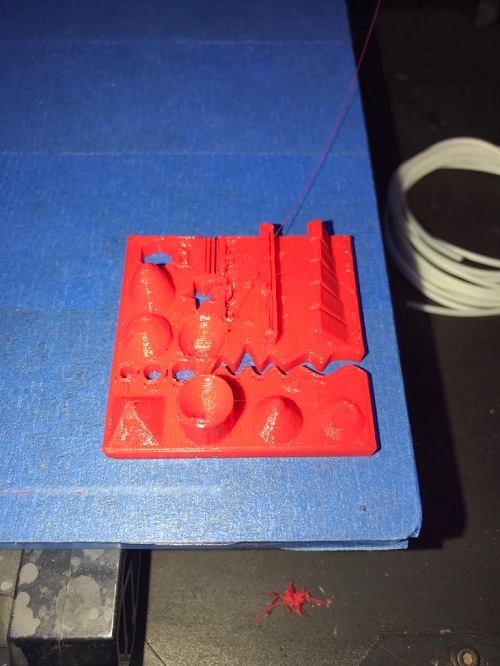
Printing Process Part:
After exporting the file and putting it to the machine using a SD card.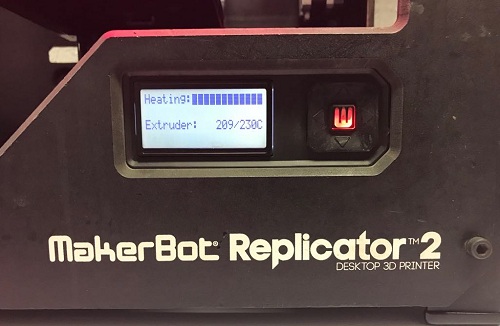
The result:
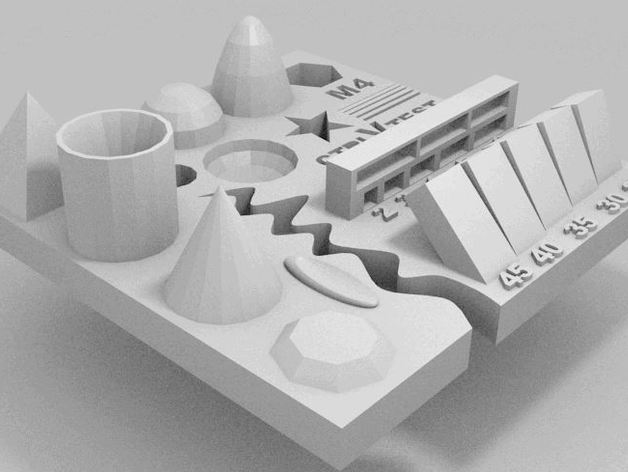
Machine Performance Testing:
In Fab Lab Egypt as a group we looked over several models and setteled on this test which consists of several tests for the the 3D printer.
 picture credits to the model owner
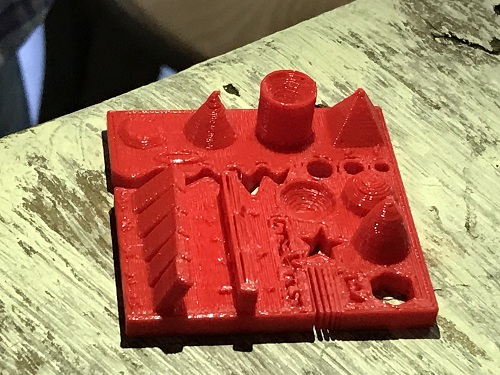
Analyzing the model after printing:
This is the model after printing:
If you're wondering how to print refer to the printing process part.
Each and everyone one of us started to analyze certain parameters.
Mine was:
- Fine details: pyramid, cone, all numbers
- Rounded print: wave, half sphere
This reference stated almost all the possible issues you might face while or after printing.
For the Fine details:
Firstly, The pyramid was pretty neat yet the top wasn't good at all it suffered from over heating, so the edge was sharp that it could hurt and this happens probably because the cooling speed is not tuned with filament temperature the cone edges was smooth too yet it suffered from the same overheating issue so the top as you can see pointed with red arrows is sharp.
Secondly, the numbers which was an epic fail to print and could barely be seen as you can see illustrated by the green arrows as there undefined pile of filament without any detail that could tell that those are numbers. Furthermore, there are a reason that I know which's the filament extruder diameter that could be too wide to print such small and precise numbers and to solve it you have to either re-design your numbers and make them a little bigger or change the nozzle itself.
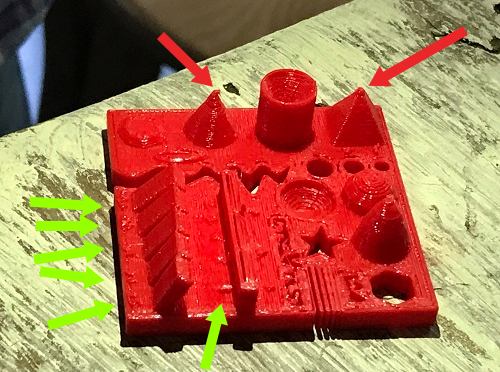
Rounded print:
The wave as you can see in the picture is smooth and perfectly made. Also, the half sphere is smooth yet it a good finishing due to the heating issue, yet it's barely noticed because of the circular motion not like the pyramid.
3D scanning:
I've previously worked with xbox kinect scanning, and I had amazing results, yet I don't have the kinect nowadays nor my computer can stand its heavy ram drainage and Graphical card usage.
So I used a mobile app called Qlone my local instructor Mohammad Aboulhaggag instructed me me to use.
After downloading and installing the app I had to print the mat provided, which works as a guide line to the app to provide the dome for scanning.
then I had to rotate several times around the model.
How to scan object and familiarization of the software:
Tips:
- You better put the oject on a tall surface taller than the lower part of you body
to ensure it's easy to access all around the part easily.
For example, a tall rounded table or a stool.- The more you scan a model the better the finishing and the model, yet sometimes it adds unnecessary parts so you have to merge them manually and select the part you want to merge in particular.
This's Mobile screen recording, and by standing on/scanning all the blue areas in doom shape around the model you get the scan all around the model.
Exporting:
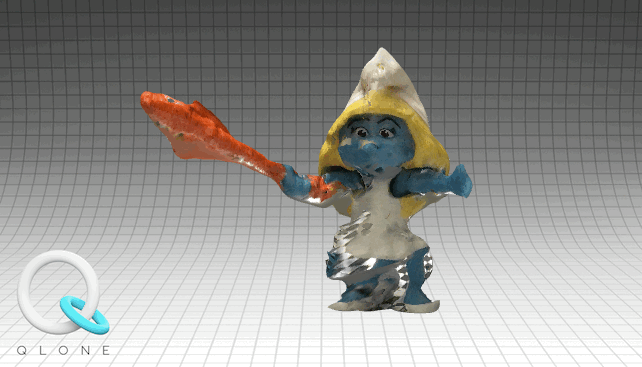
Augmented Reality testing:
Download Files:
SolidWorks Files, STL and (.x3g) ExportMachine Test File