Output Devices
Task Requirments:
- Describe your design and fabrication process using words/images/screenshots.
- Explain the programming process/es you used and how the microcontroller datasheet helped you.
- Describe problems and how you fixed them
- Include original design files and code
Idea:
The Idea is to make a board to control a servo motor that i can use in my Final profect for moving the directing gate after receiving the signal from the counting sensor
I will use the Hello servo 44 and will remove the voltage regululator as i use 5v power supply and add a pin for TX so i can serially communicate with the board from the sensor board .
Bill of materials:
- Servo Motor
- Attiny 44
- 1 R 10kohm
- 1 capacacitor 1uf
- 3 AvrISP pin head
- 1 Resonator 20MHz
Note:The biggest capacitor available in the lab was 1uf so i had to use it instead of 22uf hoping there will be no much noise and will be able to test it untill receive the 22uf capacitors.
Designing the board in eagle:
I added all my components to the schematic and connected them through the net command
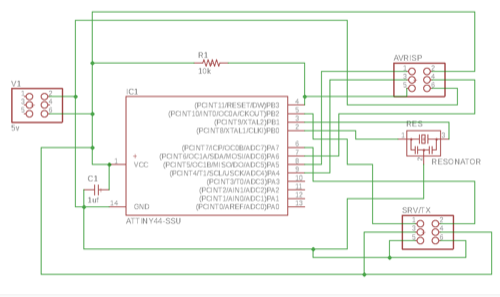
In the board view i arranged the components and routed the traces between them.
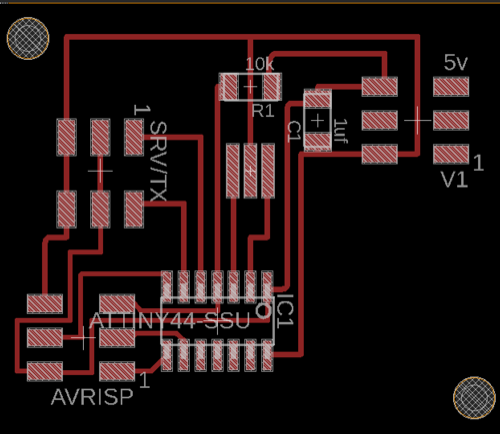
Finally i did a design rule check using DRC file of FAB.
Then I exported the top layer as monochrome PNG and imported it to GIMP to make the traces and interior PNG
For detailed step by step for eagle design, refer back to Electronics Design.
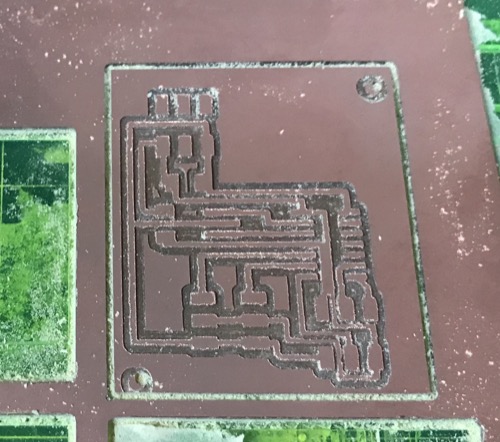
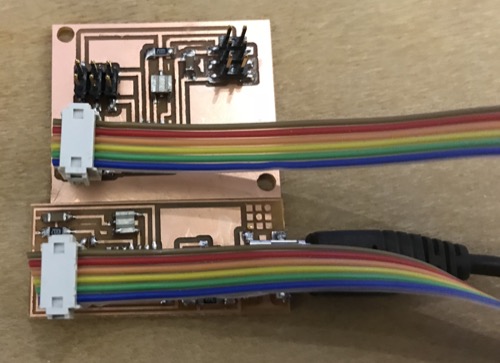
Milling the board on Modella MDX-20A and Soldering:
I imported the 2 png files to the fabmodules and milled/cutted the board using Modella MDX-20A.
For detailed step by step for board milling, refer back to Electronics Production.
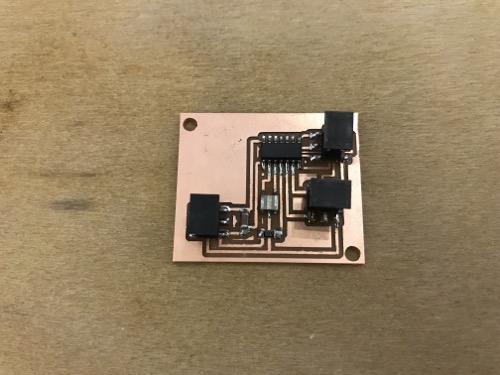
Then I proceeded with Soldering the components.
Programming
Using Arduino IDE, from the tools tab, i choose my processor: Attiny45 and the 20MHz internal clock
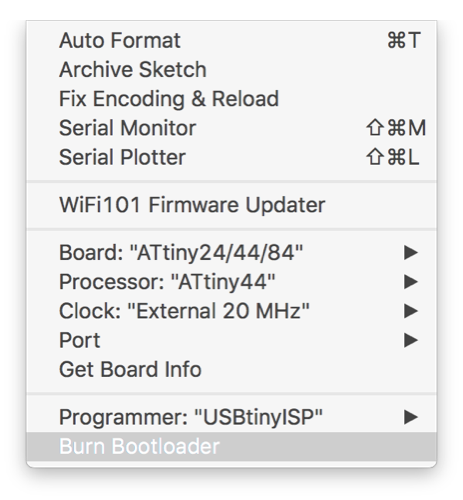
I burnt the bootloader using the fabisp while powering the board with FTDI cable.

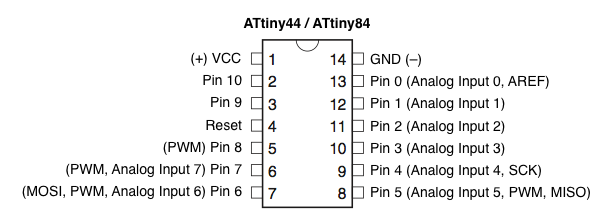
I searched Attiny44 arduino pinout to be able to define my pins in my code.
I tried the Servo.h library from arduino but it didn't work, i tried the SoftwareServo.h Library but also didn't work !!!
I uploaded Neil's code to control servo with software PWM without using the hardware PWM from the pin and it worked fine.
Here is the video.
Neil's Code was written in C language which i hade some difficulty modifing it, so i kept searching the internet for controlling servo without servo library and found this Link on arduino forums.
I downloaded the code and went through it to understand how it works and i was able to deal with the angle as a variable where i can tell my servo the exact angle where i want it to go which is exactly what i want for my final project.
Here is my final code where i tell my arduino to go to angle 130