Project Details
01
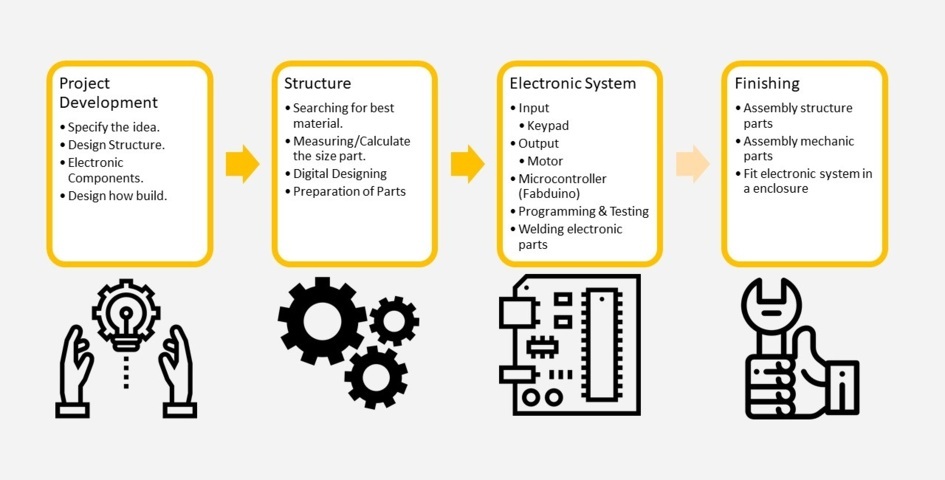
Processes
- Laser cutting
- 3D printing
- CNC Routering
- Electronic Design (Output, input)
- Programming
Machines
- Anycubic 3D printin=g
- Chinesse CNC Router Brand
- Chinesse CNC Laser Brand
- Woodpecker Milling Machines
- Lathe
Materials
- Blue Acrylic (From leftovers from Fab Lab)
- 18 mm MDF Board (Donated/ Uncle Hardware Shop)
- Bike Chain & Gear Plate (Donated/ Uncle Hardware Shop)
- 3 mm MDF board (From leftovers from Fab Lab)
- Wall Bearing (Donated/ Uncle Hardware store)
- Cilinder Aluminiun (Acero Roac Hardware Store)
- Screw/ nut/ spacer aluminiun(Nove / Hardware Store)
- 3D printing Sporcket bike (FabLab)
- Motor Nema 23HS2430B & driver DM542T (Donated/ Friends)
- Fabduino / LCD / Keypad (FabLab)
- Power Supply (24v- 14.6A / Power bank 5v)(From leftovers from Fab Lab)
Electronics Componentes
- Fabduino
-Capacitor( .1uf - 1uf - 10uf )
-ATMEGA238p
-LED
-Resistor(10k - 499)
-ResonatorFOB
-Pin Header
-6mm Swicht
-Push botton - Keypad
-6MM_SWITCH
-Resistor ( o ohms like jumper)
-Pin header - LCD Board
-Potenciometer 1k
-pin Header Male & female
Archive Files
02 - Concepts
What will it be?
-- Project idea --
-
Concept
Quorage
Verticl Storage Carousel
The project will be based on an electronic locker where a user presses a button and the locker will display the level where the object is located. Each level will have a color or identification code, where the user can organize their things by category, for parts storage and carriers can be subdivided for a customizable solution.for example: electronic parts, office article, tools and etc.
-
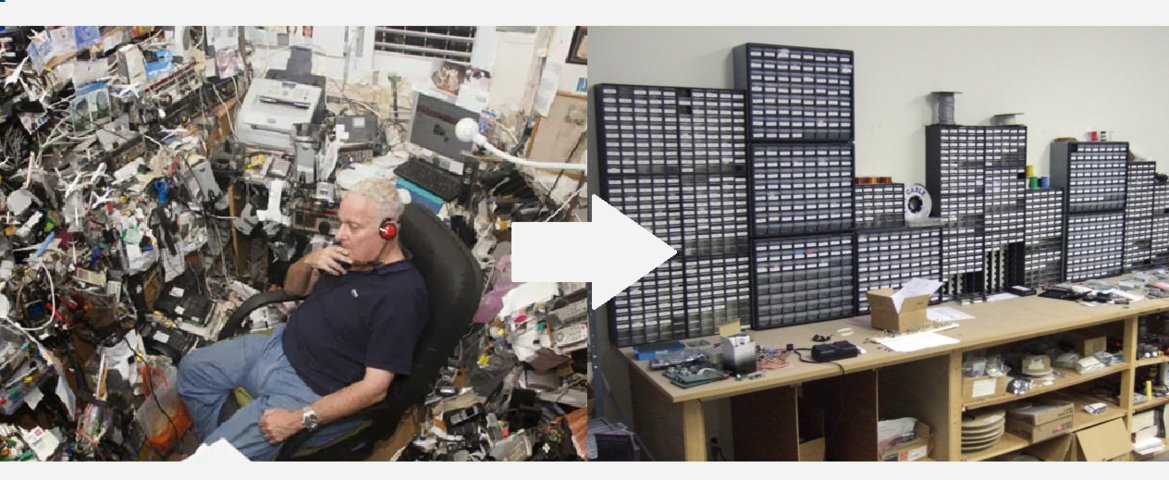
Why?
- Visual amplitude of space
- Stuff more organized
- and automatic! ;)
-
Refences
Movie
Wall-e
by Disney
Wall-e locker at his home when he put her stuff or when Eva search Wall-e part to fix him.Industry
Kardexremstar
Megamat RS
The Megamat RS is an automated Vertical Carousel Storage System that delivers goods to an operator at an ergonomic work counter - providing increased productivity and secured access while recovering previously occupied floor space.


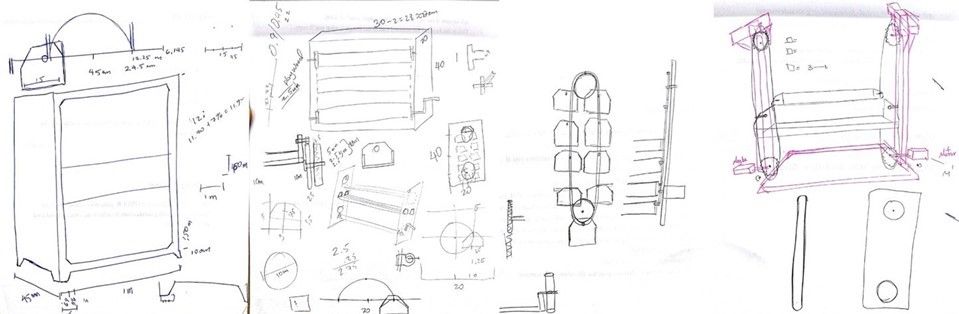
03 Structure
I started first with a sketch, drawn by hand of how the mechanical system can be and enclousure. performing the structural calculations so that the system is not overloaded in question of center of mass.
After having the sketch and the clear idea. It is time to get the essential materials for the mechanical system.
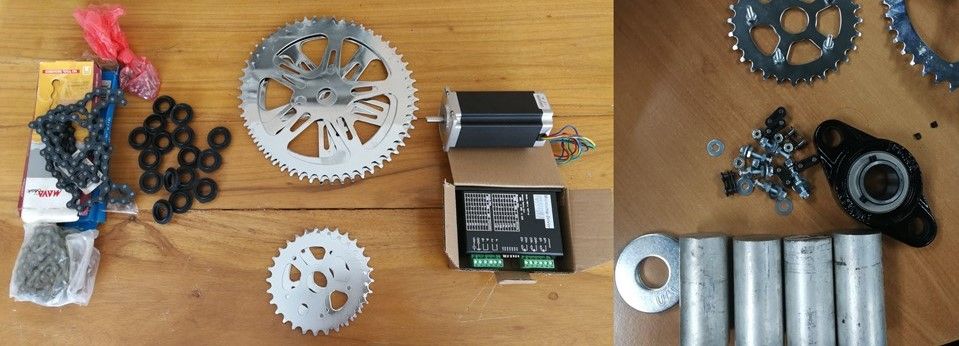
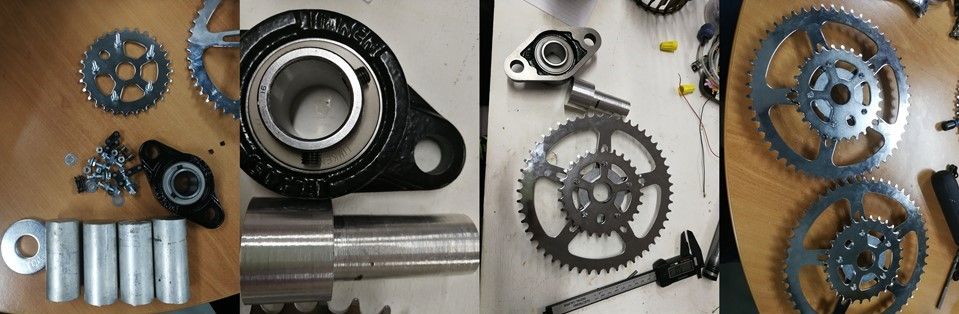
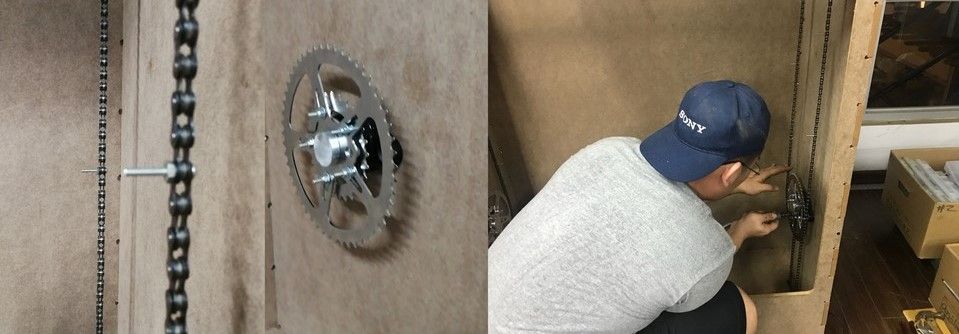
having all the essential parts of the mechanical system, I have joined the bicycle chains with the gear disc, simulating the structure that will have to take the final measure of the enclousure that it will have.
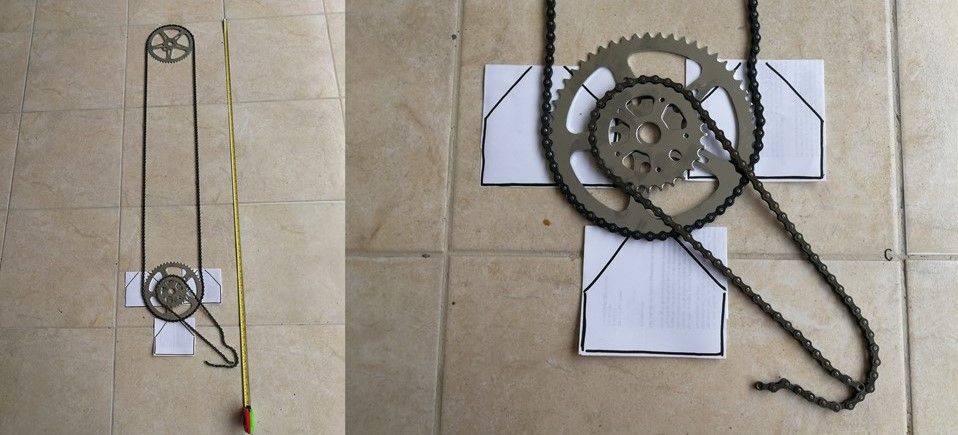
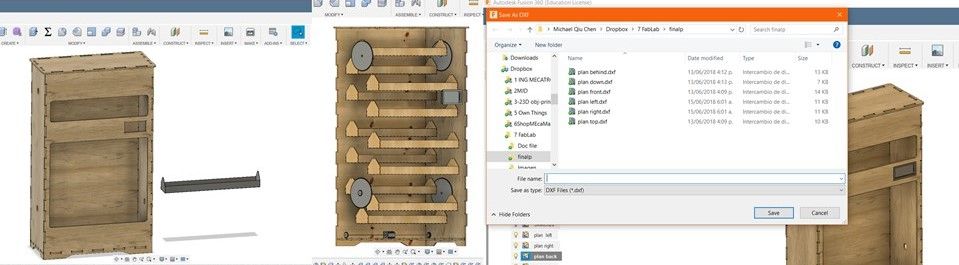
After having taken the measurements of the mechanical system, it is time to make the drawings or digital sketch, I have used fusion 360, since the program allows me to make simulations, drawing 2d and 3d. drawing the enclousure, rack, sprocket, buttons, motor coupling and also the program allows me to save the faces of a 3D object to 2D plane .dxf. and this is how I got the planes of my enclousure.
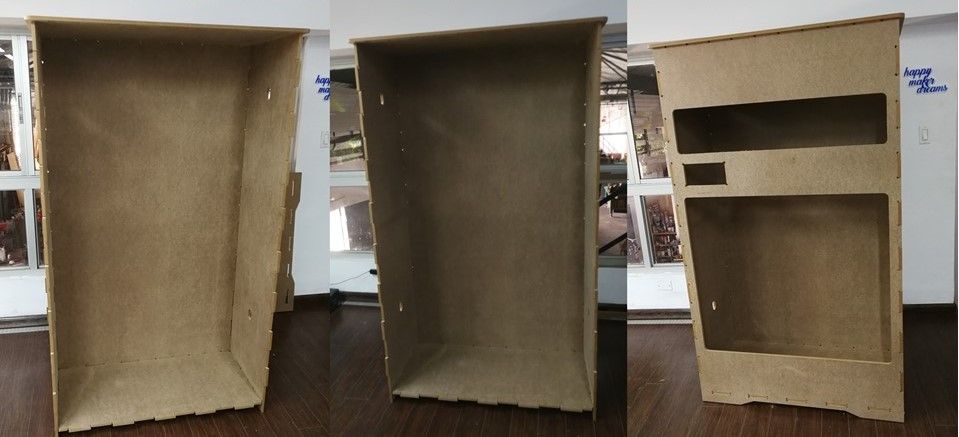
the locker has a height of 1.7m, width of 1m and depth of 0.45m.
I have used the 3D printer to have the sprocket and coupling. the sprocket helps me to fit the bike chains so that it can move with the motor it will have. Each of them will go to the end of an 8mm bar that will be attached to the motor.
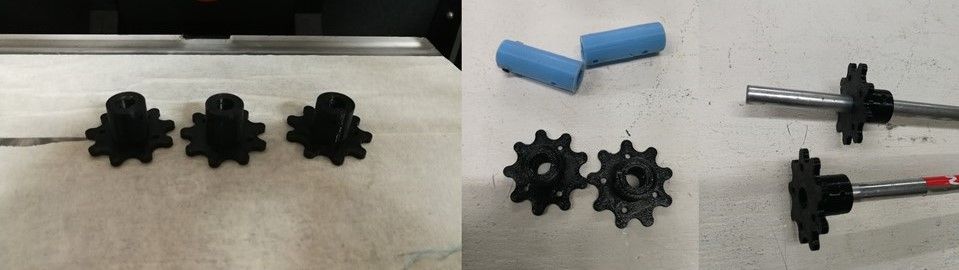
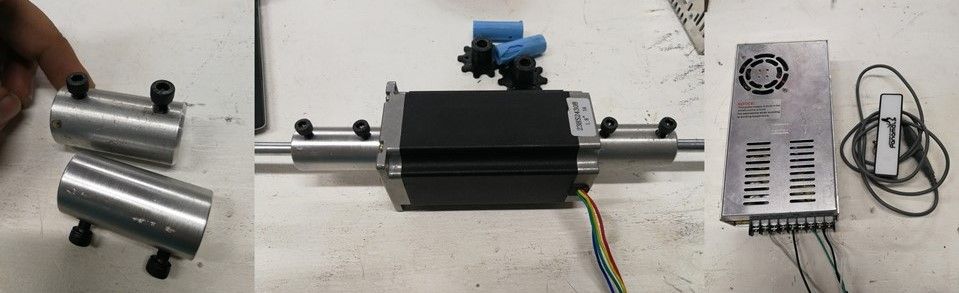
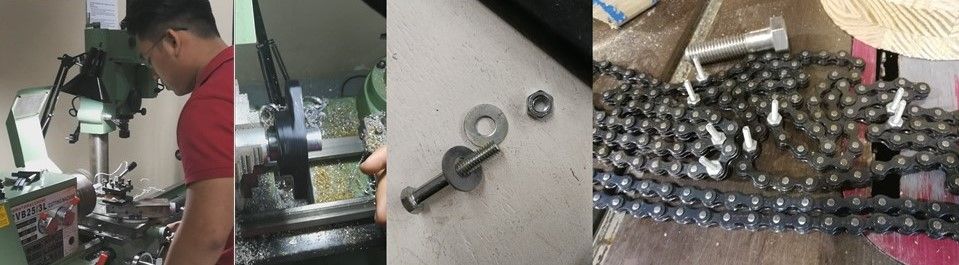
I have manufactured the coupling with a lathe, because when using the 3D printed couplings, they broke due to torque and when placed in the barrel 8mm to the motor. I have also obtained the power supply for the motor and the fabduino.
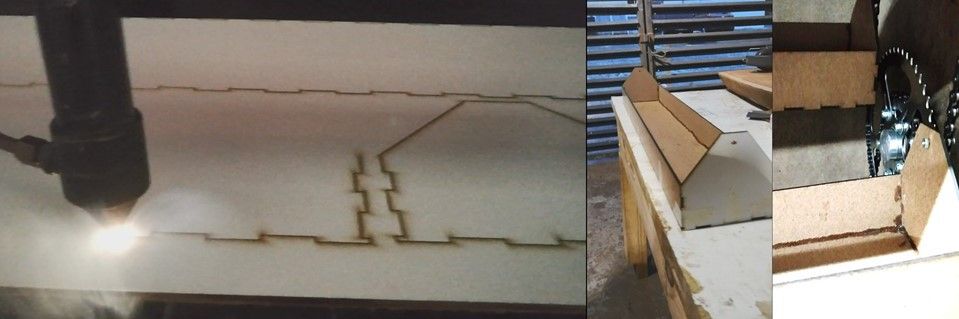
After exporting the fusion planes to .dxf format. The enclousure was cut in the CNC router and at the end of the cut I have enlarged all the faces of the encloure.
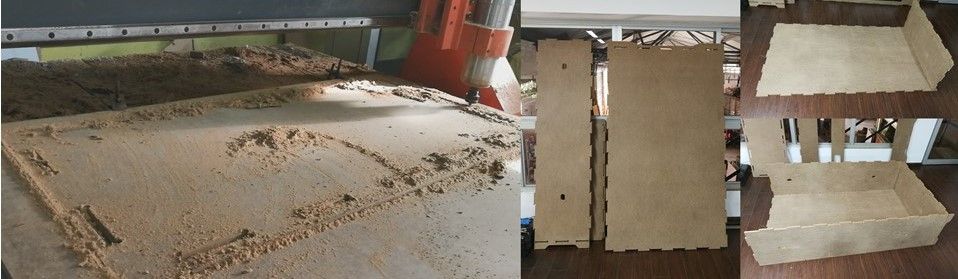
taking into account how the mechanical system of the chains and the gear plate should be, I have achieved an industrial ballast of 1 inch of internal diameter for coupling to the gear plate. When not getting the central axis of the bearing and the bike gear plate, I had to manufacture the axle in the conventional lathe, assuring me that the requirement was 1inch to enter the bearing. and join the big gear plate with the small gear plate.
I also had to remove the central pins of each section of the chain to insert a 6/32 bolts with its nut. this is to be able to hold the rack of each level.
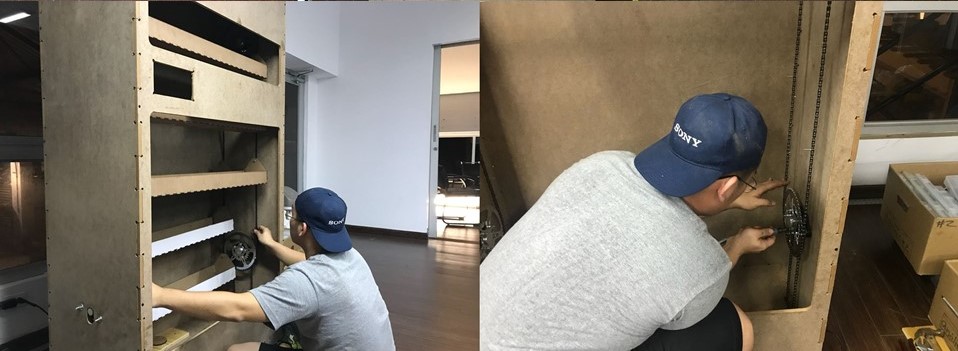
Once I had all the parts ready as the gear plate, axes, chains of bicycle joined and modified. it's time to install inside the enclousure, making sure that both sides of the closet are aligned.
I have used the laser cnc to cut the racks of each level, they are 8 rack in total. After cutting it had to be stuck with a quick drying silicone.
By properly placing each rack, it must be placed carefully as the system can fall off and decalibrate
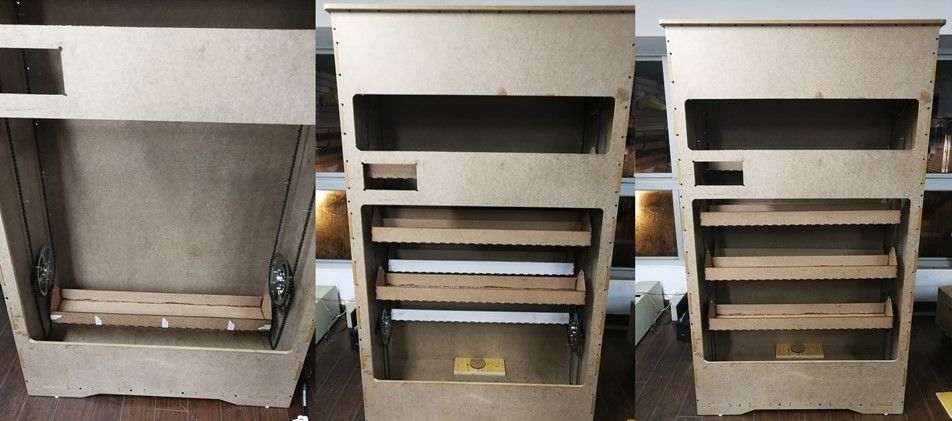
with the racks I have delayed with the installation since it must be placed one by one so that the system does not get misaligned
Taking advantage of the opportunity to be using the laser cnc to cut the rack, I cut the project's lens in acrylic.
04 Electronic systems
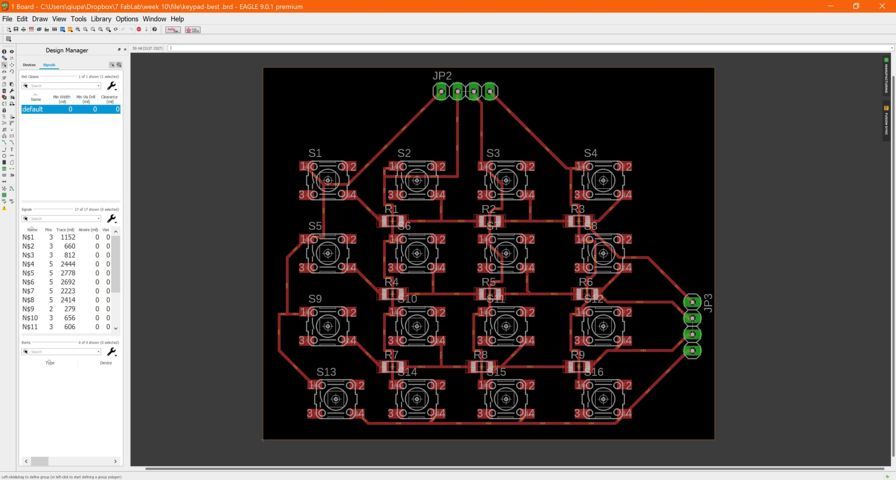
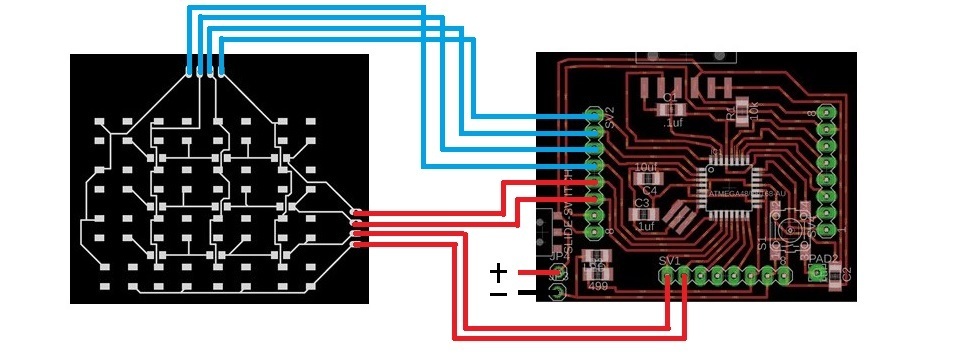
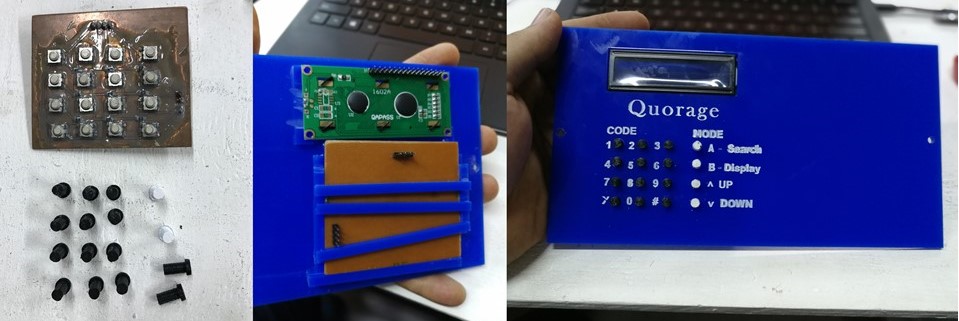
as input I designed a 4x4 keypad in Eagle. to be able to type the code of search for the moral. the keypad has a numeric key and 4 mode.
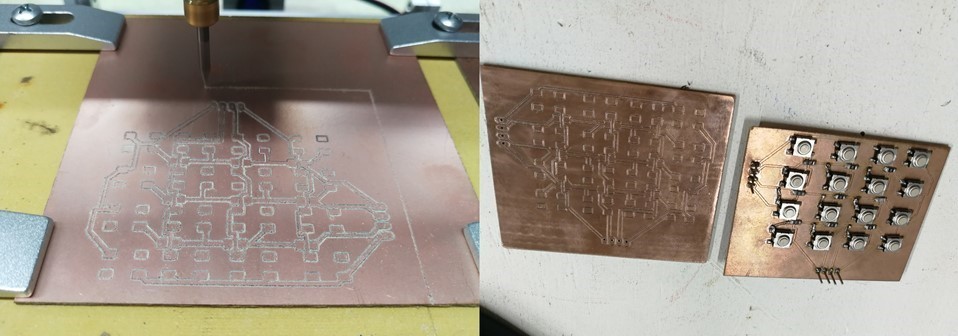
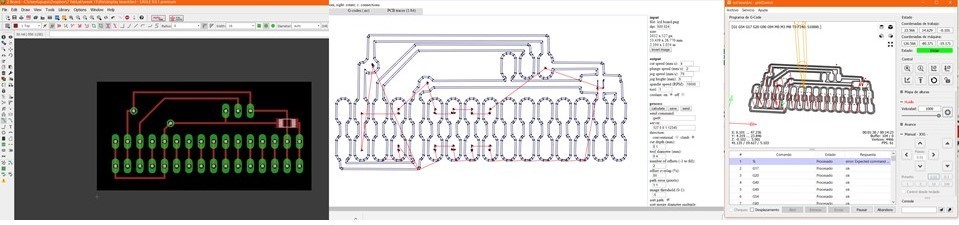
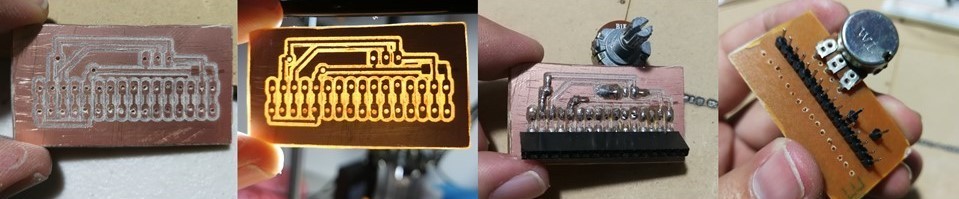
After the schematic design, the pieces and pins were cut in the cnc milling and soldier.
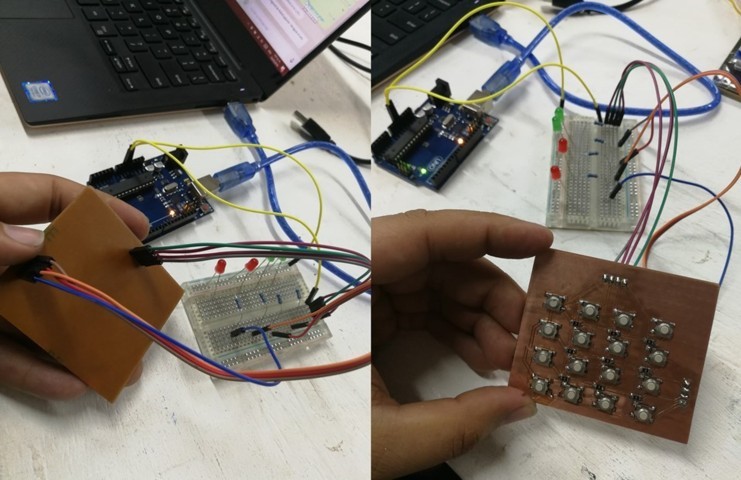
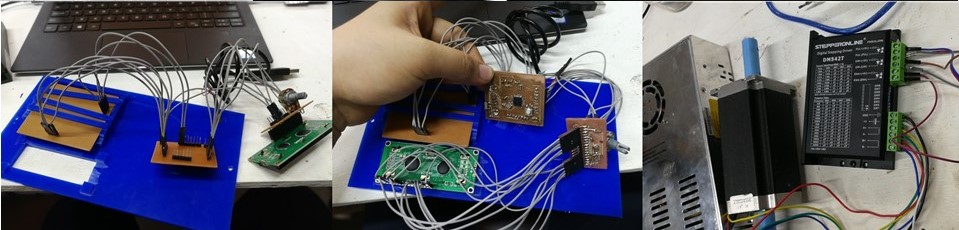
Testing the connectivity of the keypad. I used the arduino as a 5v source and 4 led for the verification of each trace or row and column of the keypad of buttons.
As a fabduino, I used the fabkit 0.3 with the difference of having added a switch swicht on and apgado in the schematic.
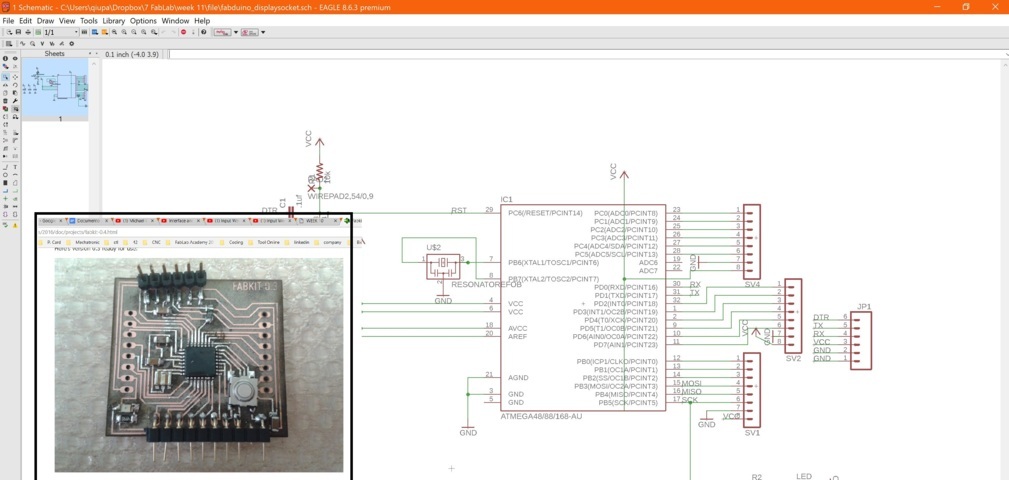
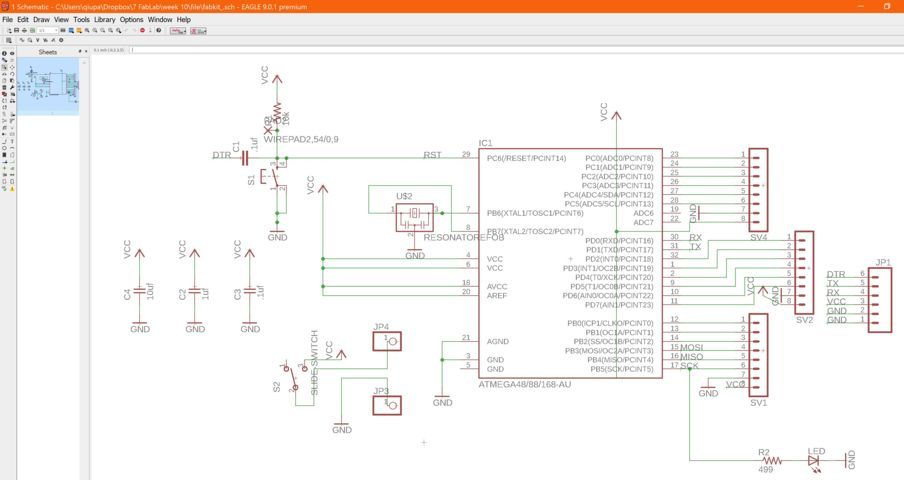
I also had to modify the .brd because the trace was too close to the other.

I have taken advantage of it and made two cut of the fabduino to have a replacement in case of not working correctly.
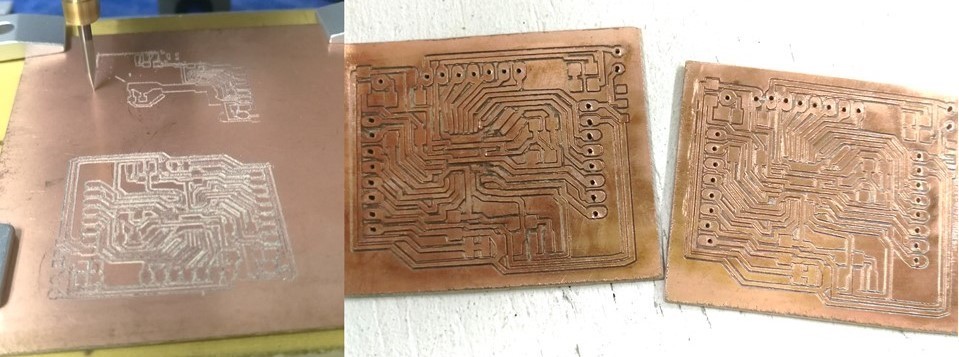
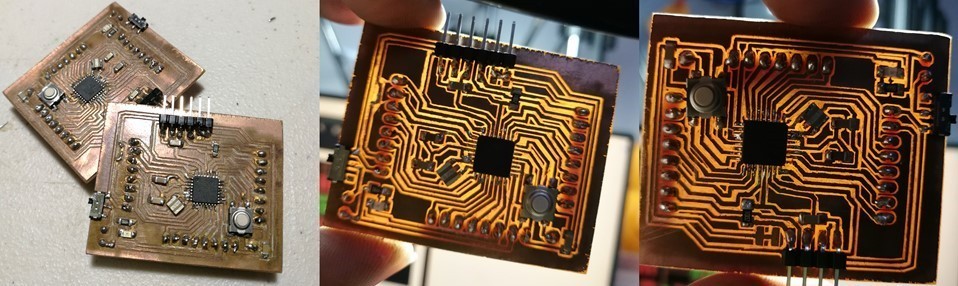
Once the boards are cut, it is time to weld the electronic parts such as the chip atmel 328p, button, capacitor, resistance, resonator and pins
This diagram is how the keypad should be connected to the fabduino.
As an output I have chosen an LCD as a display panel for the locker where the user must digital the way you want, code of the article which the locker will display the level. for that I relice a board for the lcd where are the connections and a resistance for the brightness, using the Fab to generate the odigo and then the GRBL to make the cut.
after cutting the board, soldiers the required component such as the potentiometer, pin male & female.
and here is how to connect the LCD board to the fabduino.
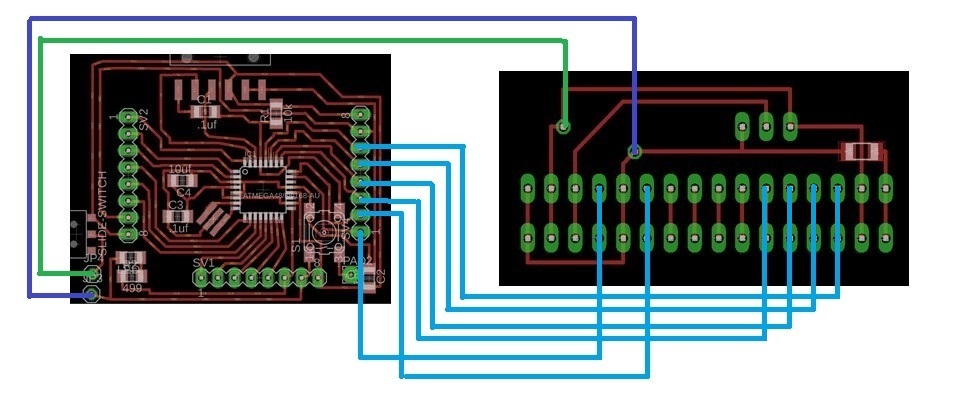
it is here the physical connections of the electronic components such as the fabduino to the keypad, lcd board, motor driver and the 5v power supply.
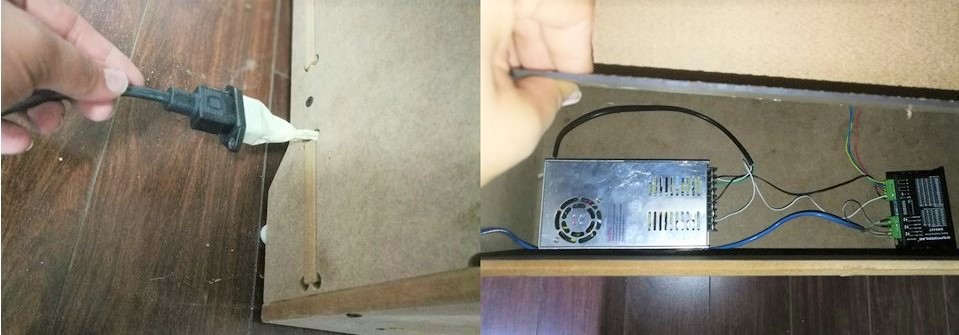
In addition the fabduino will be connected the DM542T driver to the 23HS2430B motor and an external 24v source for the motor.

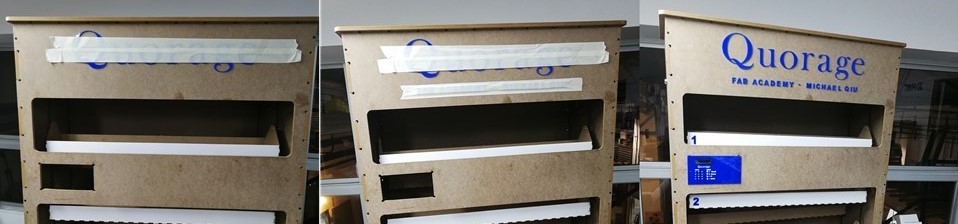
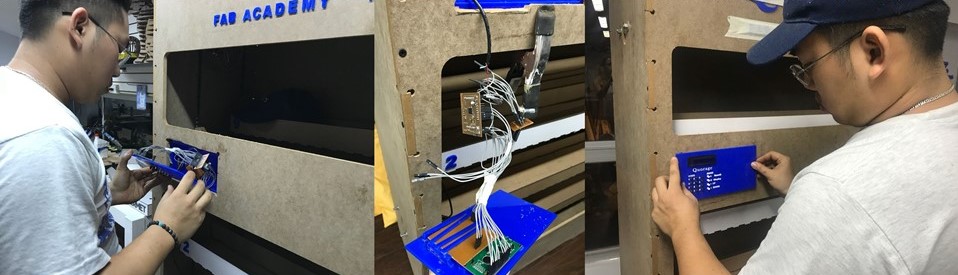
I have cut the structure where you will have all the electronic parts by frontally placing the number of each button and the modes of the modes.
Here is how you would see the physical connections of all the electronic components (fabduino, lcd board, keypad and power supply 5v) and electrinco as the motor, driver and power source 24v
I have placed all the electronic part in its place as I have extended the cable of the driver and motor so that they are not in view.
I have used a network cable to extend the connection of the fabduino to the driver. As the cable has enough cables to be able to connect the pins pulse, dir, ena and the grown also can connect the power bank to feed the fabduino with 5v.

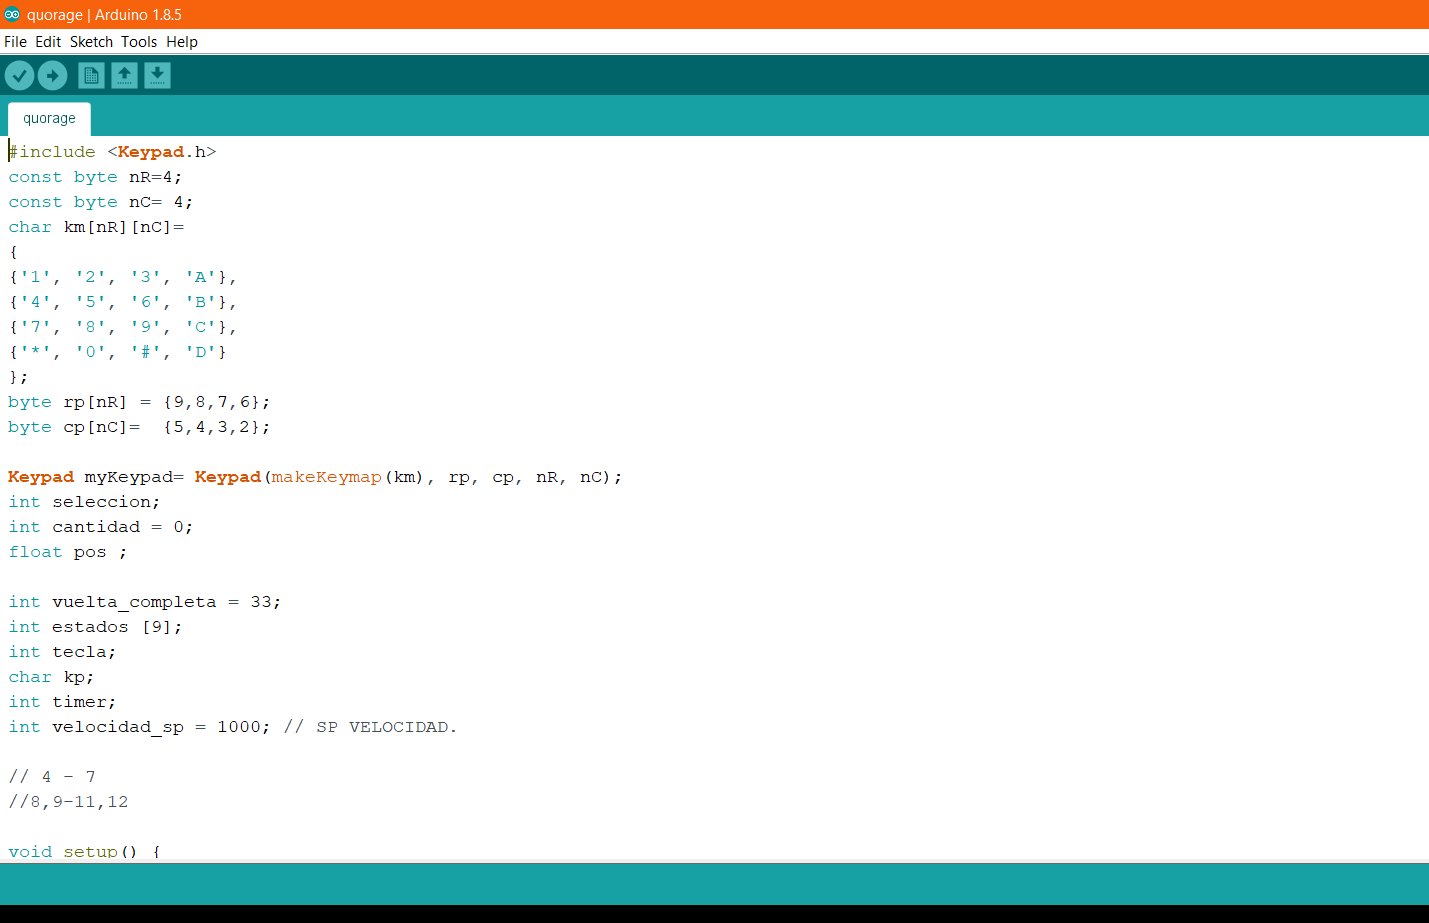
the programming is in its first phase, the keypad consists of the numeric part and the modes .. the modes consist of search, display, up and down. then variable would be added to each level with its code so that the user can digitally identify the levels in the search mode.
05 Finishing

After put all the electronic parts in the own place, we terst the bsasic function. the code work great with the motor but after fews test the mechanica sistem fail down because the gear plate bike is not align properlly and the chain it came out.
note: need to fix that or replace a new bearing.