Exercise 08 - Embedded Programming
Assignment
individual assignment:group assignment:
Group Assignment
Raspberry Pi
This week, again, was quite difficult for me. I have very little background knowledge of microcontrollers, Arduinos, Raspberry Pis, etc. I've heard of them for years and thought they would be cool to learn about. Well, I'm learning now!
Our group had some experience with our ATtiny boards and Arduinos, so we decided to try Raspberry Pi, using C code, as our different architecture to experiment with. As always, we looked for a tutorial or something to help us get started and found this one, which was listed as for "noobs", which we most certainly are! (Although the acronym really means "New Out Of the Box Software".) The gist is, you need an SD card and a computer so you can create a bootloader for the Raspberry Pi. Alternatively, you could BUY an SD card with it on there, but that seems counter to the spirit of this class!
According to the steps on the NOOBS tutorial,
- Download NOOBS and extract it
- Format an SD card
- Put the NOOBS files on the SD card
- Put your SD card into your Raspberry Pi and boot it up
Once we had the Raspberry Pi up and running, we needed to make it do something to show that we could program it. We found another excellent tutorial at wiringpi.com. We used this tutorial to hook up an LED to a breadboard and the Raspberry Pi and make it blink. We used the onboard Raspberry Pi text editor to write our code.
- First, make a directory for our project "mkdir WiringPi"
- Change to that directory so you are working in it "cd WiringPi"
- Open a text editor "sudo nano" (a weird command)
- Write the code to make an LED blink (done previously) and save as a .c file
- Next compile your code "gcc -wall -o blink blink.c -lwiringPi". This tells the compiler to compile the blink.c file into a file called "blink".
- Run the program "./blink". To stop the program "control C"
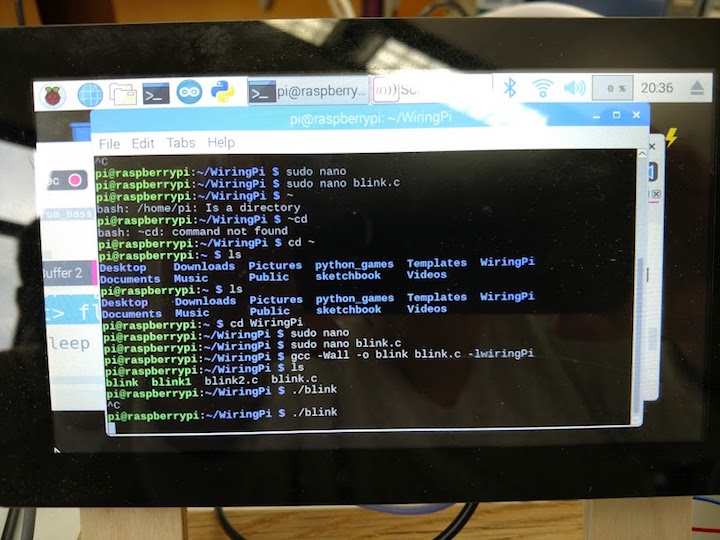
The interface and code outlined above
Video of LED blinking (Raspberry Pi hooked up to breadboard)
Individual Assignment
Read a Microcontroller Data Sheet
The first part of the individual assignment was to read a microcontroller data sheet. This was a little intimidating as the one I chose was the one for the ATtiny44a, which was 286 pages. However, it ended up being more "interesting" (useful) than I thought it would be and I actually found myself returning to it throughout this week to help me with programming my ATtiny44, especially when I needed to check the pin configurations. I was surprised at how much information was needed to explain what seemed like a fairly simple microcontroller and it really increased my appreciation for the power and capability of the AVR MCUs.

A screenshot from the ATtiny44a Data Sheet (my favorite page)
Program Your Board to Do Something
Learning and Tutorials
I felt really overwhelmed again when it came to another electronics week. Can't we just build furniture forever? I watched the lecture and that helped a bit, but I realized I knew next to nothing about computer science and how computers work and it all felt like too much. I decided to start at the basics. I sought out some tutorials on everything from logic, to transistors, to Boolean algebra and truth tables. Luckily, my partner minored in computer science in college and was able to answer a lot of my basic questions.
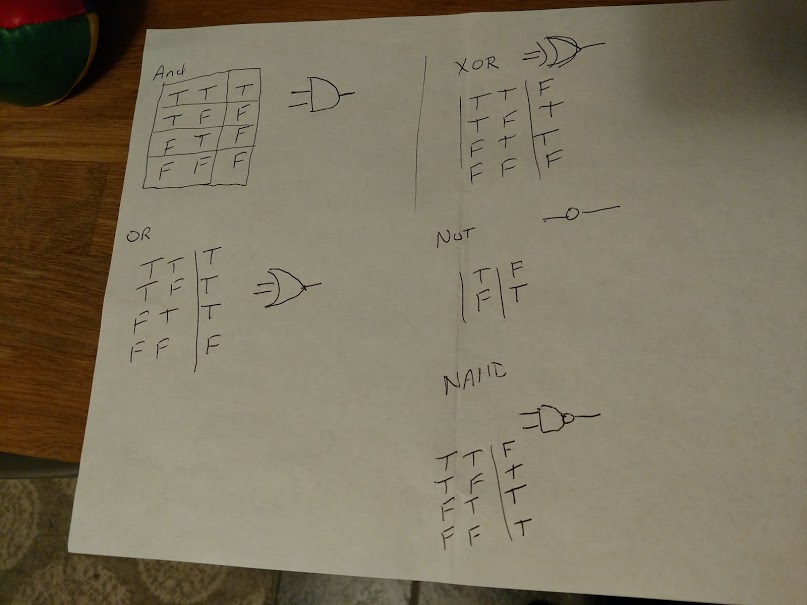
My partner's "cheat sheet" for me to learn the Truth Tables
Additionally, I sought out some videos and found some excellent resources that covered the basics of early computing, vacuum tubes to transistors, etc. I found I really enjoyed learning about this stuff, which surprised me. My favorite was the Crash Course-Computer Science on YouTube. This series manages to be really informative AND entertaining.
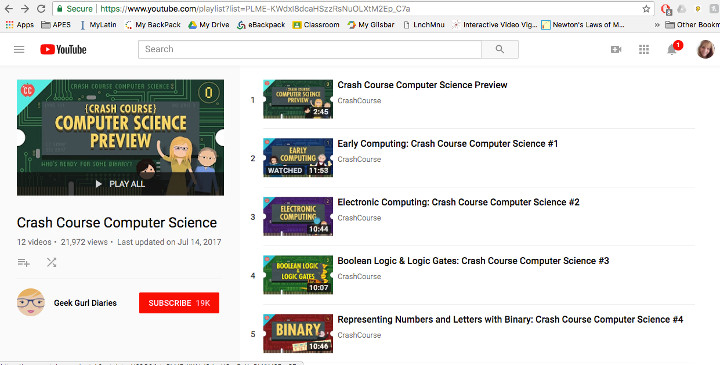
A screen shot of the home screen with the titles of some of the videos in the series
Arduino
Since it was strongly implied in the weekly lecture that using the Arduino was the easiest way to go, I decided to start with that IDE. I downloaded the platform at Arduino and installed it. I had worked with Arduino a tiny bit last semester when working with my students on their projects. I knew how to pull up the Example files and I started by looking at those. The last time I took a class on programming was Fortran in 1996. Well, I figure, logic is logic. I followed the excellent tutorial Neil posted on the class lecture page from High-Low Tech, and was off and running. This tutorial walked me through the steps I needed to add the ATtiny44 to Arduino IDE and then install that board. Everything was working well so far! The first thing I decided to do was to try to make the LED blink. I followed the tutorial, although I did have to change the pins for the input and output because of where the LED was actually connected to my ATtiny board. The High-Low Tech tutorial had a helpful pin configuration that showed the pins and their Arduino designations.
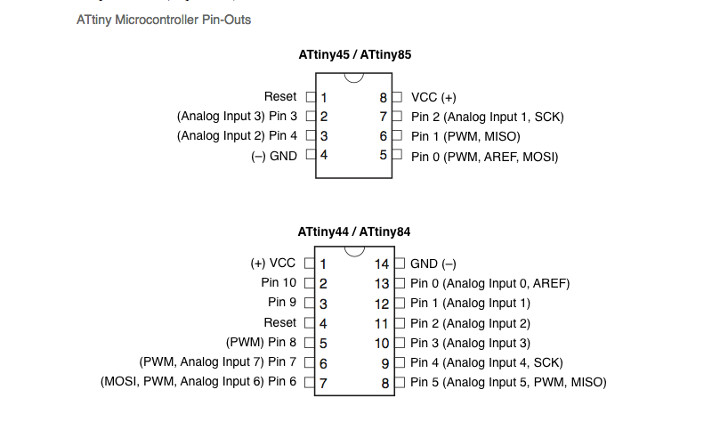
The pin configuration from High-Low Tech
Once I knew which pins I was using, I opened the Arduino example program called "Blink" and edited it to match my board configuration.
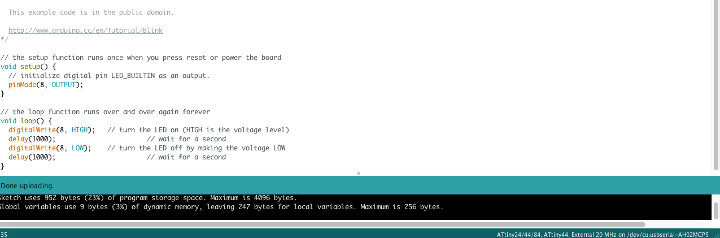
The code with the ATtiny pins configured to the Arduino
The LED blinking!
High from this success, I kept moving forward. I opened the Arduino example program called "Button" and fiddled around with the settings and pin configurations until it matched my ATtiny set up.
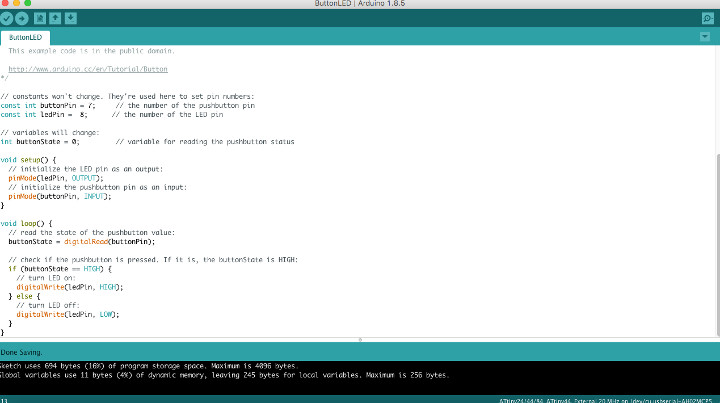
The code to make the LED turn on while pushing the button
The LED comes on with the push of a button!
Terminal/Command Prompt
Another method I wanted to be sure that I knew how to utilize was uploading through the terminal (Mac) or Command Prompt (PC). I have a Mac at work and a PC at home and I often switch between the two, however, the method of uploading through the different systems is the same. I took the program to make the LED blink from another I had written and pasted it into a text file (main.c) and put that in a new folder. I then modified a Makefile I had already to be sure the microcontroller was set to ATtiny 44, the clock speed was 20 MHz and the programmer was usbtiny. I put that Makefile in the new folder as well. I have included the files below and a list of instructions.
- Open Terminal (Mac) or Command Prompt (PC)
- Navigate to the new folder you created for this project (command is "cd + folder name" for "change directory")
- Type "ls" (note lowercase "l") to be sure you are in the right location. All the files in your directory should be listed (and it should only be the main.c and Makefile)
- Type "make". This tells the Makefile to create the .hex file that the microcontroller will use (see first image below)
- If that file compiles with no errors, then it is time to send it to to the MCU. This command is "make program". (see second image below)
- Your board should start implementing whatever task you have set it to, in this case I had the LED blink on and off at 500ms intervals. (see video below)

First screen shot of Command Prompt showing the "make" command being implemented
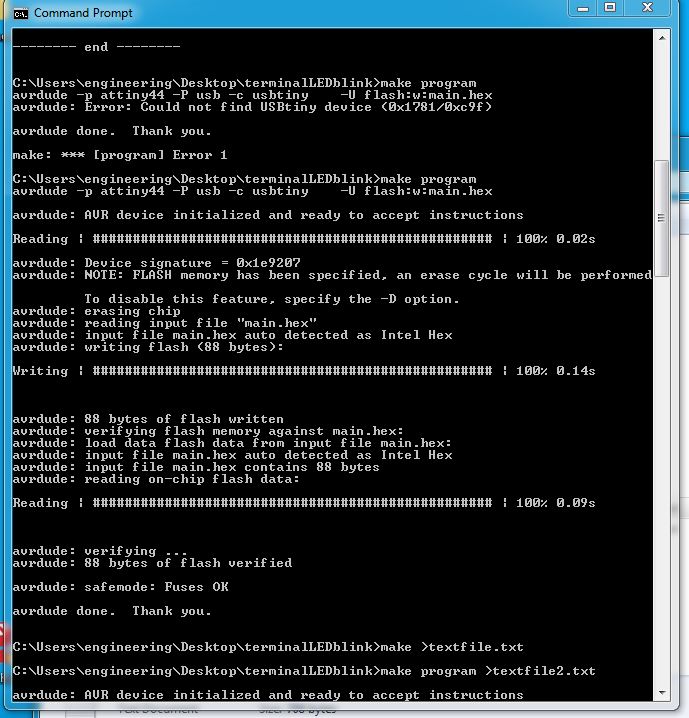
Screen shot of the "make program" command sending the code to the MCU
The LED blinking at 500ms intervals
WinAVR
WinAVR is an older IDE that, I have discovered, is mostly unsupported now. This is upsetting because I found it fairly simple and intuitive to use. One problem I encountered is that it simply would not work on my new PC that is running Windows 10. Even when I went into the app settings and changed the compatibility to an older OS, it kept giving me errors during compiling. I searched online for the error and the consensus seemed to be, "It doesn't work with Windows 10." Everyone suggested moving to Atmel Studios 7.0, and I will do that, but I spent a lot of time using WinAVR and I want to document that. This IDE was suggested to us by a FabLab alum who has been working with us (Adam Harris, '14) and I think that WinAVR worked better and was better supported 4 years ago. I borrowed an older IBM ThinkPad from school that was not running Windows 10, and downloaded WinAVR.
I watched a series of incredibly helpful YouTube videos on how to use WinAVR, although they were for the ATMega32 and not the ATtiny44, so I did have to make adjustments throughout to make sure that the setting matched the MCU I was using. I am linking the first video that I watched, "9. Arduino for Production! How to Test the programmer and Build the first Microcontroller Circuit". Watch videos 9-12 to go from learning how to use WinAVR, to turning on the LED, making the LED blink, and then using a button to make the LED do something different. These were also incredibly helpful as he talked about logic gates, truth tables, and drew schematics of how the pins were actually working.
Patrick Hood-Daniel's incredibly helpful videos on how to use WinAVR (watch 9-12)
During this process, I had to keep referring to the ATtiny44 data sheet (I'm glad I was forced to look at that) to find the right pins that my board was using for the LED and the button. Additionally, I learned that I needed to download the usbtiny driver to my computer in order to get the program to load. The driver can be found at Adafruit.
Step 1 - Turning the LED on
Following along with the tutorial, I opened Programmer's Notepad in WinAVR, which is a text editor. I started writing some code that would turn the LED on and then compiled it to check that it worked.
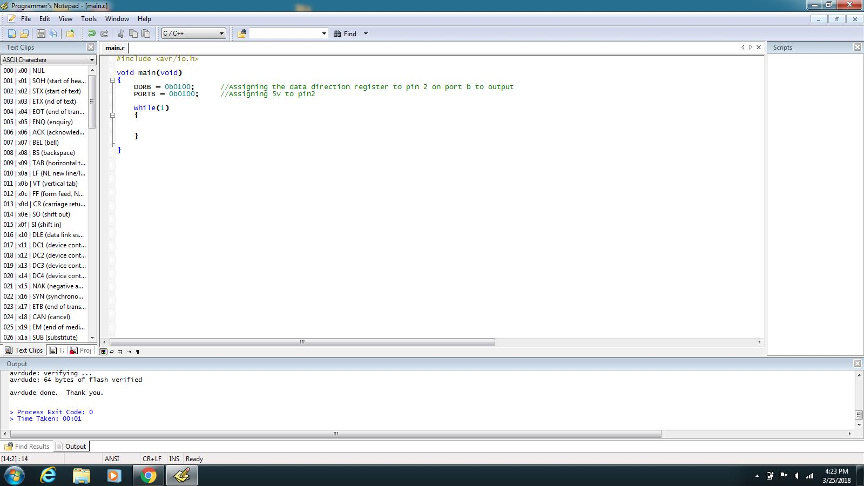
The code in WinAVR Programmer's Notepad to simply turn the LED on
After this, I used the program in WinAVR called MFile, which makes the Makefile. I had to change a couple settings, such as the MCU, the clock speed, and the programmer type, but after that, I just saved it as my Makefile. I was then able to use this Makefile for all the other projects and tinkering I did in WinAVR.

The Makefile that I created in MFile and was able to use for all my WinAVR projects
After creating the Makefile, programming the MCU was easy. Go to the tools menu, and first click on "[WinAVR]Make All". This will make the files for the MCU. Then, go to Tools menu again and click "[WinAVR]Program". This will send the program to your board, which should immediately start implementing whatever you just sent.
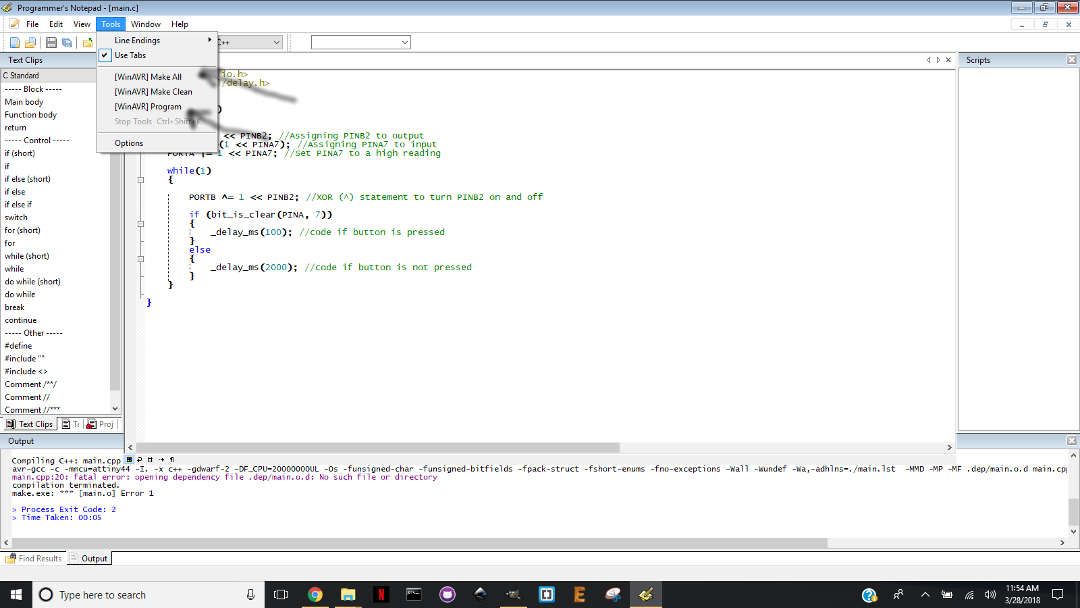
The two parts of the Tools menu you need to use to Make the files and Program the board
The LED is on!
Step 2 - Making the LED blink
In this section, I just changed the code in Programmer's Notepad to make the LED blink. Originally,I programmed it with a 100ms delay, which made it blink very fast. Then I tried a 500ms delay, which made it blink on and off once a second, which was less headache inducing.
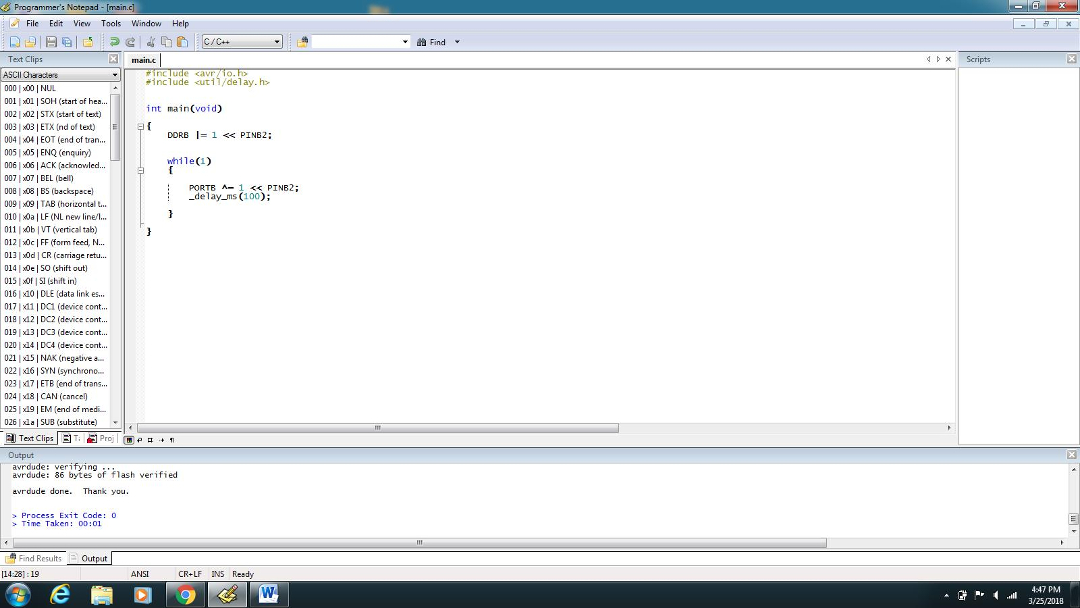
The code in Programmer's Notepad to make it blink with 100 millisecond delay
The LED blinking with a 100 millisecond delay

The code in Programmer's Notepad to make it blink with 500 millisecond delay
The LED blinking with a 500 millisecond delay
Step 3 - Making the Button Work
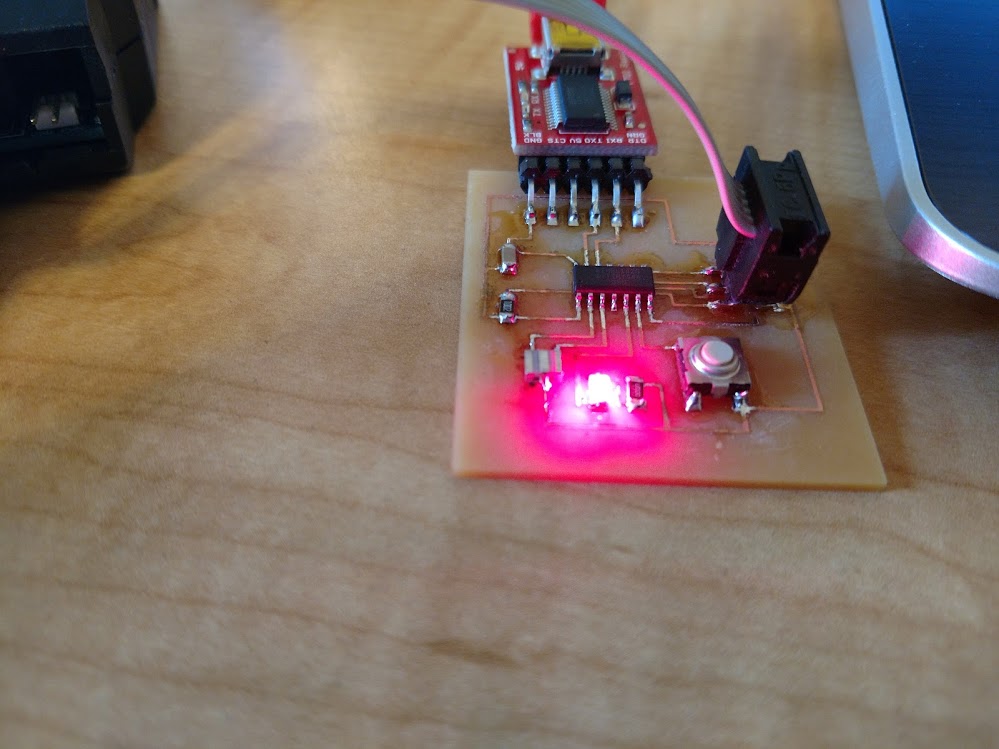
Finally, I changed the code in Programmer's Notepad to make the LED blink faster when the button was pushed and slower when the button was not pushed. I learned a lot about C programming while doing this, but I know I have SO much more to learn. I am enjoying it though (when it works). I forgot to get a video of this section, but I have included the code here from Programmer's Notepad if anyone wants to use a similar application.
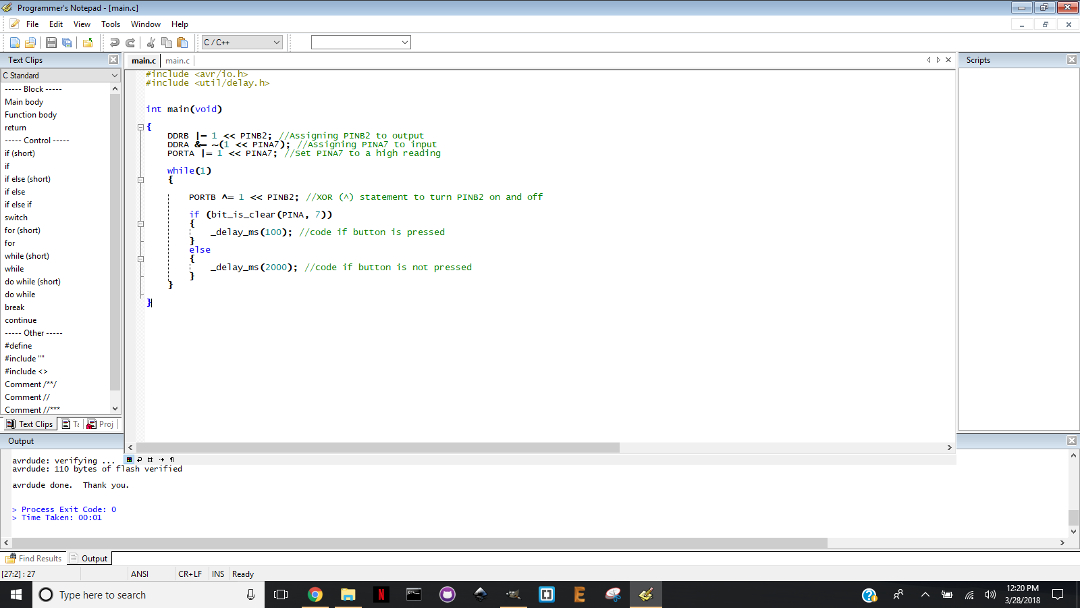
The code in Programmer's Notepad to make the button change the blinking speed
Atmel Studio 7.0
I have just begun exploring with Atmel Studio 7.0. I downloaded the program from Microchip and began playing around with it. I found the following YouTube video a good starting point.
Atmel Studio: How to upload code to a microcontroller
Additionally, I found this tutorial from crash-bang and this tutorial from avrfreaks super helpful while trying to figure out how to get Atmel Studio to work with the usbtiny programmer. Finally, I was reading this thread on how to change the CPU speed in Atmel Studio. The new version, 7.0, is not very intuitive, but I am going to keep working with it.
All in all, this was a very hard week for me, again. I learned a LOT about programming and how the boards work, and even more about what the different parts are and how they need to be handled in the Makefile codes. I think overall, like Neil said, I will probably use Arduino most but I will keep working with Atmel Studio 7.0, because I think it is more powerful and customizable overall.