


Week 17
Wild-card week
Files for this week
1 Pattern testing files
Task for the this week
Design and produce something with a digital fabrication process (incorporating computer-aided design and manufacturing) not covered in another assignment
About This Week
This week we were asked to make something which uses digital fabrication technique but we have to make something different which we haven't done in any other week, for this i choose to work on fabric and explore digital cutting of fabric with textile printing of fabric for this i decided to make diy cooling jacket for me as there is too hot atmosphere in my city during day time and i need something which give me coolness on wearing, for this i will fabricate my by myself and do screen printing on it its fun doing it
What is DIY Cooling jacket
Cooling jacket , A Jacket made of hydrogel cooling fiber technology which keep your body temperature cool in summer and light weight and comfortable wearing gives cool look on wearing .
this will made by laser cutting cloth and stitching it ( here i fix it using fabric glue) and screen printed on front an back to give cool look and it is stuff with hydrogel pads, actually hydrogel have more water retaining power than its weight and it will not wet the surface also which i am using making my jacket
Reference i checked
Current cooling vests technology are sub categorizing into five categories:
1. Gel cooling
2. Phase change cooling
3. Water cooling
4. Air cooling
5. Combo systems which involve hybrid vests where they use combination systems such as
evaporative and phase-change systems together.
checking about all this technology i find some references
1 Ice vest on instructable -ice vest they have used hydrogel for cooling the jacket
2 Ufmo -cold vest - they have used circulating water for cooling jacket
3 HOW TO MAKE A HEATING AND COOLING JACKET-hypergami
What I am going to do
I decided to make cooling vest using gel cooling technology and going with the ice vest reference which i mentioned above for this i decided to fabricate the vest by myself by laser cutting and do screen printing on it and filling hydro gel in it
Challenges for this week
1 Making correct size vaist - as i have no experience of tailoring so it is bit challenging for me to design correct dimensional laser cutting file for cutting vaist coat , i saw some reference design of laser cut but they may or may not be of my size so i decided to design that by myself
2 Getting right material for laser cutting - As there are certain material which cut nicely with laser cutting for this i checked list of material on some site reference site some suitable material which can be laser cut ,Cotton, Felt, Silk, Linen,Lace,Polyester,Fleece,Softshell,jeans, Alcantara etc for this i went to old city in Ahmadabad where i find the material i go with material made of cotton +polyester ( i.e 65 percent cotton and 35 percent
3 Getting this screen printed , i know about vinyl cutting stuff but i hav't tried printing on fabric so i tried printed cool logos and signature of cooling jacket.
Steps i followed
1 Testing laser cut on fabric and screen print
2 Making drawing file for Vaist
3 laser cutting final design on fabric
4 cutting vinyl sticker for printing
5 screen printing on fabric
6 sticking fabric with fabric glue
7 filling hydrogel in between them and test them
1 Testing laser cut on fabric and screen print
For testing i choose my cottion heney and cut some test cuttting ( a square of small size ) of 10*10 at power of 7 and speed 200 this thing i did for checking the parameters and testing


after doing this test i noticed cutting cloth on laser produces very bad smell and it may be harmful to you on inhaling so i am writing some measure you need take while doing this process on basis of my experience
Measure for cutting cloth
1 Before cutting cloth fix this on cardboard sheet or drawing sheets i used both in my experiment as so cloth will be stretch througout cutting otherwise it may start moving due to air coming out of nozzle which may result in burning
2 make sure you use cloth which can be laser cut for this refer list in top
3 for first try start with minimum power and maximum speed so you may avoid burning and check whether it is cutting or not
4 close the lid whiile cutting and wait for atleast 3-4 min after cutting so all the posionues gas go out of exhaust
Testing pattern on fabric
one random shape file just to check the laser cutting as i am not sure about the parameters and also that may stick to surface
you can get this file from here


Final outcomes of testing


Screen printing on fabric


here i printed this directly as i have to print on whole cloth and it's done nicely the process is simple in this we use screen and tecttile color
Reference design for making drawing file of vaist


Tracing design on cloth


you can see here , i have drawn double lines so that i get stiching tolerance , i have taken that in design
Making drawing file for vaist
For making drawing file for vaist , i first get one vaist which is close to my size and try to trace it manually on cloth and do correction in its size as per my requirement as there may be some Online cutting files but you don't know whether this is as per your size or not so i choose to design one for me


For designing this design first the half of it and mirror it to get the front and use this complete design remove the extra curve from trim command you will get the back side of it here i first made in 1:10 scale than scale it down by factor 10 to get correct dimension .

Laser cutting the final design


laser cutting parameters
speed 15
max and min power 80
material 65% cottton +35 polyster
Screen printing on jacket
for screen printing you first have to do vinyl cutting and we put negative of vinyl cutting part on screen and rub color over it to do screen printing stuff as i am making cooling jacket so i download some images of cooling icon and write text of cooling inside on back of my jacket
Vinyl cutting for screen printing
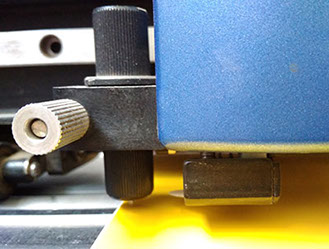
1 Vinyl cutting the sticker and transferring the complete sticker on screen by using transfer tape after transferring the vinyl apply the tape in the boundries of sticker so color will not leak from side and remove the positive part of sticker ( the part which we ant to print )so using negative part we can print

colors i used for screen printing , this are all textile screen printing ink this if your hands get colored with this than just wash them with water it easily remove even after printing one thing on screen i wash screen and reuse it

2 spreading color on screen i used black ink for printing , here you see the letter c and G are not proper because surface below this is already dried by white color so the pores are closed here , as i am using it for learning the process so used old screen available in our lab


printing another pattern on screen for this i used the same process ,here i use 3 colors using combination of all three i print colorful design for this make sure you spred the color evenly on each side.
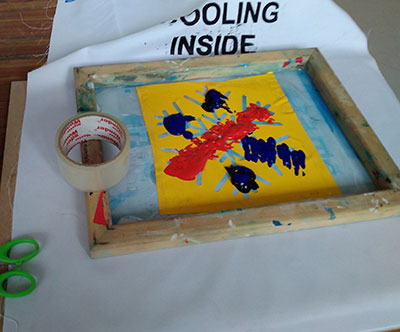
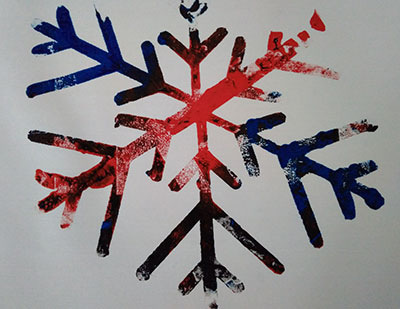
don't forgot to apply tape around the vinyl on screen otherwise your screen will leak from sides and you get exra imperession
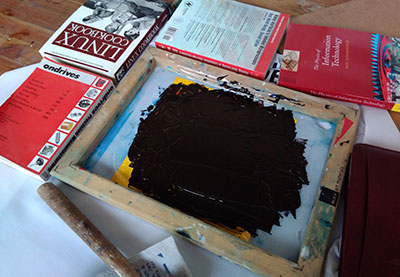
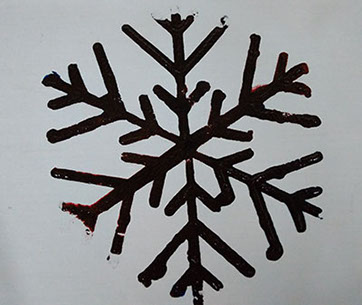
i used books in side of screen as while picking up screen cloth will not move up
Filling hydrogel in Jackets
As i find on my first reference that hydogel will create cooling in jacket once i keep them in deep frezer they make ice which you can use in your jacket ,i checked on the same reference that you can find this in dipers so i bought baby dipers and cut them into pices and fill my jacket with that
How it create Cooling
as hydrogel have water absorption capacity of 2-3 times of it weight and it retain the water on cooling / freezing it will form hydrogel ice which last longer then normal ice which can be use for creating cooling effect , also on keeping this in hot environment it evaporate the water which result into evaporative cooling thus it is good for cooling jacket
Process of filling hydro gel packets ( baby dipers ) in jacket and holding them with fibre

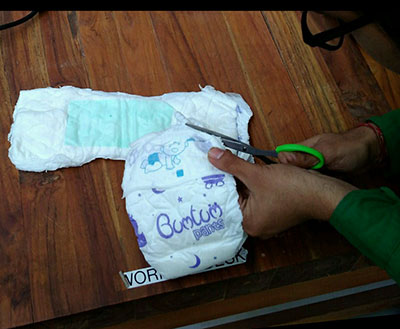
You can find hydro gel in baby diapers so i tried using it by cutting this and i fix side using fabric glue ,i find this is power substance which is mix with cotton in diapers for inserting this in jacket i cut two pieces of cloth with same design and put packets in between them in this way i arrange them in different location in front and back and stick cloth using fabric glue ad for holding the with fibre i use fibre glue in side of that and fix it


Process of joining the different layers
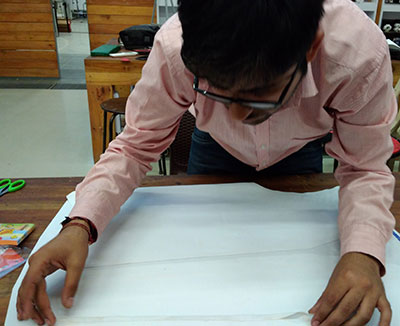
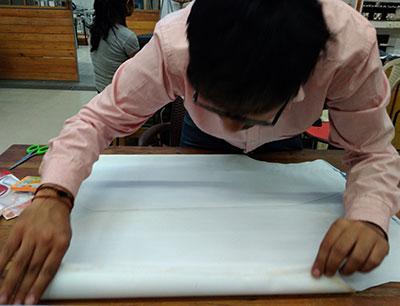
As it was written in our instruction that Although there can be manual processing steps, to count as digital fabrication the Work flow should pass through design in a computer and some kind of automated output process. but hand-stitching them wouldn’t so i used laser cutting for cutting cloth and vinyl cutting for screen printing and i stitch them using fabric glue which is standard method of fixing cloth together as i have given border in sides so i fold them and fix it as shown in figure also we don't have any digital fabrication technique for fixing cloth in lab so i used this
Final video of Jacket
Areas of Improvement
1 In this design i used baby diapers packets which i done for testing for standard practice check hydrogel thin pads or make
sheets of it and stitch them with cloth in middle layer or make a small packets and fix them uniformly on jacket
2 As i used fabric glue for stitching ,you may using stitching machine for this as it give you good result
3 you can do improvement on its shape , design etc as you have design and laser cutting so give patterns etc

This work by Gaurav wadhwa is licensed under a Creative Commons Attribution-NonCommercial 4.0 International License.