01
03
04
05
Ah, nice to see you... I don't know your name, but take a cookie, sit down, enjoy your time and try to find all the hyperlinks.
06
Once you've read this sentence and found this page, you've seen the first part of my homework for this week.
07
I decided to program this kitten-free bright shining nearly monochrome website. While using my texteditor Sublime Text for my normal daily work, I decided to develop and use a very simple, (not that strict) monochrome and texteditor-like scheme without using any fancy other programs. I like this texteditor very much, due to it's very light but also sleek GUI and performance.
08
I developed this ultra clean style to get a kitten-free script-free and light site.
My template consists of the Ubuntu system default font, called Mono,four different gray shades (#000000, #666666, #FFFFFF, #D8D8D8) and pink (#FF00FF).
09
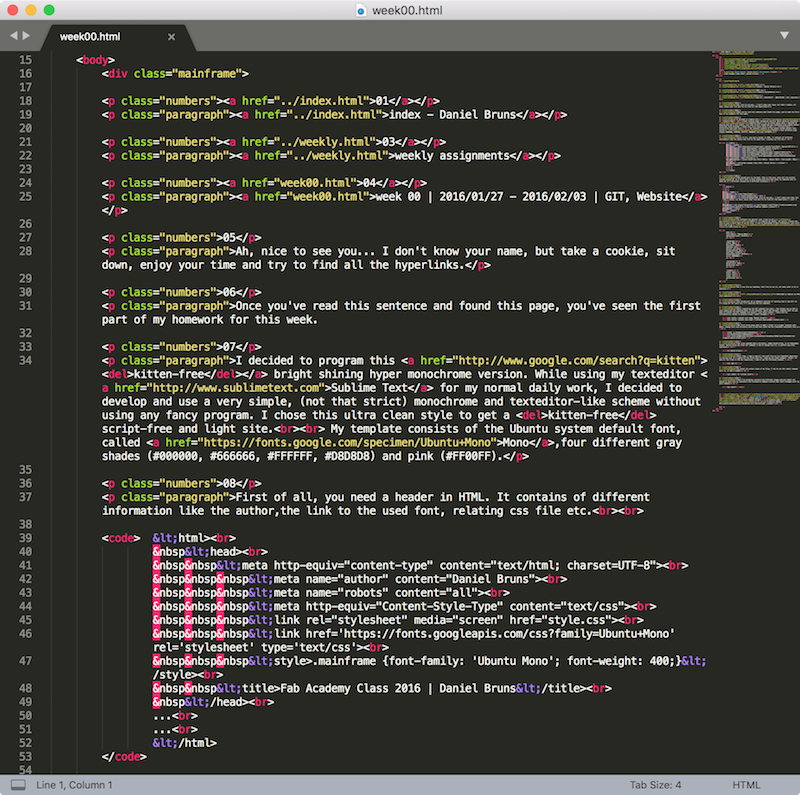
First of all, you need a header in HTML. It contains of different information like the author,the link to the used font, relating css file etc.
	<html>

				 <head>

				  <meta http-equiv="content-type" content="text/html; charset=UTF-8">

				   <meta name="author" content="Daniel Bruns">

				   <meta name="robots" content="all">

				   <meta http-equiv="Content-Style-Type" content="text/css">

				   <link rel="stylesheet" media="screen" href="style.css">

				   <link href='https://fonts.googleapis.com/css?family=Ubuntu+Mono' rel='stylesheet' type='text/css'>

				   <style>.mainframe {font-family: 'Ubuntu Mono'; font-weight: 400;}</style>

				  <title>Fab Academy Class 2016 | Daniel Bruns</title>

				 </head>

				...

				...

				</html>
10
The second part is the body. This is the area, where all the visible content should be. As I don't want to play around with divs that much, my complete site is made out of 2 different classes and 2 different divisions.
			<html>

			...

			...

			 <body>

			  <div class="mainframe">

			   <p class="numbers">05</p>

			   <p class="paragraph">Ah, nice to see you... I don't know your name, but take a cookie, sit down, enjoy your time and try to find all the hyperlinks.</p>

			...

			...

			  <div class="license"><a rel="license" href="http://creativecommons.org/licenses/by-nc-sa/4.0/"><img alt="Creative Commons License"

			  </div>

			 </body>

			</html>
11
To configure the general look, I had to use a CSS, to simplify my layout, the colors, classes etc. This is just a short part of my CSS file, if you're interested in more information, just click this Link to my CSS file
				body {

				font-family: "Ubuntu Mono";

				background-color: #FFFFFF;

				}


				.mainframe {

				width: 90%;

				max-width: 60em;

				padding: 1em;

				margin: 1em auto;

				margin-bottom: 2em;

				overflow: visible;

				background-color: #FFFFFF;

				color: #000000;

				}


				.paragraph {

				margin-left: 3em;

				margin-top: 0;

				}


				.numbers {

				width: 3em;

				clear: left;

				float: left;

				margin-top: 0;

				}
12
So if you like my template, feel free to use it, put some color in it or whatever.
13
Download my website as HTML/CSS template
14
The second part of my homework consists of learning how to use GIT. As I'm using GIT for years now, I'll describe the key commands.
15
After installing the GIT command line tools - the fastest way on OSX is just typing git and pressing Enter in the Terminal, which the Terminal responds with "Do you want to install the GIT command line tools?", just press Install - there are two configurations needed to generate proper commit messages.
git config --global user.name "Daniel Bruns"
git config --global user.email firstname.lastname@hs-ruhrwest.de
16
The first three steps were to make a folder in a proper location with mkdir, change into this directory with cd and then clone the new Class2018 repository into it.
mkdir -p Documents/git/FabAcademy
cd Documents/git/FabAcademy/
git clone git@gitlab.fabcloud.org:academany/fabacademy/2018/labs/fablabbottrop/students/daniel-bruns.git
17
The clone command made a directory, named daniel-bruns, in my FabAcademy Folder. Before using any other GIT command, I had to change into it, to perform any other operation.
cd daniel-bruns
18
After this, I had to add all the stuff from my old Class2016 repository to the new one, so I copied all the files into the - made by the clone command - folder. To add all the files to the new repository, I had to use the following command.
git add *
19
To commit the actual state of my files, I had to use the commit command with -m, to add a comment.
git commit -m "initial push"
20
Then I've wonderous survived the different stages add and commit and pushed it back into my repository and finished my homework without any fault messages with the push command.
git push

This work by Daniel Bruns is licensed under a Creative Commons Attribution-NonCommercial-ShareAlike 4.0 International License.