Molding and Casting Class
9th Worldwide gathering for Fabacademy 2015 feat. prof. Neil Gershenfeld
25 March
10 weeks to Final project
Class
Tangible digital Craft: replicating objects from the digital to the manual
What is it used for?
- Molding and casting objects is a broad espectrum technique that uses different sets of materials to reproduce its molds for later replication. Used for prototiping, special effects, restauration, encapsulating electronics, design of parts and even final pieces this reproduction precise method is very usefull and many times underapreciated.
- it starts from a design or a ready made
- usually reproduced onto:
- machineable wax, low-temp wax
- rigid foam
- gesso, ceramic, cement
- alginate gel
- urethane rubber, plastic, silicone, latex, PDMS, thermoplastic, thermoset polymers
- plaster, drywall, drystone
- metal
- glass
- ice
- food
- the result of that first step is usually a mold that represents the "negative" of the final shape from which we wish to replicate others from
- from that the final cast is molded and after its dry the final piece is ready to be repeated over and over again

Roland Modela milling
The Tools and materials
This week trying to implement a different approach to the vast possibilities of casting and molding, with Francisco, we decided that we would do together one example of a cast and a mold each so that we could understand the process at every step of the way and raise all questions needed. Naturaly a brainstorming took place and we started to consider the chanlanges of this process trying to prepare our following ideas so that they could take advantage of the production system and could adapt or workaround the limitations that this type of machining can present.
So to start we were explained properties of the materials we would be using for the cast in this case wax and how the design should be done in a way the final mold could be perfectioned and afterwords it could be reproduced over and over as we pleased. As the Roland modela will be extracting/carving the materials surface until a certain dept all correct measures were taken and translated to drawing so that a few mm of margin at least were to be left to perform as container for the fluid material that next should be poured in.
machinable wax
The Designing
For this first introduction example I used Antimony on which I drew the entire block of wax that wax physicalyly available from which I then removed a smaller block in drawing to start having room for my mold. After that I used a transformation of the 5 letters of my name in a way that it's geometry was deformed by two forces attracting it, pulling, let's say north and south, skewing the shape outside. For the purpose of creating a more dinamic shape I then preformed an extrusion and did a Boolean difference by removing a cylinder from the deformed letter extrusions and then I had the final piece ready for casting. Unfortunately Antimony crashed once more after the export and I didn't succed in saving the file in .sb format. So for a question of documentation consistency I will redraw it again in Antimony as soon as possible and make the final file available do download in this page.
After the .stl file was exported succefully the following steps of the process went fine. The only setback is that for Antimony not to crash it had to be exported in a reduced number of voxels what in the end produced a less smooth surface on the letters upper faces. Nevertheless, considering the low resolution the final result came out ok.
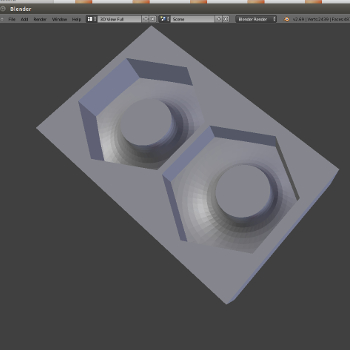
Process type: Molding a fully 3D object.
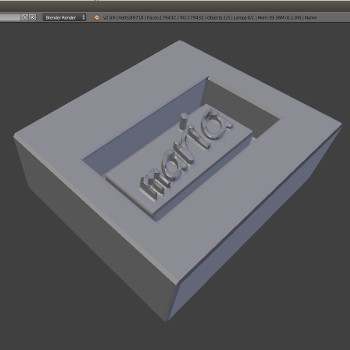
Antimony model in .stl exported showing in blender
The Molding
The molding process starts with selection of the material to mill. I our case machinable wax. Then the block should be placed in the machine bed/sacrificial layer attached with two sided tape in this case to the Roland Modela milling machine. So for the first step the bits should be set accordingly to the precision of cut that we want to start with.
For the first pass, and considering the reduced size of the piece, I decided to use a 1/16 bit for the removal of the first layers through a rought cut milling.
For the second pass I used a 1/32 bit for the removal of remaining mass through a fine cut milling that progresses in a grid-like movement sweeping all the surface one more time. The result of that second pass it generaly takes longer and it makes us realize that despite of being a very interesting process in it's possible applications, in it's work time is somewhat demanding having into account from the begining to end every pass is considerably slow, at an extreme opposite from a laser cut machining timing, for example.

The Casting
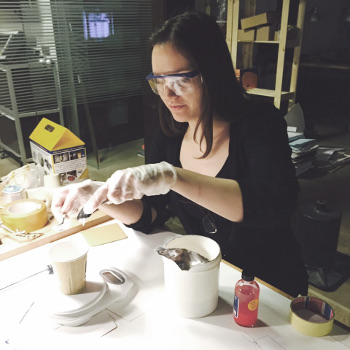
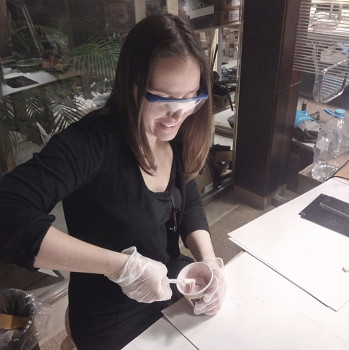
- To start with you should try to know as much as possible about the materials you want to work with. Their composition, density, resistance, etc. And for that follow carefully the data sheet so that you can proportionaly blend all the components together for a homogeneous mixture.
- In this case, as we intended to mold eatable chocolate pieces the Smooth-Sil 940 Silicone Rubber Compound was the one selected for this exercise.
- The mixing should be either vigurous if you have a vaccum system that you can use later on to extract trapped bubbles or should be slow and gentle if you don't have that option. Luckily we could set that vacuum option in the lab. Not in a very fancy manner but it works!
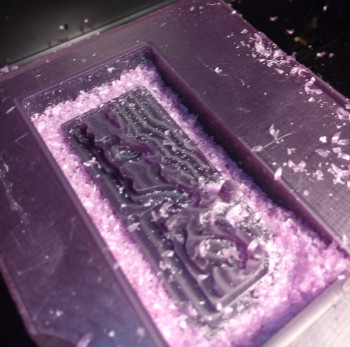
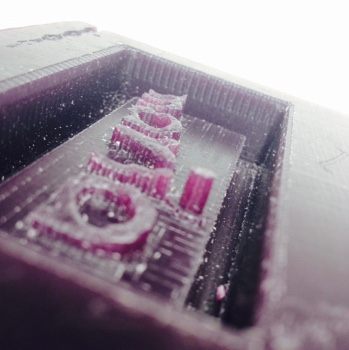
- So when the mixing is ready (look for solidifying time frame) you can pour it in the mold slowly so it flows to every space even the smaller gaps in between volumes. The mold should be slightly tilted for better results.
- Once the misture is covering all your mold just apply the vacuum so that can extract mechanically the extra air. We added a plastic dome on top of our molds so that it works as a vacuum chamber as its shows on the images bellow. Then a bit of patience is required since we manually had to hold the vacuum machine tube against the opening of the vacuum bag.
- When no more bubbles are poping outjust close the bag and leave it to rest. Considering the time established for full drying of the material you used, when done you can remove the cast from de mold.


The Final result
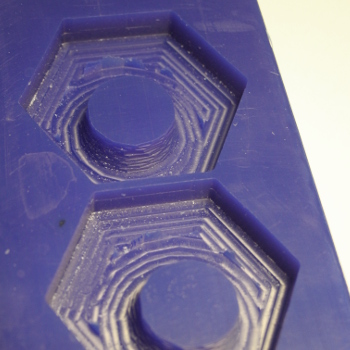
The unmolding of the cast is amazingly easy as this material is very flexible. Some of the material needs to be trimmed and once that is done you can use this piece as many times has you wish to replicate this shape.
The dimentions here used were small so that could fit a previous milled wax block and so I decided to do something very simple like this for a future molding in chocolate or some other eatible material since this was an food safe material. Our only concern was that it was an old one so we ended up not casting it with this one.
For more details on how to prepare for food safe molding and casting with this material follow this link.

Second exercise - Logo coin
For the logo coin I used a design done in Illustrator that uses the one iteration Peano curve as base of geometry and then simulates a switch with a tilting perspective of an imposible switch design. This is a design that I am working on for my personal project.
Process type:2.5D object.
For the custom size boxe I used an online software for design in and making the ittings. IT is an outomated system of course it's not the same as understanding how the press-fit systems work and how does each material performs on each type of joint but if you want a fast solution and the fits are not your main goal I can recomend this very practical alternative MAKERCASE
So simply using the 2D shape drawing I laser cutted it plus the box to be used as a container to be used as mold walling once the laser cutted piece is done and its placed centered inside the box.
![]()
Laser cutting it was not as simple as I first imagined because acrilic can suffer from excessive heat and melt or shift rapidly when in contact with over powered laser beam. At the same time the drawing had to be improved for laser, meaning its thin lines had to be thickened for better results.
Nonetheless, our concerns were that for the little spaces between the lines the casting material would flow in the gaps. So for that purpose I increased the shape size so all was scaled porportionaly and in between spaces were made bigger.
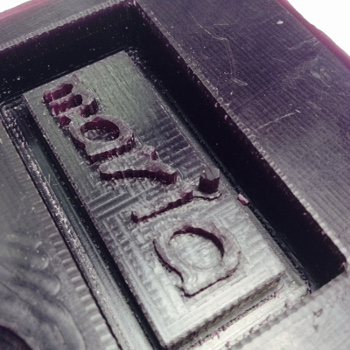
I tryed severall options from engraving it only, using the image as it is shown or reverse it and make the white part the one to be molded.
The best result was going for a power of 100 with speed of 30 so that it was faster and would melt the thin lines I've designed once the laser went by the sides of those lines in a short period of time since the shape is small and so close together.
![]()
![]()
![]()
To prepare the cast:
- Place the lasered object in the center of the box.
- Prepare the silicone mixture in the right proportions according to the volume that it needs to fill
- Pour it gentely to avoid bubbles
- Take it to the vacum chamber or bag
- Leave it to dry respecting datasheet requirements
- After the required time has passed remove the mold from the cast
- Clean residual surfaces
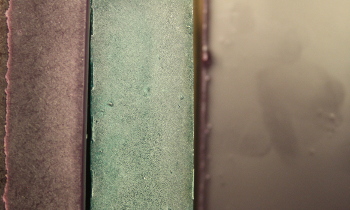
Final result was a bit too thin as we already were guessing so what ever I could cast on this had to be very fluid to be able to flow nicely through the tight spaces
![]()
![]()
![]()

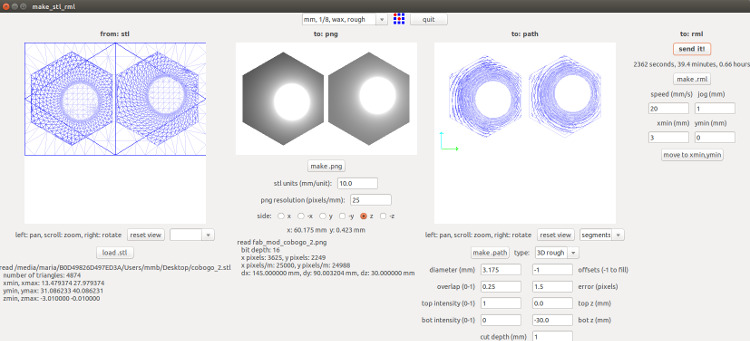
Third exercise - Cobogo curtain wall - double sided mold
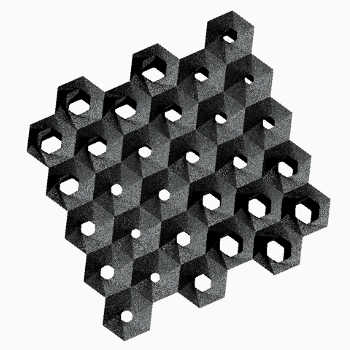
The cobogo is a ventilating system build up to be a curtain wall made out of stackable units forming a textured architectonic element that works as shading system and filtrates air currents.
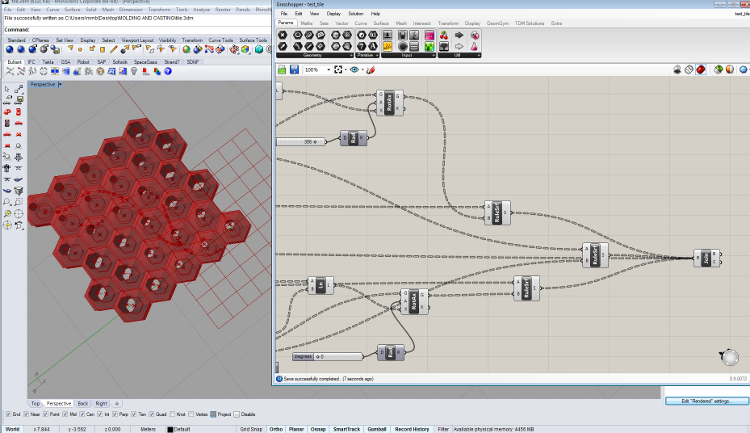
When design it in Rhino, I did several shape studies namely the vulcanic tile made 100% parametric but some what difficult to transform into a good two sided mold. So I had to design a simpler version. For a practical reasons I redesigned this object several times and for a matter of not rebooting my computer on windows system I had the chosen one imported to Blender and exported from there.


Molding and casting is unfortunately a process that takes a lot of time. It's obvious that between designing to molding production and casting material preparation there are a lot of moments where mistakes happen and all the process can get caught by time.
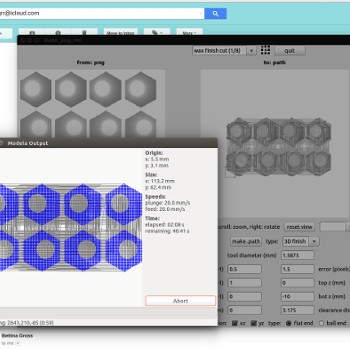
For this third exercise I had some issues with the settings when I exported. Those reflected when I had the file opened on Fabmodules and it would produce a rare z dept effect ruining my milled surface, producing a very rapid ramped cut instead of a smooth one for the first rough pass. I redid it and now I forget to set the Modela right and it just cut where it shouldn't. It was then that I realised I was so mad at the outcomes I just had forgoten to leave an opening for pouring and another as a breather. Just not a good day...
The week was just finishing and I had wasted the two blocks of machinable wax with wrong outcomes. So for the time being this last exercise was stated as a failure.
What have I learned? It's an amazing process but is time demanding.