Computer-Controlled Machining Class
8th Worldwide gathering for Fabacademy 2015 feat. prof. Neil Gershenfeld
18 March
11 weeks to Final project
Week's Work
This 8th FabAcademy Assignment was delayed for several weeks for technical reasons since we didn't have a BIG CNC machine to work with directly at our Beach Lab we had to wait on cue to have access the one in Barcelona's FabLab or else in Valldaura Green Lab. As the number of students in Barcelona Lab is very hight taking into account machining times for each job/person, plus the Iaac students projects also depending on the same machines, soon we realize that a trip to Valldaura Green Lab was going to be the best choice.
Nevertheless, meanwhile we had the time to try several ideas for "making something BIG":
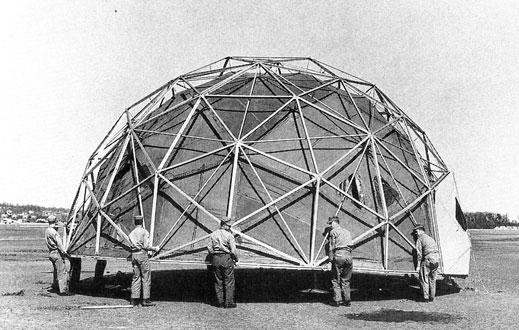
- Making a geodesic dome: this was my first idea for this week because I have a great interest on testing the possibilities of a modular lightweight structure like this, and, context wise, I was very curious about getting more practical knowledge on Buckminister Fullers studies. Mainly due to its applicability on nowadays ephemeral or low-cost constructions for a more sustainable practice of architecture and a more effective way of looking at mobility. Unfortunately, I soon had to forget that idea, at least for the time frame of Fab Academy, because time wise it would demand a lot of machining time for a proper size dome (as in being able to stand up inside).That idea was then put on hold for after Academy projects since I don't think I can drop this and not build an amazing DIY structure at least a model scale.
Making a modular WORK-PLAY-REST travel unit with an individual foldable bed, a desk/dinning table plus stools, lounge chair for reading.
As much as I really liked the idea of producing one entire module for all of the above activities and making them portable, this design would needed a lot of testing to be done right and probably would need rotating parts and therefore some metal hinges, screws, wheels, etc. Taking that into consideration it was a more risky project since we only had one day to try it out at Valldaura. So for the time being this project will not leave the digital world.
Making a Modular chair/table just in time for my new flat.This idea was the one I finally chose for the "make something Big assignment". Trying to solve furniture distribution in the kitchen/living/dinning room of my new apartment, the choice of furniture that was reduced in scale but still could be versatile enough for this multifunction tiny space, was mandatory.
Scaling up the challenge: design simple,
build BIG!
Design Process
It is a known fact that architects at Fab Academy tend to build chairs, so to feed statistics right I thought I should follow the trend but give it a little twist.
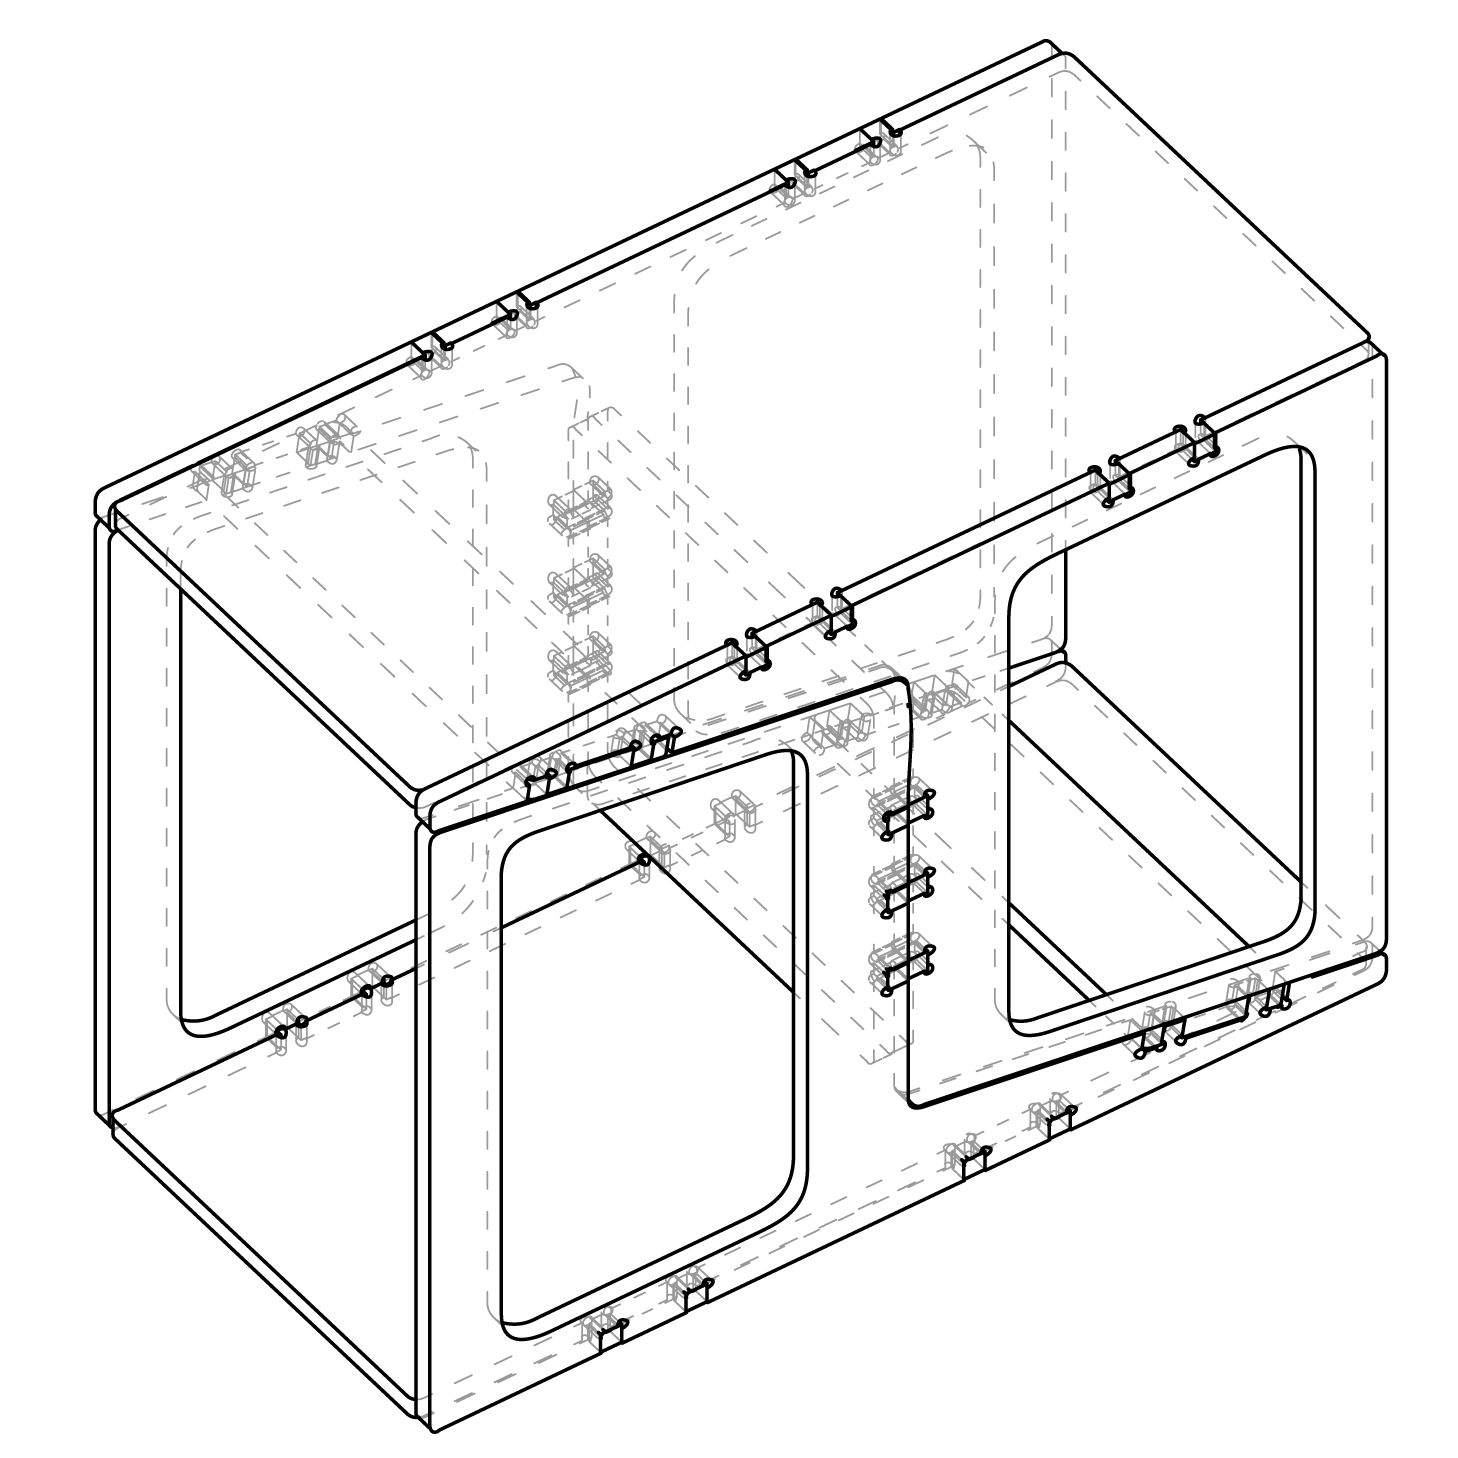
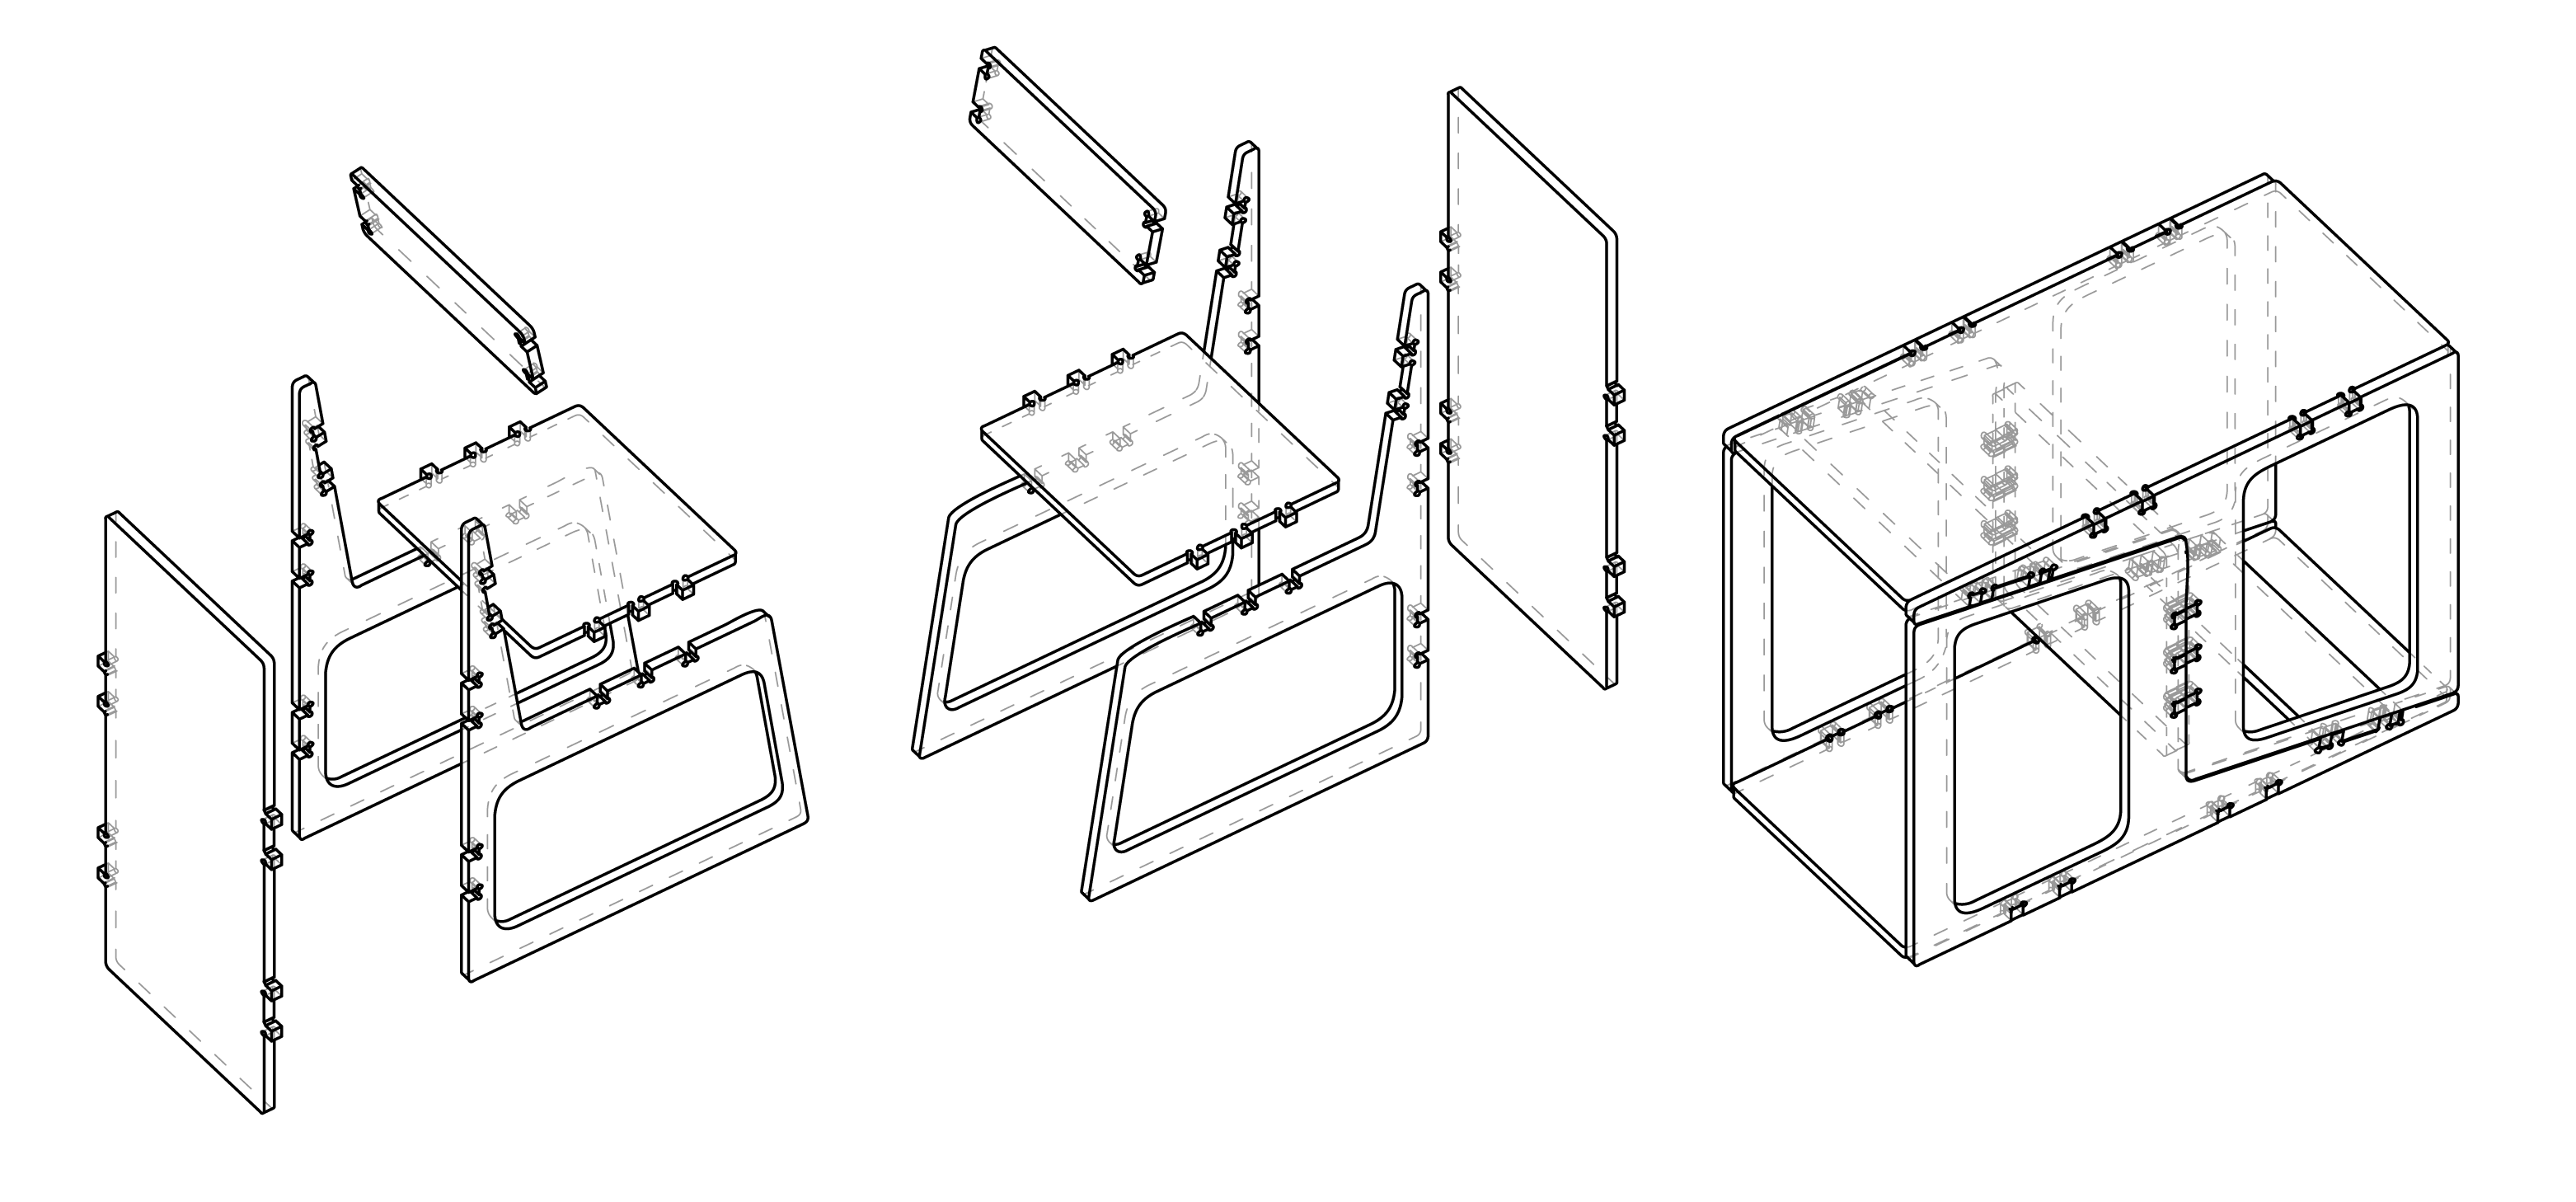
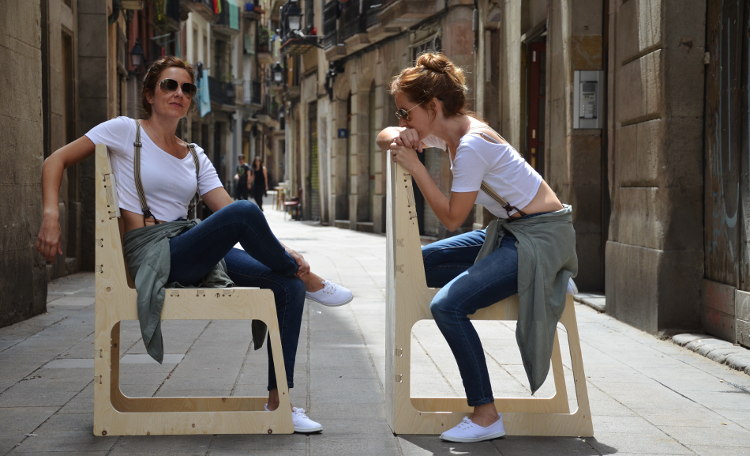
As starting point I wanted to produce at least two modular chairs that could both be assembled as one table. As we are two in the apartment that would mean that we would have a nice table to eat together or work and when not necessary the two chairs would individual be used for seating while in living-room-mode for our own use or for guests.
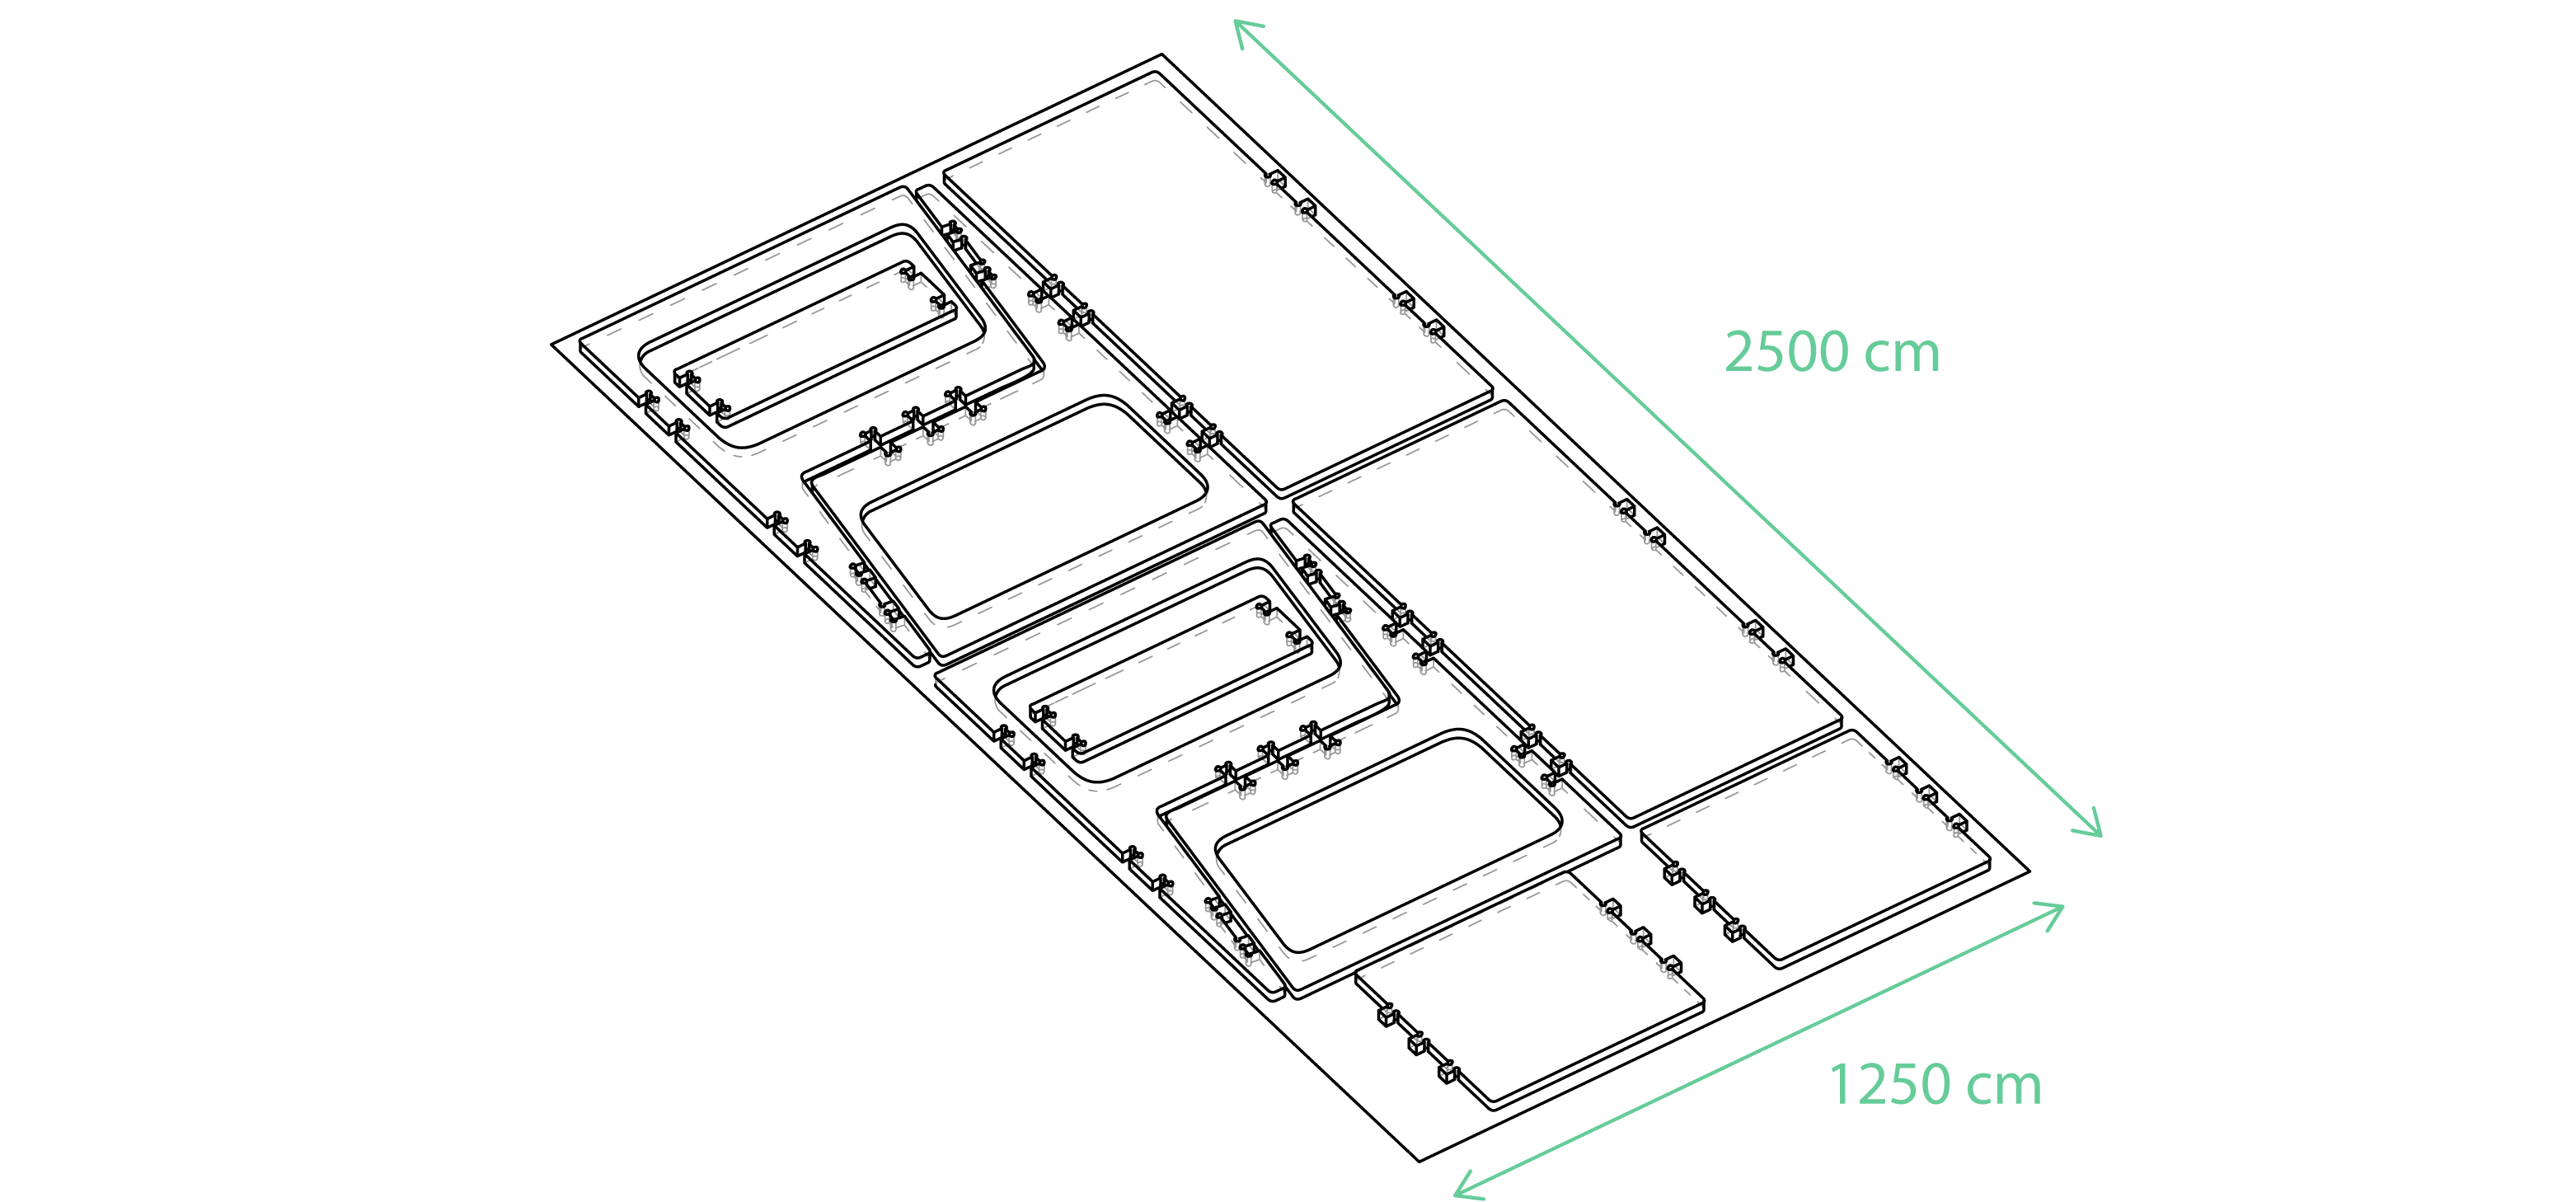
For this design the main goal was to use the maximum of the given board as possible leaving only the necessary boundary for screwing the board onto the CNC machine bed. With this approach I could minimize enormously the waist produced.
Also that was a good challenge since I wanted that the number of variable parts was reduced, modularity should be taken into consideration and the press-fit joints design would have to be parametric in order to adjust perfectly to the chosen board thickness rapidly and just by changing a few parameters when needed.
Design Constrains:
- 2500x1250cm 2.1mm board (1x)
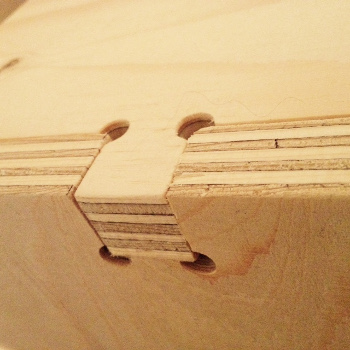
- full press-fit assembly
Production Process
After the design phase we kept waiting for the day to really test it at Valldaura Lab. Unfortunately time available was not much and all possible fails could result on an assignment fail. Fortunately enough everything when smoothly thanks to a properly adjusted ShopBot CNC machine and brand new mills.
Material and machinery used:
- 2500x1250x2.4cm plywood board (1x)
- ShopBot CNC router
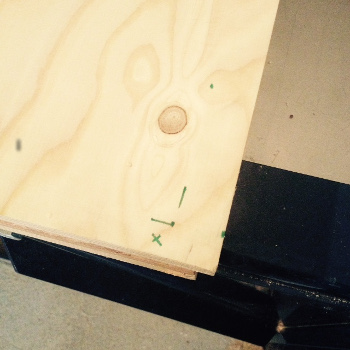
First step is measuring with caliper the exact thickness of the board - be aware that most of the times it doesn't match exactly what you ordered because of material properties fluctuations or how it as been stored.
Next step screw your board onto the sacrificial layer on the CNC bed. Make sure that every axis is aligned and plan where your screws will go so they are not in the way of the drill - ever! To make things simpler just measure your designs boundary and mark them on the board then you should have a free border around what you designed that can be used for fixing your board as just explained.

ShopBot at Valldaura Green Lab
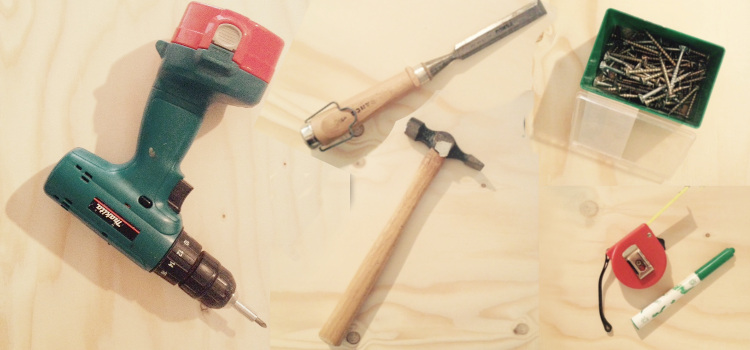
Tools needed: Drill and Screws; Hammer and ;Measuring tape and marker
ShopBot at Valldaura Green Lab
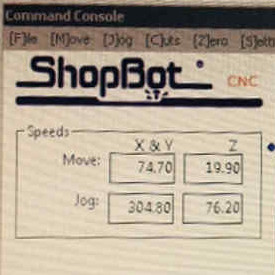
Third step would be checking if the mill and axis of the machine are working correctly. For mill alignment, and in the case of the Shopbot you will have a metal bar attached to the end-mill that you should use for rough and fine adjusting of the Z-axis. I our case we used a Just follow software directions and you will have it done it to mm perfection.
After zeroing every axis and setting your cutting options as desired you are ready to begin milling. Step aside.
Milling
Here is a video of the first minutes of the milling were you can see that routing is being done nicely and clean cuts are already appearing. Here in use is a 6mm end mill.
At this point you understand how important it is to have left tabs that in non existent would cause some parts to just move during the milling process.

ShopBot Speeds and Feeds
At all times put your goggles on, this machine is working at very high speed and chips of wood, metal, of the mills themselves might be projected and it can be very dangerous if you are not taking every precaution possible to save your self from harm. Security is very important for this assignment wear gloves as well for handling the wood, proper shoes and some clothing that you wouldn't mind getting dirty, because there is going to be dust everywhere!
In my case as the design area was really stretched and the board was fixed to the bed at its very limits, extra attention had to be taken in order to prevent any encounter between end-mill and screws. For that reason and because we we running out of time at Valldaura we had to paused the milling process to take pieces as they were being finished so that meanwhile sanding could be performed.
After every part of your design was milled turn off the machine and remove the screws and finally the remaining part of your board. In my case a tiny frame was left corresponding to 5% of the total board.

Finishing Process
When your pieces are out remove the remaining tabs maintaining the pieces together and if the cut came out clean, as it did in my case, not much sanding is needed but just enough to smoothen the borders so its nicer to the touch and easier to press-fit.
Has all parts use press-fit to be joined there is no need for any screws or glues. Just use a hammer but protect the surface you are going to hit with some cloth first so it doesn't get marked.
I had in plan painting some faces of the modular chairs that way it would be a more dynamic unit when all together. For now I left it raw no treatment was given to the surfaces yet. Nevertheless, soon some varnish will be haded for stain protection.
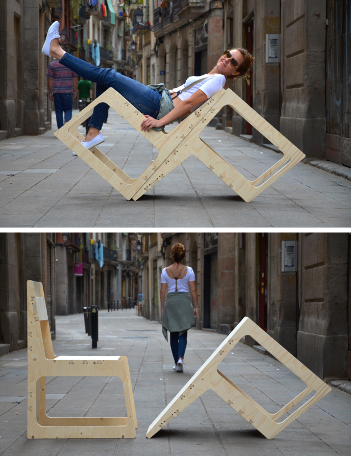
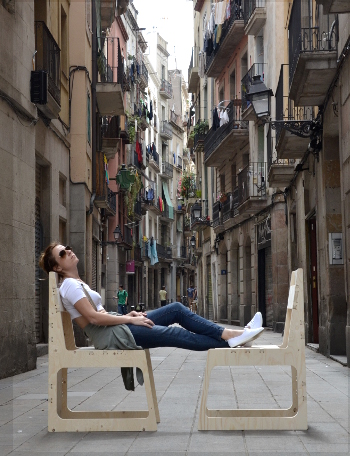
Here are some pictures of the finished product that I decided to take to the streets of Barcelona.
CHAIRABLE
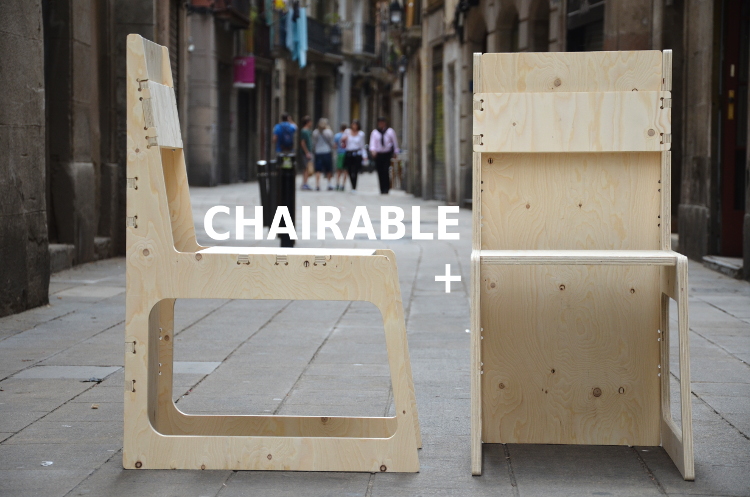

CHAIRABLE is a piece that promotes sharing, it's sustainable and cheap only counting on price of 1 2.50x1.25m plywood board (around 16euros) machining and assembling time. It uses only press-fit joints so it needs nothing more then a bit of sanding, a few edge smoothening and it's ready to use.

What have I learned?
This was definitely one successful assignment despite of all the waiting and considerable high chances of failure with having just one day for CNC milling.
I am very happy with the result and I have to say people on the streets feel the same. Some asked if it was already for sale and where could they buy it - simply amazing!
Nevertheless, there are some adjustments that I feel should be done, namely:
- Changing the frequency of press-fit joints on the seat part to make them stronger.
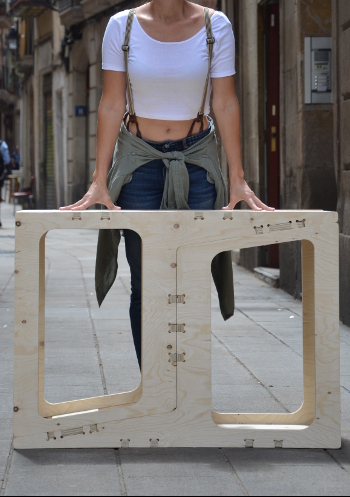
- Make the chair lighter - it's a bit heavy to handle
- Review the stools that would fit on the sides for a fully closed unit when all together
- Decide if the sides should be partially painted and if yes which colors
Last but not least thank you to my friend Montse for playing along and helping me capture these photos. It was worth it!