June 22, 2015
Assignment:Make a machine including the end effector. Build the passive parts and operate it manually, then automate your machine as a group project.
Mechanical and Machine Design was a group assignment. Even though we are only two students at our Fablab - Happylab Vienna (Myraida
and Juliette) we managed to complete our machine,
a Wooden Plotter.
Our division of tasks were primarily: Electronic Design by Juliette and Mechanical Design by Myraida.
We started by downloading Rhino and Grasshopper. After a few online tutorials to understand how these programs work we proceeded to download the files for the stages on the
tutorial page.
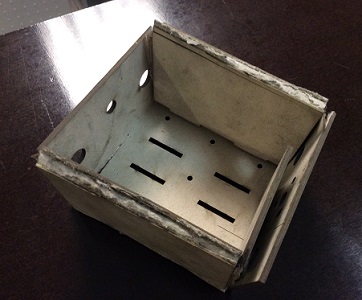
Our first problem was that we didn't have 3mm thick cardboard available locally but instead a 6mm cardboard. We tried
using the parametric model with grasshopper but for some reason it was not possible for us to modify it easily for a 6mm
thick cardboard.
We then decided to use another 3mm thick cardstock which was much denser and brittle than poster cardboard. The results were not successful (see photos below):

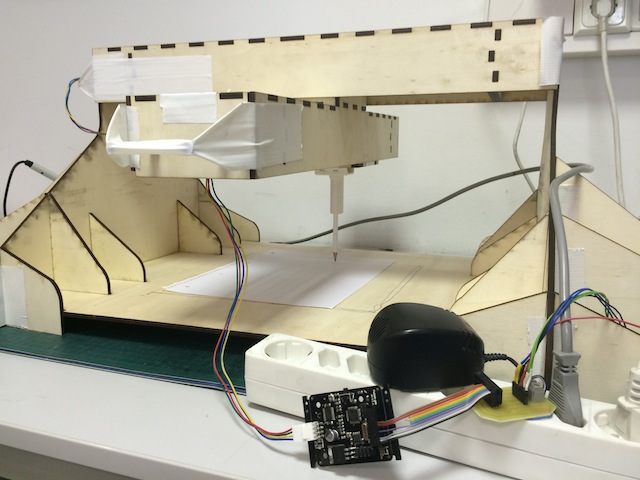
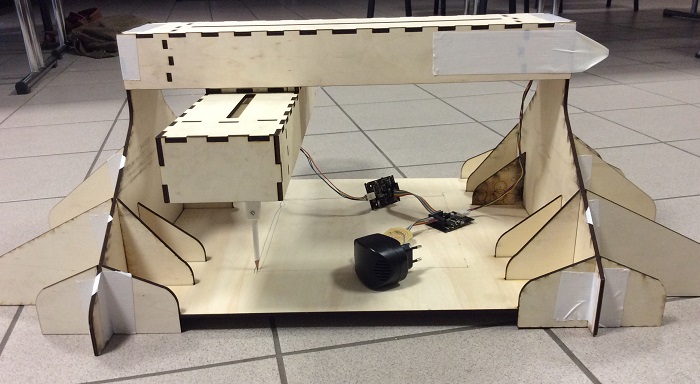
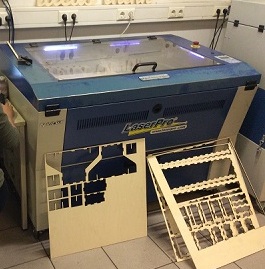
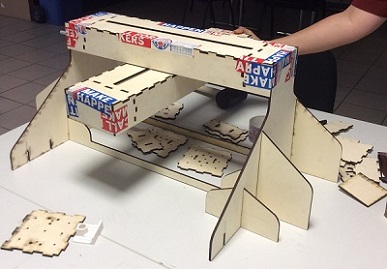
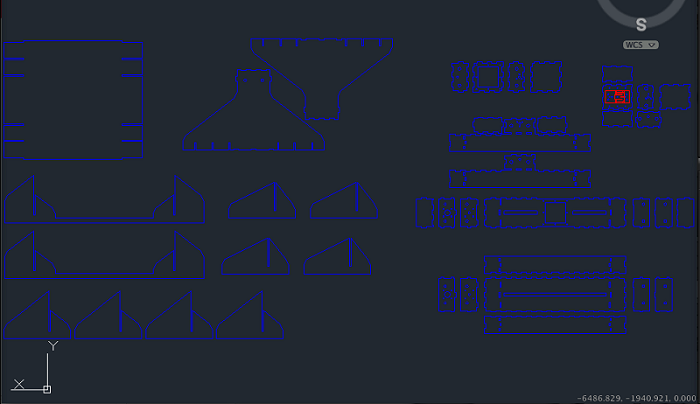
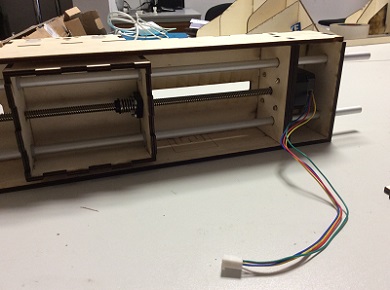
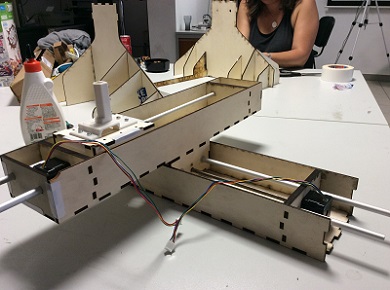
Without a good cardboard available to us we decided to use a 5mm thick plywood. We adjusted the design of the stages for wood and ended up with a new machine design. The design was drawn on Autocad and laser cut. We then proceeded to assemble the pieces together with tape. Minor adjustments were needed on the design but at the end everything came together.
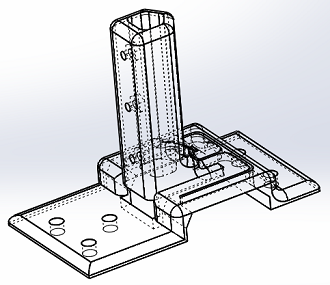
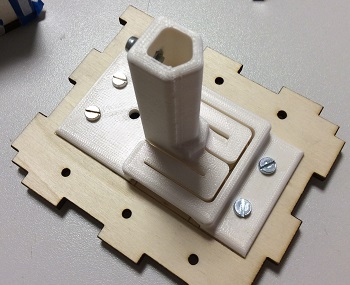
For the tool head, we decided to make a pen holder. After designing it together on Solidworks we 3D printed it. Here is the pen holder file.
Once all mechanical parts were finished, we glued almost everything together, mounted the stepper motors and axis. Myraida will re-use the stepper motors and axis for her final project hence the white tape on portions of our final machine.
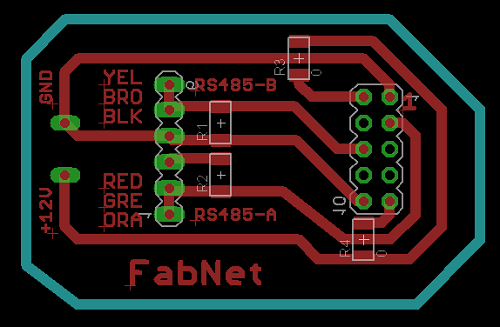
For the electronics, we redesigned and built the Fabnet on Eagle. Here is the eagle file.
We then proceeded to download and install all the programs that were needed to run the gestalt nodes on Happylab's computer (python 2.7, pyserial, guestalt-master, wxpython, git ...) and wired everything accordingly, following the instructions on the tutorial page.
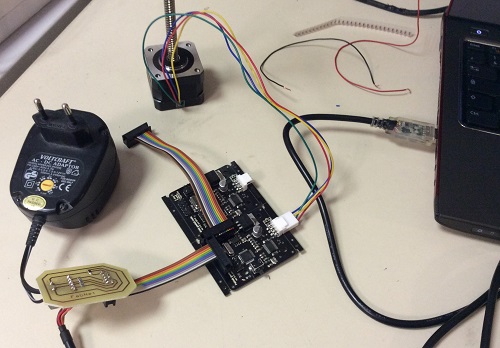
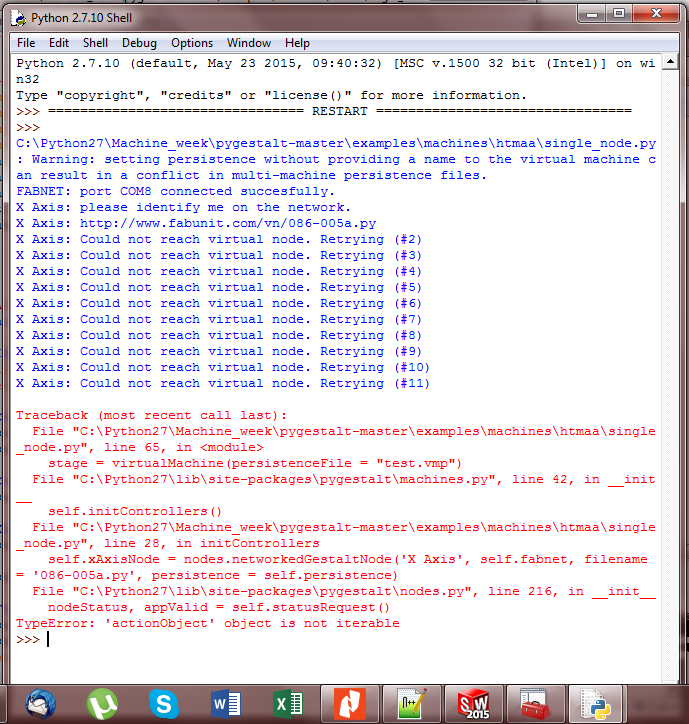
Originally when we tried to run the machine, there was no response back from the gestalt nodes when asked to click on the Gestalt button to identify the corresponding axis. The message received was: "XAxis: Could not reach virtual node..."
After weeks of searching to find out what was wrong and asking for help from others in the Fab Academy, without success, we tried testing the hardware of our two gestalt nodes. We programmed the gestalt's microcontroller directly and with a simple C program the motors were able to move. We then proceeded to test the FTDI cable with the oscilloscope and no problems were perceived. Nevertheless, one of the recommendations received was to replace the cable, so we went ahead and ordered a new one. With the new cable we are able to receive a signal back from the gestalt node, when identifying the corresponding axis. But not all problems were resolved. When the pink light at the node turns on, we click the gestalt's button to identify the axis, but receive a new message::
"XAxis: http://www.fabunit.com/vn/086-005a.py"
before retrying 11 times with the message:
"XAxis: Could not reach virtual node. Retrying (#2 through #11).
This web link is not functional and we are unable to proceed further.
Our lab manager has really tried to help and we have tried all previous recommendations from others at the FabAcademy. Unfortunetely, we have absolutely no idea what is wrong and we are helplessly lost. It's all very disappointing because after all tried our machine does not work....