Fab Lab Barcelona SuperNode /Fab Lab Sevilla /Jose Perez de Lama
Weeks 16-19++ / final project

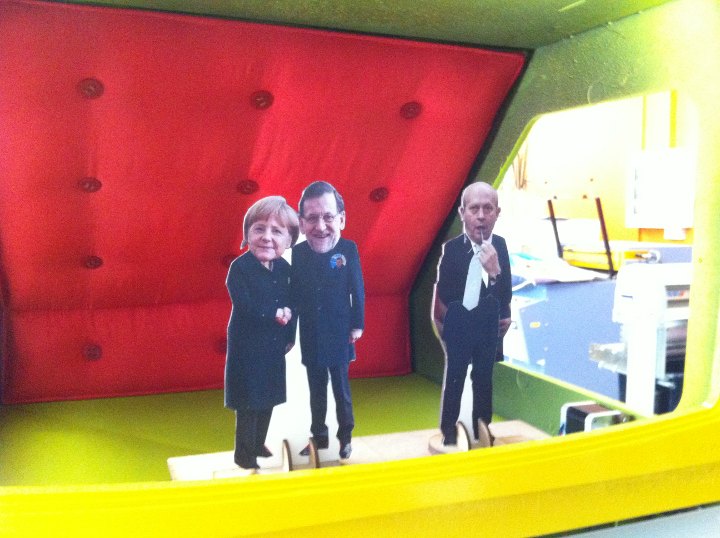
Retablillo de las Maravillas v1.0
Developed july>>august 2013
5./ Programming
5.1/ Motor controller
5.2/ I/O & interface
6./ Downloadable files & license
[5./ programming]
[5.1/ motor controller]
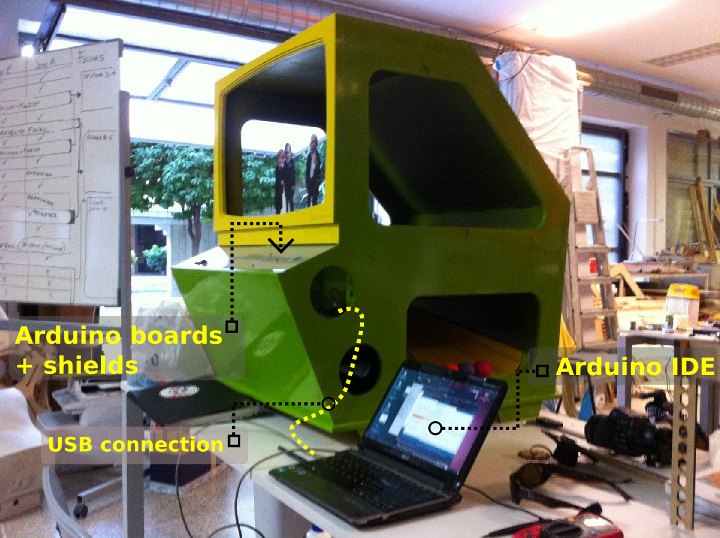
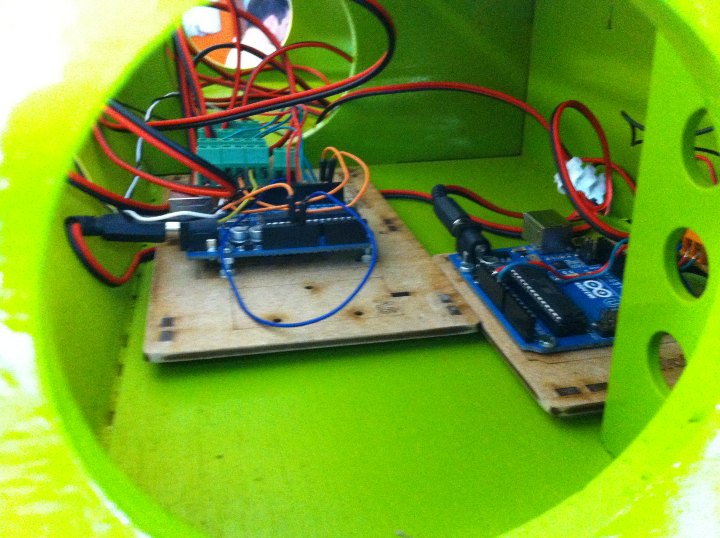
All programming has been done with Arduino and the Arduino IDE [v 1.0.5]. The code to control the stepper motor is based on a sktech provided by igna94igna, a local colleague on his youtube site. It is a simple code to run a stepper motor using the Allegro A4988 mini-board; which is the same that we used for the Reprap Prusa i2, and that we were familiar with.
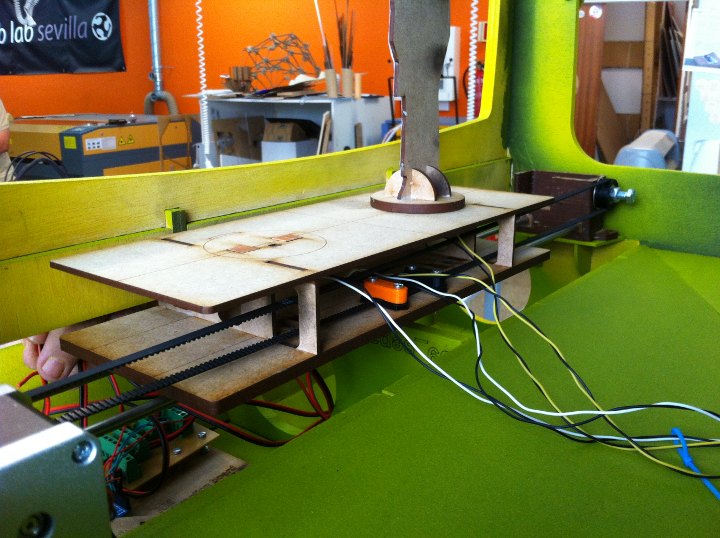
The code sets three Arduino pins for "steps", "direction" and "reset" or enable motor. Very schematically to run the motor it sets the "reset" pin HIGH, sets the "direction" pin HIGH or LOW, and then, using a "for loop" it sends alternative HIGH-LOW pulses to the "step" pin. A delay between these pulses, which is a variable set in the program, "velocidad" [speed], sets the speed of the motor. The number of iterations on the for loop determines the number of steps, which is proportional to the distance traveled by the platform.
I programmed two different movement routines for the platform within the four loop. In the set up section i wrote an initial movement from the center to one of the ends,to fine tune the platform behavior.
Then i introduced the routines within an "if loop" which is controlled by time, combining "millis()", that is the time elapsed since the start or reset of the program and a certain interval, the duration of the routine (i.e. the duration of the game) is entered as another variable, named "interval", that is defined as an unsigned long variable, in milliseconds.
Above: code fin tuning configuration.
This is the code used:
//sketch by jose perez de lama fab lab sevilla for fab academy 2013
//retablillo maravillas project v03 motor controller
//based upon code by igna94igna Motor2
unsigned long totalTime;
unsigned long interval;
int steps = 2;
int direccion = 3;
int reset = 9;
int pasos = 600;
int velocidad = 0;
// the setup routine runs once when you press reset:
void setup() {
// initialize the digital pin as an output.
pinMode(steps, OUTPUT);
pinMode(direccion, OUTPUT);
pinMode(reset, OUTPUT);
delay(4800);
digitalWrite(reset, LOW);
delay(100);
digitalWrite(reset, HIGH);
velocidad = 1800;
pasos = 420;
digitalWrite(direccion, LOW); // izquierda en retablillo maravillas
for (int i = 0; i<pasos; i++)
{
digitalWrite(steps, HIGH); // This LOW to HIGH change is what creates the
digitalWrite(steps, LOW); // al A4988 de avanzar una vez por cada pulso de energia.
delayMicroseconds(velocidad); // Regula la velocidad, cuanto mas bajo mas velocidad.
}
}
// the loop routine runs over and over again forever:
void loop() {
totalTime = millis();
interval = 29500UL;
if(totalTime <= interval)
{
digitalWrite(reset, LOW); //Mientras reset este en LOW el motor permanecerá apagado y no sufrirá. El chip apagará todos los puertos y no leerá comandos.
delay(100);
digitalWrite(reset, HIGH); //Cuando reset se encuentre en HIGH el motor arrancará y leerá los comandos enviados.
velocidad = 1700;
pasos = 800;
digitalWrite(direccion, HIGH);
for (int i = 0; i<pasos; i++) //Equivale al numero de vueltas (200 es 360º grados) o micropasos
{
digitalWrite(steps, HIGH); // This LOW to HIGH change is what creates the
digitalWrite(steps, LOW); // al A4988 de avanzar una vez por cada pulso de energia.
delayMicroseconds(velocidad); // Regula la velocidad, cuanto mas bajo mas velocidad.
}
digitalWrite(reset, LOW); //Mientras reset este en LOW el motor permanecerá apagado y no sufrirá. El chip apagará todos los puertos y no leerá comandos.
delay(100);
digitalWrite(reset, HIGH); //Cuando reset se encuentre en HIGH el motor arrancará y leerá los comandos enviados.
velocidad = 1700;
pasos = 800;
digitalWrite(direccion, LOW);
for (int i = 0; i<pasos; i++) //Equivale al numero de vueltas (200 es 360º grados) o micropasos
{
digitalWrite(steps, LOW); // LOW to HIGH hace que el motor avance ya que da la orden
digitalWrite(steps, HIGH); // al A4988 de avanzar una vez por cada pulso de energia.
delayMicroseconds(velocidad); // Regula la velocidad, cuanto mas bajo mas velocidad.
}
digitalWrite(reset, LOW); //Mientras reset este en LOW el motor permanecerá apagado y no sufrirá. El chip apagará todos los puertos y no leerá comandos.
delay(100);
digitalWrite(reset, HIGH); //Cuando reset se encuentre en HIGH el motor arrancará y leerá los comandos enviados.
velocidad = 1360;
pasos = 300;
digitalWrite(direccion, HIGH);
for (int i = 0; i<pasos; i++) //Equivale al numero de vueltas (200 es 360º grados) o micropasos
{
digitalWrite(steps, HIGH); // This LOW to HIGH change is what creates the
digitalWrite(steps, LOW); // al A4988 de avanzar una vez por cada pulso de energia.
delayMicroseconds(velocidad); // Regula la velocidad, cuanto mas bajo mas velocidad.
}
digitalWrite(reset, LOW); //Mientras reset este en LOW el motor permanecerá apagado y no sufrirá. El chip apagará todos los puertos y no leerá comandos.
delay(100);
digitalWrite(reset, HIGH); //Cuando reset se encuentre en HIGH el motor arrancará y leerá los comandos enviados.
velocidad = 1360;
pasos = 300;
digitalWrite(direccion, LOW);
for (int i = 0; i<pasos; i++) //Equivale al numero de vueltas (200 es 360º grados) o micropasos
{
digitalWrite(steps, LOW); // LOW to HIGH hace que el motor avance ya que da la orden
digitalWrite(steps, HIGH); // al A4988 de avanzar una vez por cada pulso de energia.
delayMicroseconds(velocidad); // Regula la velocidad, cuanto mas bajo mas velocidad.
}
}
}
[5.2/ I/O & interface]
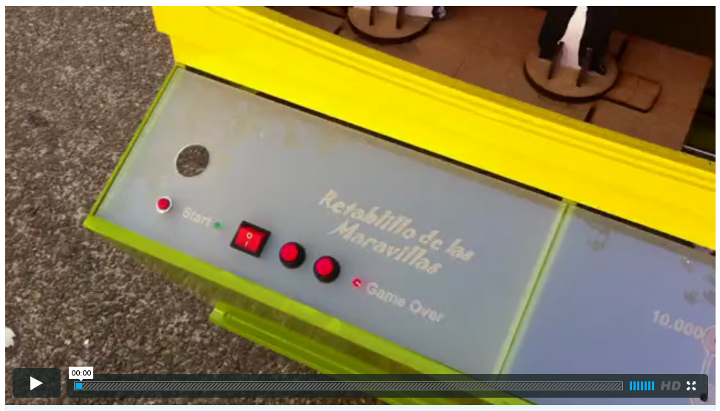
The second piece of code controls the Retablillo's interactivity. It is based upon quite simple code in the Arduino Projects Book. On one hand it relates two on/off switches to three LED's in the scoring board with a series of nested if loops/statements. On the other, the former code is included within an "if" loop, similar to the one in the first piece of code, that controls the duration of the game, sinchronizing it with the platform movement.
In the set up section of the code, the program sets the start LED to blink for some seconds to get the player ready before actually starting to play. This delay is introduced in the motor sketch as well to wait for the green start LED to stop blinking.
This is the code used:
//sketch by Jose Perez de Lama Fab Lab Sevilla for Fab Academy 2013
//project Retablillo Maravillas v02 i/o controller
//based on the Arduino Projects Book spaceship interface project
unsigned long totalTime;
unsigned long interval;
int switch01State = 0;
int switch02State = 0;
void setup()
{
pinMode(4,OUTPUT); // 50 points led
pinMode(5,OUTPUT); // 5000 points led
pinMode(6,OUTPUT); // 10000 points led
pinMode(7,OUTPUT); // start led
pinMode(8,OUTPUT); // game over led
pinMode(2,INPUT); // switch01
pinMode(3,INPUT); // swicth02
//blink the start LED at pin 7 10 cycles aprox 6 seconds
for (int i=0; i<=8; i++)
{
digitalWrite(7,HIGH);
delay(250);
digitalWrite(7,LOW);
delay(250);
}
}
void loop(){
totalTime = millis();
interval = 30000UL;
switch01State = digitalRead(2); // read switch01 state
switch02State = digitalRead(3); // read swicth02 state
if(totalTime <= interval)
{
if(switch01State == LOW) // figure 01 is down
{
if(switch02State == HIGH) // & figue 02 is up
{
digitalWrite(4,HIGH); // blink 50 points led
delay(250);
digitalWrite(4,LOW);
delay(250);
}
if(switch02State == LOW) // & figure 02 is down
{
digitalWrite(4,HIGH); // blink 50, 5000, 10000 points and game over leds
digitalWrite(5,HIGH);
digitalWrite(6,HIGH);
digitalWrite(8,HIGH);
delay(250);
digitalWrite(4,LOW);
digitalWrite(5,LOW);
digitalWrite(6,LOW);
digitalWrite(8,LOW);
delay(250);
}
}
if(switch01State == HIGH) // figure 01 is up
{
if(switch02State == LOW) // & figure 02 is down
{
digitalWrite(4,LOW);
digitalWrite(6,LOW);
digitalWrite(8,LOW);
digitalWrite(5,HIGH); // blink 5000 points led
delay(250);
digitalWrite(5,LOW);
delay(250);
}
}
}
else
{
//interval over
digitalWrite(8,HIGH); // blink game over led
delay(250);
digitalWrite(8,LOW);
delay(250);
// keep scored pints lighting
if(switch01State == LOW) // figure 01 is down
{
if(switch02State == HIGH) // & figue 02 is up
{
digitalWrite(5,LOW);
digitalWrite(6,LOW);
digitalWrite(4,HIGH); // blink 50 points led
digitalWrite(8,HIGH);
delay(250);
digitalWrite(4,LOW);
digitalWrite(8,LOW);
delay(250);
}
if(switch02State == LOW) // & figure 02 is down
{
digitalWrite(4,HIGH); // blink 50, 5000, 10000 points and game over leds
digitalWrite(5,HIGH);
digitalWrite(6,HIGH);
digitalWrite(8,HIGH);
delay(250);
digitalWrite(4,LOW);
digitalWrite(5,LOW);
digitalWrite(6,LOW);
digitalWrite(8,LOW);
delay(250);
}
}
if(switch01State == HIGH) // figure 01 is up
{
if(switch02State == LOW) // & figure 02 is down
{
digitalWrite(4,LOW);
digitalWrite(6,LOW);
digitalWrite(5,HIGH); // blink 5000 points led
digitalWrite(8,HIGH);
delay(250);
digitalWrite(5,LOW);
digitalWrite(8,LOW);
delay(250);
}
}
}
}

///
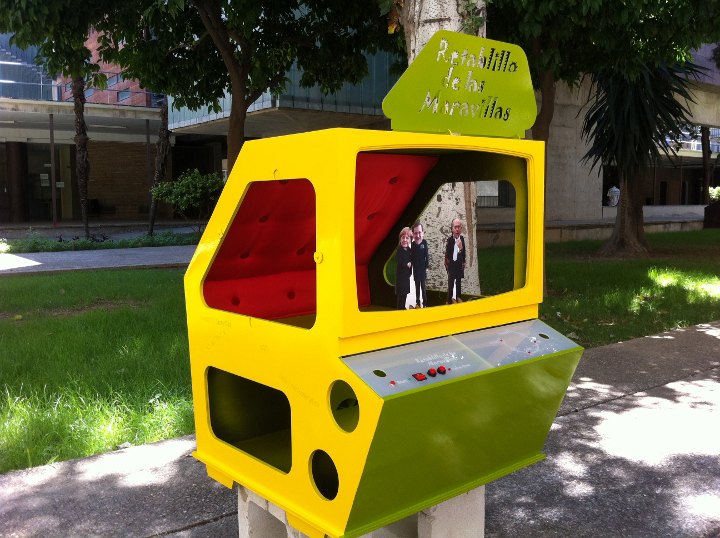
* "El Retablo de las Maravillas" is the title of a short story, “entremés”, by Spanish classic author Miguel de Cervantes, where he depicts a lighthearted while ironic story around a theatrical representation: http://miguelde.cervantes.com/pdf/El%20Retablo%20de%20las%20Maravillas.pdf
///
Unless otherwise stated, information in this page is downloadable under a Creative Commons Attribution-Share A Like license; attribution: Jose Perez de Lama / Fab Lab Sevilla / Fab Academy 2013. Work based in the documentation provided by Neil Gershenfeld / Fab Academy 2013; and Anna Kaziunas, AS220 Fab Academy 2013, among other sources.

final project home / structure / mechanics / electronics / programming / all files
return home /perezdelama.jose