molding and casting
Week 7 Overview
This week covered molding and casting.
The assignment for the week was to design a 3D mold, machine it, and cast parts from it.
This week I decided to make an ice cube tray that had mint leaves and lemons as the shapes for ice cubes.
Designing and creating the 3d mold
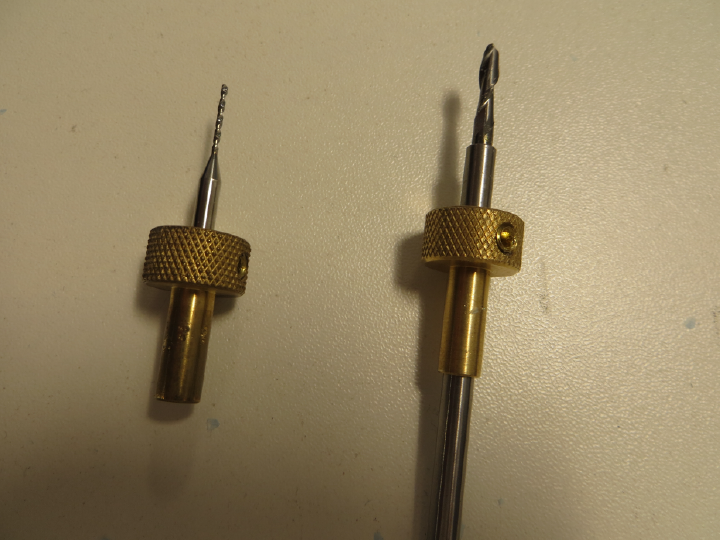
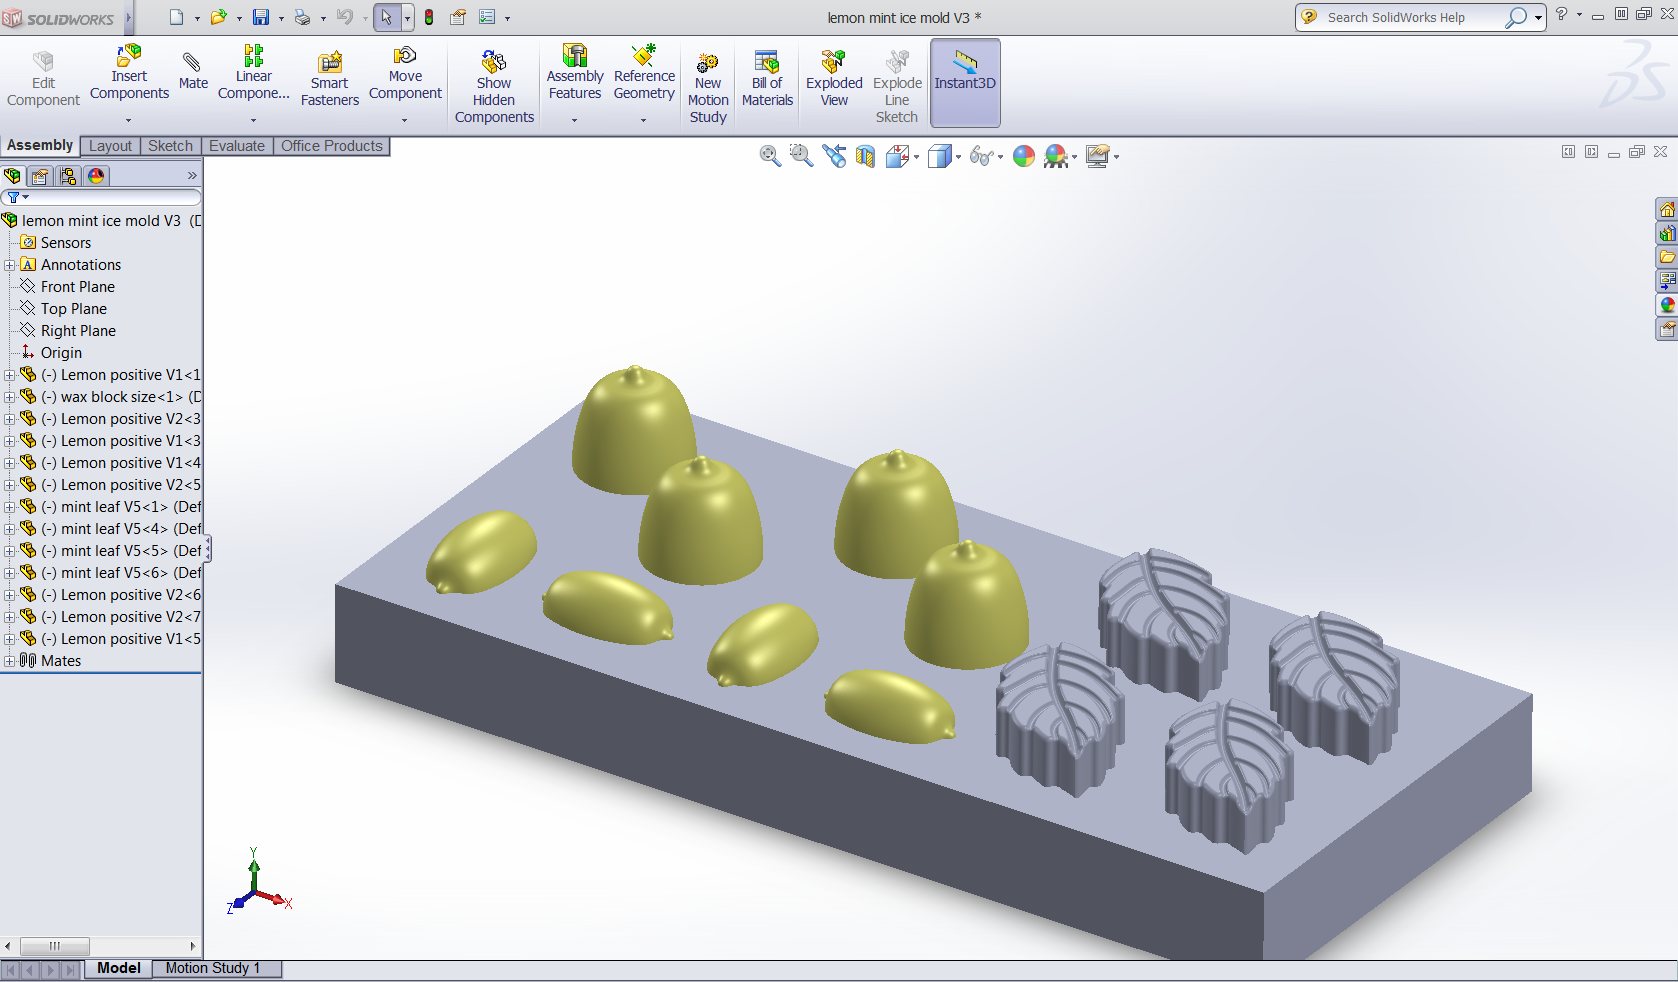
I made up the mold for machine in Solidworks. When I was making the 3d model I checked what's the smallest tool bit we have
so I didn't make any pieces of the model the bit wouldn't fit into.
Download the solidworks model of the mold here here
Once it was made in Solidworks I exported it as an stl file.
Download the stl of the mold here
Next I opened this up in modela player on a computer that connected to the modela
Machining the mold on the modela
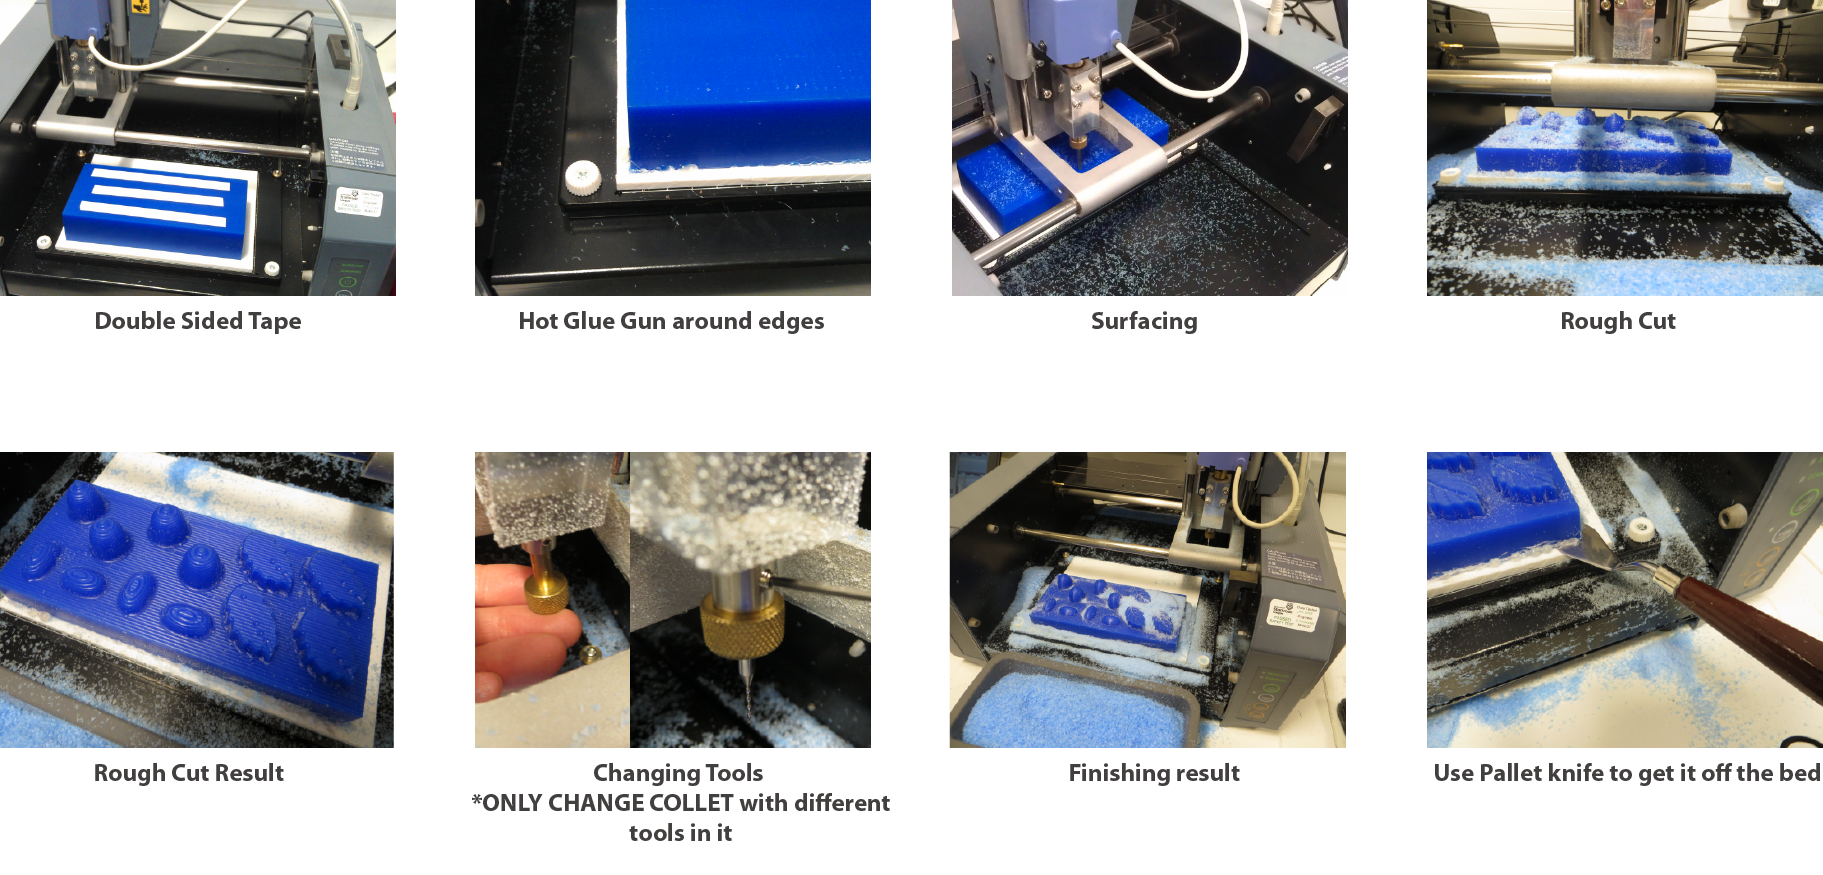
To machine the mold on the modela I followed the following steps:
- use doubled sided tape to stick the wax to the bed of the modela
- in addition I also glued the base edges to the bed with a hot glue gun
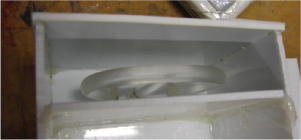
- Setting the tools in 2 different collets to set the z index for both tools. As there was a tool change in the middle we worked out a way of keeping the z in the same place for both the 3mm bit and the 1mm. Before cutting anything I placed the material on the table and fixed both tool pieces in the collet with the tool just touching the surface of the material. Once this is set I didn't change the tool in the collet but for tool changes I just changed the whole collet with the other one that had the 1mm bit in it. You can see an image of this on the right.
- Surfacing cut with a 3mm bit
- Rough cut with the same 3mm bit
- Finishing pass with a 1mm bit
I've made a much clearer document of how to use modela player for this purpose
here.
Casting the mold
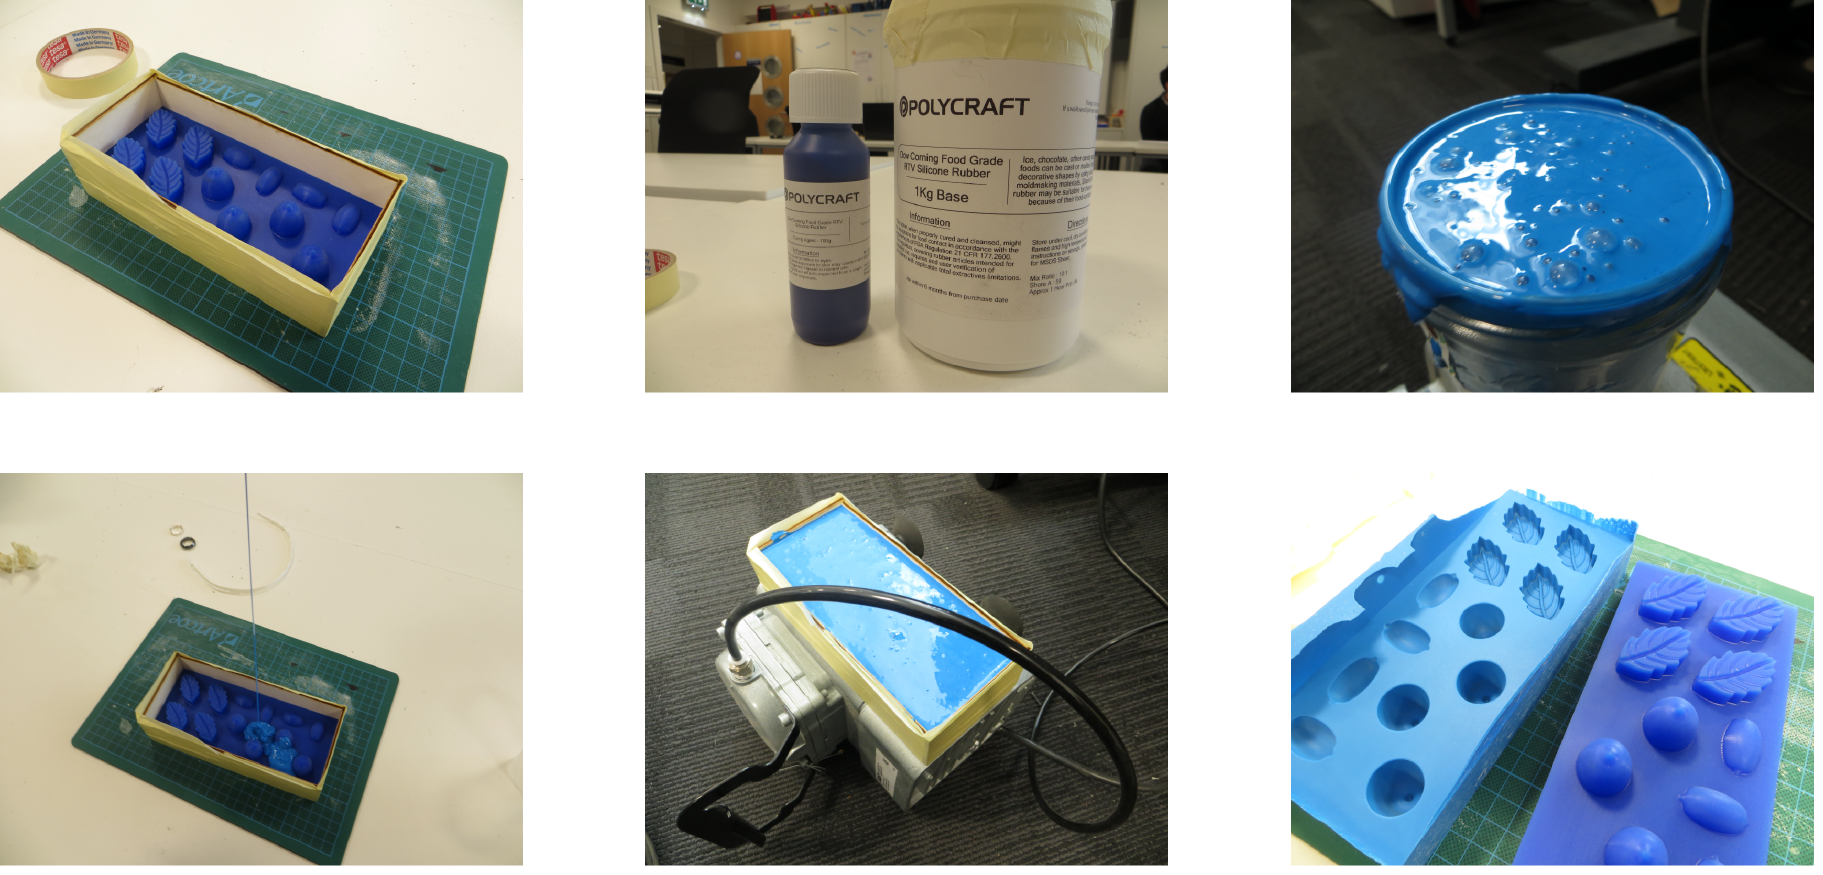
I used the Polycraft DOW Corning Food Grade RTV Silicone Rubber for casting.
This is mixed in a 10:1 ratio. I need to use food safe silicone for making the ice tray.
After mixing the two together thoroughly I placed the mix on top of the compressor for approximately
20 minutes. This vibrates the mix and brings the air bubbles to the top of mix, getting rid of some of them.
When I was pouring the mix I poured it from a height and tried to pour in the same spot all the time. This
was to try and decrease the amount of air bubbles in the mix. Once it was all poured I put the mold with the
unset silicone back onto the compressor to vibrate some of the remaining air bubbles out of the silicone.
The Final Product
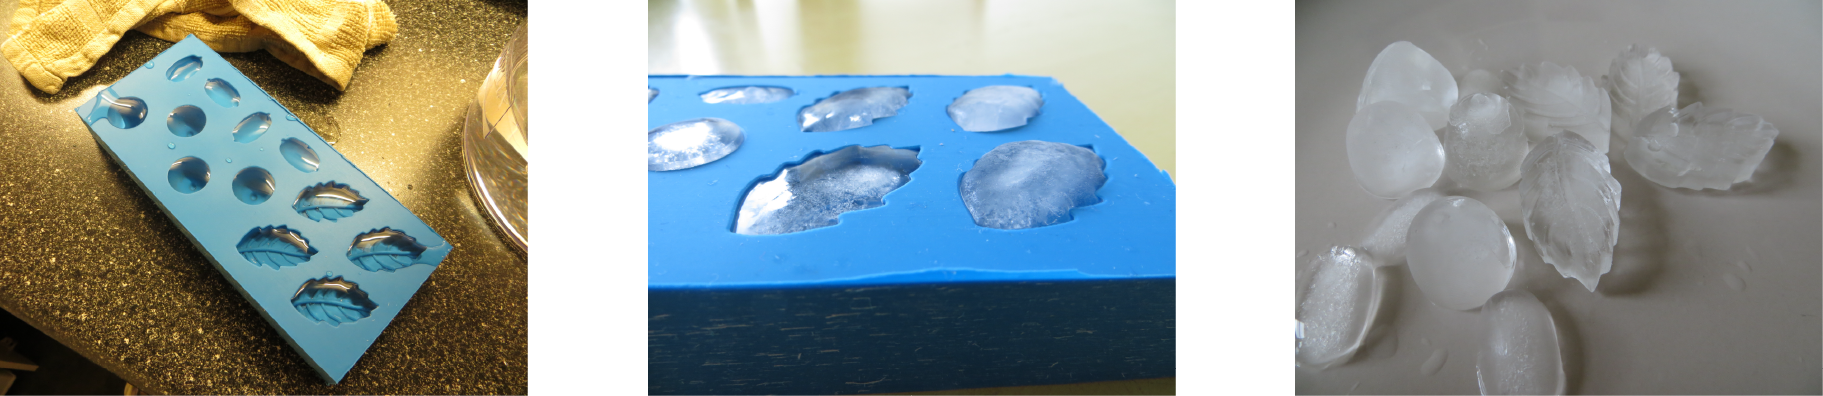
I was quiet impressed with how much detail you could see on the mint ice cubes. The lemons were a bit more
disappointing. I didn't have high hopes for them but I wanted to see how they'd turn out.
A few things I'd do differently if I was making another ice tray:
- Each piece had approx 7mm between them. So there is 5mm of silicone between each ice cube. This is too much and the silicone is surprisingly strong. I'd estimate you'd only need 3mm between each ice cube.
- The depth of the lemons was less than the depth of the mint leaves. This meant there was a substantial thickness of silicone under the lemons. It made it had to push the lemon ice cubes out of the tray and it also wastes silicone. Next time I'd make sure all the ice cubes are the same depth.
- When you pour the water into the mold it can pour over the edge and onto your kitchen counter. If I was making thing again I'd make a lip around the edge so water couldn't pour off the mold. Commercial ice trays have these lips on them.
Download Machine File/s
Download the stl of the mold here
Week 7, Mar 6