computer-controlled cutting
Week 3 Overview
The third week covered computer-controlled cutting which mainly covered using a vinyl cutter and a laser cutter.
The assignment for the week was to design and create a press fit construction kit.
Vinyl Cutter
I've never used a vinyl cutter before and I'm really interested in the idea of being able to create copper circuits with this that might be able to be embedded
into physical artefacts and materials.
I'd like to create a logo for the research group I am part of at Strathclyde University. I have the graphics but it's not a matter of cutting it out.
Lazer Cutter
For the assignment I've done a few things
Before creating a press fit kit I decided to get to grips with using the laser cutter by creating a poster using the laser cutter and traditional colour printing for a
conference I am attending. First I created the poster in illustrator, shown in the image on the right. I thought it would be really nice to make some of the poster from laser cut white cardboard
that could be overlaid onto a coloured background to give some 3D dimensionality to the poster instead of being a traditional 2D print.
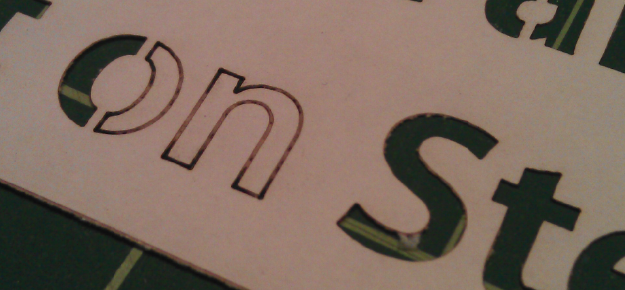
I altered the font and wheels at the top of the poster so the inner pieces of the letters would be positioned and supported on the poster, once the laser has cut the card board.
So for example after the laser cut the letter 'o', the centre of the letter 'o' would be freely moving with no attachment to the rest of the card.
Also the wheels were first designed that the laser cut would have ended up with just a circle cut and the embedded cuts inside of this circle would have been not attached
to the rest of the card.
I used illustrator to draw these shapes and text. The pathfinder tools were used to merge the shapes.
 Modifying the text and wheels so the embedded shapes inside the text and wheels are secured
Image of the Initial Laser Cut
 The file was saved from illustrator as an illustrator file version 10 with no compression of the file.
Alternativaly I could have exported it as a dxf version 2000 file either.
The file was saved from illustrator as an illustrator file version 10 with no compression of the file.
Alternativaly I could have exported it as a dxf version 2000 file either.
PROBLEMS THAT ARROSE FROM THE FIRST ATTEMPT
1. There were some lines that were overlapping which the laser cut so the inside of the wheels were not attached to the paper once the laser was finished cutting. A
new drawing was created without any overlapping lines. You can see the overlapping lines in the above image.
2. The settings used for the laser cutter were adapted from settings for light weight courgated cardboard.
Speed: 90
Power:20
Corner power: 10
However, the laser seemed to be cutting through some parts of the card and not others. I changed the settings
on power, corner power and speed until I got the desired cut.
THE FINAL CUT
The final cut settings for 160gms card where
Speed: 80
Power:26
Corner power: 22
Assignment: Press Fit Kit
For the assignment I decided to make a monitor stand for my desk that my laptop could sit under.
Basically I wanted a stand that would not only hold up the monitor a bit higher but also use the empty space
under the monitor to keep my laptop out of the way, when it's connected to the monitor.
Step 1:
To make the monitor stand for my desk I started by making the model in Solidworks (shown here on the right). I created individual parts for each piece.
Then I put these together into an assembly file. This is really handy because you have then see if the parts
fit together properly before cutting them on the laser.
Step 2:
Next I saved the individual pieces I needed to cut from the part files as dxf file. I've documented the exact steps to save the solidworks part
files as dxf in a pdf
here.
Step 3:
Then I open up CorelDraw
and import the files into a new document. I've documented this in a pdf with images
here.
Step 4:
Finally I cut the pieces out of 6mm ply on an Epilog Laser mini using the following settings:
Speed: 10
Power:100
Frequency: 500
The steps for printing from corel draw are documented in detail
here
in a pdf.
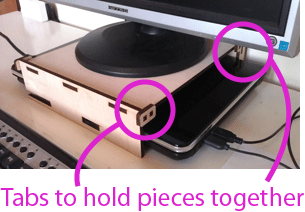
Step 5:
Assemble the pieces and here's the final product in action. Notice the tabs on the side, highlighted in pink. These work to make sure you can't pull
the front of back off. First you'd have to pull these tabs off. I did make an initial version without these and then revised the
design to include these so you couldn't easily pull of the front or back. The back tab also stops the monitor stand from slipping off the back off
the back of the desk if you push it too far.
Download the files for the monitor stand here
Lessons Learning, General Notes and Reflections from Laser cutting
1. NEVER EVER leave the laser cutter running without being at it.RISK OF FIRE
2. As a rough guideline, the laser power at the corners should be roughly 2/3 of the power of a straight line.
3. Test out small areas that include the most complex parts of the image before cutting the whole area, to test the settings
4. Make sure there isn't overlapping lines or doubled lines in the drawing
5. The material to be cut should be away from the sides of the laser cutter bed (ie. not pushed up to the sides)
6. Use the honeycomb bed with paper or pieces that you want the centre pieces that would be cut out
7. Save files for the larger laser cutter (in maklab) in illustrator 10 or .dxf 2000
8. The smaller machine is best for more refined work
9. Focus the laser before cutting after a different material was cut on the table
10. Test the boundary area before cutting
11. You can use different colours in the drawing to cut in order and at different settings on the same drawing
12. Always turn on the extraction system to take away the fumes
13. If the laser isn't cutting through the material properly, try decrease the speed by 1 incrementally
Attending Tangible Embodied Interaction conference
I also got to attend TEI 2013 Conference in Barcelona where I saw really interesting work and visited Fablab Barcelona.
Download Machine File/s
Download the files for the monitor stand here
Week 3, Feb 6
Mobiquitous Lab Logo
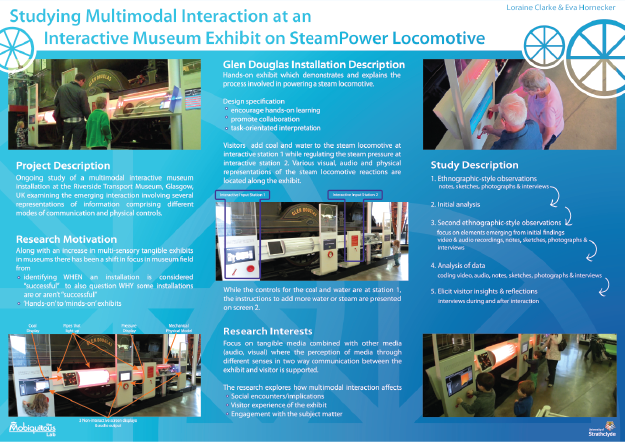
Original Poster Design
An example of the parts the laser didn't cut through
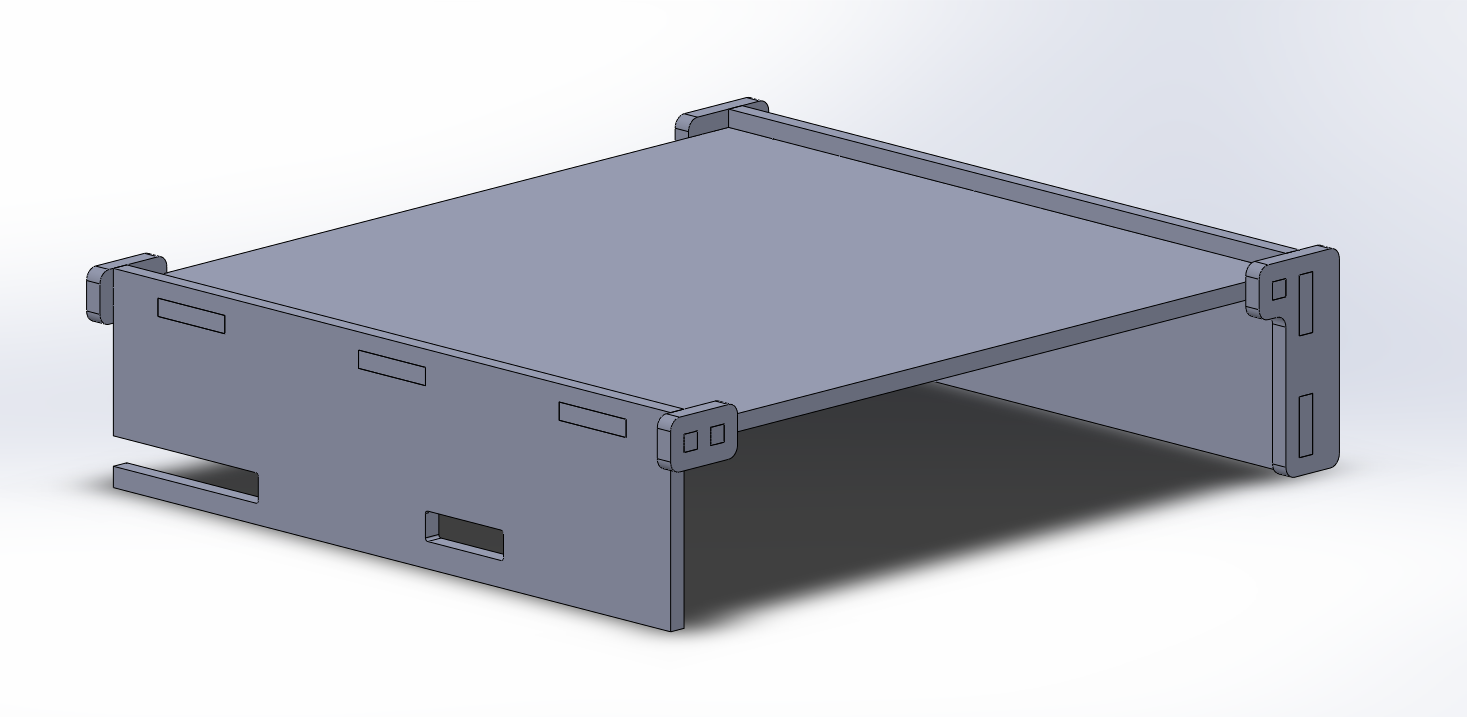
The solidworks model for press fit kit
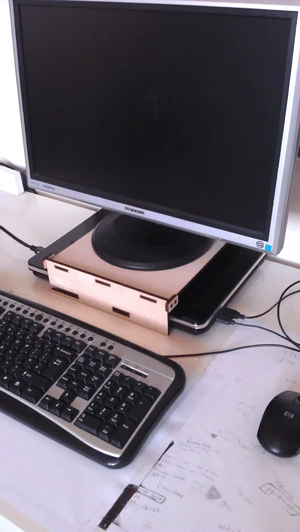
Final monitor stand in action
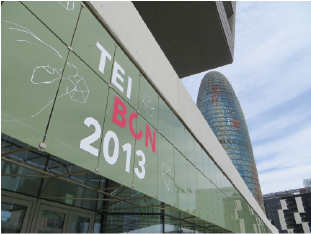
TEI 2013