Week 12 Overview
The interface and application programming week covered how to write programmes to make interfaces
creating mainly visual representations of the sensor data coming from the input board we made.
As I am hoping to build an interactive installation of some sort the programming languages or IDEs that I'm really interested in are
1. Processing
2. Open Frameworks
3. Javascript
Links to the tutorials and materials for interface and application programming
Assignment
The assignment for the week was to write a programme that interfaces with one of the input sensors we made
or an output device.
Description of Embedded Programming Work using ubuntu OS
I deciced to use processing to make an interface that would work with the phototransitor to change depending on the light in the room.
Depending on the light reading the interface will change to one of the following night, dusk, cloudy or sunshine scene.
Hardware for the assignment
- FTDI cable
- hello light board
Software running on Ubuntu OS
Most of this should be installed from the other electronics weeks
Processing Programming
One of the main resources I used was the processing online reference as well as the examples provided in the processing IDE.
Link to processing online reference
Joel had sent me on some processing code to communicate with the light sensor board. First of all I just commented out the code to figure out what
exactly the programme was doing.
Download processing example from Joel with comments added
import processing.serial.*; //import the serial communication library
Serial myPort; // Create object from Serial class
int val; // create a varible called val to store the Data received from the serial port temporialy
int[] sync = {0,0,0,0}; //create an array called sync holding 4 values all that are 0
boolean readLow, readHigh;//create 2 boolean (true or false) varibles to store the low and high bites
void setup(){//setup function that only runs once at the start of the program
size(200, 200);//make the screen size 200 by 200 pixels
String portName = Serial.list()[0]; //create a string variable called my port and make this be the first serial port available in the array of serial ports
myPort = new Serial(this, portName, 9600);//open the port and set it at the baud rate we want
myPort.buffer(1);// setting the number of bytes to bufer before callin another serial event. so we just want to take one byte at a time, process this and then take the next byte
readLow = false;//setting the low reading to nothing initially
readHigh = false;//setting the high reading to nothing initially
noStroke();//making there be no stroke for any drawings
fill(255);//setting the fill colour to be white
}
void draw(){//draw loop that is constantly running
}
void drawGraph(int val){//the loop the changes the colour of the background. needs the int varibles val to be passed to it
background(map(val,0,1024,0,256));//set the background colour to be the mapped value of val which could be a value anywhere
//between 0 and 1024 and set it to be the equilvent to a value between 0 and 256
}
void serialEvent(Serial myPort){ //function to read serial port events. need the serial port reading to be passed to it
if (!readLow & !readHigh){//if readLow and readHigh is false (which is what we set it to in the setup)then....
sync[0] = sync[1];
sync[1] = sync[2];
sync[2] = sync[3];
sync[3] = myPort.read();//set the 4th entry in the array called sync to be the reading of the serial port
if ((sync[0] == 1) & (sync[1] == 2) & (sync[2] == 3) & (sync[3] == 4)){//if the entries in the sync array are 1,2,3,4 then...
readLow = true;//set readLow to be true
}//otherwise do nothing
} else {//otherwise.....
if (readLow) {//if readLow is true
val = myPort.read();//val becomes the port reading at this moment
readLow = false;//set the readlow to false
readHigh = true;//set the readHigh to true
} else {//otherwise
if (readHigh) {//if reading true is high
val = val + (256*myPort.read());//val becomes the previous val amount plus 256 multiplied by the current port reading
readHigh = false;//set the readHigh to be false
drawGraph(1024-val);//use the drawGraph function to change the colour of the background
}
}
}
}
A few points from the code are;
- 6 bites are being sent every cycle
- The first 4 bites are 1,2,3,4 then a low bite and then a high bite
- We are concerned with the low and the high bite and put them together to get our reading from the sensor
- The sensor values will be between 0 and 1024
- The rgb values for colour are betwen 0 and 256
Something I was confused with was the line which multiples 256 to the high port reading
val = val + (256*myPort.read());
//val becomes the previous val amount plus 256 multiplied by the current port reading
Joel explained why we are doing this;
the A/D converter on the attiny45 supplies a 10-bit number, ie between 0b0000000000
(0) and 0b1111111111 (1023). However a byte is only 8 bits, so can carry up to a
maximum of 0b11111111 (255). Therefore to read the value, you have to split it up.
It gets split down the middle, so you get a high byte and a low byte like this -
10-bit reading 0b1111111111
equivalent 16 bit reading (ie two full bytes) 0b0000001111111111
split down the middle into two 8 bit values 0b00000011 and 0b11111111
so the attiny45 sends the low (0b11111111) then the high (0b00000011).
You need to stick them back together to get the full value. But what you've
read in is 0b11111111 (255) and 0b00000011 (3) so you can't just add them together;
you need to multiply the high byte before adding the low byte.
Think of it in decimal numbers; if you wanted to send 1234 as a pair of two-digit
umbers, you'd send a high pair (12) and a low pair (34). To stick them back together
you'd multiply the high pair by 100 (12 x 100 = 1200) then add the low pair (1200 + 34 = 1234).
Then I altered the code to create different scences on the interface depending on what the readings from the phototransmitter were.
Download processing code
import processing.serial.*; //import the serial communication library
Serial myPort; // Create object from Serial class
int val; // create a varible called val to store the Data received from the serial port temporialy
int lowVal = 10;
int highVal = 990;
int midVal = (highVal-lowVal)/2;
int lowMidVal = (highVal-lowVal)/4 + lowVal;
int highMidVal = highVal - (highVal-lowVal)/4;
int[] sync = {0,0,0,0}; //create an array called sync holding 4 values all that are 0
boolean readLow, readHigh;//create 2 boolean (true or false) varibles to store the low and high bites
void setup(){//setup function that only runs once at the start of the program
size(1000, 750);//make the screen size width by height in pixels
String portName = Serial.list()[0]; //create a string variable called my port and make this be the first serial port available in the array of serial ports
myPort = new Serial(this, portName, 9600);//open the port and set it at the baud rate we want
myPort.buffer(1);// setting the number of bytes to bufer before callin another serial event. so we just want to take one byte at a time, process this and then take the next byte
readLow = false;//setting the low reading to nothing initially
readHigh = false;//setting the high reading to nothing initially
noStroke();//making there be no stroke for any drawings
fill(255);//setting the fill colour to be white
}
void draw(){//draw loop that is constantly running
}
void calibrate(){
int midVal = (highVal-lowVal)/2;
int lowMidVal = (highVal-lowVal)/4 + lowVal;
int highMidVal = highVal - (highVal-lowVal)/4;
}
void changeBackground(int val){//the loop the changes the colour of the background. needs the int varibles val to be passed to it
println(val);
if(val > lowVal & val < lowMidVal){ // night time
night();
}else if(val > lowMidVal & val < midVal){ //dusk
dusk();
}else if(val > midVal & val < highMidVal){ //cloudy day time
clouds();
}else if(val > highMidVal & val < highVal){//sun shine
sunshine();
}
}
void serialEvent(Serial myPort){ //function to read serial port events. need the serial port reading to be passed to it
if (!readLow & !readHigh){//if readLow and readHigh is false (which is what we set it to in the setup)then....
sync[0] = sync[1];
sync[1] = sync[2];
sync[2] = sync[3];
sync[3] = myPort.read();//set the 4th entry in the array called sync to be the reading of the serial port
if ((sync[0] == 1) & (sync[1] == 2) & (sync[2] == 3) & (sync[3] == 4)){//if the entries in the sync array are 1,2,3,4 then...
readLow = true;//set readLow to be true
}//otherwise do nothing
} else {//otherwise.....
if (readLow) {//if readLow is true
val = myPort.read();//val becomes the port reading at this moment
readLow = false;//set the readlow to false
readHigh = true;//set the readHigh to true
} else {//otherwise
if (readHigh) {//if reading true is high
val = val + (256*myPort.read());//val becomes the previous val amount plus 256 multiplied by the current port reading
readHigh = false;//set the readHigh to be false
changeBackground(1024-val);//use the drawGraph function to change the colour of the background
/*if(val > highVal){
highVal = val;
println("highVal = " + highVal);
calibrate();
}else if(val < lowVal){
lowVal = val;
println("lowVal = " + lowVal);
calibrate();
}*/
}
}
}
}
void night(){
//NIGHT TIME SETTINGS
noStroke();
// println("night");
fill(255);
background(0);
ellipse(width-width/4, height/4, width/2, width/2);//moon
//stars
star(50,120, 0.75);
star(230,170, 0.5);
star(150,50, 0.25);
generalScene();
}
void dusk(){
//background
noStroke();
background(0,0,64, 50);//navy colour
fill(250,39,10,30);
rect(0,0,width, height);
//sun settings
fill(255,0,0, 150);//colour for sun inner circle
ellipse(width/4, height-height/4, width/2 - 25 , width/2-25);//sun inner circle
fill(255,88,9, 200);//colour for sun outer circle
ellipse(width/4, height-height/4, width/2, width/2);//sun outer circle
// println("dusk/sunset");
generalScene();
}
void clouds(){
//CLOUDS
noStroke();
fill(230,186,70,200);//fill for the sun
background(126,147,173);
ellipse(width/3, height/4, width/3, width/3);//sun
fill(240);
ellipse(width/8, height/3, 100, 50);//cloud 1
ellipse(width/8-30, height/3-20, 80, 40);//cloud1
ellipse(width-width/8+40, height/5, 120, 70);//cloud 2
ellipse(width-width/8-60, height/5-20, 80, 40);//cloud2
//println("cloudy");
generalScene();
}
void sunshine(){
//SUNSHINE
noStroke();
fill(255,242,0,190);
background(199,237,254);
ellipse(width/2, height/4, width/2, width/2);
// println("sun shine");
generalScene();
}
void generalScene(){
//green hill 1
noStroke();
fill(72,119,62);//colour of hill
ellipse(width/2, height-height/18,width, height/2);
stroke(109,172,94,50);//colour of hill stroke
strokeWeight(5);
noFill();
ellipse(width/2, height-height/18,width -15, height/2-15);
//green hill 2
noStroke();
fill(92,194,103);//colour of hill
ellipse(-50, height-height/18,width+width/2, height/2);
stroke(48,126,55,80);//colour of hill stroke
strokeWeight(5);
noFill();
ellipse(-50, height-height/18,width+width/2 -15, height/2-15);
//green hill 3
noStroke();
fill(49,139,10);
ellipse(width, height+height/16,width+width/2, height/2);
stroke(98,203,48,60);
strokeWeight(5);
noFill();
ellipse(width, height+height/16,width+width/2 -15, height/2-15);
}
void star(int x, int y, float diff){
beginShape();
noStroke();
fill(255, 200);
vertex(x, y-50*diff);
vertex(x+14*diff, y-20*diff);
vertex(x+47*diff, y-15*diff);
vertex(x+23*diff, y+7*diff);
vertex(x+29*diff, y+40*diff);
vertex(x, y+25*diff);
vertex(x-29*diff, y+40*diff);
vertex(x-23*diff, y+7*diff);
vertex(x-47*diff, y-15*diff);
vertex(x-14*diff, y-20*diff);
endShape(CLOSE);
}
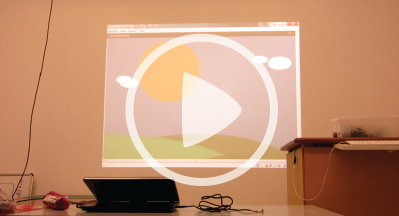
Video of the light sensor board interfacing with the processing sketch with the lights in the room slowly brought up and dimmed again.
 At the moment transitioning between each scene can be a bit flicky if the readings are jumping up and down a lot between a values that are
either side of changing the scene. I'd like to figure out how to fix this. It may be the way I have written the programme or it could be the processing
speed.
I tried to make a kind of calibration thing for the lighting changes in a room but I didn't managed to get this working sucessfully. I'd like
to get this working in the future.
I also want to look at programming with javascript as well for the other sensor boards.
![]() At the moment transitioning between each scene can be a bit flicky if the readings are jumping up and down a lot between a values that are
either side of changing the scene. I'd like to figure out how to fix this. It may be the way I have written the programme or it could be the processing
speed.
I tried to make a kind of calibration thing for the lighting changes in a room but I didn't managed to get this working sucessfully. I'd like
to get this working in the future.
I also want to look at programming with javascript as well for the other sensor boards.
At the moment transitioning between each scene can be a bit flicky if the readings are jumping up and down a lot between a values that are
either side of changing the scene. I'd like to figure out how to fix this. It may be the way I have written the programme or it could be the processing
speed.
I tried to make a kind of calibration thing for the lighting changes in a room but I didn't managed to get this working sucessfully. I'd like
to get this working in the future.
I also want to look at programming with javascript as well for the other sensor boards.


