Input Device
With this assignment we return to the world of electronics and programming! The task is to design, make and program an input device to measure something with a sensor.
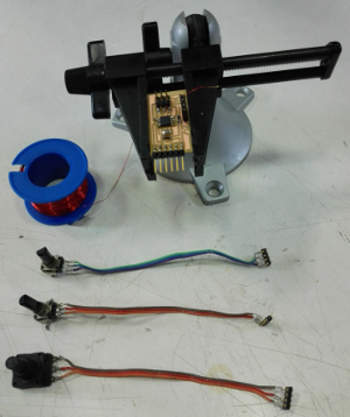
The first step is to design the board with a ATTiny 45 microcontroller with a sensor an its components. Focusing, as usual, in doing something useful and which may be applied to my final project, I decide to design a circuit with pontetiometer. It may seem simple enough, but it could be of use in controlling the speed and intensity of the movements of my device.
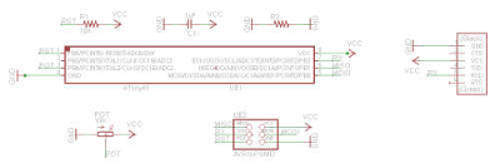

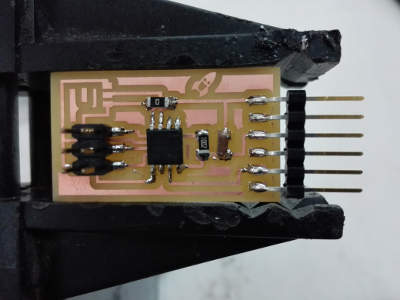
For design the PCB, I used the Eagle software to make the schematics and board files, based on the Neil's switch circuit. As we do in the Electronics Design assignment, first we have to know wich components we need, and then design the sketch. Once it was checked, we have to design the electronic traces. When is done, we leave just the bottom layer and export the board as png monochrome images with 1.000 dpi. On Gimp we add the outline of the board and add some kind of personalization like your name, logo, etc. In ma case, I add a little space rocket. Then, we make two files, one with the traces and other to cut the board.
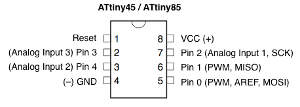
The ATtiny 45 has been chosen this time to program our circuit .
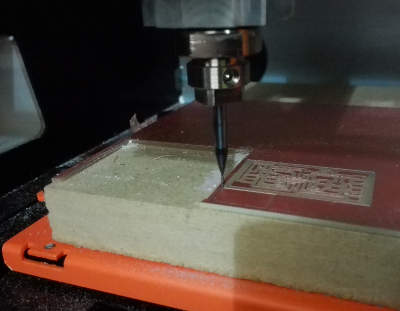
For this assigment, I use the Roland SMX-20 milling machine. It's much easier to calibrate and its software is fairly intuitive.
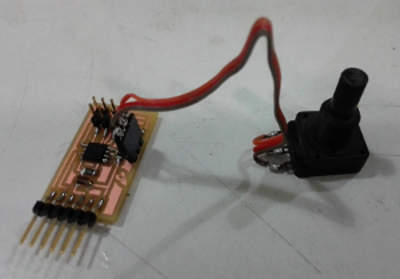
I design the PCB with the potenciometer of the FabLab Inventory, but there was none, so I had to use a recycled one, for which we had to improvise's connection to the PCB.
The next step is to program the PCB with our Fab ISP. I wanted to try programming the PCB with the FabAcademy C programs (input hello worlds boards), so I downloaded the Phyton software, version 3.4.3 wich incorporate Tkinter, and Pyserial.
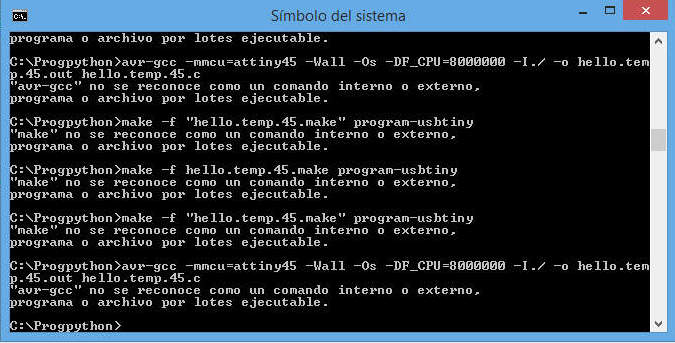
Even if we donwload several usefull libraries for Python, like Numpy, and we make several attempts, editing the C files, was not possible with the Windows 8 OS. The make and avr-gcc command was not recognized.
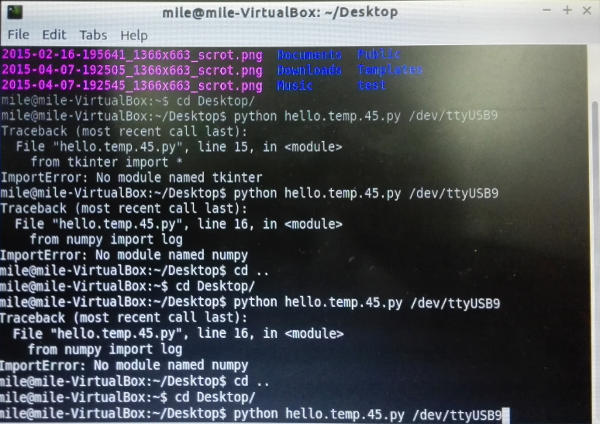
I decided to program PCB with Linux. In my laptop, with W8 OS, I had to install Lubuntu with a Virtual Machine, so this did not work either. The next option was programmed in Linux computer from my colleague Jani.
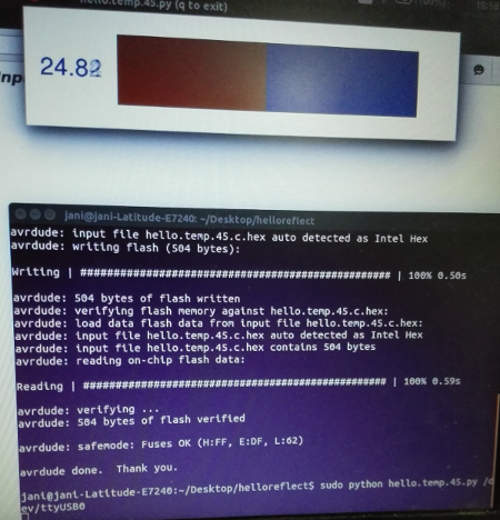
Then we run the Python program to display potentiometer readings. We only obtained a difference of 1.0 in the readings.
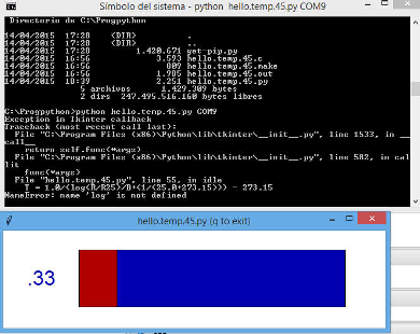
Once programmed, I did several tests from my computer with Python file, but always with the similar result, no more than 1.0 of difference. We also made several tests on our Local Instructor Santi's Mac (files), using differents sensors programs, editing the files, etc. While with an Arduino IDE script we do not get a single reading. Finally the problem was in a misallocation of a pin of the microprocessor, which even had checked with data sheet.
Something that seemed so simple as getting the reading of a simple potentiometer turned out to be rather more complicated, partly because of problems with Windows 8, partly because of the type of potentiometer, partly because of the difficulty of adapting commands C to this type of sensor.
Although we finally programmed the circuit, and got a reading, though weak, is extremely important to improve programming skills, especially in C and Python language.

Fab Academy 2015 website by Milena Orlandini is licensed under a Creative Commons Attribution-NonCommercial-ShareAlike 4.0 International License.
