
shirley niemans
week 13 networking and communications
Assignments
"design and build a wired and/or wireless network connecting at least two processors".
..................................................................................................................................................................................
Choosing the type of communication
April 30 / In my final project I will need wireless communication between two microprocessors. Accelerometer data produced by the movements of one ball will be used to control light and sound (vibration) in a second ball, and vice versa. I've been doubting between using radio (specifically the nRF24L01 modules) and the HC-05 Bluetooth modules. Since I haven't used either and got charmed by the added possibility of controlling the balls with a mobile app, I decided to give the Bluetooth a go. Since I planned to use two microcontrollers, I took two HC-05 modules home with me.
May 2 / I spent today reading up on the HC-05 chip and module, the HC-05 Arduino library, several tutorials (such as this one to pair two modules as a master and slave) and looking up projects, I found that it was difficult finding documentation that really applied to my situation. Many projects (such as those by Keiichi Onishi and Vincent Chow) started out with plans to make two processors, each fitted with a bluetooth module, which communicate as a master and a slave, but ended up sending and receiving data between a Macbooc/PC and one mc with Bluetooth module.
May 3 / Today my collegue Joe told me that it was enough for this assignment to design a circuit board with a microcontroller and a Bluetooth module and control it wirelessly from a Macbook. Although I will need to figure it out eventually, I was glad to hear this since I'm still catching up on assignments and especially in these last weeks time seems to fly!
..................................................................................................................................................................................
Designing the board
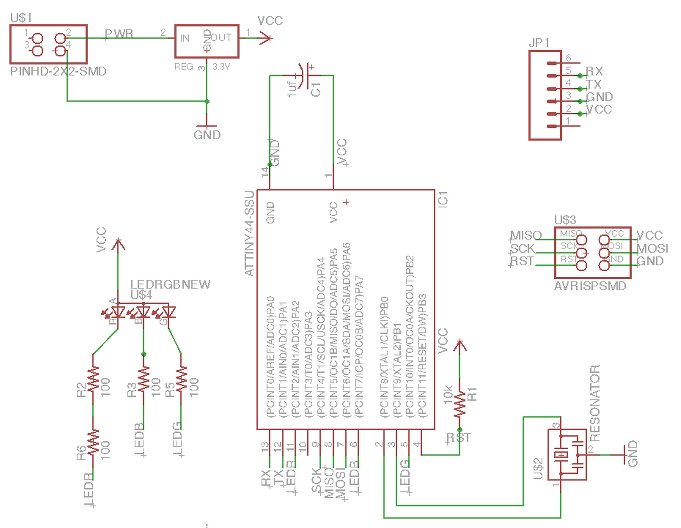
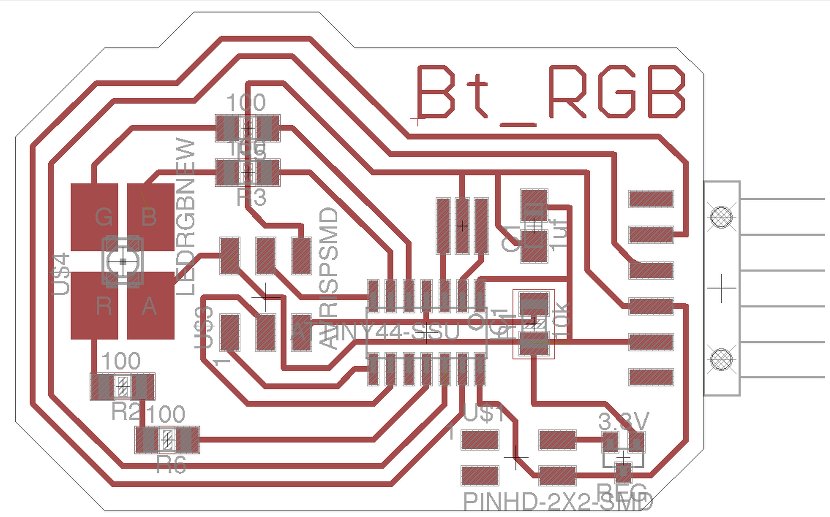
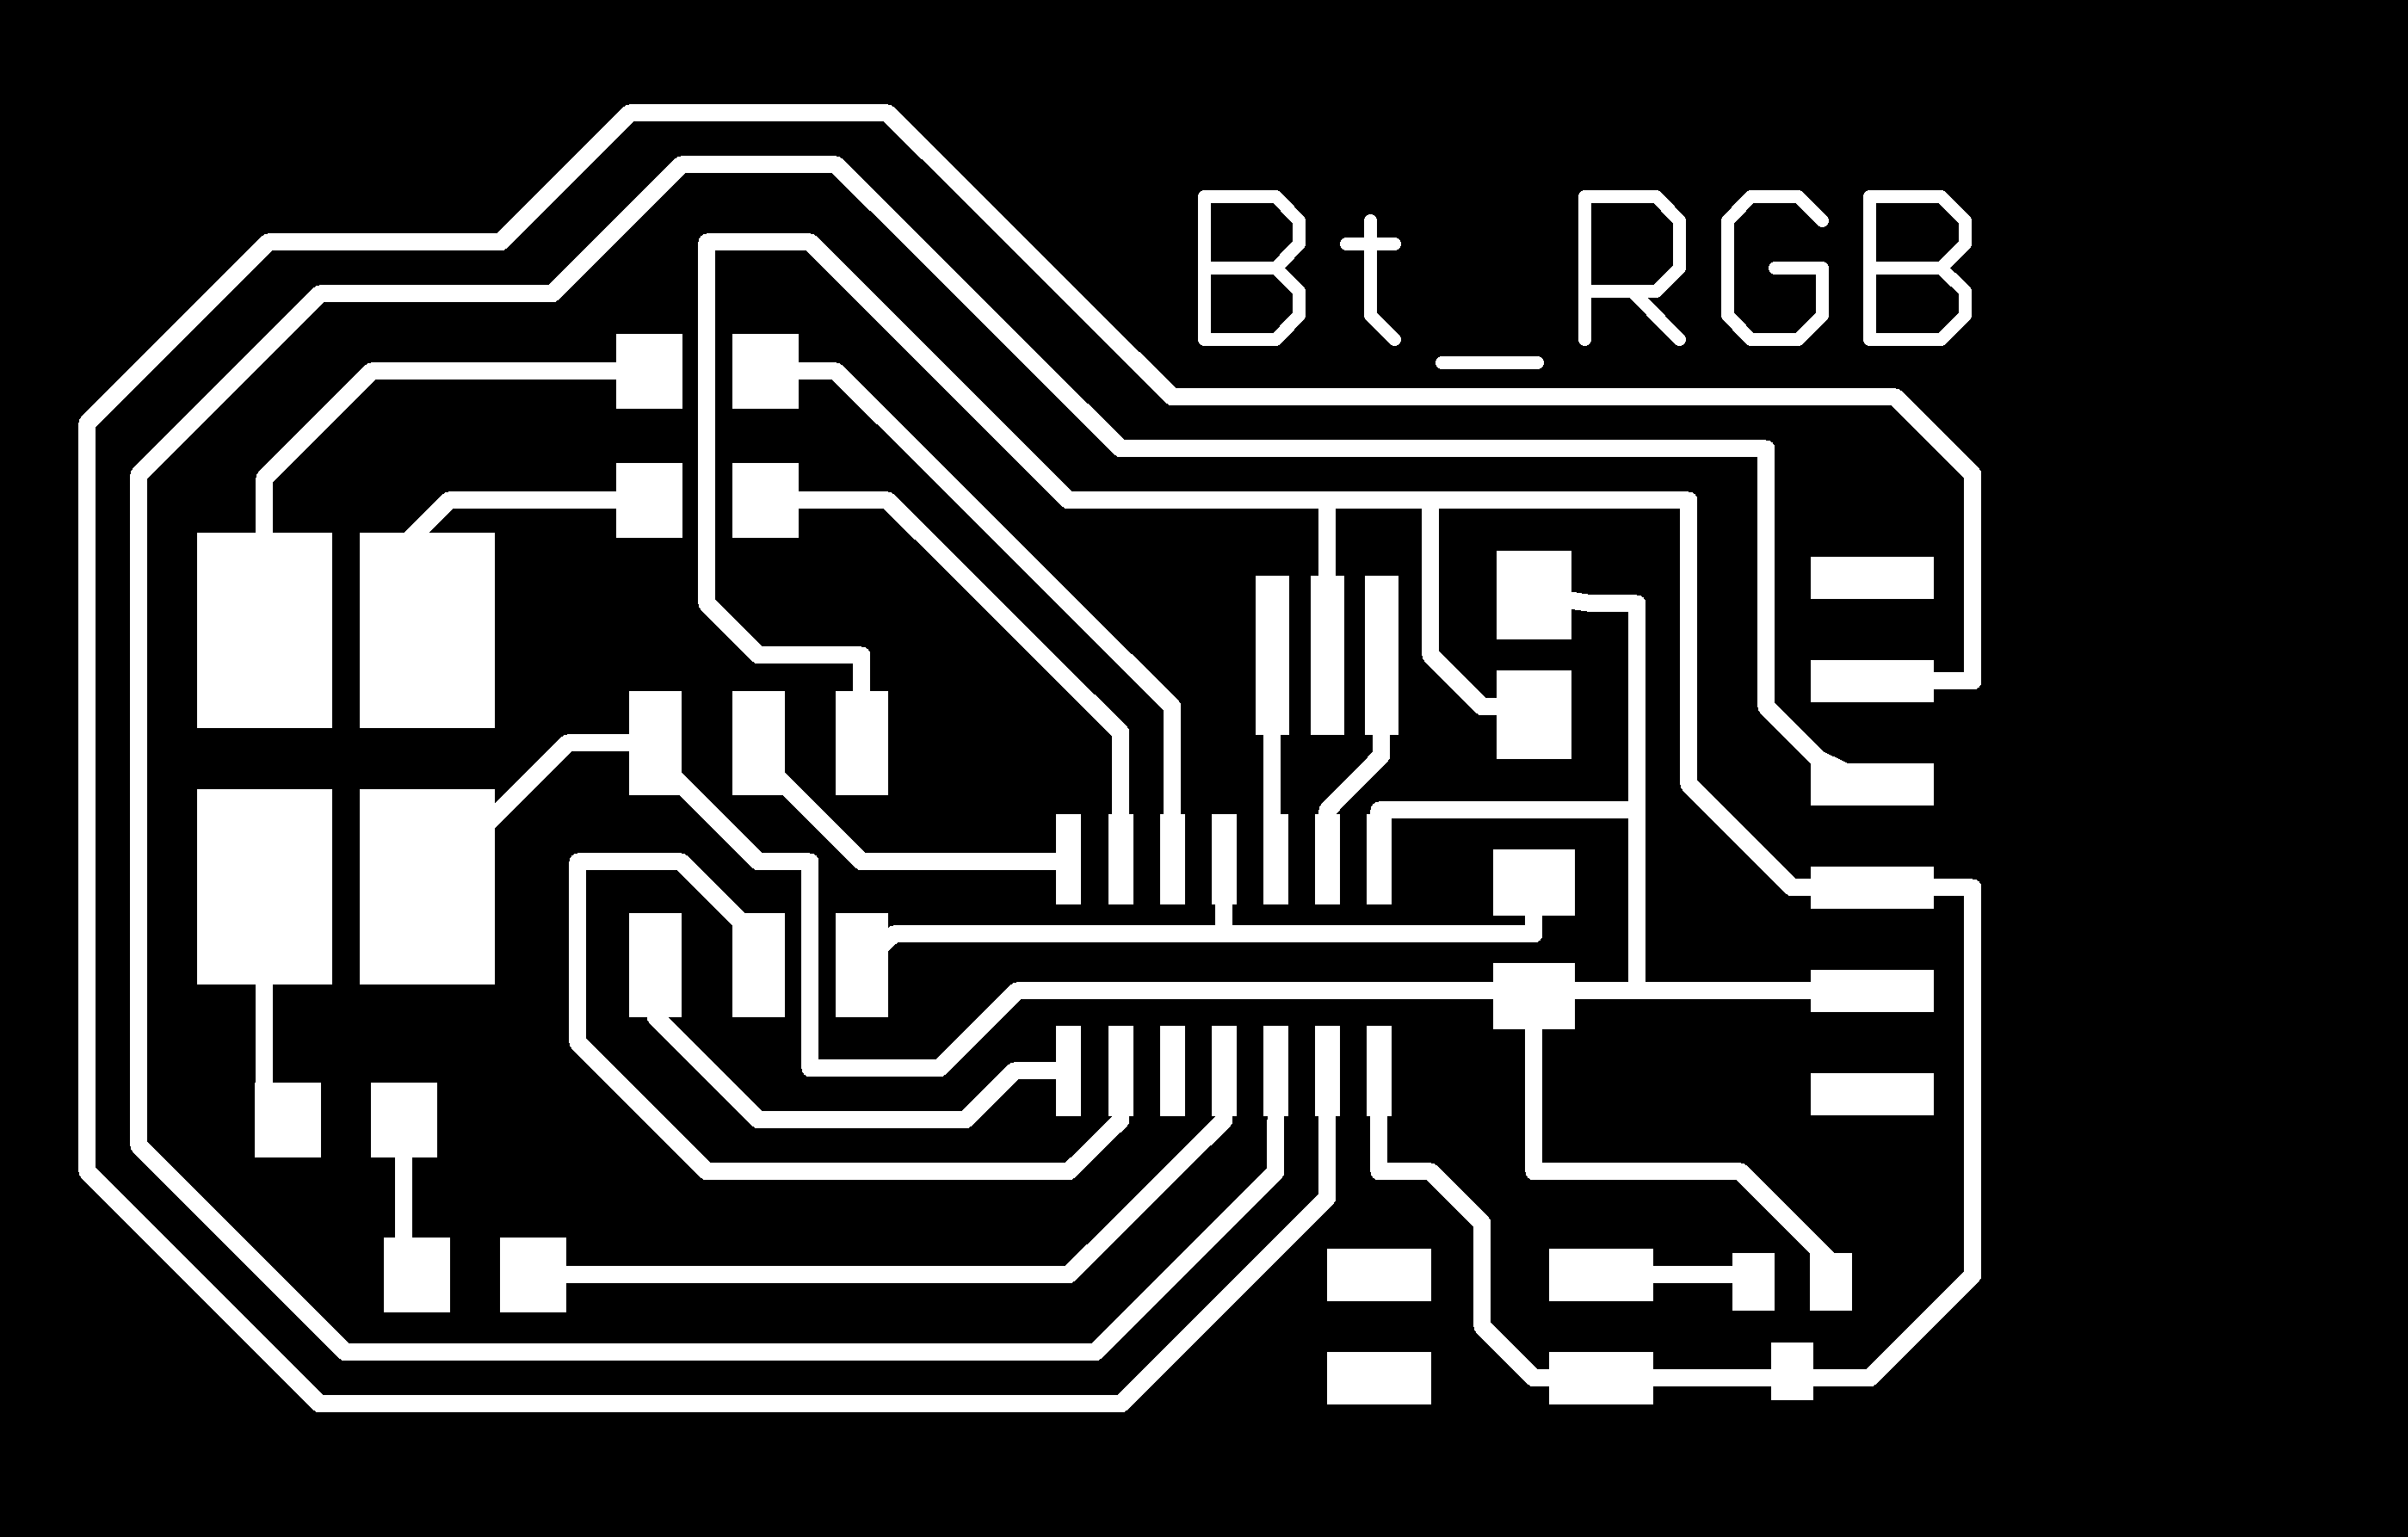
I decided also to make a board with an RGB led (I'll need that later on) so I added it to my schematic, along with a 20mHz resonator, the header for the Bluetooth module and a 3.3V regulator, since I was convinced to have read that the HC-05 module can't take higher voltage. I'm sure you noted in my grammar that I now know better :) Anyhow - I was able to route the board manually without 0 ohm resistor bridges so that was a small personal victory. You can find the milling files under 'resources' below.
 ..................................................................................................................................................................................
Milling and stuffing
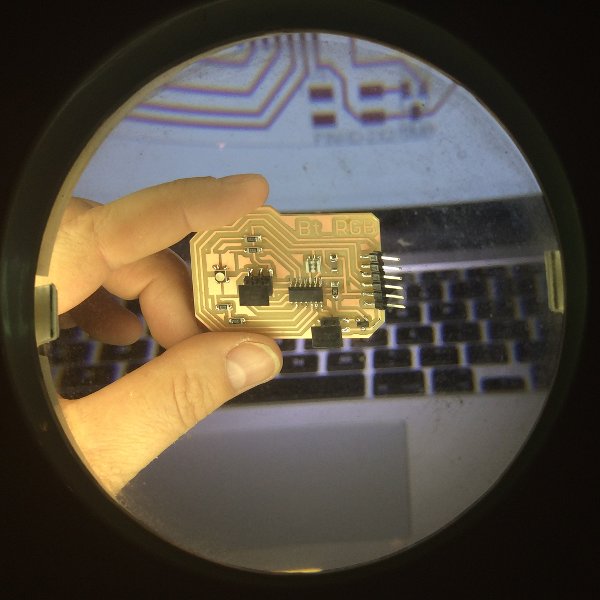
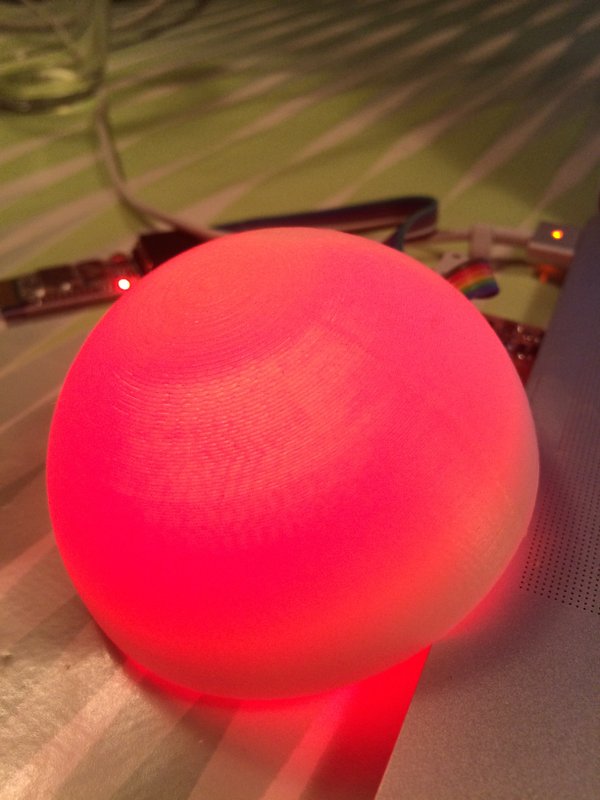
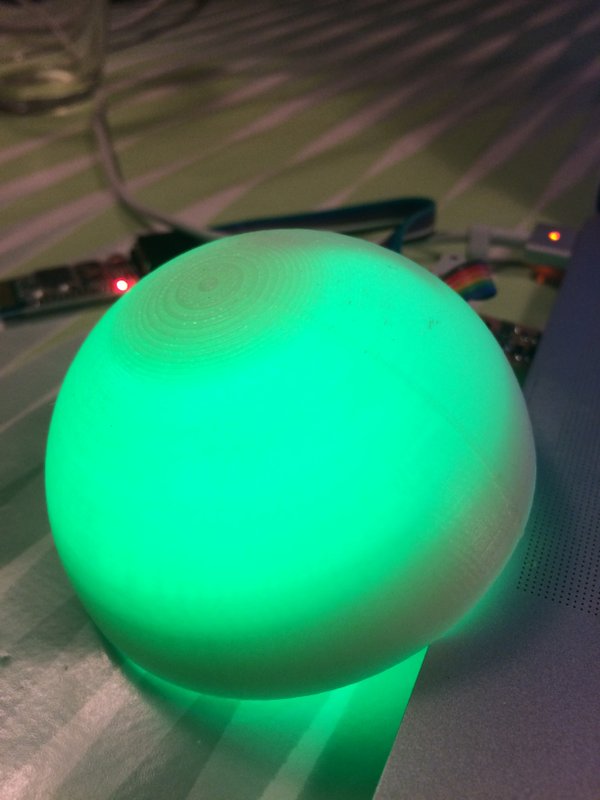
May 4 / Milling and stuffing didn't render any issues, although I did notice how the footprint of the RGB led is HUGE compared to its actual part. Whether that's a mistake on my part or intended to be so, I still mean to find out.
 ..................................................................................................................................................................................
Programming the board
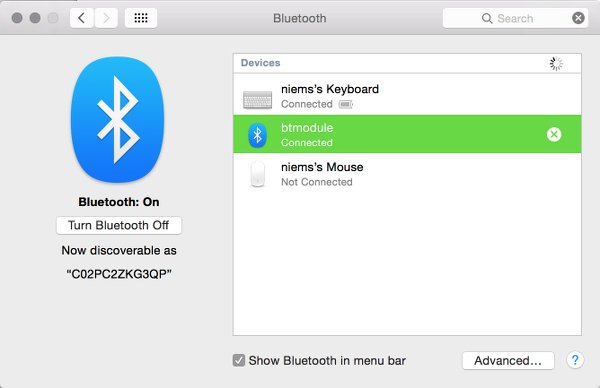
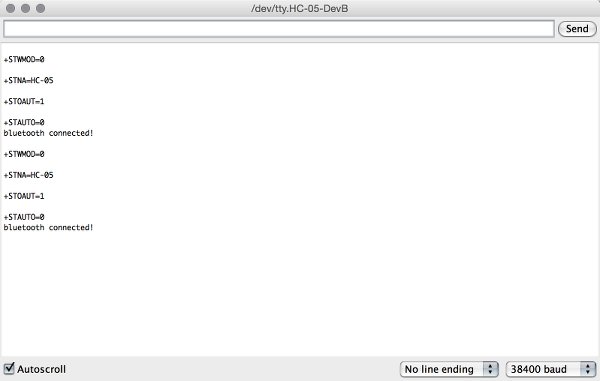
 May 4 / Although I used the code by Keiichi Onishi as an example that I adapted, programming the Bluetooth module to do what I want and understand it completely, wasn't so straightforward. First off, I noticed how I wasn't able to burn the bootloader with the power switch turned off on my Tiny*ISP so that it would not provide 5V to my circuit, which I powered with 3.3V using a 9V battery and a 3.3V regulator. I was only able to burn the bootloader by allowing the ISP to momentarily power the microcontroller with 5V, and turning the switch off again right after it was uploaded. This heated up the regulator on my board, but (I tested) luckily kept it working. As it turns out, the HC-05 has its own built in regulator, and actually needs 3.6 to 5 volts to function. So unfortunately, the ISP cable will stay connected for now, even while communicating wirelessly. It was easy enough to find and pair my Mac with the HC-05 after plugging it into my board, and renaming it:
After uploading the first version of the code to the microcontroller however, I couldn't get the serial communication going. It wasn't until I consulted the infamous Joe Kruczkowski that I noticed how the pin numbers were screwed up - TX, RX as well as all three led pins - I still find it hard to wrap my head around the right configuration and should make some good notes on it. Changing that got the serial communication going and turned the blue LED on.
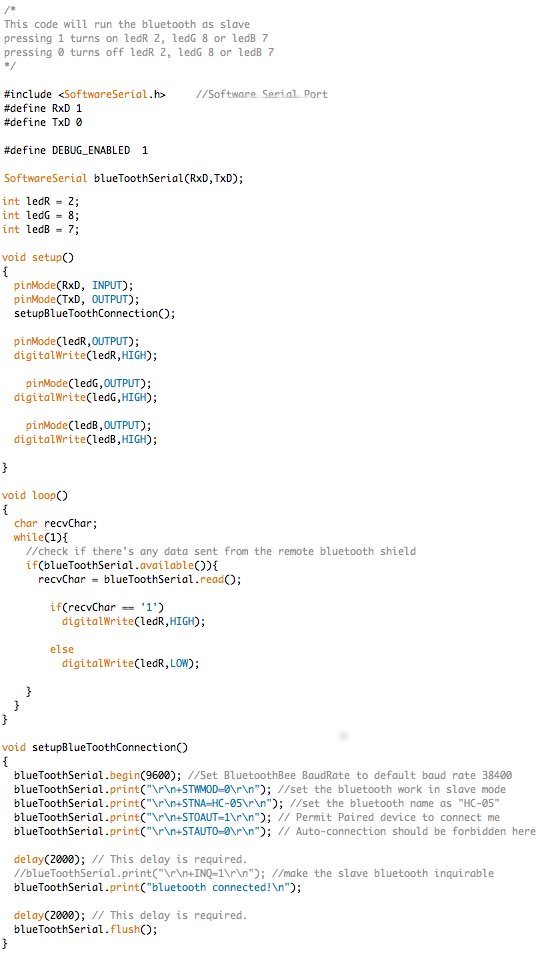
The final version of the Arduino code I used;
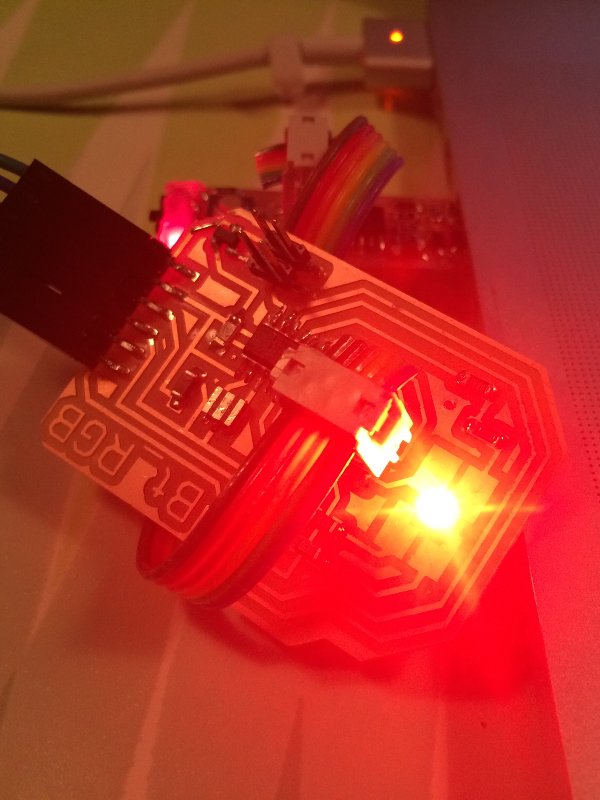
Again, I took the opportunity to test the output of three colors in my 3D printed balls to see whether the light would be strong enough to shine through with the current wall thickness.
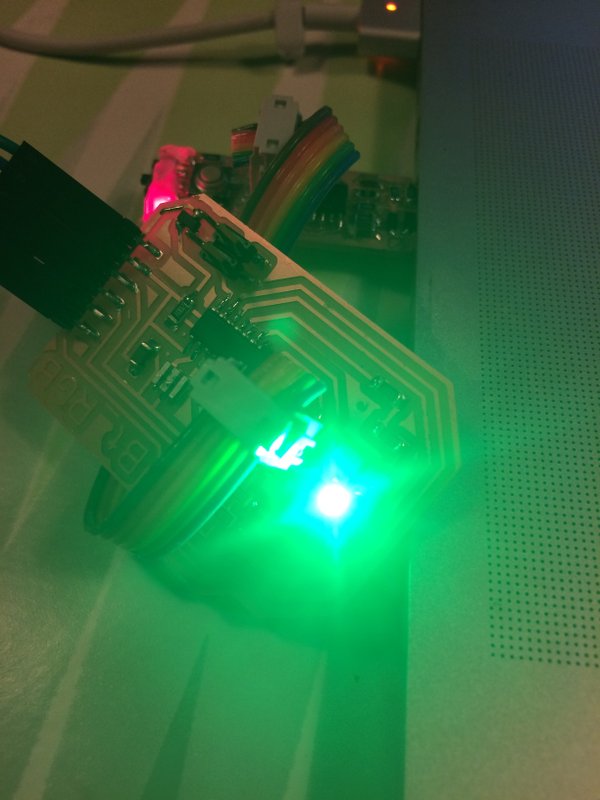
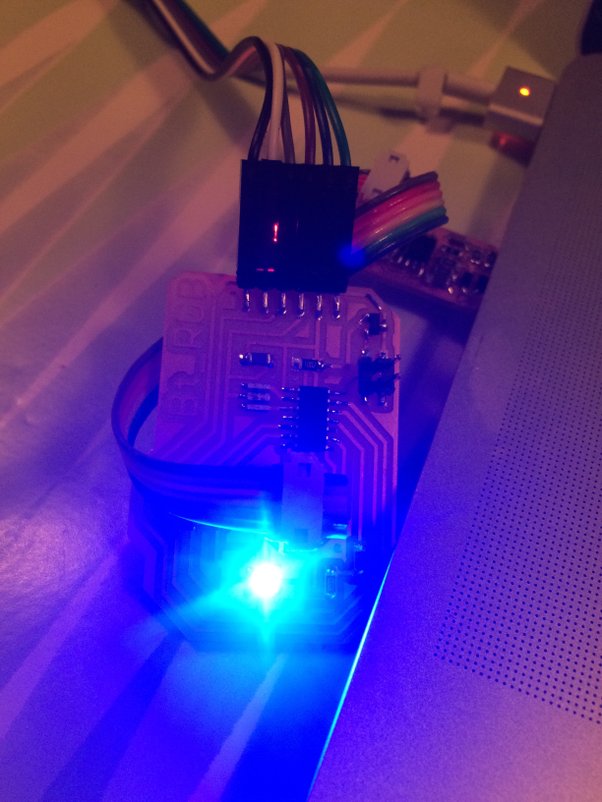
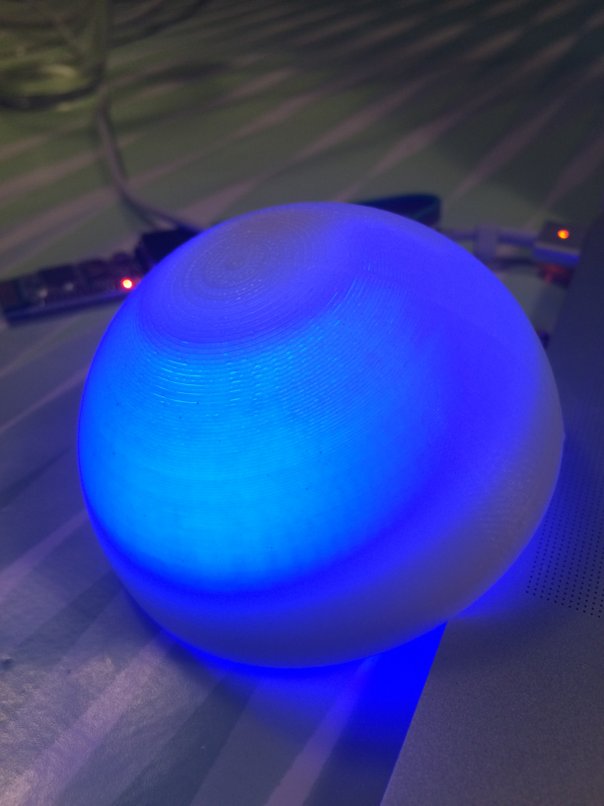
Although the serial communication is working over a bluetooth connection, there are some things that puzzled me. According to the code, sending a "1" would cause the led to turn on, sending a "0" should cause it to turn off. Neither of these things happen though. In reality, the led is turned on by sending whatever number, and is turned OFF by sending "1". You can see that happen in the video below. This is probably caused by the fact that the code was written for a common cathode RGB led, while in this lab we're only using common anode RGBs. Good thing to check beforehand next time, for now I made a note of in in the Arduino code under 'resources'.
Controlling an LED using Bluetooth module HC-05 from shirley niemans on Vimeo.
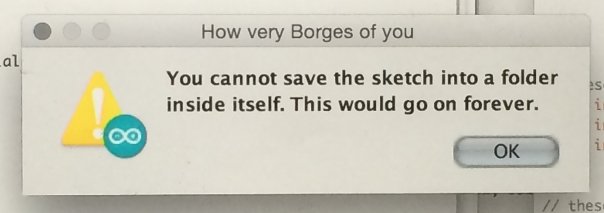
May 5 / As a final comment this week, I want to share with you an error message that the Arduino IDE gave me today, which completely made my day;
Some conclusions
There are several down sides to the use of Bluetooth for my final project, that counter the up side opportunity of controlling the balls with a mobile phone app, from my point of view. First off; also Emma confirmed that there is no useful documentation or succesful projects to be found using two distinct Bluetooth modules. I like a challenge but I don't feel experienced enough to pioneer in this field so that's a big reason to switch to radio. Also, the distance over which communication can take place is about 3 metres. For my project, that's pushing it.
Resources